Search the Community
Showing results for tags 'Custom'.
-
![IMG 6016[1]](https://www.macrossworld.com/mwf/uploads/gallery/album_800/small.gallery_30818_800_905303.jpg.f32b4bca64fc11ba5fc16b087026005b.jpg)
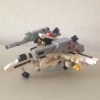
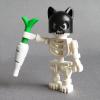
From the album: Nanoblock Macross
-
![IMG 6175[1]](https://www.macrossworld.com/mwf/uploads/gallery/album_800/small.gallery_30818_800_160765.jpg.ab88d1c575b4a76dddabbe7535baf125.jpg)
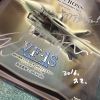
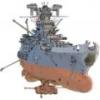
From the album: Nanoblock Macross
-
![IMG 6173[1]](https://www.macrossworld.com/mwf/uploads/gallery/album_800/small.gallery_30818_800_186612.jpg.8c7c8d94be994c3f274ee5fdf91db6e7.jpg)
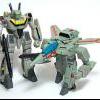
From the album: Nanoblock Macross
-
![IMG 6178[1]](https://www.macrossworld.com/mwf/uploads/gallery/album_800/small.gallery_30818_800_40467.jpg.3e0767e399da816efe935a9bb280298f.jpg)
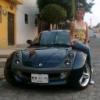
From the album: Nanoblock Macross
-
From the album: sh9000's collection
-
How could I let 2012 go without doing another VF-4? Here is Milia's VF-4 Racing Custom. I had really hoped that the 'Macross: The Ride' racing series would encourage people to do some more racing customs. I love military aircraft, but I also love racers, with their crazy colour schemes and sponsor logos plastered all over the place. I thought about Milia - a pilot hotshot, no longer in active duty. What would she do? Why not race with a hotted-up retro VF-4! However, this V4-F has some pretty substantial... modifications. From the souped up engines, reformed cowlings, control surfaces and even wings... a lot has been replaced in subtle and not-so-subtle ways. Custom decals were produced, one with a fun little spin on Milia's origins. Some were cribbed from a Macross decals option sheet. While I love weathering, somehow, it didn't seem appropriate for a racer like this. It was all about chrome and gloss finishes, and black, red and white. Enjoy the pics. Thanks for looking! Regards, Petar
-
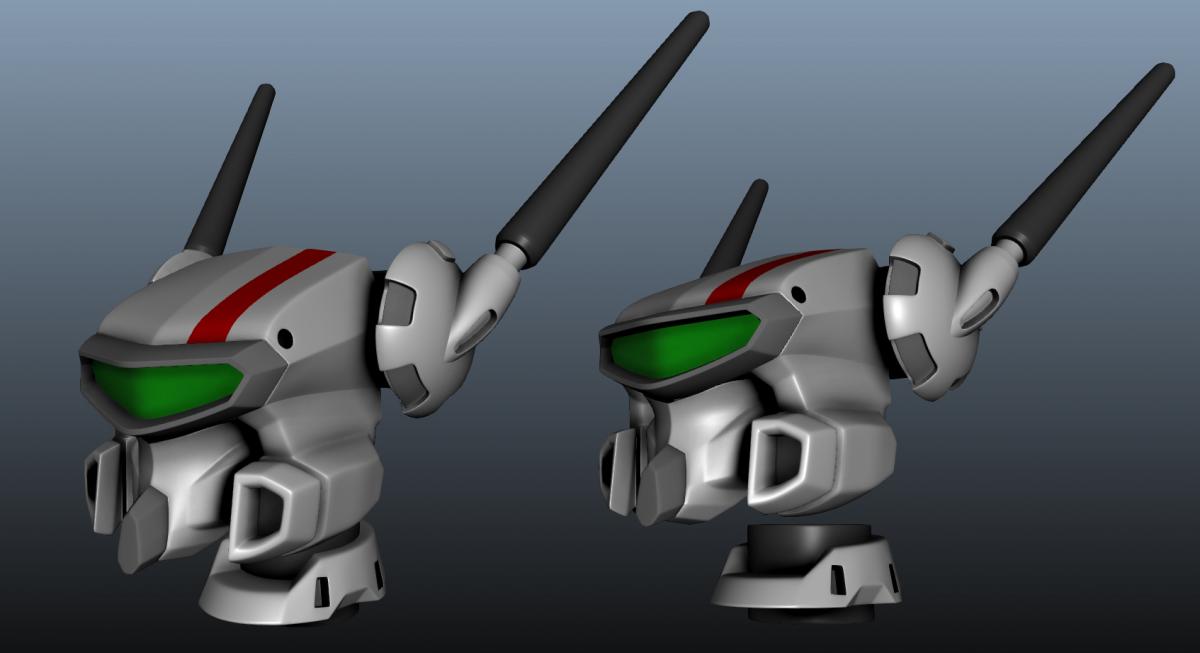
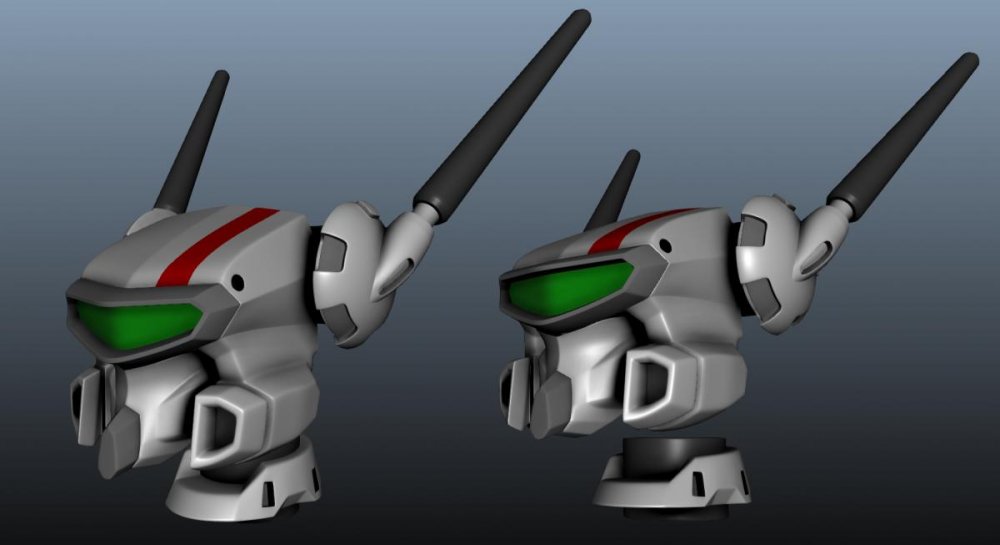
Hey all - this one's been itching (in my head) to be made for ages - so this morning I put aside my 'real' work and started to make this kick-ass head sculpt by Tenjin-sama. Still needs some angles to be tweaked and the back portion and internals to be made, but it will be done soon - but we'll have to wait for a while for a print to get to me to make sure it's all good. Unless people trust me enough to just make it available. I will include a few laser options - as the concept art has them splayed at about 15 degree each side where as the current 1/60 are nearly parallel - they're also 2mm wide at the tip, just like the current one - but may be too fragile. Seeing if I can make the visor removable for separate painting too. Anyways, progress as it happens, enjoy. Feedback welcome.
-
So whenever I do a new group pic, folk ask about my old repaints. This is very flattering, and I appreciate it, though they really oook better in pics than in person. Anyway start this thread so I can put them all together and refer to them later. So in order of when i did them: From around the time they came out - VF-0S Max VF-0A Wolf Squadron 1/48 VF-1A Marine Custom. Yes i used a Low Viz. VF-19S with the anniversary stuff painted out
-
Hi all, I'm new to the forums here, so please let me first introduce myself! I have been a long time Macross fan as far back as I can remember. I have always been into the toys, especially the VF-1 Valkyries from the orginal series. From the old-school 1/55 Bandai/Takatoku's to the new Yamato variations...I loved them all. I just wanted to share a project that I have been working on that I am sure most of you will enjoy. I'm also a big LEGO fan, and work on my own custom creations. I've recently built a fully transformable VF-1S Fokker Type. Though its not the first ever, LEGO Valkyrie, I feel that my design is a lot closer to the actual designs when compared to other LEGO Valkyrie models that are out there on the web. I'd appreciate any comments or suggestions as I am constantly working on trying to improve it! Any way, here is my creation!: LEGO Macross VF-1S with removable Fast-Packs: Fighter Mode Gerwalk Mode Battroid Mode You can find more photos of my model here: http://www.flickr.com/photos/daikoncat/8651084788/in/photostream -daikoncat
-
Greetings everyone! First time poster here at MW. Been lookin at this site for a while & thought I'd jump in with all you fine folks! So, like many of you guys, I got the new 1/72 BANDAI Variable Valk kit & was, well, a bit dissapointed. But I have to say, coming from a long time modeler's point of view who does it mainly for the love of it, its not that bad of a kit. Sure it has its problems but we as modelers can just do what we do best...improvise, adapt & overcome right? So saying, I'm planning a little something "special" for my kit but first I need to address some of the problems it has...parts fit, looseness, lack of detail in some spots etc etc..all stuff I'm sure you guys have already come across! The First thing I tackled was the wonky fit of the legs in fighter mode & how they don't fit quite perpendicularly to the fuselage. The main problem is, like I'm sure most of you have figured by now, the grey retention tabs that lock the arms in place in fighter mode. The top edges of these are rubbing the sides of the legs & keeping them from sitting in where they should. Instead of cutting these off entirely tho, I thought if I could shave down one side sufficiently on a diagonal angle it might allow the leg to seat better & have a more perpendicular angle to the fuselage when viewed end-on. Here's what I shaved off: Secondly I thought, again, like most of you I'm sure, that the arms are too spindly & need fixed. I plan on beefing up the upper arms, shoulders & forearms. The first thing I started with was the degree of bend to the elbows. With a little tweaking of the lower part of the upper arm where it joins with the elbow joint, I was able to give it a lot more bend, so much so that now the Battroid mode will have the ability for the Gunpod to actually touch the shoulder armor: Next ( because I'm a hopeless scratchbuilder & can't leave anything alone straight out of the box ) I'm gonna lite this guy up with micro LEDs. The first thing I worked on was the optics section on the head. Since this particular build is gonna be a "one-off" style, i wanted something different. He's gonna be a predominantly really dark low-vis Valk & I thought he'd look kick-@ss with a blue Optic sensor: A veeeeeery long time ago, when the Hasegawa VF-1 kits came out, the only way you could get a pilot figure was to get the add-on weapons set. So, I got one & and while the figure wasn't bad, it could be remade better. Now, don't get me wrong, the pilot figure the new kit comes with aint bad but I'm anal when it comes to miniatures & detail & I looooooves me some detail work... at that point I remembered my old VF-1 Hase pilot. I dug the little guy outta storage & I think with a little tweaking I can make him fit in the new kit: So, thats where I'm at right now. Any ideas or comments are heartily welcomed & appreciated! Thanks for lookin guys n Cheers!! ~BK
-
So, how does this look as a possibility? Anyone interested in a custom head based on this, cast in resin? This is just a very basic dryfit on a Bandai reissue DYRL 1/55 VF-1A. The head actually comes from this plastic SD-series kit: Thoughts, anyone? While it's SD, I think it has the style of interpretation seen in the other superchunk 1/55 heads. It would look right at home on those big square shoulders...
-
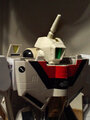
From the album: Custom DYRL 1A 1/55 Head Project
A closer shot of the dryfit of Bandai SD Super Max VF-1A SD kit's head to reissue Hikaru Bandai 1/55 DYRL VF-1A (which I obtained minus its original head, fitted with an old Jetfire head instead), to check scale & style. Looks in-scale, and the big SD-style eye doesn't look out of place on the big, blocky 1/55 body design.© Ray "AcroRay" Miller
-
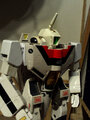
From the album: Custom DYRL 1A 1/55 Head Project
Dryfit of Bandai SD Super Max VF-1A SD kit's head to reissue Hikaru Bandai 1/55 DYRL VF-1A (which I obtained minus its original head, fitted with an old Jetfire head instead), to check scale & style. Looks in-scale, and the big SD-style eye doesn't look out of place on the big, blocky 1/55 body design.© Ray "AcroRay" Miller
-
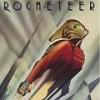
I just found this amazing Imperator Class Star Destroyer model built by a Korean Star Wars fan. In addition to the amazing build and incredible paint job, it features what has to be the most amazing model lighting I've ever seen for the Star Wars Star Destroyer, right down to orange area lighting and blue-white hangar bay illumination. The placard even has Engrish! http://blog.naver.com/PostView.nhn?blogId=no1jujil&logNo=130177875505&redirect=Dlog Astounding work worth looking at.
-
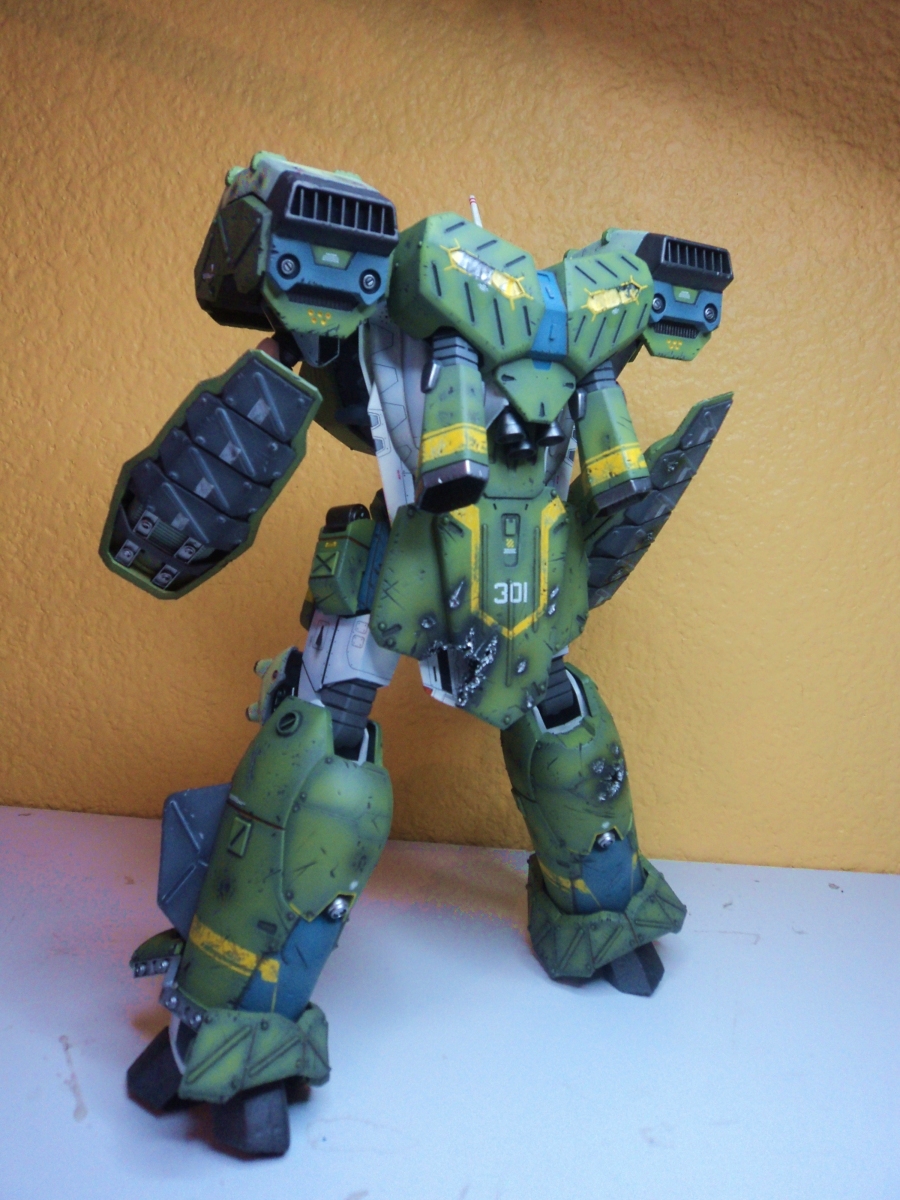
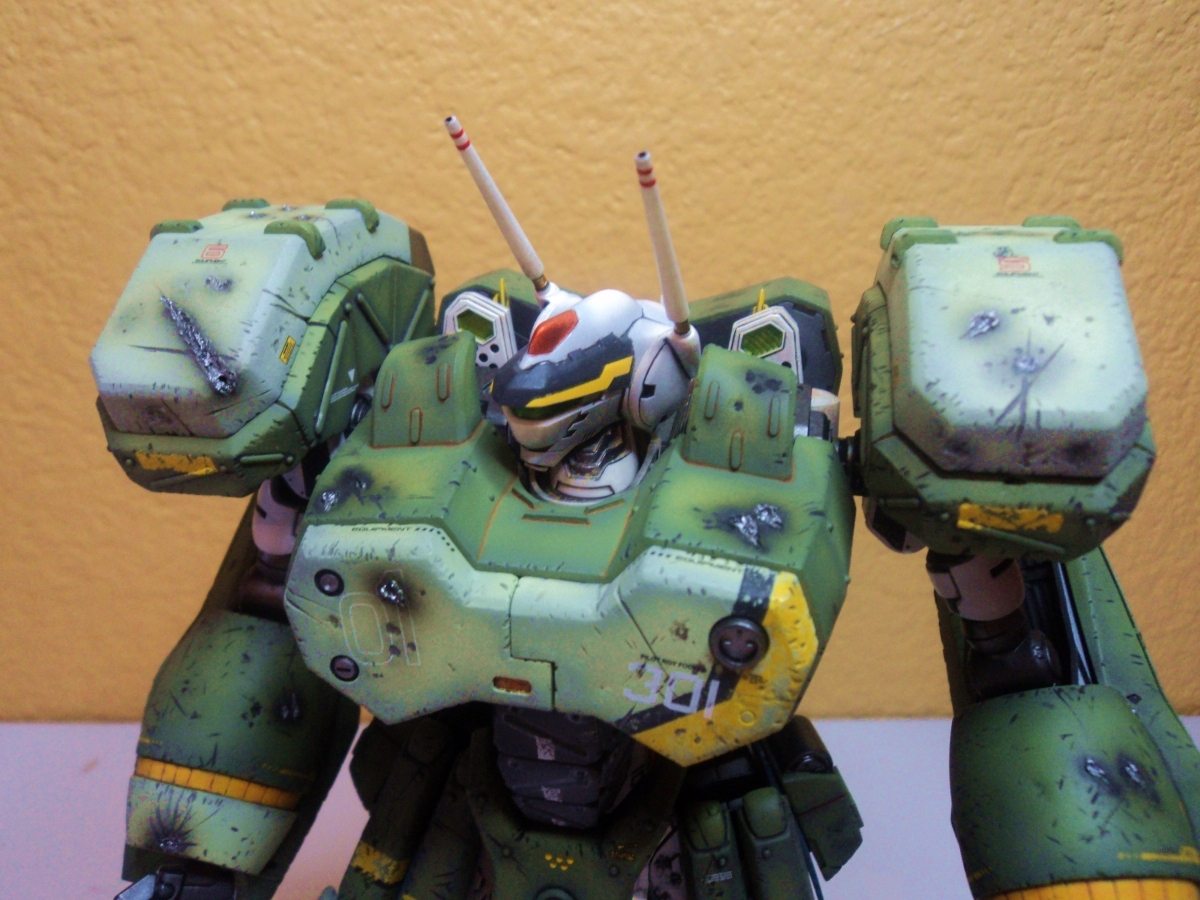
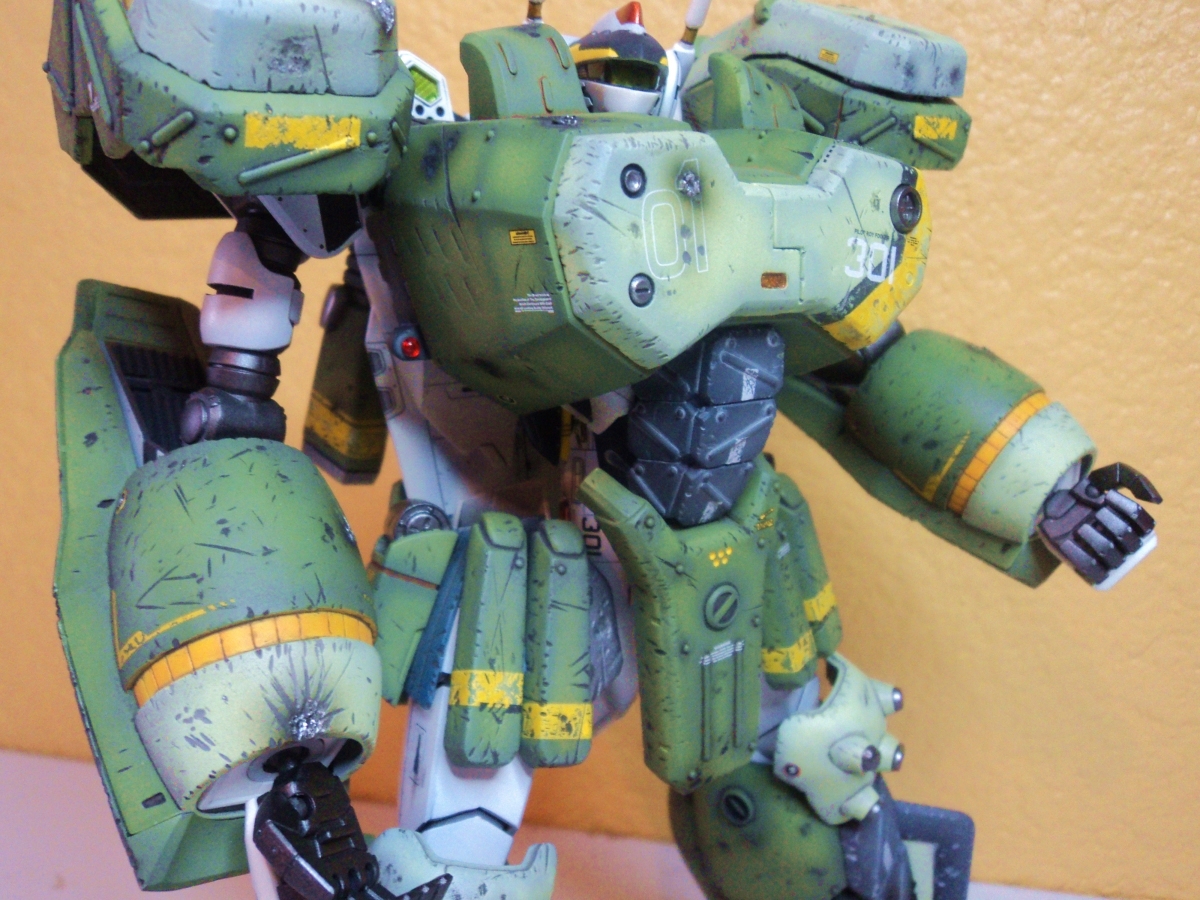
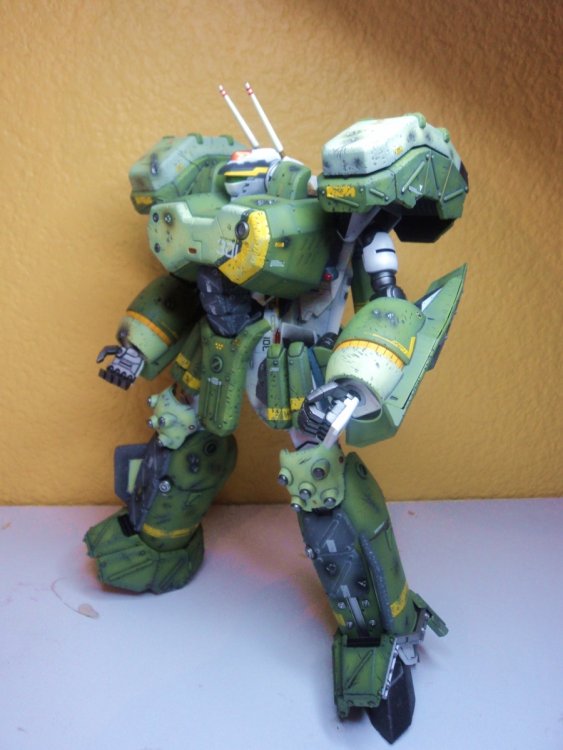
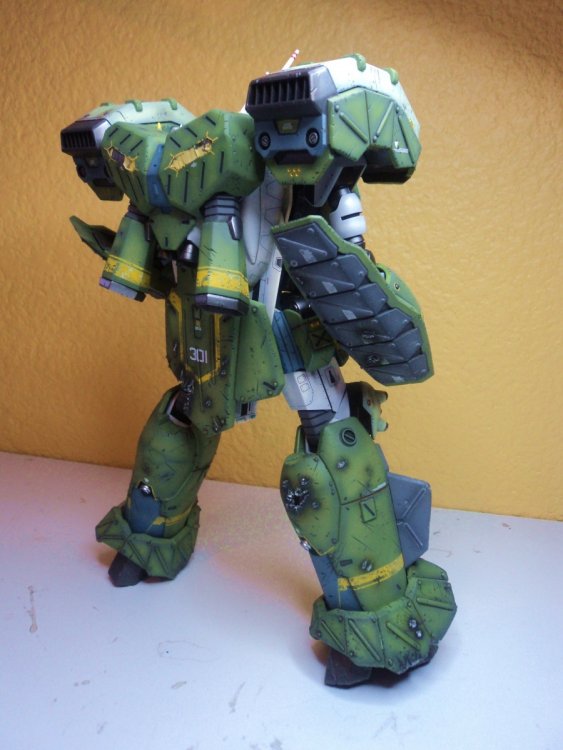
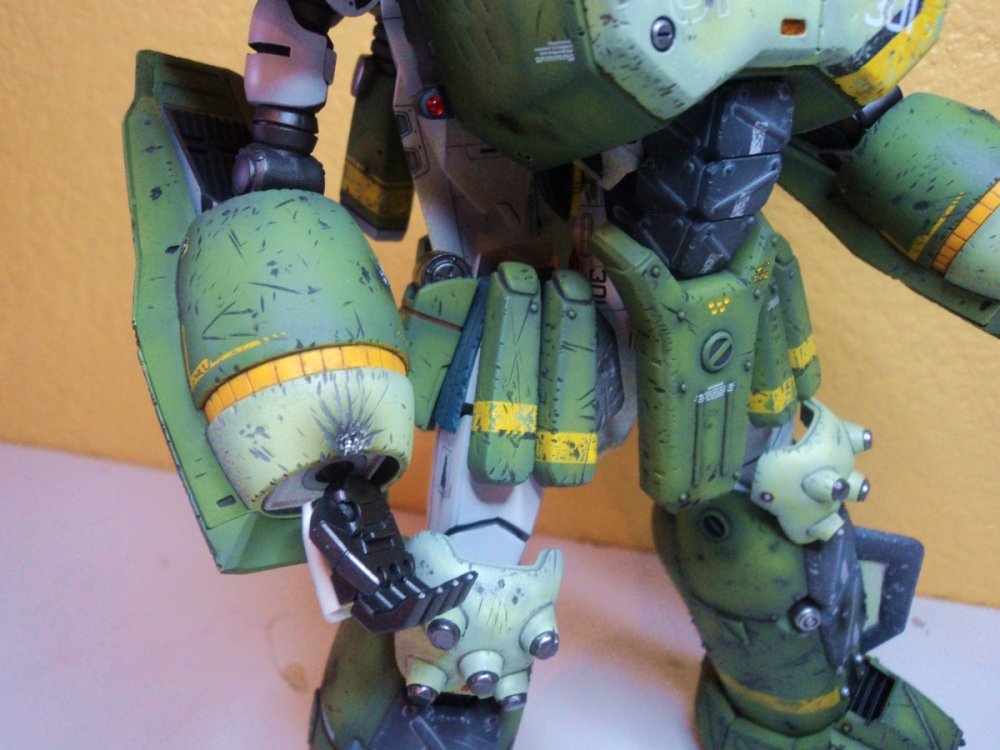
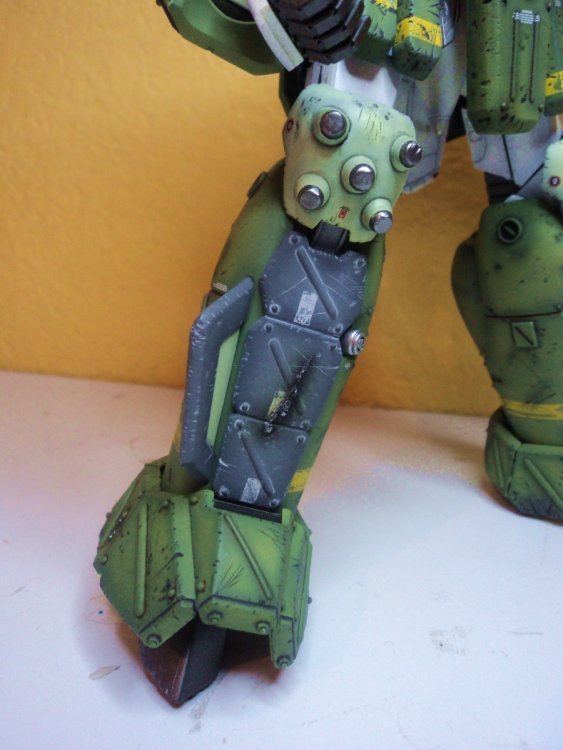
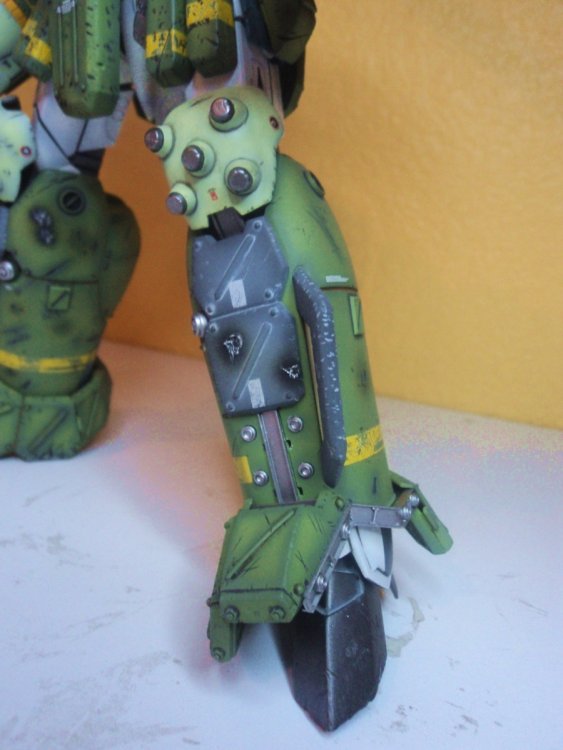
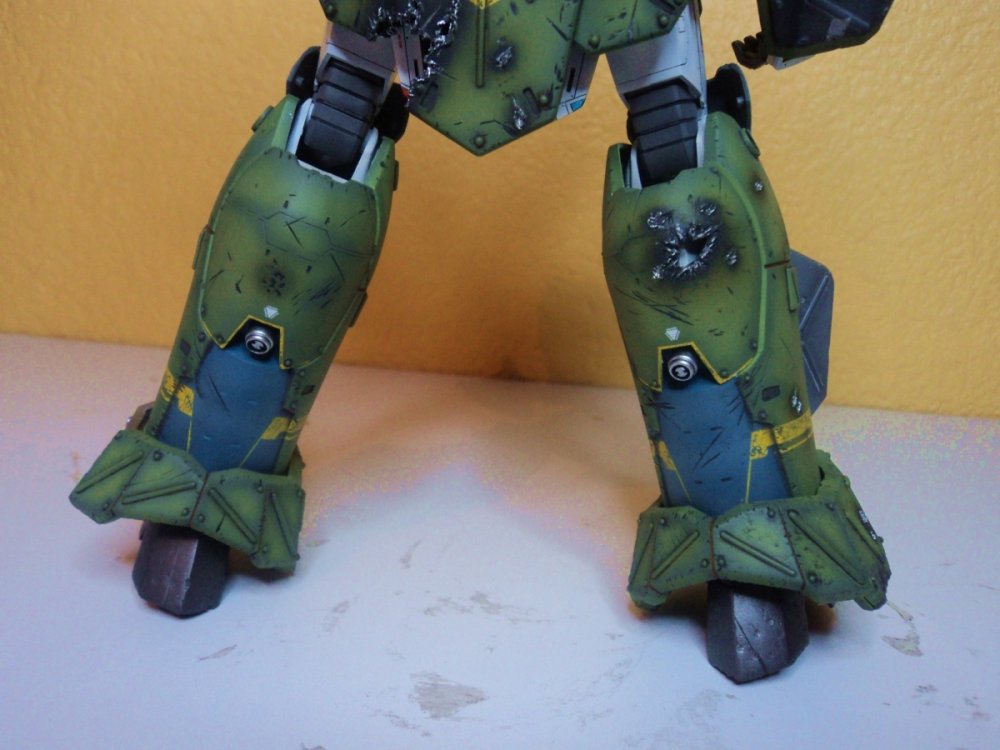
Warning, heavy post, constantly uploading images... Hi my friends, long time no posting, this time I will share with you 6 months of my life, originally intended for a contest, but didn`t finished it on time. Inspired by a Japanese magazine, I decided to make my own version, it cost me money and above all, so much time and effort, but it worthed, the only bad thig was my poor skills in photograph (cell phone) and the absence of a light box...I added many details, almost 300 round bolts and many styrene rods, and of course I damaged the styrene with many items. The next top secret pictures were taken when one of the last reactive armours were set to a VF-0 valkyrie to go to battle against the anti U.N. forces, whom haven`t stopped their attacks on the last days, giving no time for repairs, we`ve been forced to use it as it came back from it`s last mission...barely a couple of hours ago, we hope to hang on until reinforcements arrive...from...only God knows where...


-
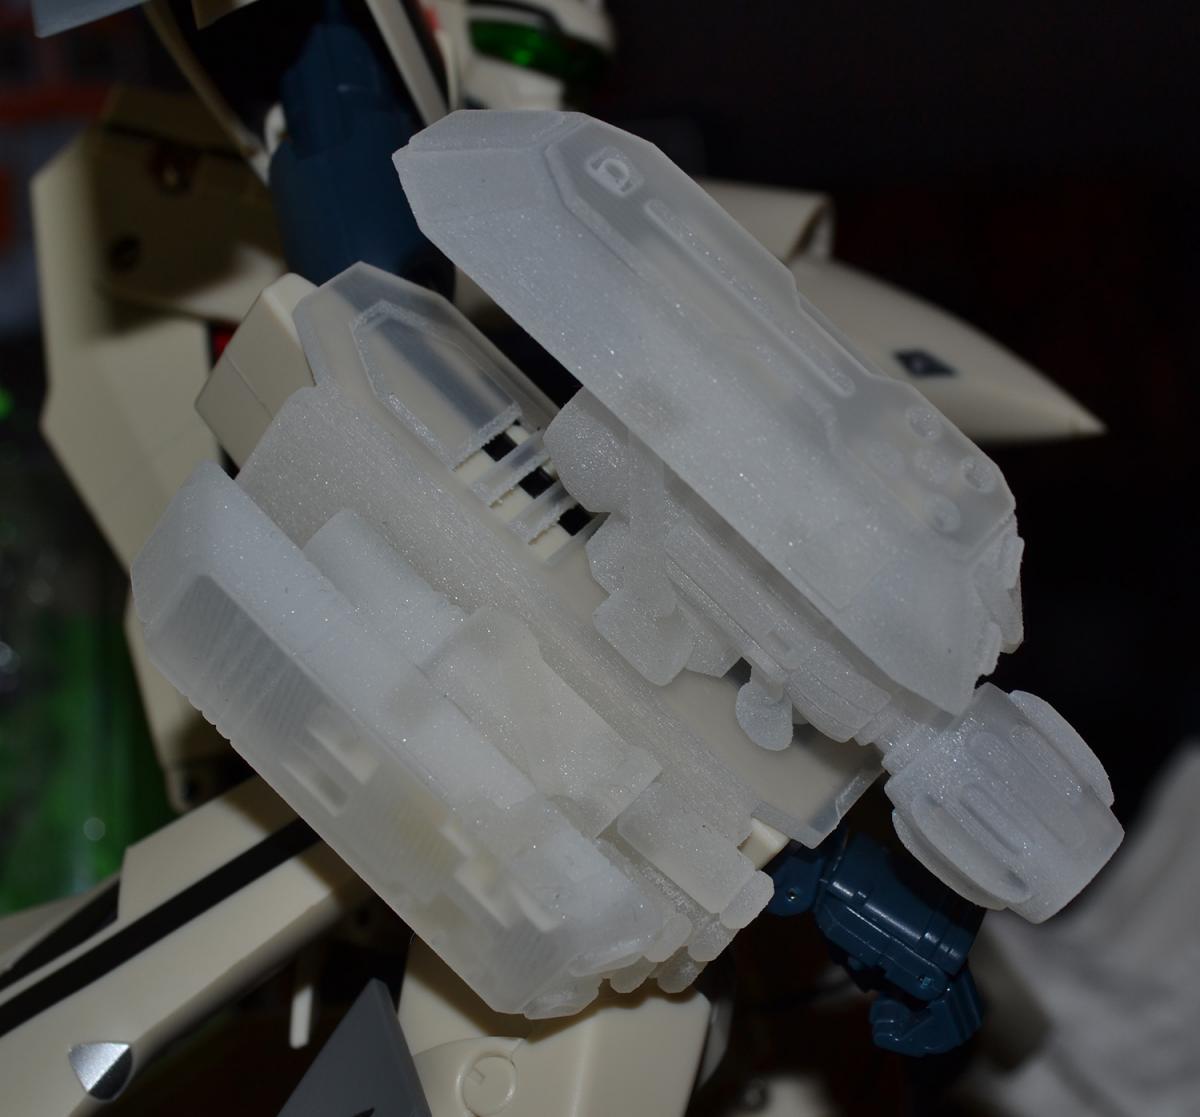
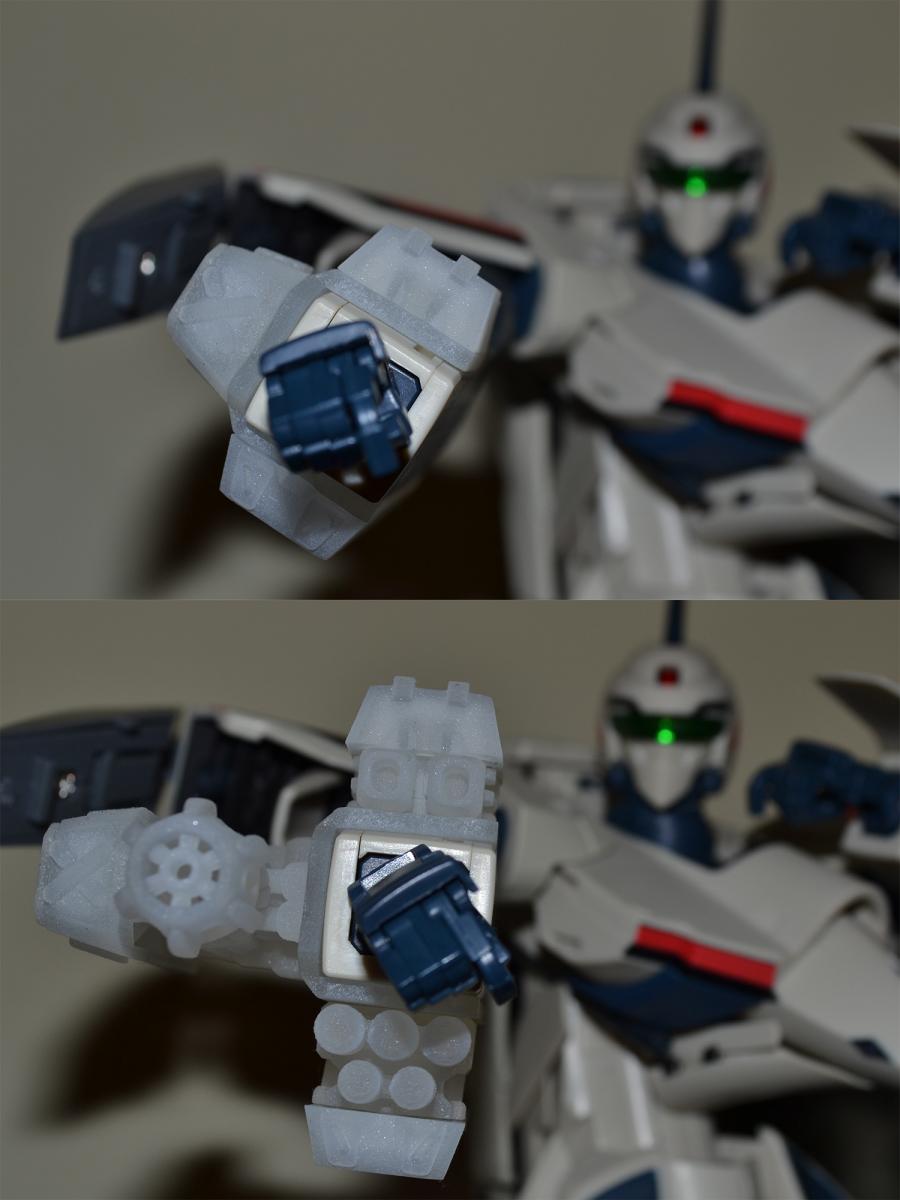
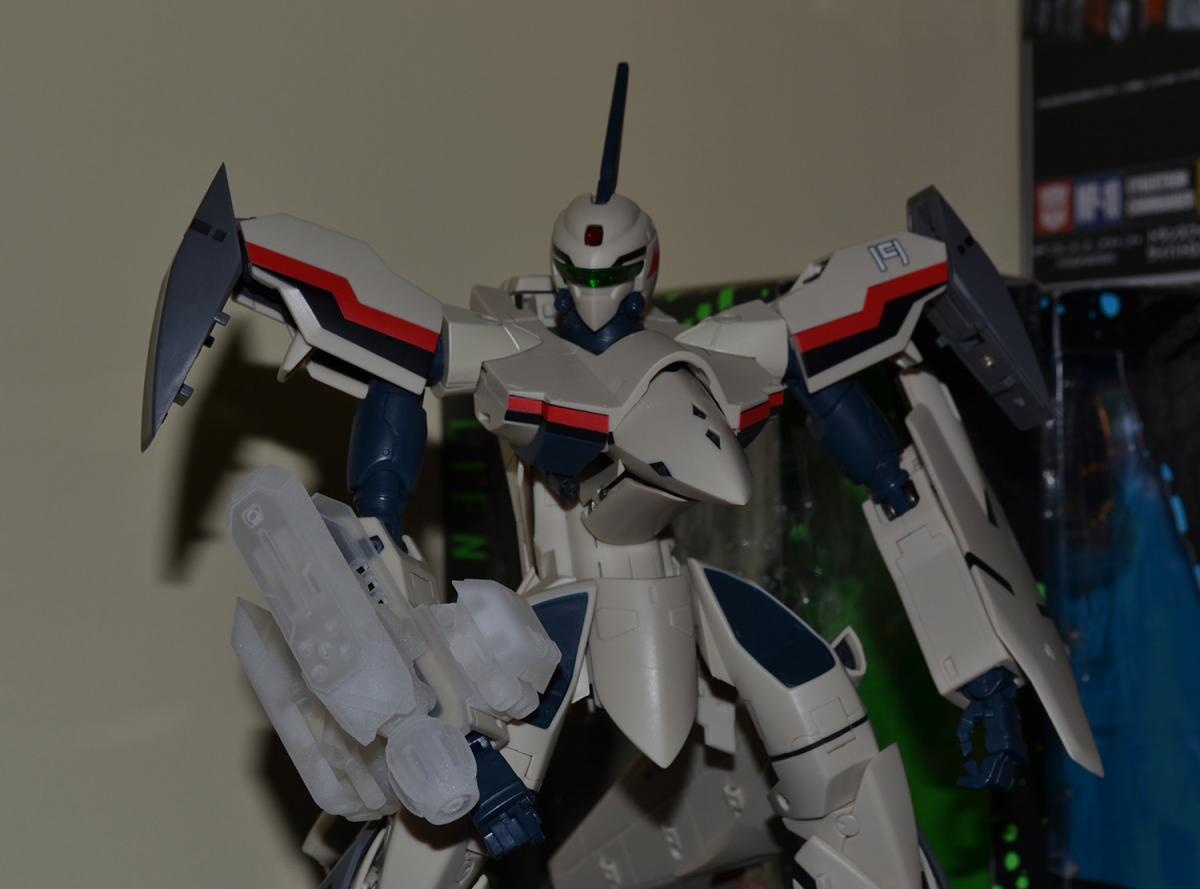
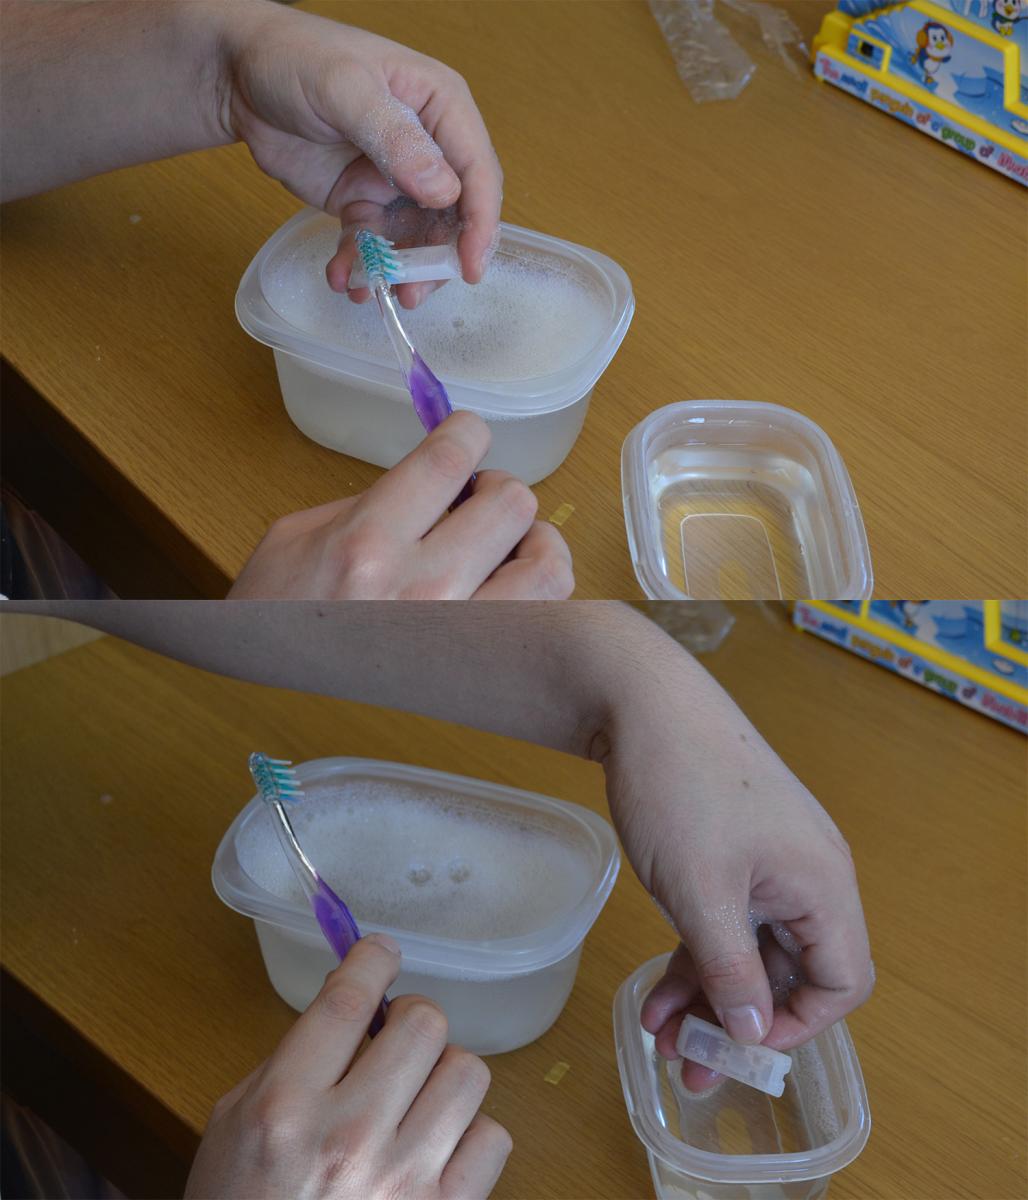
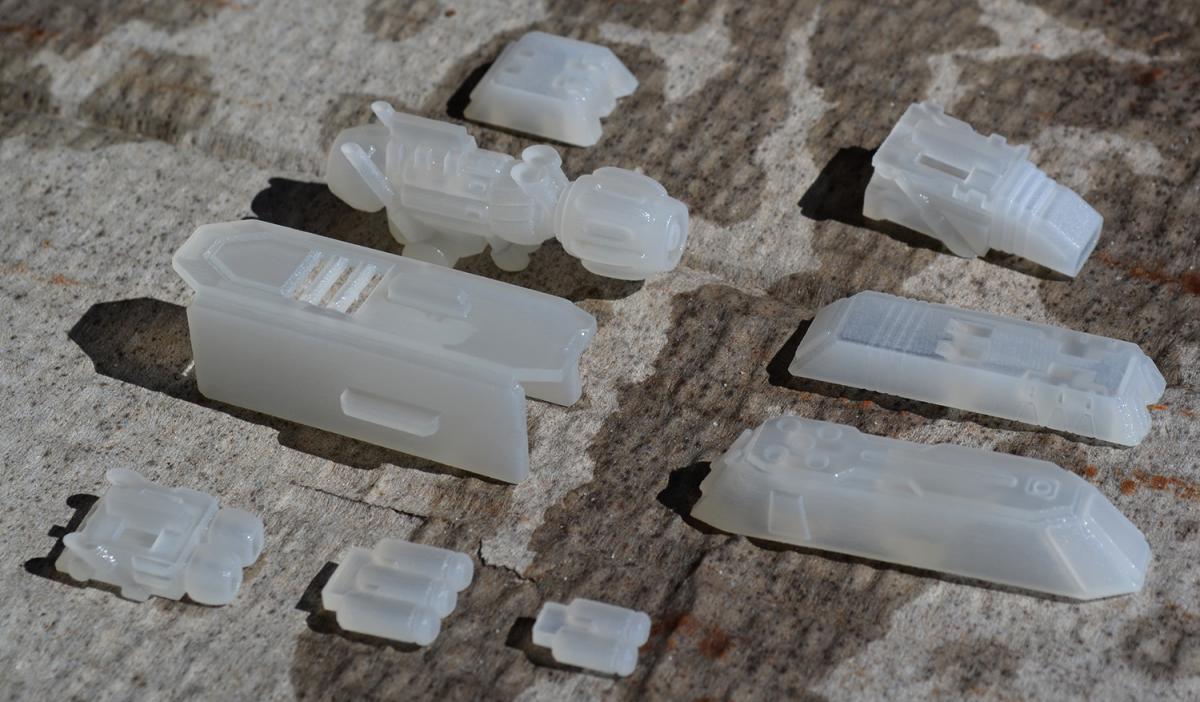
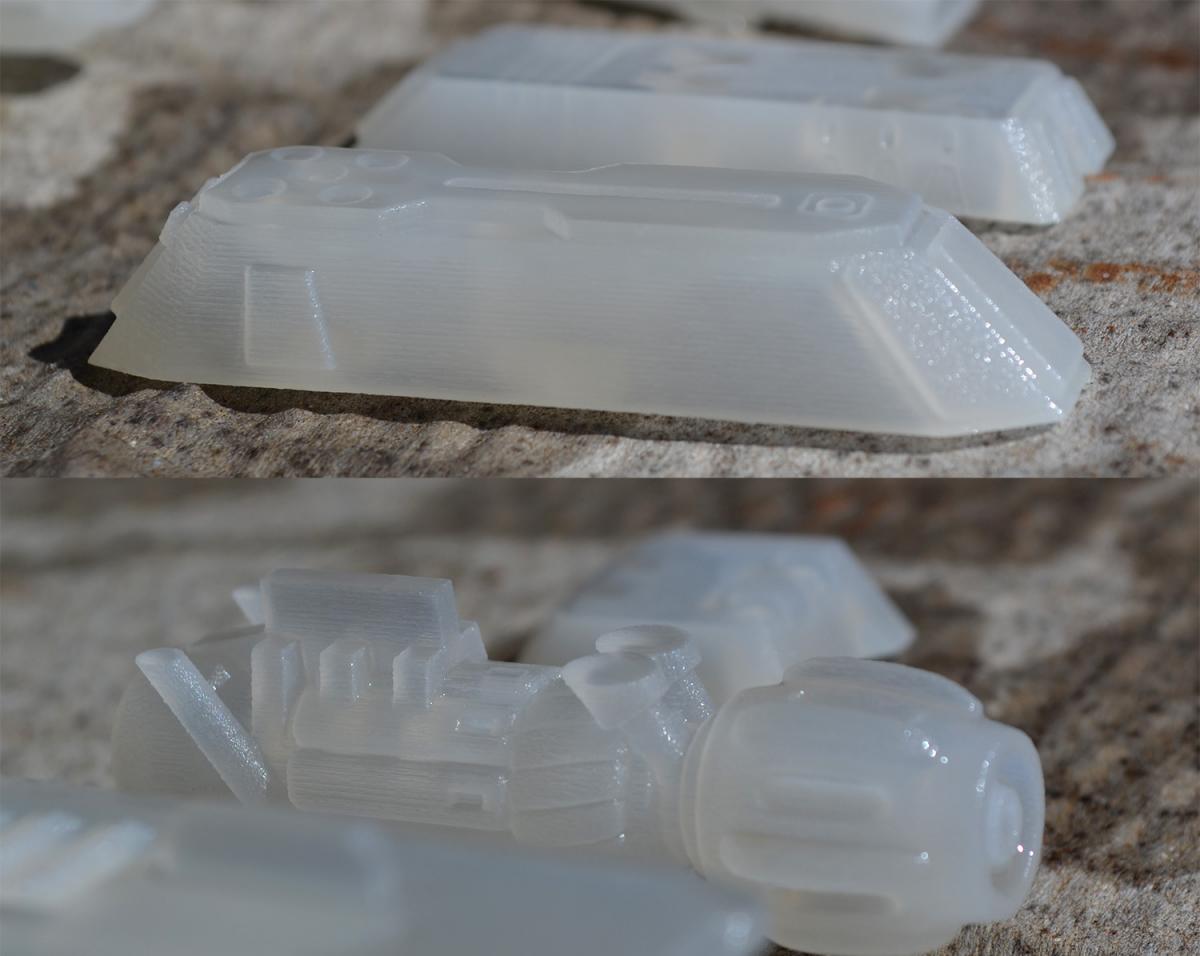
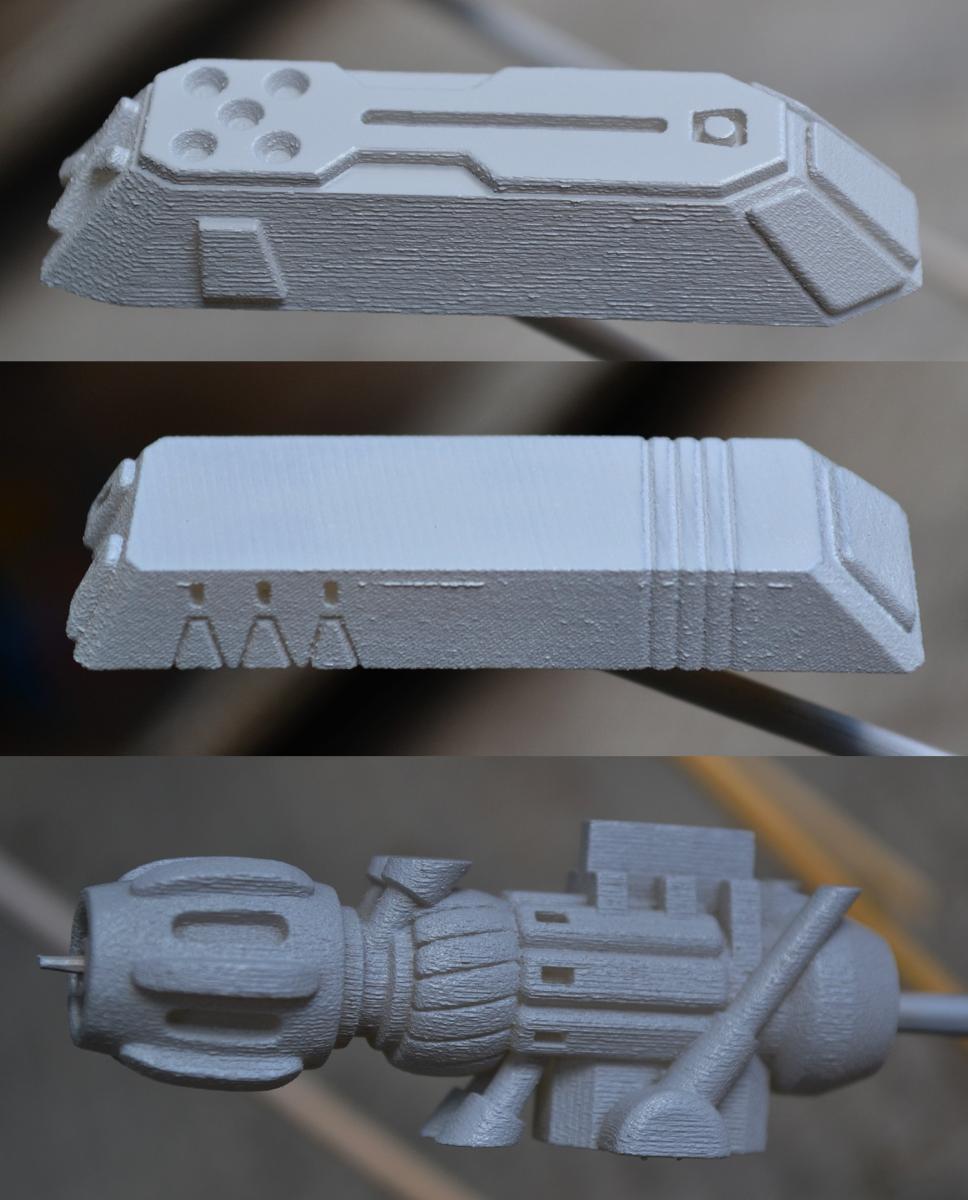
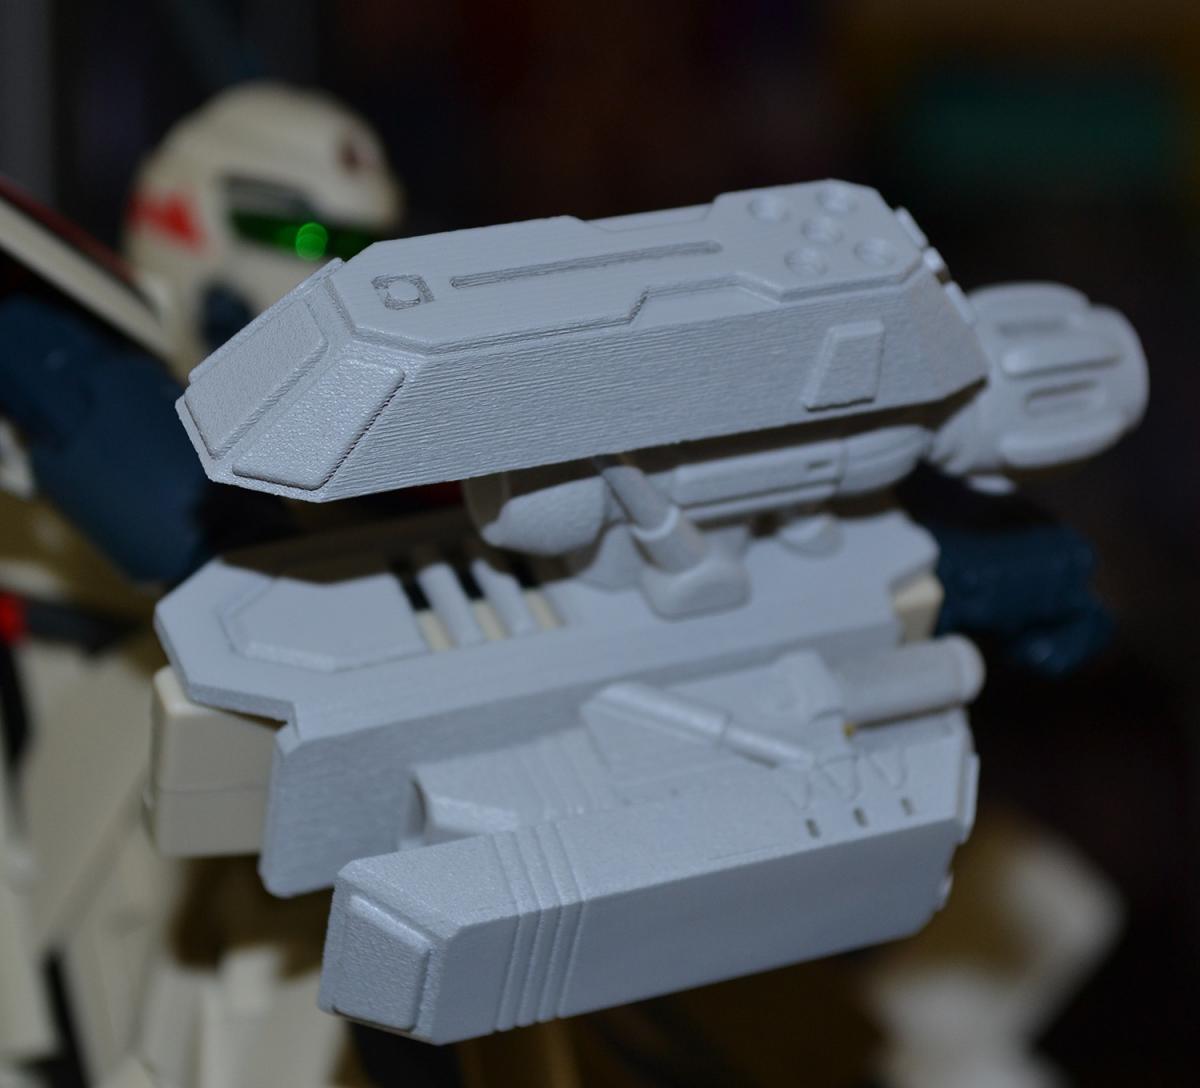
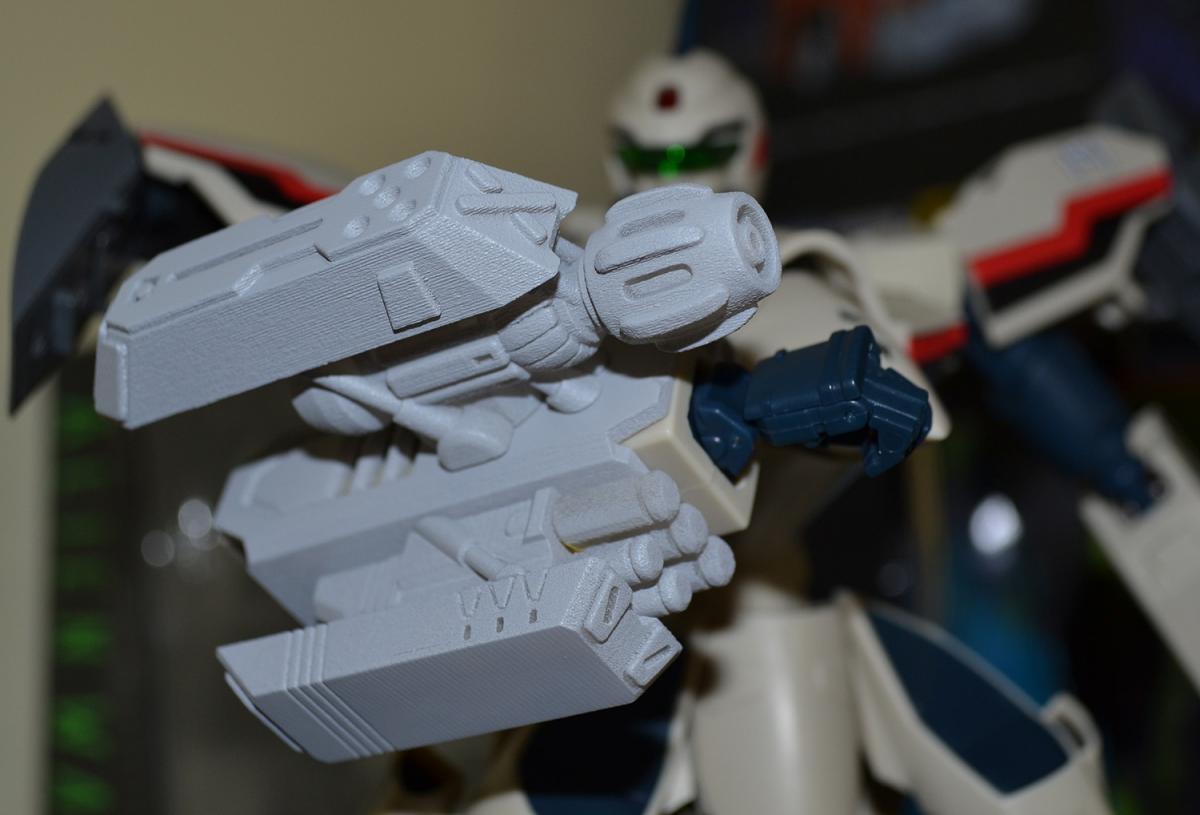
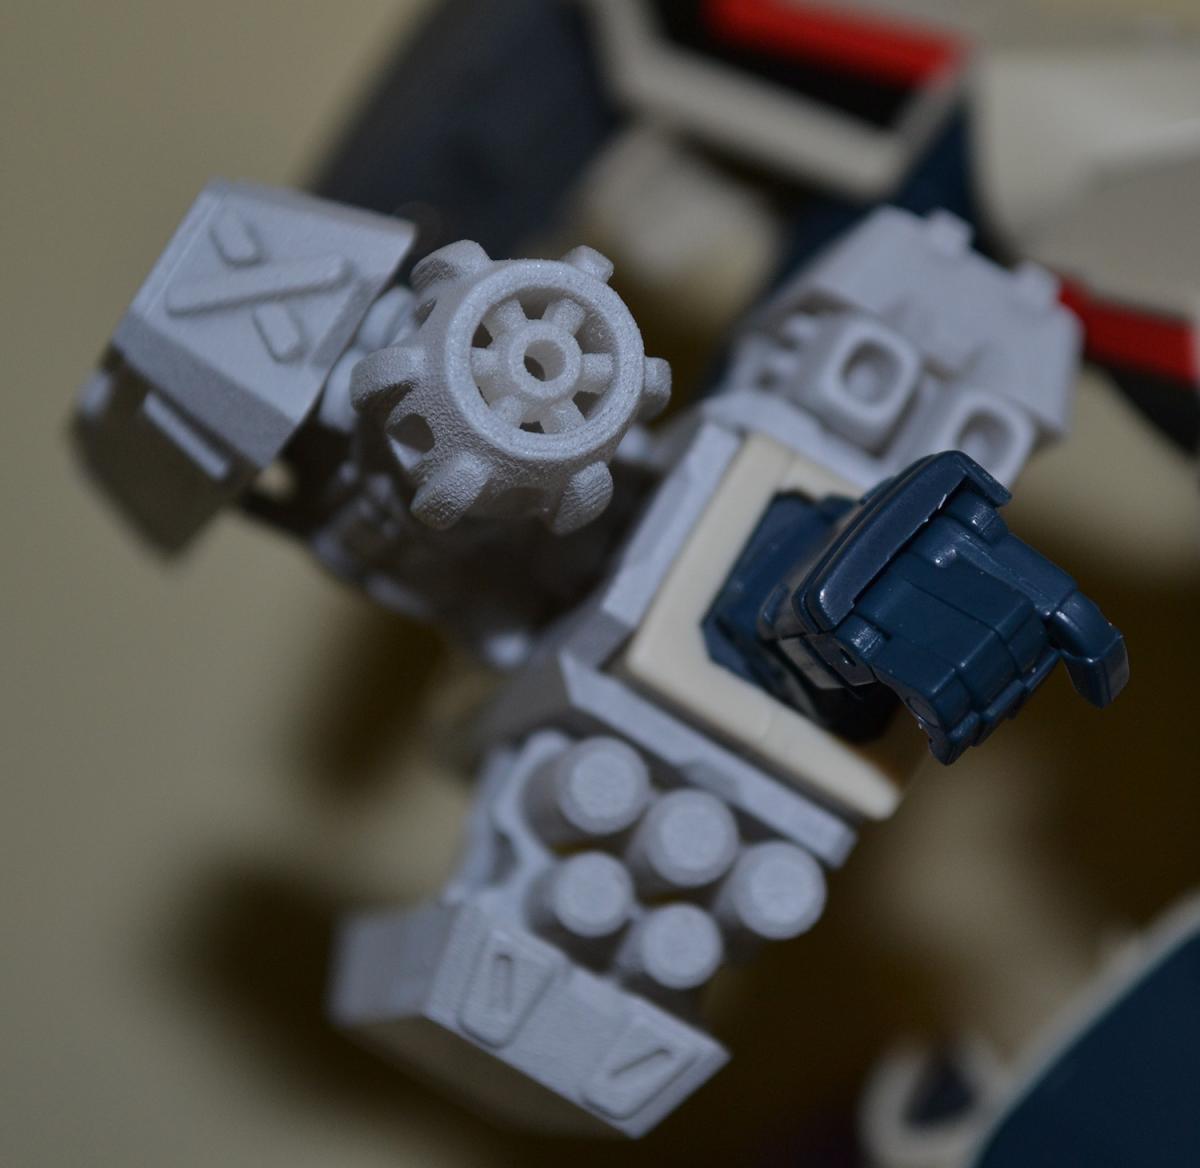
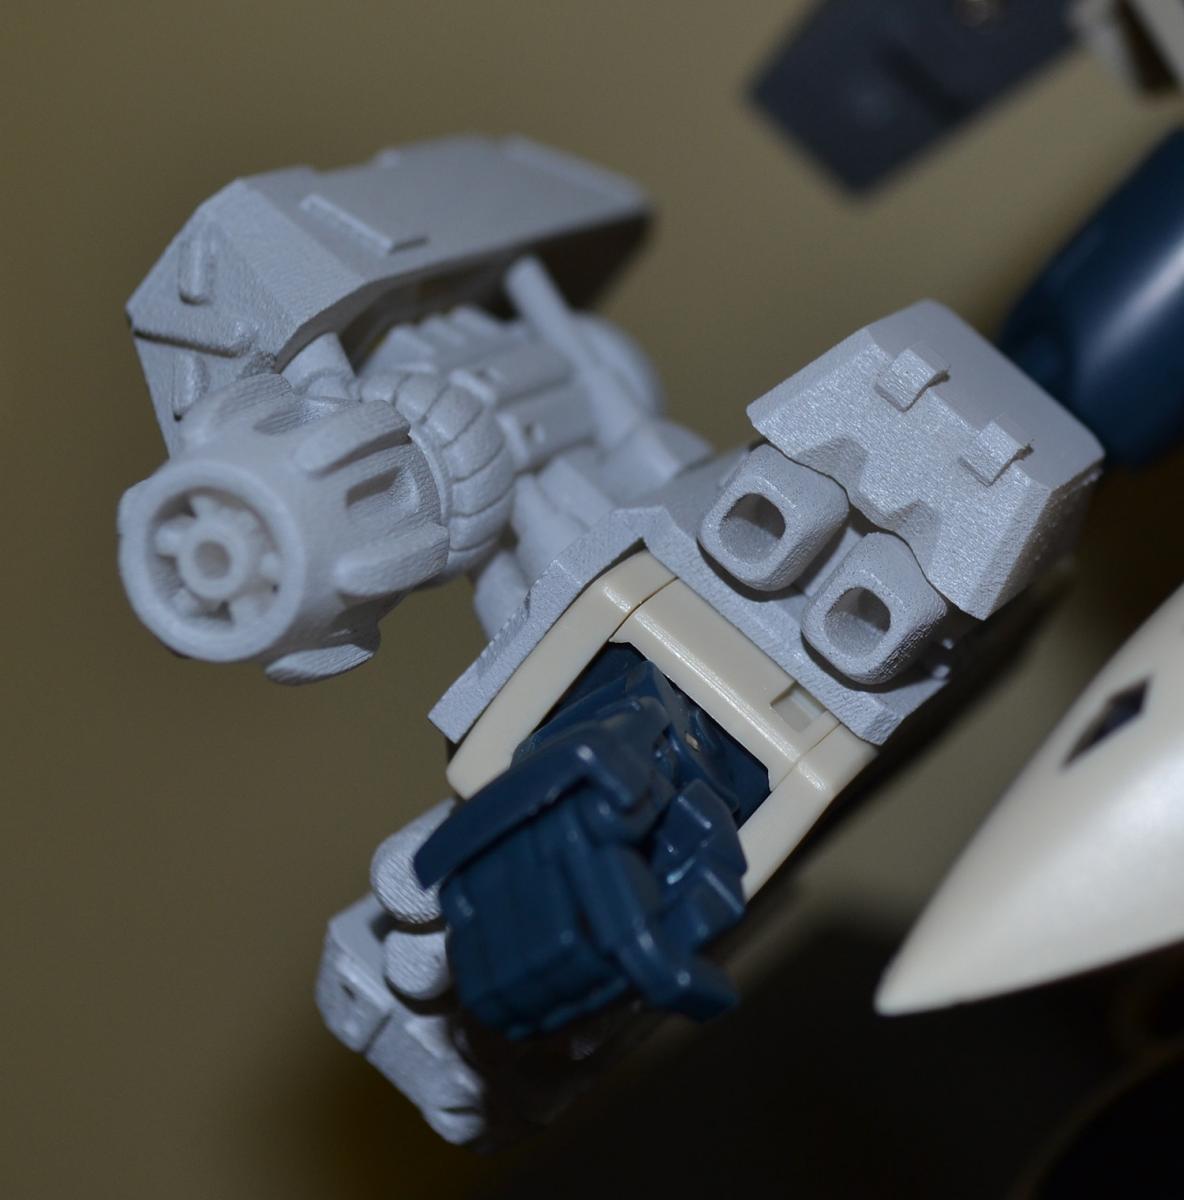
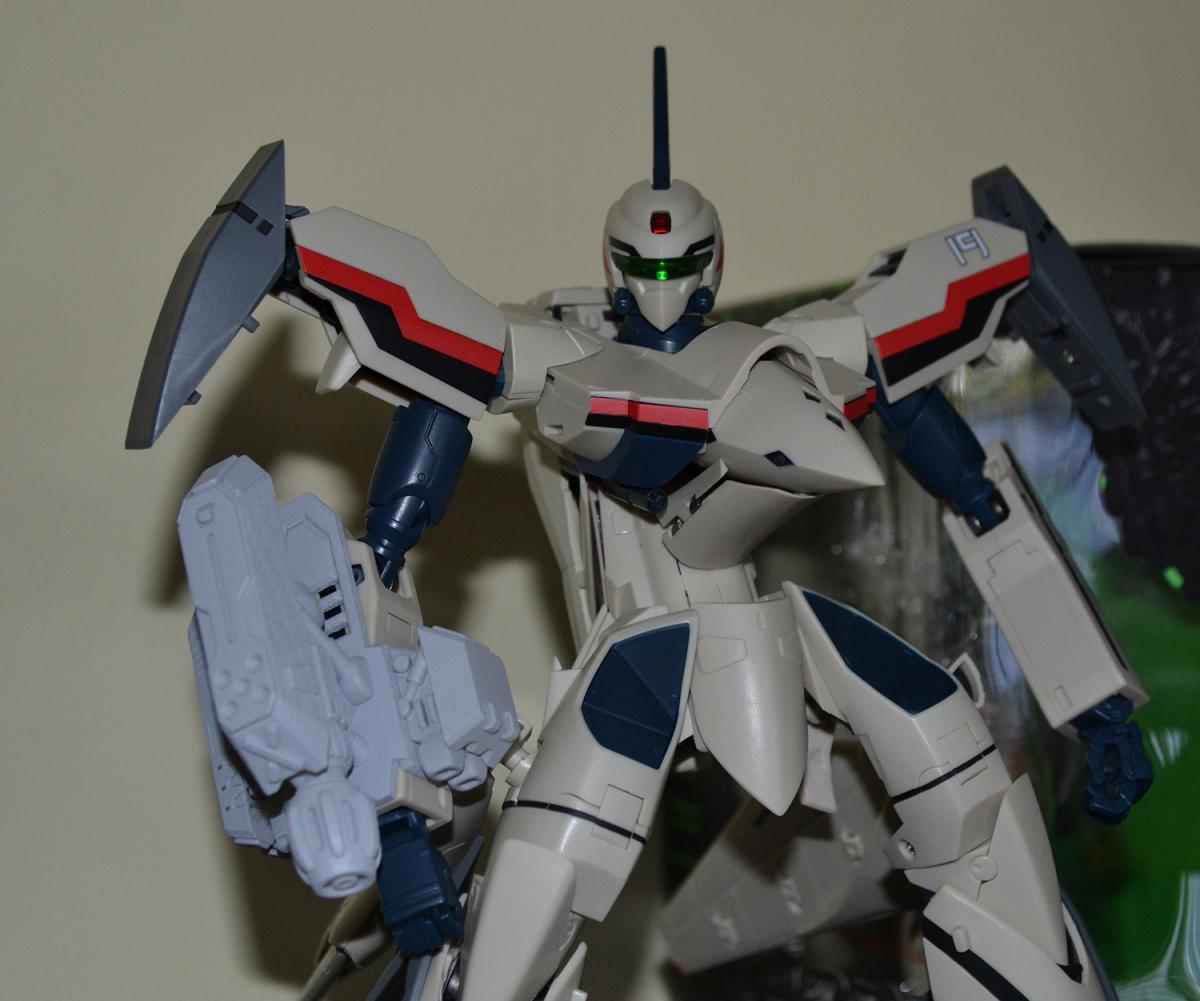
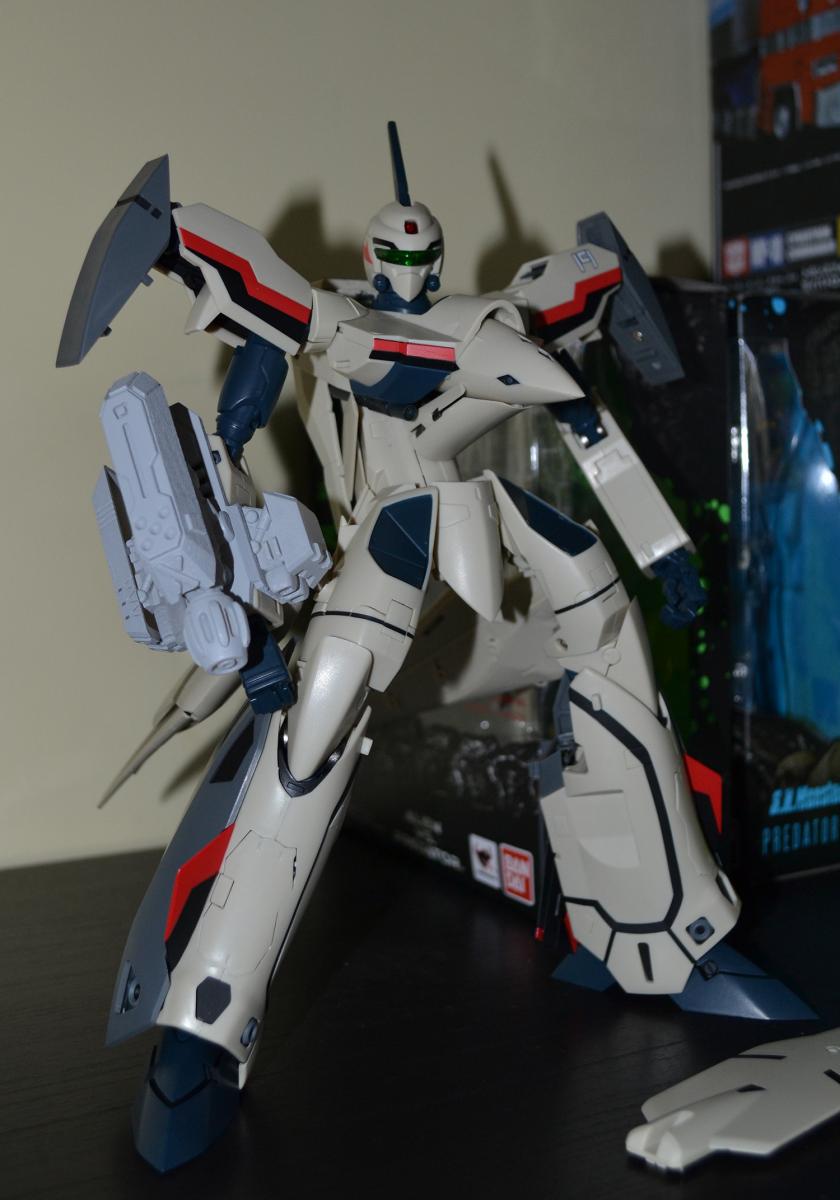
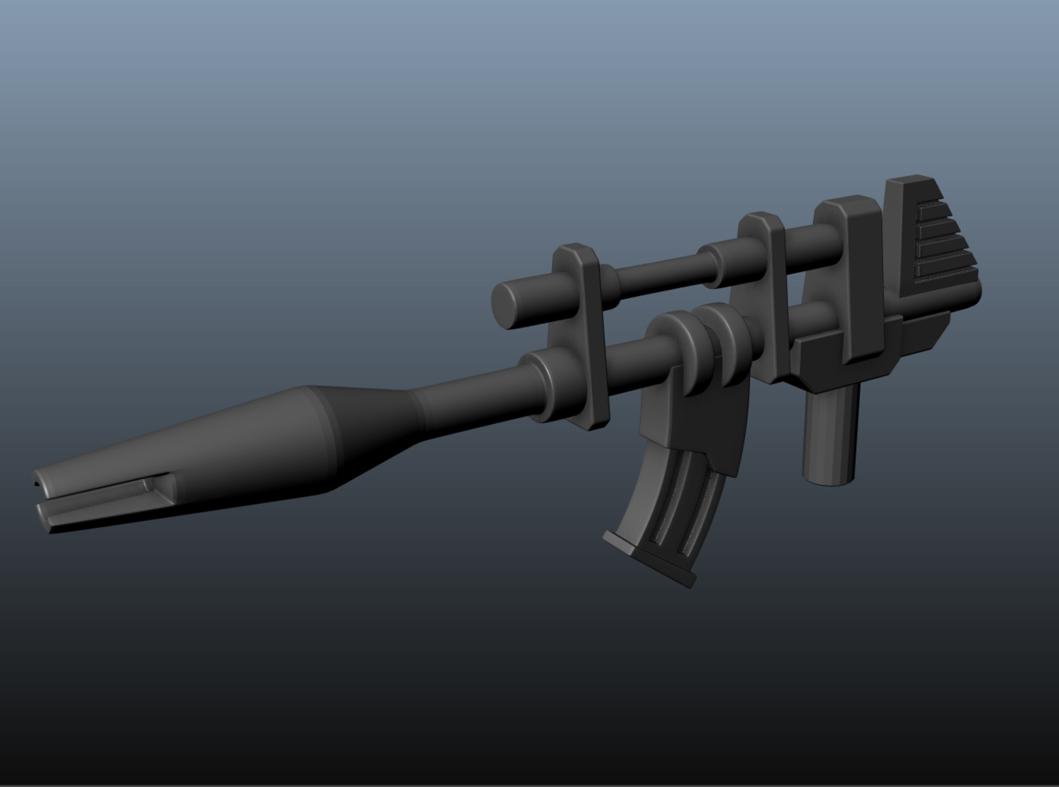
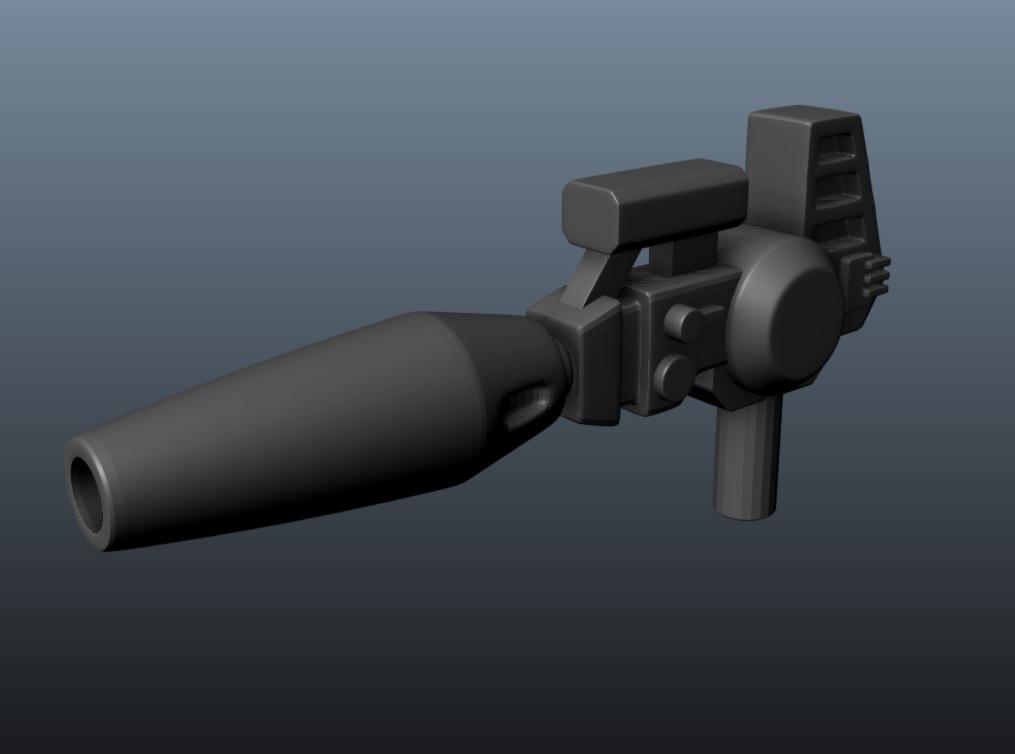
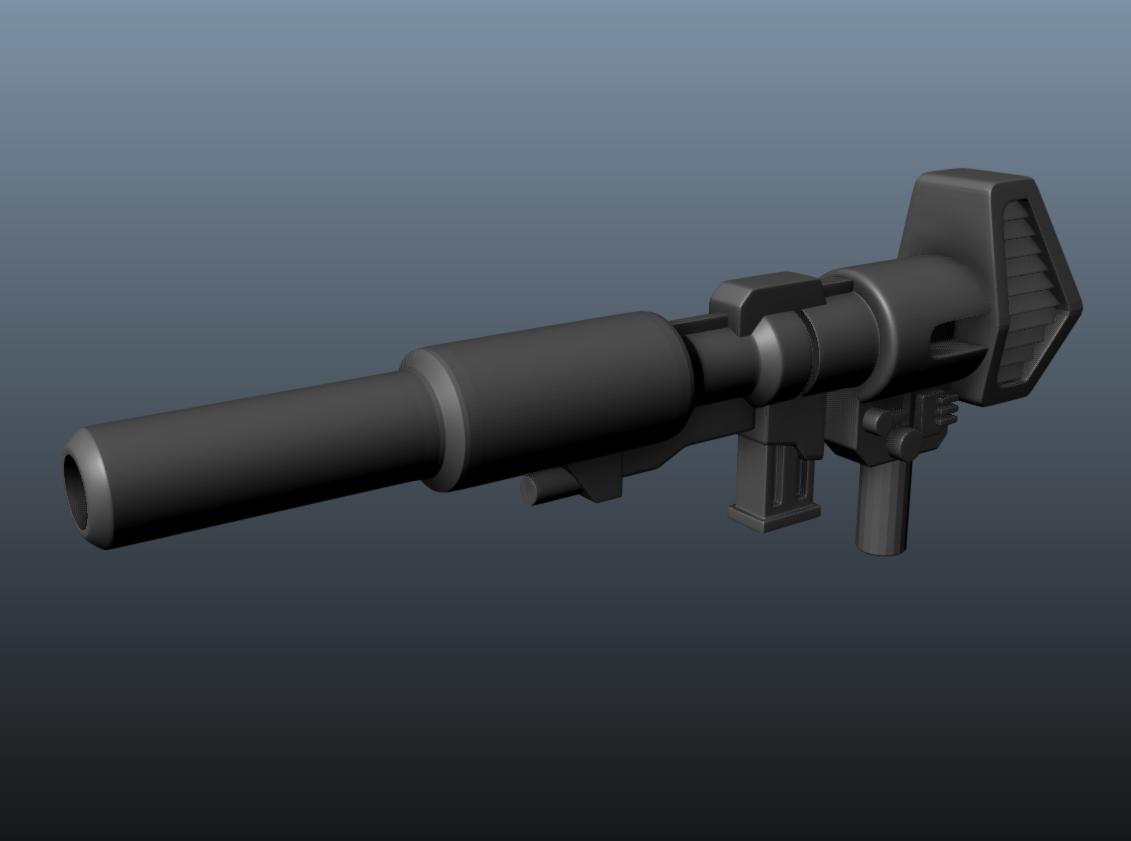
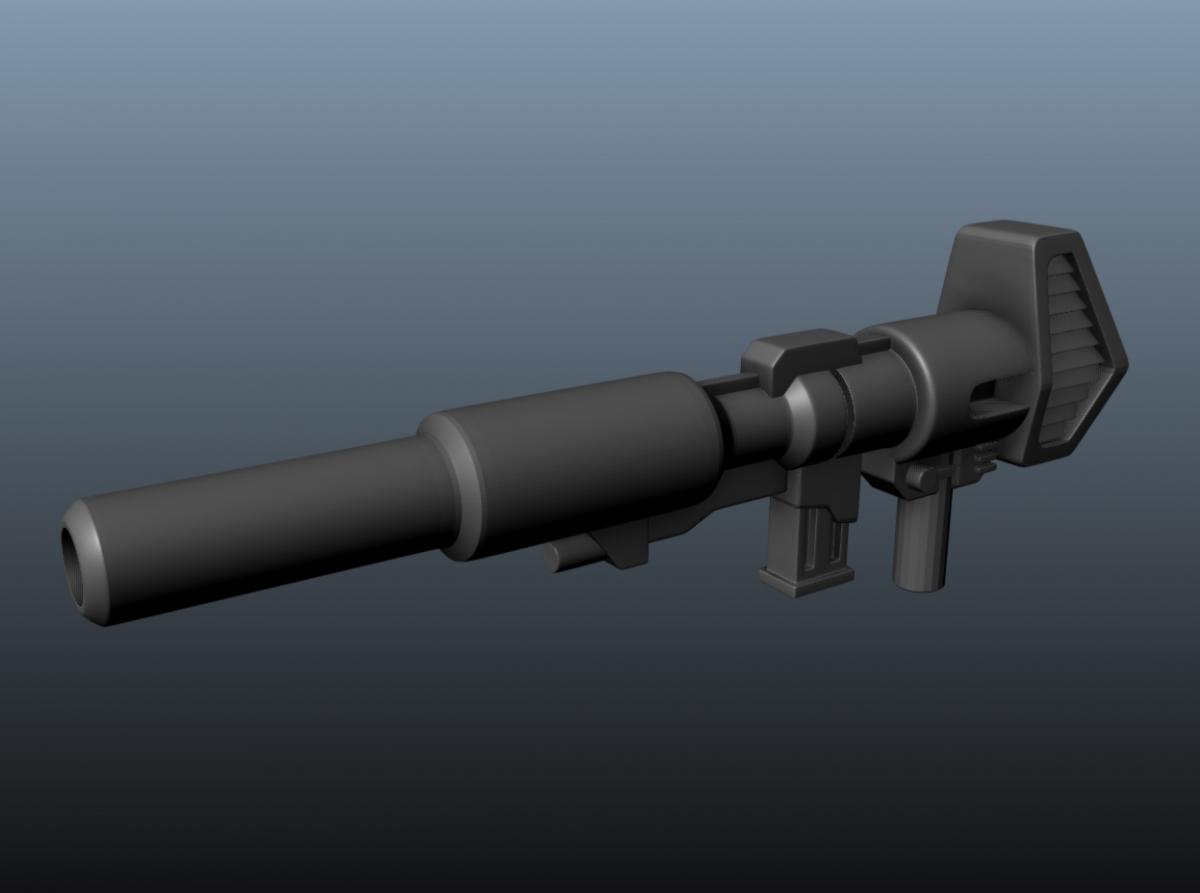
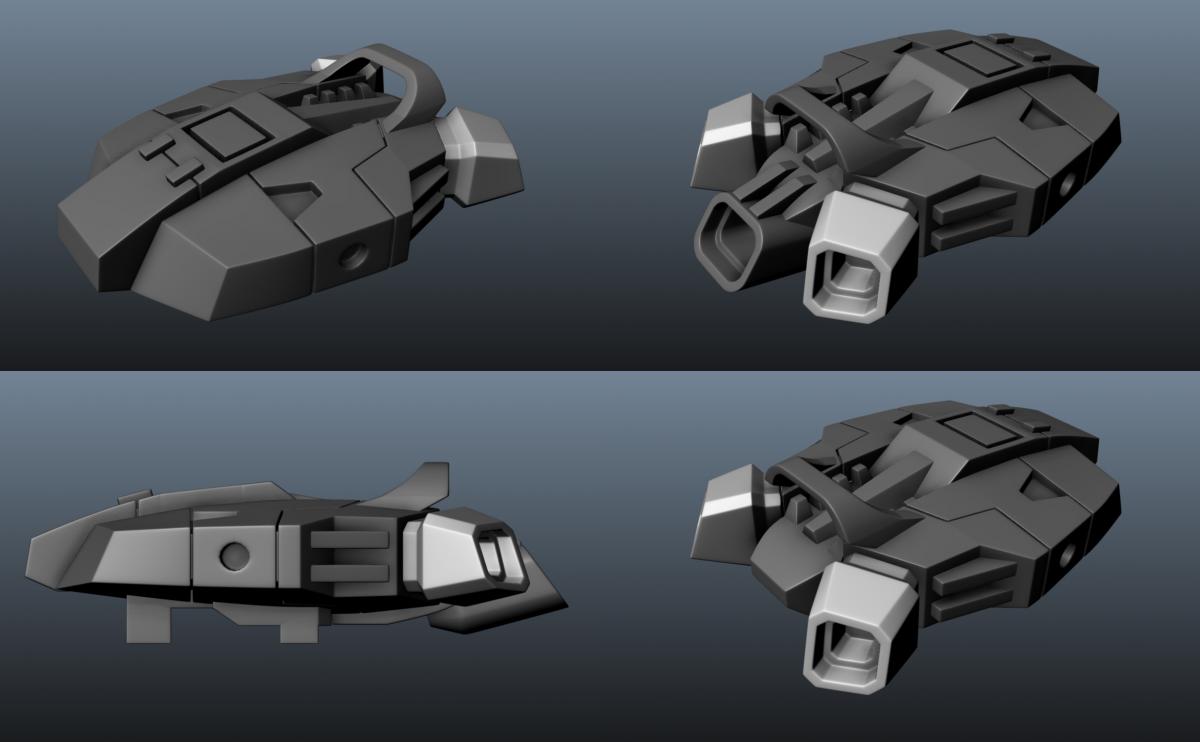
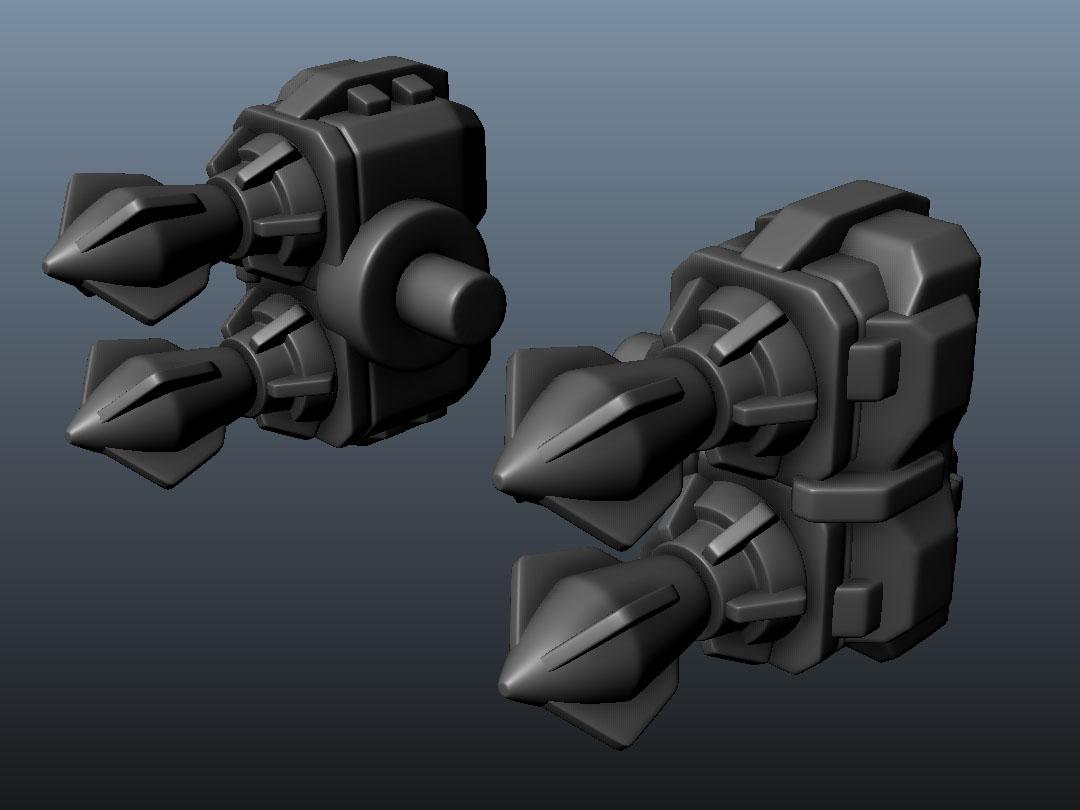
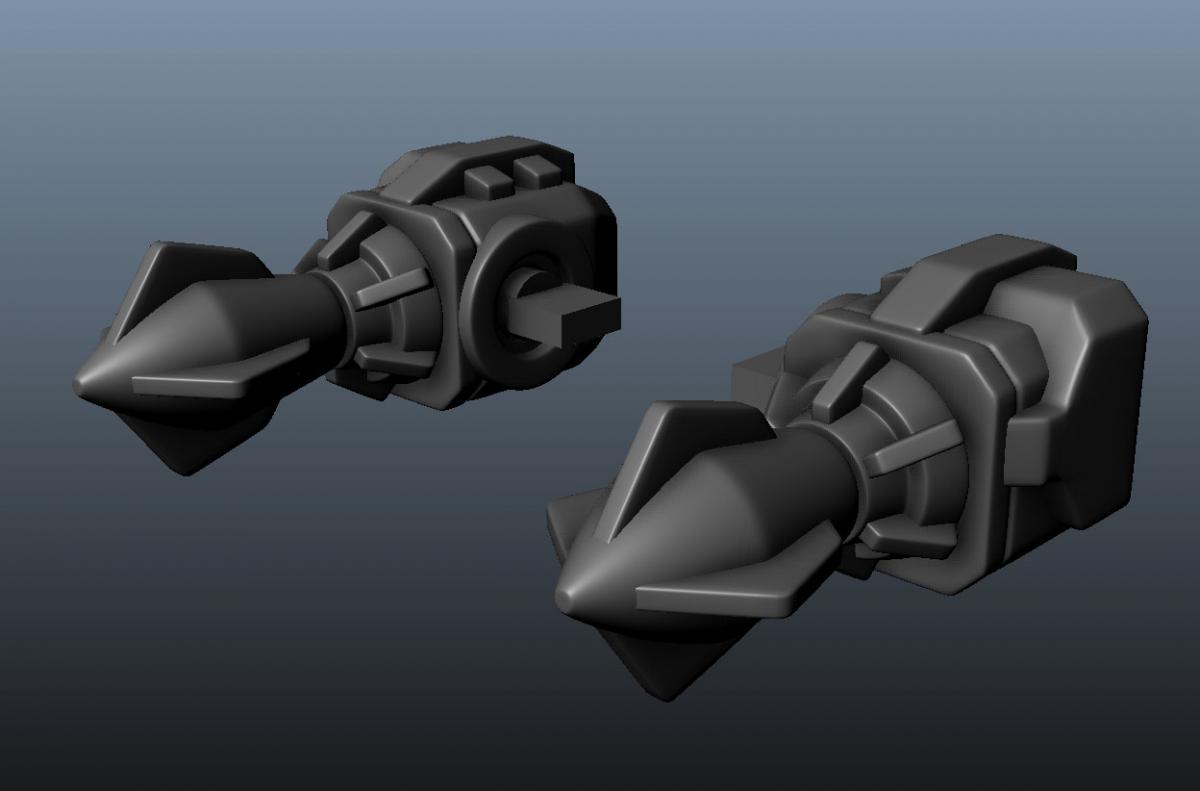
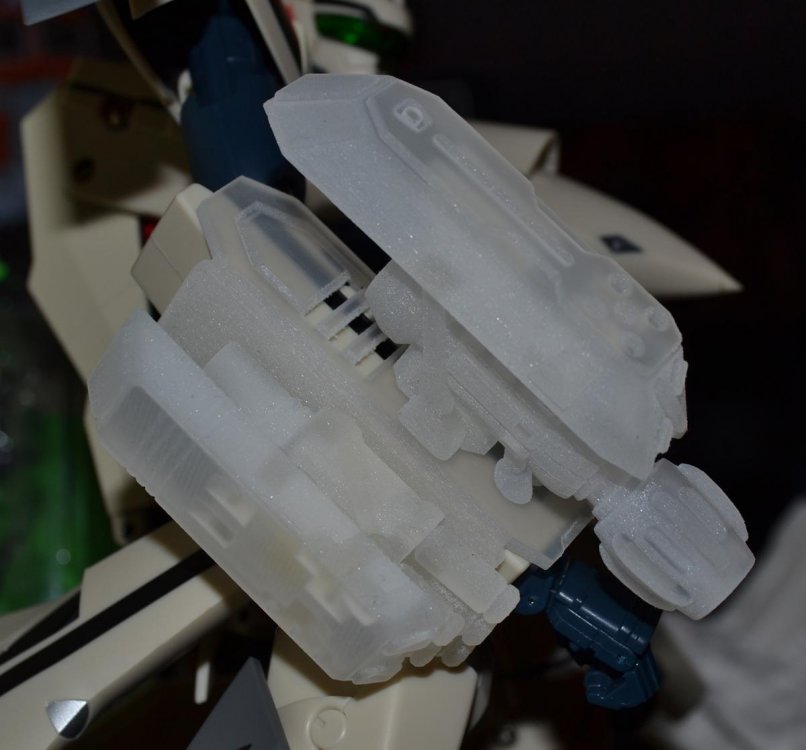
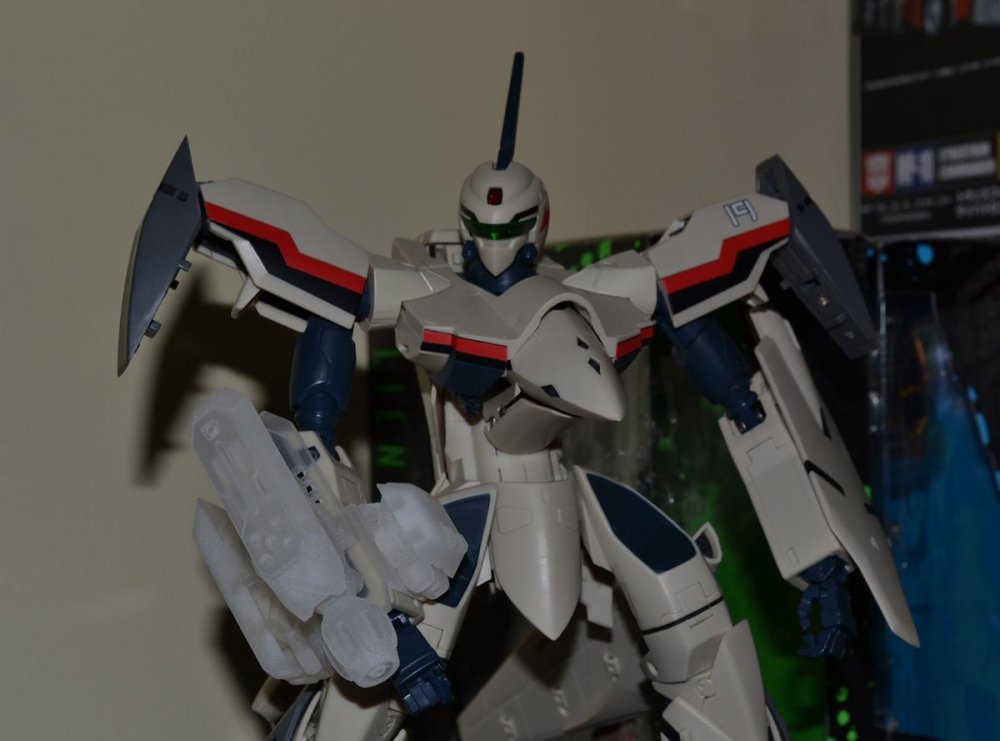
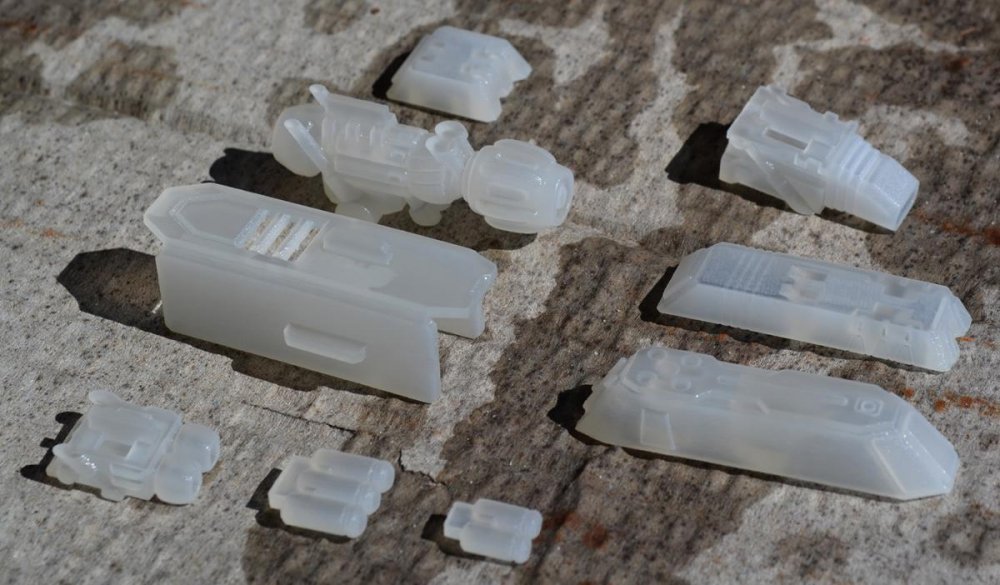
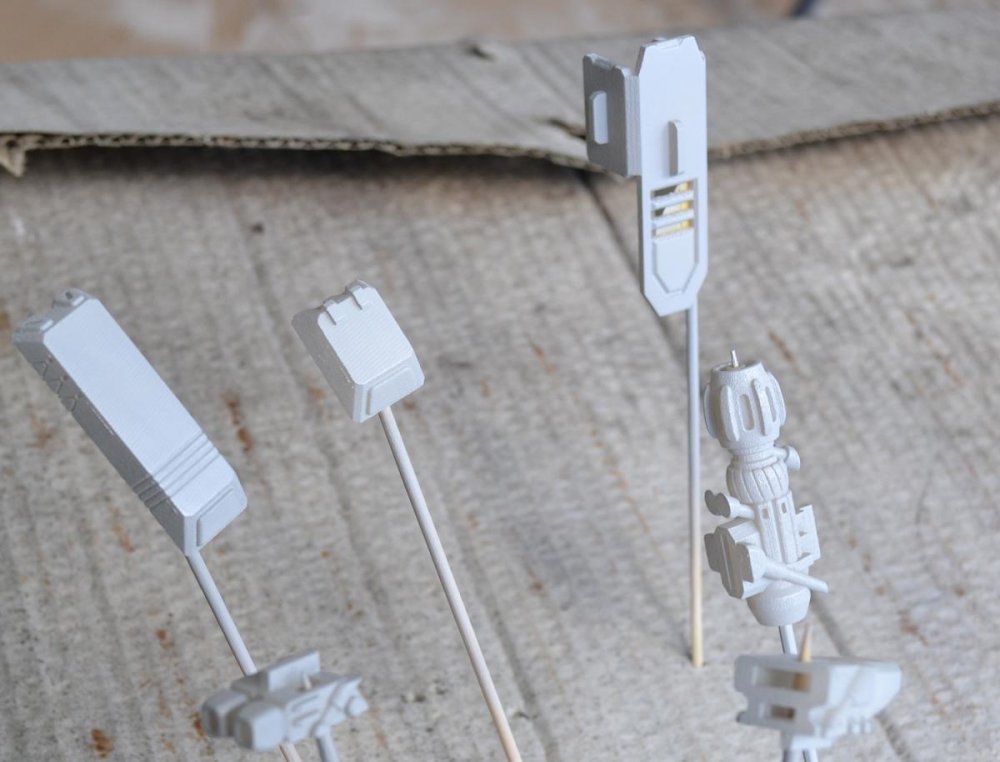
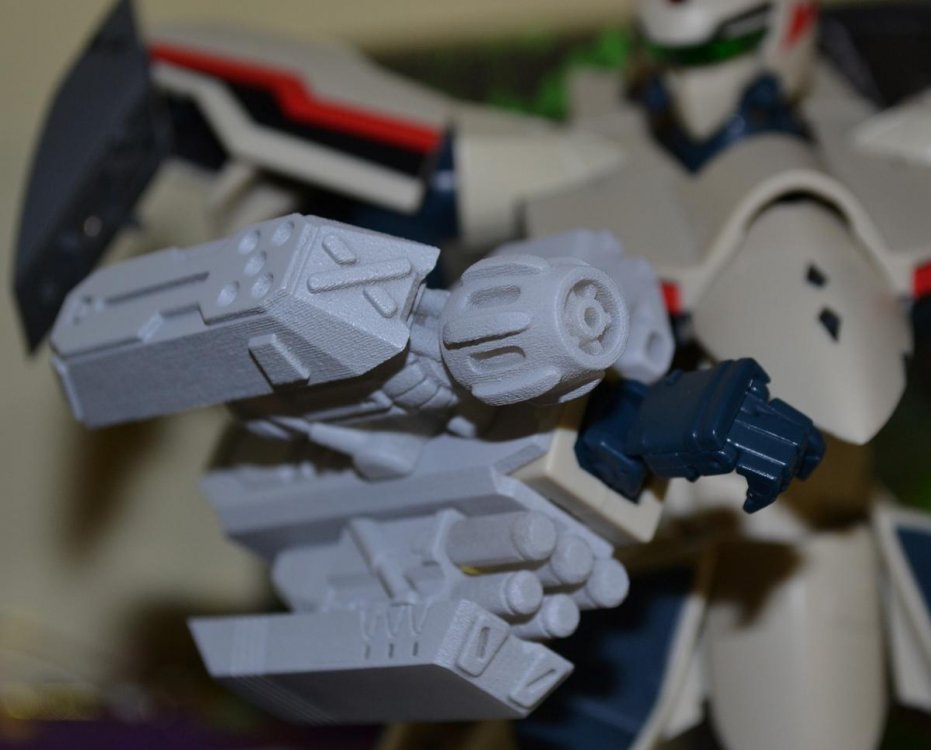
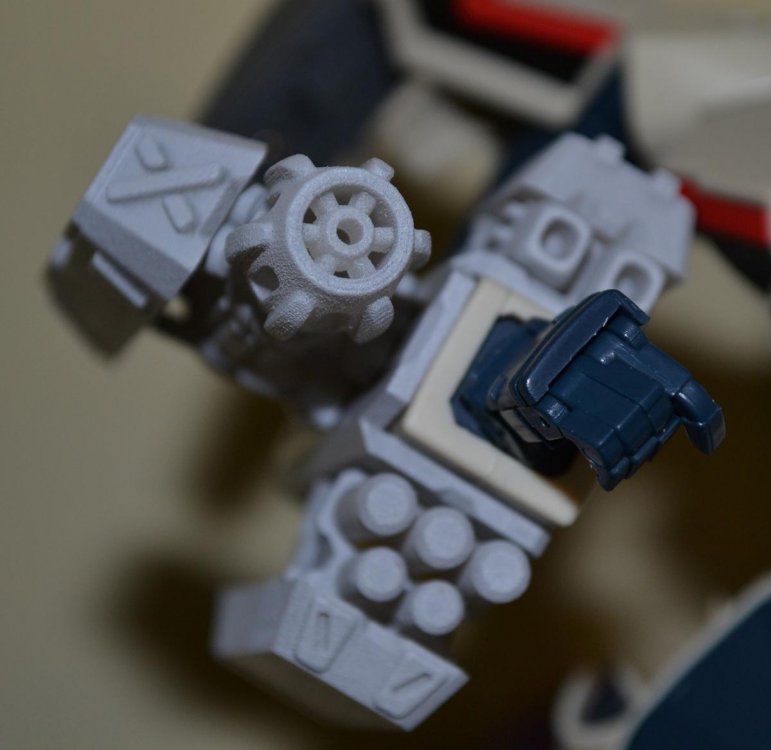
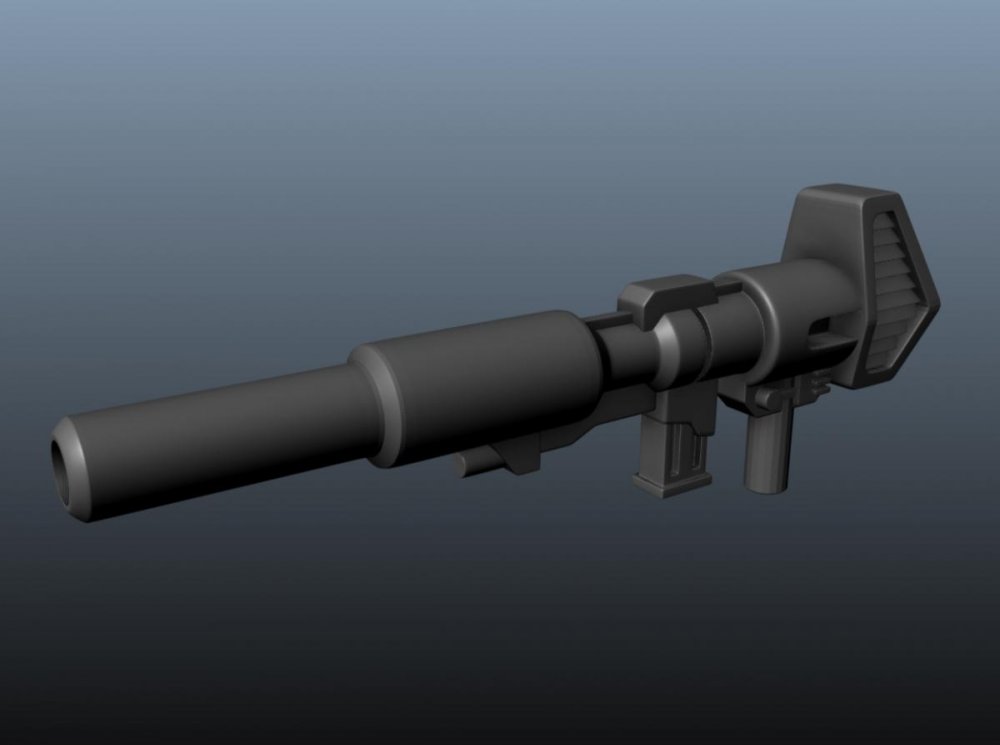
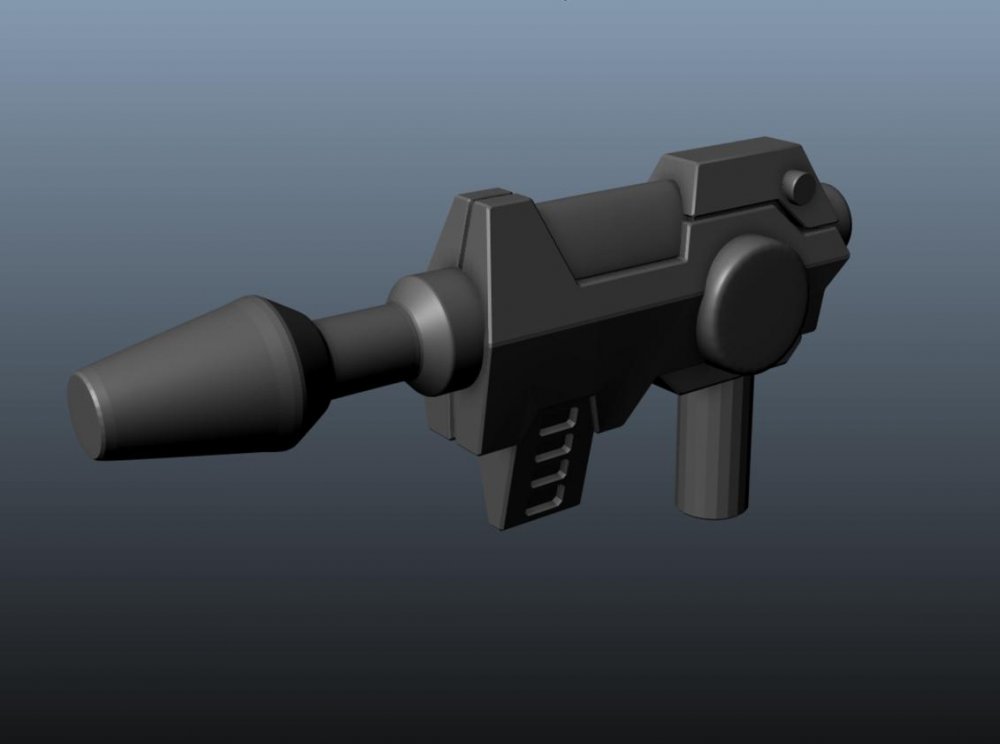
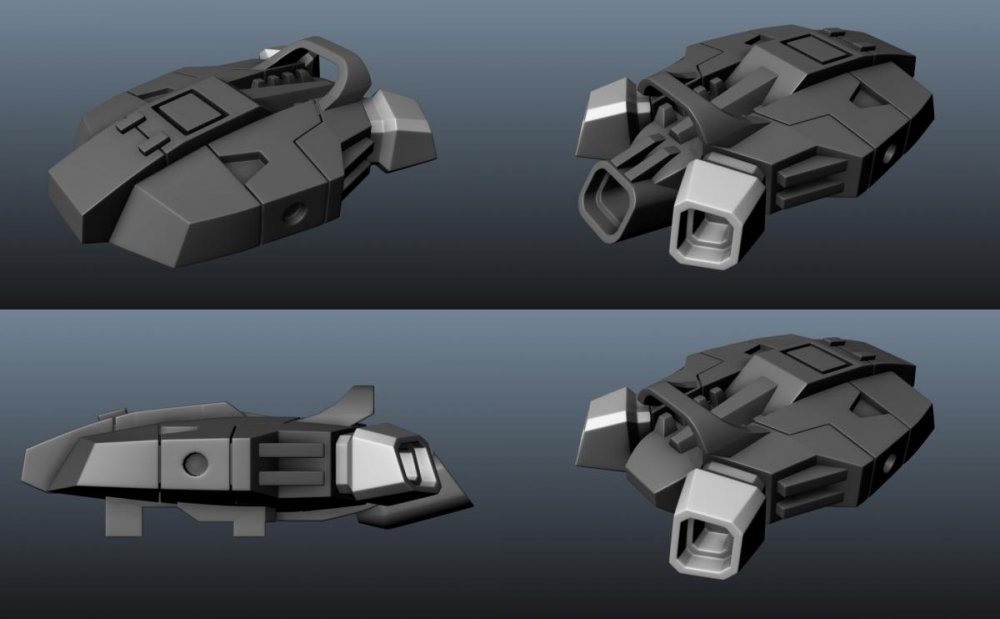
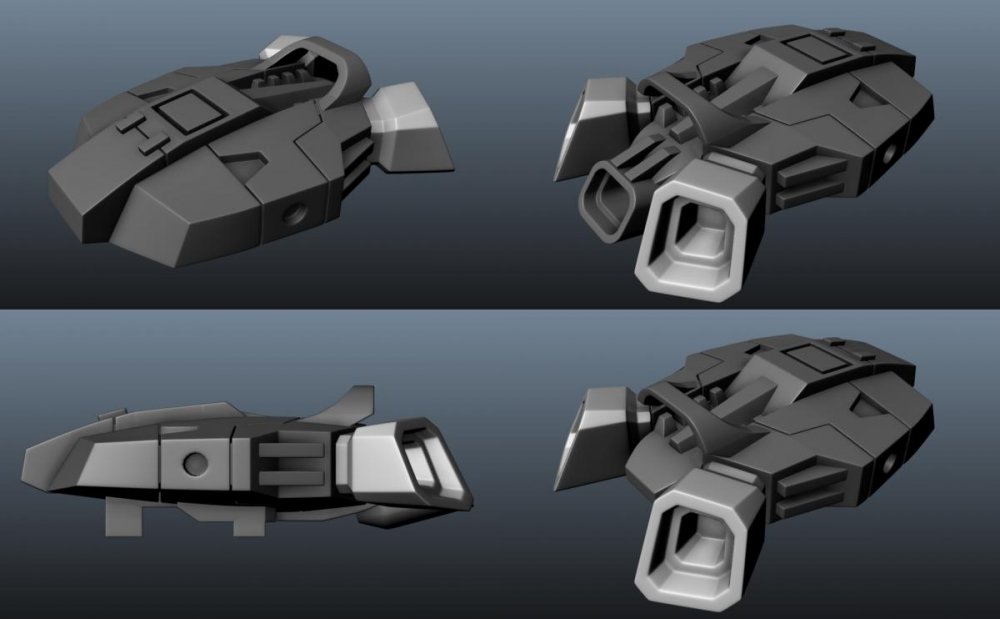
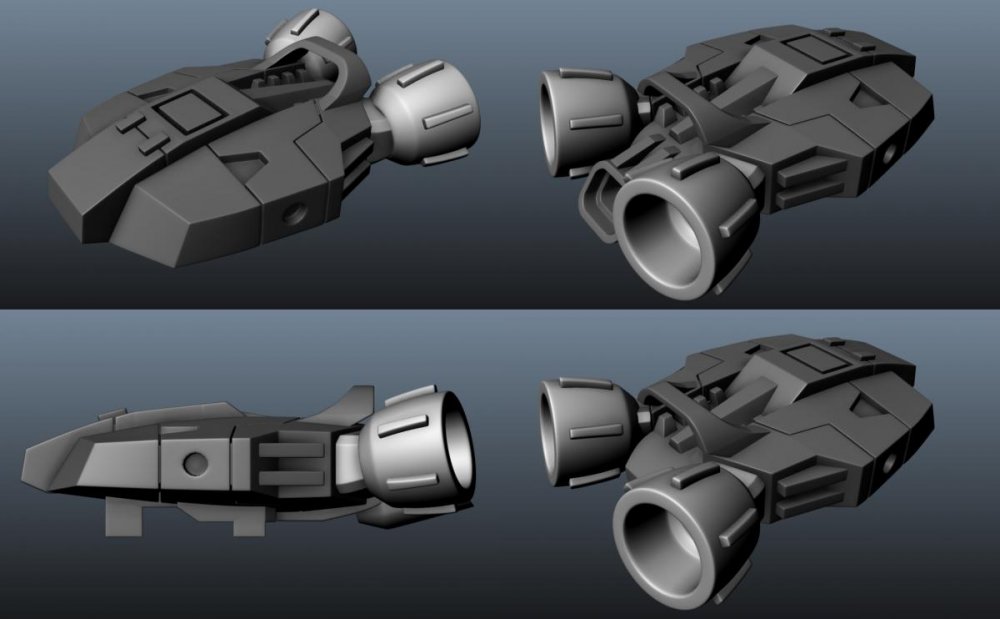
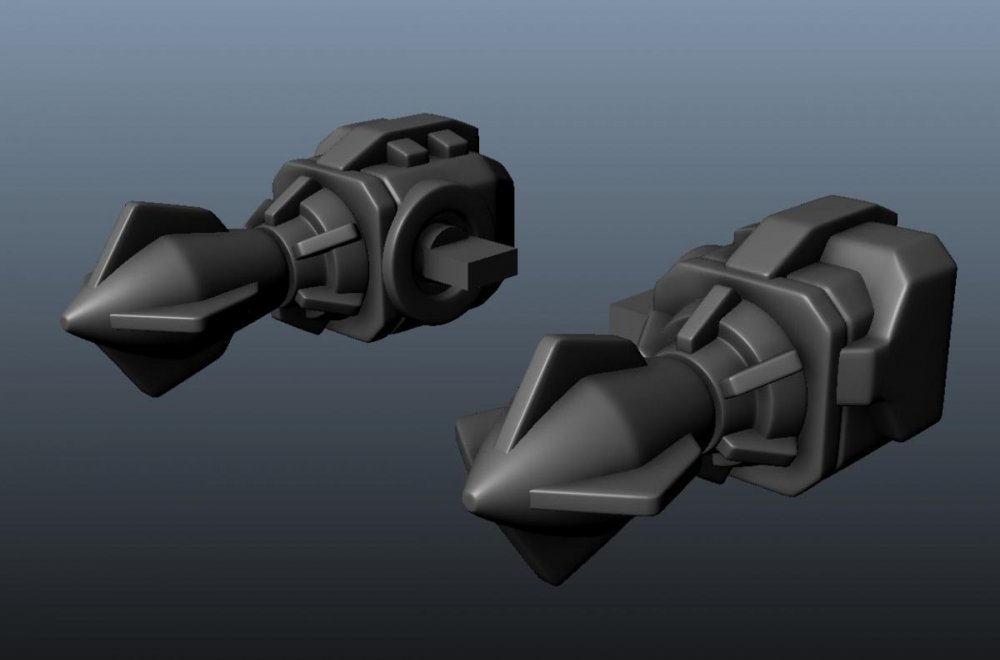
Hey everyone! As some of you have already seen on the Arcadia YF-19 thread and my general custom release thread - I've finally gotten my rendition of the YF-19's arm weapon from Shapeways; I'm going to use this thread to document the process of getting a 3D print up to spec, start to finish. I have a long weekend and hope to get it done between hanging with the family (4yo son and pregnant wife!) and lounging about /packing the house for a move over the next few days. Feel free to ask any questions regarding ordering or preparing the print. First off (after initial fitting of parts and testing on Alpha-One ) I separate all the parts and soak them in a not-quite-hot-but-not-warm tub of water with regular washing detergent. I then scrub each piece (carefully) with a toothbrush and then put in a second bath of just-hot-water (don't want to warp the plastic) and then scrub again and rinse in some more warm water - shake them off and take outside to dry in the sun for a good few hours, turning them all the while so each surface gets a decent amount of exposure; I then use a primer (Mr.Surfacer if u can get it or Tamiya works well too) and lightly coat all surfaces and let dry for about 4 hours - again, turning so each surface gets a good dose. Now you can clearly see the print lines - they look severe here cause I used the macro setting on my camera, but to the naked eye, it appears much smoother. Still, it will require sanding. I've now sanded the pieces as best I can given the awkward angles (no photos yet! tomorrow ) using Tamiya Finishing Abrasives P320 grain - using the P2000 did little, so not worth using it. I can now see where the primer has filled in the print line grooves. Will update with new photos of the sanded (will also brush with a dry toothbrush to get rid of the sanded primer and plastic and also pick out debris from details with a pin-needle or hobby blade) pieces and next round of primer and/or base colours - as well as what Tamiya colours I use. And a couple more pics for the lulz;


-
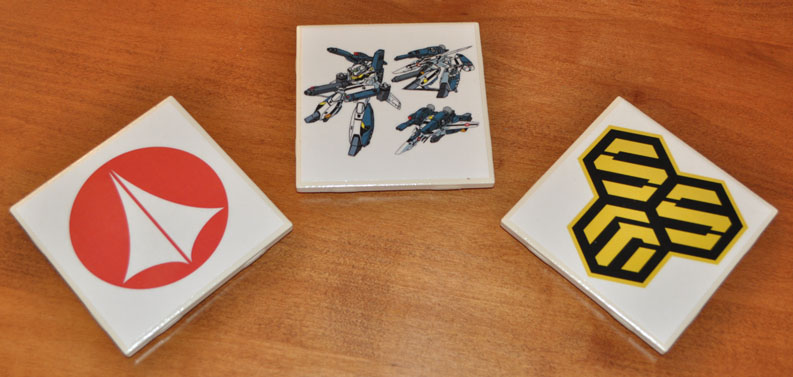
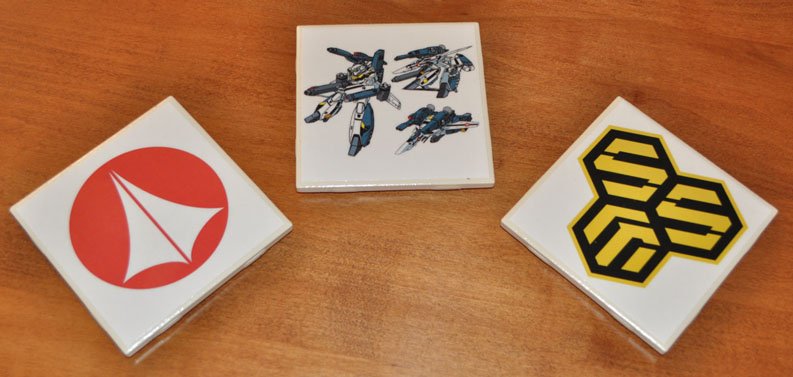
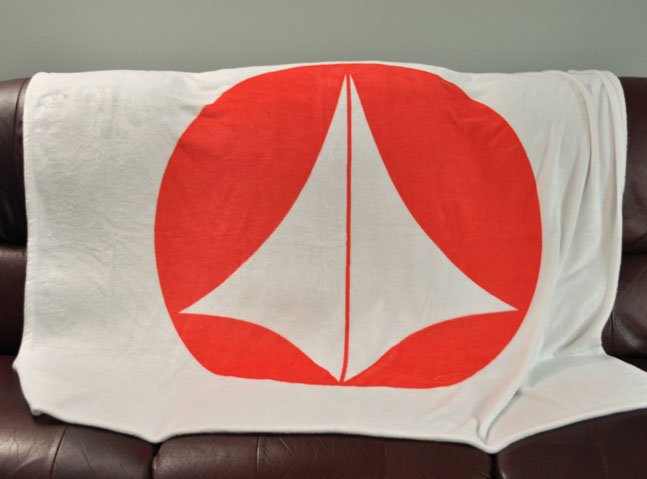
Just got home after Christmas and thought I would share some custom Macross-related items that I received from a combined effort of my mom & my sister. A set of coasters: UN Spacy logo, VF-1S Strike, and SMS logo: And a UN Spacy blanket: It should be worth noting, too, that they themselves aren't really Macross fans. They just know what a huge Macross fan that I am!
-
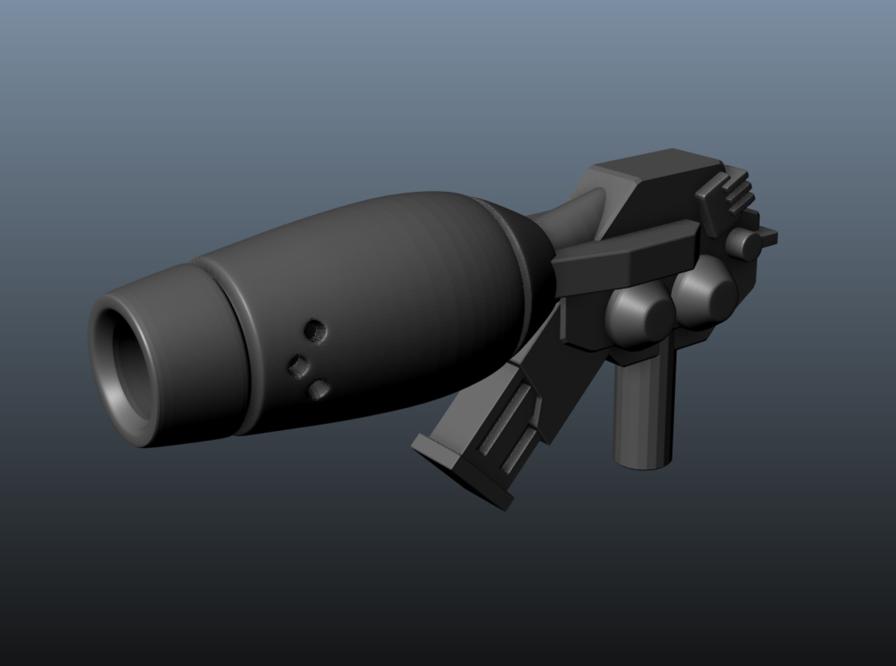
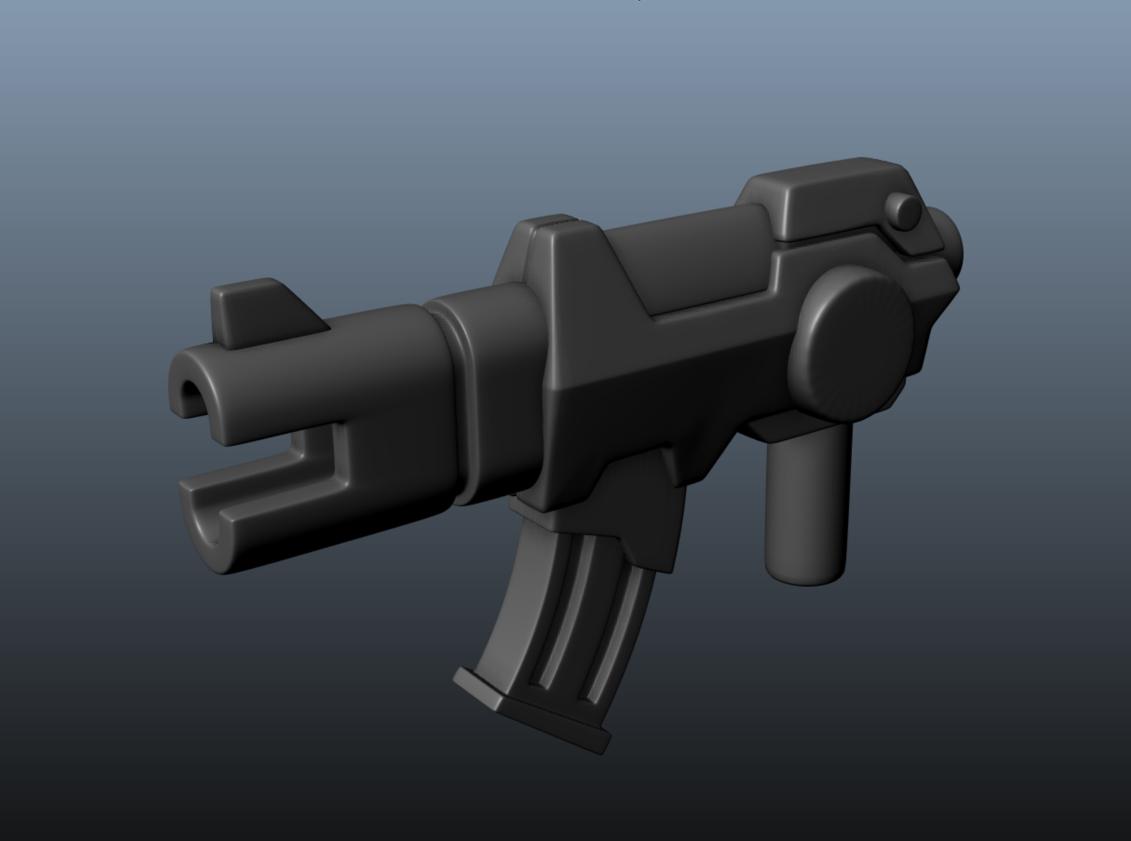
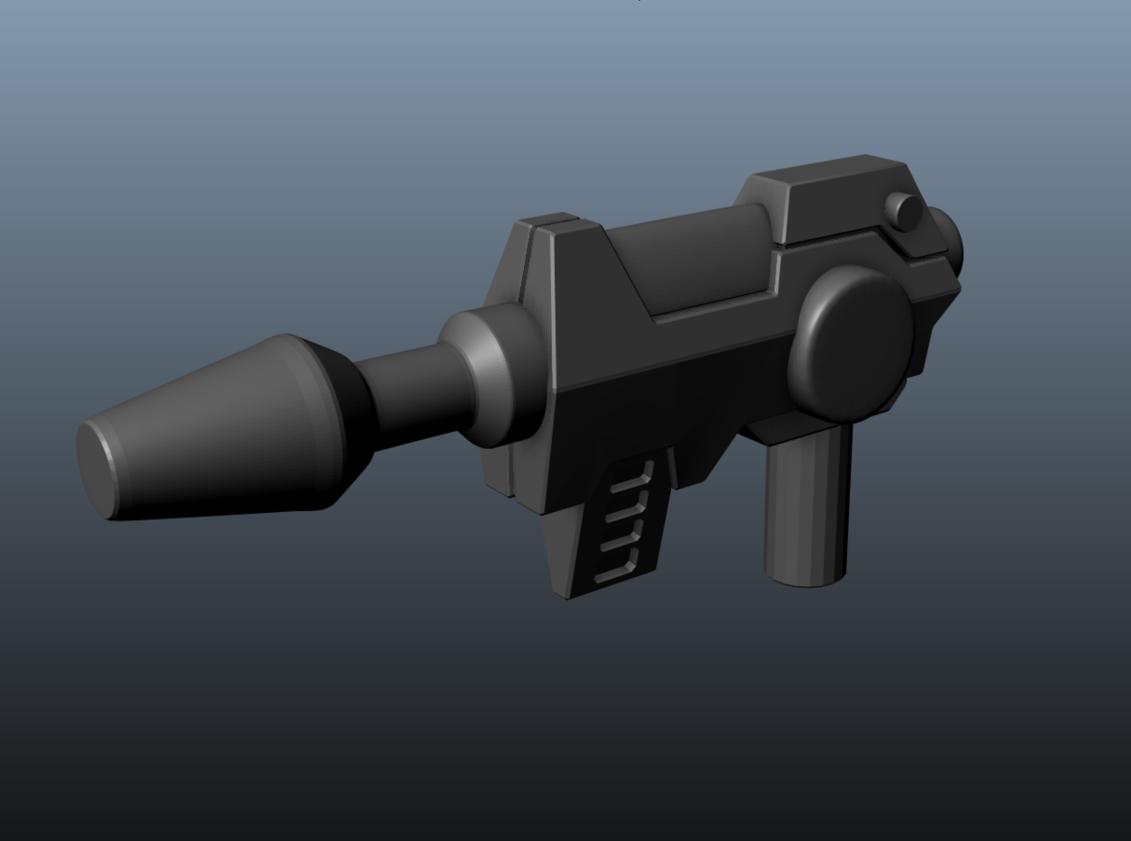
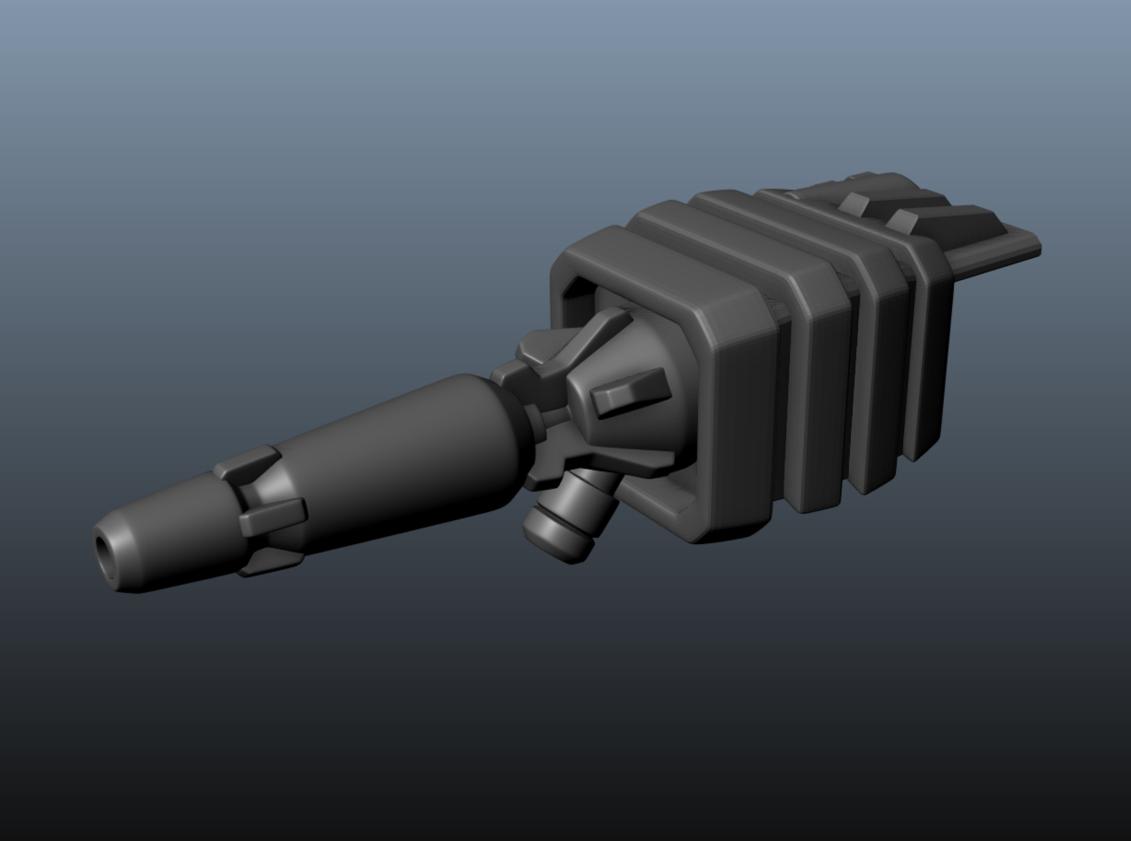
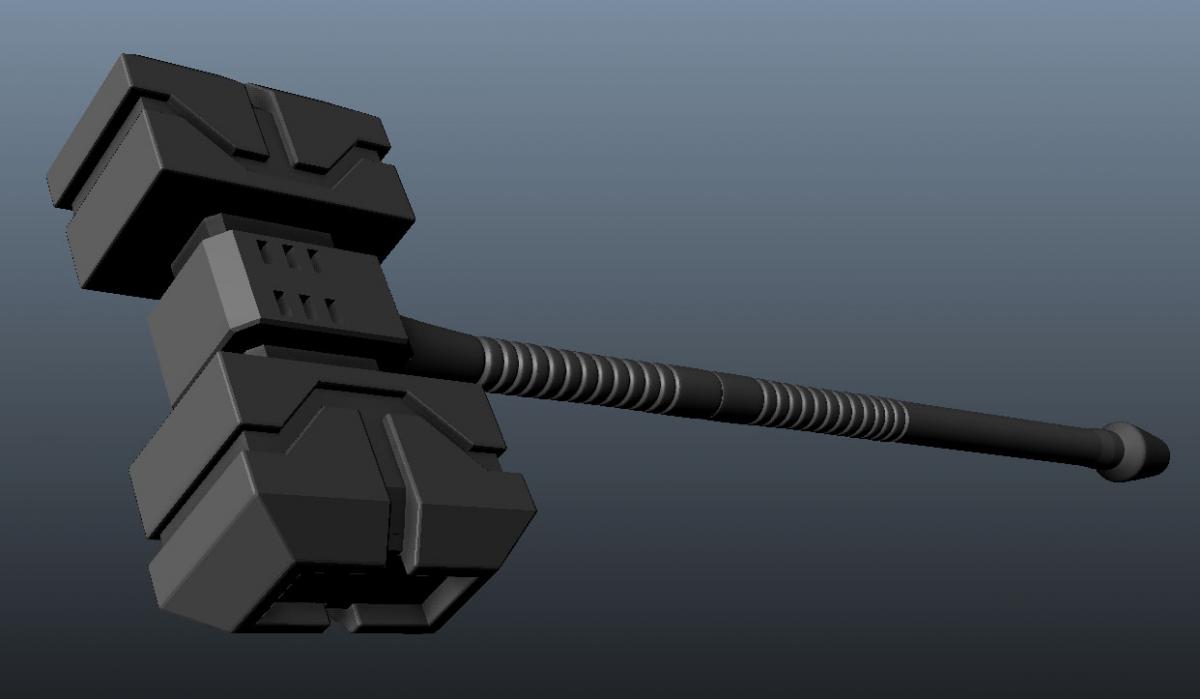
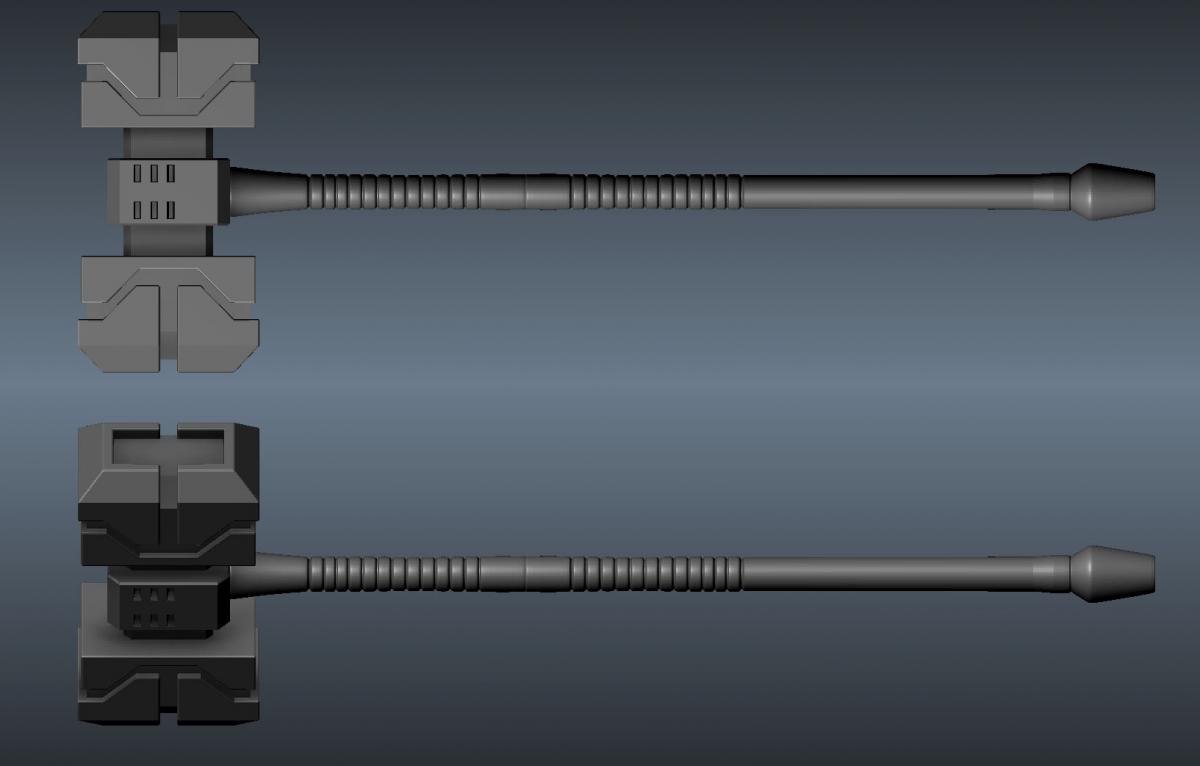
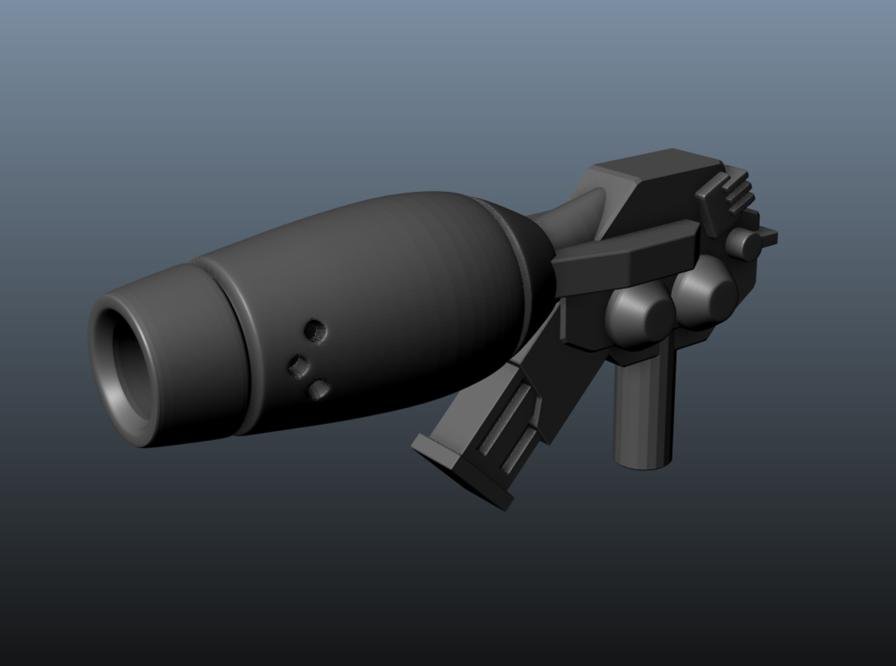
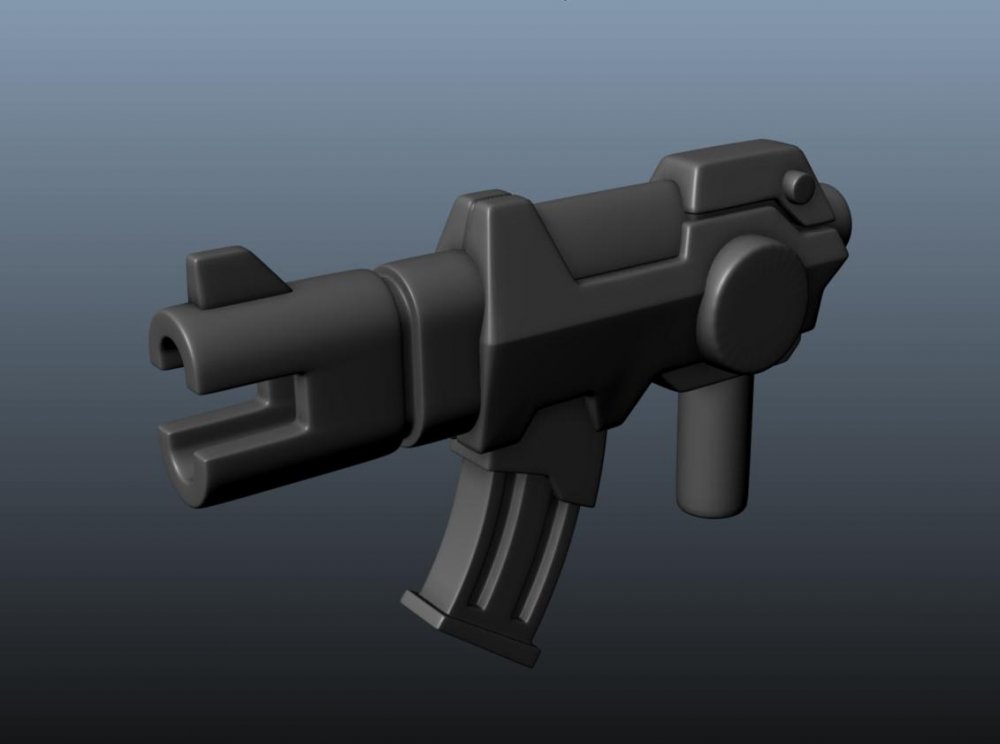
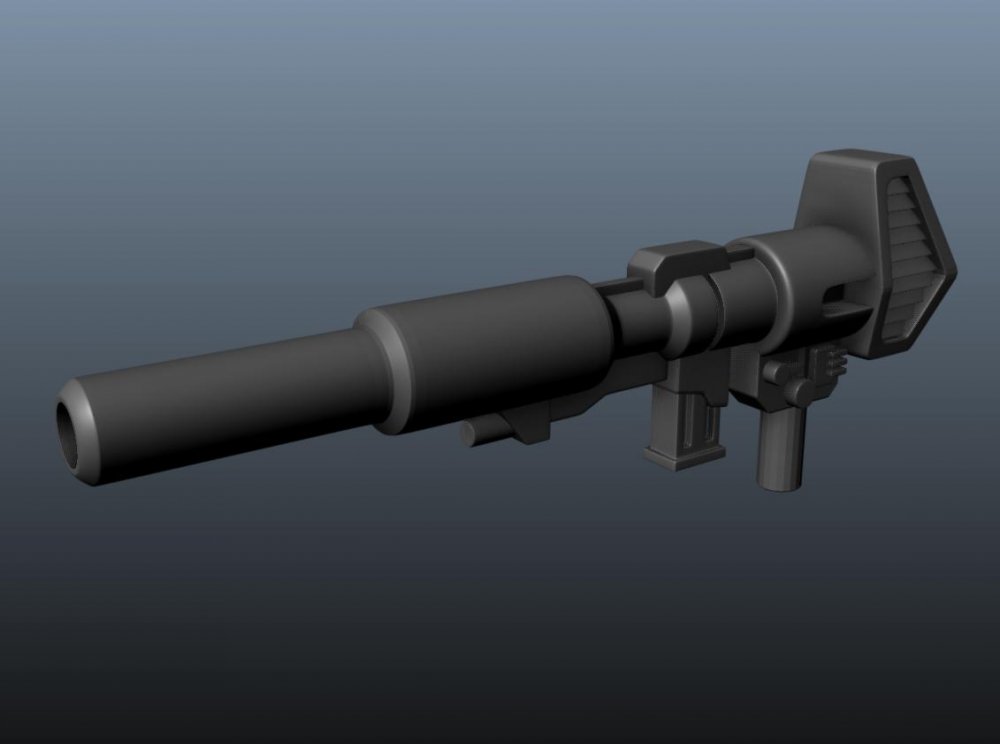
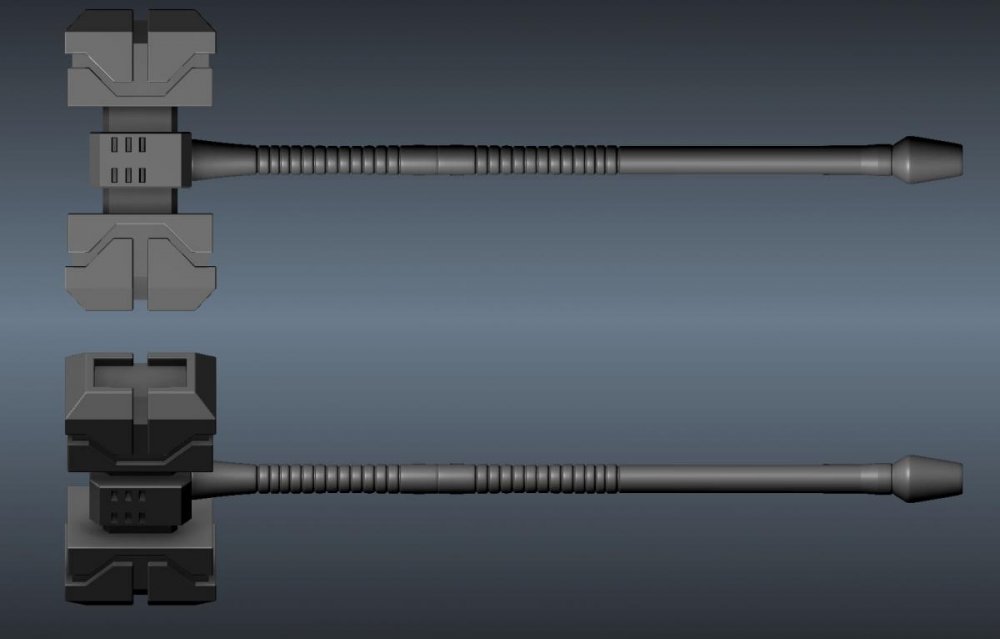
Well, hello gang. Graham kindly requested I move my TF-centric mongering here! So I'll post up here items available from my Shapeways store and news of upcoming parts and what not - may even take requests or constructive criticism? First up are the pew-pews; In order; misc pistol with design cues from IDW's Infiltration, misc pistol with elements of Hound's Alternators gun, Bumblebee's gun inspired by IDW's Infiltration, Jazz's pistol from the same comic arc, Hound's rifle inspired by the original toy, Prowl's rifle inspired by the new MP Prowl coming out, Sunstreaker's hand-cannon inspired from IDW's Infiltration and of course Prime's blaster with 2 different positions of the grip for use with the Classics Prime mold or for other bots. Then the accessories; My homage to Sideswipe's jet pack from the G1 cartoon, with several options for the nozzles & missile launchers for FOC Ultra Magnus - both for classic shoulder positions and additional shin-mounts, will work for both modes. And the only meleé weapon so far; I love TFA. I want my Magnus to have pretty things. I can/will also post WIPs and sneak peaks of upcoming projects - if people are interested. Enjoy.


-
OK... After my sad foray into trying to make 1/48 articulated hands. I know a lot of people were waiting to replace their chicken hands. While looking thru my parts that I need to clean up for recasting. I found the masters for Etern'l D's custom hands he used to sell that he gave to me. I called him to see if I can offer these and he gave me the green light. I'm just wondering if there's enough people that may want these. I know Old Man wanted some a while back.
-
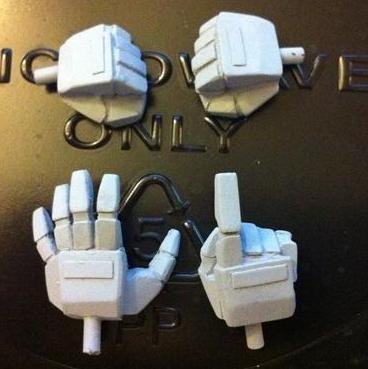
Not a total success just yet. It still needs a lot of work but I just got my prototype for my stow-able 1/48 DYRL articulated hands. I have to work on some tolerance issues and missing parts from the printer. But it seems like it's getting there. Hopefully it'll be done soon, but it looks like I got another round of prototyping...
-
So I'm embarking on my first ever custom paint job and I'm looking for recommendations for brushes, paint, and techniques. This is a small job and I won't be touching the 1/48 itself, just the side, neck, and intake covers. The Valk is a 1/48 VF-1S Roy. I'm looking to get the covers to match the Valk. Is there a recommended yellow and black for this? The material I'll be painting is resin, the side and neck covers are recasts. The intake covers are factory material. Thanks for your help guys, I appreciate it.
-
I'm back to customizing some valks after a long hiatus. I was wondering if anyone was still making custom parts for the chunky 1/55 valks. Rob Beer's stuff is what I've been wanting. Is he still in action or anyone else? PM me if necessary with any information or if you have anything along with what you want for them. It doesn't matter if it's broken or has bubbles. I have some jetfires with armor so I really don't need any of that, mostly other head casts and other armor sets. Thanks guys.
-
So a friend of mine turned me on to this brand of paints that's made for field weapons and is rated to be super resilient to scratches. I am considering using this for transforming toys as it is completely permanent and even sticks to steel. Let me know what you guys think. http://www.houtsente....net/index.html Most of your DYRL colors here... http://www.houtsenterprises.net/dur_bloomberg.html - Nghia