Cesar Enrique
-
Posts
164 -
Joined
-
Last visited
Content Type
Profiles
Forums
Events
Gallery
Everything posted by Cesar Enrique
-
Super Deformed Destroids coming at Japan Wonderfestival
Cesar Enrique replied to ahiachris's topic in Model kits
Nice. So we are not going to be able to buy them? -
The making of a 1/72 Tacticar Pod Graug--the musical!
Cesar Enrique replied to captain america's topic in Model kits
I hope a second run of the other regults and other Cap´s kits could be done -
If you want to sell your VF-1S 1/48 hasegawa valkyrie I pay immediately
-
Need advice on those damn energy lines on Jehuty
Cesar Enrique replied to GU-11's topic in Anime or Science Fiction
I would take some days to carefully mask A LOT, then use one of the next options: 1.- Apply (with a brush) a reflective metallic base such as Tamiya chrome-silver X-11, then, (with a brush again) apply clear fluorescent blue paint, such like this one: http://www.ebay.com/...a#ht_3934wt_856 ...or maybe just 1 THIN layer of any clear blue paint can work, Tamiya x-11 shines a lot. 2.- I would try A VERY THIN layer of invisible fluorescent blue paint that glows with UV light over the clear blue and I would make a base with some UV leds attached to it surrounding the figure, or simply stick a very small and cheap UV lantern somewhere hidden in the front of my robot, then the energy lines would look like real energy lines: http://www.ebay.com/...8#ht_566wt_1139 3.- I could also try mixing invisible UV pigment to a mix of white and sky blue (almost white) acrilic paint... http://www.ebay.com/...51#ht_500wt_922 ...and, again, use UV lighting, even with your room´s lights turned on, UV light glows nice, check this out: As a final touch, I deffinitely would install blue, green or white micro leds inside the clear parts of the robot, wich seems to be eyes, leggs and shoulders, this combined with UV glowing paint, would make the robot look super duper hyper mega ultra amazingly AWESOME!! But, well, that´s just me!! Hehehe. P.S. I love Zone of the Enders robots, maybe I will buy it and build it just like I mentioned above. -
Hi comrades. I wish to know if some of you have ever try to fit resin seats for extra detailing a 1/72 hasegawa VF-1, if so, wich model could fit properly? I read somewhere that F-18 resin seats could fit, but I haven´t try because those seats are not cheap and if it doesn´t fit, I don´t know what I´m going to do with it I want to make a hasegawa gerwalk conversion with an open canopy and a detailed cockpit, Any suggestions for resin seats?
-
ahiachris I ordered an Atmospheric Booster kit from Starship Modeler 2 years ago and the kit was awful, it needs a LOT of work and resculpt, my kit even has pieces of the silicon mould. Tell me, have you already received your kits from starship modeler? How was the quality? Maybe only mine was ugly.
-
¡Increible!, es difícil hacer que el rojo se vea temperizado en un robot de ciencia ficcion, te quedo excelente, da mucho gusto ver este tipo de trabajos en figuras de macross.
-
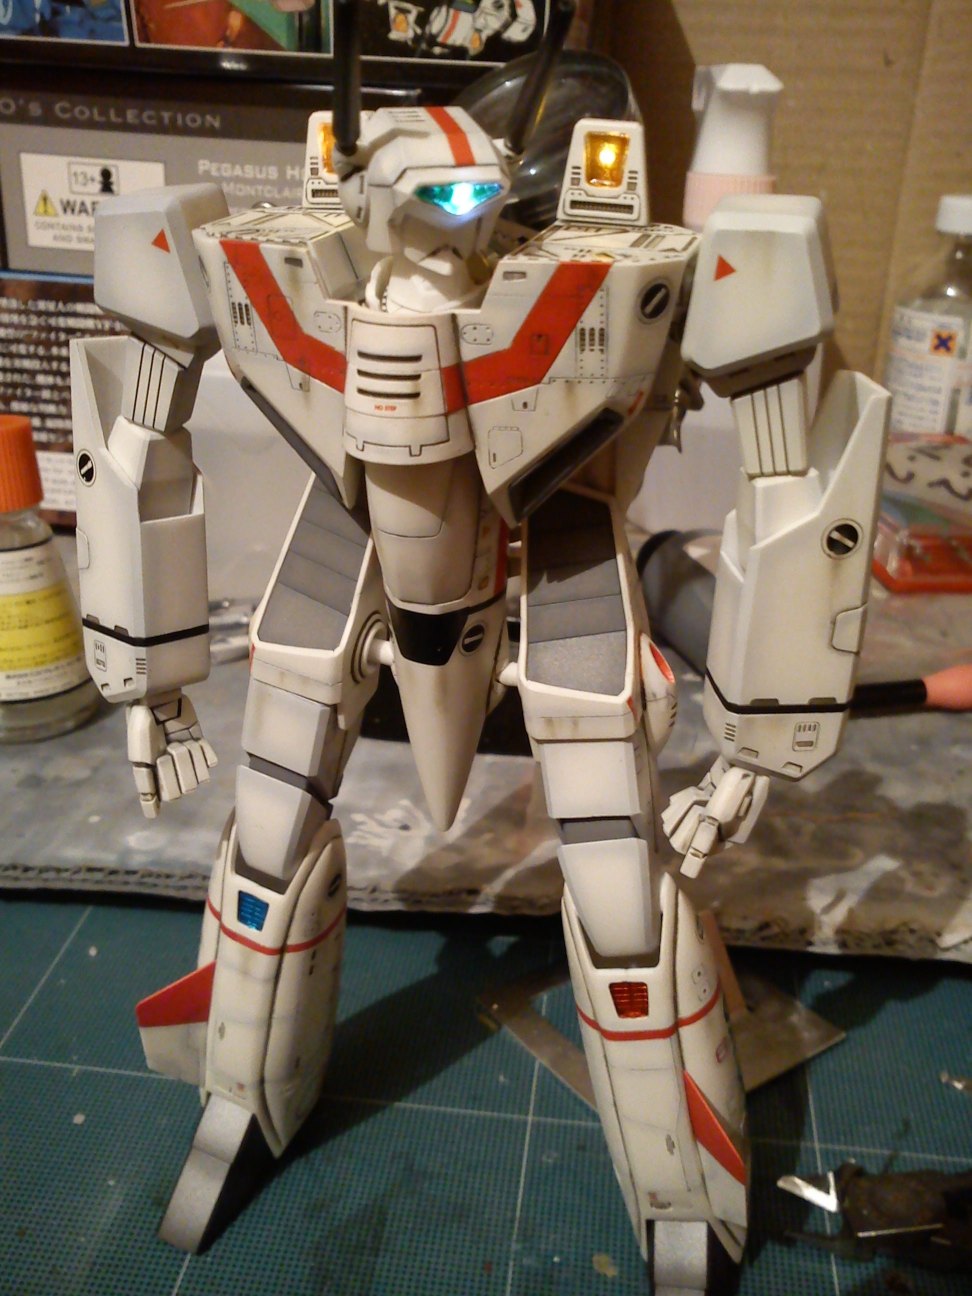
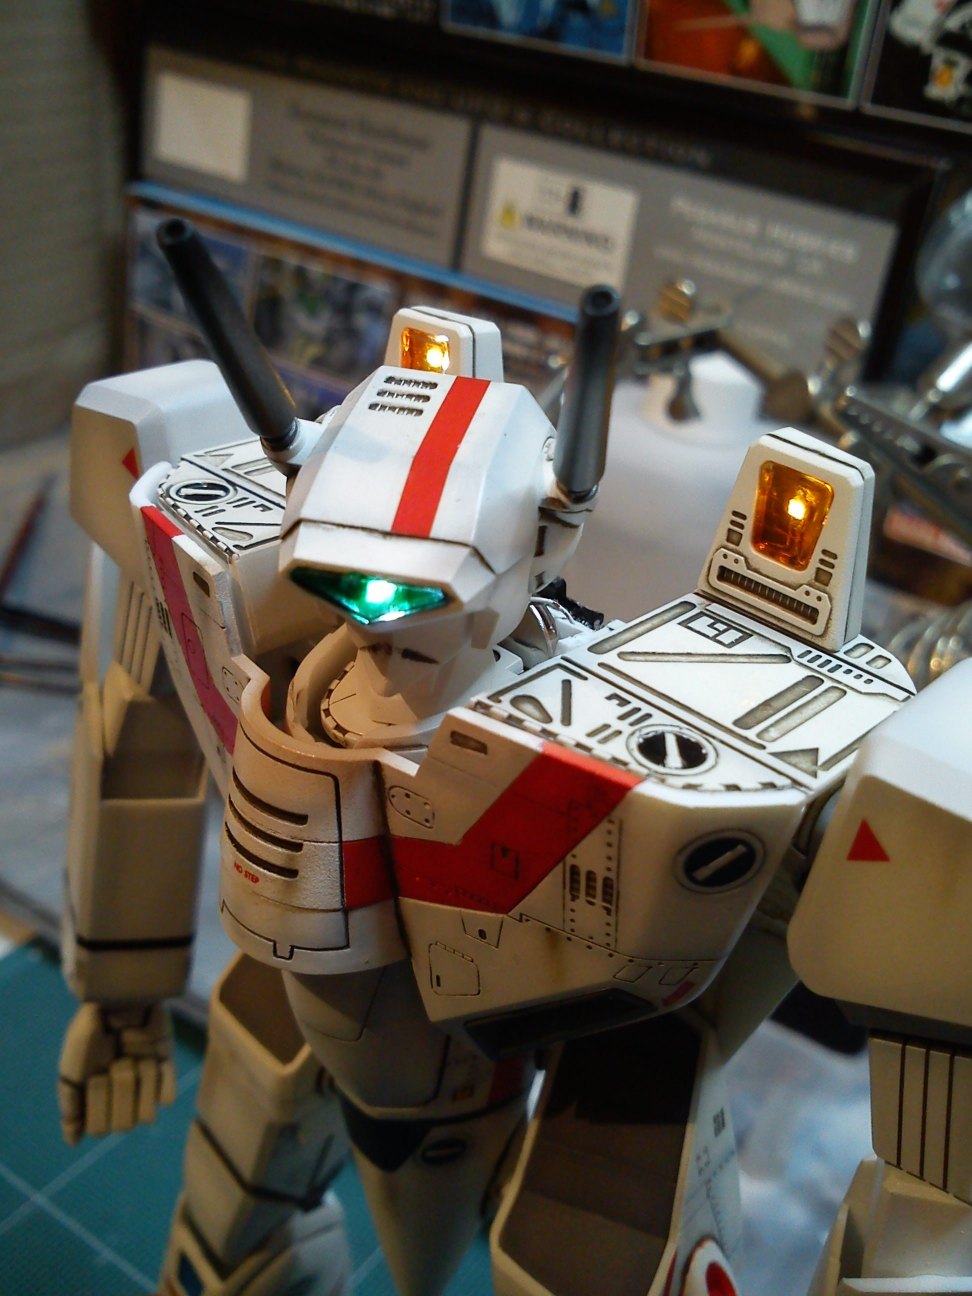
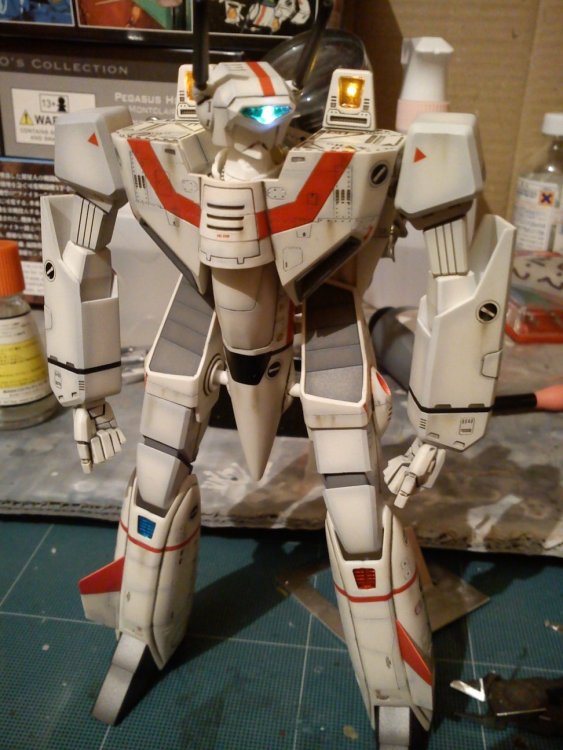
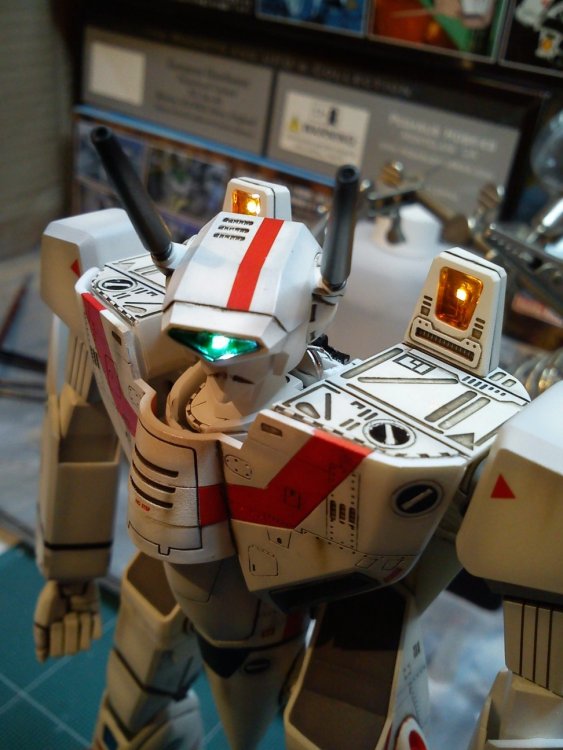
Nice 505thAirborne, you added LEDs to your space ship, I also added micro LEDs to the VF-1J Battroid 1/72, wich I am finishing right now. Here´s a test :
-
Beautiful paint and build. I hate the part of painting the 1/72 hasegawa macross tires.
-
I know this question is "off topic", but I don´t want to open a thread just for this... I wanted to buy 2 VF-1S 1/48 from hasegawa, but, in HLJ and hobby search it is discontinued, my question is, will this item be available again? I can´t believe that just a limited run was out. Thank you.
-
Wow....Excellent!!! Just Excellent!!!
-
Excellent idea!! we 1/72 builders needed this. Just 1 suggestion as a customer, about the 2 BIG flat parts that cover the rear of the fuselage between the wings... It´s nice to have this parts, as sanding and painting this requiere time...bored time, I would like to have those pieces, but deffinitely NOT with lack of details, I would like to have this parts WITH details, some nice panel lines, maybe just like those from the 1/48 hasegawa model, could you add this details to the parts? That would be deffinitely awesome for everyone. Also, 2 suggestions that could be interesting, please, tell me what do you think. I want to make a valkyrie with the wing spoilers up!! it requires much work on styrene, and photoetched spoilers would make it waaay eassier, also, some photoetched parts to help make the flaps and slats down would be veeery nice. And just a question, I can see that you added some control panels on the side of the cockpit, this is a exrtemely good idea, cuold you show more detail of this? Thank you very much. P.S. I second the GREAT idea of "Spitfire_BR", a PE set for battroids is really needed, could you accept suggestions about wich parts we need? hehehe.
-
Hi. Could you sell to me just a canopy? I have one of this kits, but canopy was badly damaged so I haven`t started this kit just for that reason, also, if you are willing, I would like to buy some other parts that are broken on my kit. Thank you.
-
Wow, VERY nice. How`s it going? please, update.
-
Perfect!!!! I have done several 1/72 vf-1 Hasegawa gerwalk convertions from a battroid and a fighter (obviously both from hase), and right at this very same moment I was studying the 1/48 hasegawa vf-1 to convert it to gerwalk (or at least "chicken" mode) using scratch styrene, so your thread is like gold to me. I am in for some of your final convertion kits, thats for sure. Just please, post some updates, because I don´t think that the knee joint on your design is the final design, right? Hehehe If you are gpoing to make the leg joint moveable, then you will have to make the knee and the hip moveable, so the gerwalk can adopt some 1/60 v2 yamato pose I really don´t care about having it frozen, jut make it a nice gerwalk pose. I will be watching you!!! hehehe
-
Don´t loose your time, comrade!! 3 years ago, I made a huge mistake, I bought a vf-4 Monsters in Motion recast, as soon as I saw it in person, I got very MAD, this kit is useless, the canopy is just crapp, you just can`t use it.
-
VF-4 Voted!!!!
-
Thank you very much for all your kind comments my friends, I really invested some time on this VF-1 and VF-0D convertions, I am glad you liked it, makes me feel that my effort really worth it. I think my next convertion will be a GERWALK hasegawa VF-1D... double cabin, nice huh? I don´t know yet. Well, it might be the picture perspective, as this is the head that the hasegawa vf-1 battroid provides. Yeah, this gerwalk automatically maked me fan of it since I watched it on the Macross Zero show, so I had to have one, but there wasn´t any toy of it. Here you can see the process and final pics of my VF-1 gerwalk. http://www.macrossworld.com/mwf/index.php?showtopic=33351&st=0&p=858656&fromsearch=1entry858656 Thank you all!!
-
Anyone knows for fact if Hasegawa is going to release Super/Strike packs for this valks? AND if they are going to release 1/48 battroid kits?? Thank you.
-
Standard Type Tactical Pod Regult plamo kit Resale
Cesar Enrique replied to valhary's topic in Model kits
I am glad I didn´t bought the old Imaii kits, those were expensive because they were vintages, now with this re-release, I have already ordered 6, this are the most accurate in proportions and in details Glaug ever made, I couldn´t get the Captain America regults, so this are the best option after the cap´s resin ones. I just love them, can´t wait to have them. -
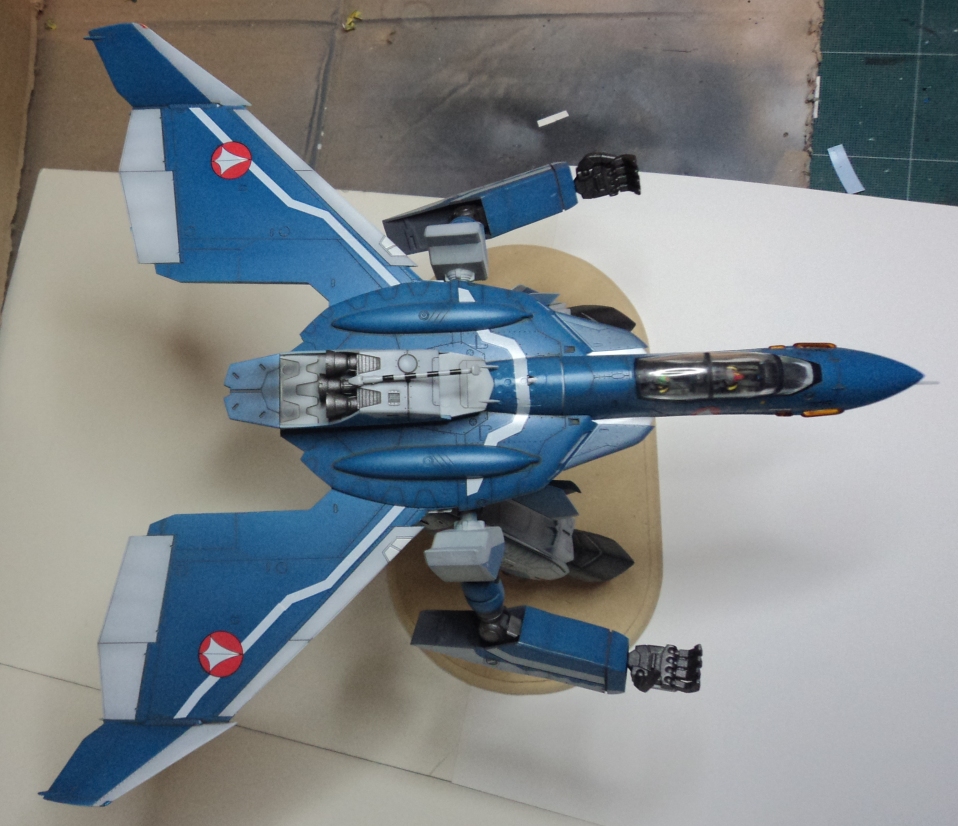
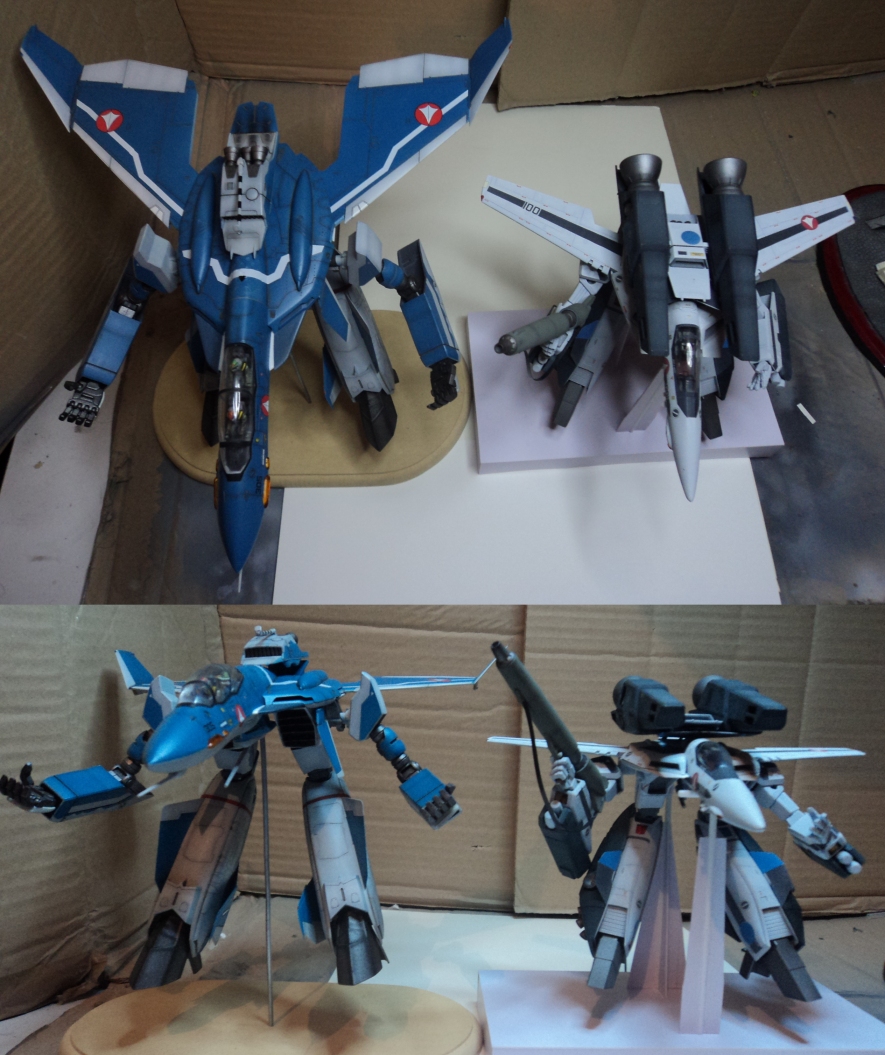
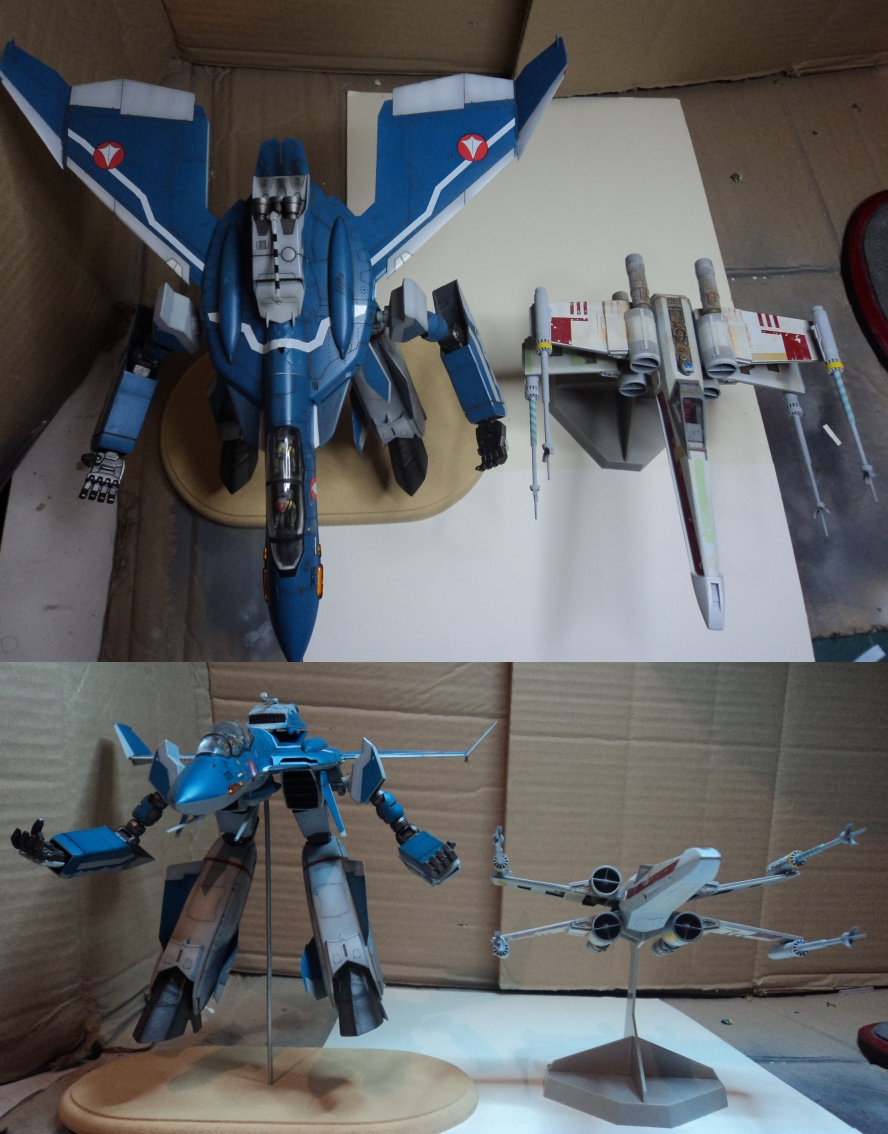
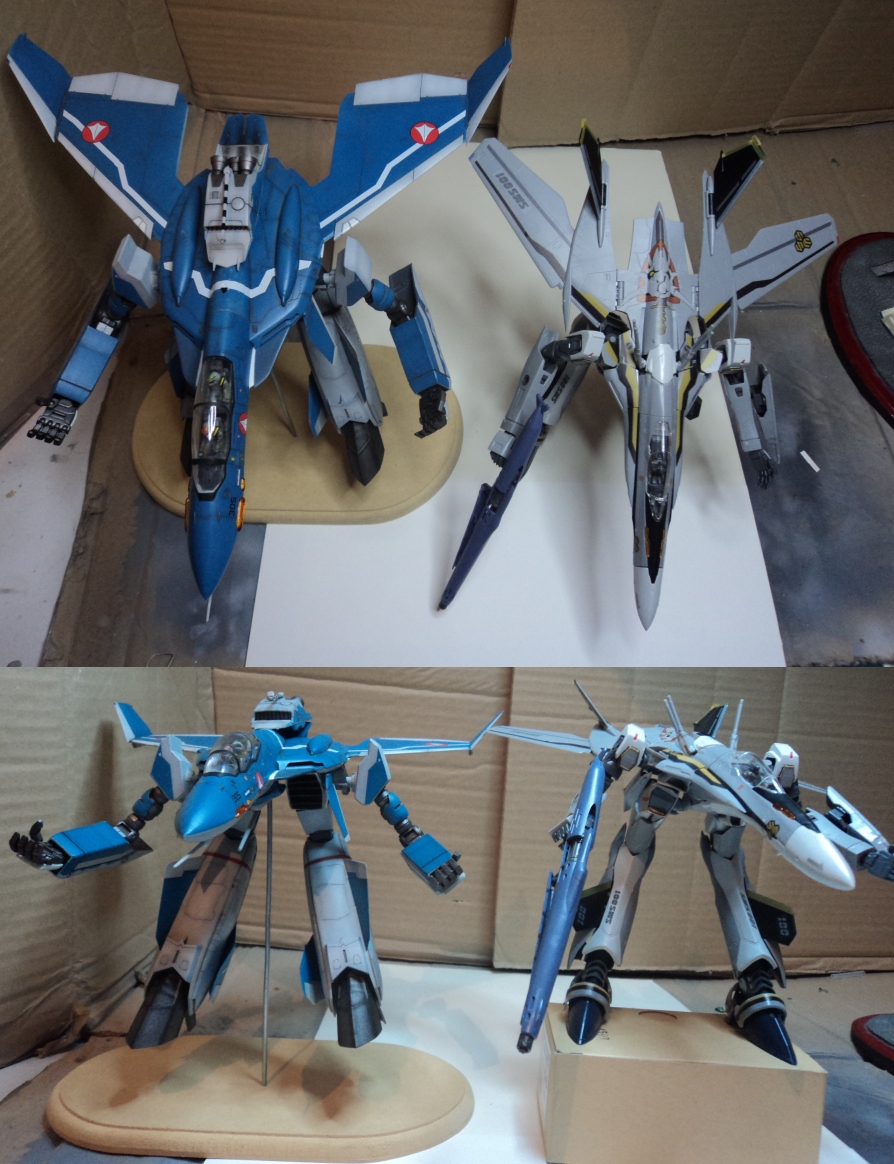
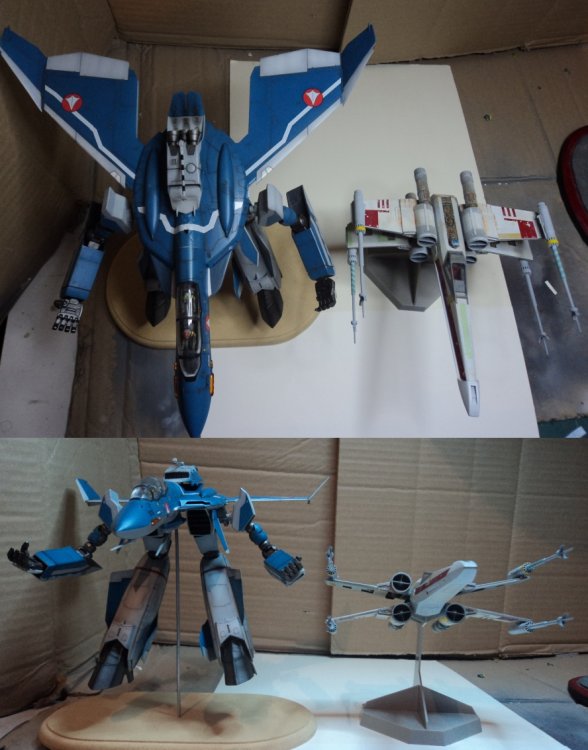
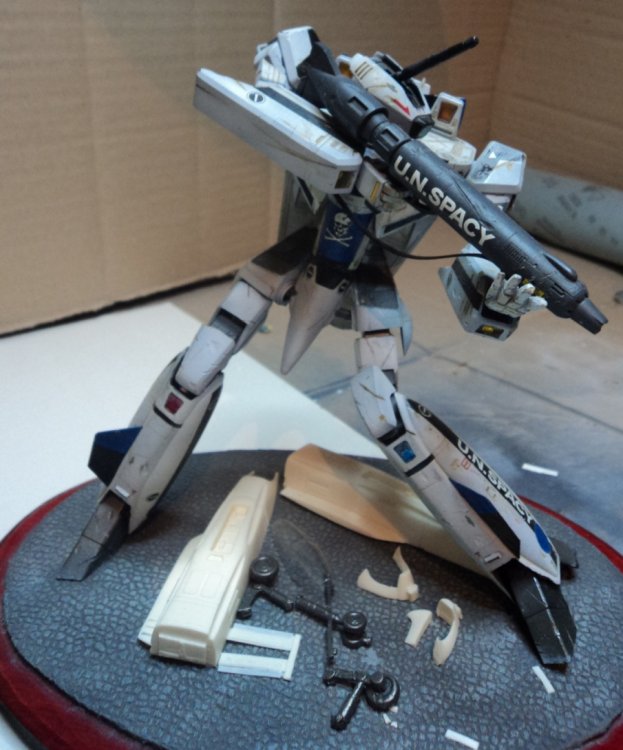
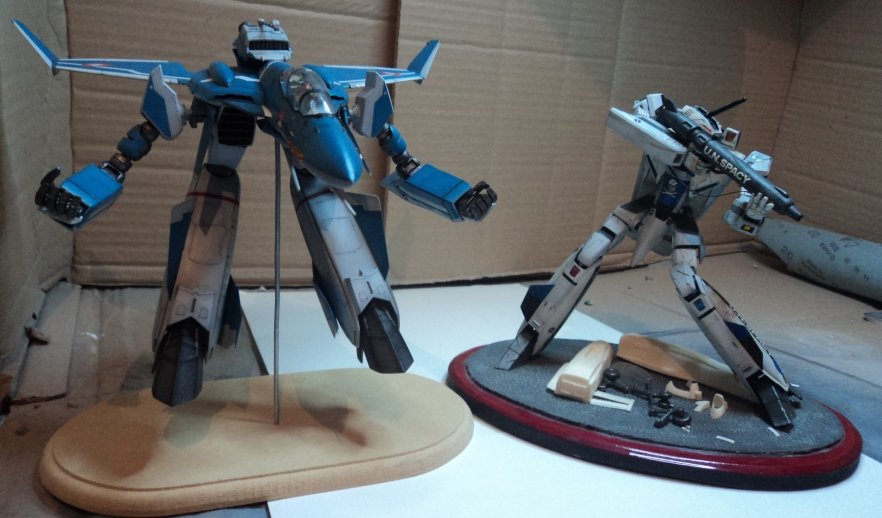
Hi again. I am very sorry for taking SOOOOO LOOOONG on uploading the finished gerwalk, I have had so many things on my head that I forgot to take pictures of it. I used a different camera so pictures are horribly grainy, I hate this!!! Thank you for your compliments on my process of building and modifying it, it was very fun because I didn´t found anything on the internet about this convertion. I wanted to make some vf-0b gerwalks but I just can´t find where to buy the VF-0B, some days ago HLJ had them available but they flew away very fast. Let´s stop writing, and let´s see some pictures: And here you have some comparisons between 1/72 Hasegawa VF-1 Gerwalk, 1/72 FineMolds X-wing, 1/72 Bandai Messaiah Gerwalk and a Hasegawa 1/72 Battroid A close up of the modified and battle damaged Battroid...ignore the resin kit and metal pieces on the base


-
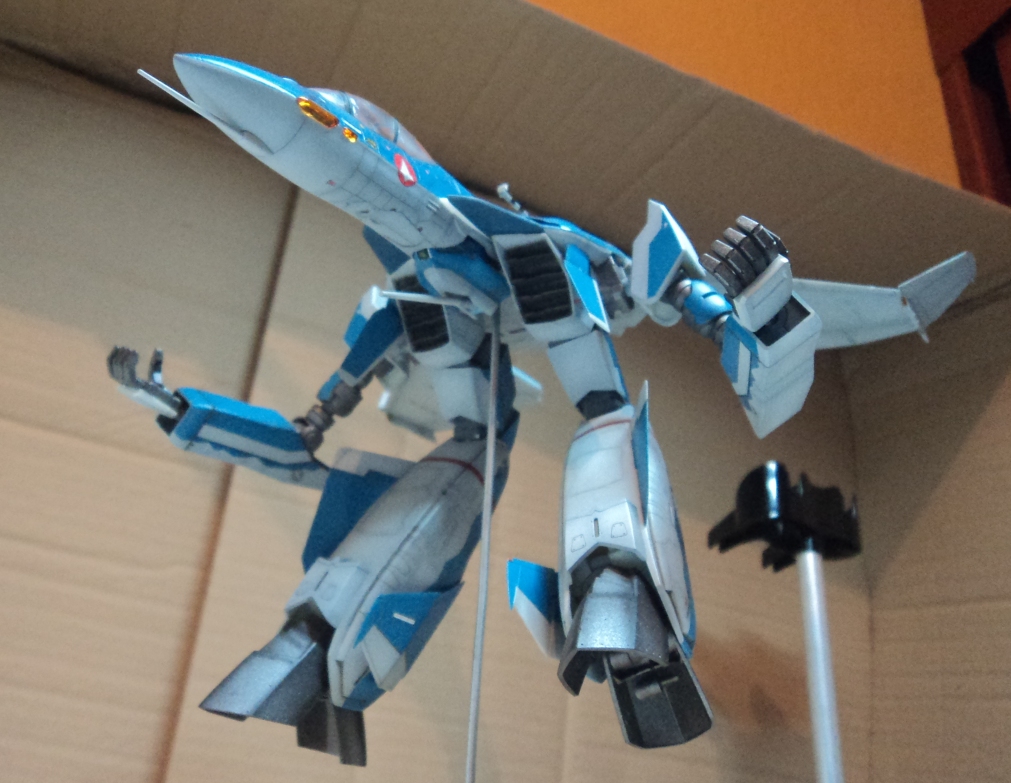
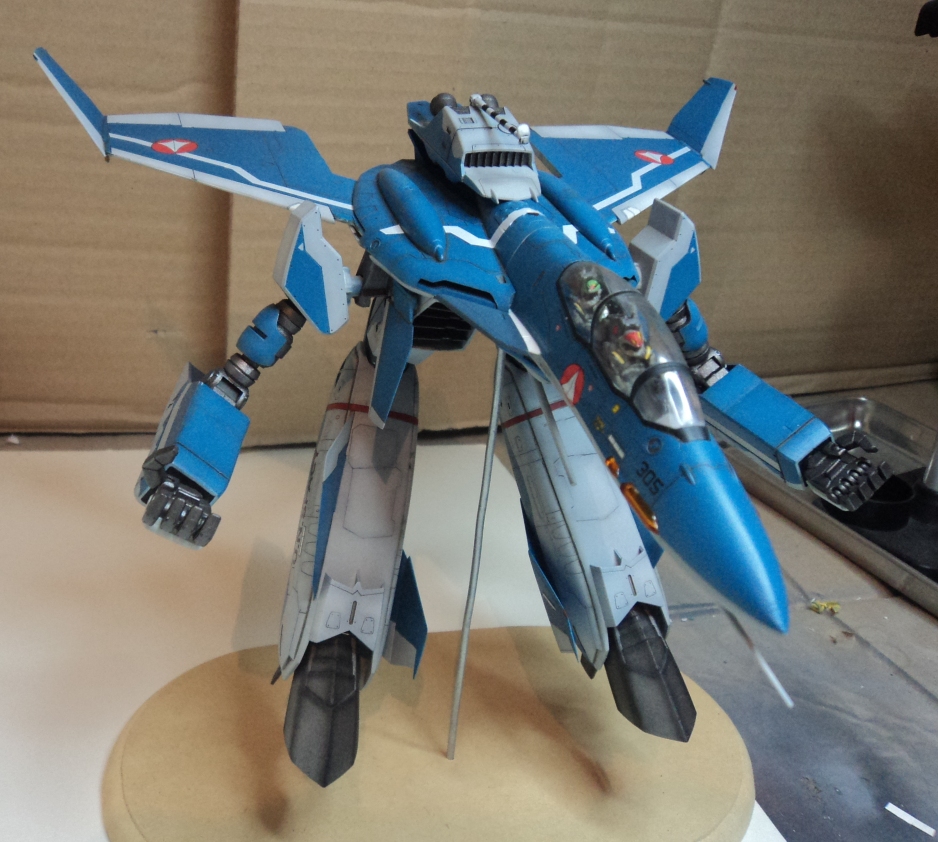
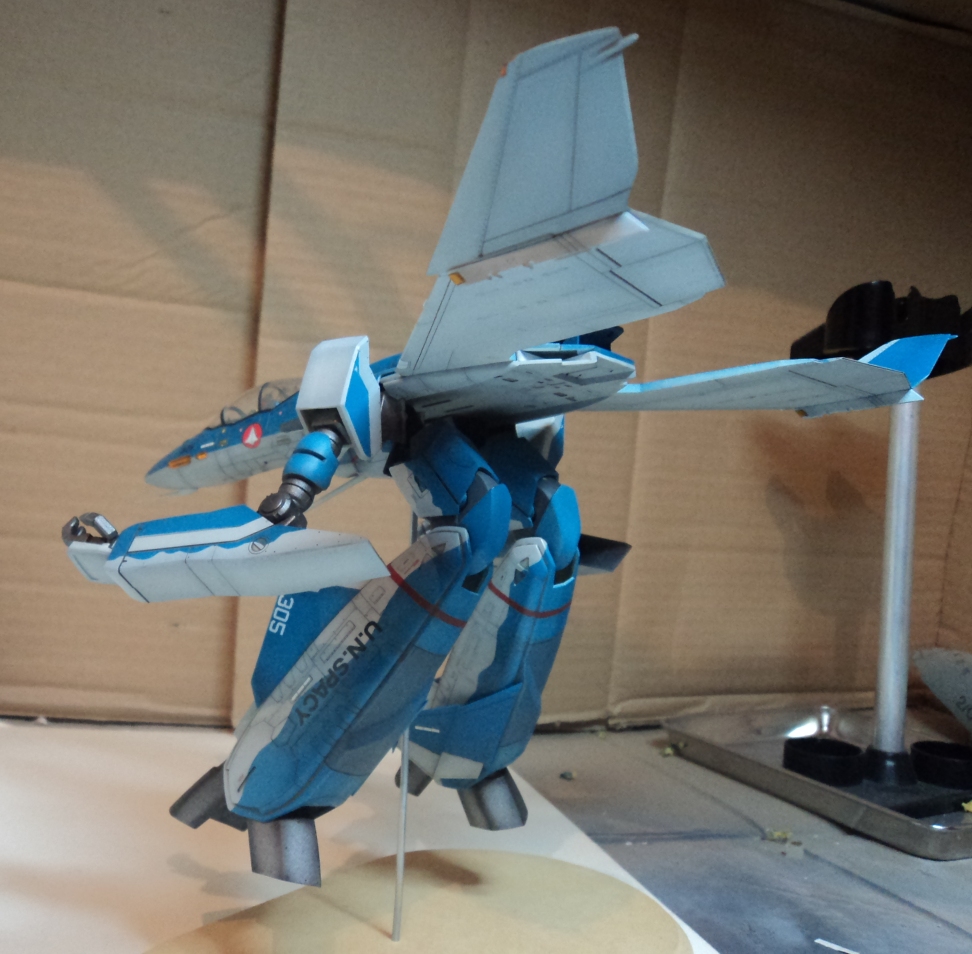
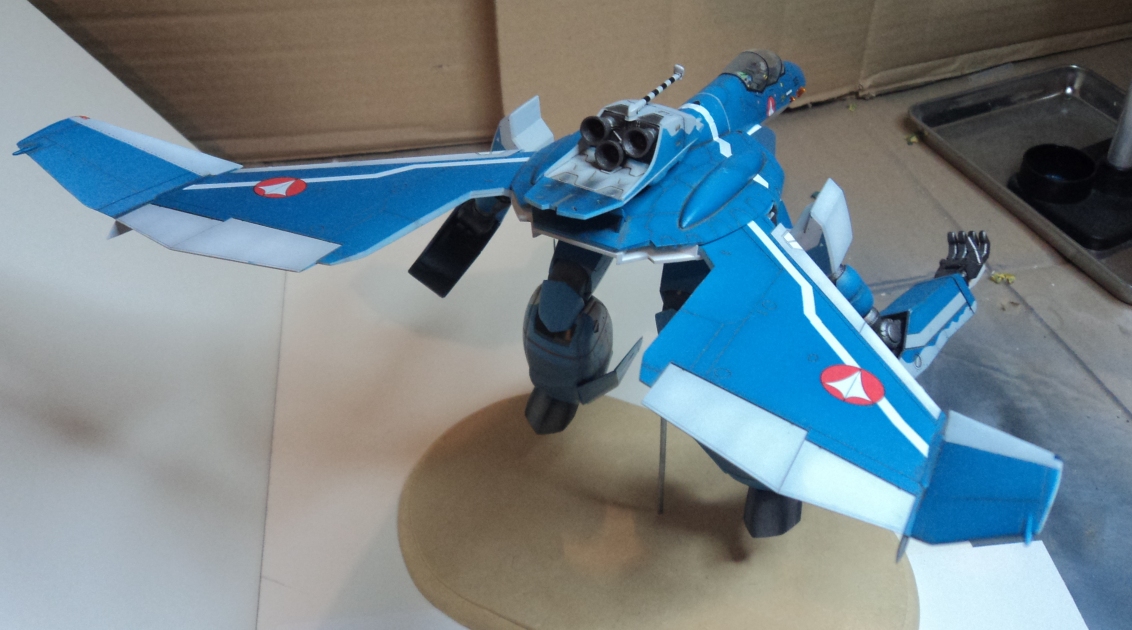
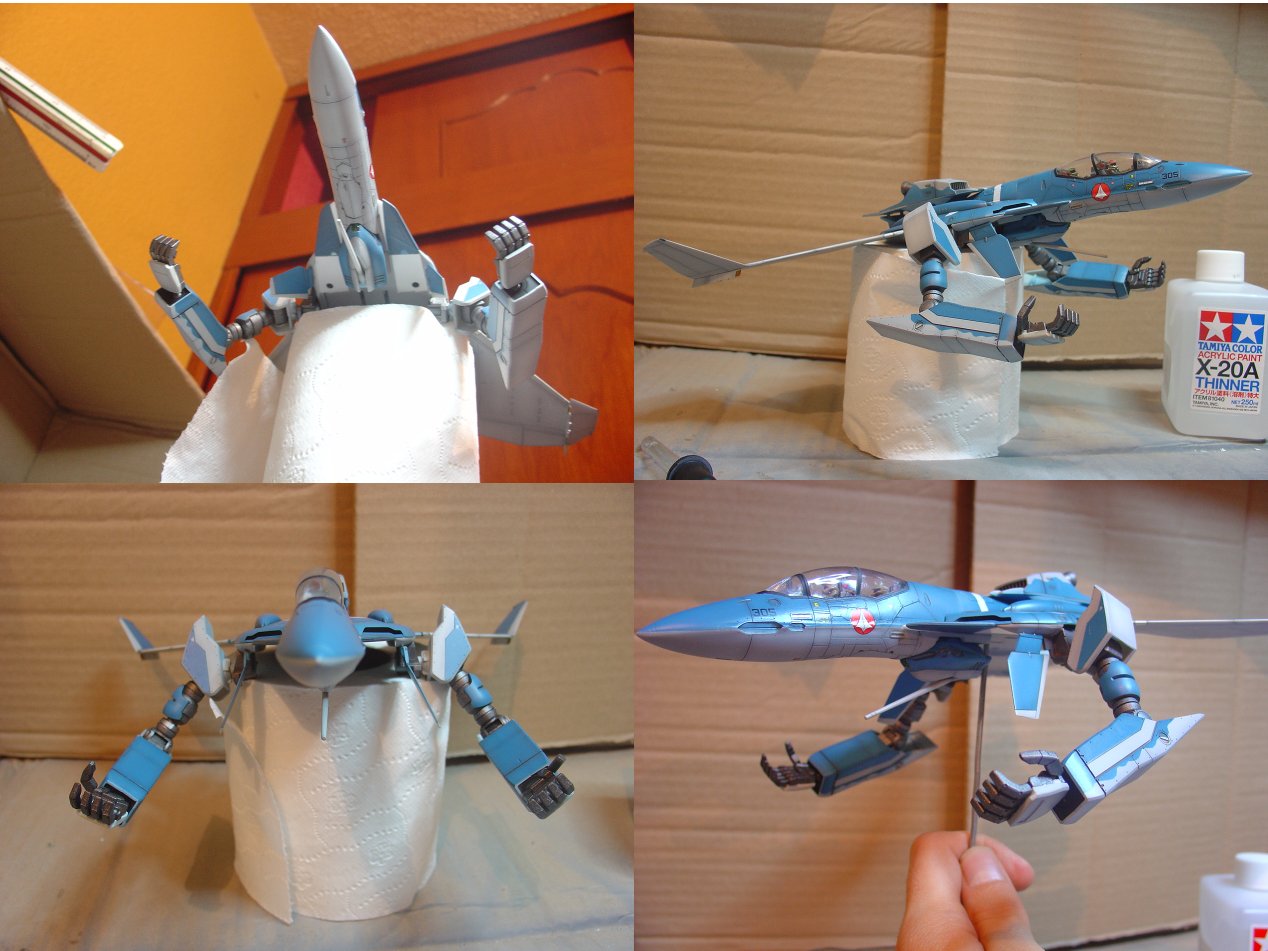
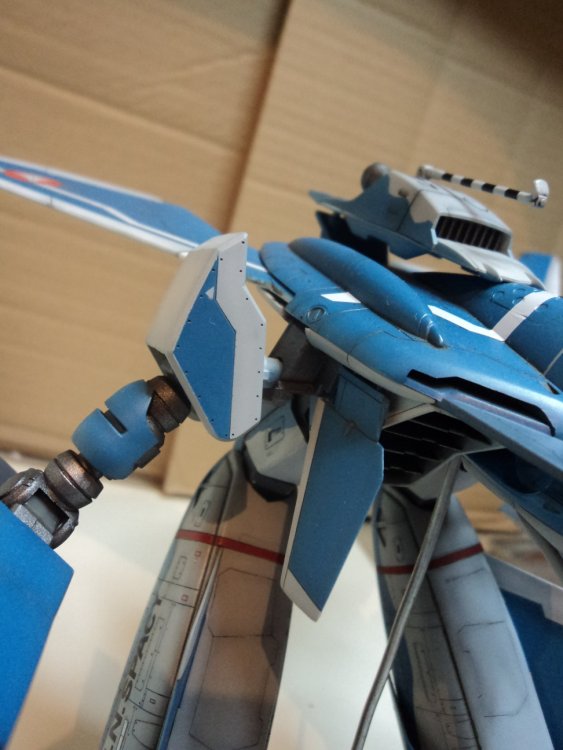
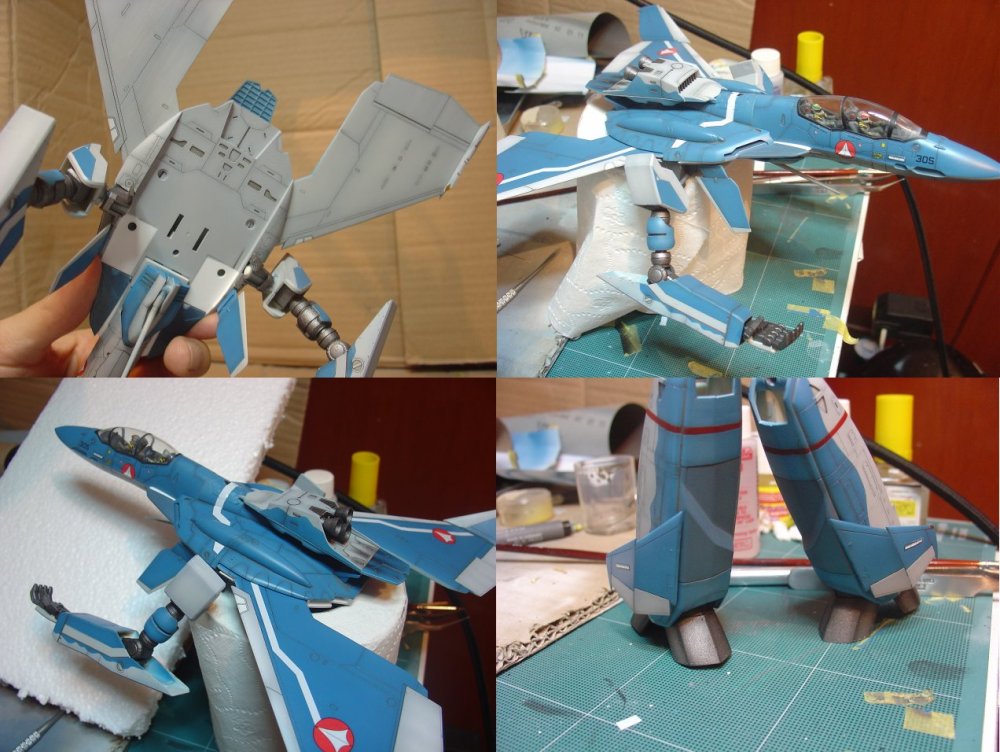
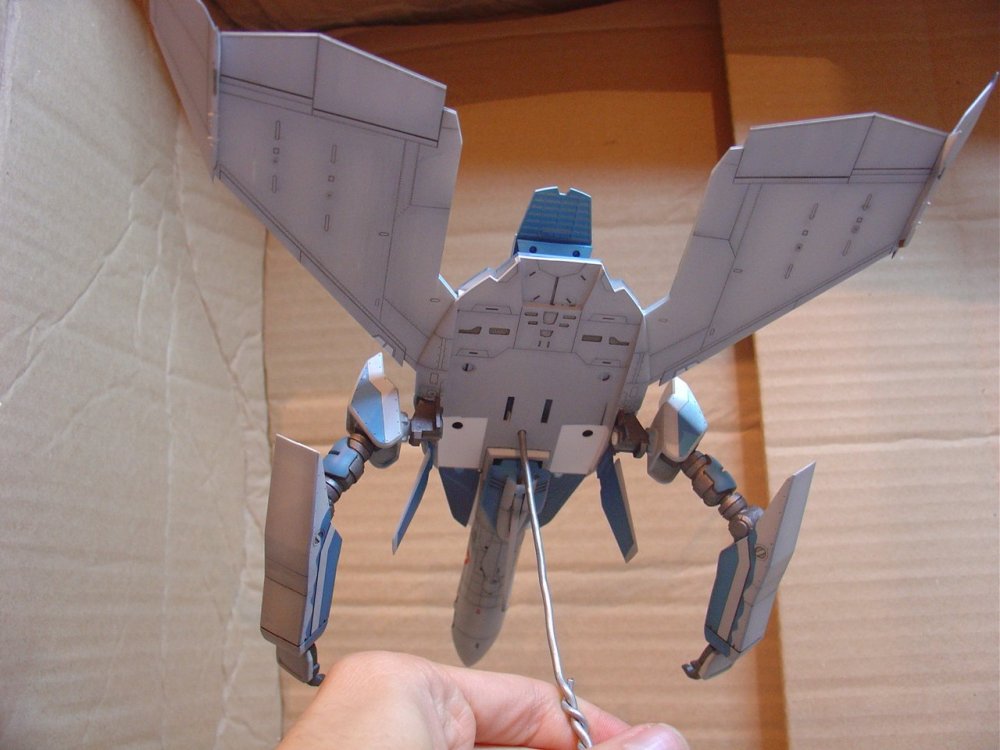
Hi again friends. This is how it is going, I have decaled it and clear coated it with taimya clear, I still have to completely paint the gun, also need to paint in dark sea gray some joints of the legg, it was going to be easier to paint it at the end than paint them first and then masking for painting base color and blue color. I have almost finished and assembled upper body...still some clear parts and some antennas need to be painted and glued. I love how I DID NOT used ANY glue to assemble all painted parts, just glued the head on the bottom, the res was just pop up, even the complete cockpit is just attached firmly to the body....I LOVE HASEGAWA Here´s how it´s going: And this is how it will be suppoerted for final Display on a wood base: I have to say I am in love with this Valkyrie, it is very BIG, it is almost double size than a normal valkyrie and even bigger than a Macross Frontier Valkyrie, I will upload pics for comparison at the end.


-
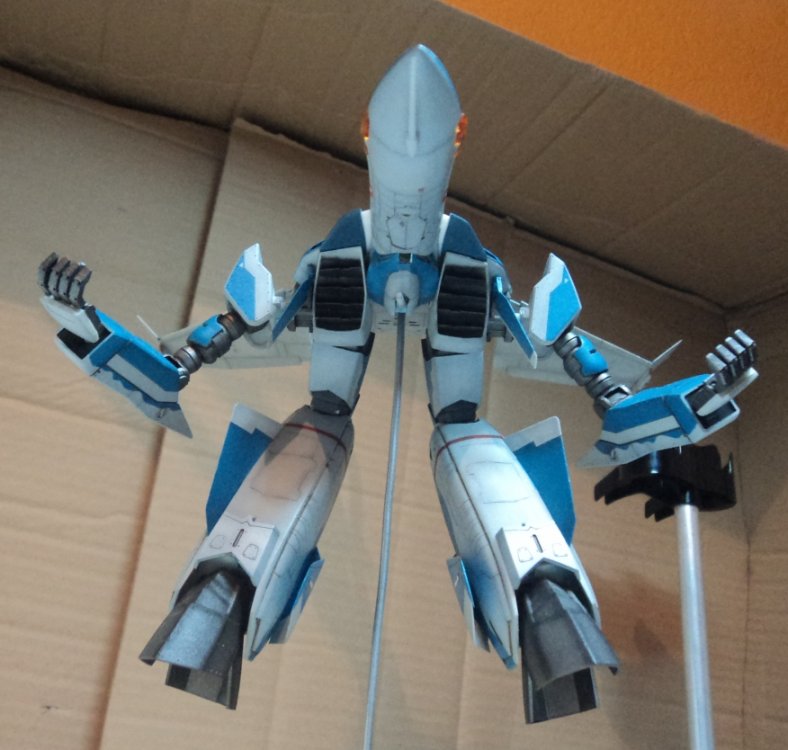
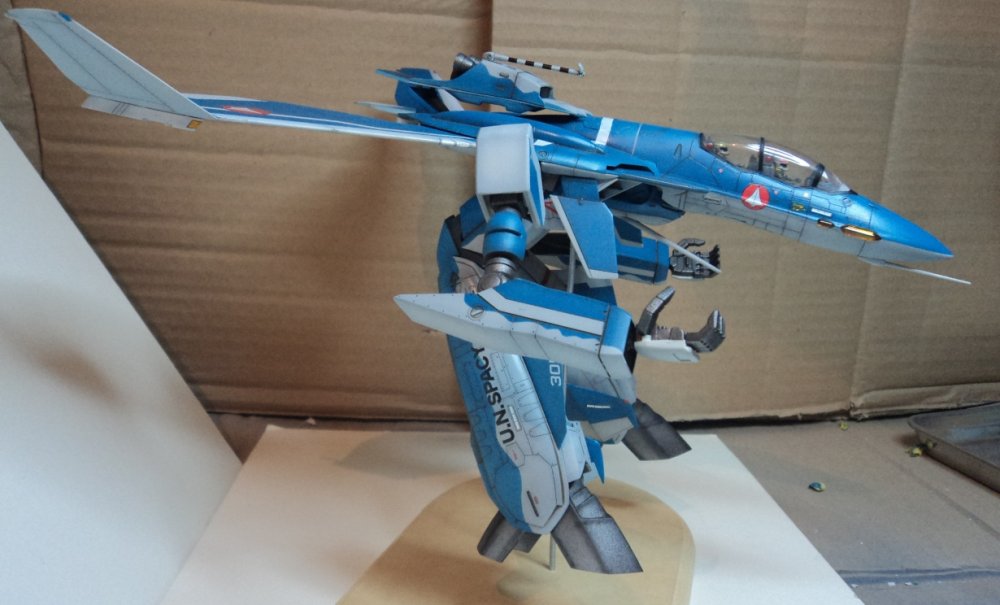
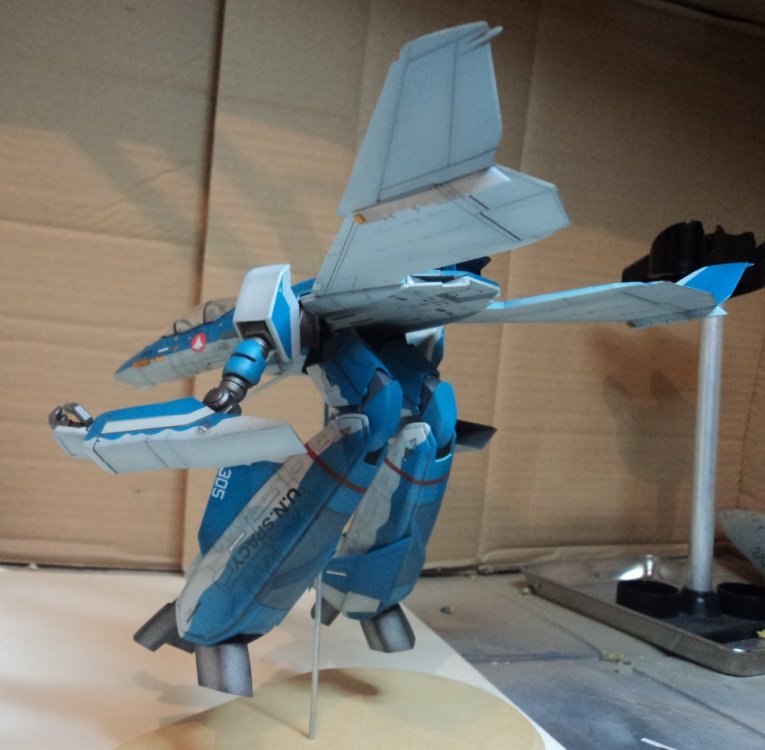
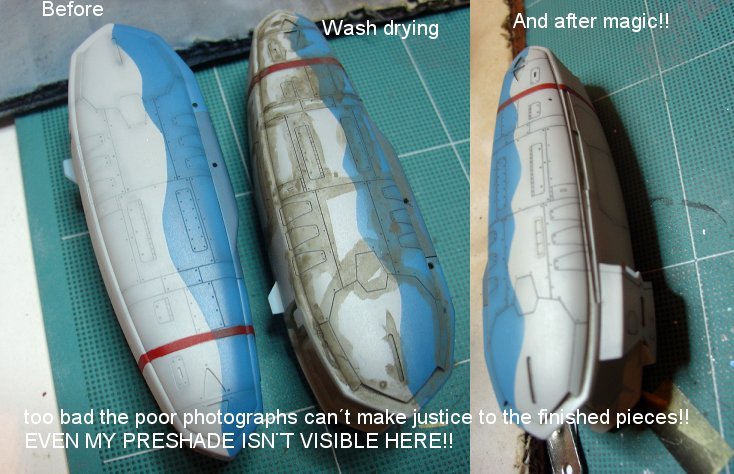
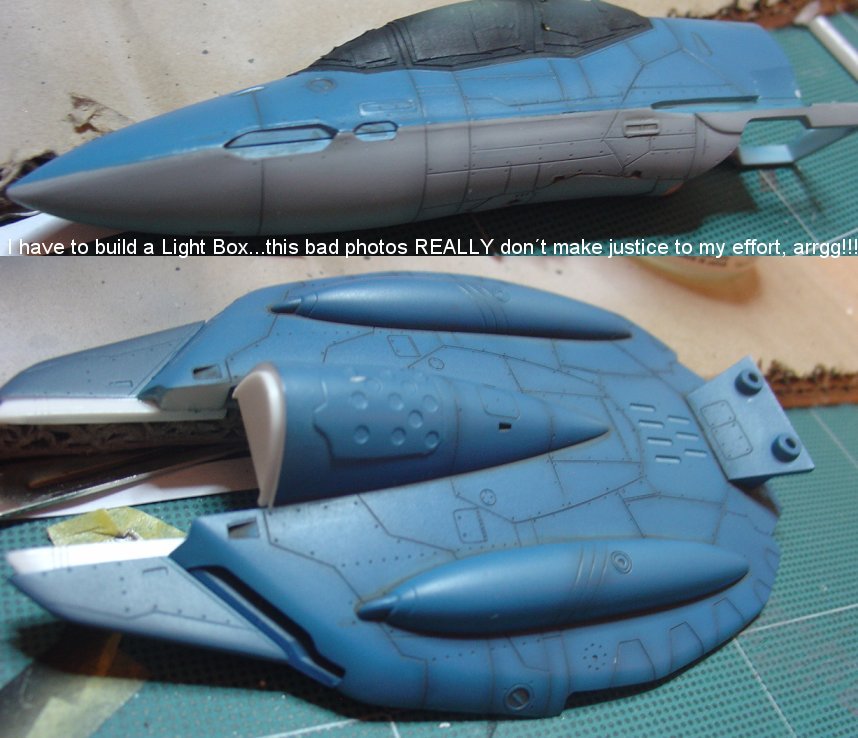
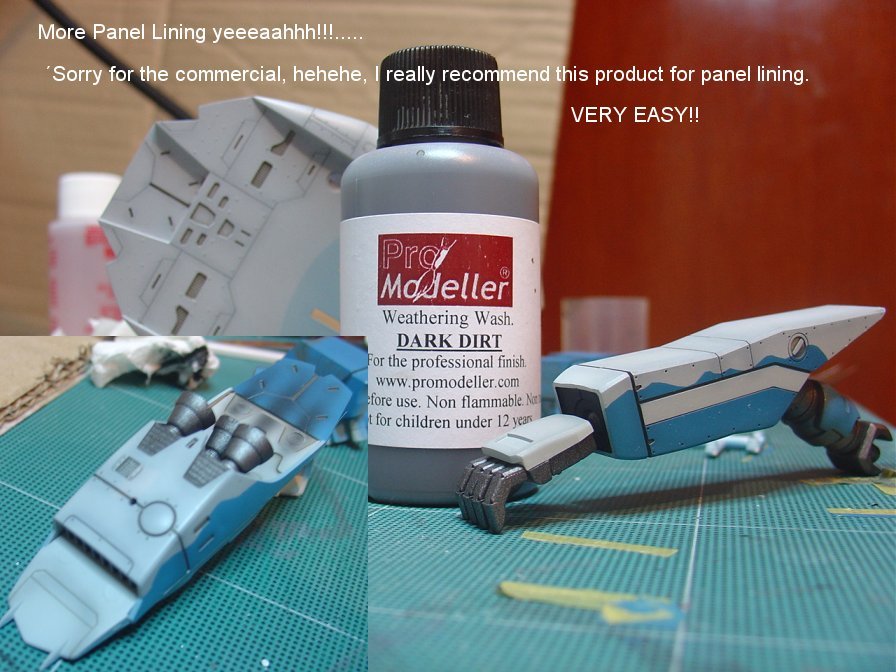
I am sorry, I didn´t took photos of the painting process, but the scheme was this: 1.- base coated the whole kit with Tamiya Light Grey 25% mixed with white75% This kit is a 2 tone painting scheme, Light Grey on the bottom, and blue on the top, so... 2.- post shaded with tamiya dark grey ONLY where the light grey will be visible, avoided preshading where blue color will be painted. 3.- some layers of the step 1 mixed paint. 4.- Masked light grey areas that will be visible, and then preshaded with Tamiya xf-17 sea blue 5.- Then painted the blue scheme mixing 20 drops of Tamiya x-14 sky blue, 5 drops of Tamiya XF-18 Medium blue, and 3 drops of XF-8 Flat Blue, of course I made this mix several times... next time I will prepare a lot more on a spare bootle 6.- Unmasked and clear coated with Tamiya CLEAR. 7.- Now the part I love MOST, panel lining, and I love it because I am using an excellent product that doesn´t affect clear coats like turpetine and oils, also it doesn´t react with any kind of paint, and is WAAAYYY EASY AND FUN to do panel lining... I will be using promodeller´s wash, I had many headaches with turpetine and oils in the past, but not anymore, you simply apply it, wait 10-15 minutes to dry, then (with cloth or paper moisted in water) rubb gently the surface and it is gone...MAGICAL!!! Next step...DECALING!!....oh no... the almost infinite "NO STEP" decals again...mmmhh!!!
-
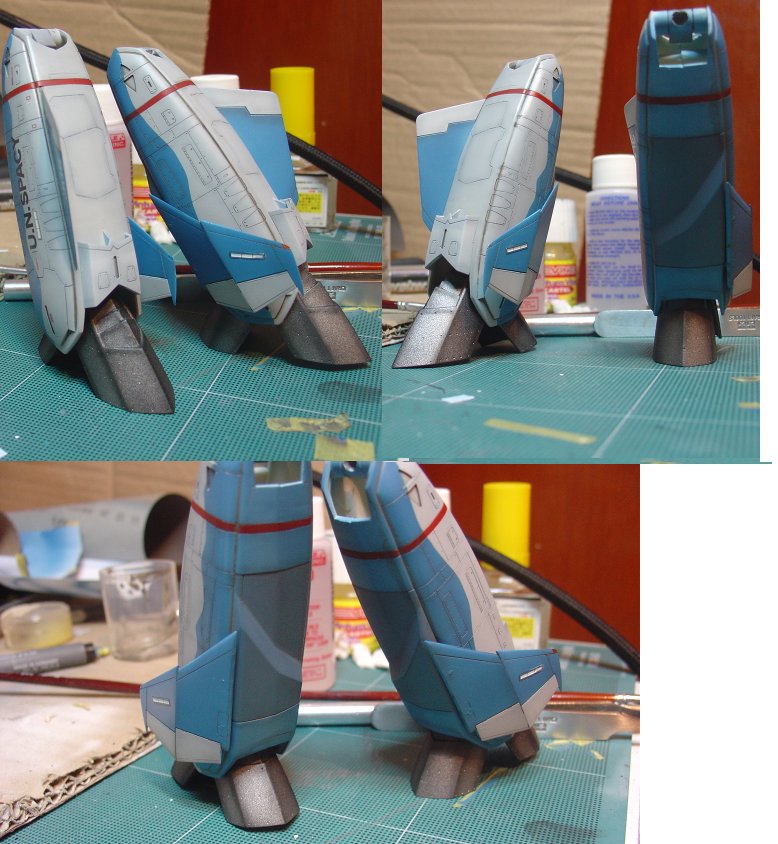
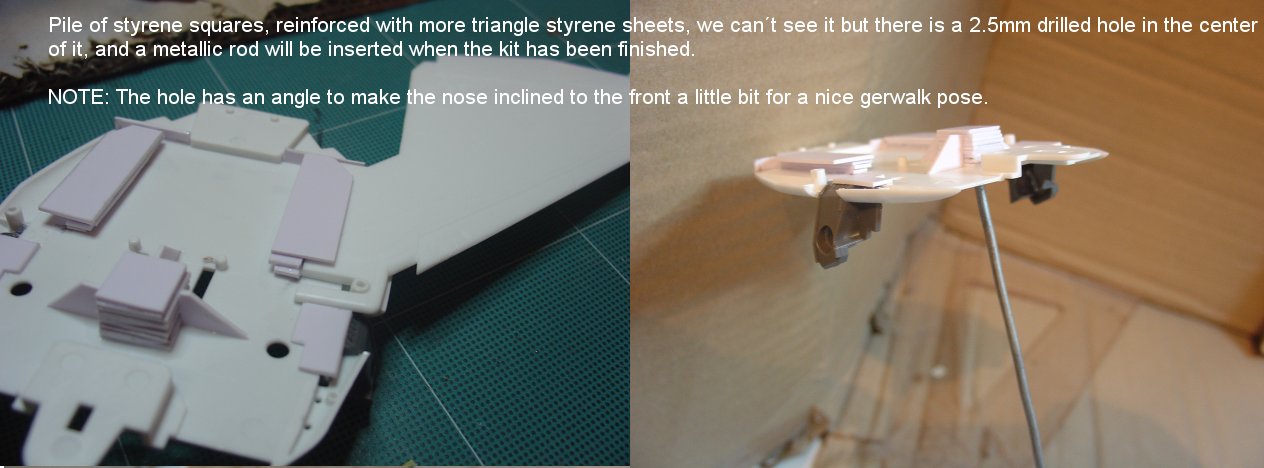
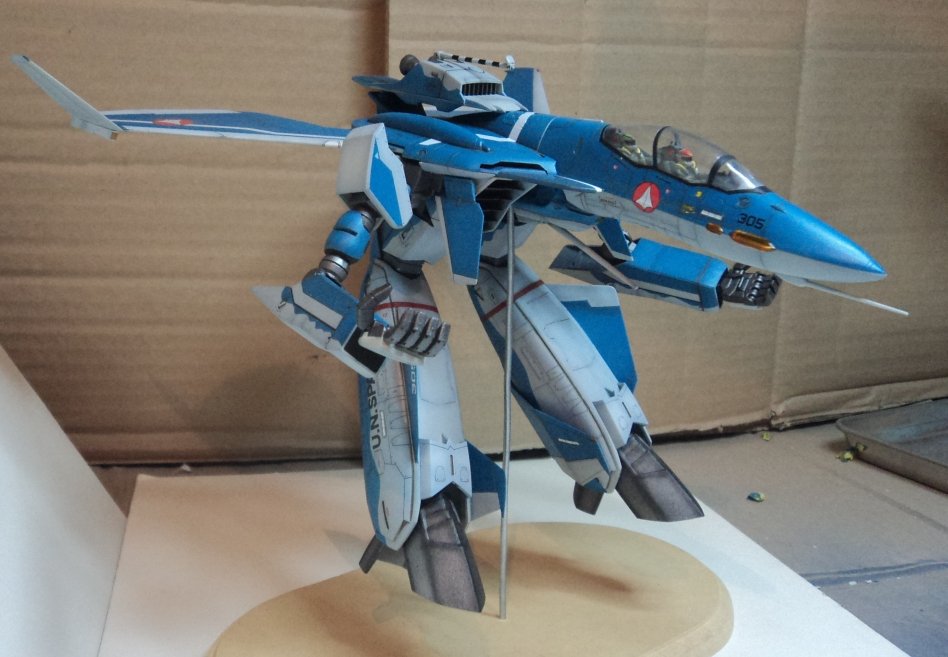
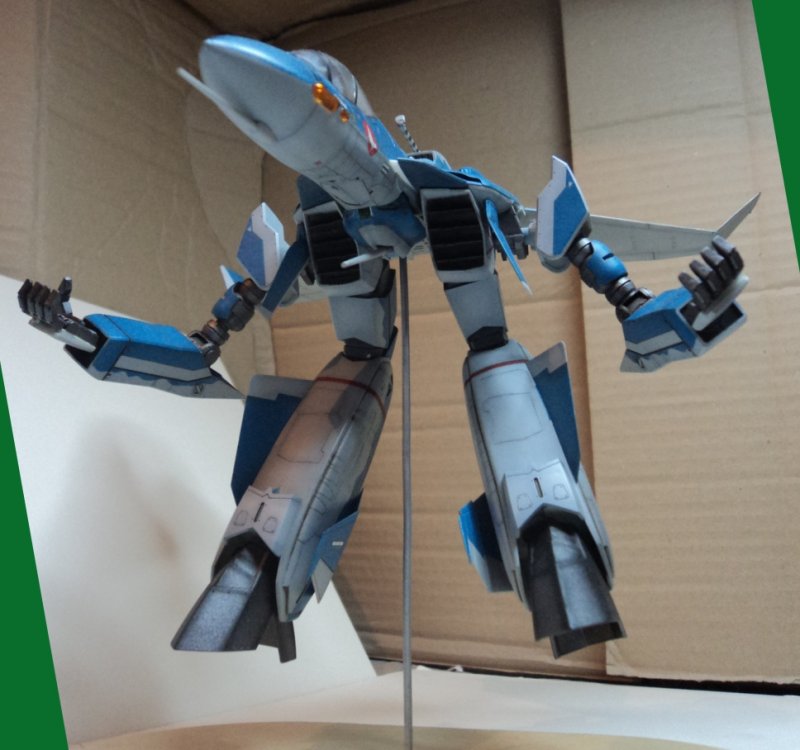
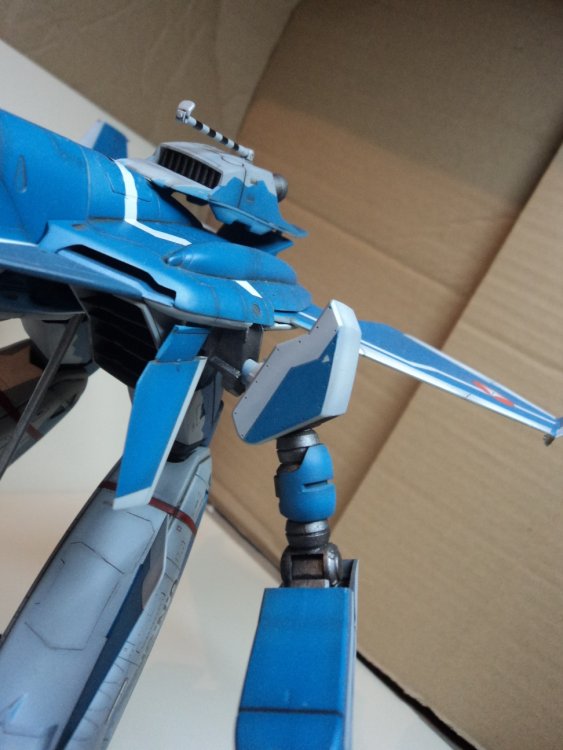
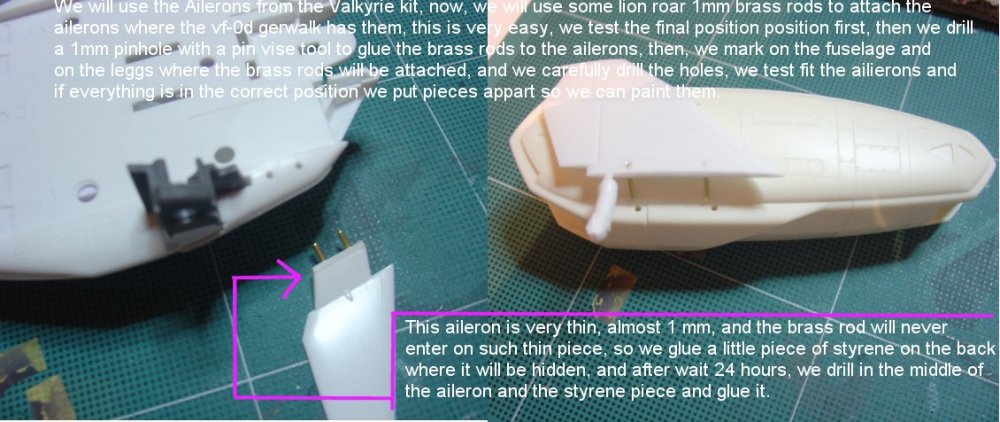
Hehehehe, maybe you are comparing it with my VF-1 gerwalk post: http://www.macrossworld.com/mwf/index.php?showtopic=33351 This is a VF-0 Gerewalk... So lets continue, Now, let´s see the modifications for the upper back of the Gerwalk: Now, the VF-0D Gerwalk has some Ailerons position very different from all other vf-1 and vf-0s gerwalks, let´s see: There is no pieces to make such change on battroid or Valkyrie mode, so, this simlpe solution was made: The final major change was to glue many styrene pieces one after another in the center (and inside) of the fuselage, then, drilled an -ANGLED backwards- 2.5 mm hole so we can insert a metallic rod for display the kit when finished. Now, let´s star the painting process.....


-
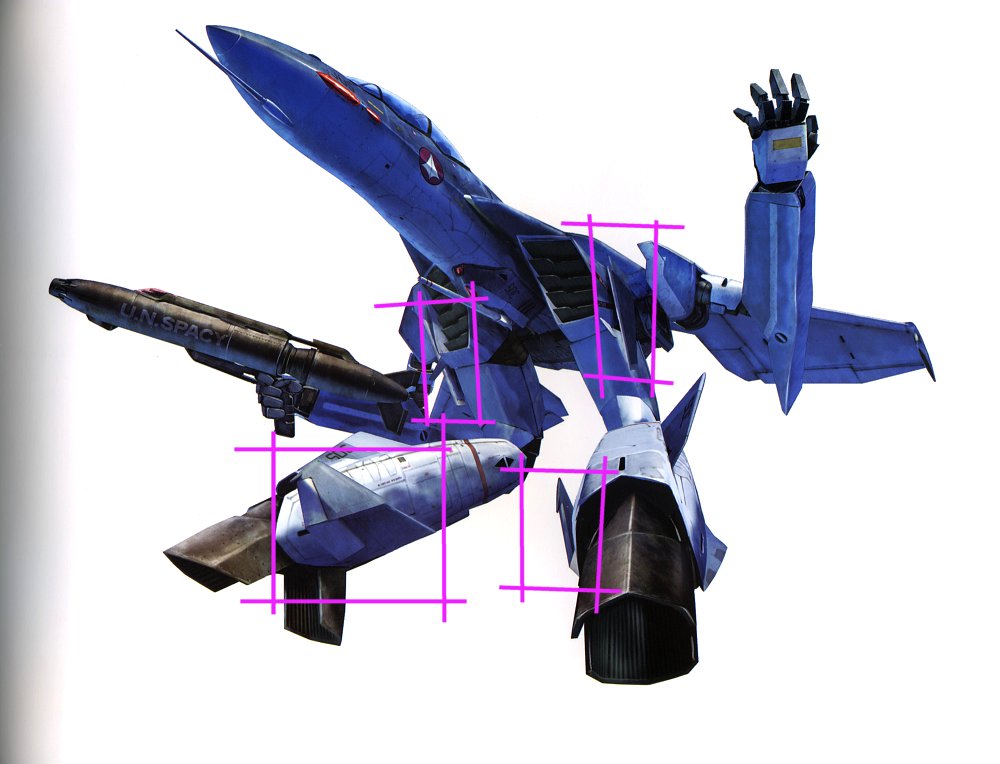
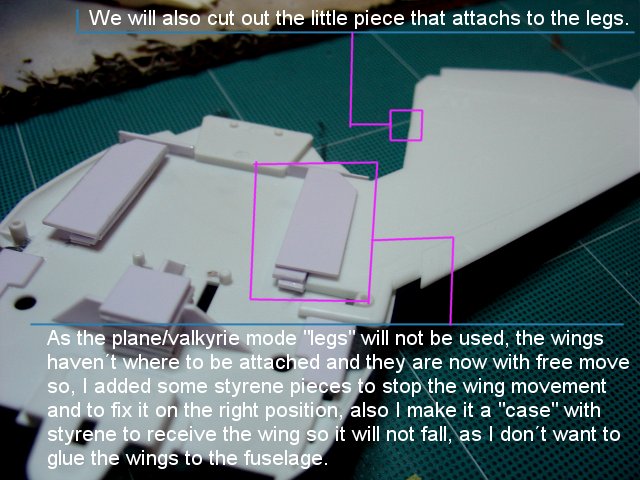
Dear Macross friends, I´m back with a new gerwalk customization, as I said before, I am a gerwalk lover, and a fan of hasegawa detailed kits. So this time, I am doing a VF-0D gerwalk 1/72 from "hase" using the VF-0D and the VF-0 Battroid. I didn´t found any helpful reference on the internet to make this convertion, however, the work isn´t really new or different from the steps for making the vf-1 gerwalk convertion, the same basis is used, just some minor changes need to be done in order to make the VF-0D in a properly converted gerwalk. * Arms are straight from the battroid kit. * Leggs are straight from battroid kit, BUT, the knee will be attached backwards, and some little sanding will need to be done so the leg can move without problems. The rest of the process (at least the one that I came up with) is as follows: Shoulder´s attach: Fixing wings to it´s correct position after avoiding the valkyrie leggs: tsuzukeru...