
NZEOD
-
Posts
1955 -
Joined
-
Last visited
Content Type
Profiles
Forums
Events
Gallery
Everything posted by NZEOD
-
only speculation while you dont build it.... summer projects?
-
-
the VF19 will be alot harder as there is a lot of airframe forward of the wing roots and the front canards are small and canted upwards. Getting the C/G right will be even harder on that airframe. YOu'll notice the stall speed on these VF1s is REALLY high too! A VF-0D on the other hand.... I used to build and fly alot before my time in the military and thats one of the things that got me into working with and operating the IEDD Robots. These are some really good looking airframes in the air and roll at a believable rate.
-
http://www.reneltbelicdesign.com.au/
-
A few more lessons learned over the weekend. 1. Toslink Fibre Optic cable is NOT the one to use as modelling optics. Its a glass based strand same as what we use for direct link comms on the IEDD Robots so I have quite the talent for handling, splicing and repairing these type cables when ever I run over one with the Bomb robot! However.... I hates a tight turn so the confines of a 1/72 model. any tiny nick in the glass surface will become a weak point and will cause the strand to snap at the point from just looking at it! avoiding nicks is INCREDIBLY hard to do when you need to strip off the inner liner. And it loves to break off after being set up, fitted and epoxied into place. I'm sure it possess and evil form of sentience. For modelling, just use the cheaper plastic stuff. 2. After epoxying in Nanopixel Neo LED units make all your solder connections VERY quickly and do one at a time with a break to let the unit cool off. Crystal Clear Epoxy resin appears to melt at a low temp and the Pixel units conduct heat SUPER rapidly! SO the careful epoxy fitting and lens that you make for the Neopixel goes all to hell as you solder - like melted toffee! On a plus note though, it doesn't discolour so you can easily modify the lens while its still soft and repair it with more epoxy without any evidence. The Carrier deck section now has the launch lights fitted and running, the Jet Blast Deflector (JBD) servo fitting and mechanically working - still need to work on programming for this - and the two orange Ramp Raising/Lowering hazard lights fitting and running. I'll try to sort a short video tonight.
-
Fading... blending. Its easier with a double action BUT it can be done with a single by controlling the distance from the item to be sprayed and the amount of product flow to begin with. I have a Badger Double for doing all my Operational Weapon and Kit camoing (I get crap for how well they look in the desert or jungle) and an Alclad II Single Action for modelling You can make your own booth out of Card boxing and PC Fans. For a filter you can use Fishtank filter Elements and Plumping PVC drain pipe connectors for the outlet and filter holder. You can buy the Filter material in bulk sheets for cheaper than the precut filter elements in most good pet stores. For fans use the $10 120mm PC chassis fans running as exhaust (sucking out through the filter) and mount it in the bottom of the booth . PVC Fittings like above can be used to make a filter element holder and mount to the fan or fans and booth. PC Fans run on 5V so any old repurposed 1A plus wall charger for a Cell phone or even a USB power supply will run it. USB to 3 and 4 pin fan adaptor cable Shower ceiling fan piping is good for the exhaust pipe as you can run it out your bedroom window then pack it away like a slinky when you are done. Pretty straight forward and fun project for you.
-
Get the Airbrush! You'll love it
-
I have some Toslink optic cables I'm slicing up to use.
-
Last nights Madness Base layer for the Digicam laid down. Model Masters RLM Grun 72 Next was tinting the canopy to represent the Gold Anti Radiation coating... this was interesting. Mixing up some Long Life Floor Acrylic (Kiwi Version Future but with a cloudy appearance as a liquid) with yellow food colouring I flooded the inside of the canopy then wicked off the excess. Next I added 3ml of Model Master Gold and flooded it again with this mix. Worked really well! Ended up with a yellow tint with a golden glint but still totally transparent!
-
Oh, I'm not giving up on it. I'll fix all the screw ups. Just thought it was funny the steady hand of the Bomb Technician still makes mistakes!
-
definitely keen to build a 3 barrel rotary Airsoft version now!
-
So glad I chose to make a test model first! Mistakes made over the weekend include ... Assembling the engine assemlies beyond the point I could fit a small panel... that I forgot to fit! Have a plan to sort that though. Finding out the Tamiya putty sets in zero secs flat and goes like concrete! Letting a run of cement get on the canopy!!! This ones a problem and I may have to polish it out! Spraying Alclad on too high a PSI... its basically looking like matt black paint and not burnt metal at all. Knocking over the $20NZD bottle of uncapped Alclad II Gun Metal while spraying the Hand Cannon. ... idiot. Tamiya TS Spray Can Flat White is crap at covering. Using it on the rear of the Jet Blaster Deflectors and its like water. Instrument display panel decals are bigger than the display they are meant to go on. Brilliant. On a brighter note the its otherwise looking good. Jet Blast deflectors raise and lower nicely and the VF19A is all assembled and awaiting airframe base paint.
-
MWO is alittle slow and clunky. I gave my account to my sister Keira and shes been tearing it up having fun.
-

Adrian's Custom Destroid Defender "Pain Killa" . . .
NZEOD replied to miriya's topic in The Workshop!
Advertise it on the Mechwarrior Online forum. They love their Battletech models over there and are making alot of 3D printed stuff for sale. http://mwomercs.com/forums/ Just call it an Unseen 65ton Rifleman -
Saturday night and the first model gets started. Was supposed to be a test model, one of the Bandai throw away VF-1 models, but after poking around through the boxes i liked the look of one of the VF19A's better. All the major assemblies sorted, undercoated and test fitted only. Still need to cement together and sort the seams. As pretty much EVERY one of the 22 models will be a custom I'm thinking this one will be a Lo-Viz Digital or maybe a Hex camo.
-
there was an attempt recently that went WAY off track with cards and other crap added. Mechwarrior Tactics.
-
send me your address and I'll send it anyways. It needs a good home.
-
do you have any spare 1/72 pilots or left over decals laying round? I'll trade.
-
That Tyrell is an accident. The Japanstore on Amazon sent it in place of a Valk. lol Its free to a good home.
-
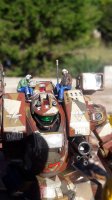
Started work fitting the fiber optics and painting up a bunch of the cockpits this weekend and was a little gutted to find just how many of the Hasegawa kits don't have the pilots/copilots with them. More than I had planned! Waiting on some more Weapons kits for the extra crew now.
-
I want those VF25 kits
-
Brazilian Portugese is my one to learn from the old GF.... Hey Mosa, sua bunda gostosa!
-
You can build a rotary airsoft cannon fairly easily nowadays. There are alot of tutorials on it online. You can also buy a Mossberg Tactical Shotgun from Tokyo Marui that has 3 barrels hidden inside to fire 3 BBs at a time. That could be retrofitted into this project easily enough.
-
Airsoft internals?
-
lol Bridge bunnies.... don't EVER let that good looking cosplay model read you called her that!