

Kylwell
-
Posts
585 -
Joined
-
Last visited
Content Type
Profiles
Forums
Events
Gallery
Posts posted by Kylwell
-
-
On 11/15/2020 at 9:46 AM, MechTech said:
@pengbuzz Your design is looking cool!
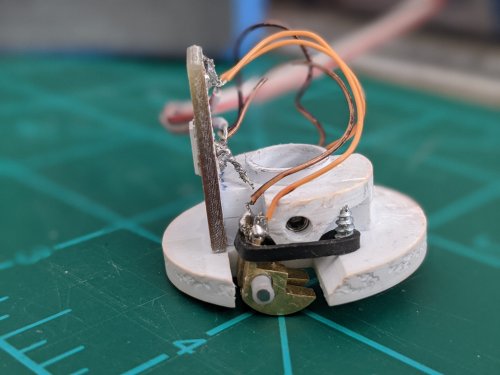
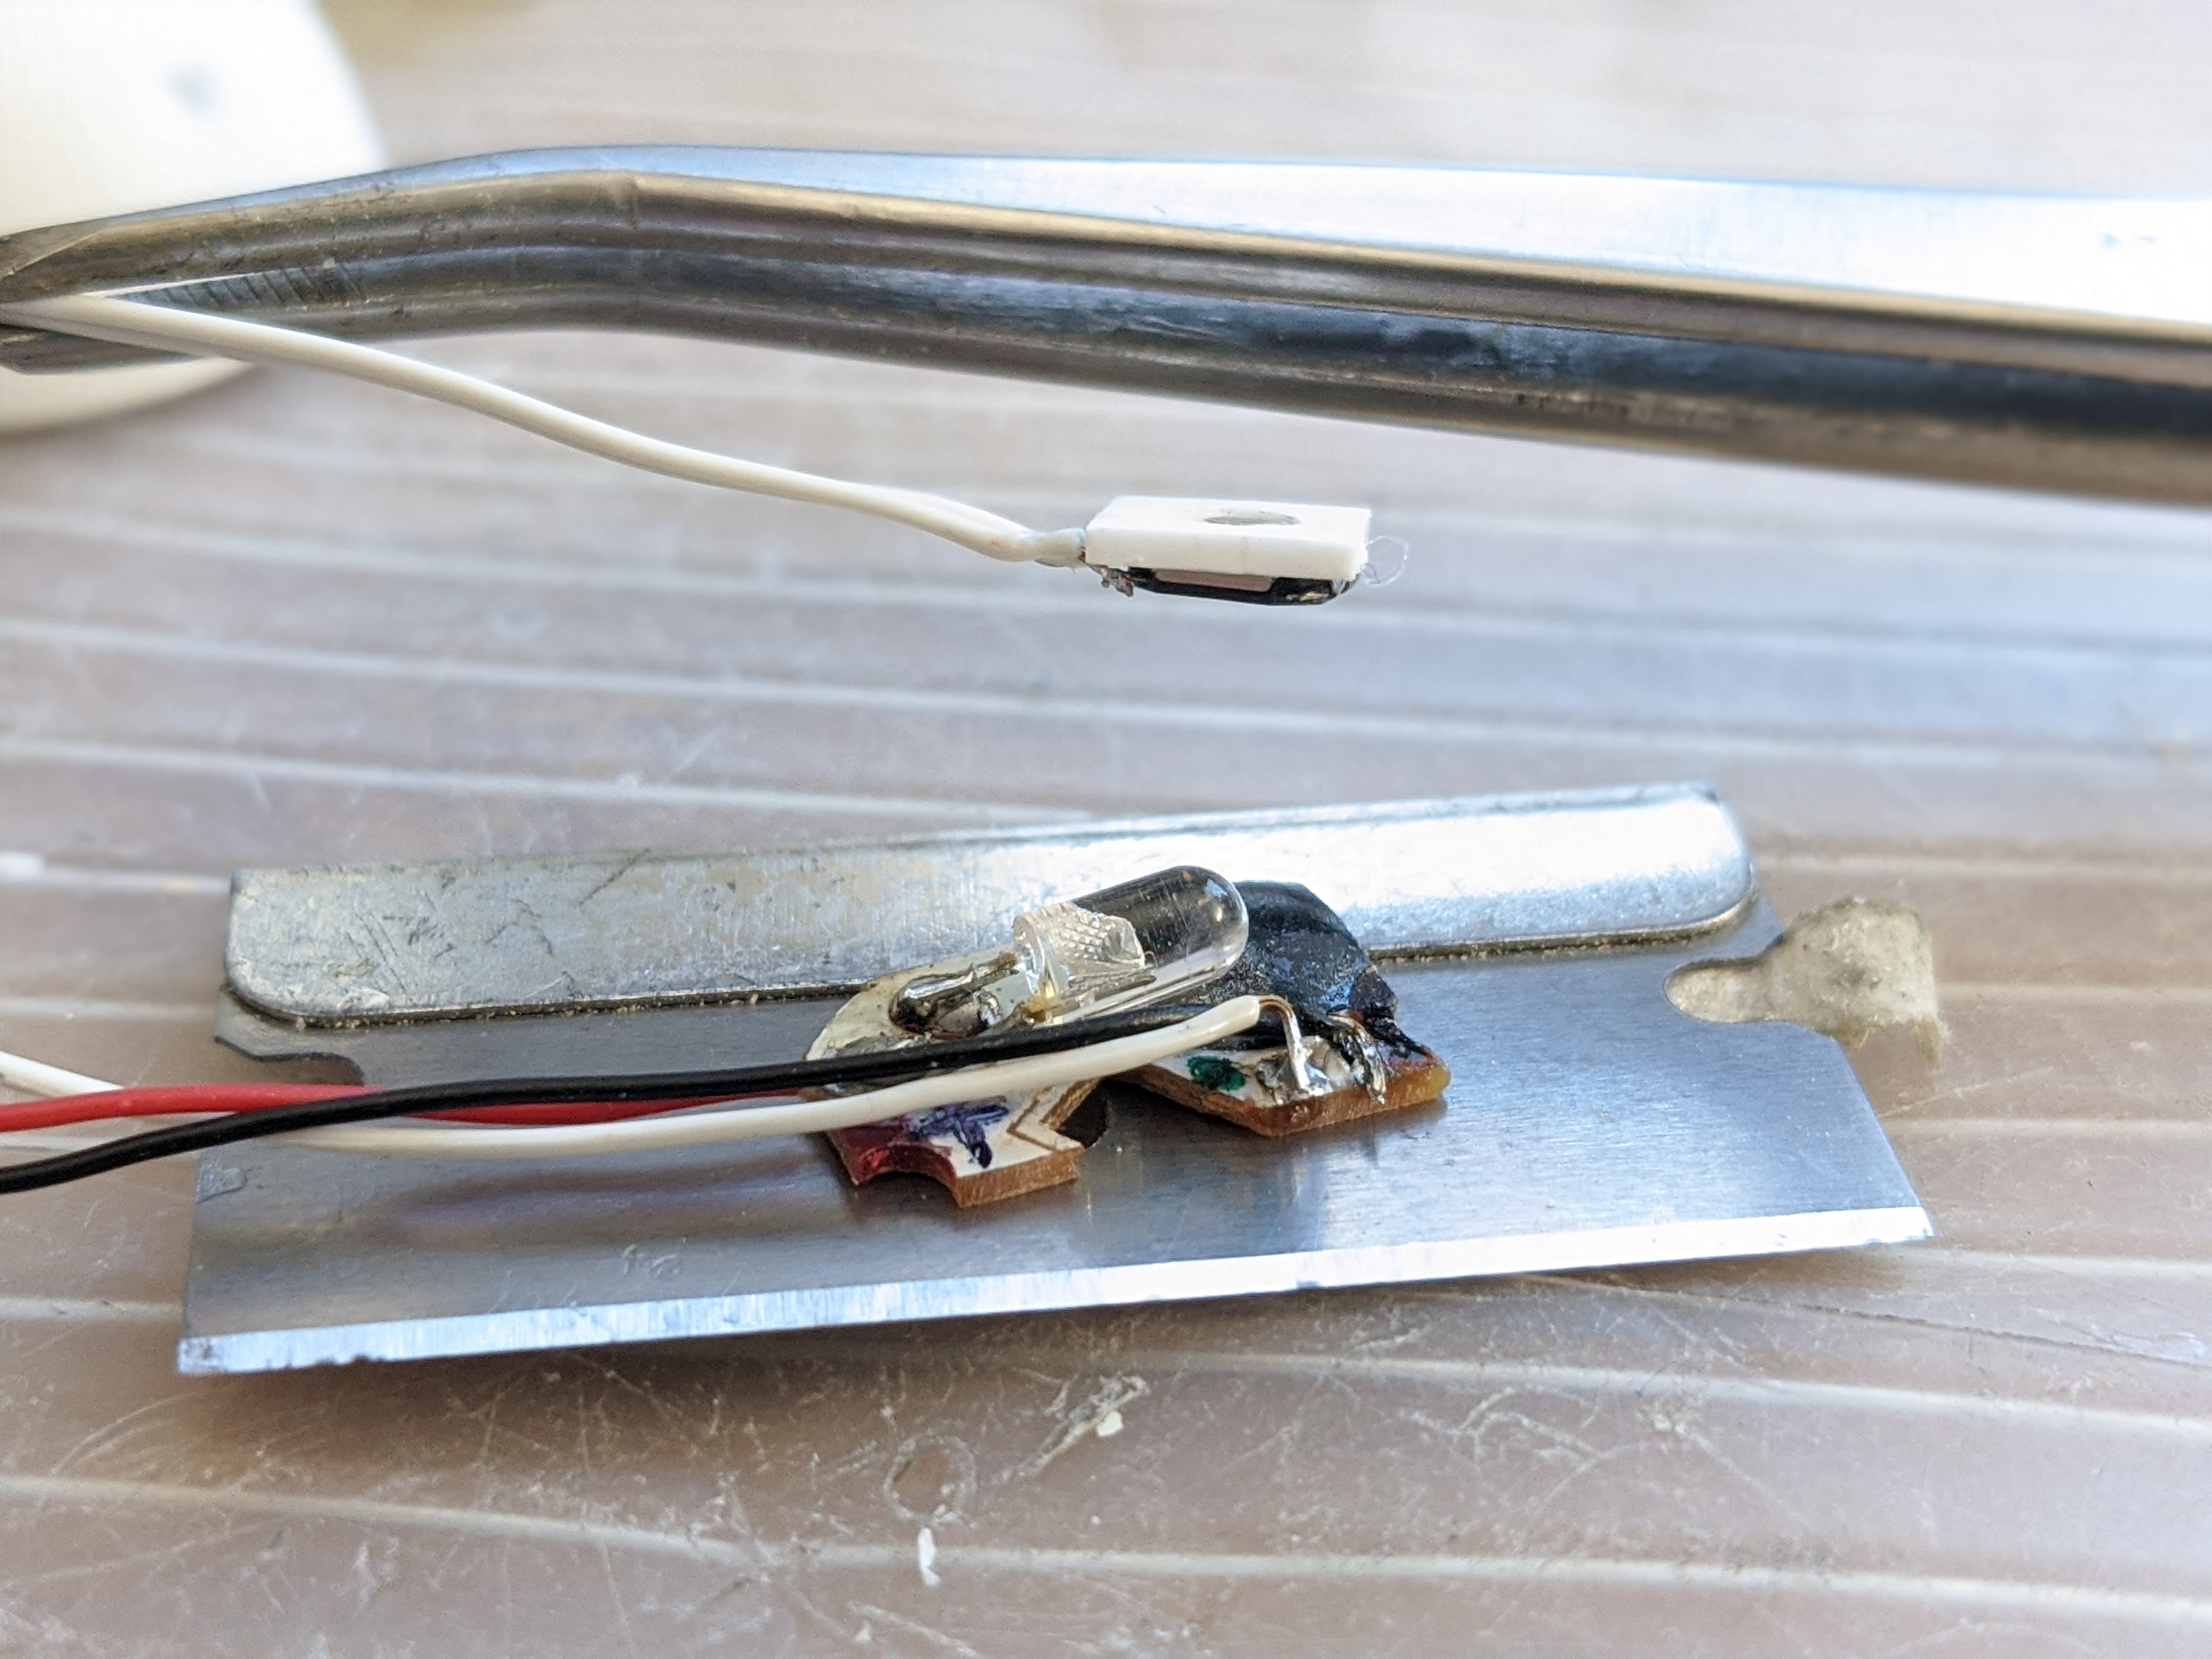
Starting to get there with the lighthouse. The F-86 "flying" around the lighthouse will have LED fiber optics in the gun ports. This is the heavily modified circuit board from a dollar store toy for the gun LED and the 1/16" thick button to fit in the lighthouse top to trigger it.

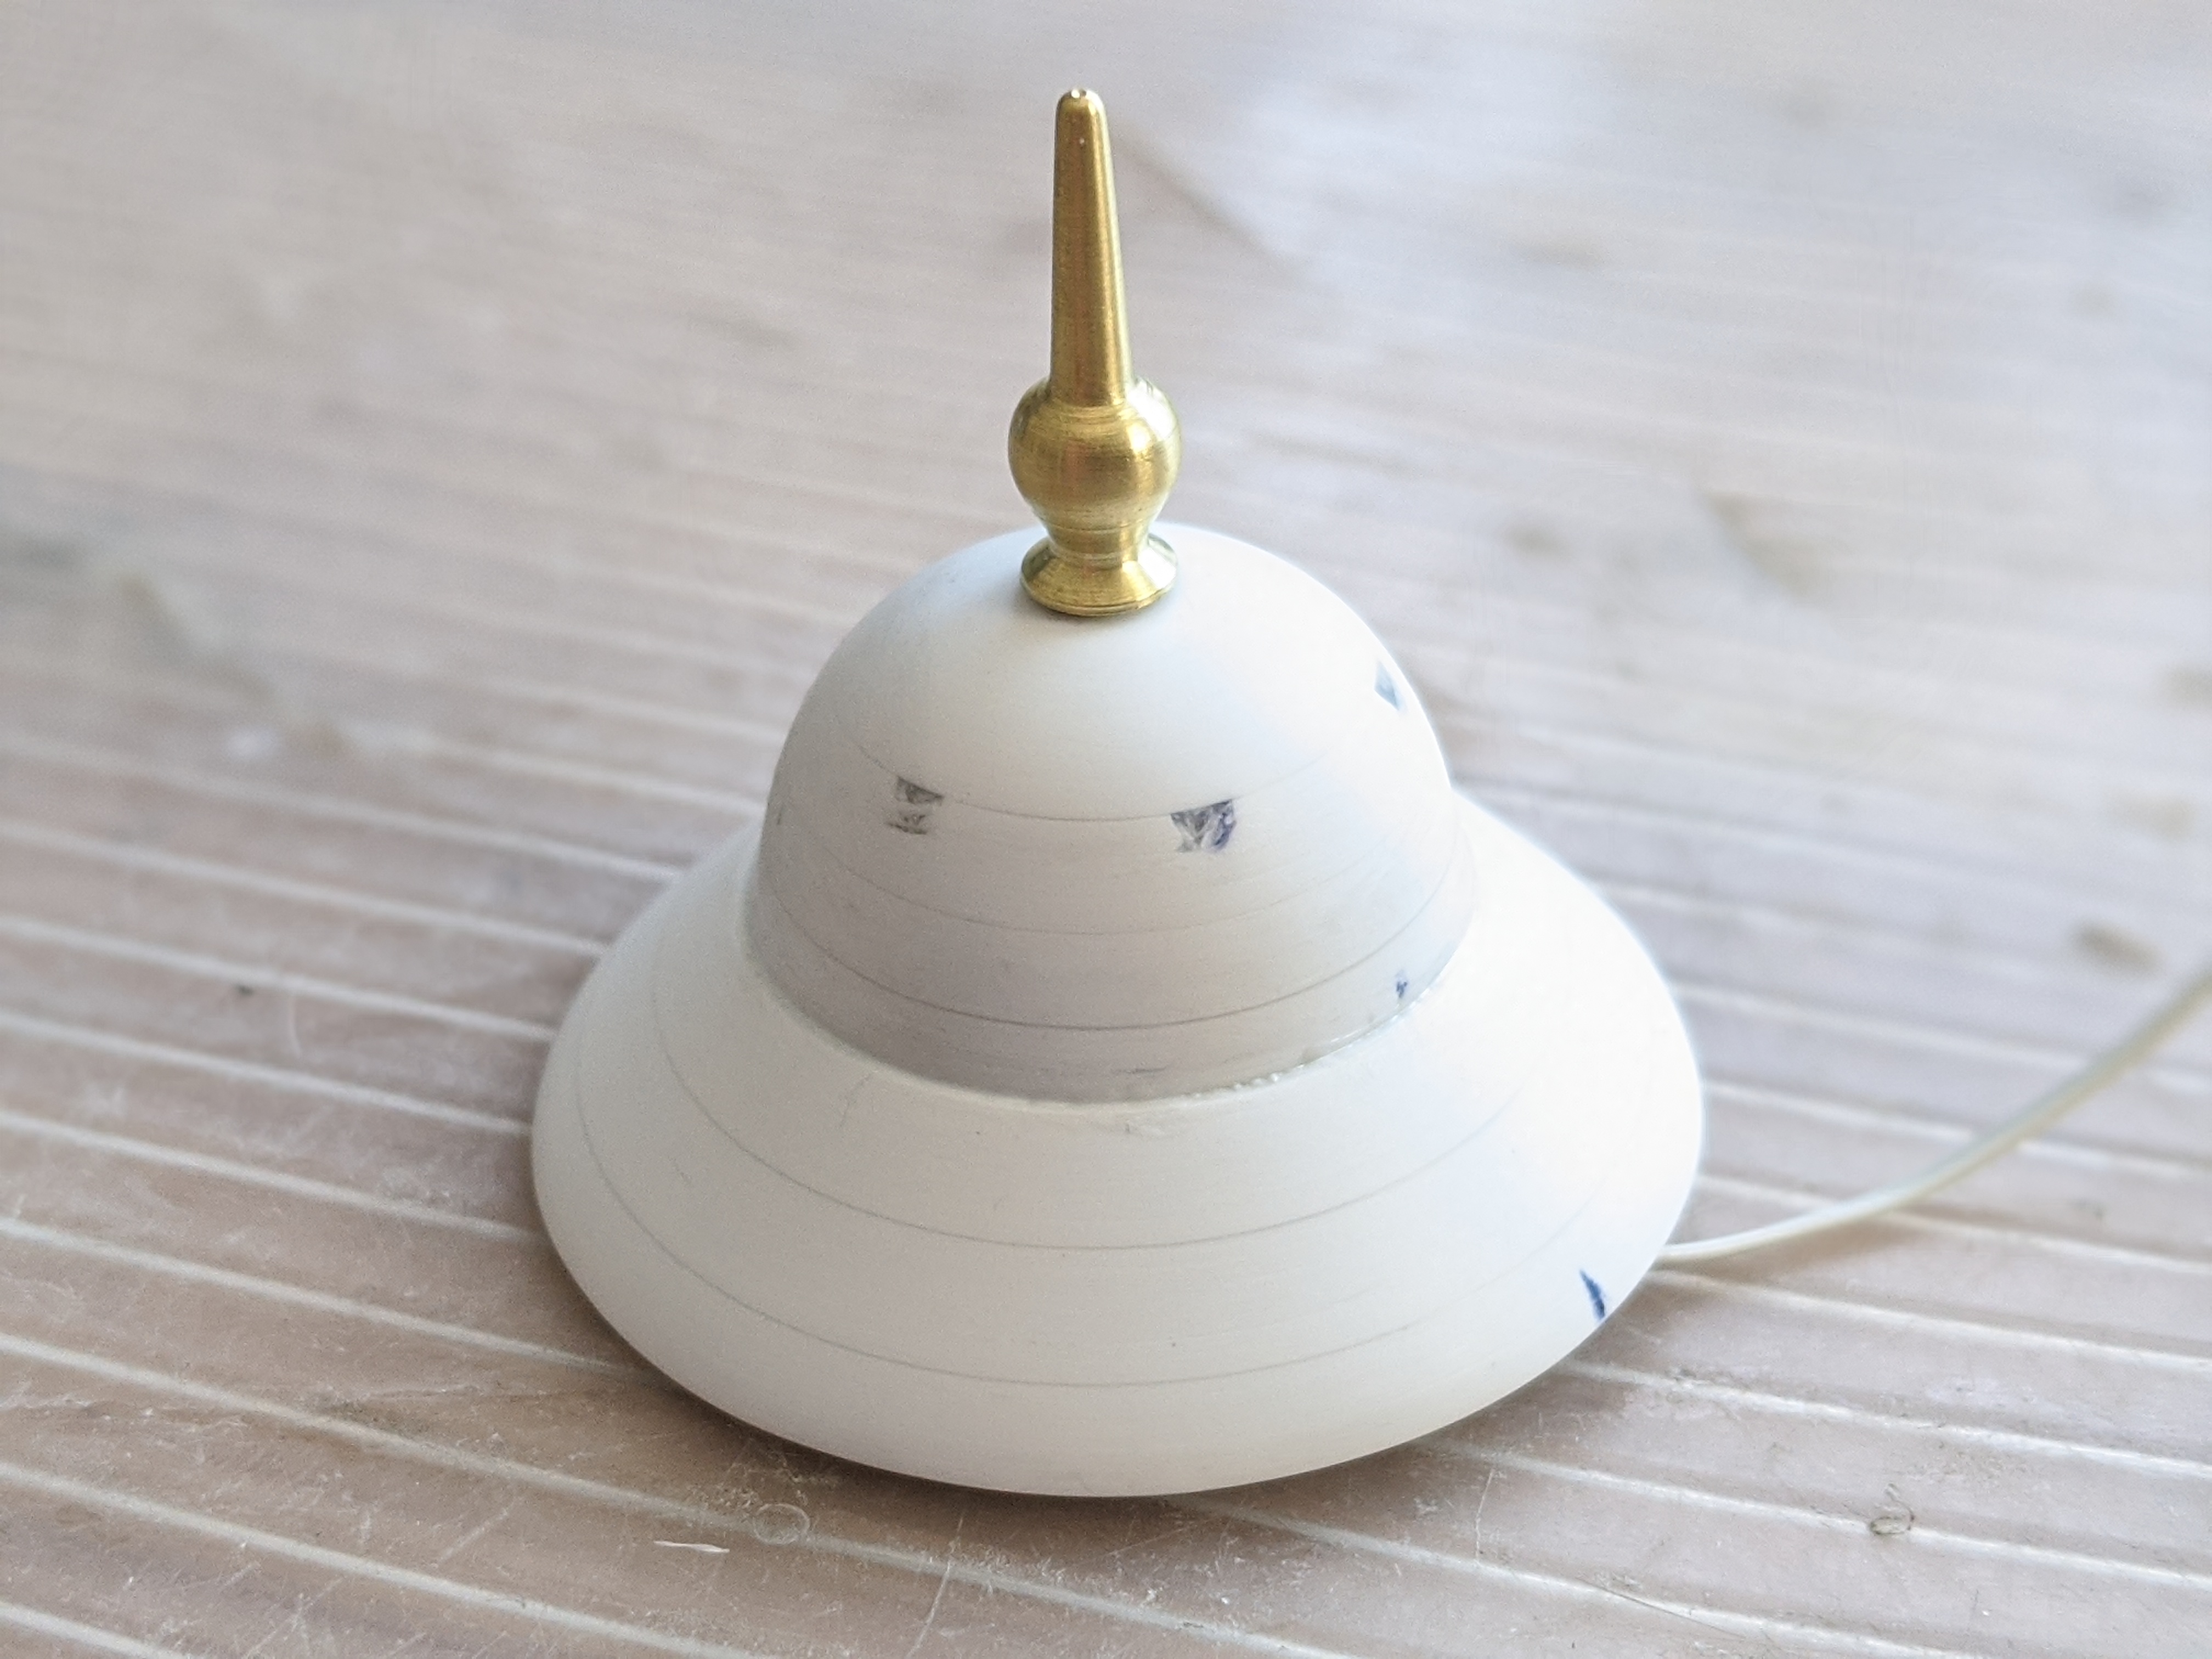
This is the lighthouse finial I turned on the lathe that is also the push button for gun LED circuit in the previous photo.

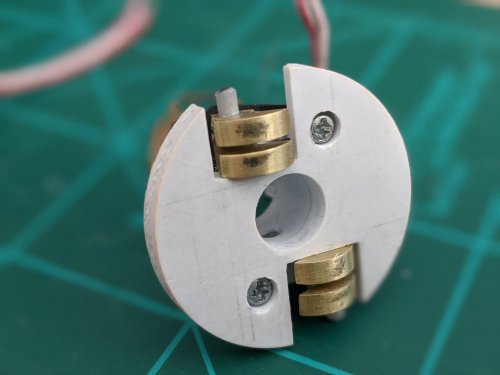
Third time's a charm! Here is the all new rotor and brushes. The flat thing sticking up is the lighthouse LED that rotates. I don't like using rubber bands because they dry out and fail, but it was the only thing to help add tension to the brushes. I thought the weight of the brass brushes would be enough on their own to make them keep contact with the circular circuit board, but that idea failed.
I used a 3mm "candle" LED and machined tubing really thin to house it and contain the light for the rear "flames." Hopefully this week it all comes together on schedule! - MT
I've got an assortment of springs that would probably work if you give me a length & diameter I'll see what I have.
-
Long time customer. They every now and again have some hiccups but by & large they're my go-to for overseas purchases.
-
I will admit this has taken a lot of pressure off me. I no longer have to worry about motorizing anything and my idea for the cockpit will be much simpler. Still trying to argue my way out of adding buttloads of details.
-
On 5/23/2020 at 6:04 AM, valkyriepilot said:
Tweet basically says the the 1/72 VF-1 moulds are almost done. It also mentions that they are nearing completion of the test shots for the 1/20 Mirage kit. Finally, the tweet also says that the PLAMAX line will continue to make more Macross-related items/kits, and thanks everyone.
Well the 1/20 PLAMAX Mirage's release date was previously announced as July 2020, so they're probably gonna post the full set of test shots for it towards end of May, if not early June, in preparation for its release.Not sure if production for the 1/72 VF-1 will start soon, as even if the moulds are almost done, it may still need to undergo some fine-tuning...
So more Macross. And Max loves BIG models. Really loves them.
*whisper* 1/72 injection molded MONSTER! -
On 9/27/2019 at 8:26 PM, Thom said:
The model currently being worked on on my table,

Oooh, my fav!
-
On 7/28/2019 at 12:18 PM, MechTech said:
Nice n clean Derex. That thing almost looks the size of the Chrsitmas ornament Defiant we have.
Thank you guys! That was the first time I've cut flutes into barrels like that.
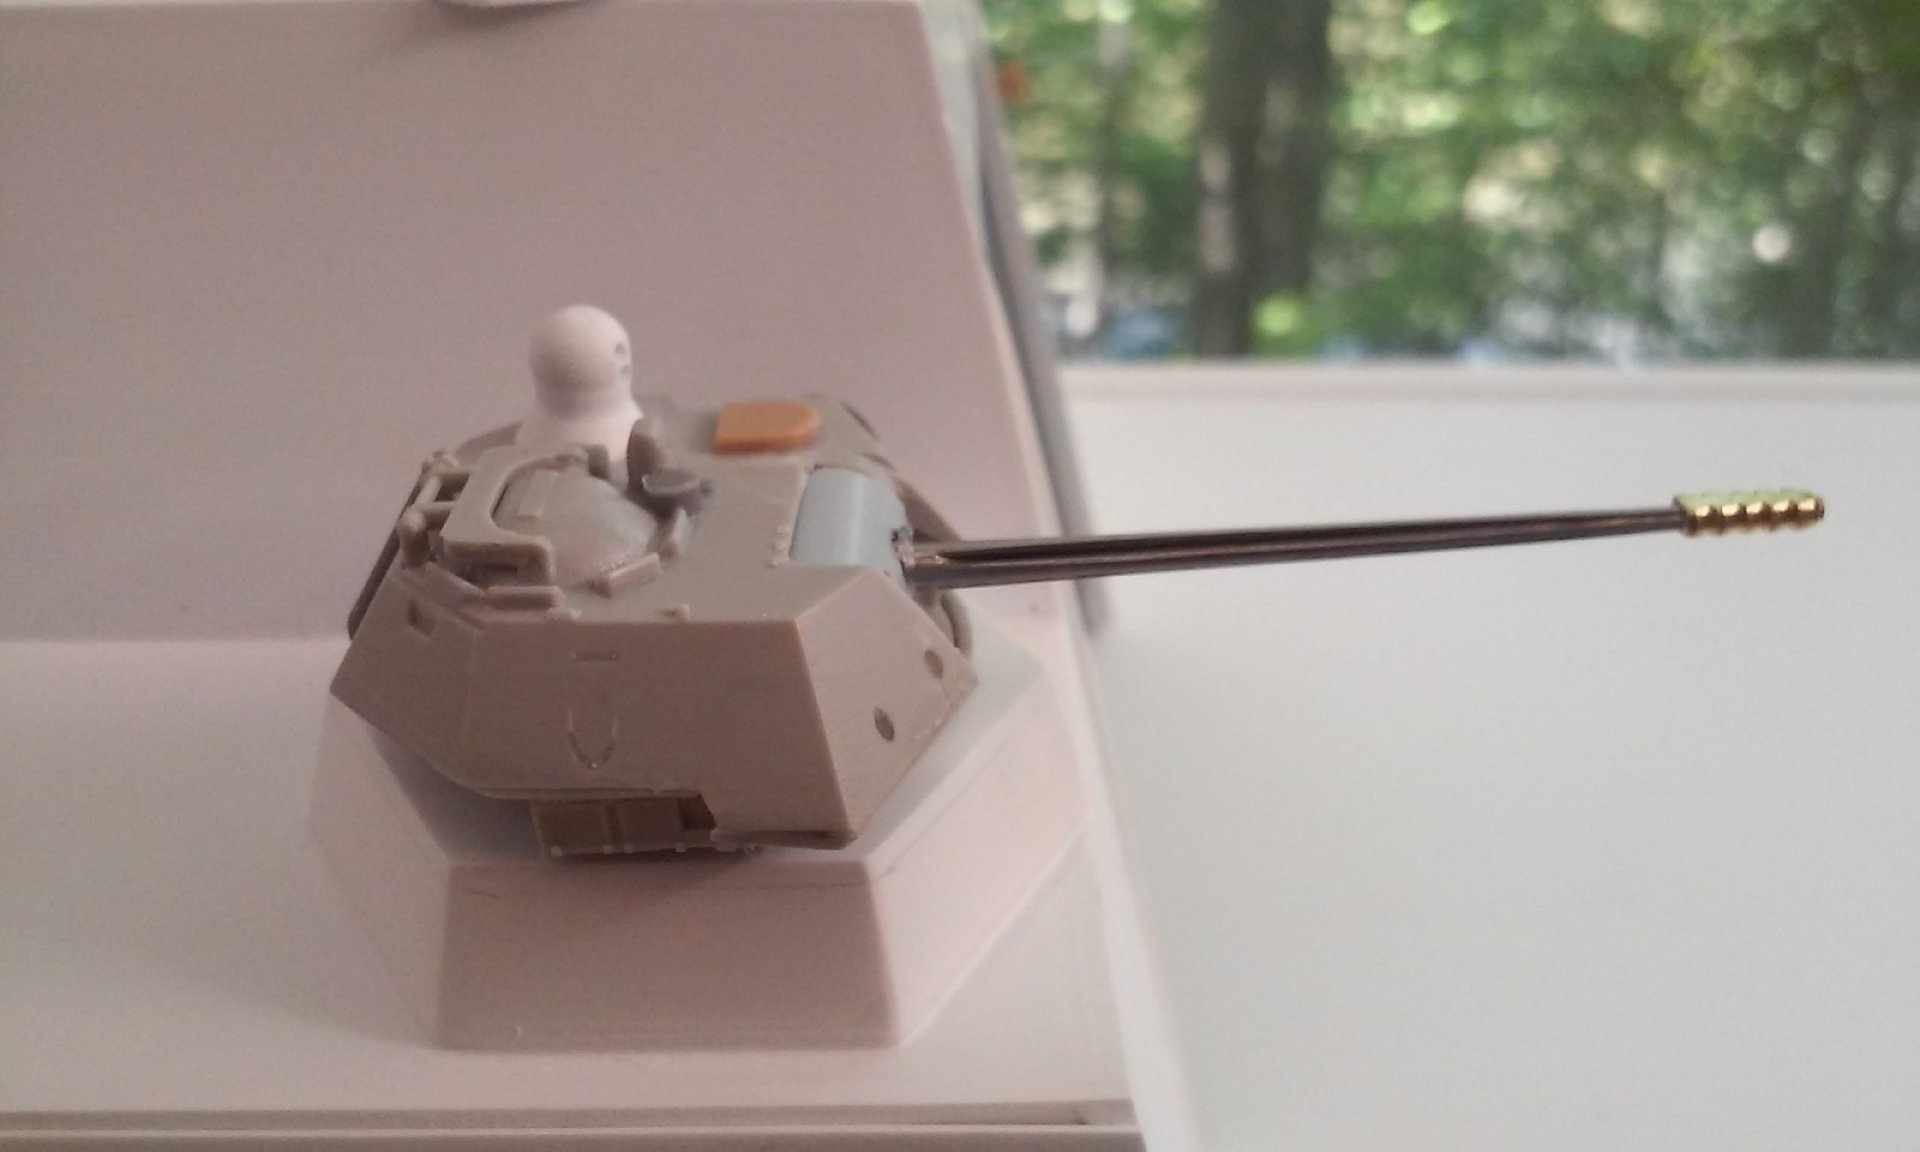
"Does this muzzle brake make me look fat?" I thought the first muzzle brakes looked awkward, bulbous at the end so I made something more modern looking in brass. The turrets are nearly done now too after adding details.
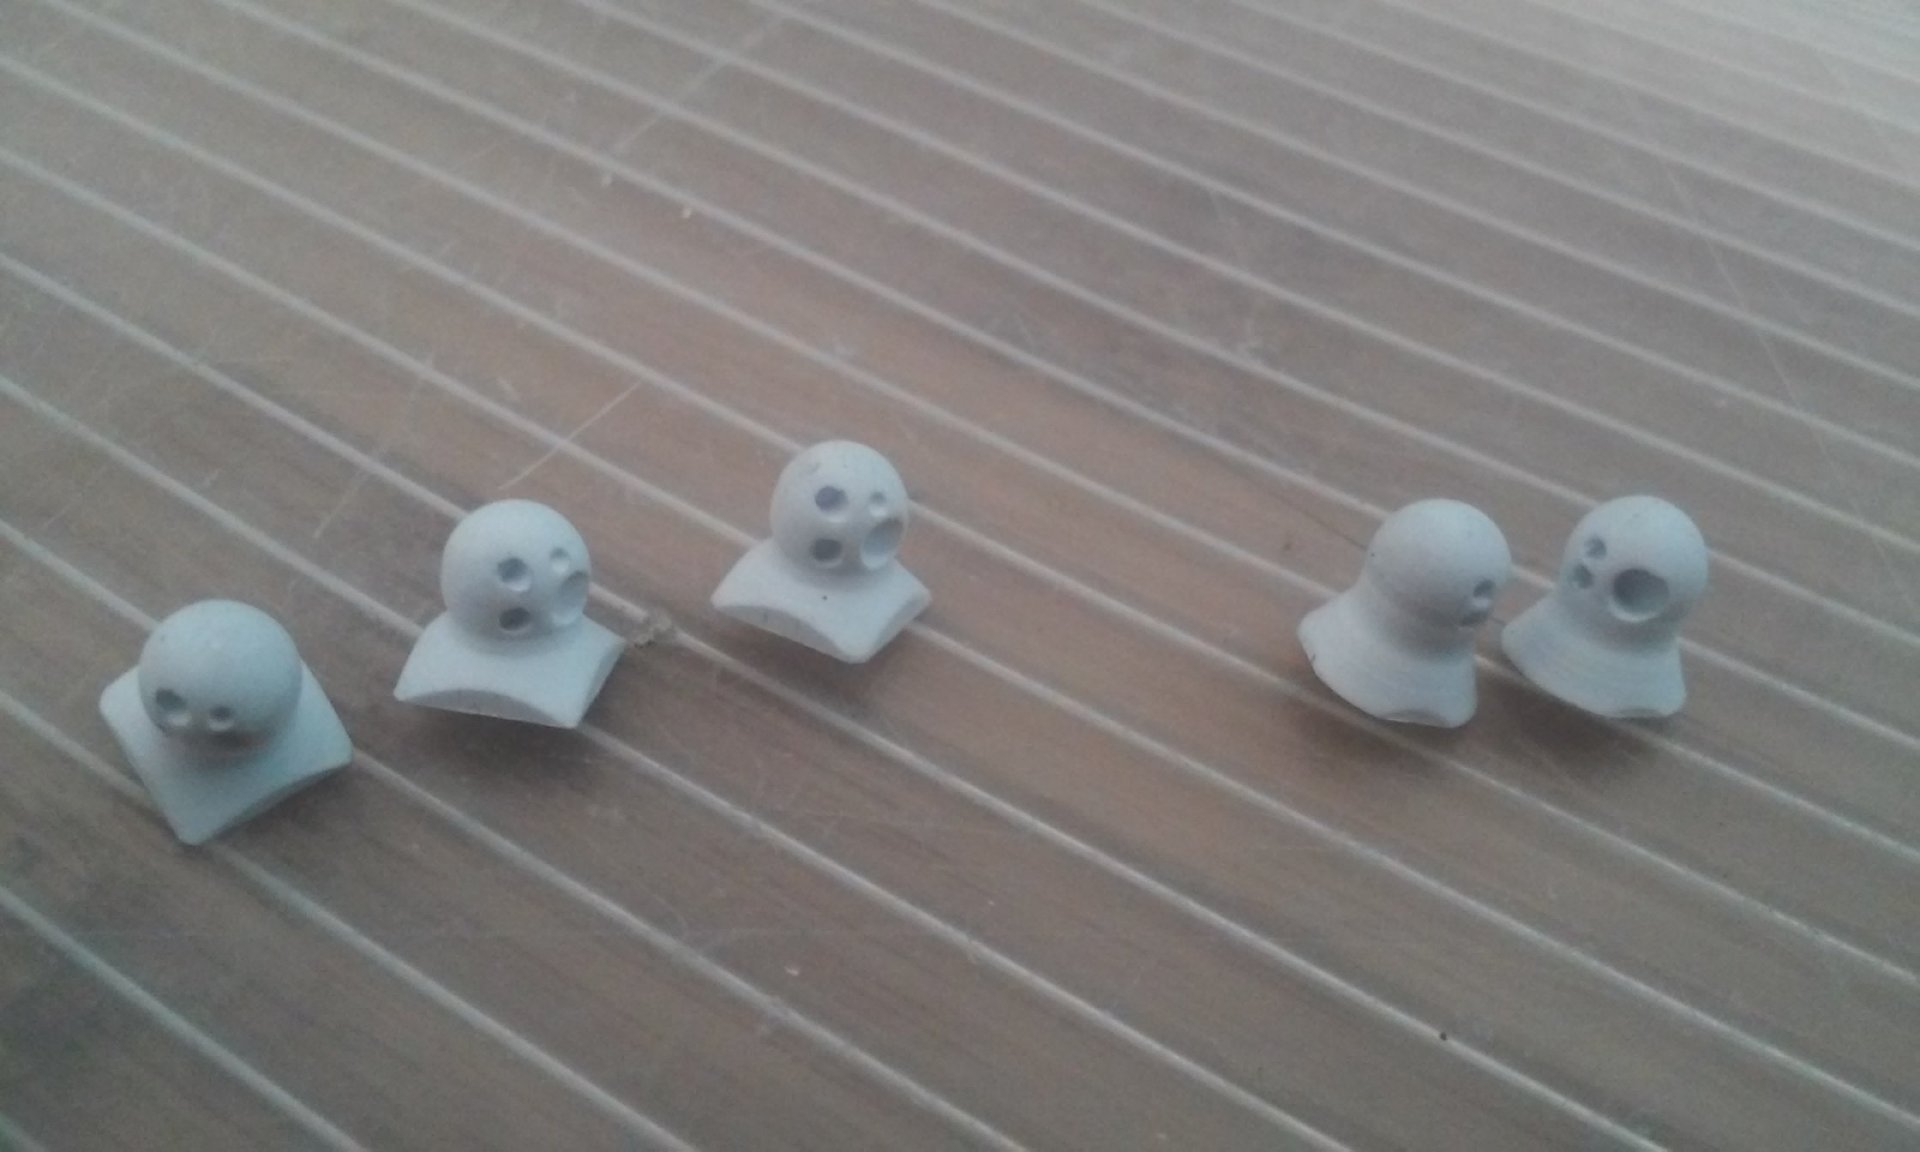
I wanted optics turrets for the ship and turrets so I turned some radii (balls) on my lathe and then milled "lenses" into them of various sizes to simulate lasers, IR cameras and cameras. I just need to clean the dust out of the cuts.
Long story short, I rechecked the main turret size and am going to redo the cap firing mechanism to make it smaller. Right now the mechanism sticks out of the turret where it should and has no room to cycle in either. Hopefully it won't take me another month like the last ones did each. - MT


so I've got to ask, have you ever cruised RB Models looking @ barrels? https://www.rbmodel.com/index.php?action=products&cat=c_bm&sub=35B
-
-
アキヒラ does some pretty extreme kit basking. Beautiful stuff.
-
On 11/15/2018 at 1:49 AM, Return To Kit Form said:
Great work guys! And I am especially loving the 1/48 VF-1s.
I can tell you what isn't on my workbench any more...this VF-0B! Finally finished two years after I started it. Rubbish pictures but better ones will have to wait until after I move cities.

So glad it is finished so that I can move onto the next shelf queen!
Cheers,
Brett
Dude... So frikken cool. Awesome. Wild and awesome. Man I want to go paint something...
-
On 8/14/2018 at 4:23 AM, SuNDuK said:
It's a running joke. Can't remember why exactly but large containers of pressurized cheese just seem funny. A friend is going to have a largish pipe running to a spaceship he's building that'll be labeled 'Warning Pressurized Cheese".
-
On 7/2/2018 at 4:30 AM, arbit said:
Whoaaaaa! You've been busy dude. Show us the WIP on this behemoth.
Best I can do is the Facebook album https://www.facebook.com/robb.merrill/media_set?set=a.10208187556785981.1073741858.1213577182&type=3
-
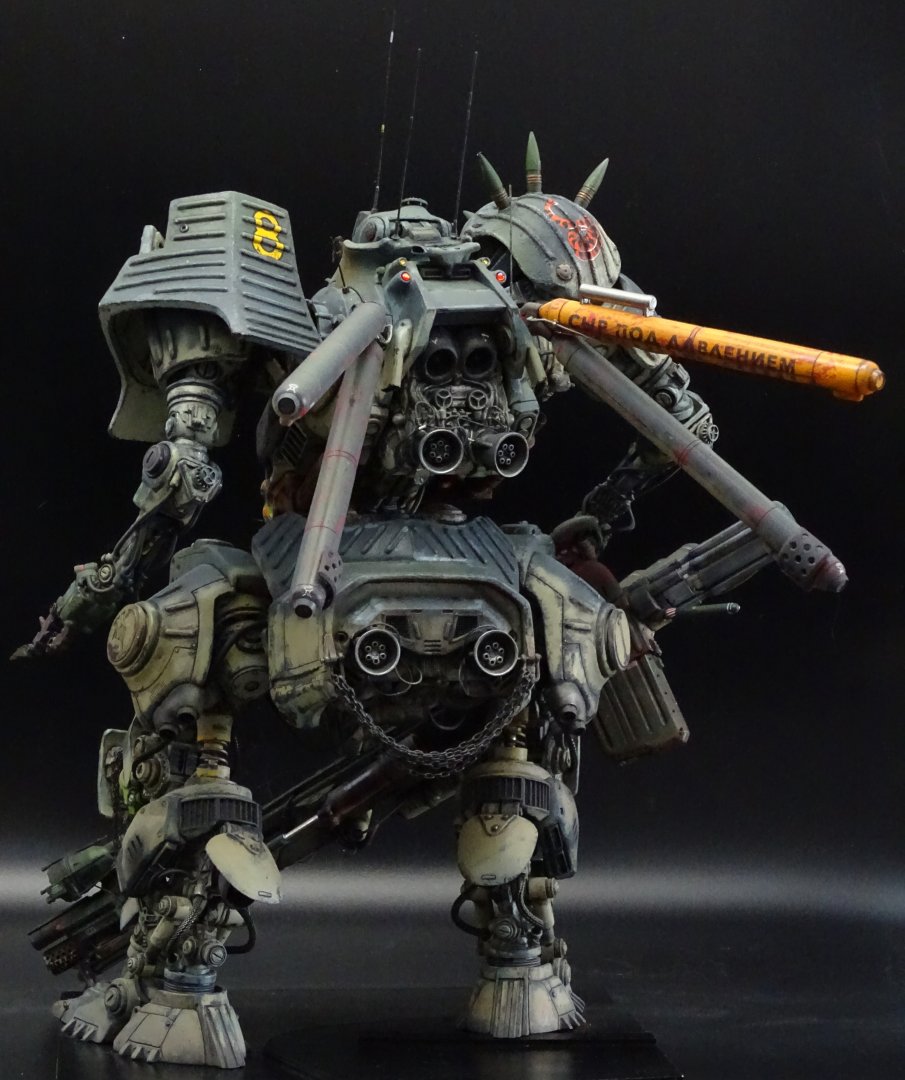
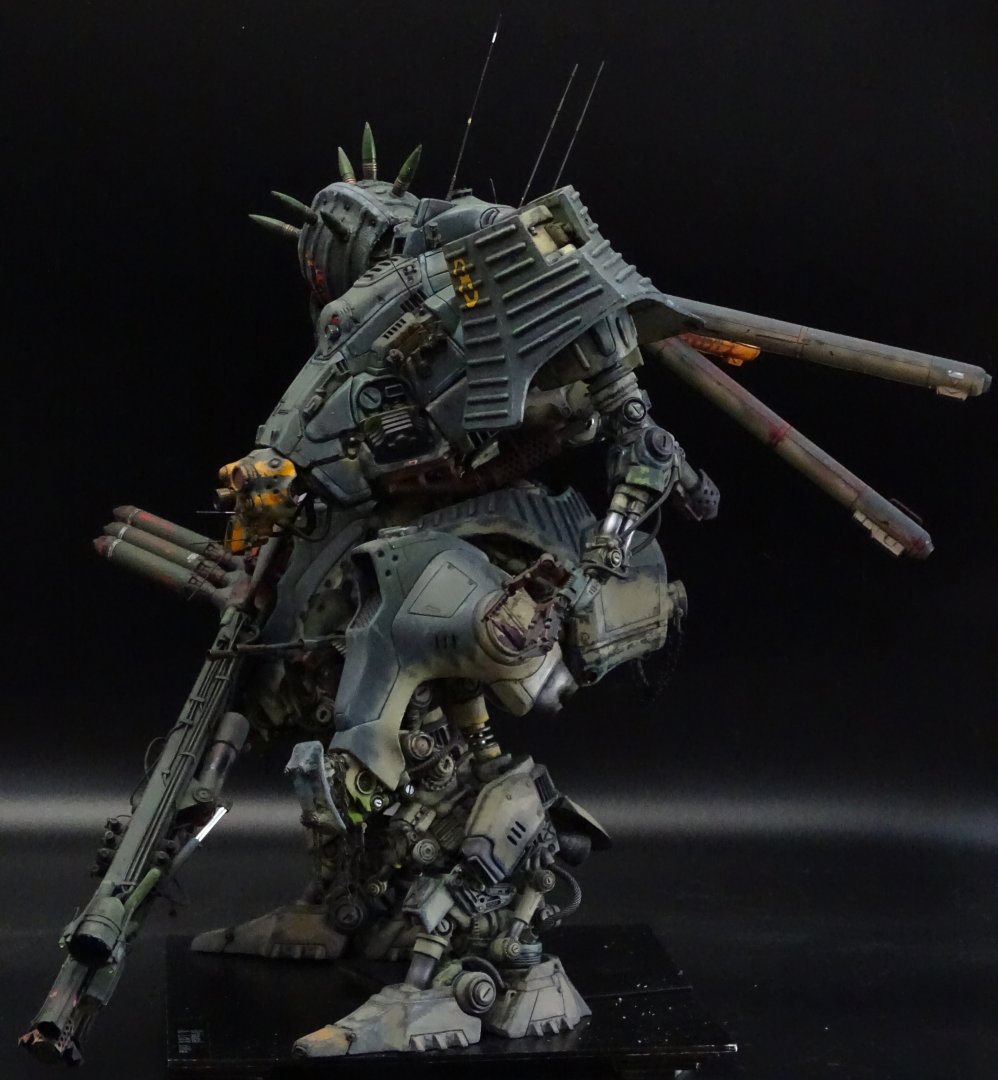
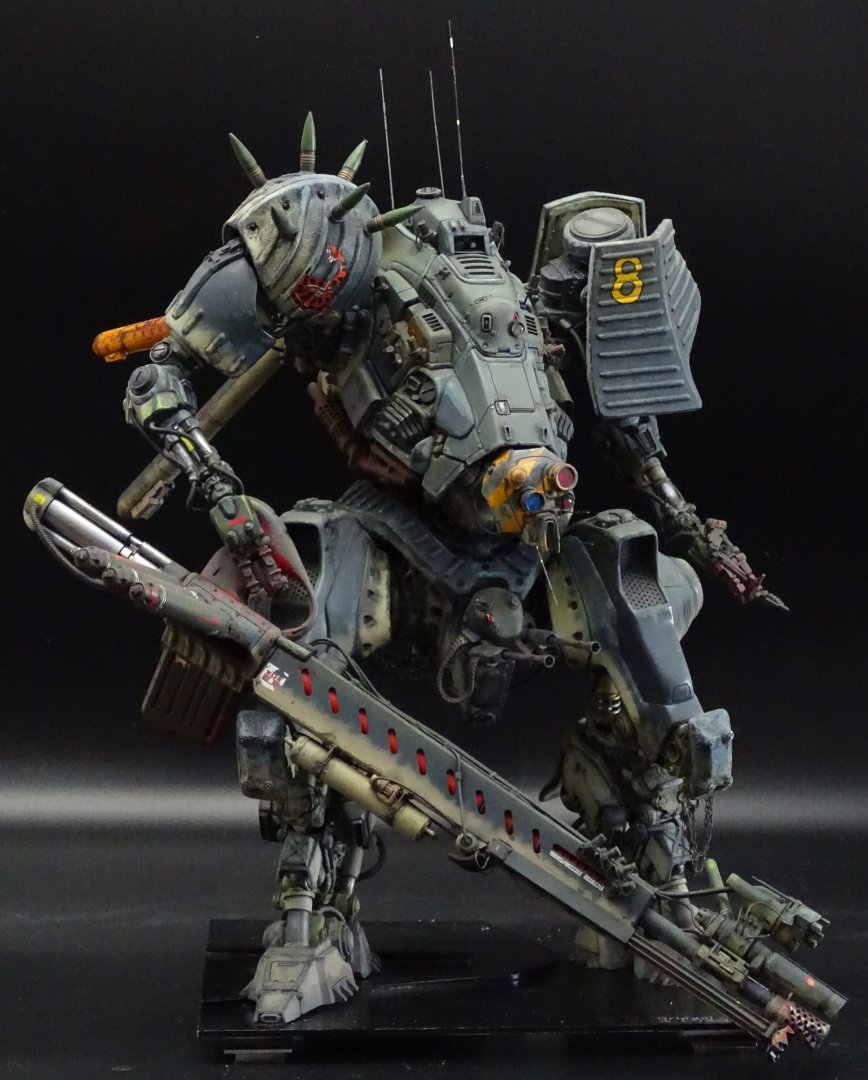
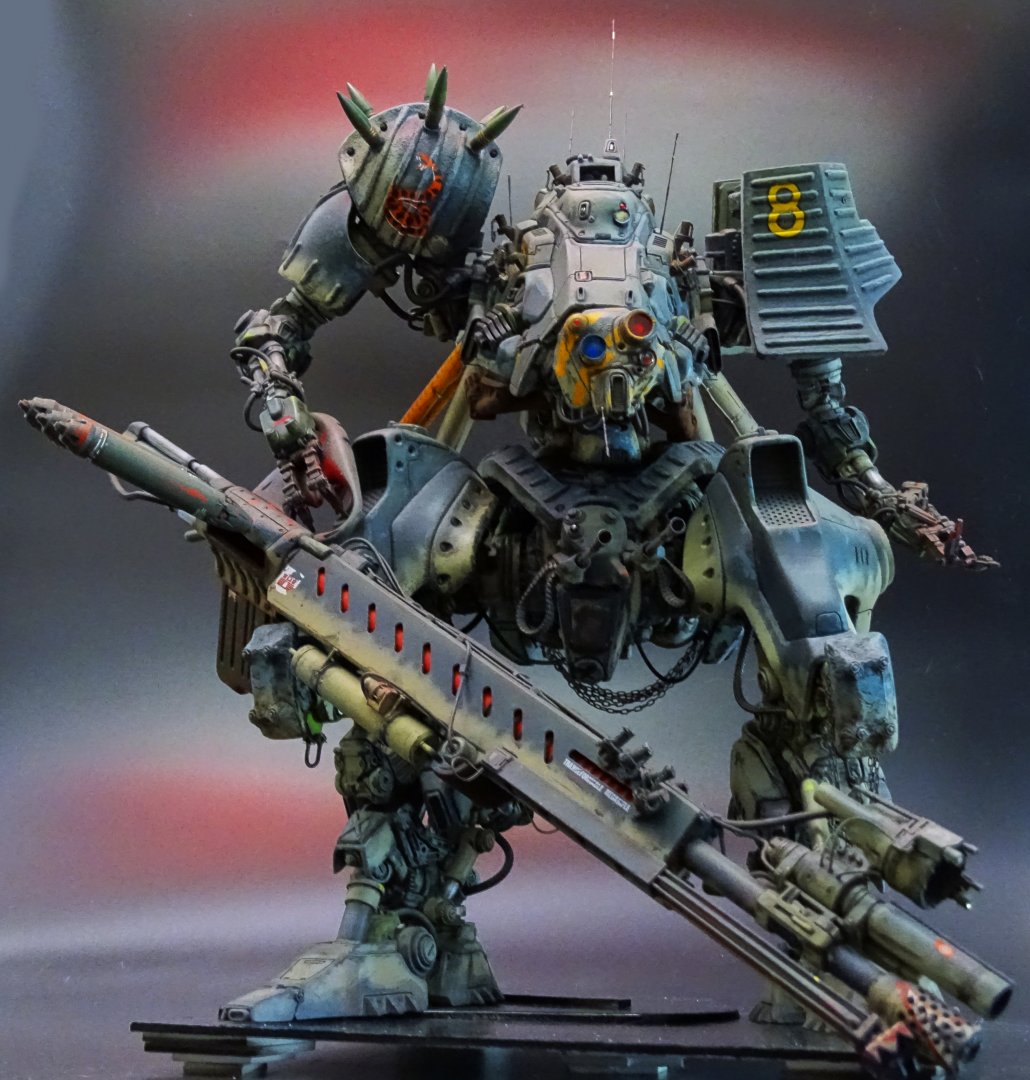
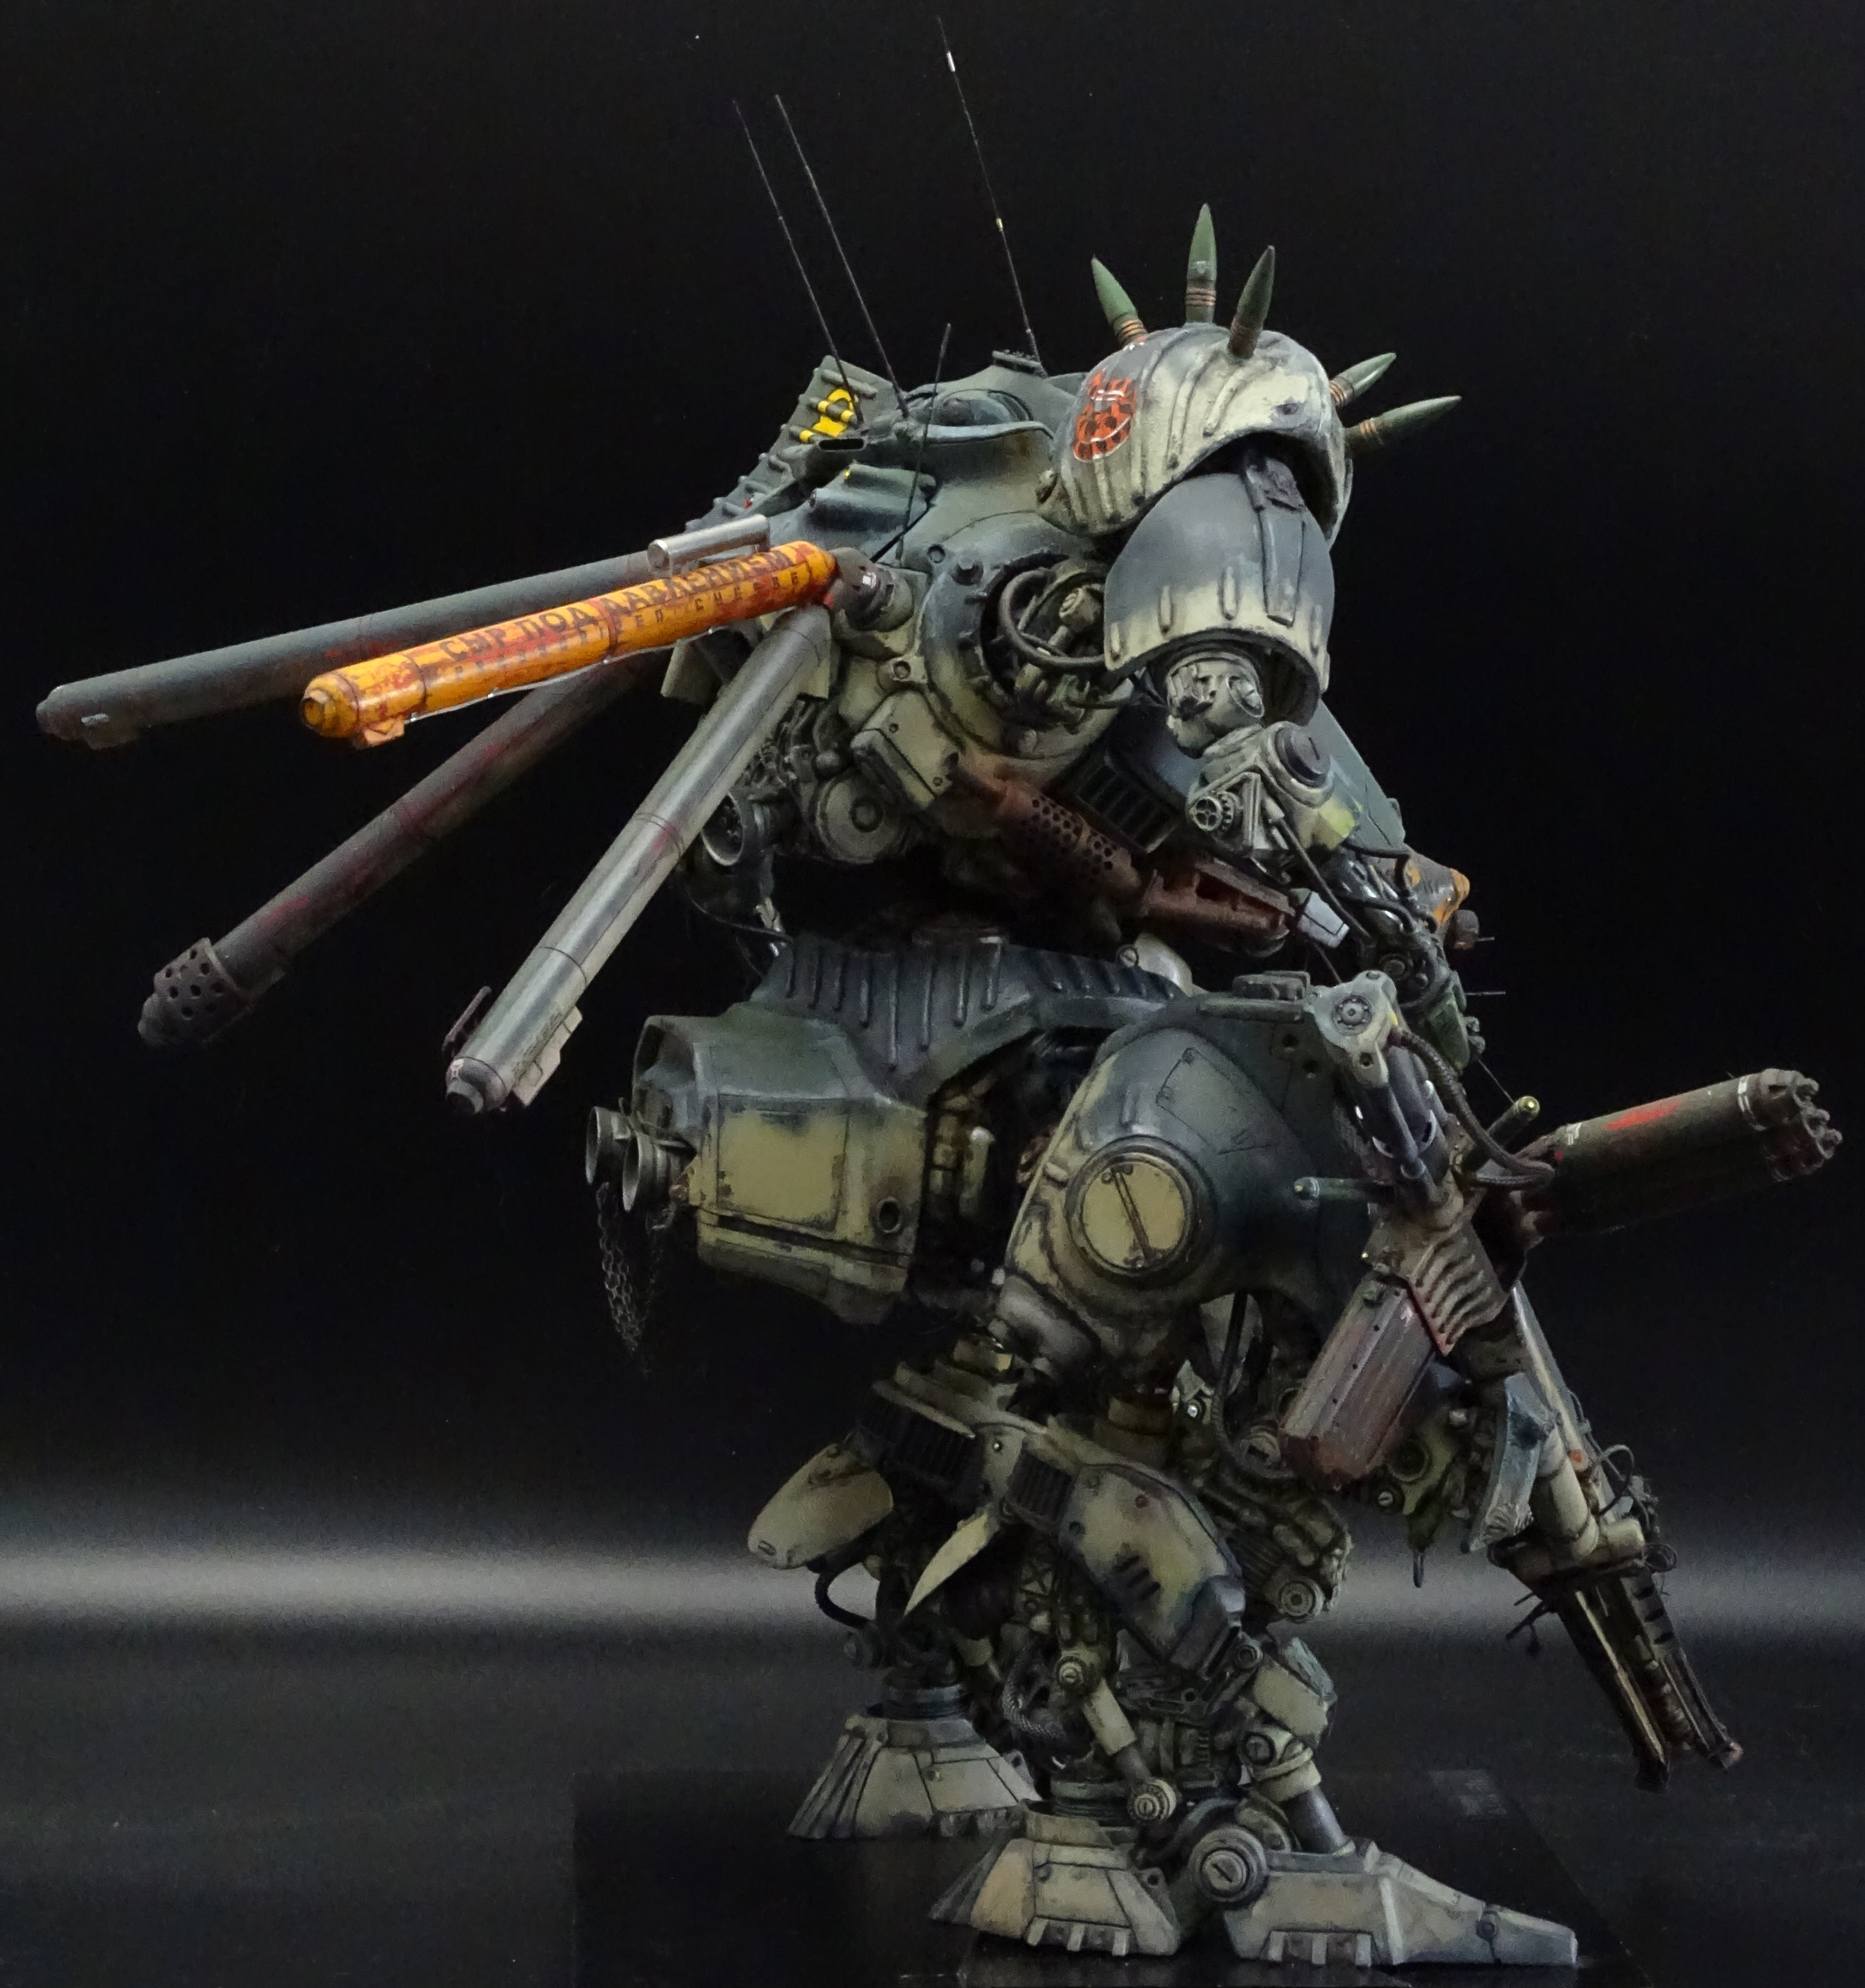
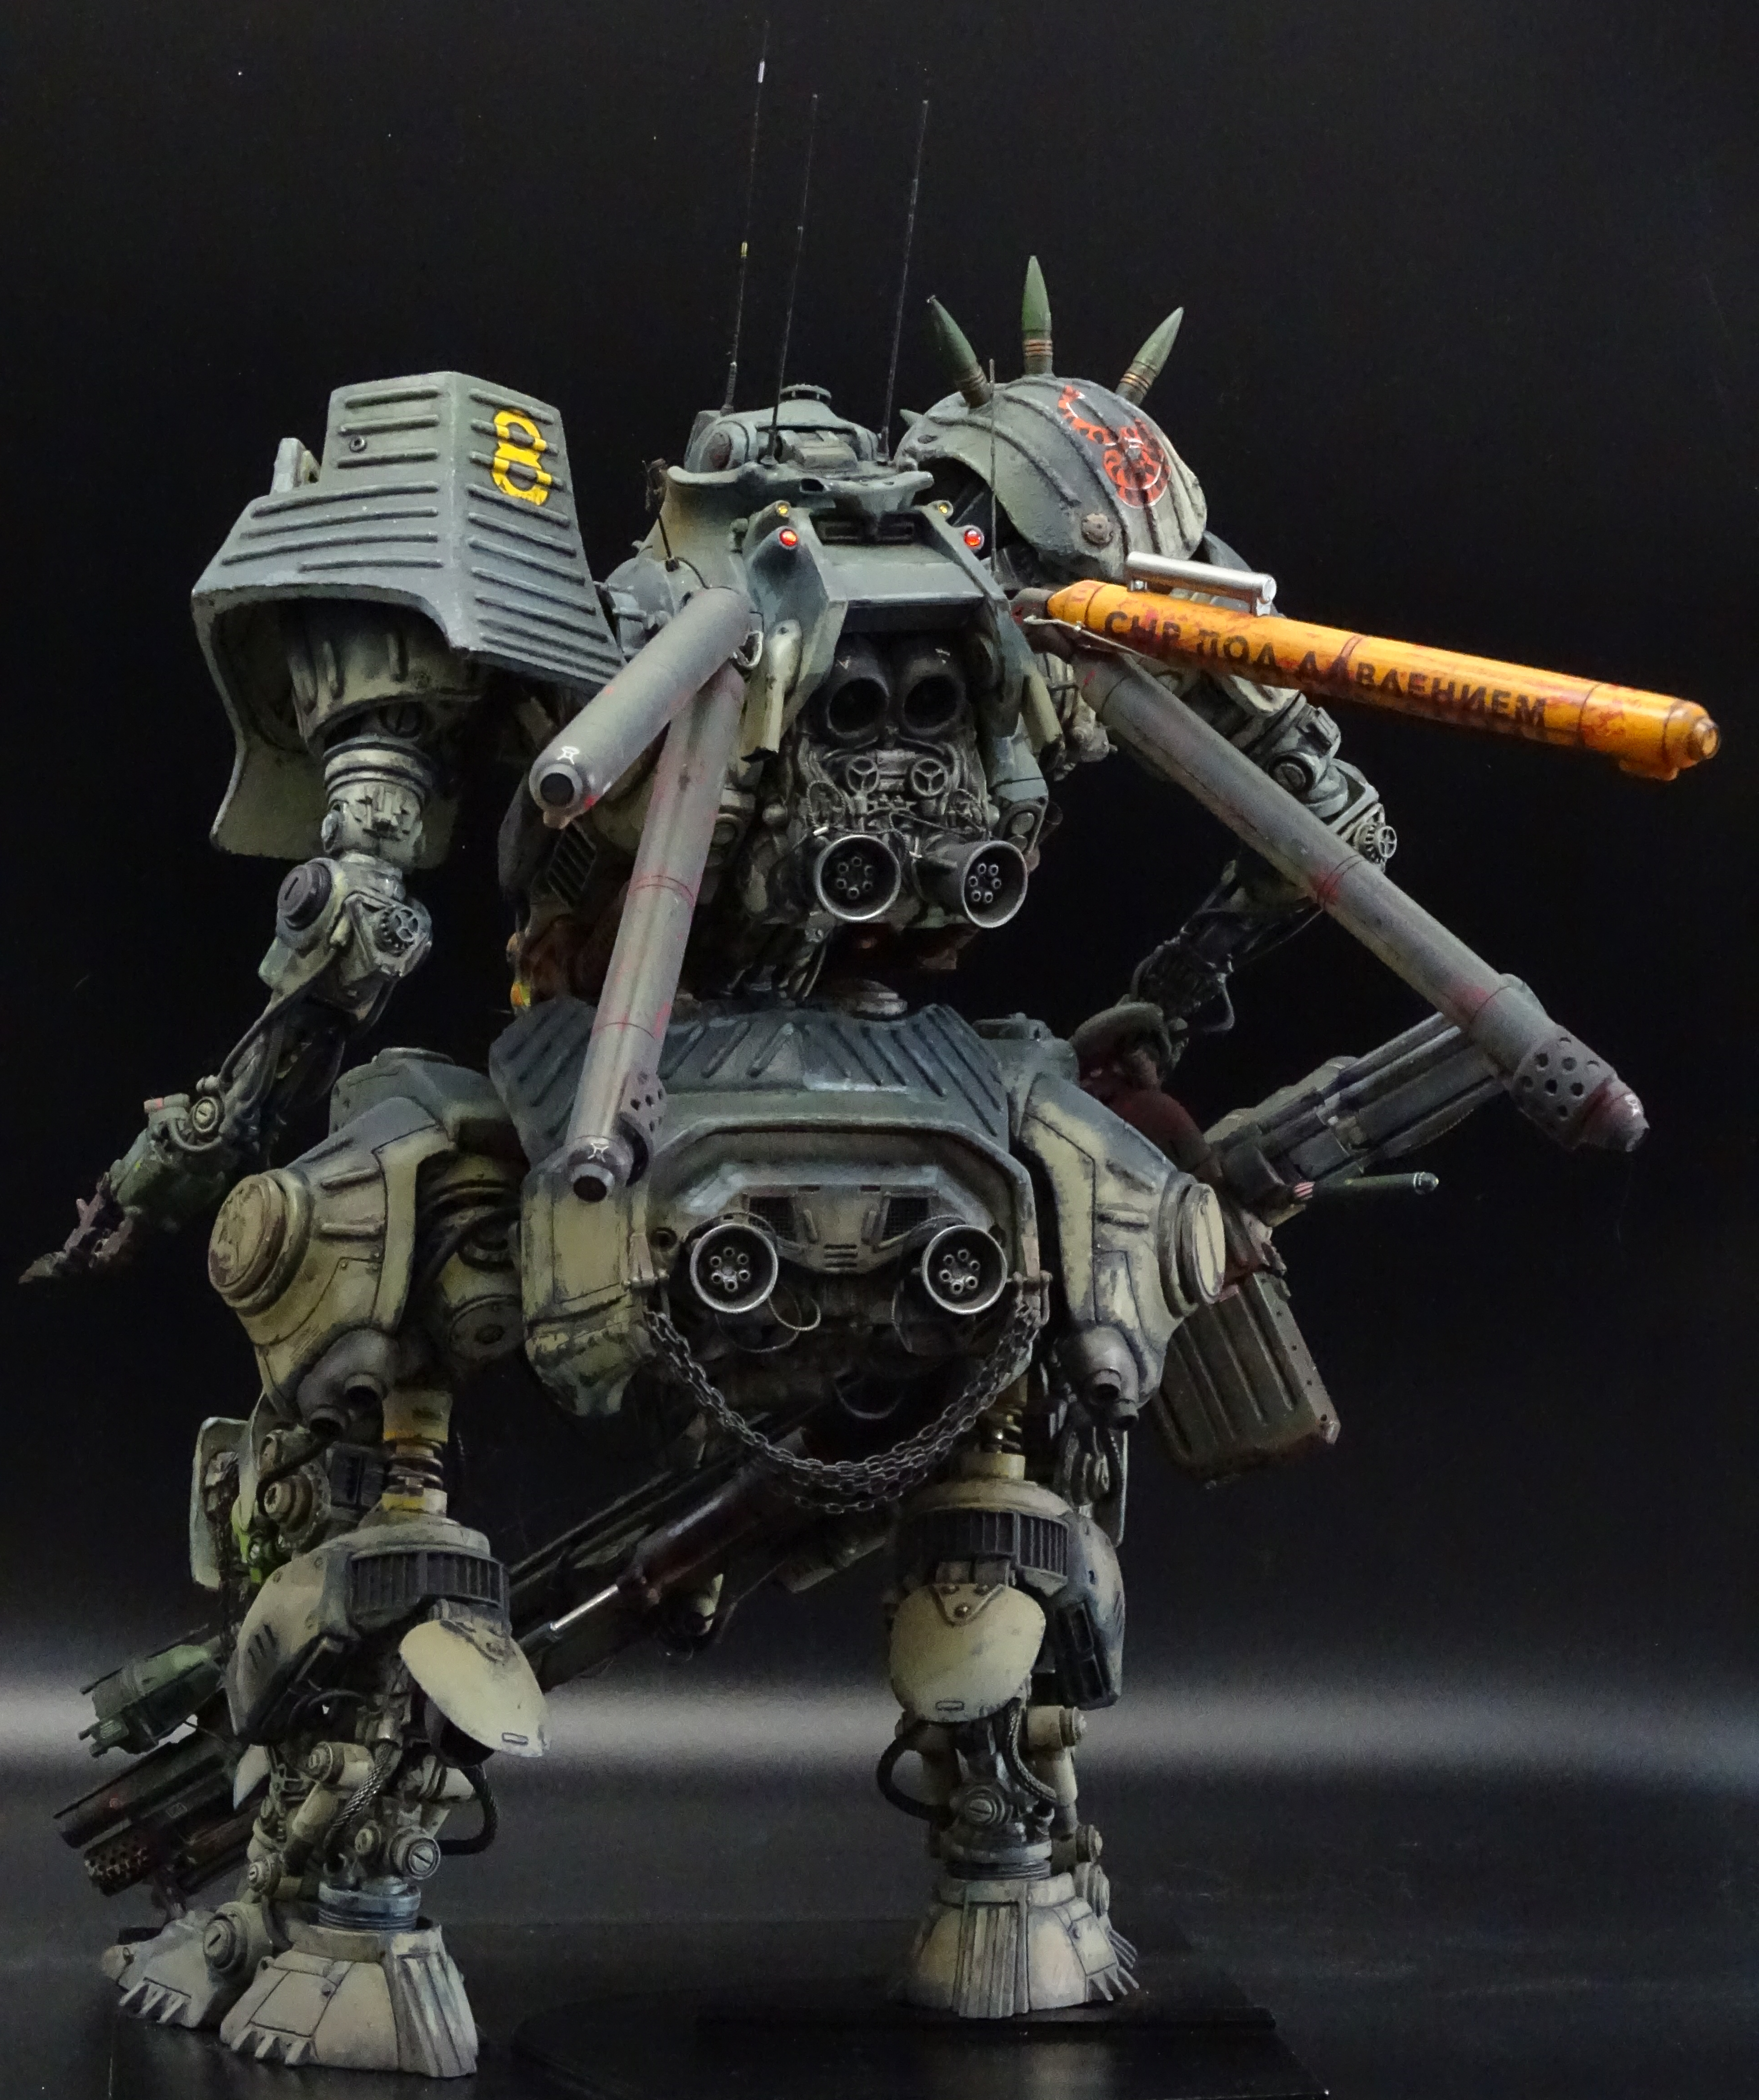
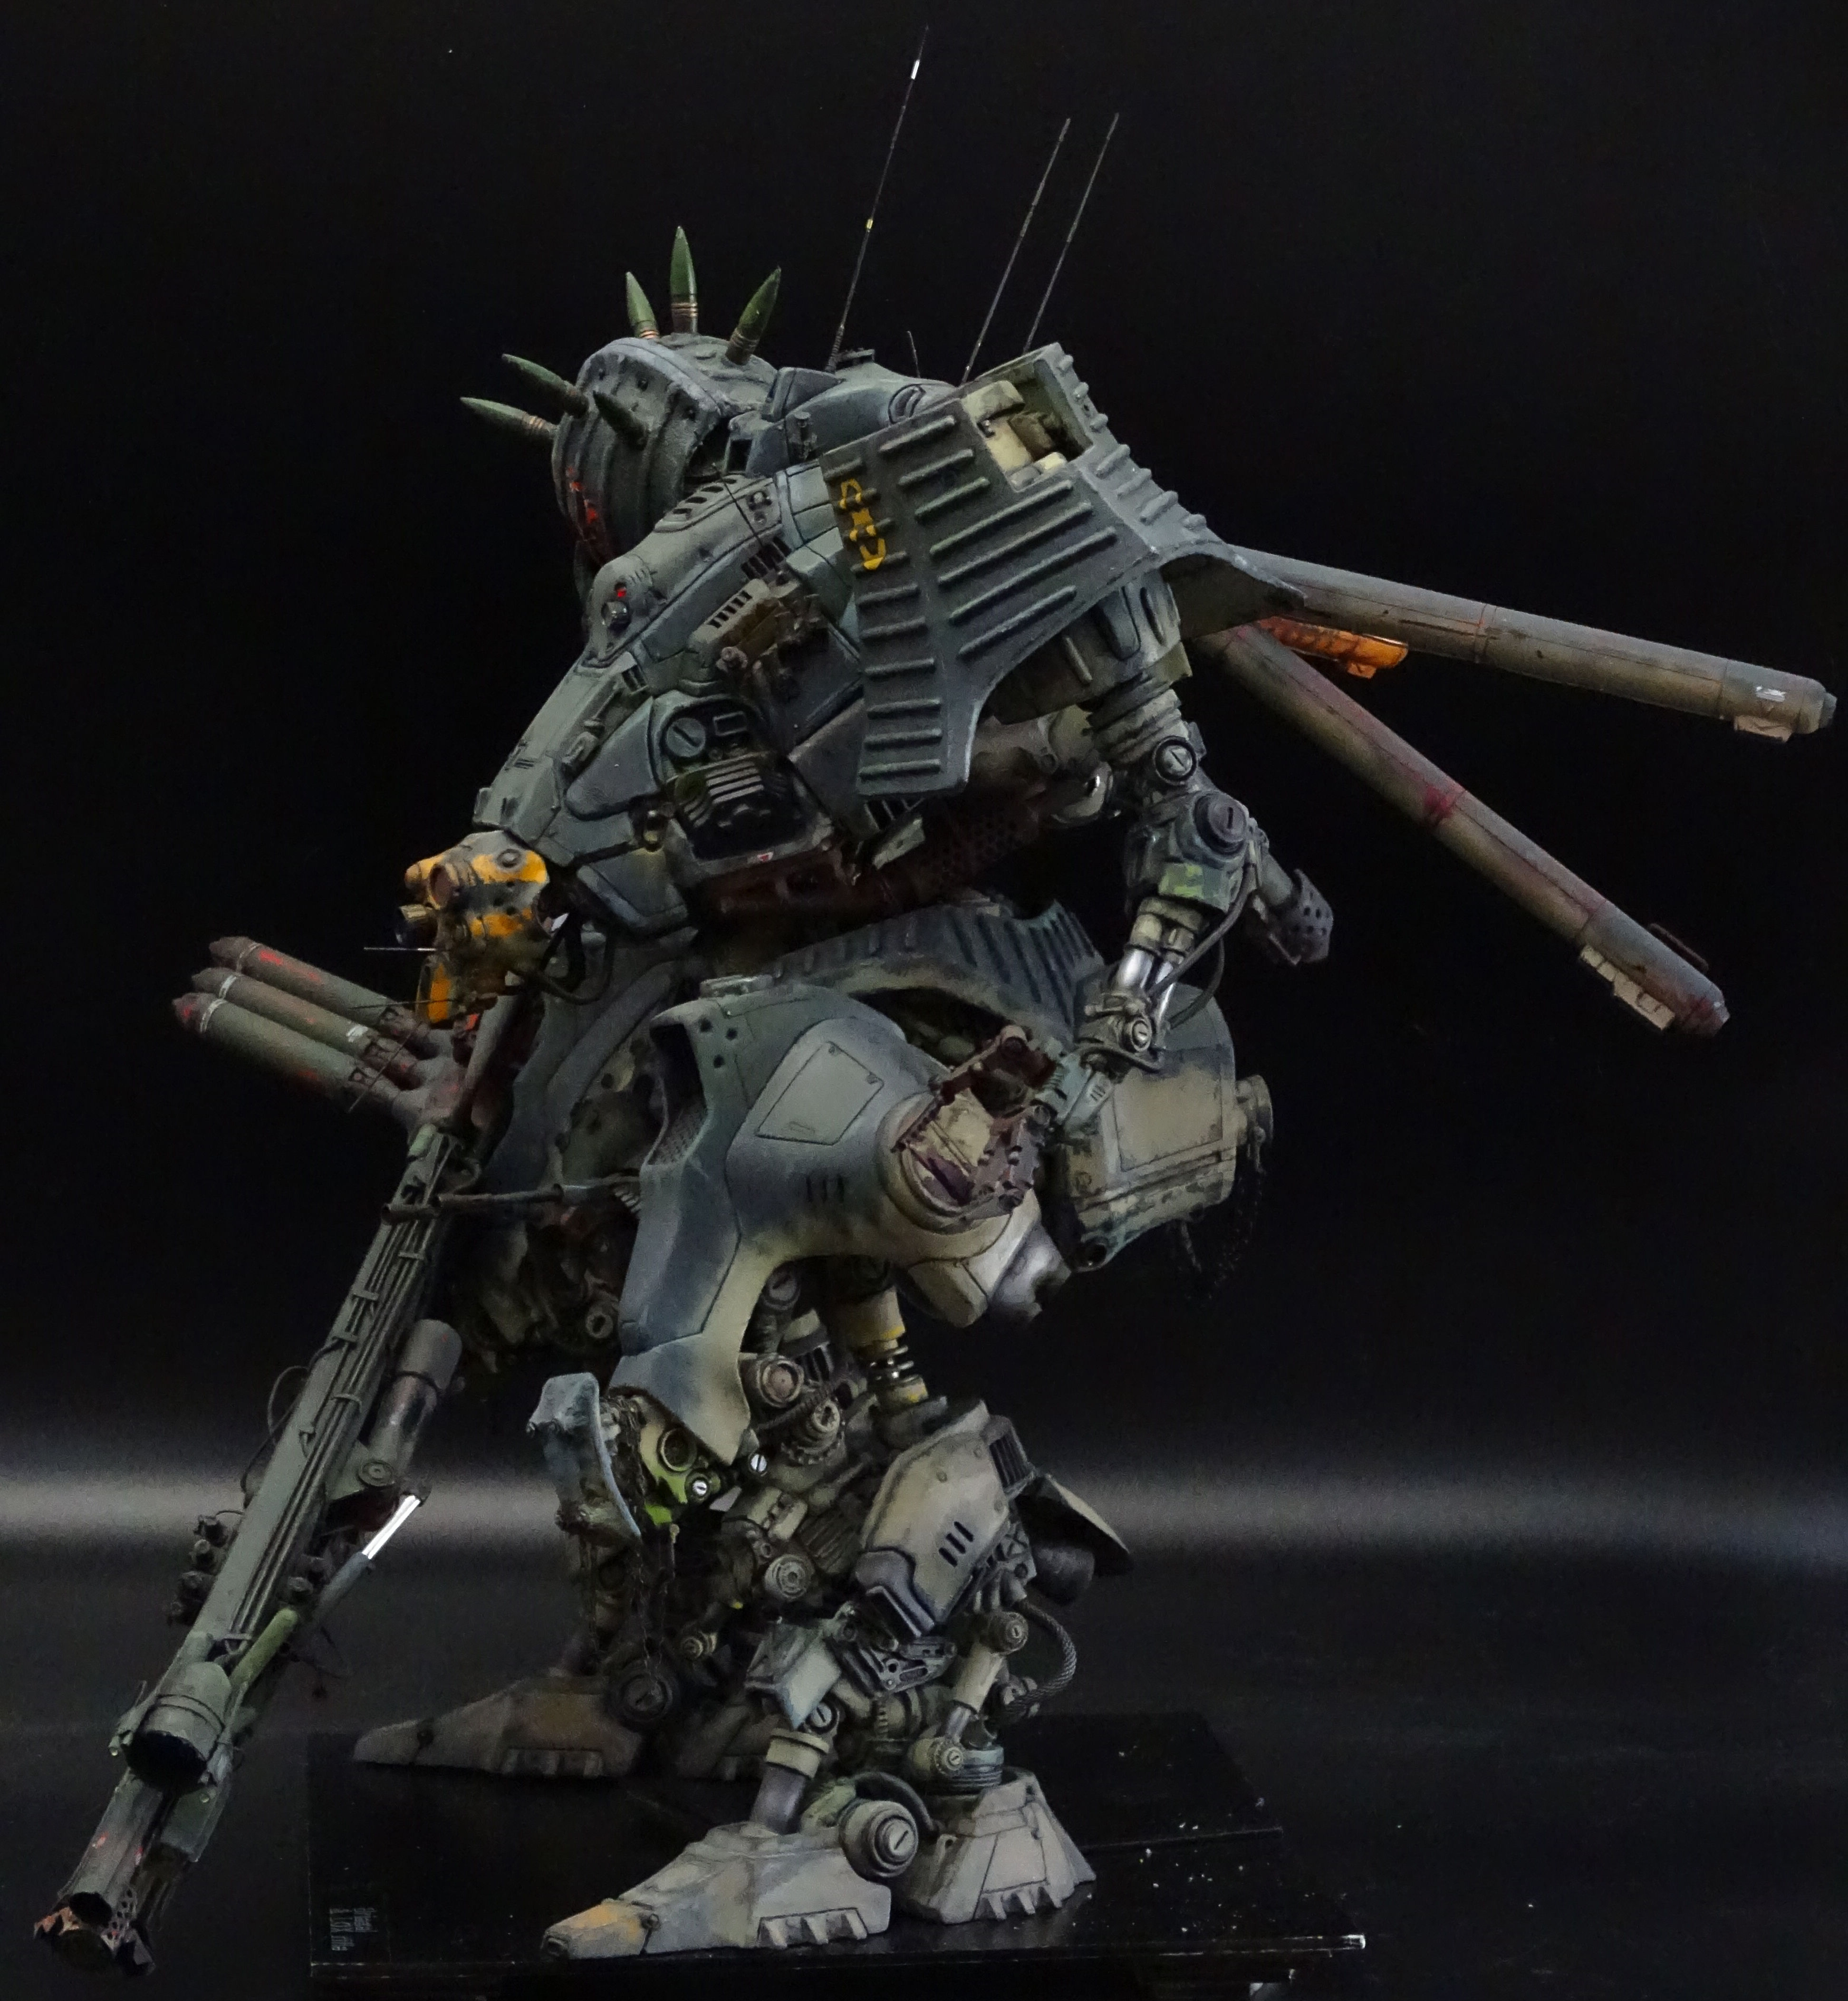
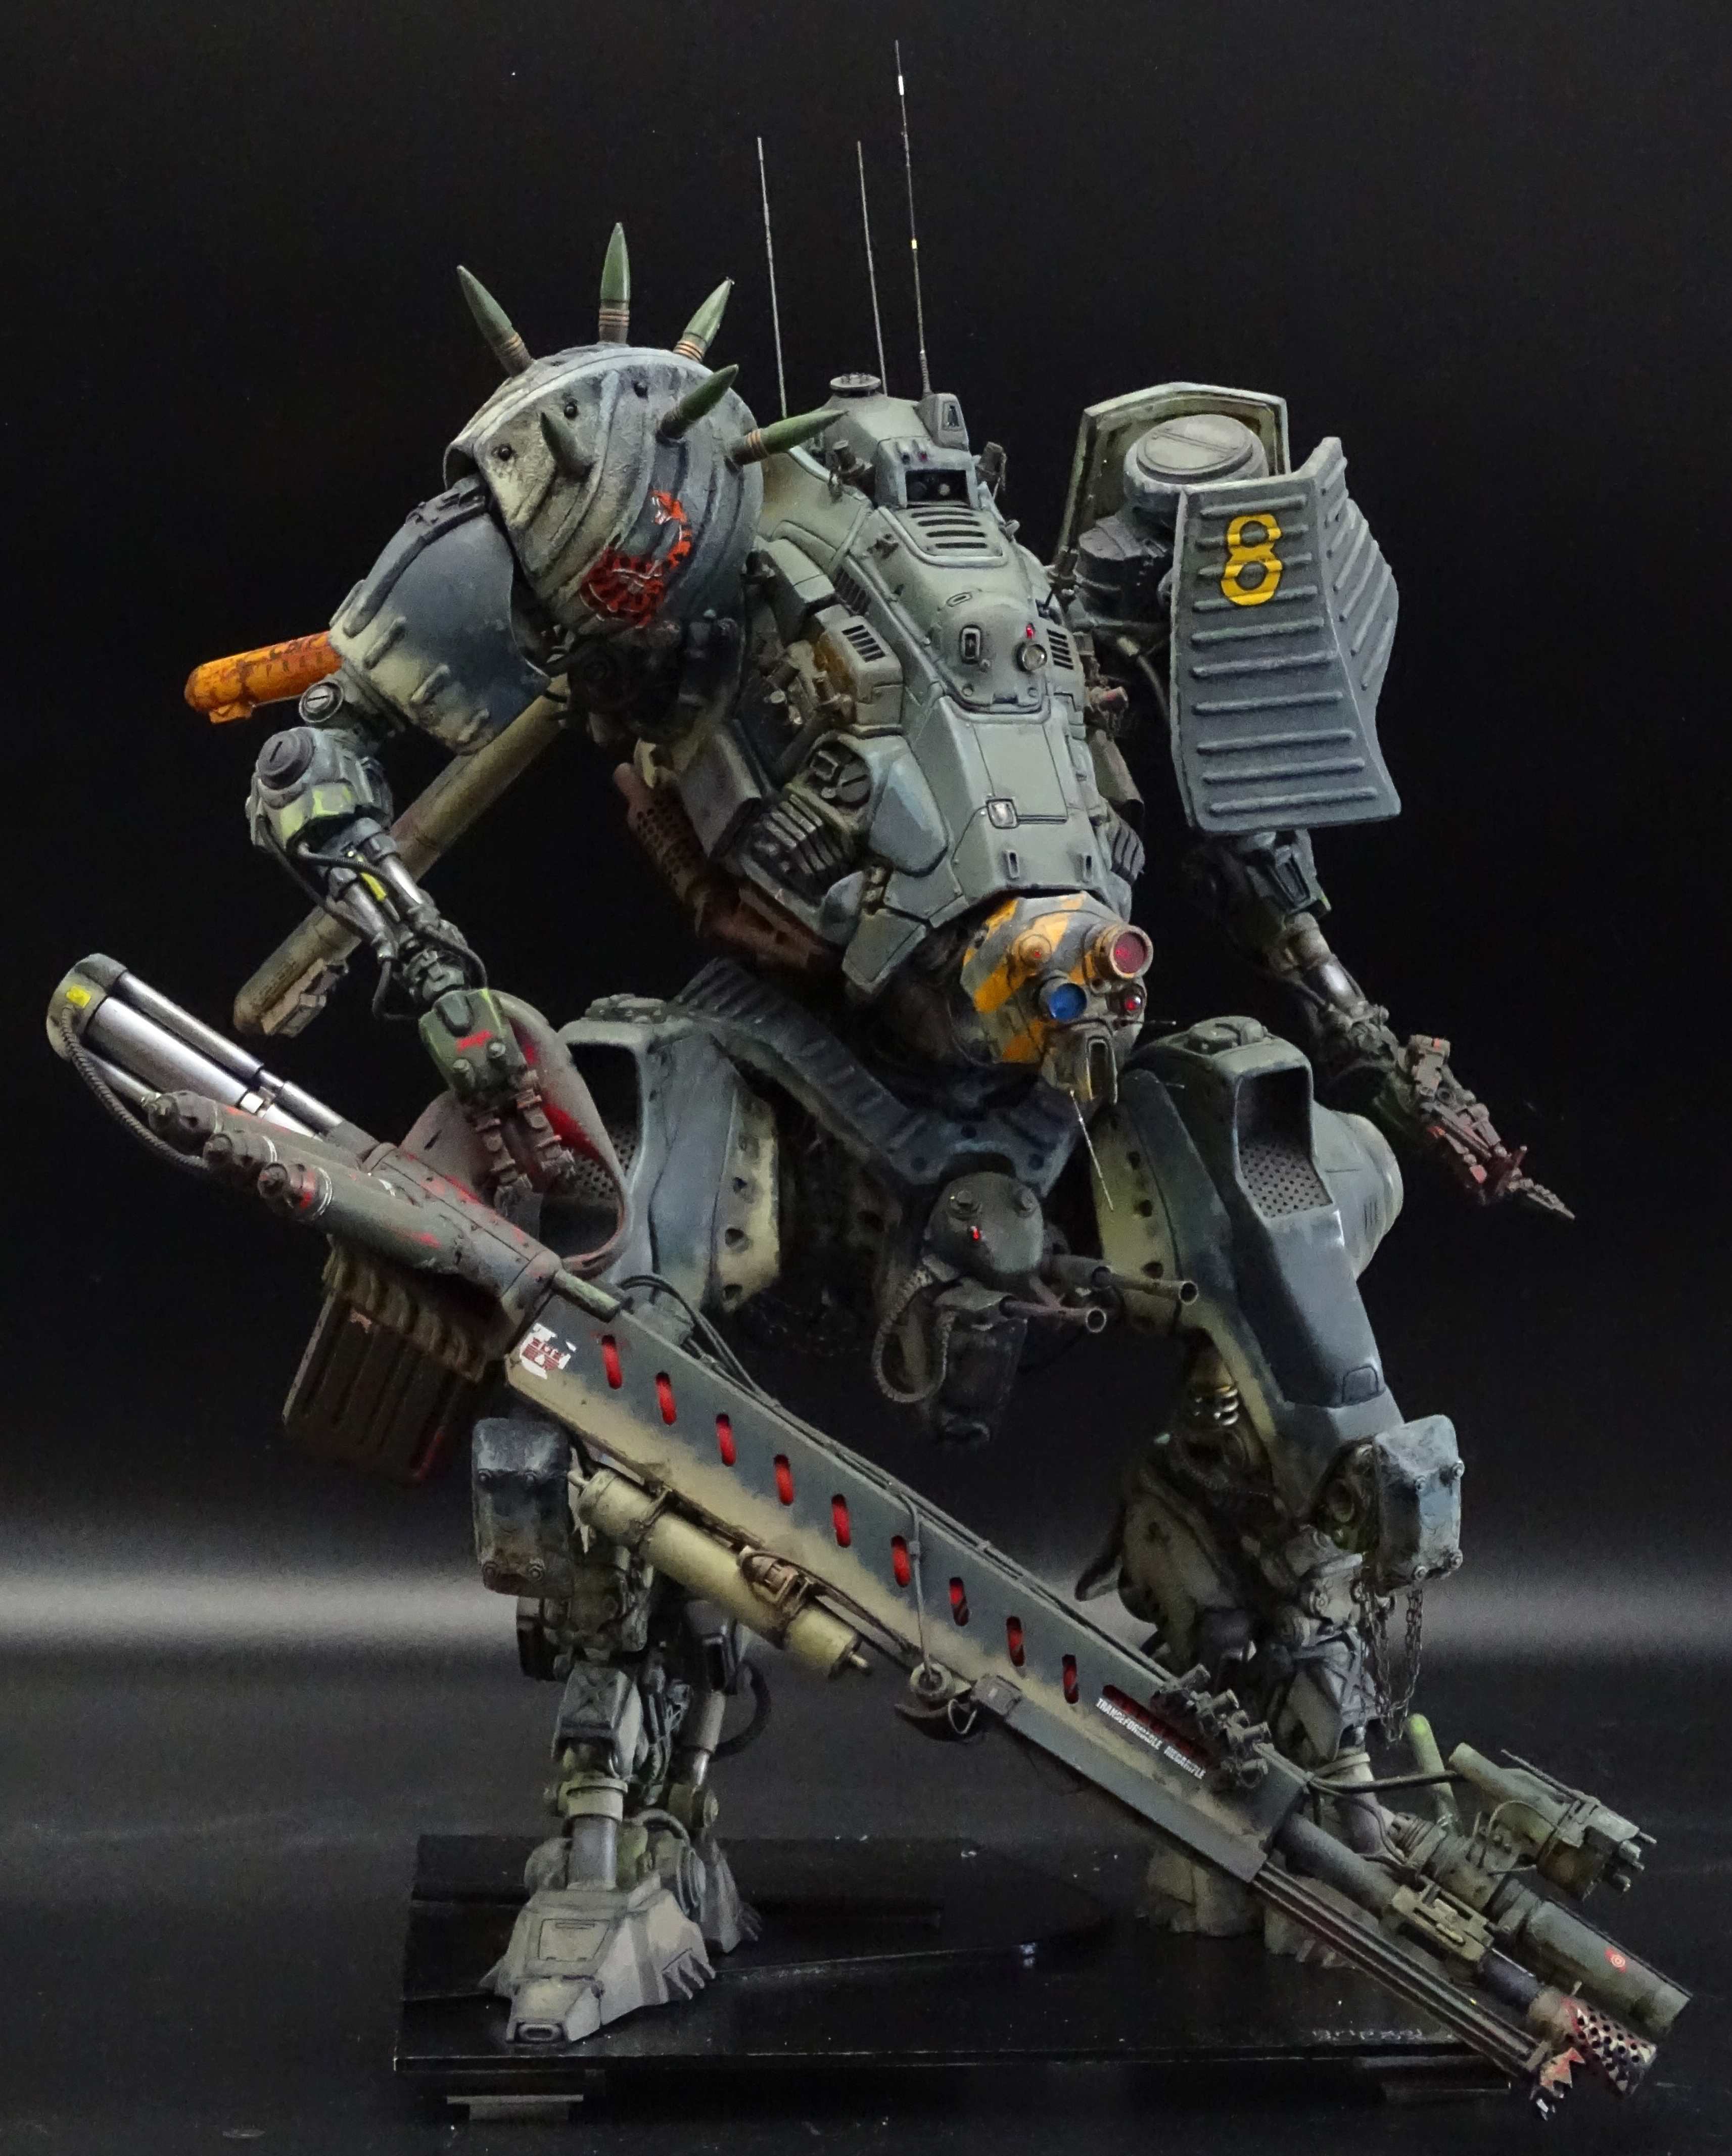
Industria Mechanica's production of Kallamity's Breigel. Scratched a new gun, vents, smoke launchers. tanks, and right shoulder armor.

-
54 minutes ago, DarkArchon3000 said:
Bummer.
 I've been thinking of purchasing some myself but I prefer water sanding to prevent dust.
The putty? You can still wet sand once it's dry.
-
5 minutes ago, NZEOD said:
I'e had a dremel fibre cut off wheel explode and bury a half wheel chunk between my eyes across the bridge of my nose to the bone. Slightly amusing when my safety goggles were in arms reach
Which is why you never have your eye in line with the wheel. Even with a steel cutting blade. Had one too many close calls myself.
-
2 hours ago, arbit said:
Let me introduce my new best friend: the enameled wire stripper. As you guys know who work with this stuff, enameled magnet wire needs to be stripped. It can become really tedious when you have 40 or 50 wires in a project that you have to file down from both ends for soldering. I actually have several projects I never finished because I hate this step so much. But this stripper is fantastic. It is a bit pricey, but I can confirm that with a bit of practice, you can have dozens of wires prepped in a matter of seconds. Works for 0.3mm wires and above.
So like this one? https://www.ebay.com/i/331610469604?chn=ps
-
8 hours ago, MechTech said:
Thanks guys!
Herve, your comic based paint scheme came out great! You could slice it in half down the center and display it in the comic book it matches so well!
CrossAir, your Gunhead model looks nice and clean! I never saw the series, but the ads I saw drove me nuts because they were so foggy and you couldn't see the mecha very well.
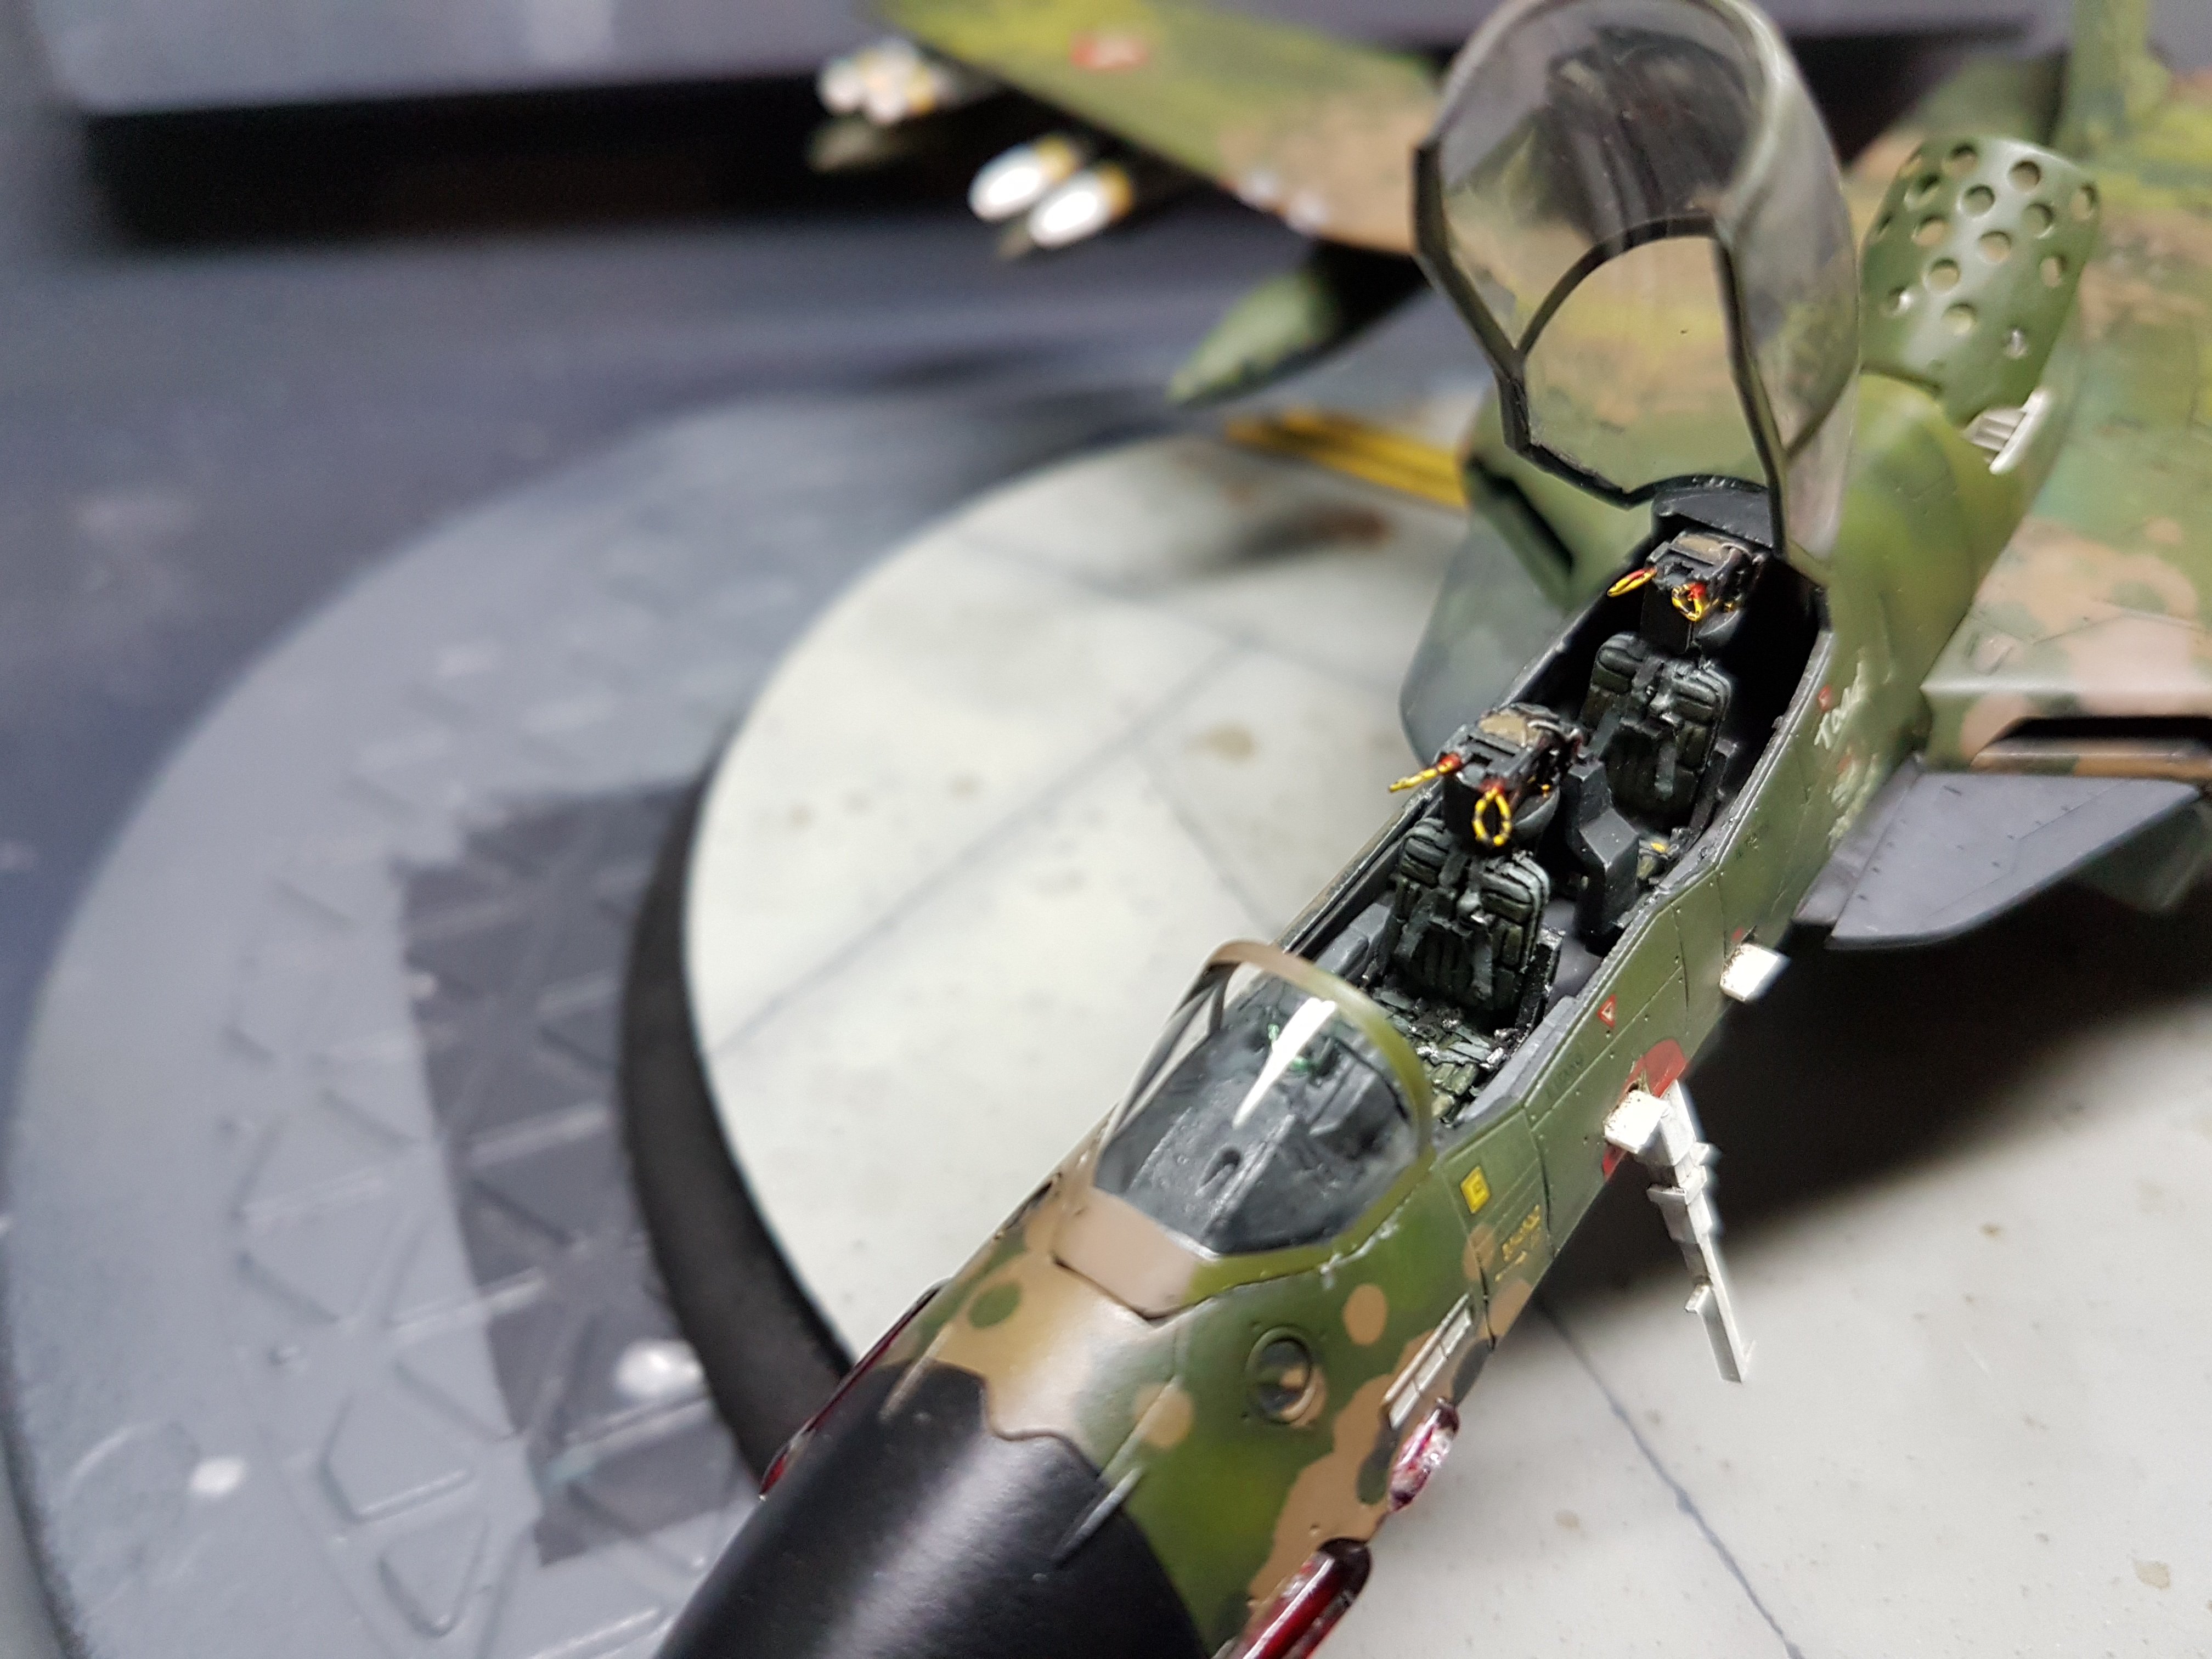
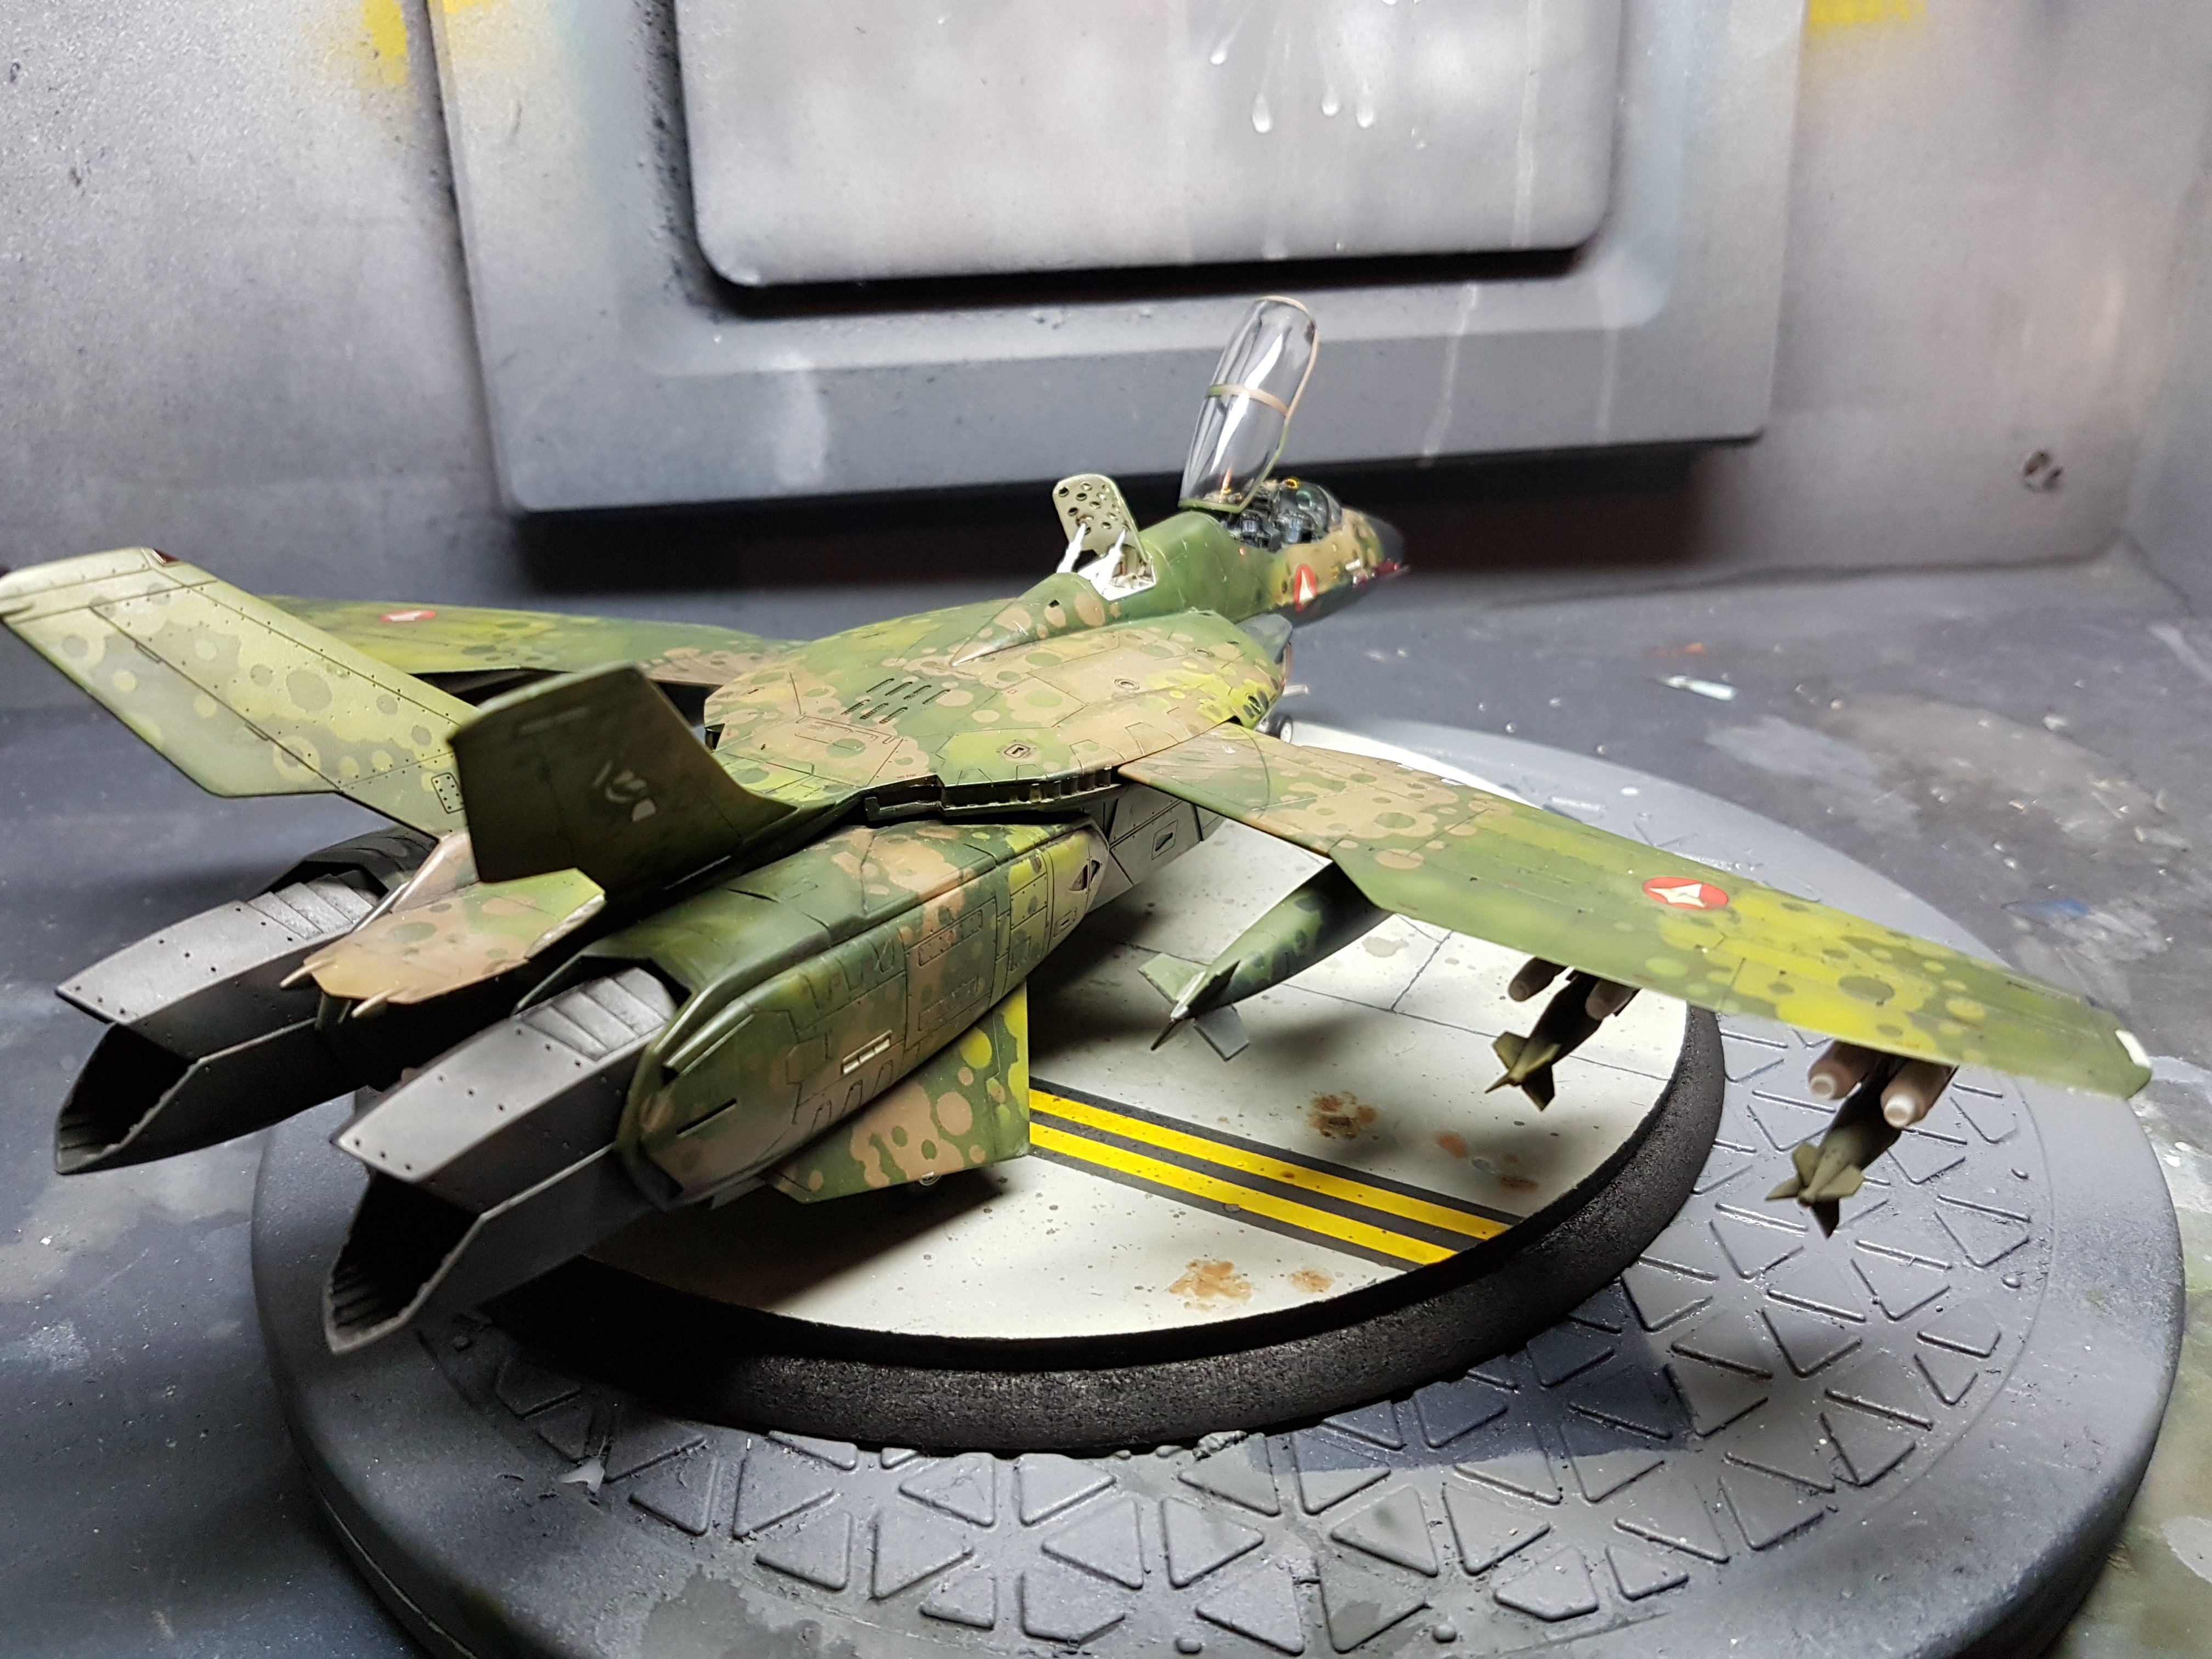
Nearly done with construction. I got the seems clean and the color is good, so matching paint will be used to look like dirt and cover the seems without going through the whole process of priming and painting only for it to get scratched up. One missile pod will be built to open and display the ordnance since they include it. This kit is a LOT of fun and not too bad fit wise. The toughest part is building the tiny tri-pod to put the range finders on that goes with the troops! - MT

And beware the decals. The ones with mine @ least were the thickest, most non-conforming decals I have ever dealt with. Even Solvaset didn't do much to them. Love the new barrels.
-
Upscale it to 1/350 and use it as a frame for lighting & detailing...
-
1 hour ago, MechTech said:
I saw those colors and said "Matchbox!" Hopefully the fit isn't too bad on that kit. Some of Matchbox's colored moldings were great when I was a kid, and then others were a pain because they ddin't match the color scheme.
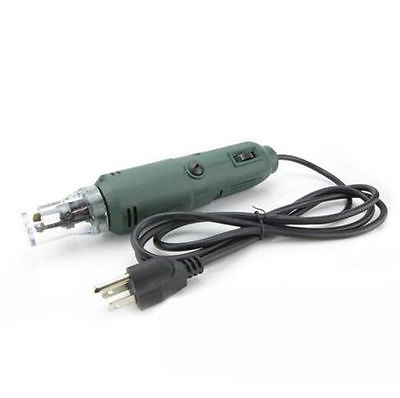
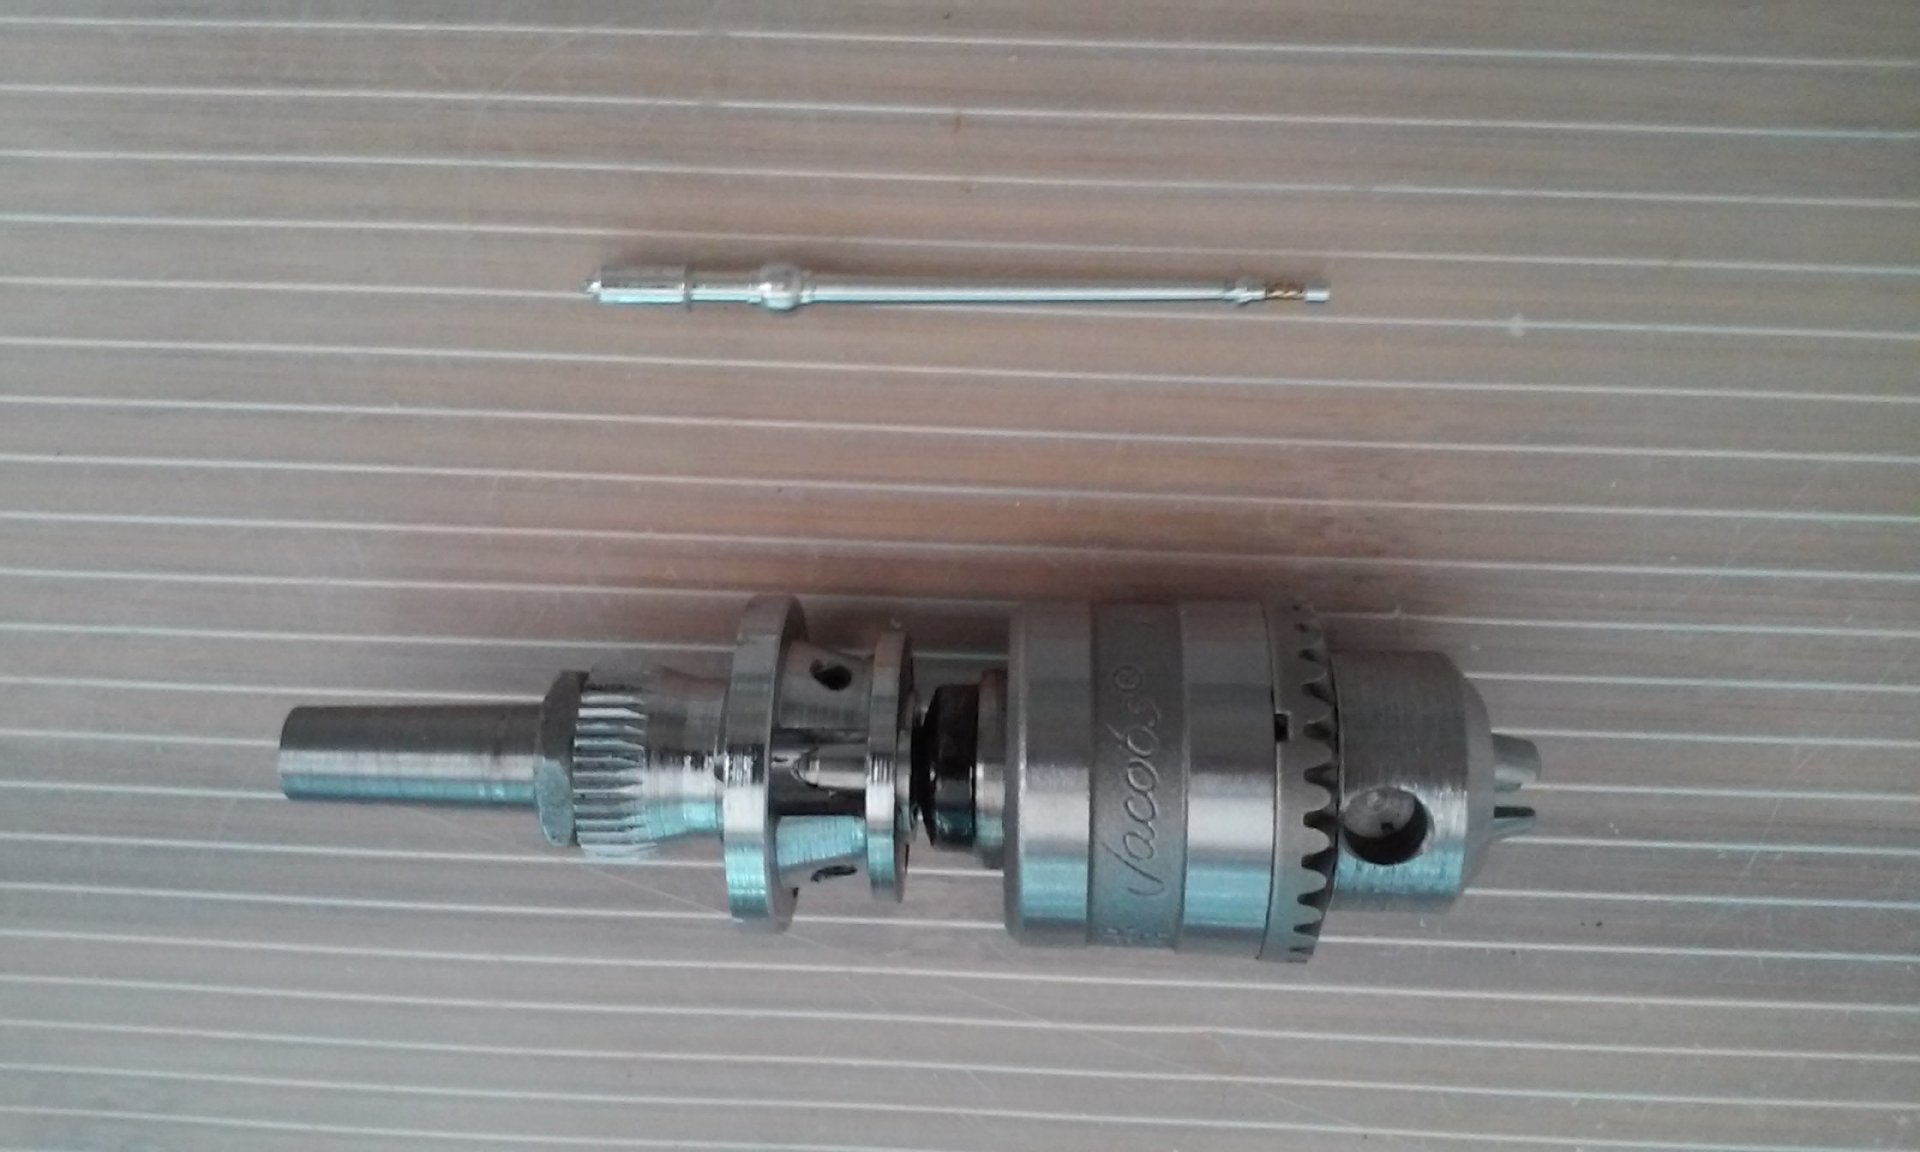
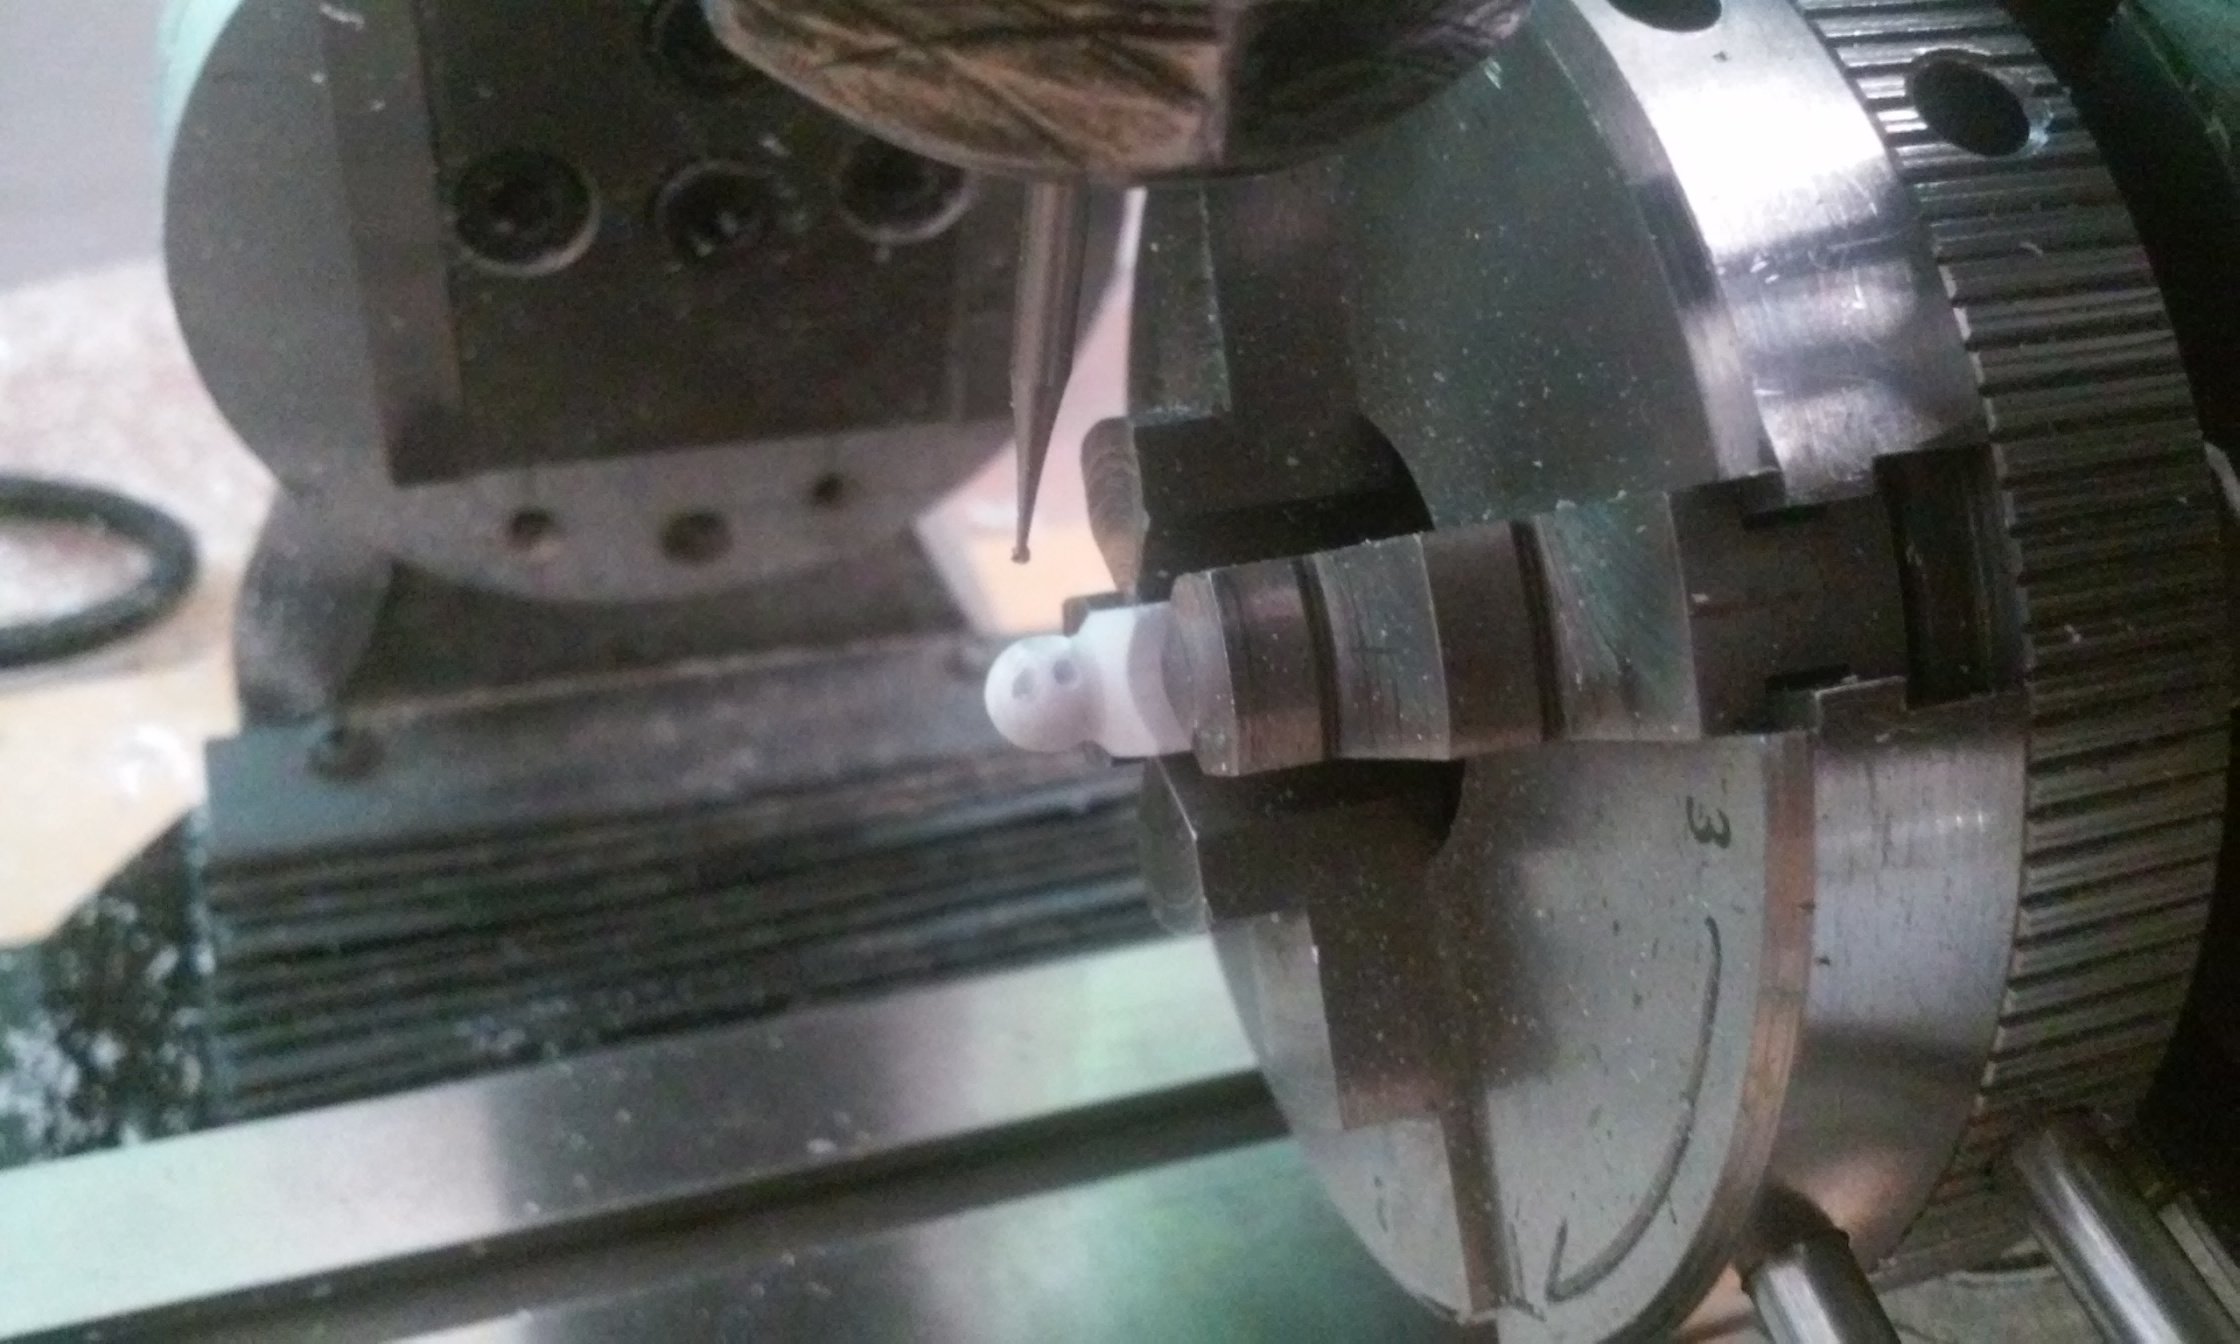
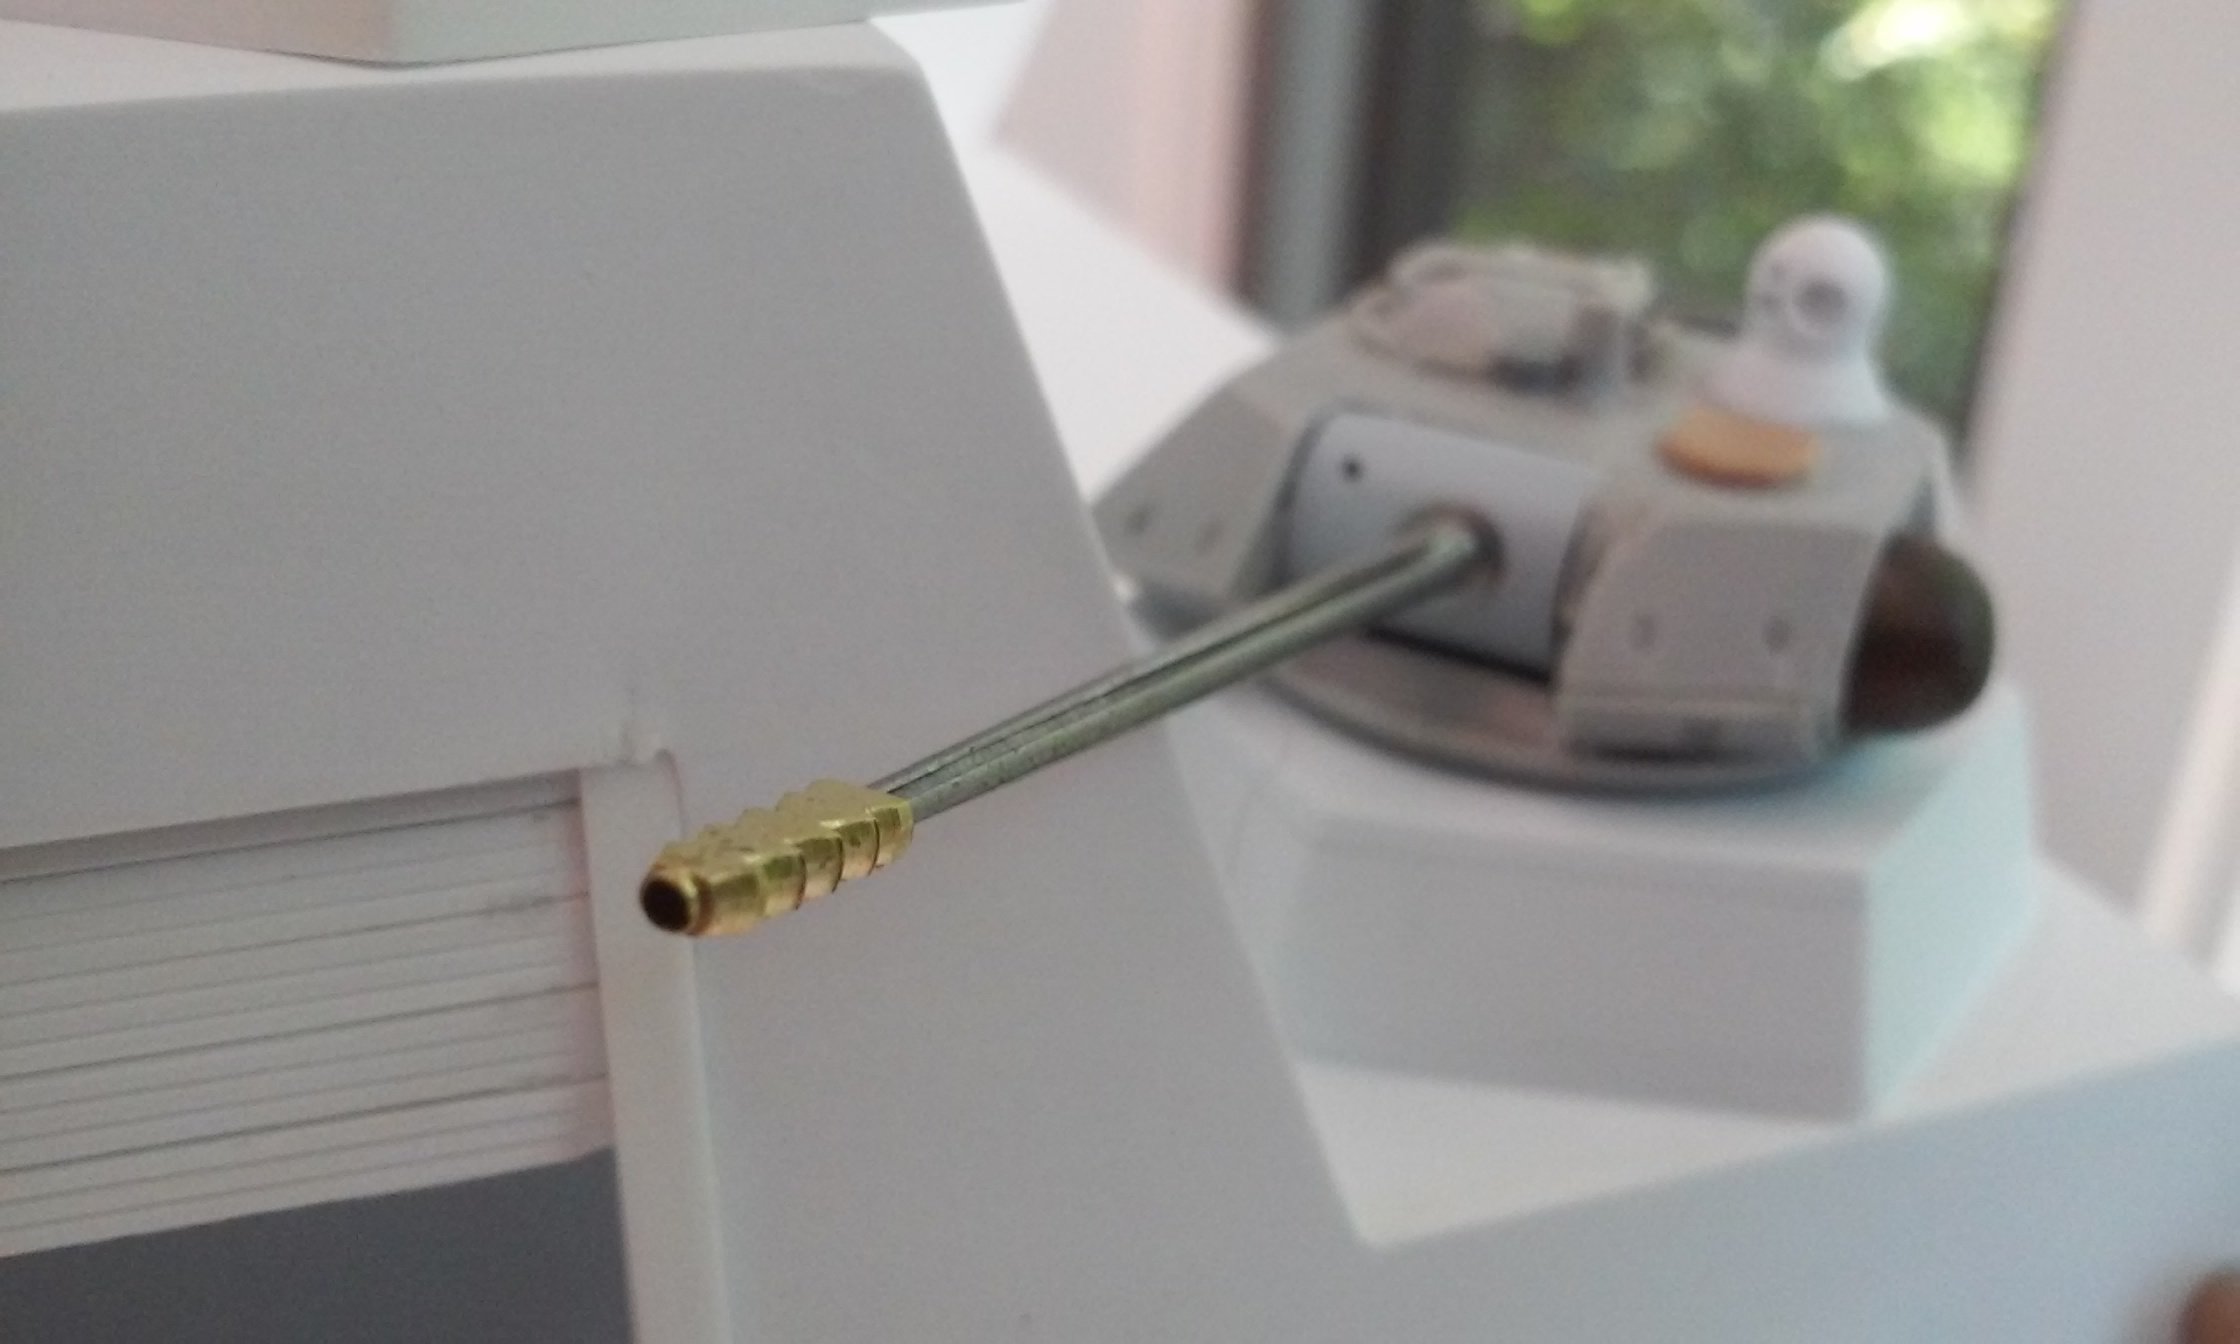
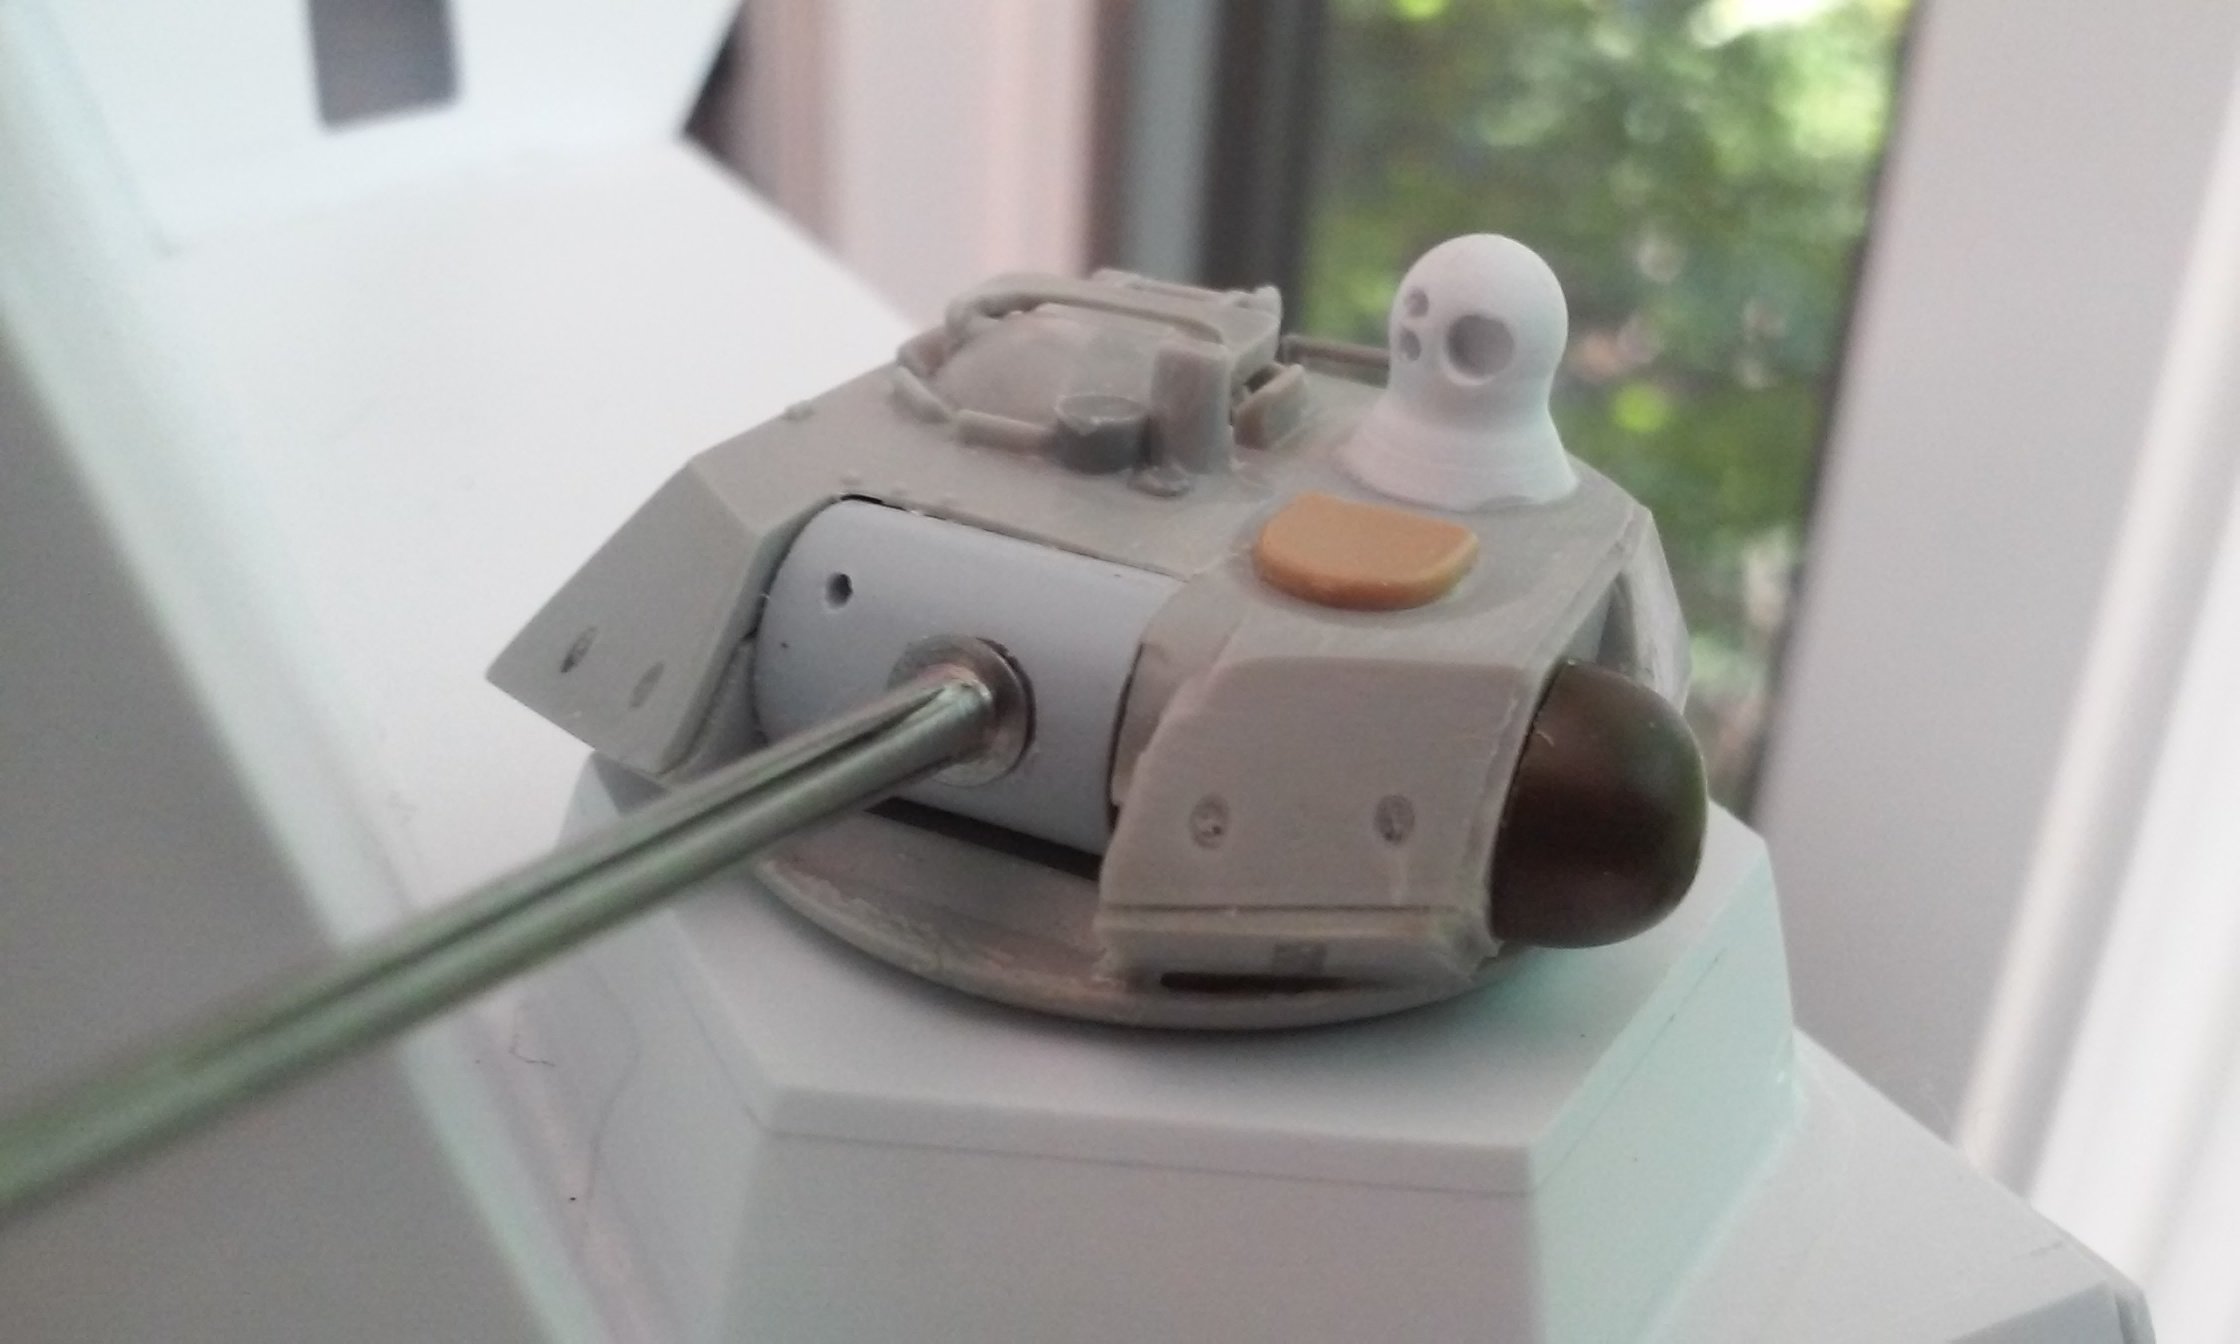
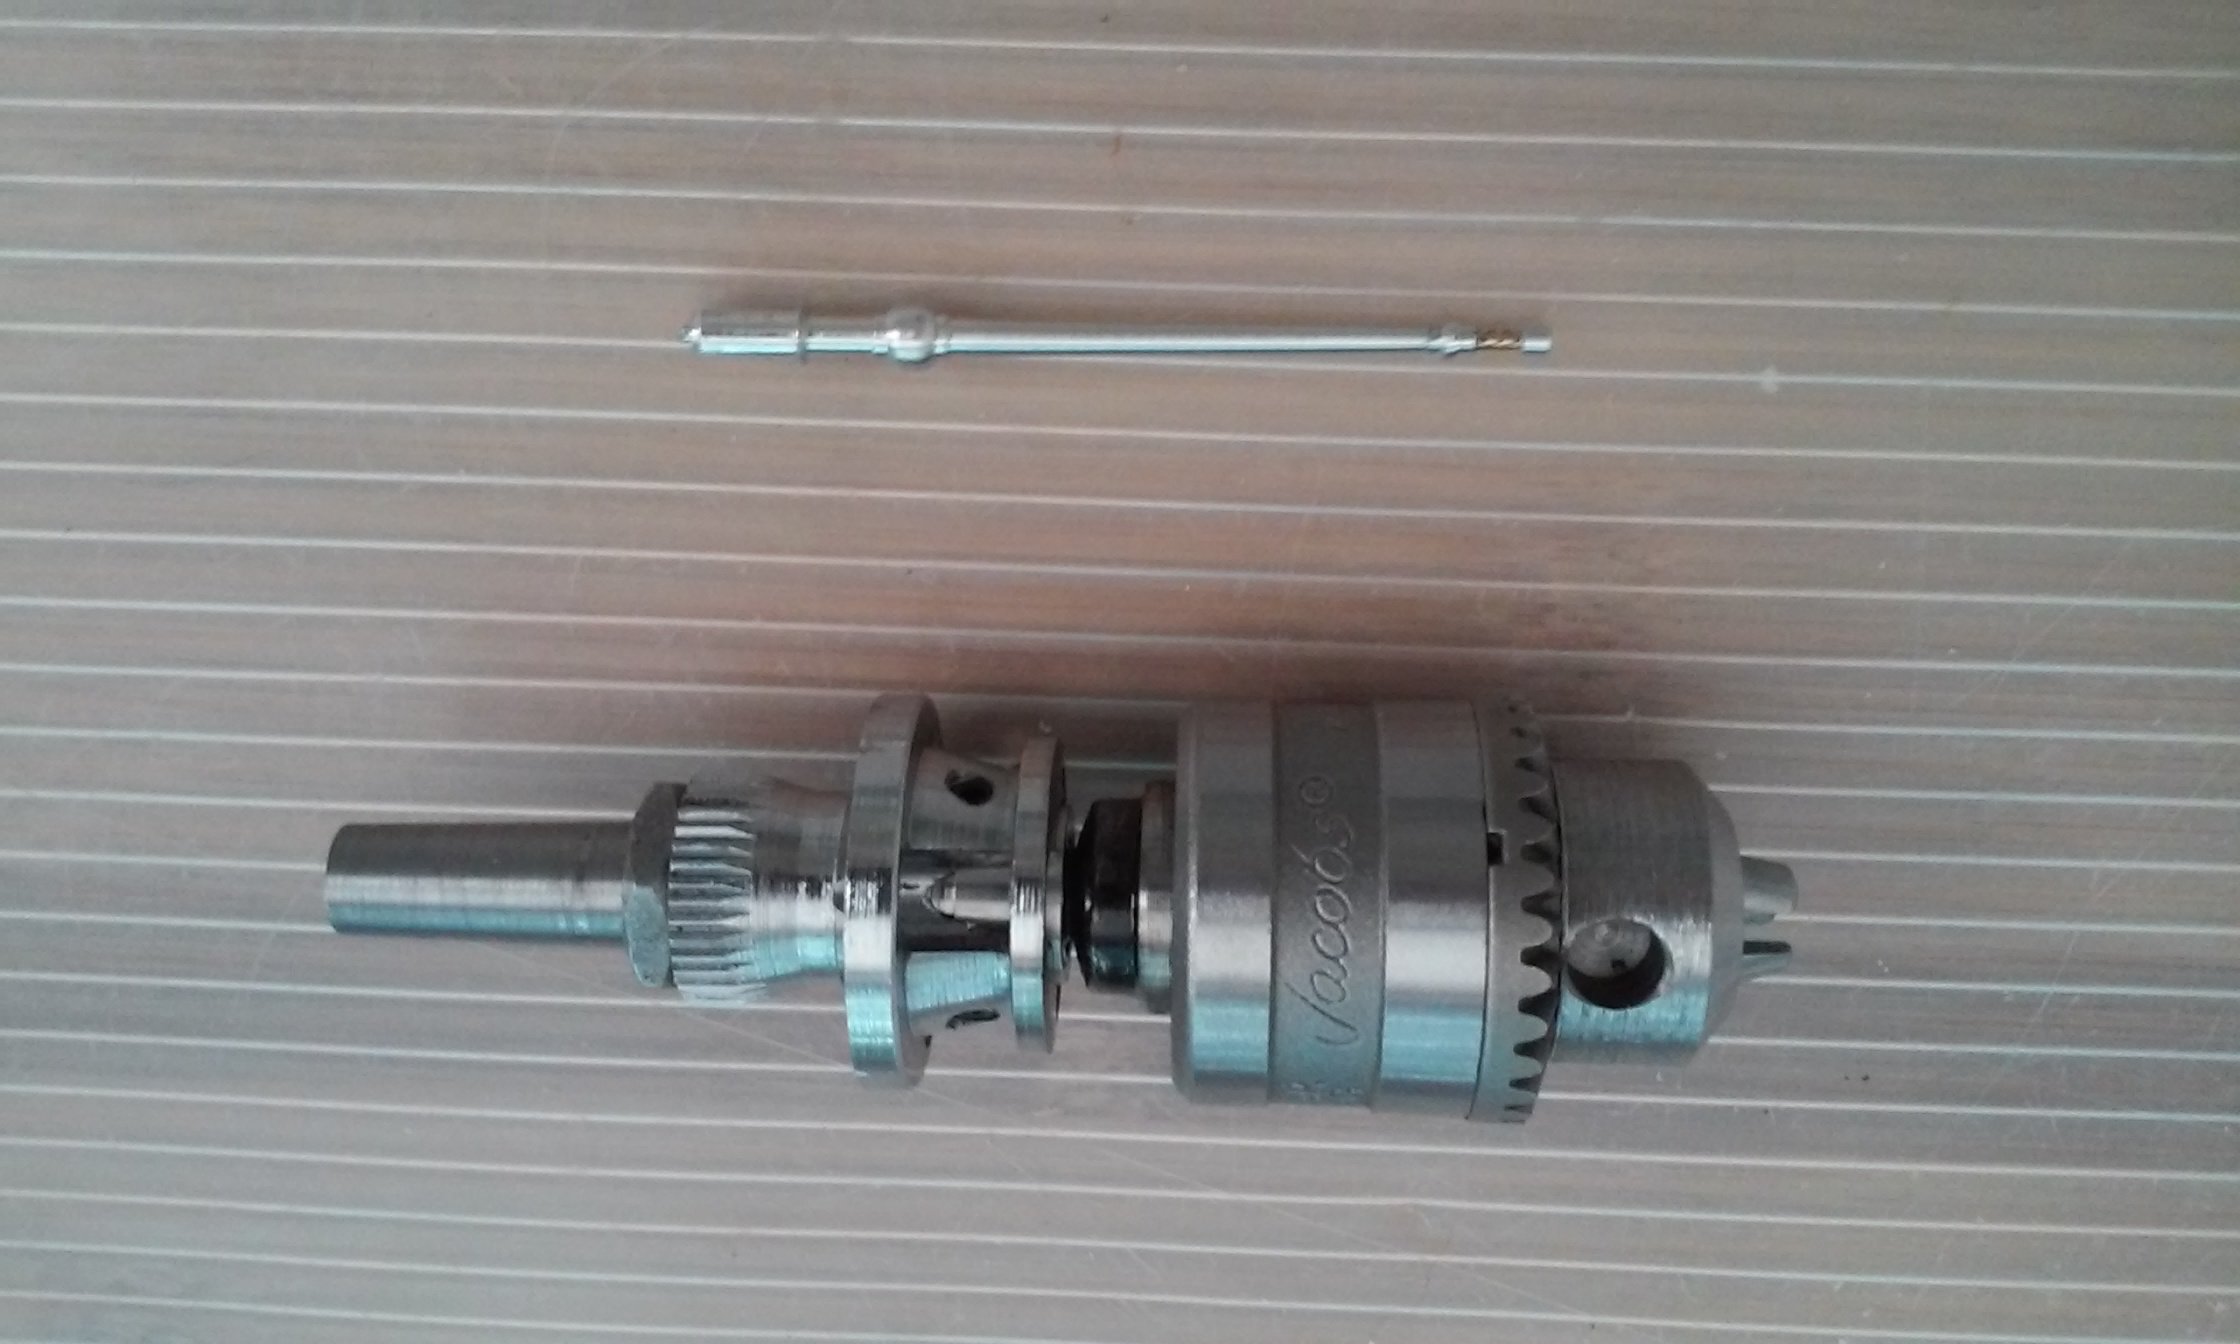
Things have been slow going back on my ship. I create one thing and then somehow screw it up. I need to lathe small gun barrels for models so I mounted a drill chuck into bearings for the lathe tail stock. Now thin work can be supported without warping easily. I have to remake this tool too because it has some wobble in it. Got a nice action shot of sparks flying.
Then I machined the gun barrel (Oto Melara 76mm) in 1/72nd scale. The turret mount was machined from solid glued together styrene blocks and the rest was from styrene sheet. They were done on a rotary table on a mill. That tool has made a lot of cool things possible. Need to take more pictures after the glue sets and they are mounted to the turret.- MT


It's the repeating of parts that always kills me. Love machining, hate machining the same part multiple times.
-
On 8/12/2017 at 1:44 AM, big F said:
I used my one of these the other night it's supprising how many flaws that it shows up, in a good way though. LED light is so much better for modelling than other light.
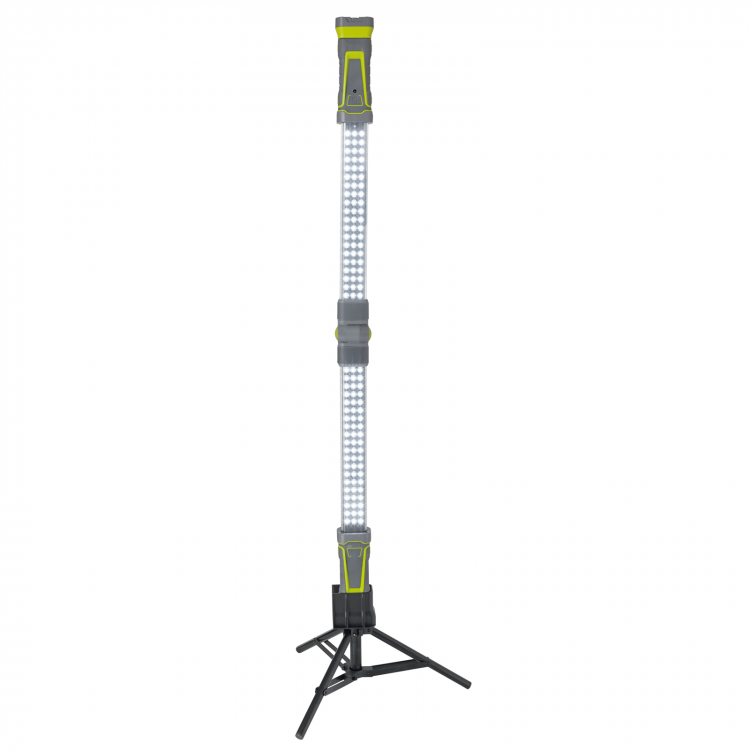
i think the only time it will let you down is colour matching stuff and subtle shading as the intensity washes out the colour, and the slight blue light you get from hyper white LEDs messes with colour. But for building and filling etc it's tha bomb.
I've been installing these in my work area. https://www.amazon.com/gp/product/B017SN55H4/ref=oh_aui_detailpage_o03_s00?ie=UTF8&psc=1
-
Mr. Surfacer is best applied in thin coats. Thin layers dry faster which means you can follow up with a second (or third) coat w/o as much wait. Or, if you're like me, glob on a thicker coat before bed and let it cure overnight.
-
I use Mr. Surfacer 500 for such shallow flaws.
-
Well me being pedantic or not, here's my pictures from the 2017 Wonderfest this is just the mecha, if you hop out one you'll find the anime, horror, scif/fantasy, dioramas, etc.
-
but as this is not a European forum....
-
I'm working on getting my pictures up, with 746 entries it'll take me a bit.


Whats Lying on your Workbench MK IV
in The Workshop!
Posted
I've found a drop or 2 of Tamiya X20a thinner brings them back to life.