Chas
-
Posts
777 -
Joined
-
Last visited
Content Type
Profiles
Forums
Events
Gallery
Everything posted by Chas
-
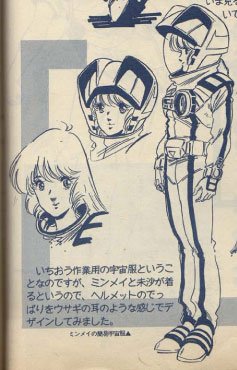
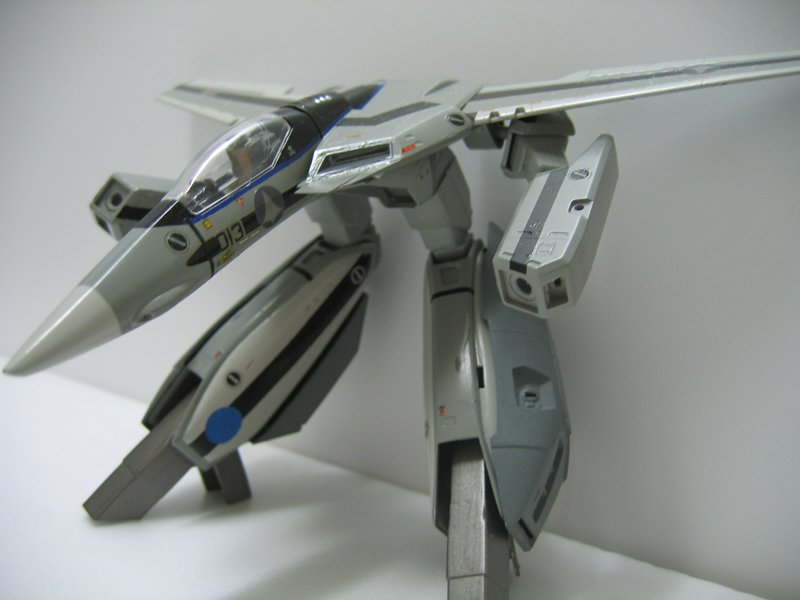
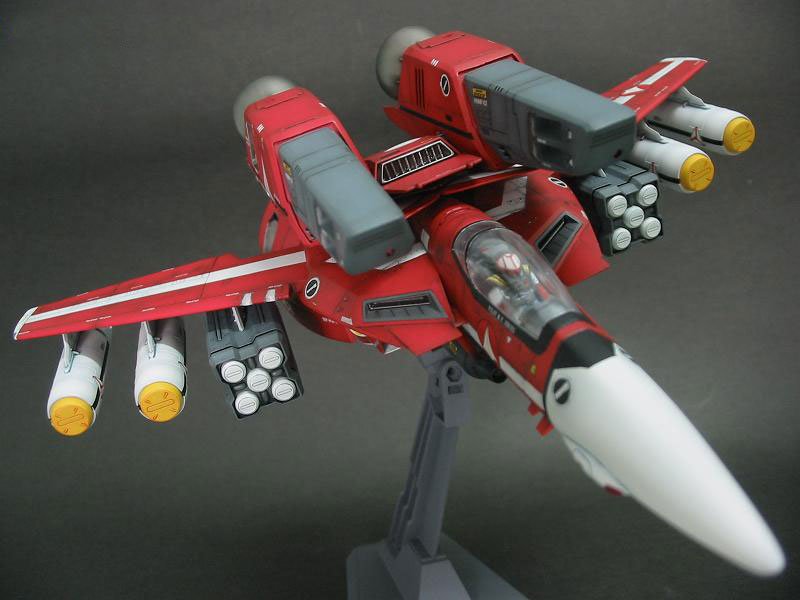
Well let's see 1. I look at the instruction book and notice color #318 is called Radome. What color is Radome? Radome is the tan-like colour you see on the fuselage (the parts that are not orange). 2. Is the color guide in the instruction book refers to Gunze-Sanyo Mr. Color enamel or the acrylic kind? It actually refers to both. The white squares in black boxes are Mr Colour (solvent based) and the black numbers in the white boxes preceeded by an 'H' are the Mr. Hobby (acrylics) line 3. I saw some pictures where the Super Ostrich is white and red. Is that accurate? Just stick to the Hasagawa instructions and you'll be fine. They're pretty much dead on as far as colour/markings. As for what you saw, could be a colour annomally due to photo-shoot lighting, of monitor calibration or web-colour non compatibility, or just some crazy custom. 4. Is there such Super Ostrich as one seater with missiles? -NO- the S.O. is basically the DYRL? version of the VF-1D two seat trainer from SDF Macross. 5. Can anyone help me with the line drawing of Lynn Minmay's helmet? You just had to ask for line art didn't you! Hope this all helps. and don't forget to post pics when your done! Charles.
-
You mean like this?
-
Glad to be of help. Best of luck to her! Hope she does well.
-
Second sheet.

-
As for DYRL thi is all I've everbeen able to find. If you need higher res just let me know.
-
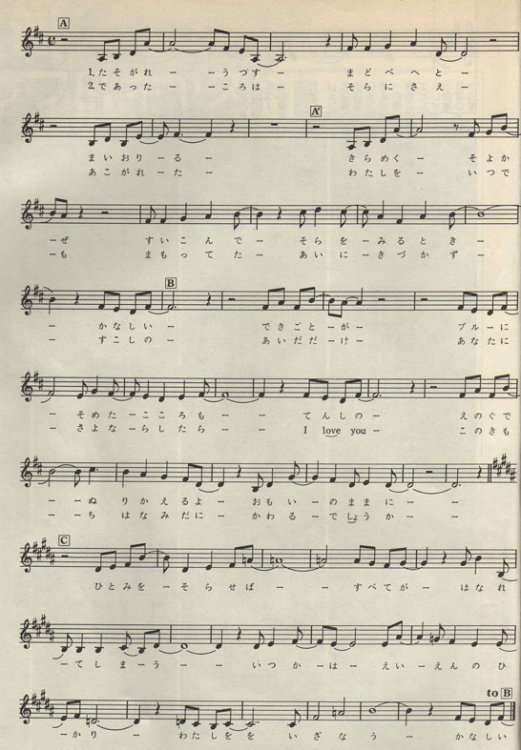
Um, yeah. Well what instument are we talking about? I've got some for DYRL but it's just the vocal part i.e. the melody line. I can post scans if you want, but unless she's singing I don't think it's enough for an exam.(e.g. if she plays piano there's no left hand part).
-
It doesn't matter! just pick one. There is no 'right' choice in that situation. You're just procrastinating. .
-
I'm actually planning to pay these guys a visit on the weekend. Their location is only about a half hour from my place by subway. ( that is if the address on their website is correct!
-
Try looking here: Doh!
-
Nevermind nothing to see here. . . These aren't the droids we're looking for . . . move along.
-
Yeah I think that second one is deffinately a wash. I see what you mean about the pupleish look on that first one too Harsh!
-
Well here's an image of a pre-shaded Millia super from the Completed models by Hong Kong Modelers thread in the Models forum. Don't know what colours he used for the pre-shading though. Couldn't you just use like a medium/dark grey or something for pre shadinng? I've never used the technique, but my impression was that the colour one used for the preshading was not all that important as long as it was darker in tone than the base-coat colour, but not too dark.
-
I don't think there is any reason to strip what you've already done and start over. Doing it in the order that you have been should still work out fine. I mean you certainly hven't ruined the model. in fact, if the sample image you posted is anything to go by, your first kit will look a whole hell of a lot better than my first kit did! Just keep going with what you've been doing for this kit and try it the other way on your next. That way you'll be able to compare the two methods directly. Yeah, well my technique has changed a lot in the last year or so. The secret is keeping the coats very thin and painting the whole kit in one direction (say top to bottom) letting it dry throughly then paint the next coat in another dircetion (say left to right ) and just keep alternating this untill you are satisfied with the depth of colour.
-
Again there isn't a right way to do this. I usually do the panel lines after I decal because when I used to do the panel lines first then clearcoat then decal, I found that I would, more often than not, need to redo the panel lines on the sections where the decals crossed over them to get a good scale effect and make the decals look painted on rather than having them look like something applied on top of the suface. So what I do is: primer, base coat, clear coat, decals, clearcoat, panel lines, weather, dull coat. But as I said that's just what I do, and by no means is my way the only correct way to do this. I' there are better ways but this is what I have found works for me. One adjustment is if I'm going do heavy weathering I sometimes do a clearcoat after the panel lines. Oh and keep in mind I'm a brush painter, don't know how those air brush folks do things.
-
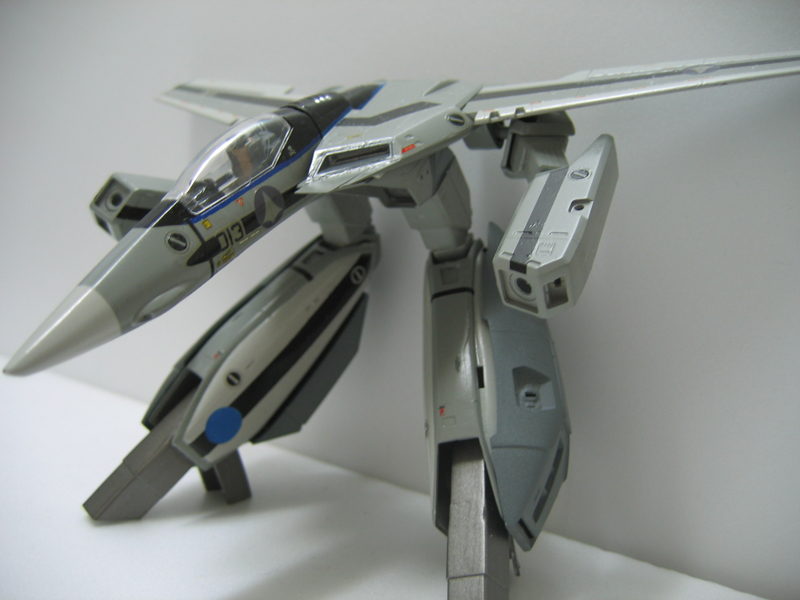
Holly Crap! How do you put screws in Styrene? That is just nuts! I'm surprised at how good it looks in fighter mode given that I'm preeeetty sure he's using the legs (bottom half- knees down) from the Battriod kit which are much bigger than those of the fighter kit. Am I right in that assumption? What does it look like to you folks?
-
That is purely a matter of taste. Do you like the way it looks? If so then no it is not too prominent. With model building (particularly SF and Fantasy subjects) ther is no 'Right' way for the model to look (unless you are trying to recreate a specific subject, in our case how a subject looks 'on screen'. If that is what you are attempting it would be best to state what the subject is and maybe post some of the ref. images you are using. Barring that you are the sole arbiter of what is right or wrong. In my opinion it looks quite good! Keep it up and let's see some more! P.S. I usually do panel lines after the Decals have gone on (less coats on the model that way, er. . . well. . . the way I do it anyway, not sure of others here.)
-
Wow! Very nice looking builds.Very, very clean look. Is it me or does it look to you folks like he uses straight black for the panel lines too? He did a great job on that transforming VF-0, but I'll bet he doesn't transform it much . Still modifying a kit like that is an awesome challenge and, when completed successfully, can be an incredibly rewarding experience, even if you only transform it a few times just to show others what you did! Mad props to this bloke for his incredible skill.
-
Well it sounds fishy to me! This is what Wiki.org has to say on the etymology of the term. Otaku: Sounds a-lot more plausible to me.
-
Well I just started using spray paints recently, and I'm getting awesome results! what kinds have you used? For me it's Tamyia. I think the secret is to wash the parts with soapy water, make sure they are thoroughly dried, then prime them (sand/putty any blemishes) and lay the spraypaint down in THIN LAYERS. I cannot stress enough how important it is to apply THIN layers of both paint and primer. Make sure you are holding the spray can the requisit 12" (30cm) away from the object. Another tip is to try and keep the can in a verticle position while sprying - tilt the part not the can!. As for weathering/panel lineing there are many different techniques each with there own tools. I always refer folks to the A.R.C. for a good pimmer on some of the different methods. Just visit the 'Tools 'n' Tips' section and read untill you feel confident in what you want to do. When you've decided on what kind of paints you are going to use (i.e. acrylics?/ lacquers?/ enamels? ) for your base coat then we can talk further about how to tackle the panel lines, as the choice of base coat can have an effect the steps that follow it. One thing I'd like to add is, as I said, I keep my primer/paint coats thin, but when I aplly the clearcoat (Future in my case - and I use a brush for this) for the decals I make that a thicker coat. (something I learned on these very boards!) Hope that helps a little. Keep us posted. (Ha, Ha, I slay me )
-
Can't hepl you there. I don't use an airbrush. Strictly old fashioned here. But I'm sure someone will be along soon who can help out. My primer of choice is Mr. Surfacer 500, 1000, and 1200. Glad to hear your test went well. Good luck!
-
Primer for model kits serves the same purpose as primer for interior painting, or automotive etc. . . it primes the surface, by evening out minor colour variations, and surface makrs and providing good uniform suface texture for the paint to stick to. You can find 'specialty' primers that are designed for certain tasks, i.e. High-Build Primers (auto) designed to fill in scratches (left from sandinng) etc. but they all serve the basic function mentioned above. As you are applying a layer of primer over the model of course it gets into the panel lines. If it filled them in and made them useless do you think we would use the stuff? It is basically another layer of paint. If you mean, will the primer melt the styrene or something akin to that, no not in my experience. But then again I've never put a thick coat of primer on a model. I don't know why you would want to do that. The idea is to putty and sand down the imperfections and seamlines untill you think they are smooth then apply a layer of primer to check for any imperfections. Where you see them (and you always will) you sand again and then reapply the primer, repeat untill the offending uneveness is no longer visible. I have found it to be easier to scribe the panel lines before I begin to sand in order to deepen them and prevent them from disappearinng during the sandding proccess. Once you are happy with the relative smoothness of the kits appearance you lay down your base coat and begin the painting process. At least that's how I do it. Putty is different because it is designed and used to smooth areas that have severe differences in height, i.e. sink holes, seamlines, gouges, etc. . . Putty is not meant to, and in my experience does not, provide a uniform surface for the paint to stick to. That's where the primer comes in. Hope that helps. I'm no expert but that's how I see things.
-
Well I'm going to assume that your talking about a model _ 'cus, well 'cus I'm just that kind of guy. So, you say that and .Which leads me to believe that your previous models have been somehow lacking in your estimation. I think that you probably have what it takes to build the kit yourself and get some satisfactory results, not to mention the sense of accomplishment, but, before I, or, I suspect anyone here, can give you any advice/tips on how to do that more clarification is required. What did you have difficulty with in your previous builds? was it the building of the kit? (i.e. the gluing, sanding, puttying, sanding, re-puttying, sanding, re-re-puttying, sanding etc.?) or was it the detailing?( i.e. the decaling, weathering, panel-lining, painting etc.?)
-
It's a VF-1J Shadowfighter Just kidding, nice job. I think that, that particular pattern of colouration on the chest-plate (Darker top--light sides and front) should be known from here on out as the "ghostryder scheme"!
-
Experience only comes from doing. You have to start somewhere. You learn by making mistakes and then trying to fix them. This is my way of saying give mixing a shot! You never know, you might find a colour you like even better!
-
Hey , cool I like them alot. Thanks, I'm gonna have to find some albums of their's now.