Chas
-
Posts
777 -
Joined
-
Last visited
Content Type
Profiles
Forums
Events
Gallery
Everything posted by Chas
-
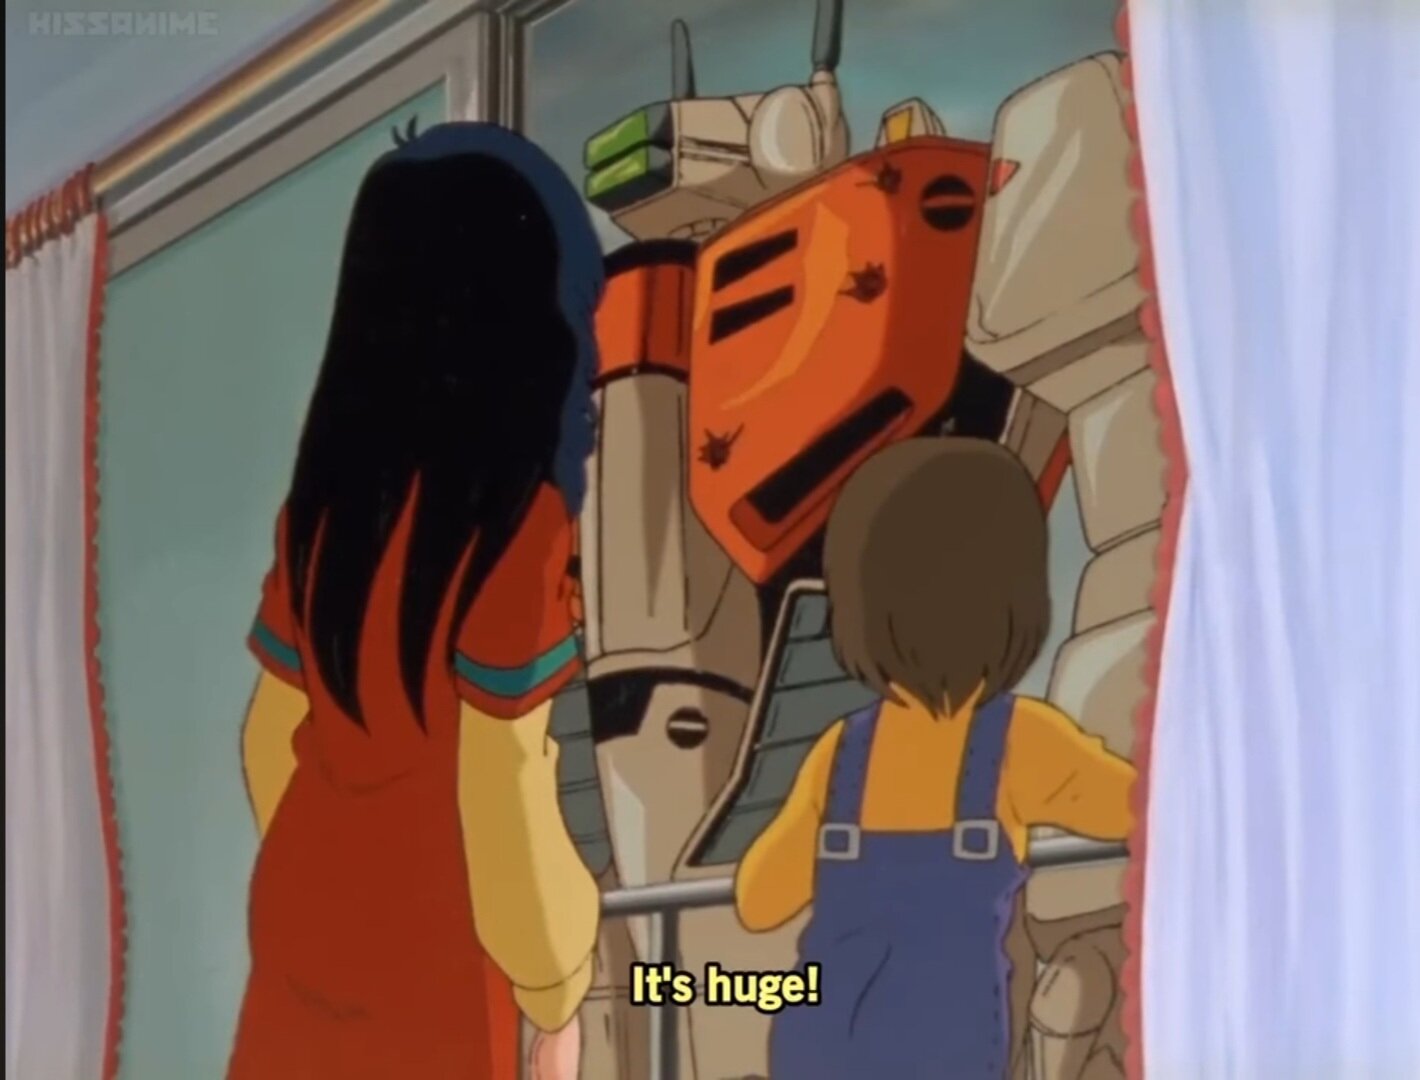
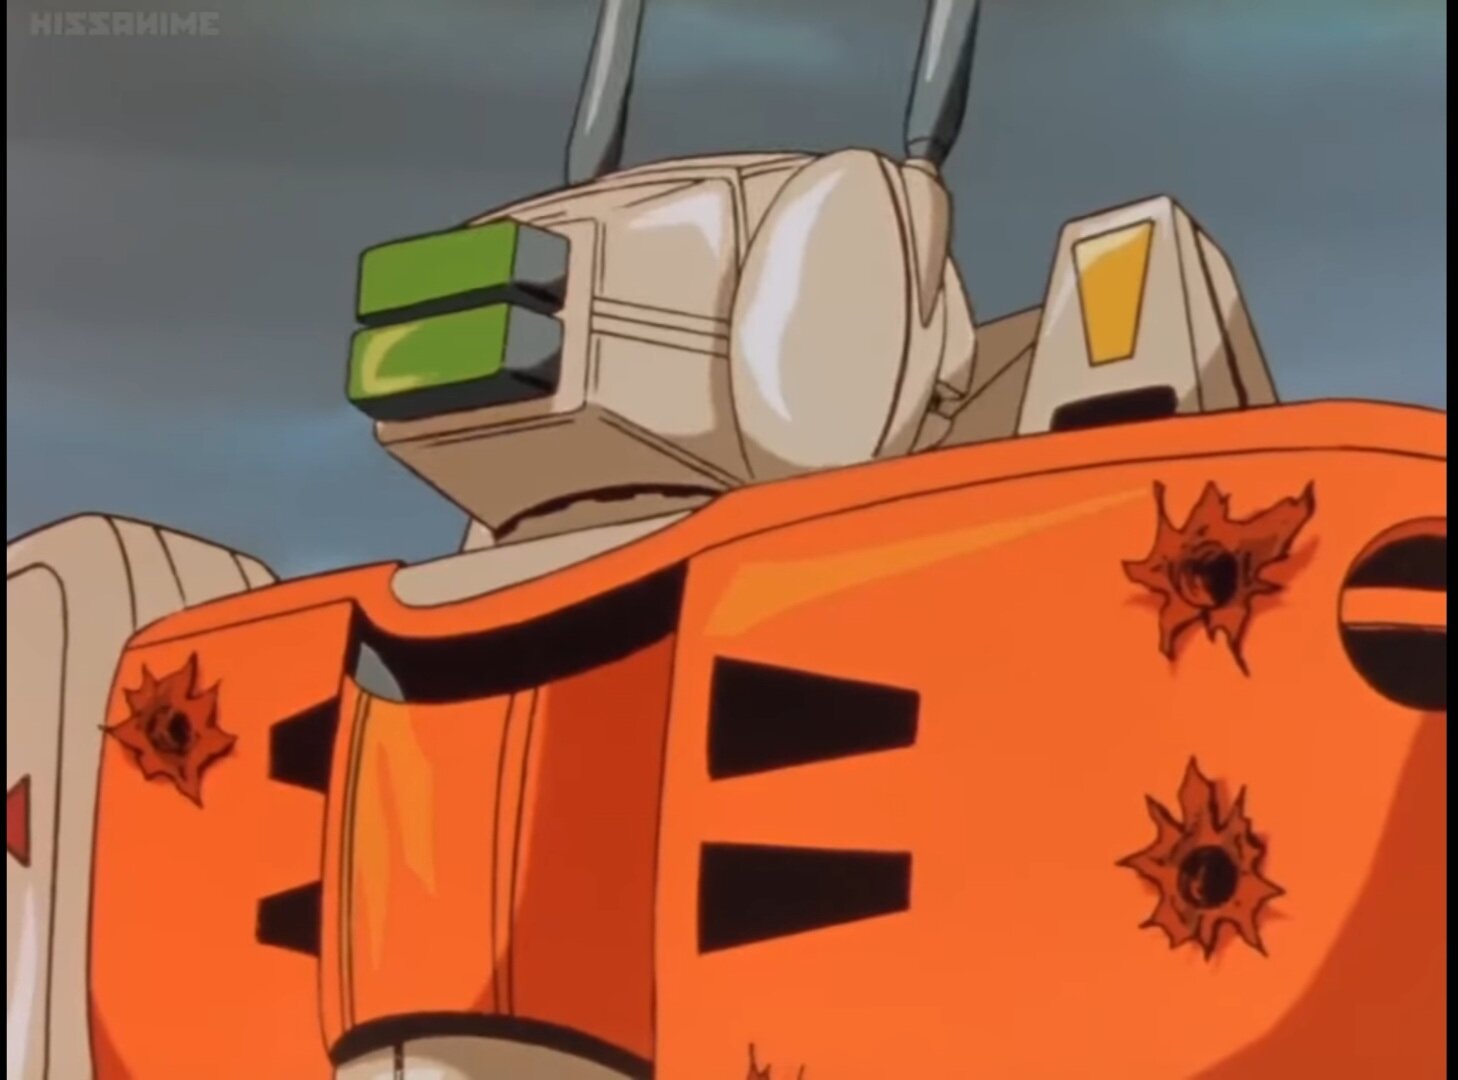
You're kidding, right? As for the changes in position or the holes. This was hand drawn animation remember.
-
Really great build! The cockpit detail is exceptional. And the canopy itself looks spectacular! Congrats on a job well done and a beautifully finished kit.
-
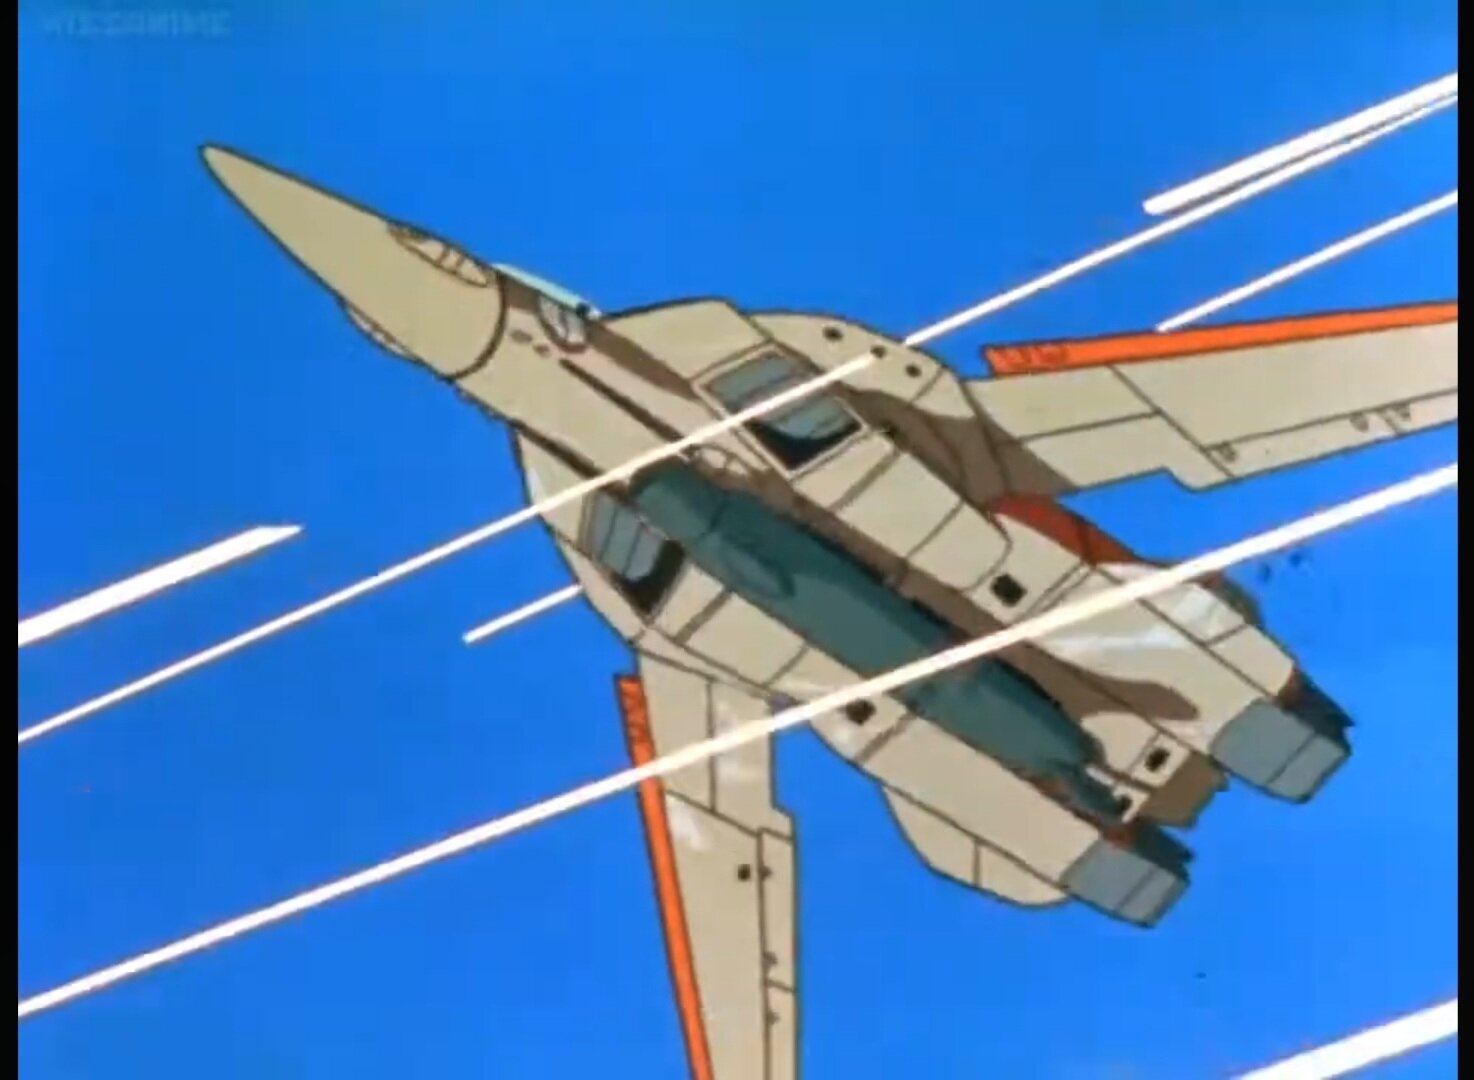
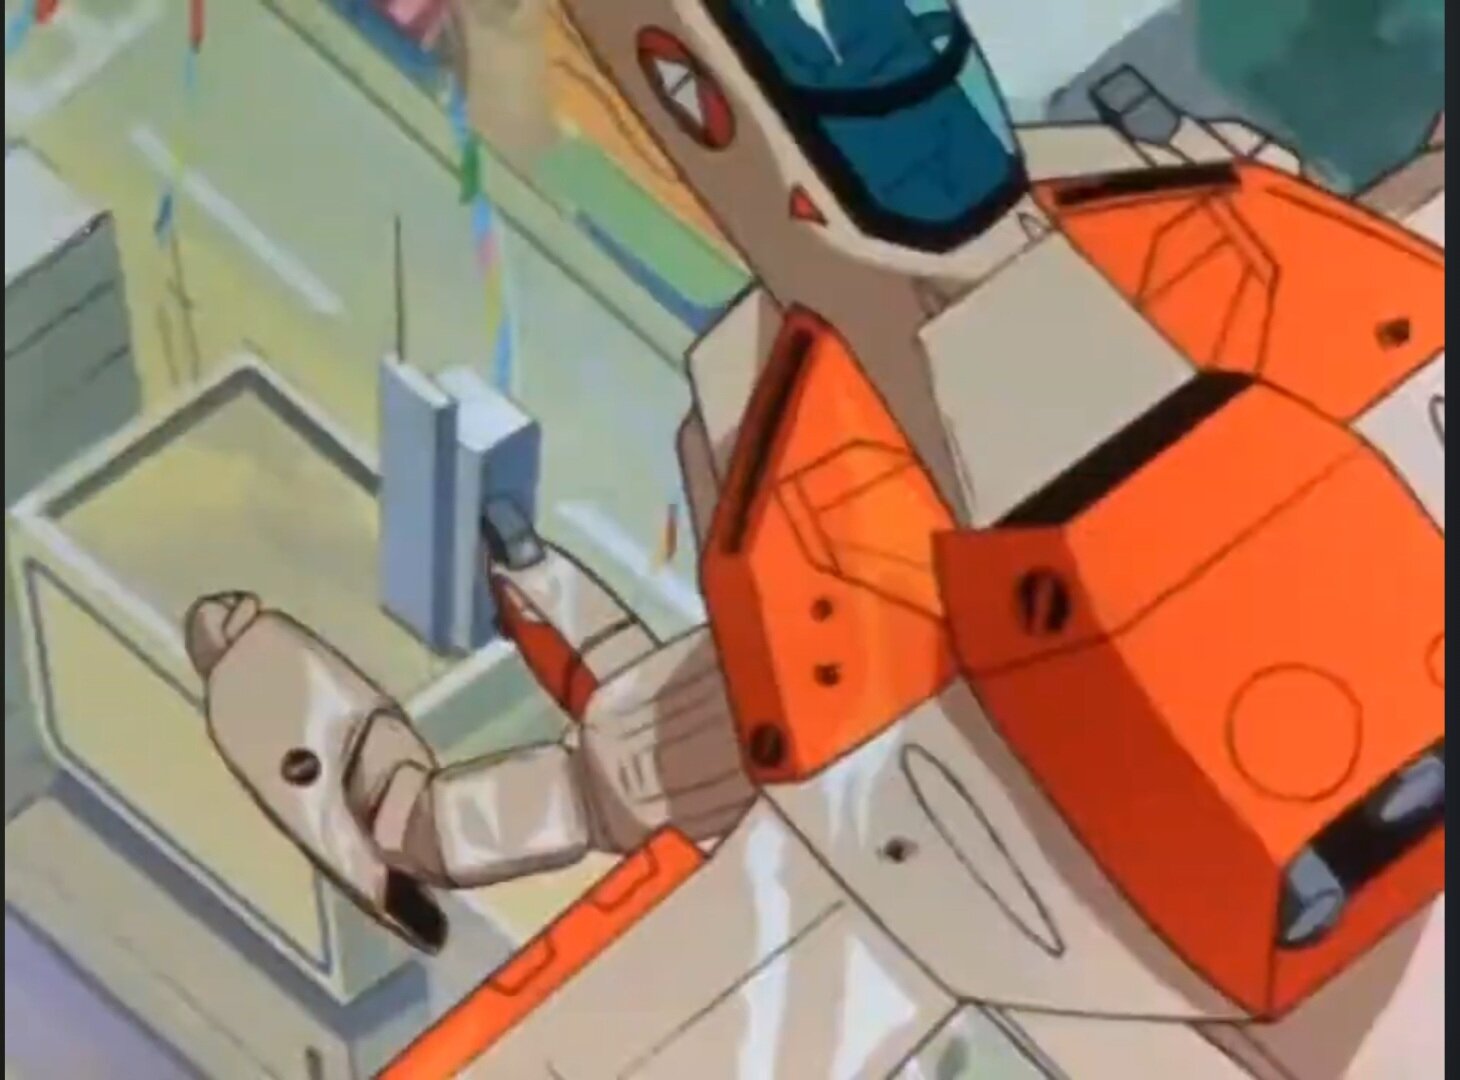
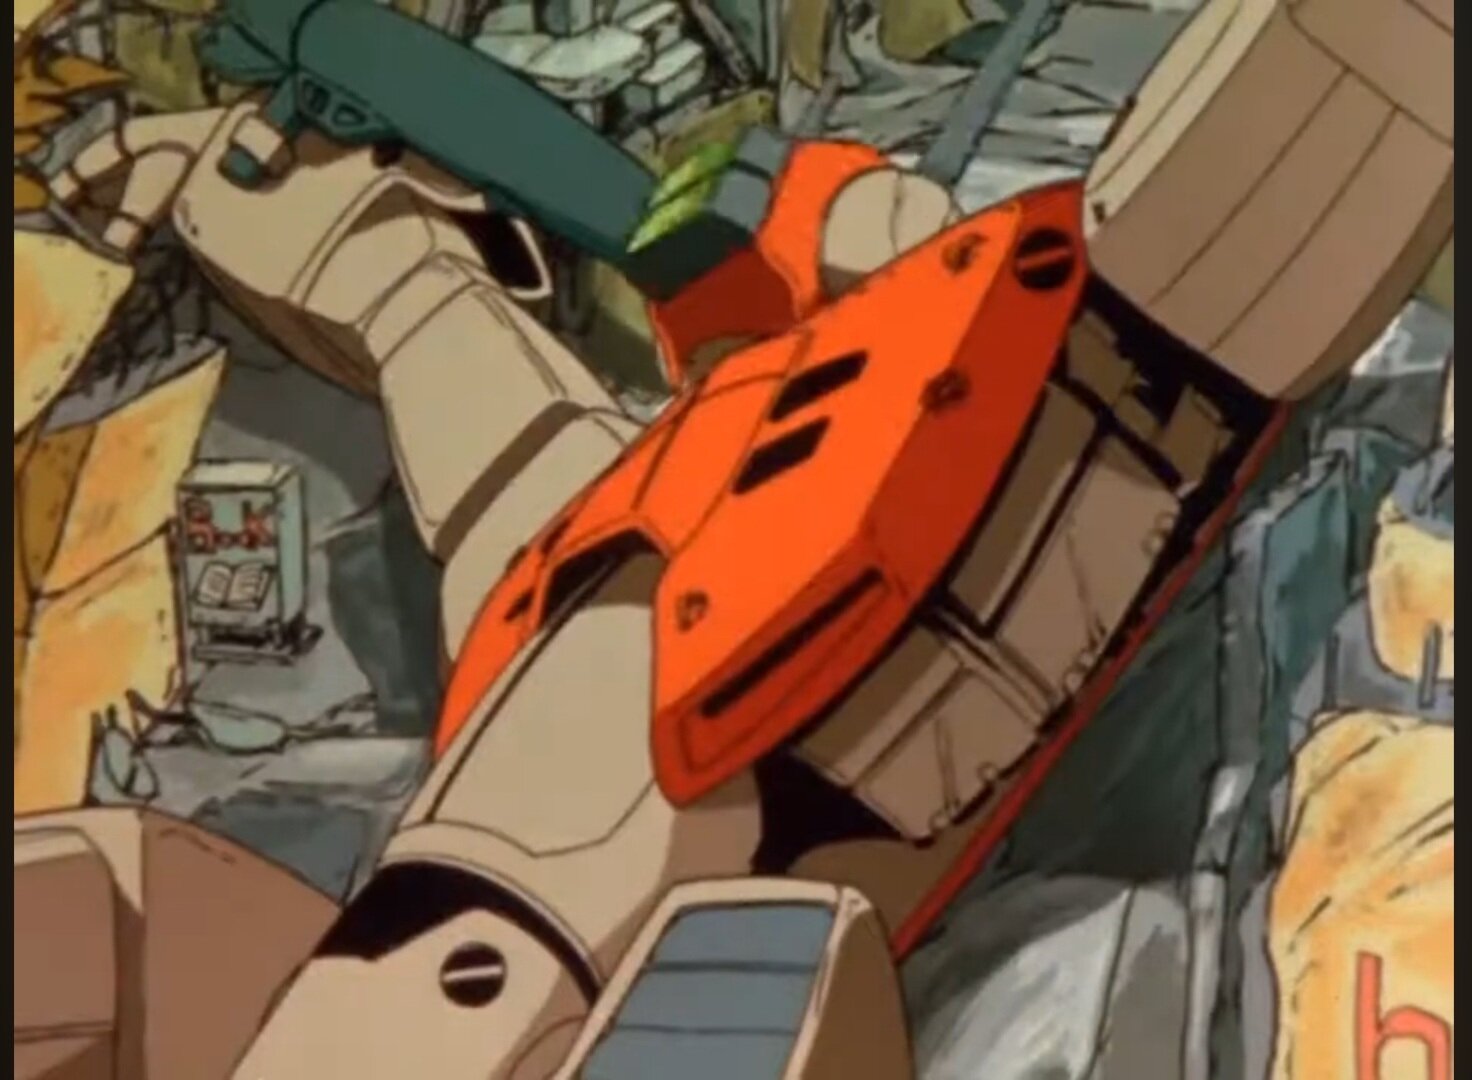
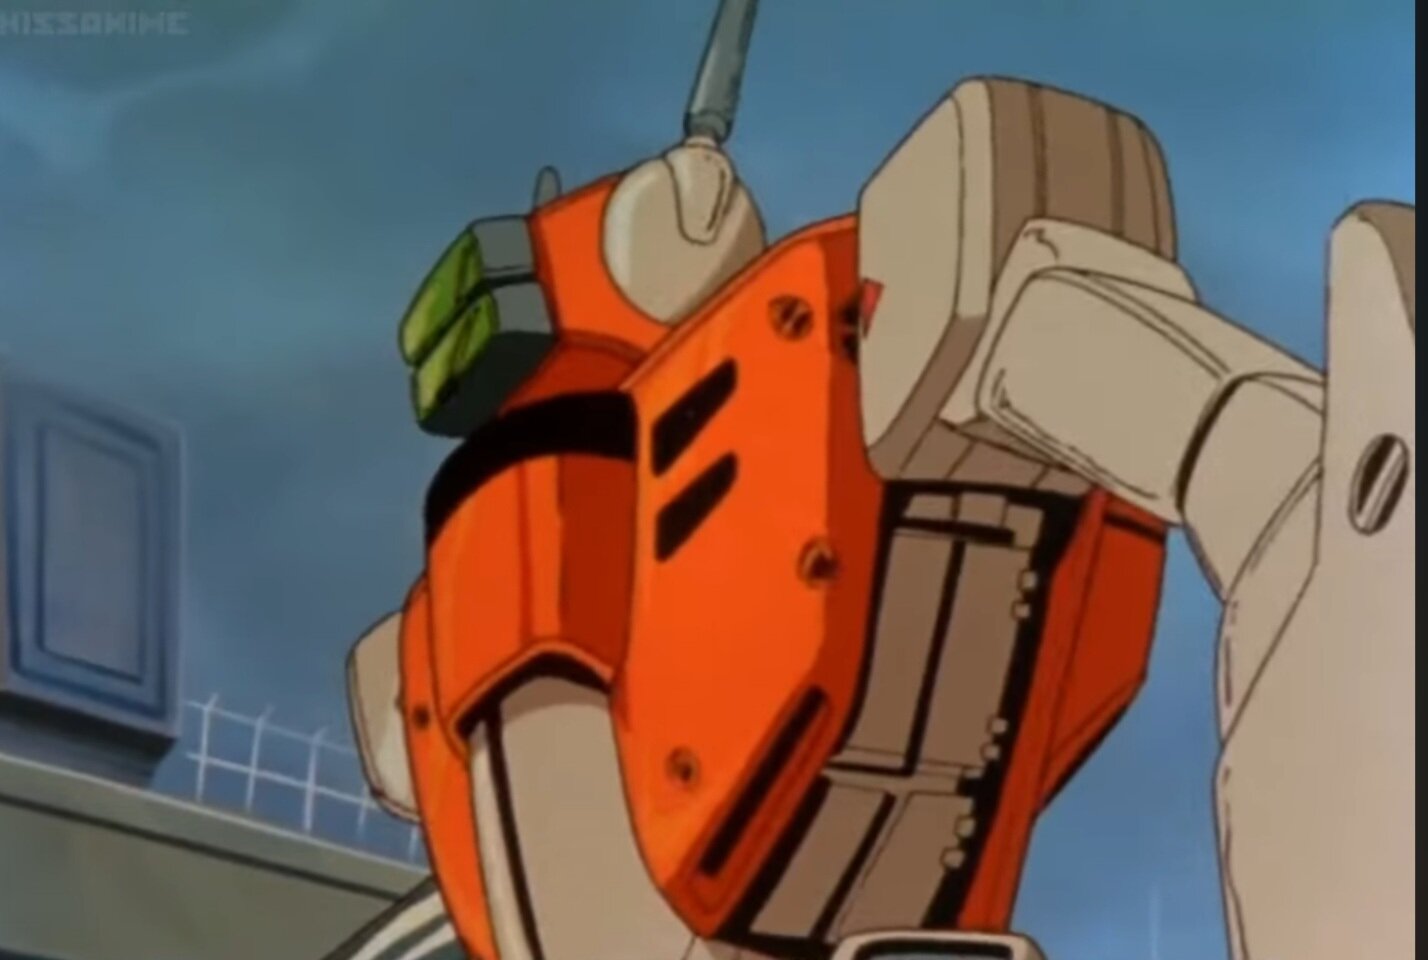
When he gets hit: Visible in transformation as he falls from the sky: And when he comes to a stop ( after destroying the Studio Nue building) in battroid mode amongst the rubble: And after he gets back on his feet: And in episode two:
-
The 'Hey look at this really cool model build I saw' post
Chas replied to Shawn's topic in Model kits
I was thinking that it looks like it would be a great solution for resin kits! -
The 'Hey look at this really cool model build I saw' post
Chas replied to Shawn's topic in Model kits
Nothing to say about the relative legitimacy of the video, but I was very interested in that UV curing 'glue' he used. Anybody here have experience with that category of product? I imagine it's a special formulation of a UV resin, á-la 3-D printer resin. Looks like it could be useful for gap filling/ rebuilding parts. -
Nice work salvaging that resin kit. Looks like it needed a lot of work! You did a really good job with what many would have abandoned. You should be proud of it. It turned out looking really good!
-
Try this link. Scroll down and look at the Pick and Pack Foam, or the Convoluted Foam. I just always save the packing material from stuff I order or purchase always have lots lying around. https://www.uline.ca/Grp_18/Foam?pricode=DB055&AdKeyword=packaging foam&AdMatchtype=e&gad_source=1&gclid=CjwKCAiArfauBhApEiwAeoB7qEO61VrwLqij9PRVbqVbaDQrRc_rIHYncOV-bbxrViXMBqQY-RaHdRoCqiMQAvD_BwE That's a canadian site by the way👍
-
Exactly what I was thinking of doing at the start of the project, but could not find any of the TIE kits at reasonable cost. If I happen to get my hands on some in the future it would be a fairly easy addition.
-
Well I'm calling this one done.

-
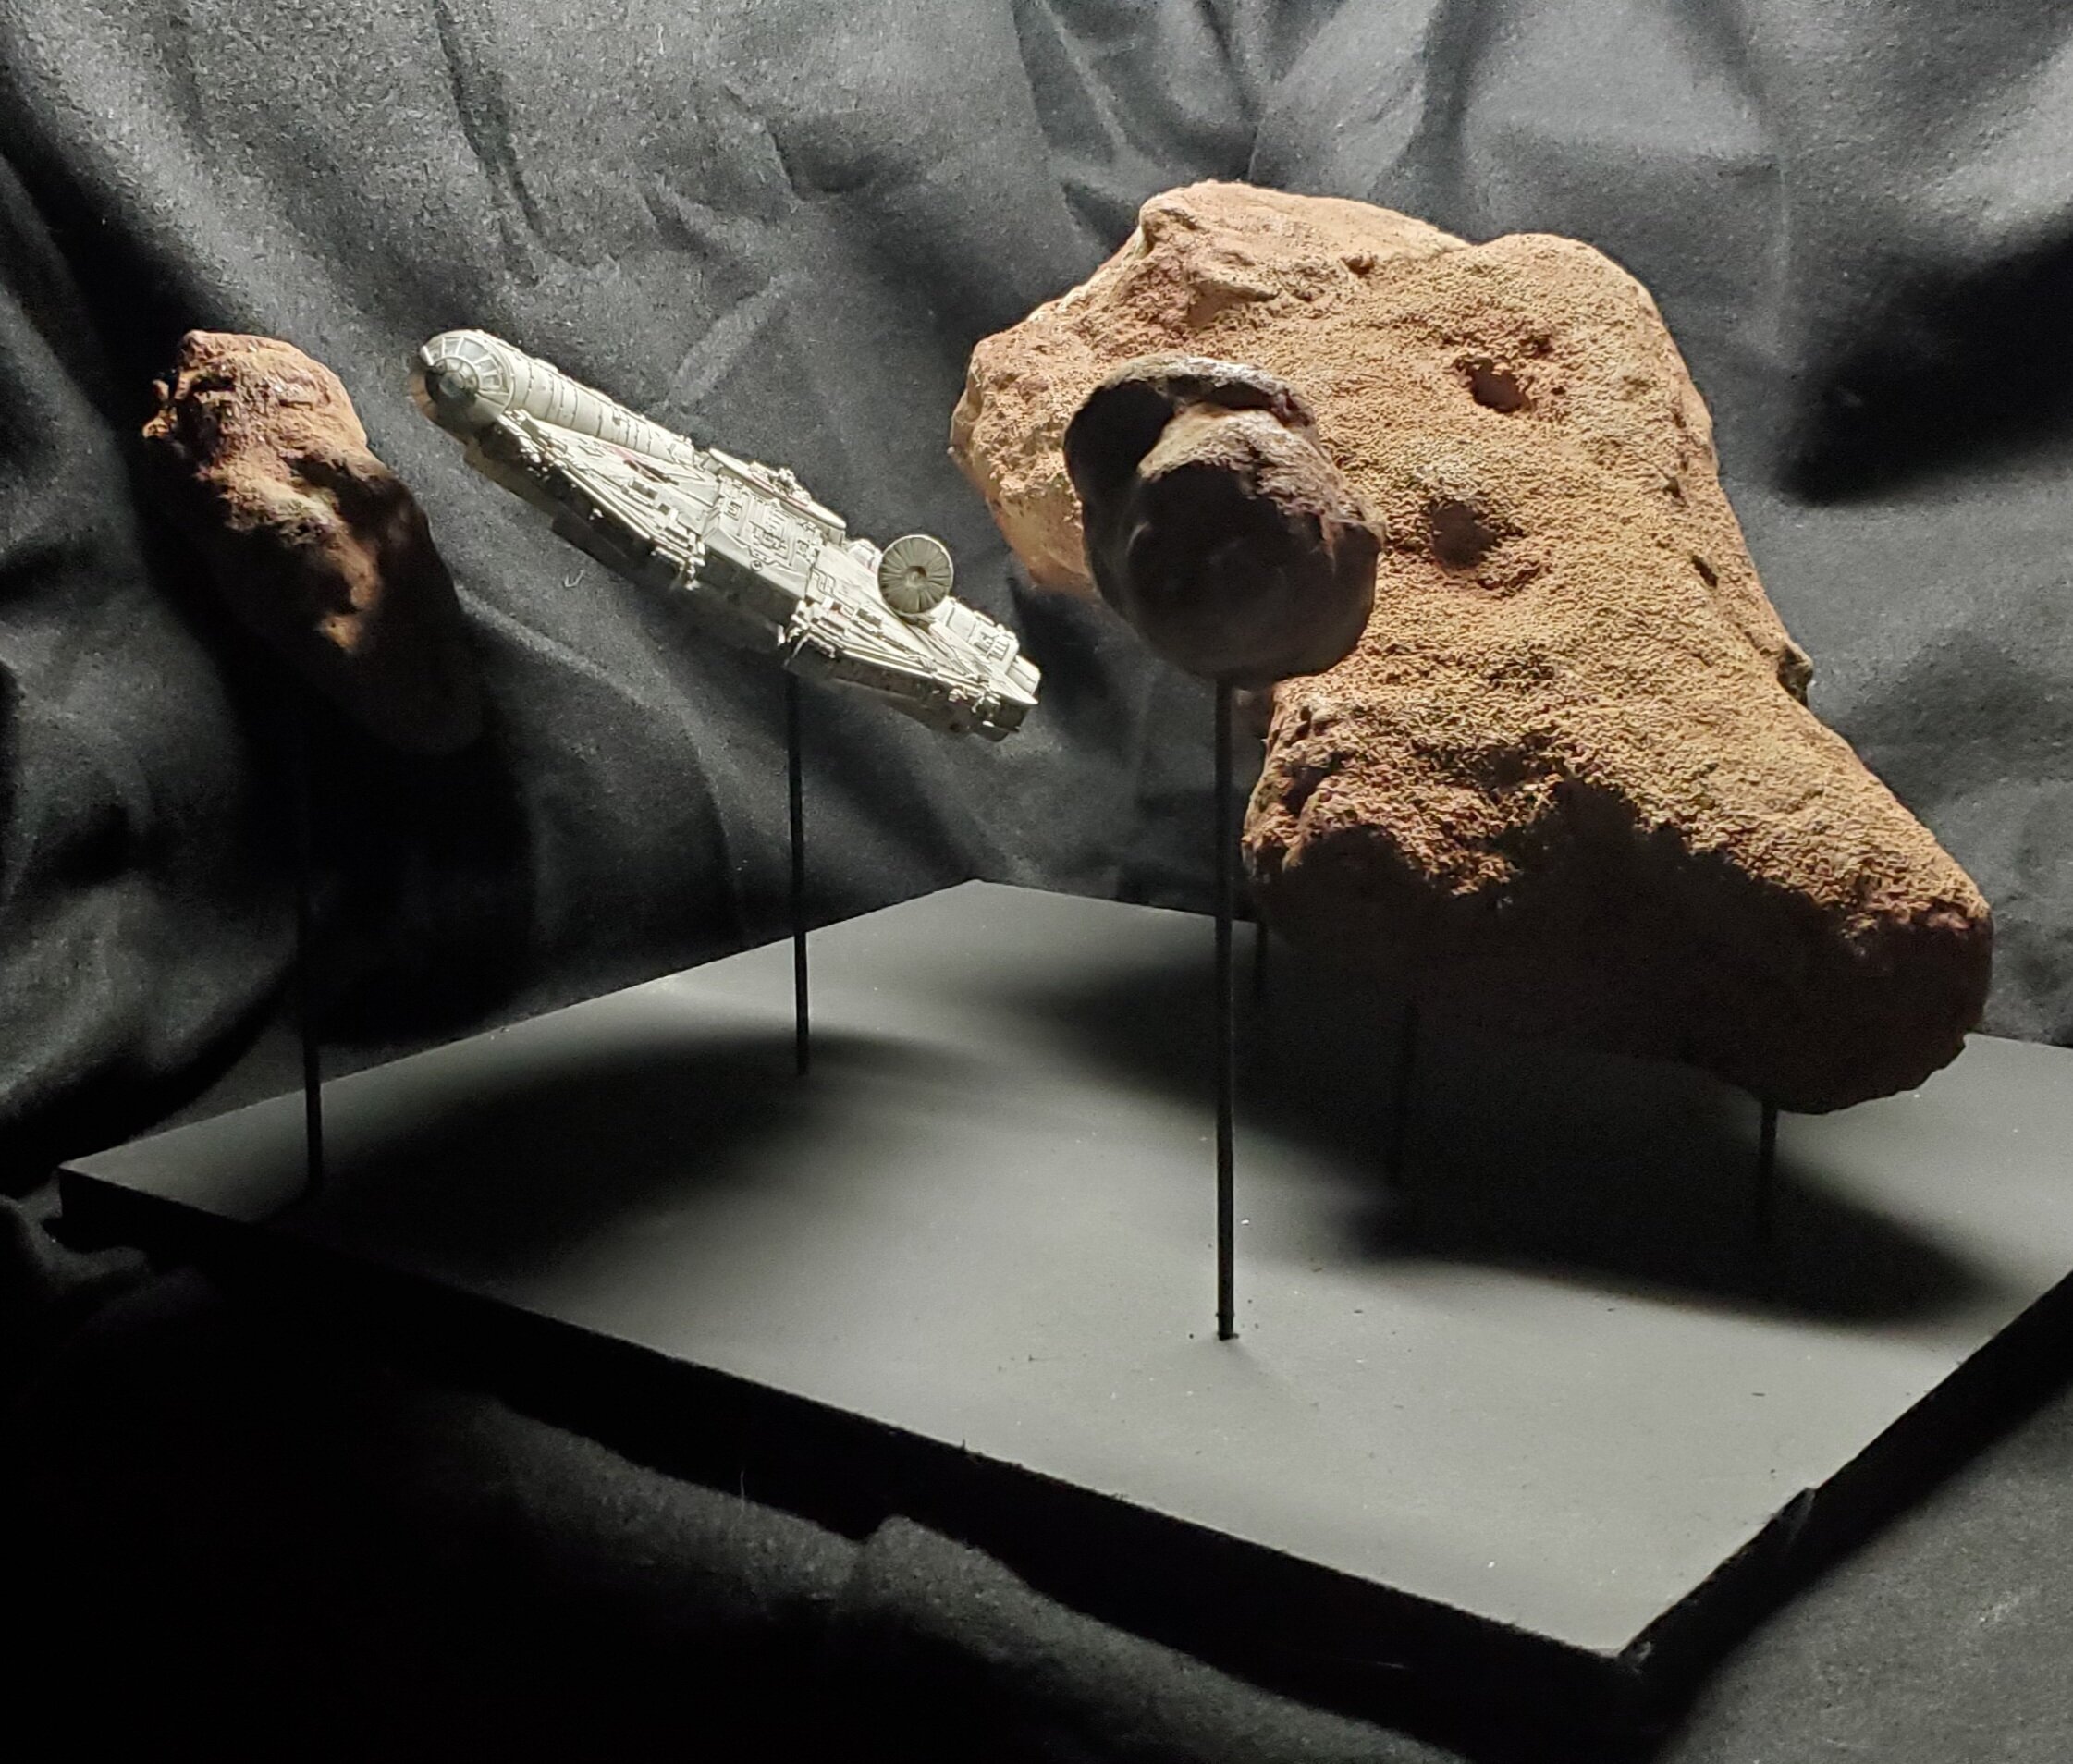
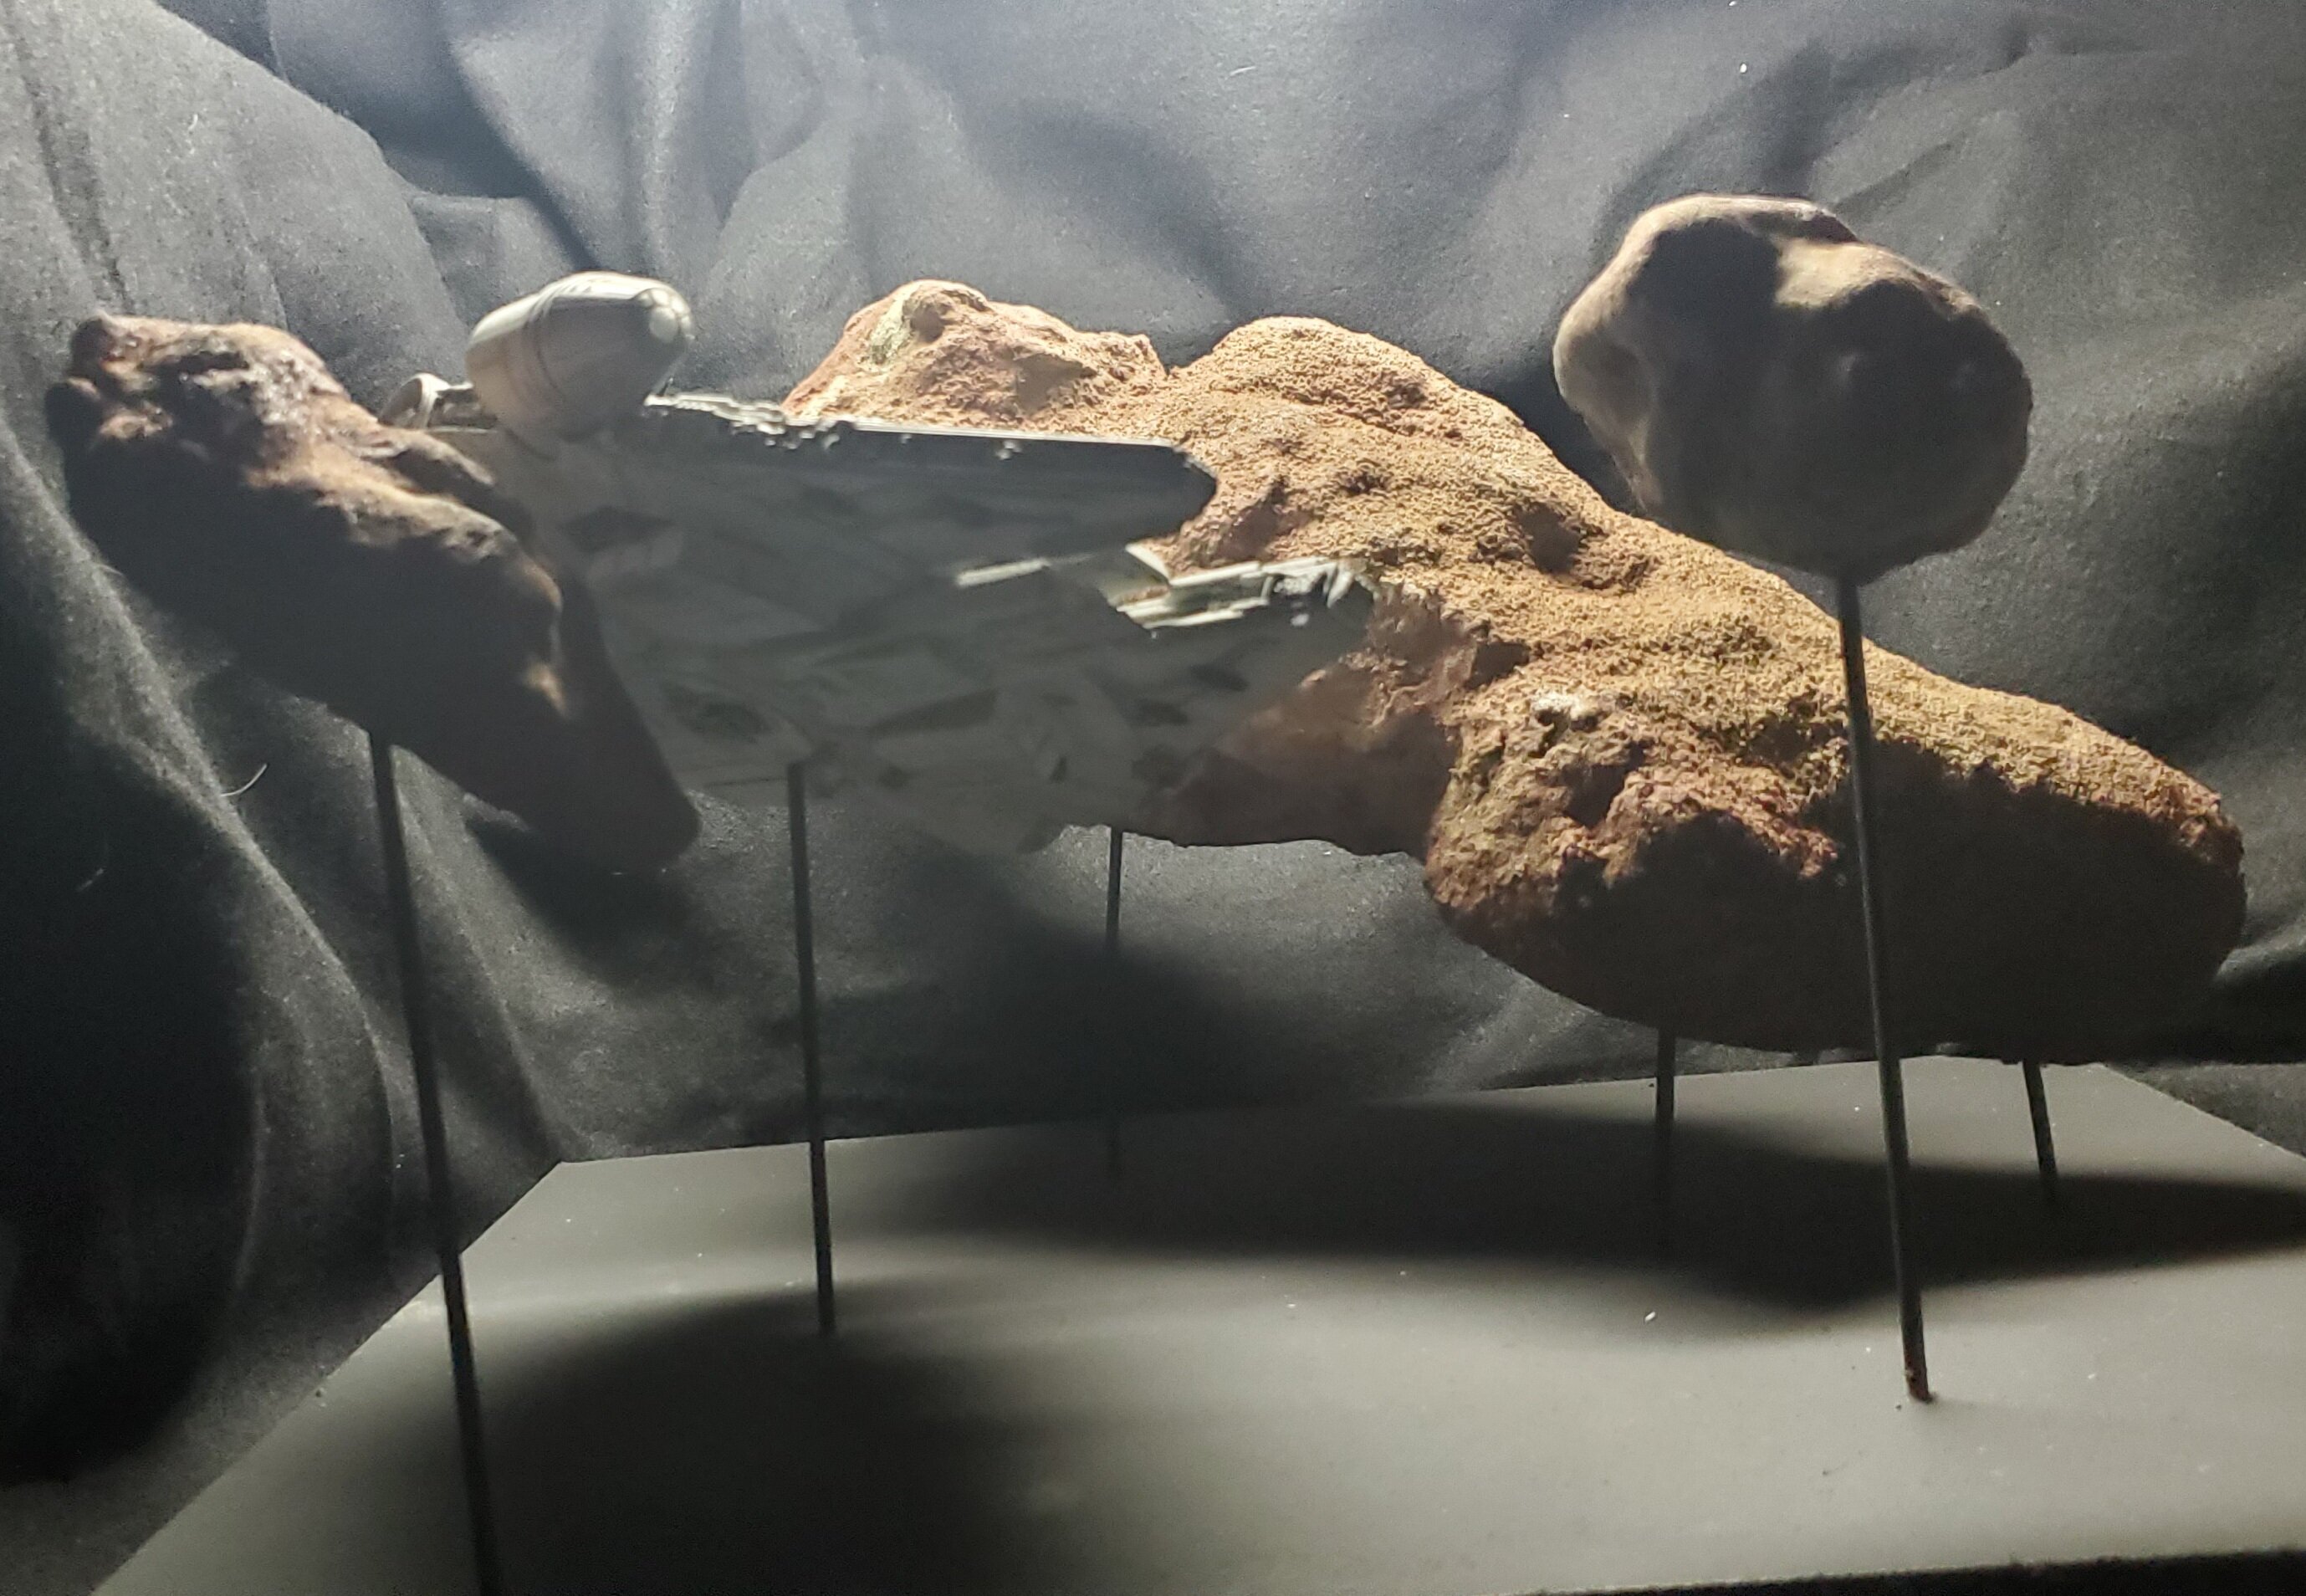
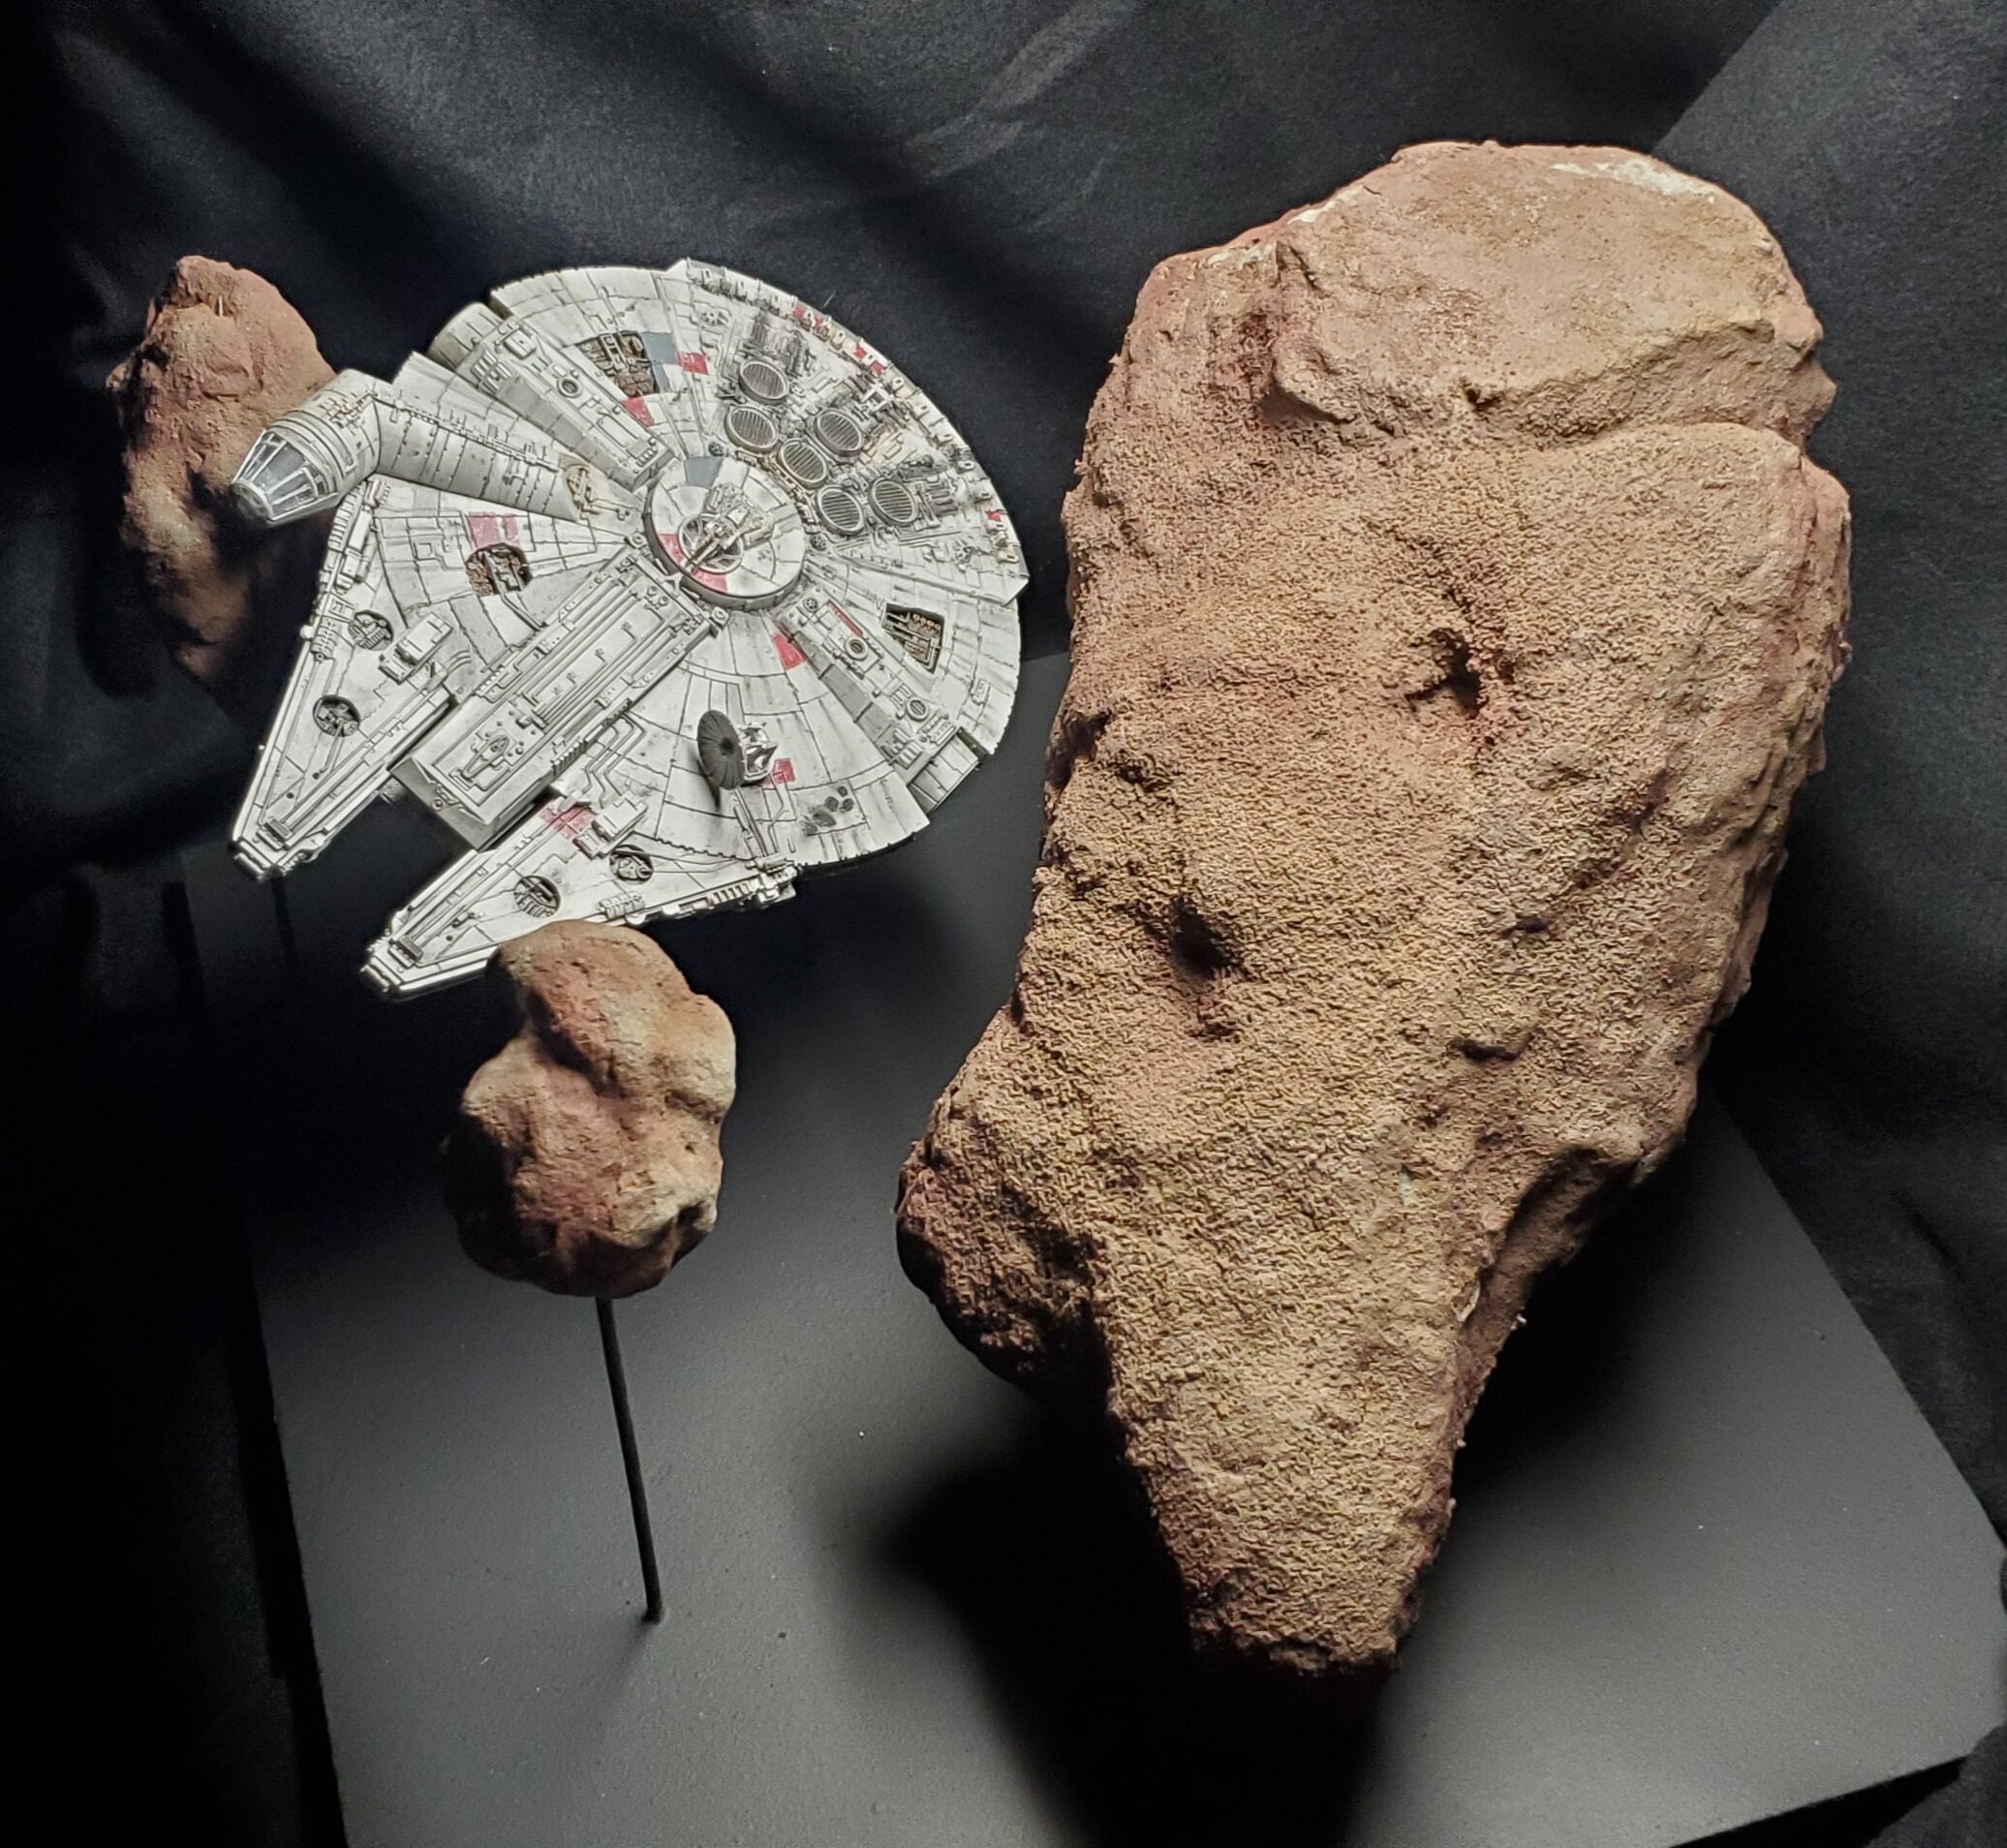
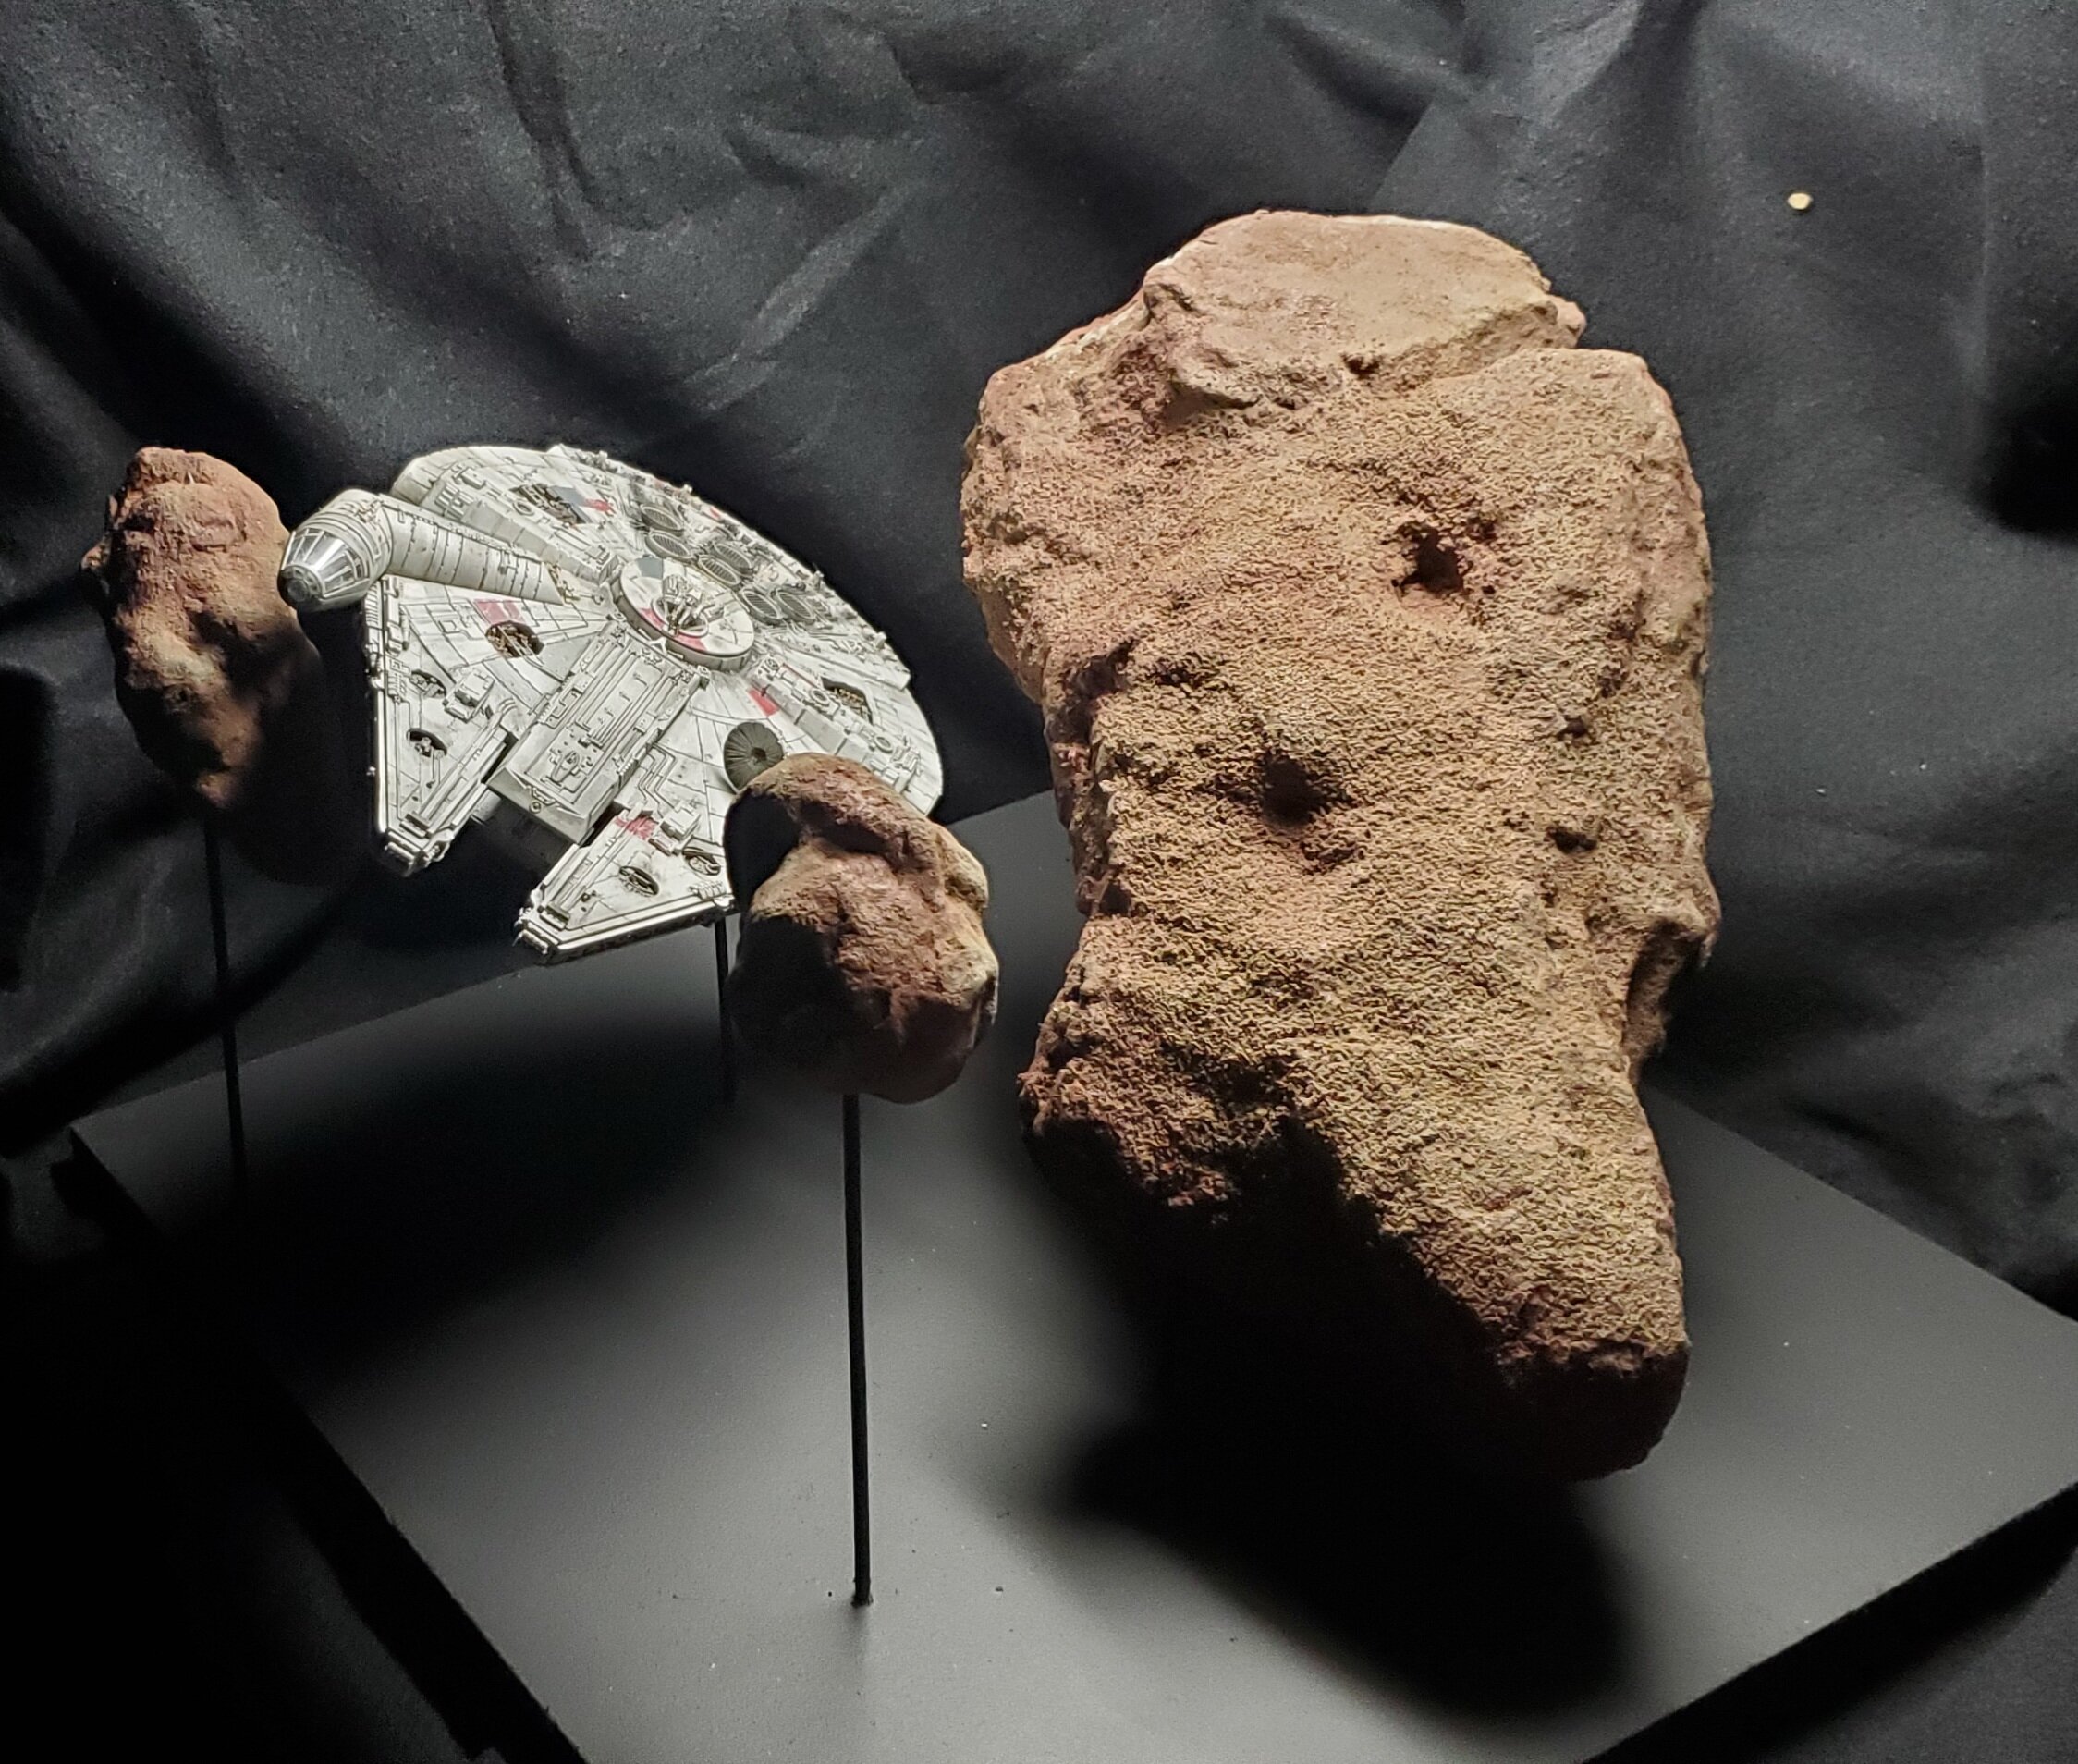
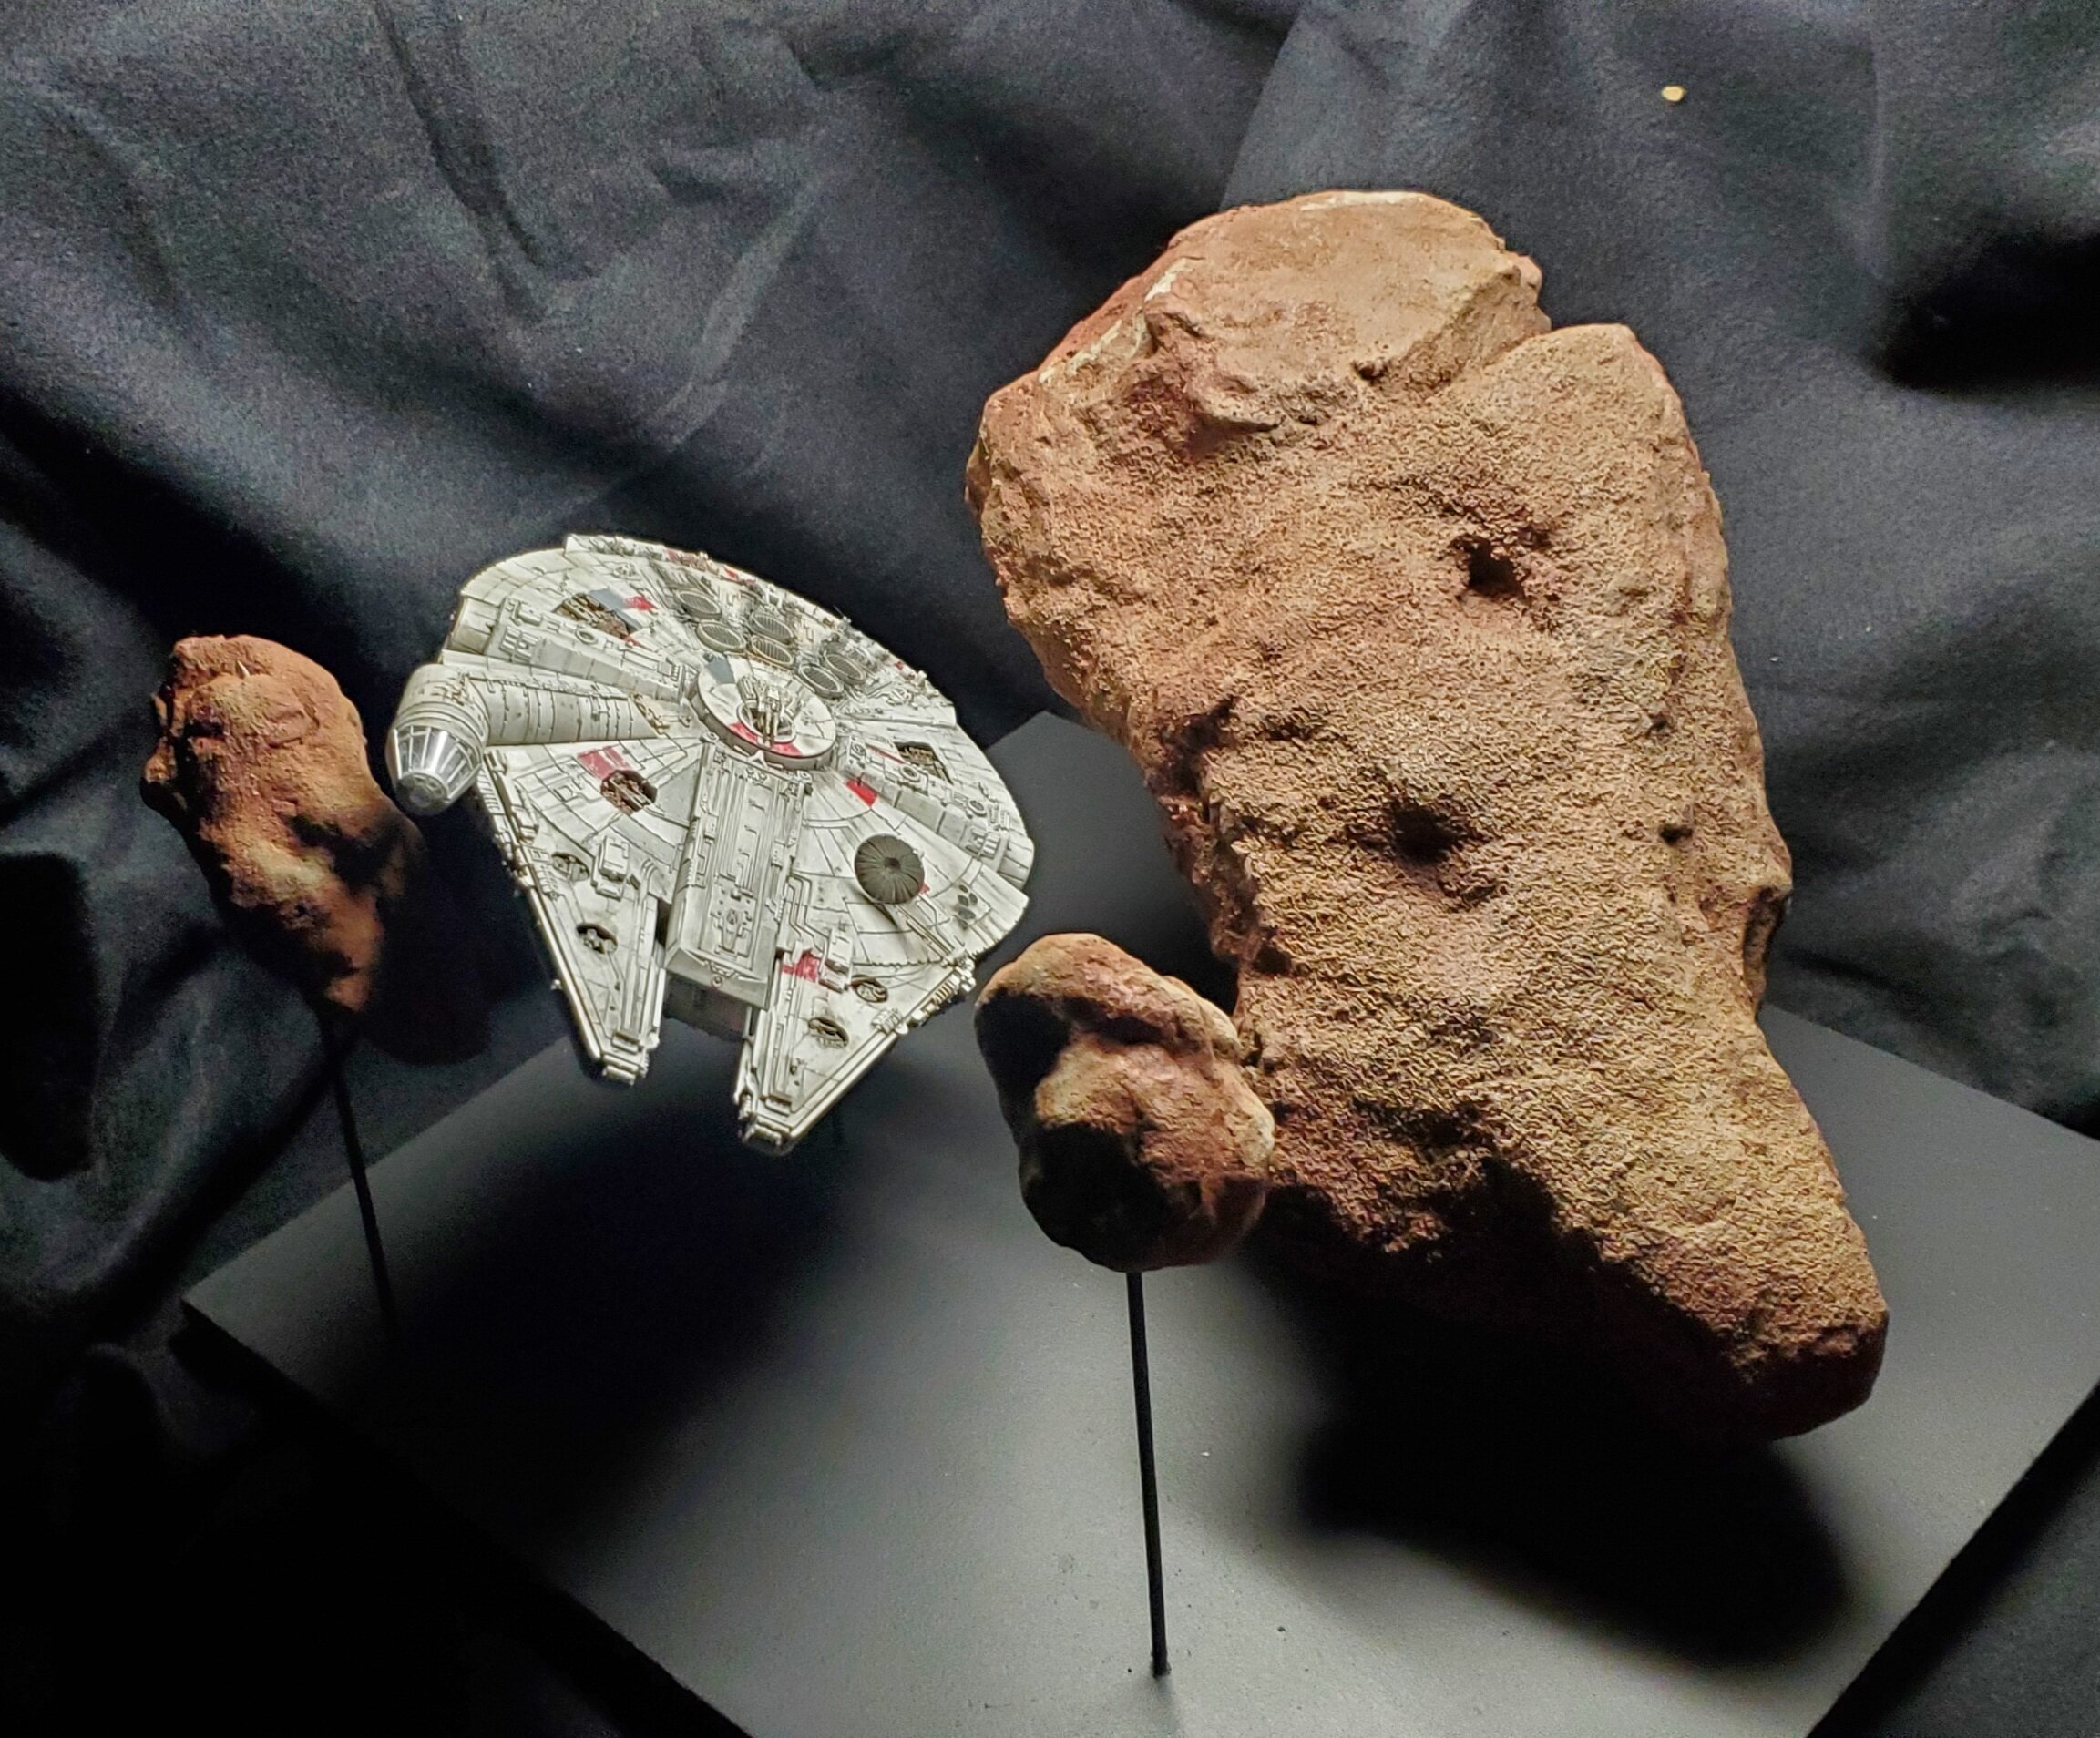
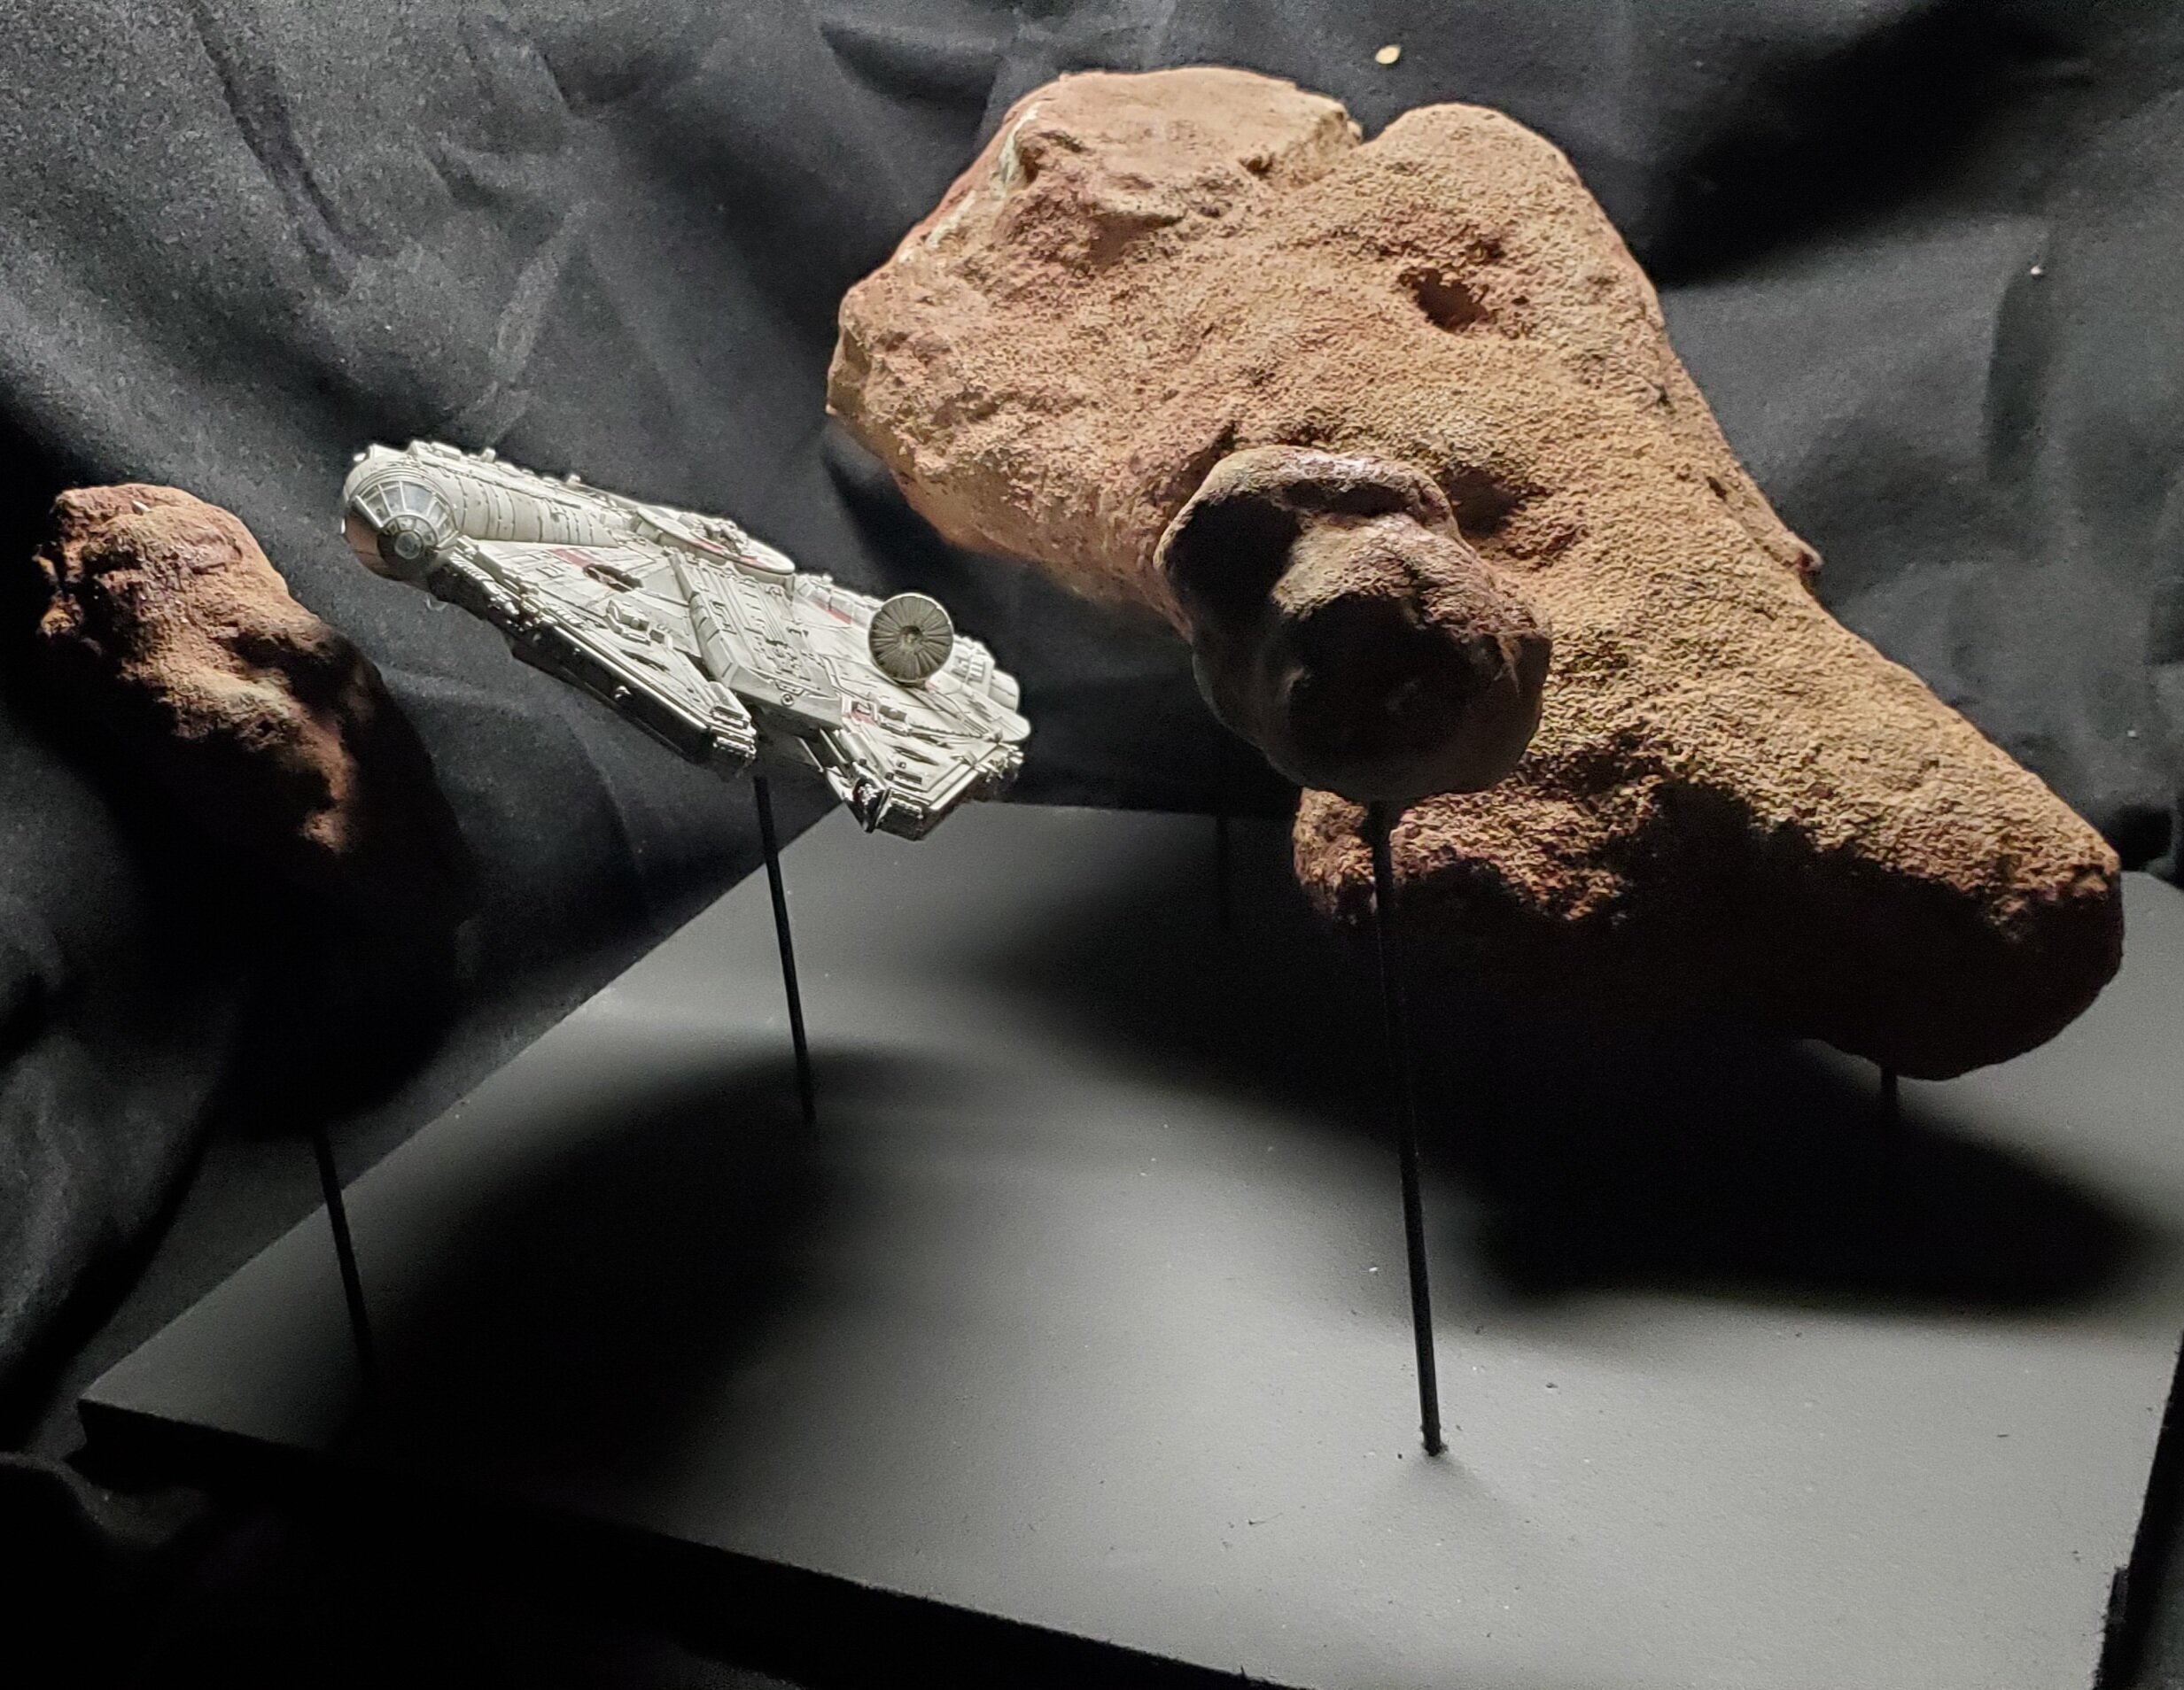
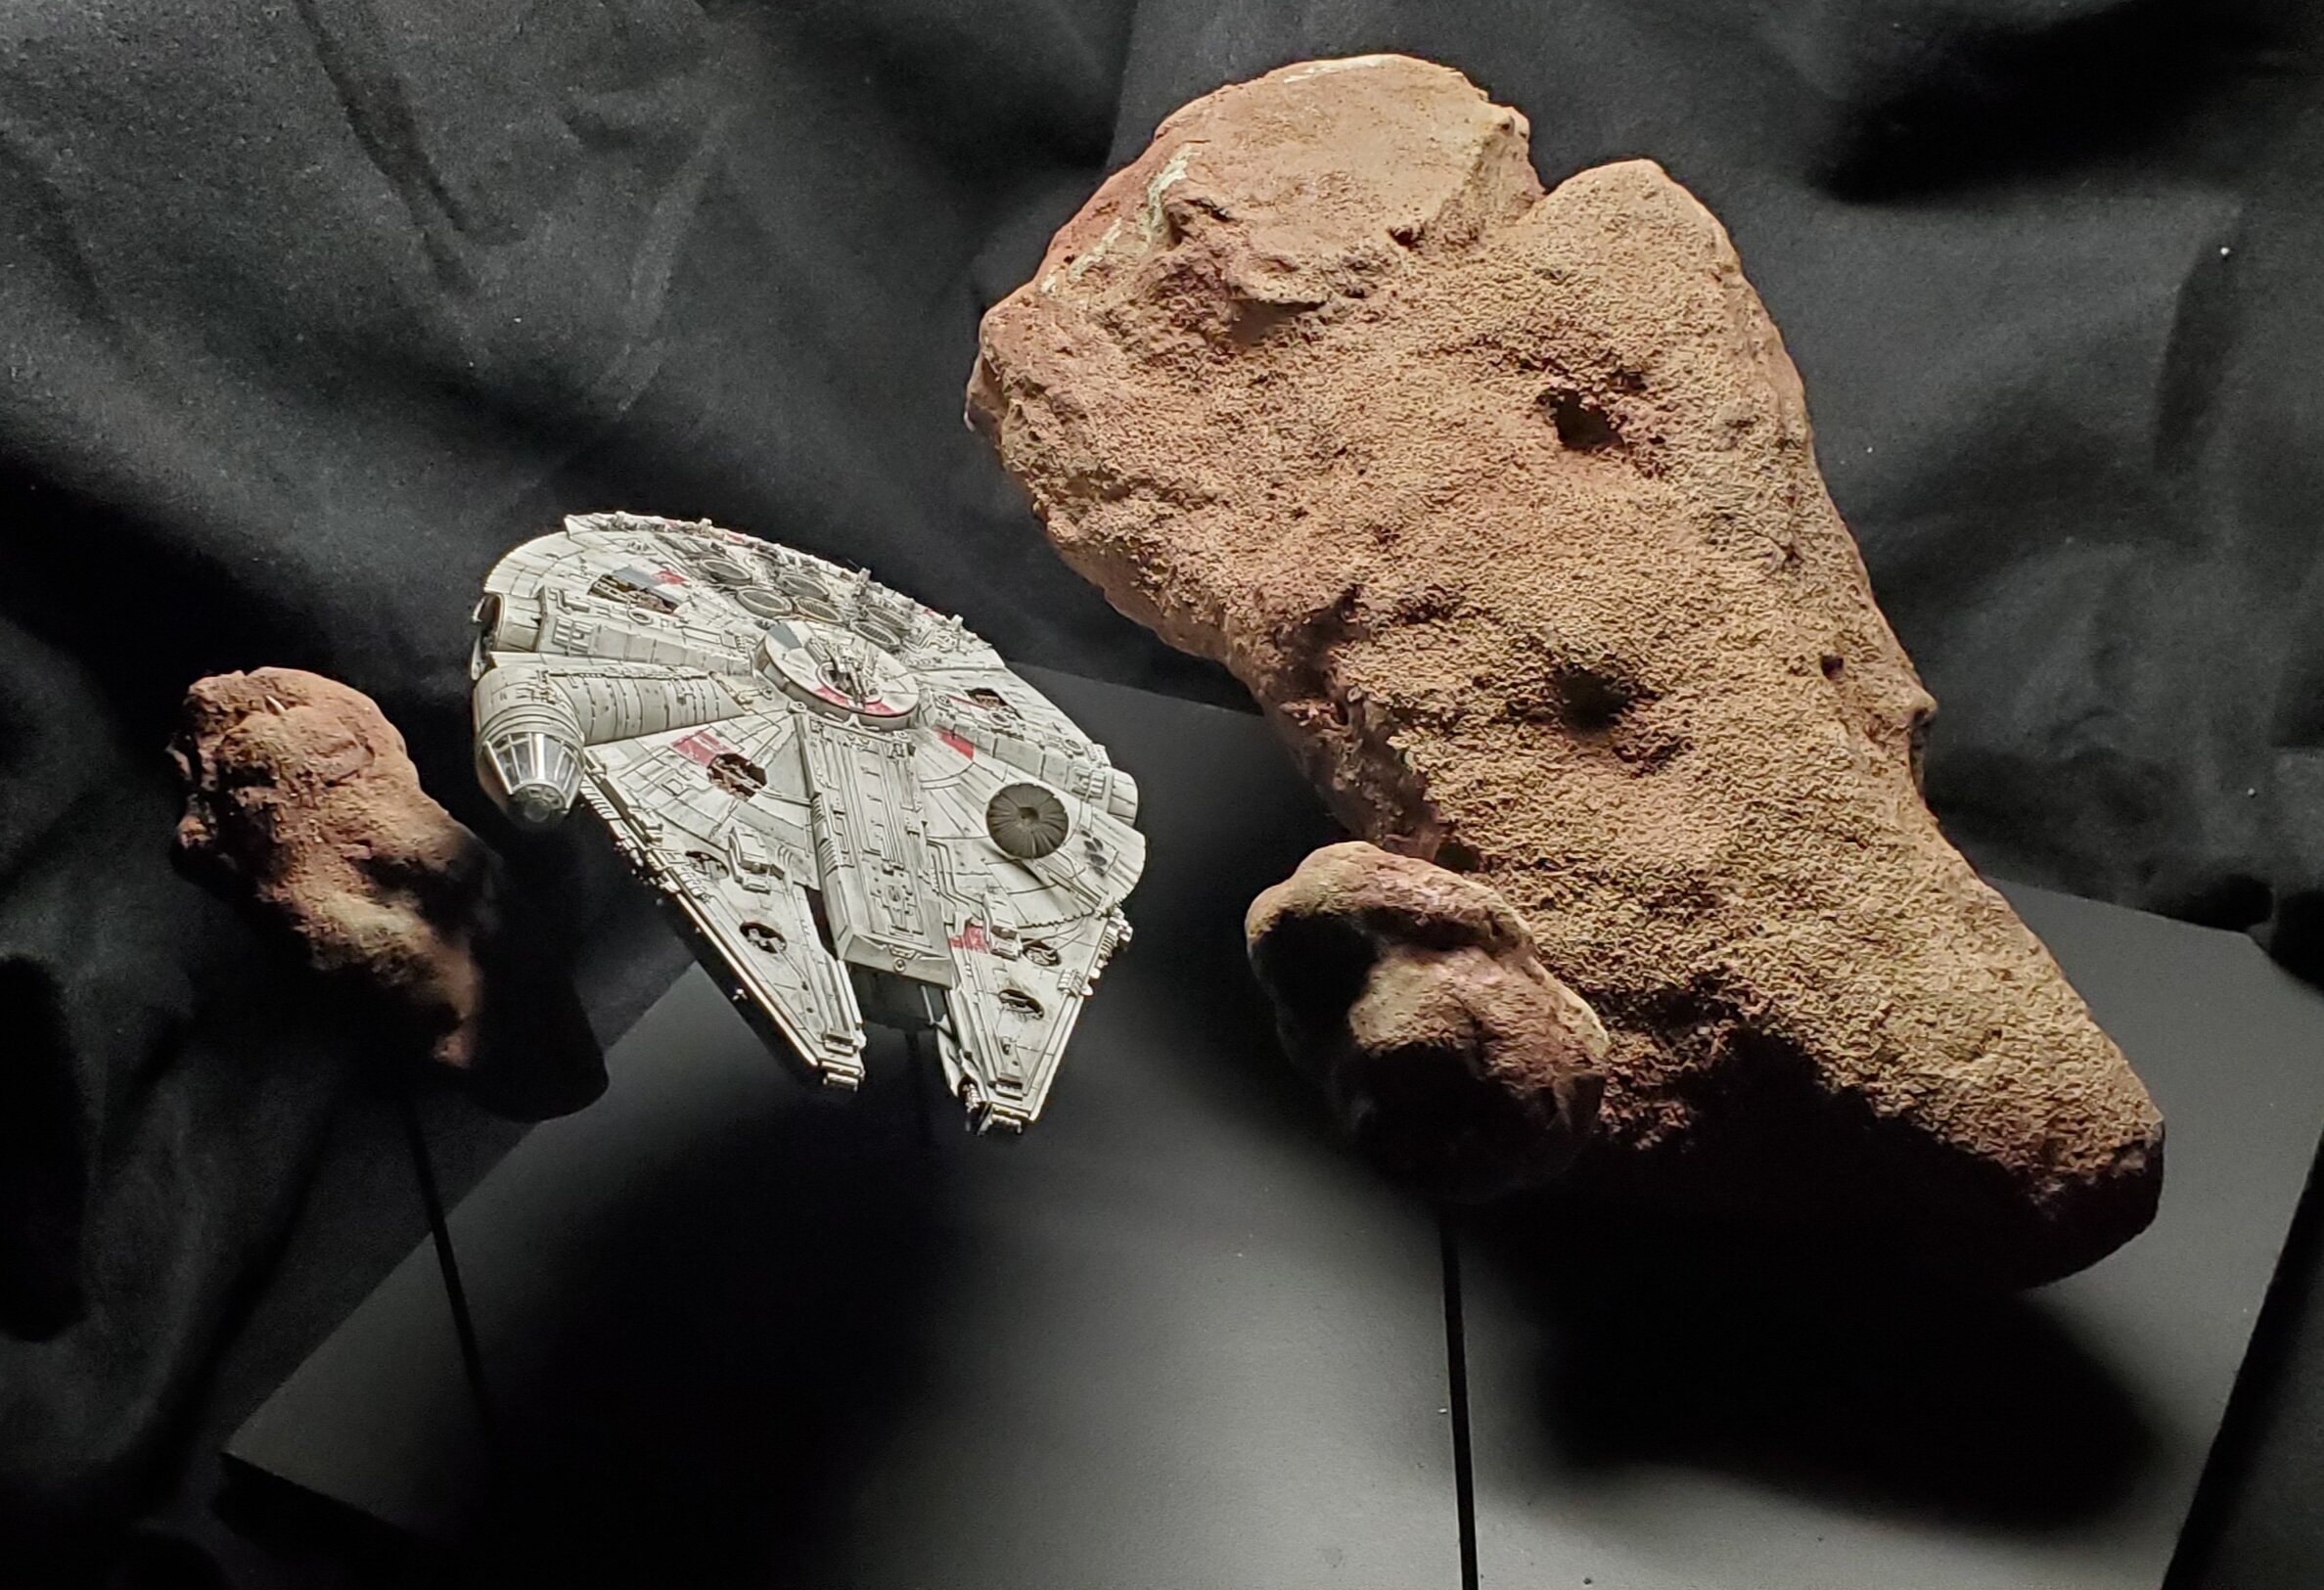
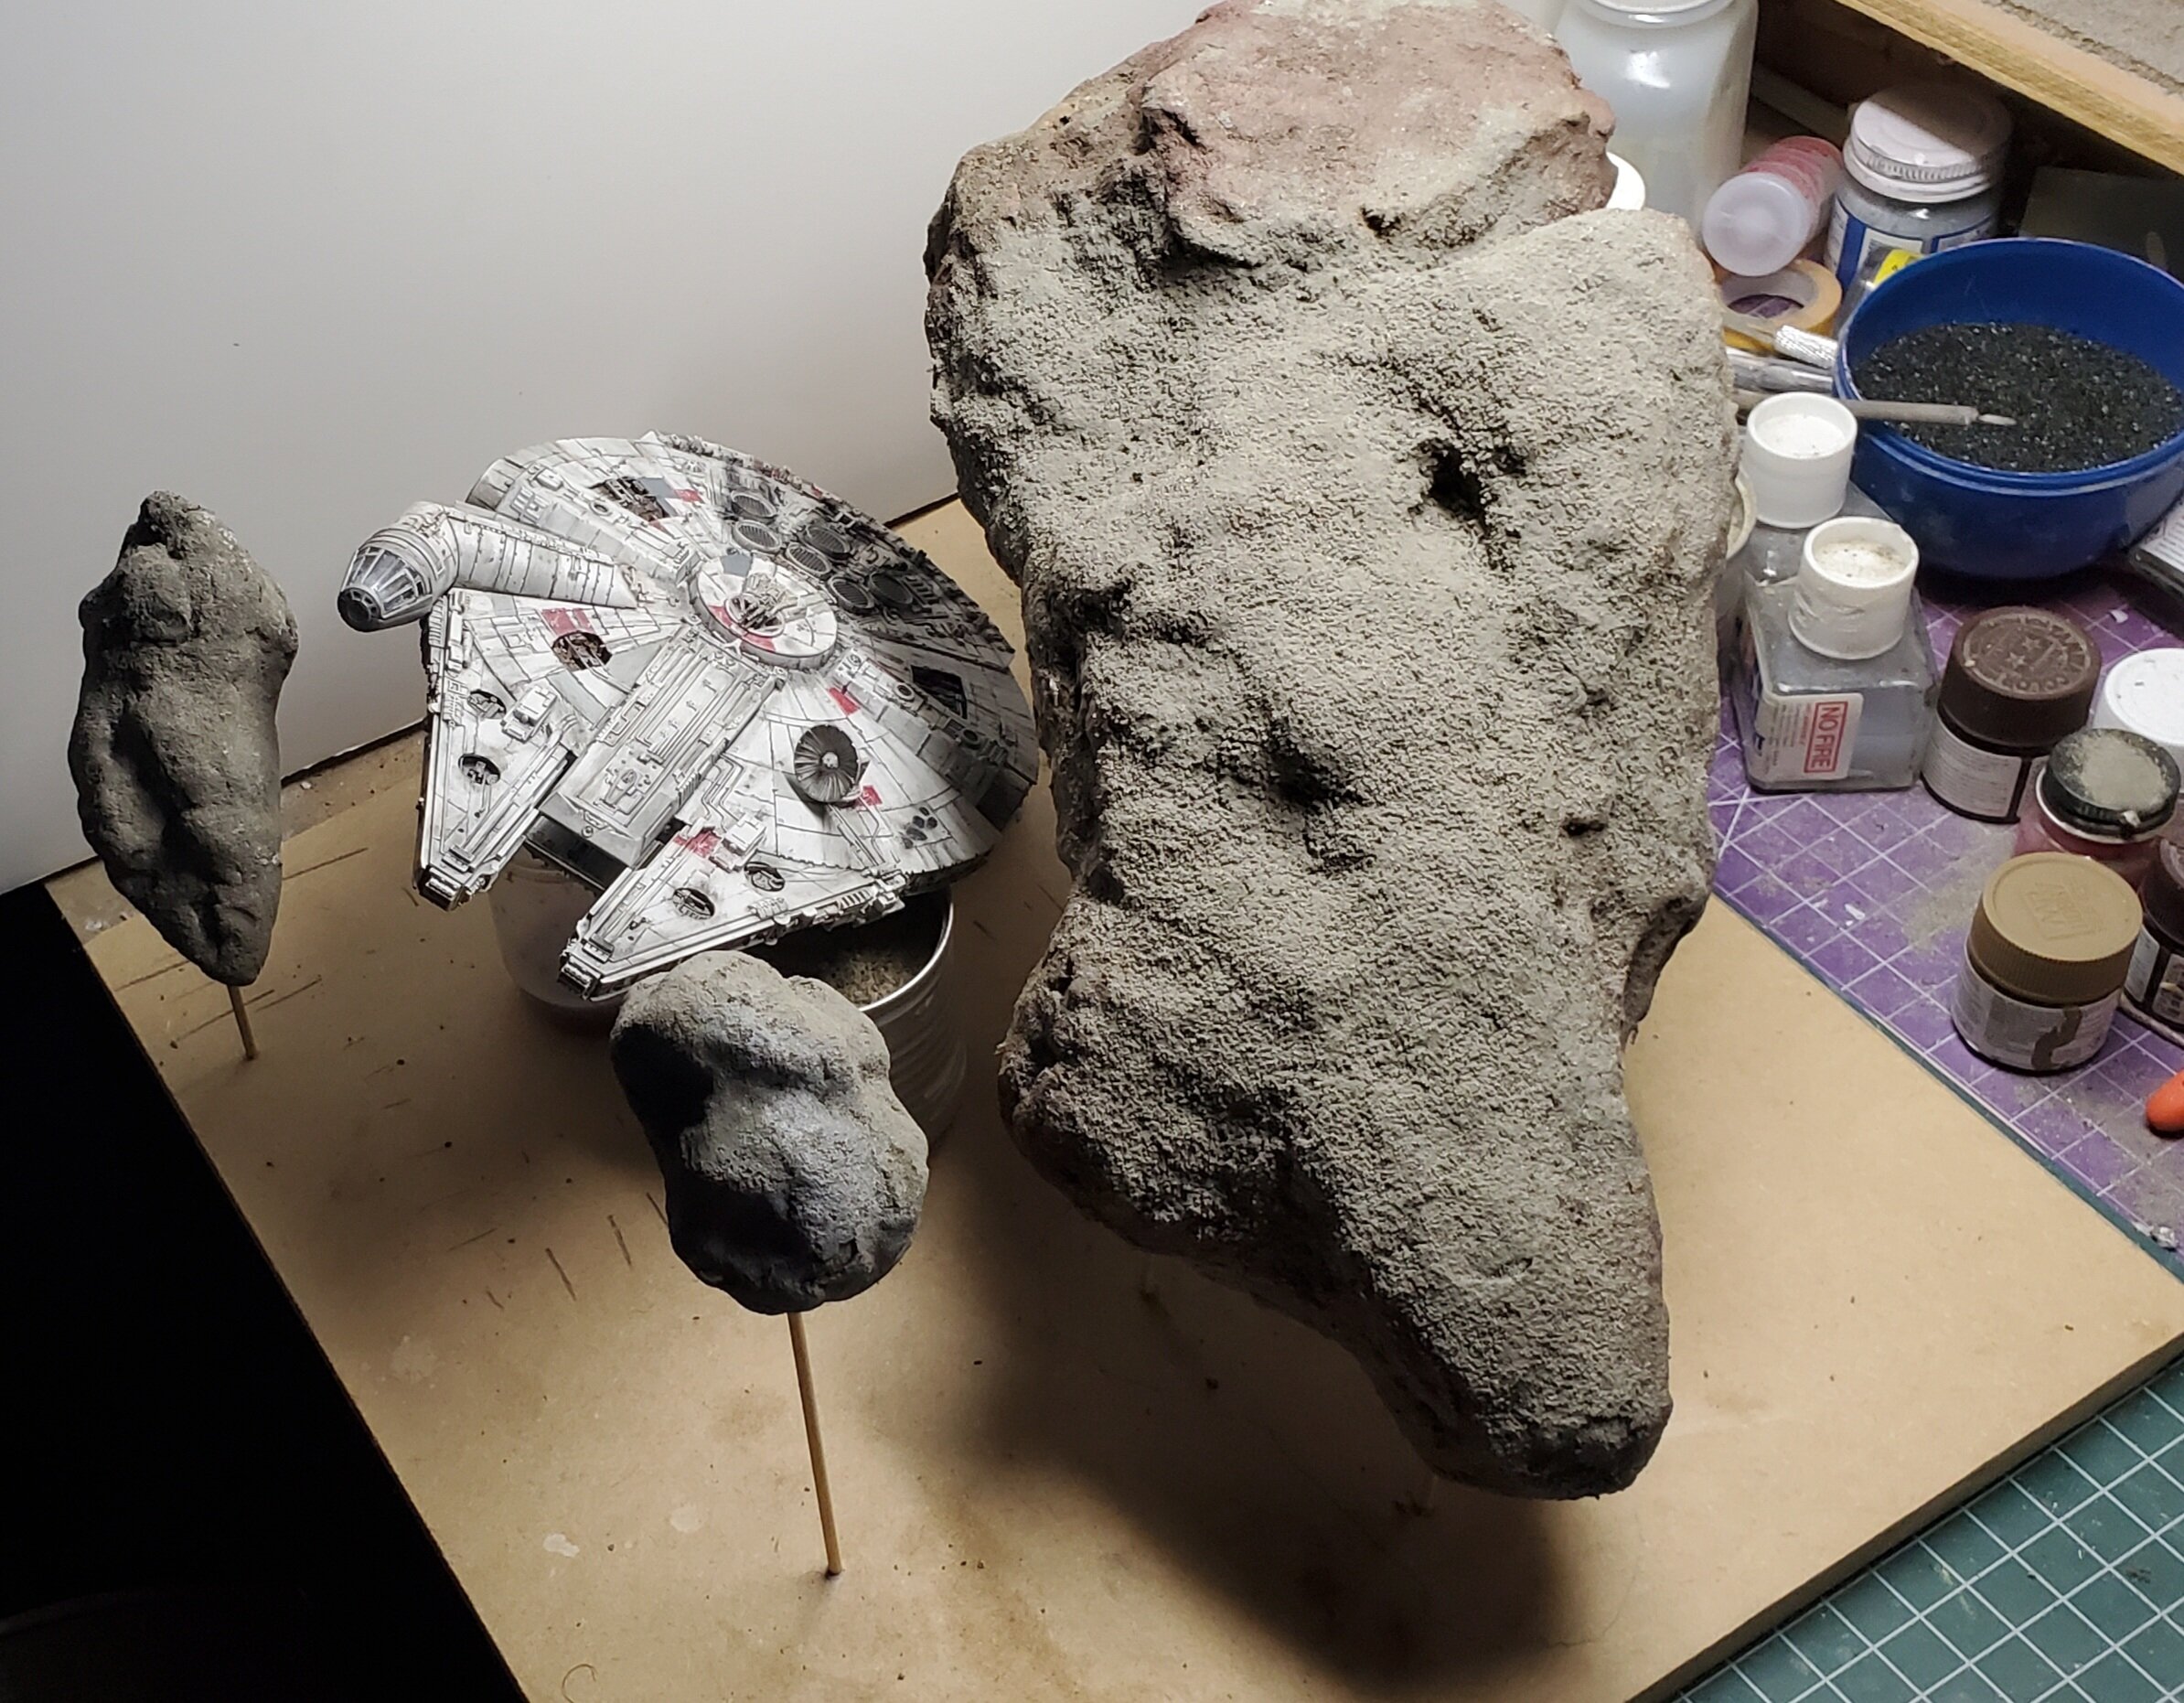
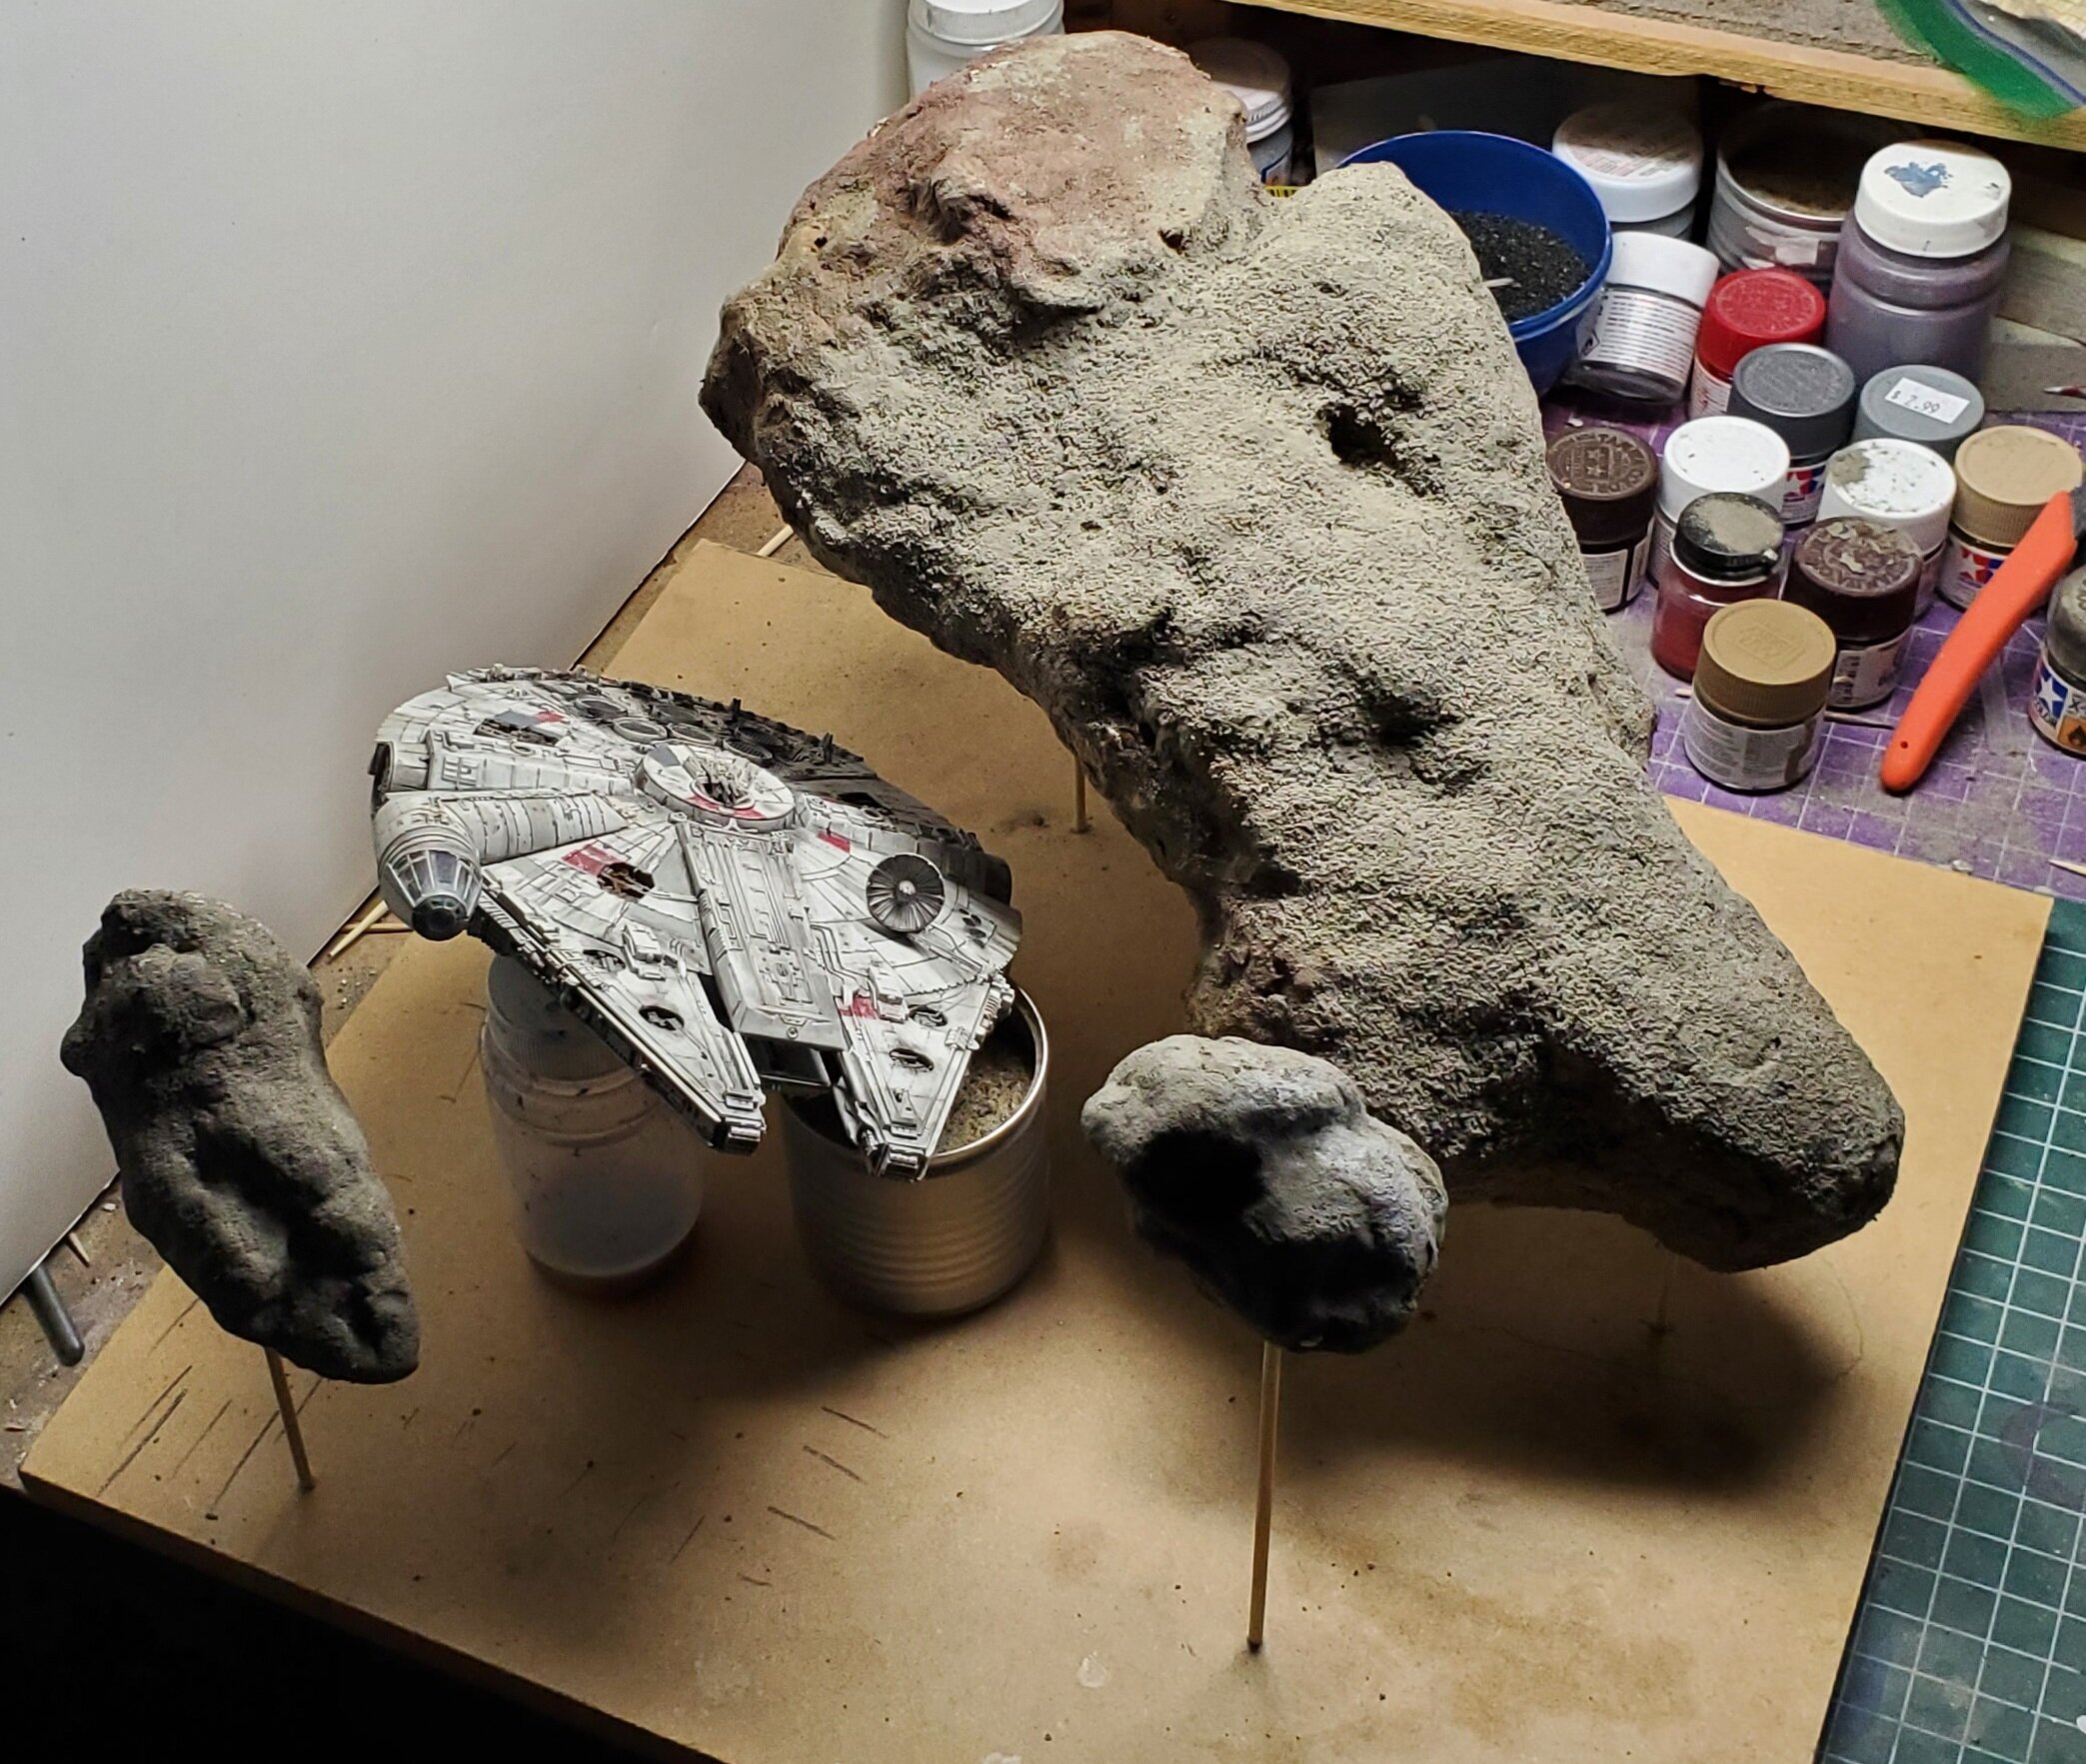
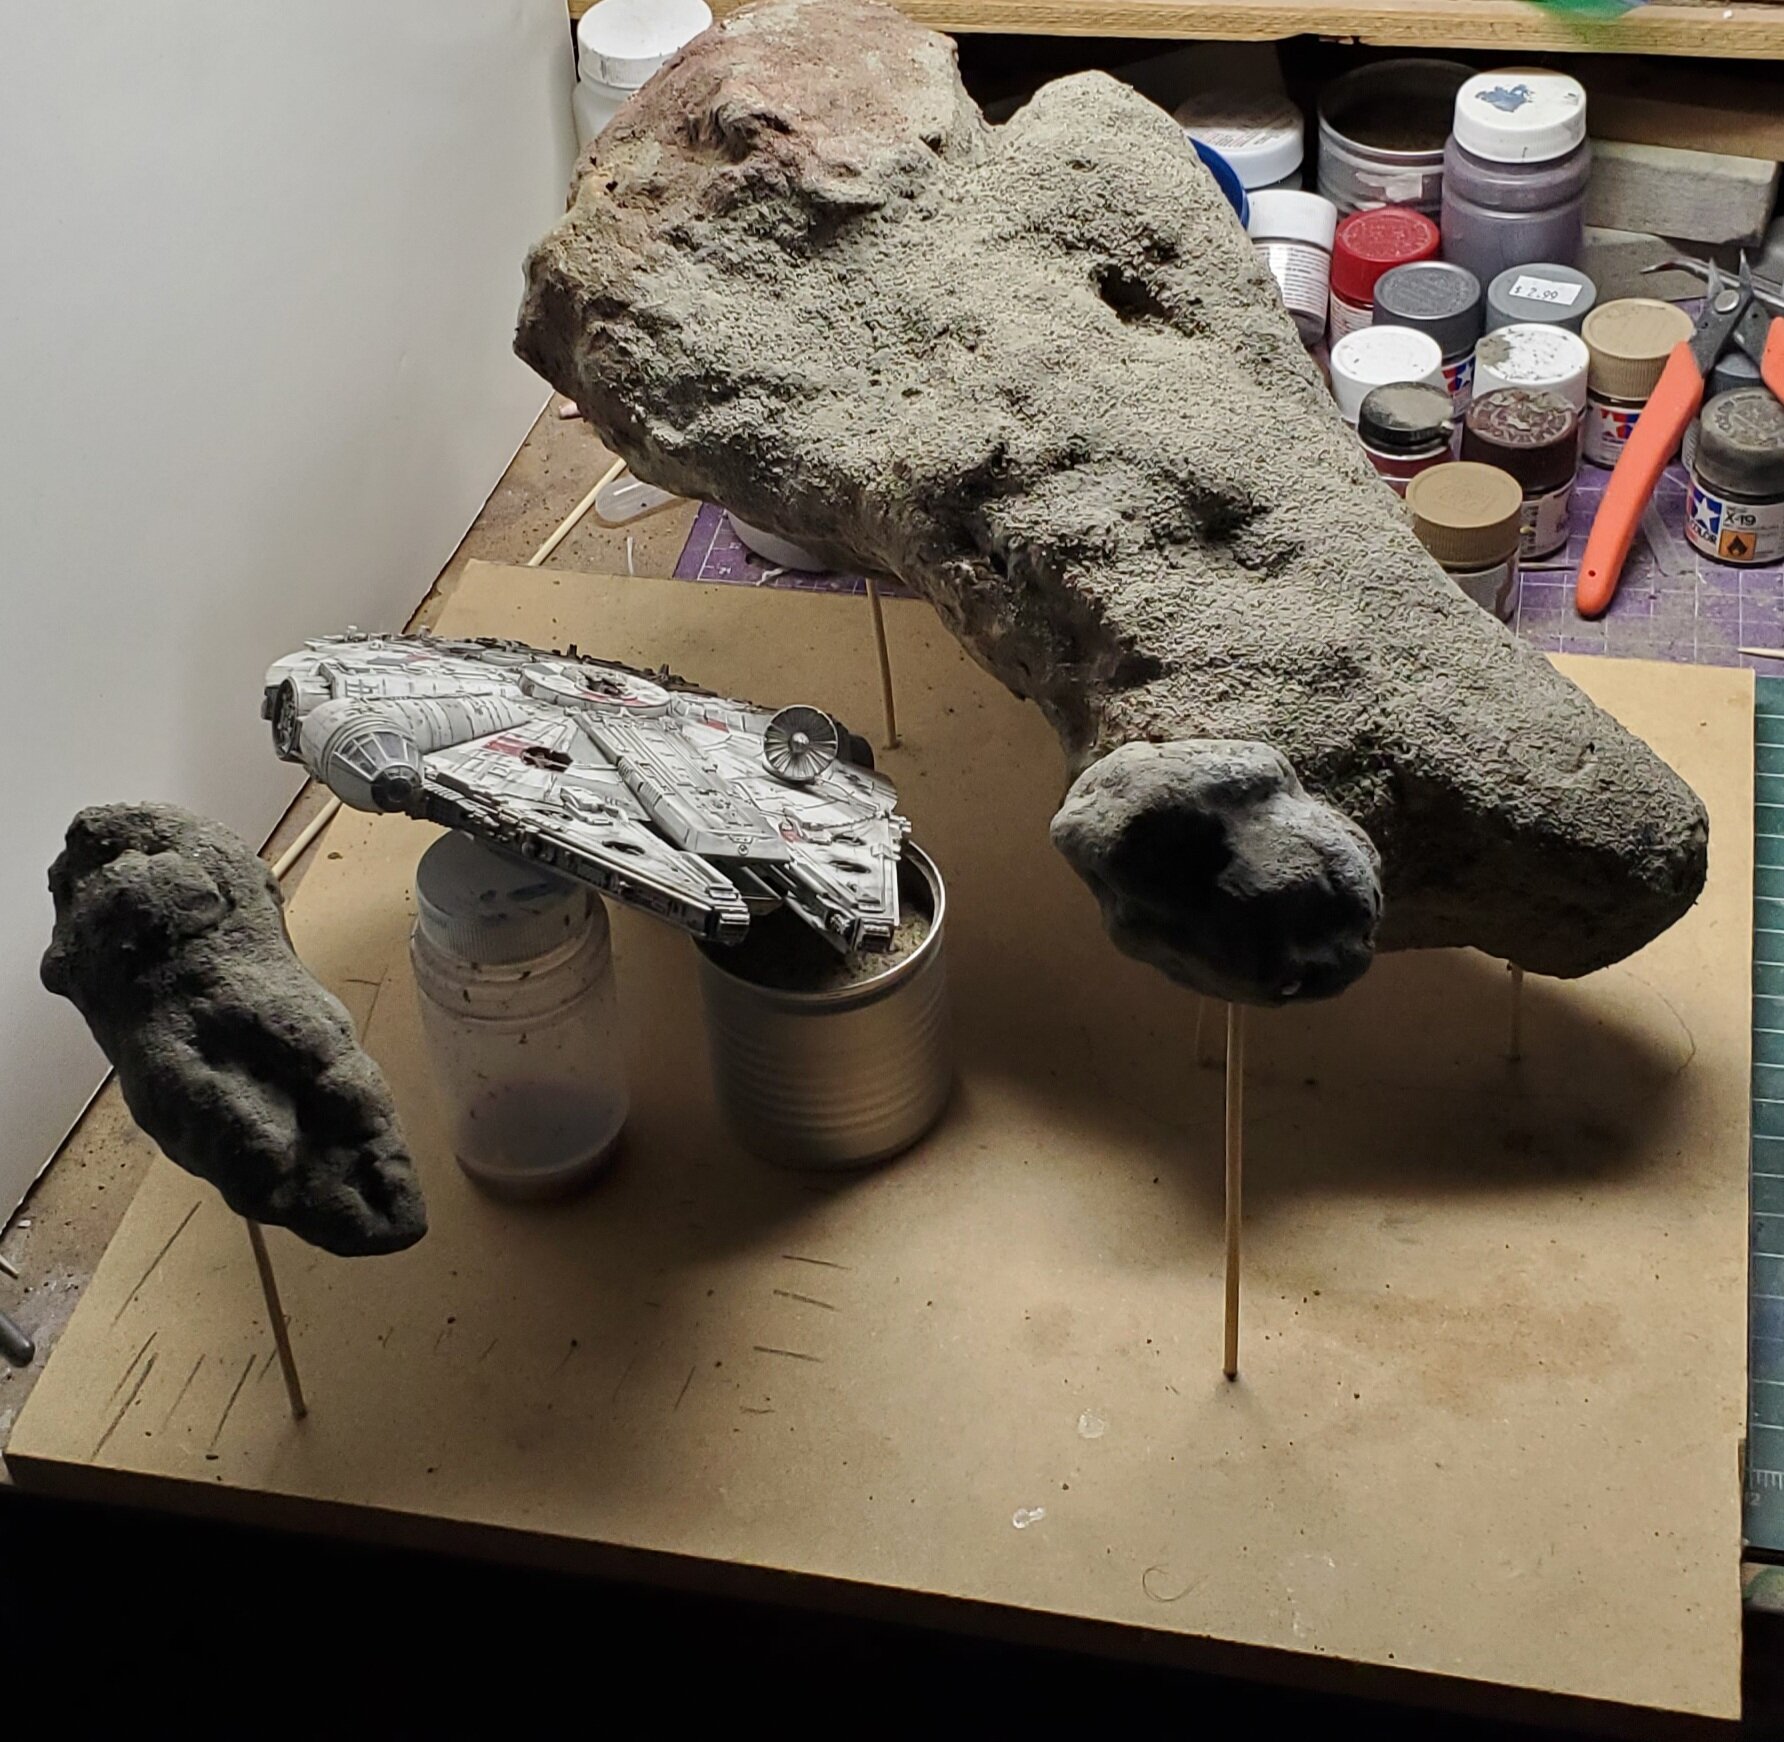
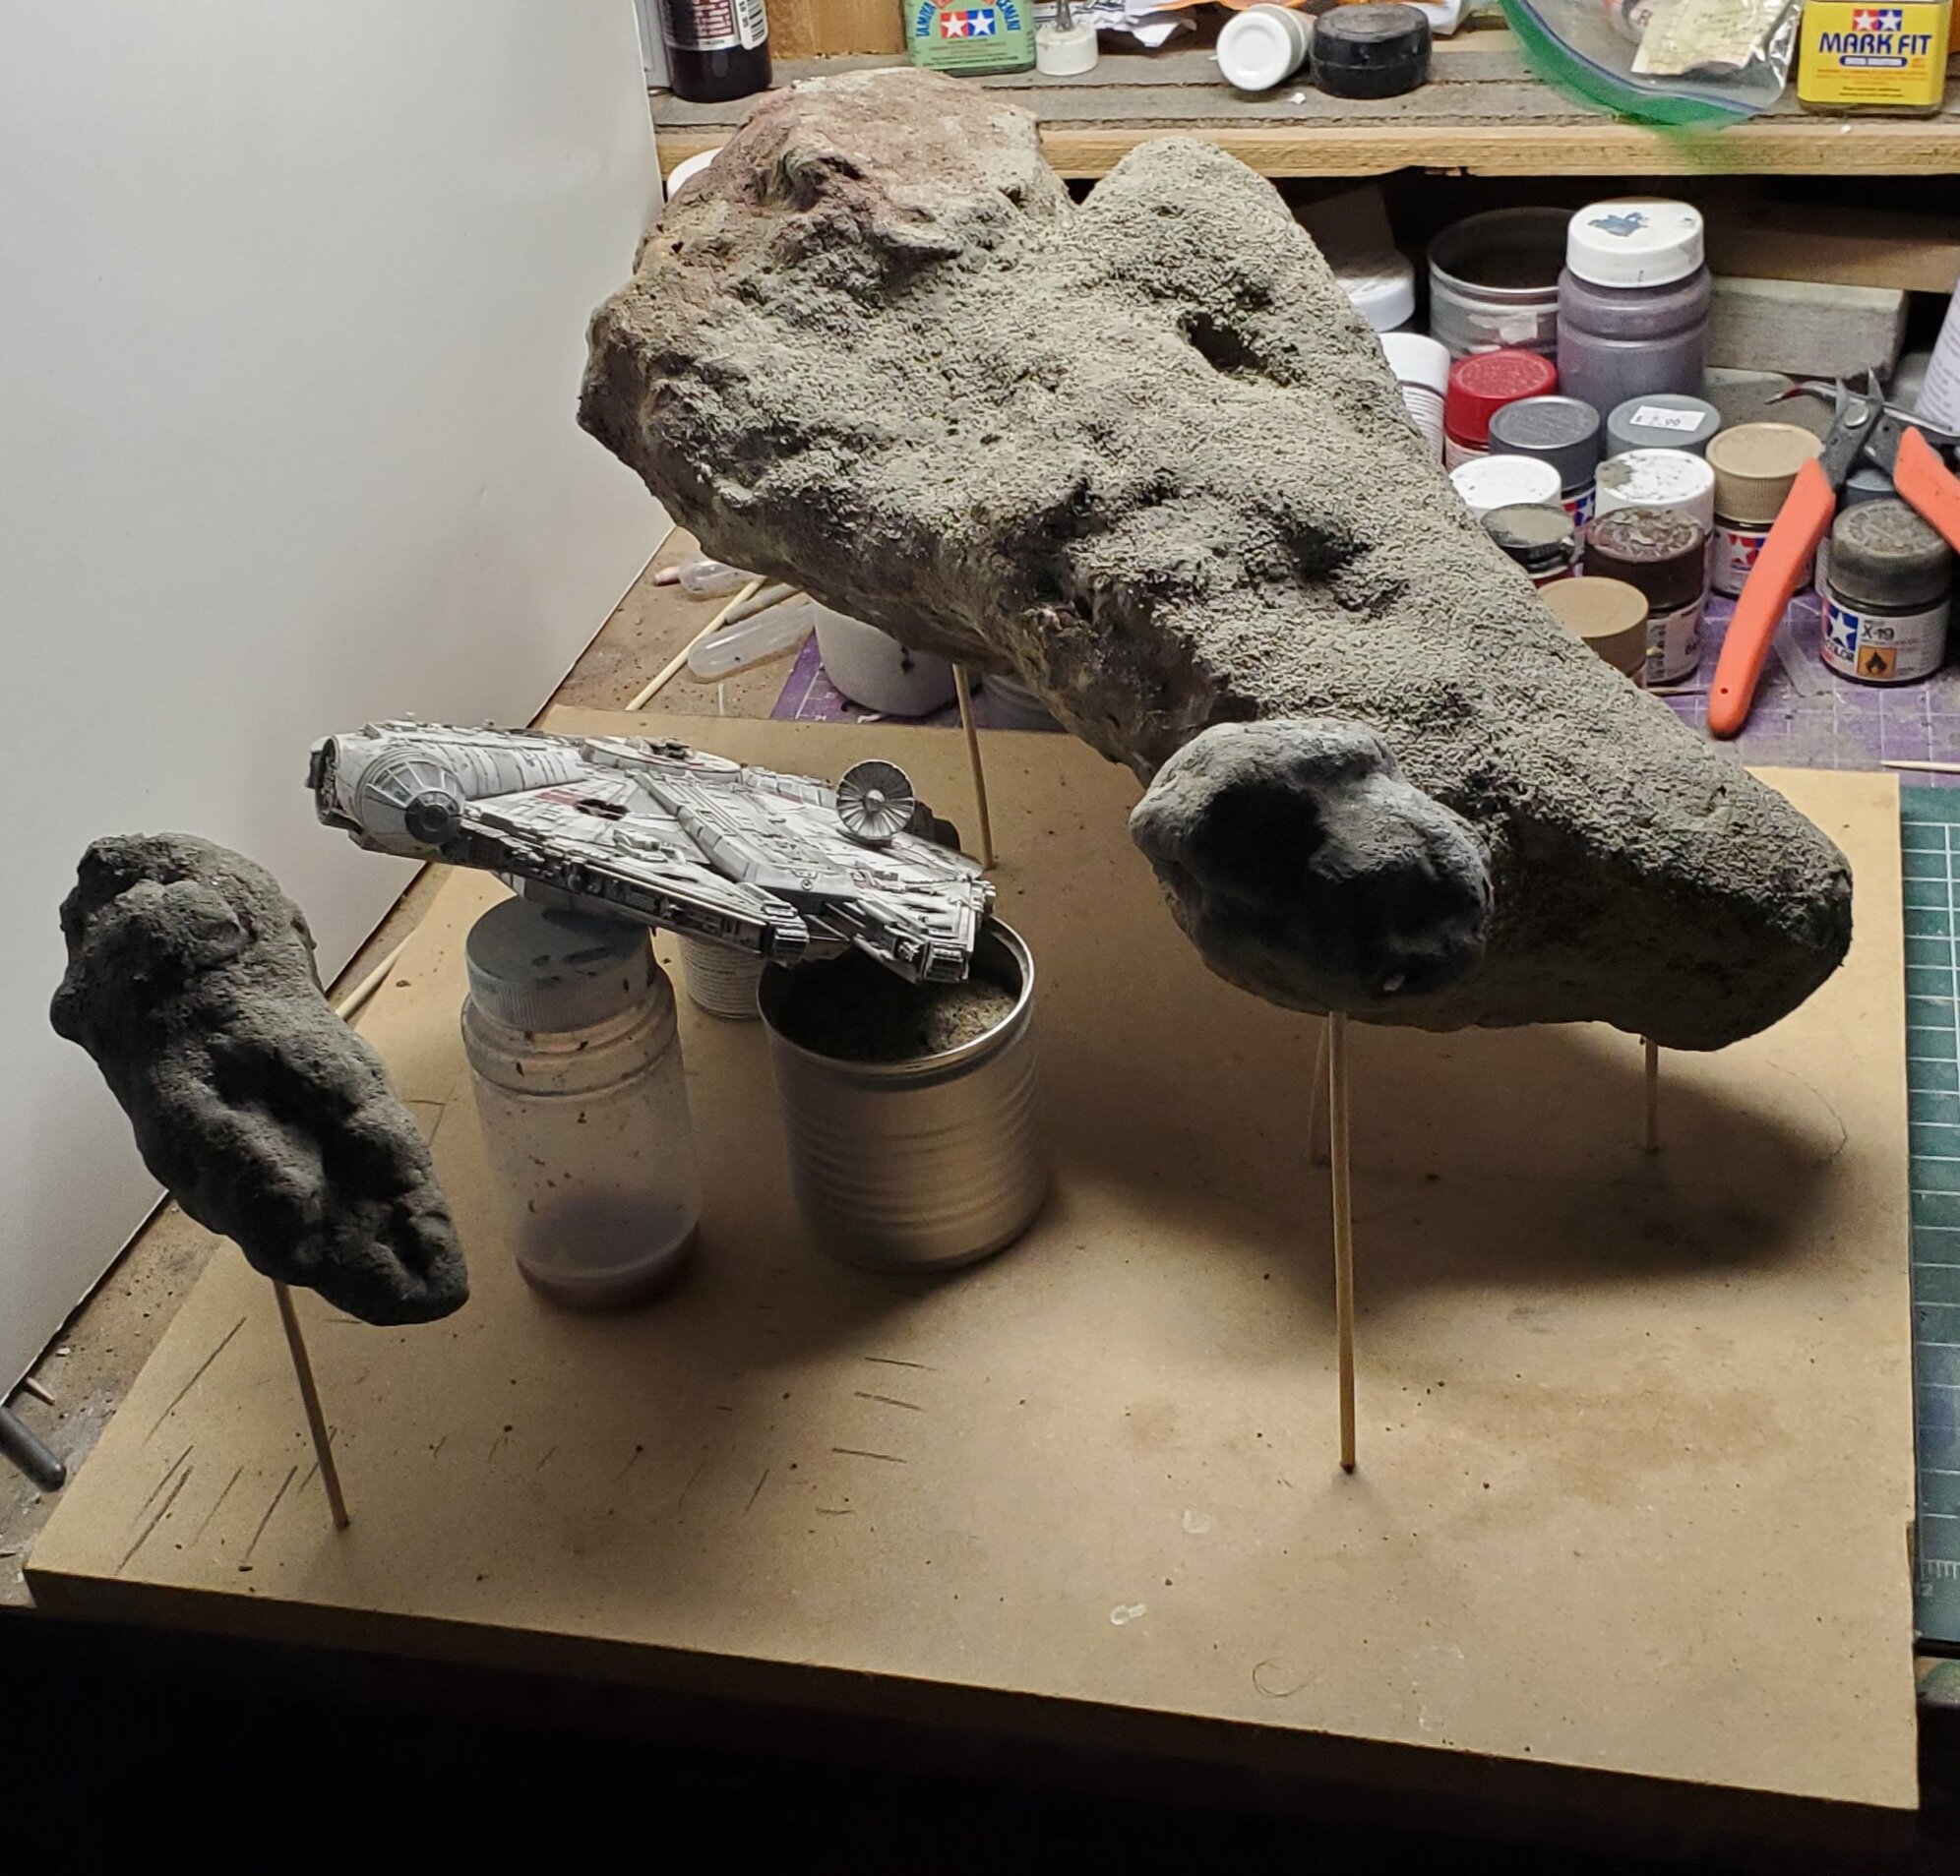
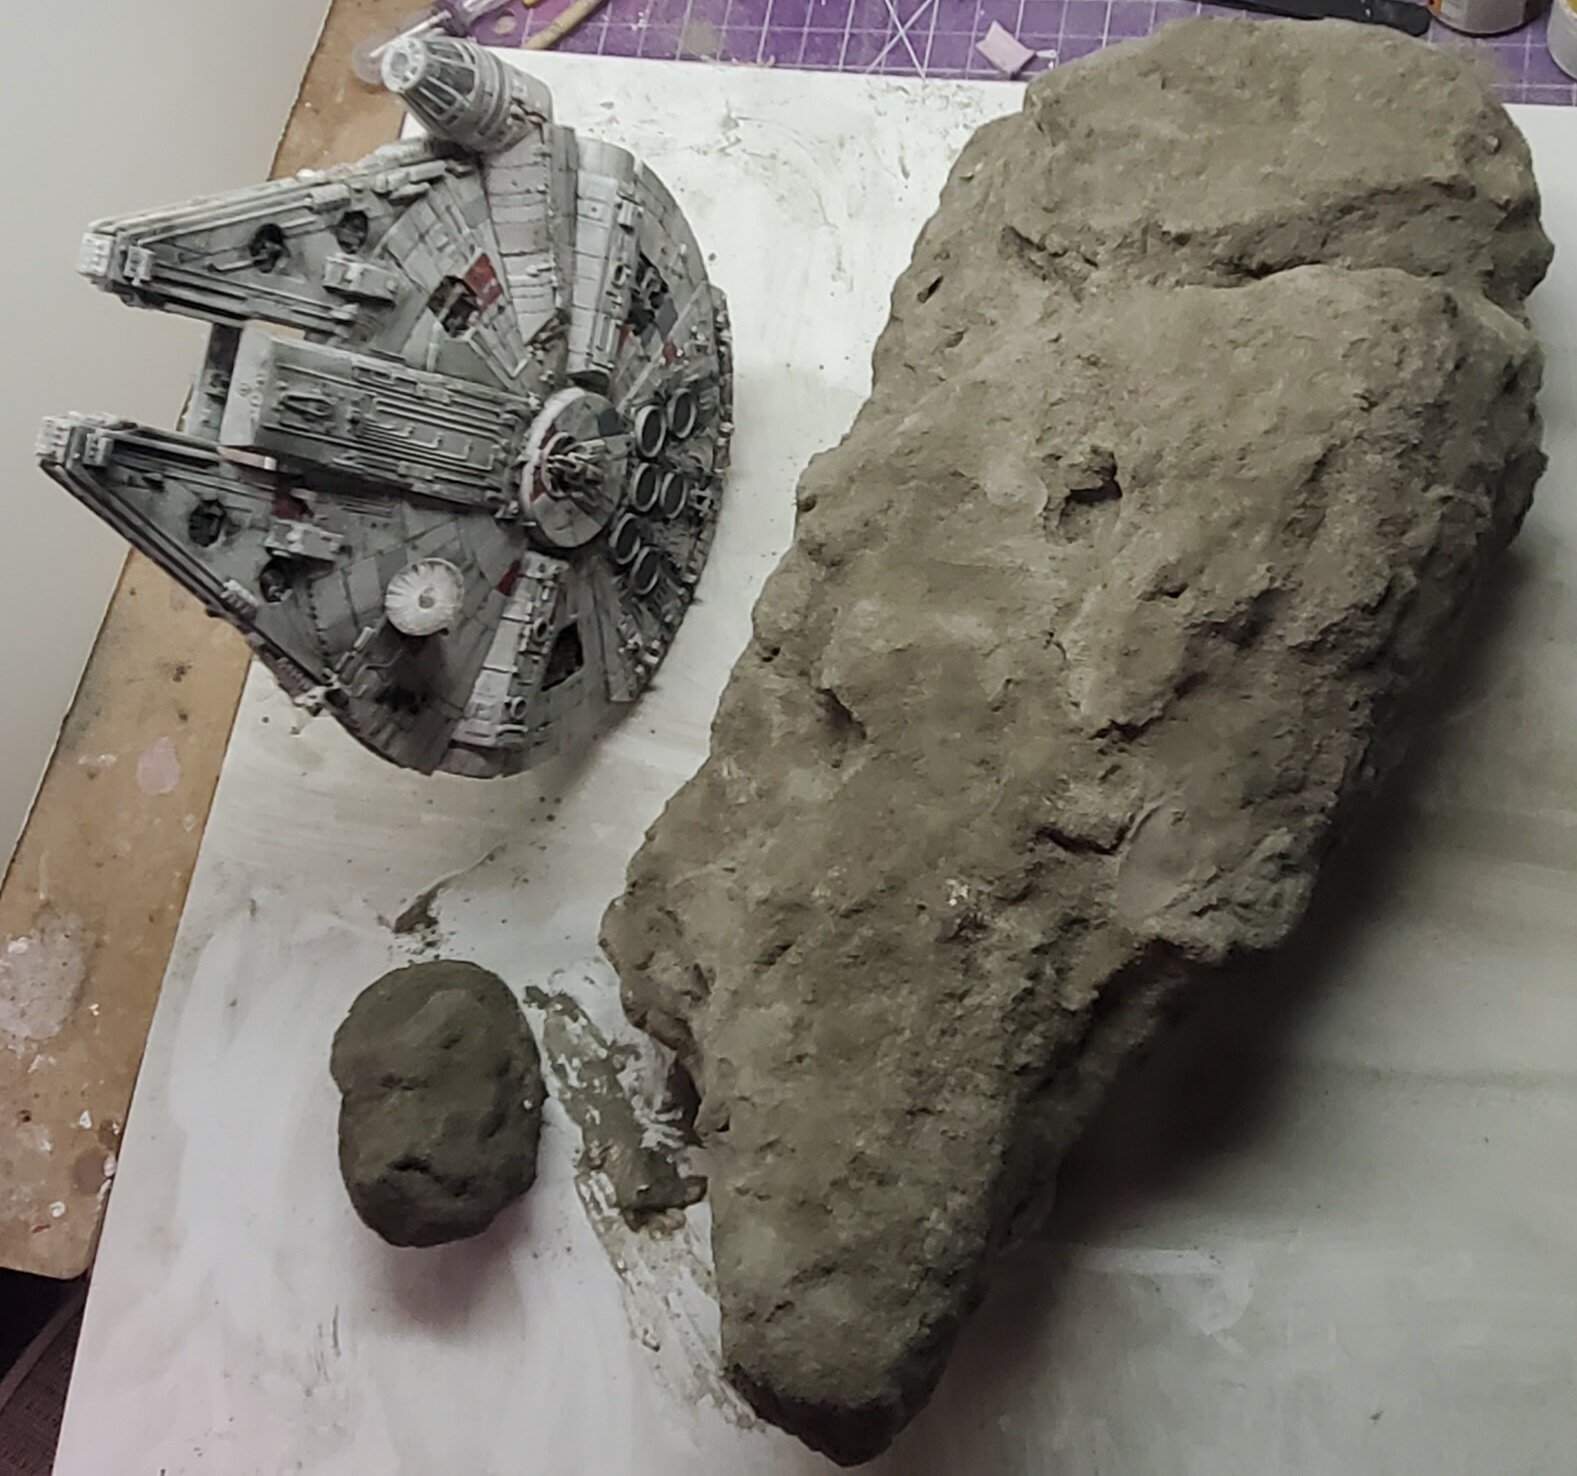
@505thAirborne beautiful Black Widow. The decals really make it pop. @Rock What scale is that? Looks rather large I that pic. Love the look of it so far. @derex3592 get some base colours on that! Can't wait to see her all dressed up! Trying to figure out placement on the base for the Falcon and the 'roids 😉. The rocks I've got figured out and the placement of the Falcon here is approximate (will be a little more nose up in the end).
-
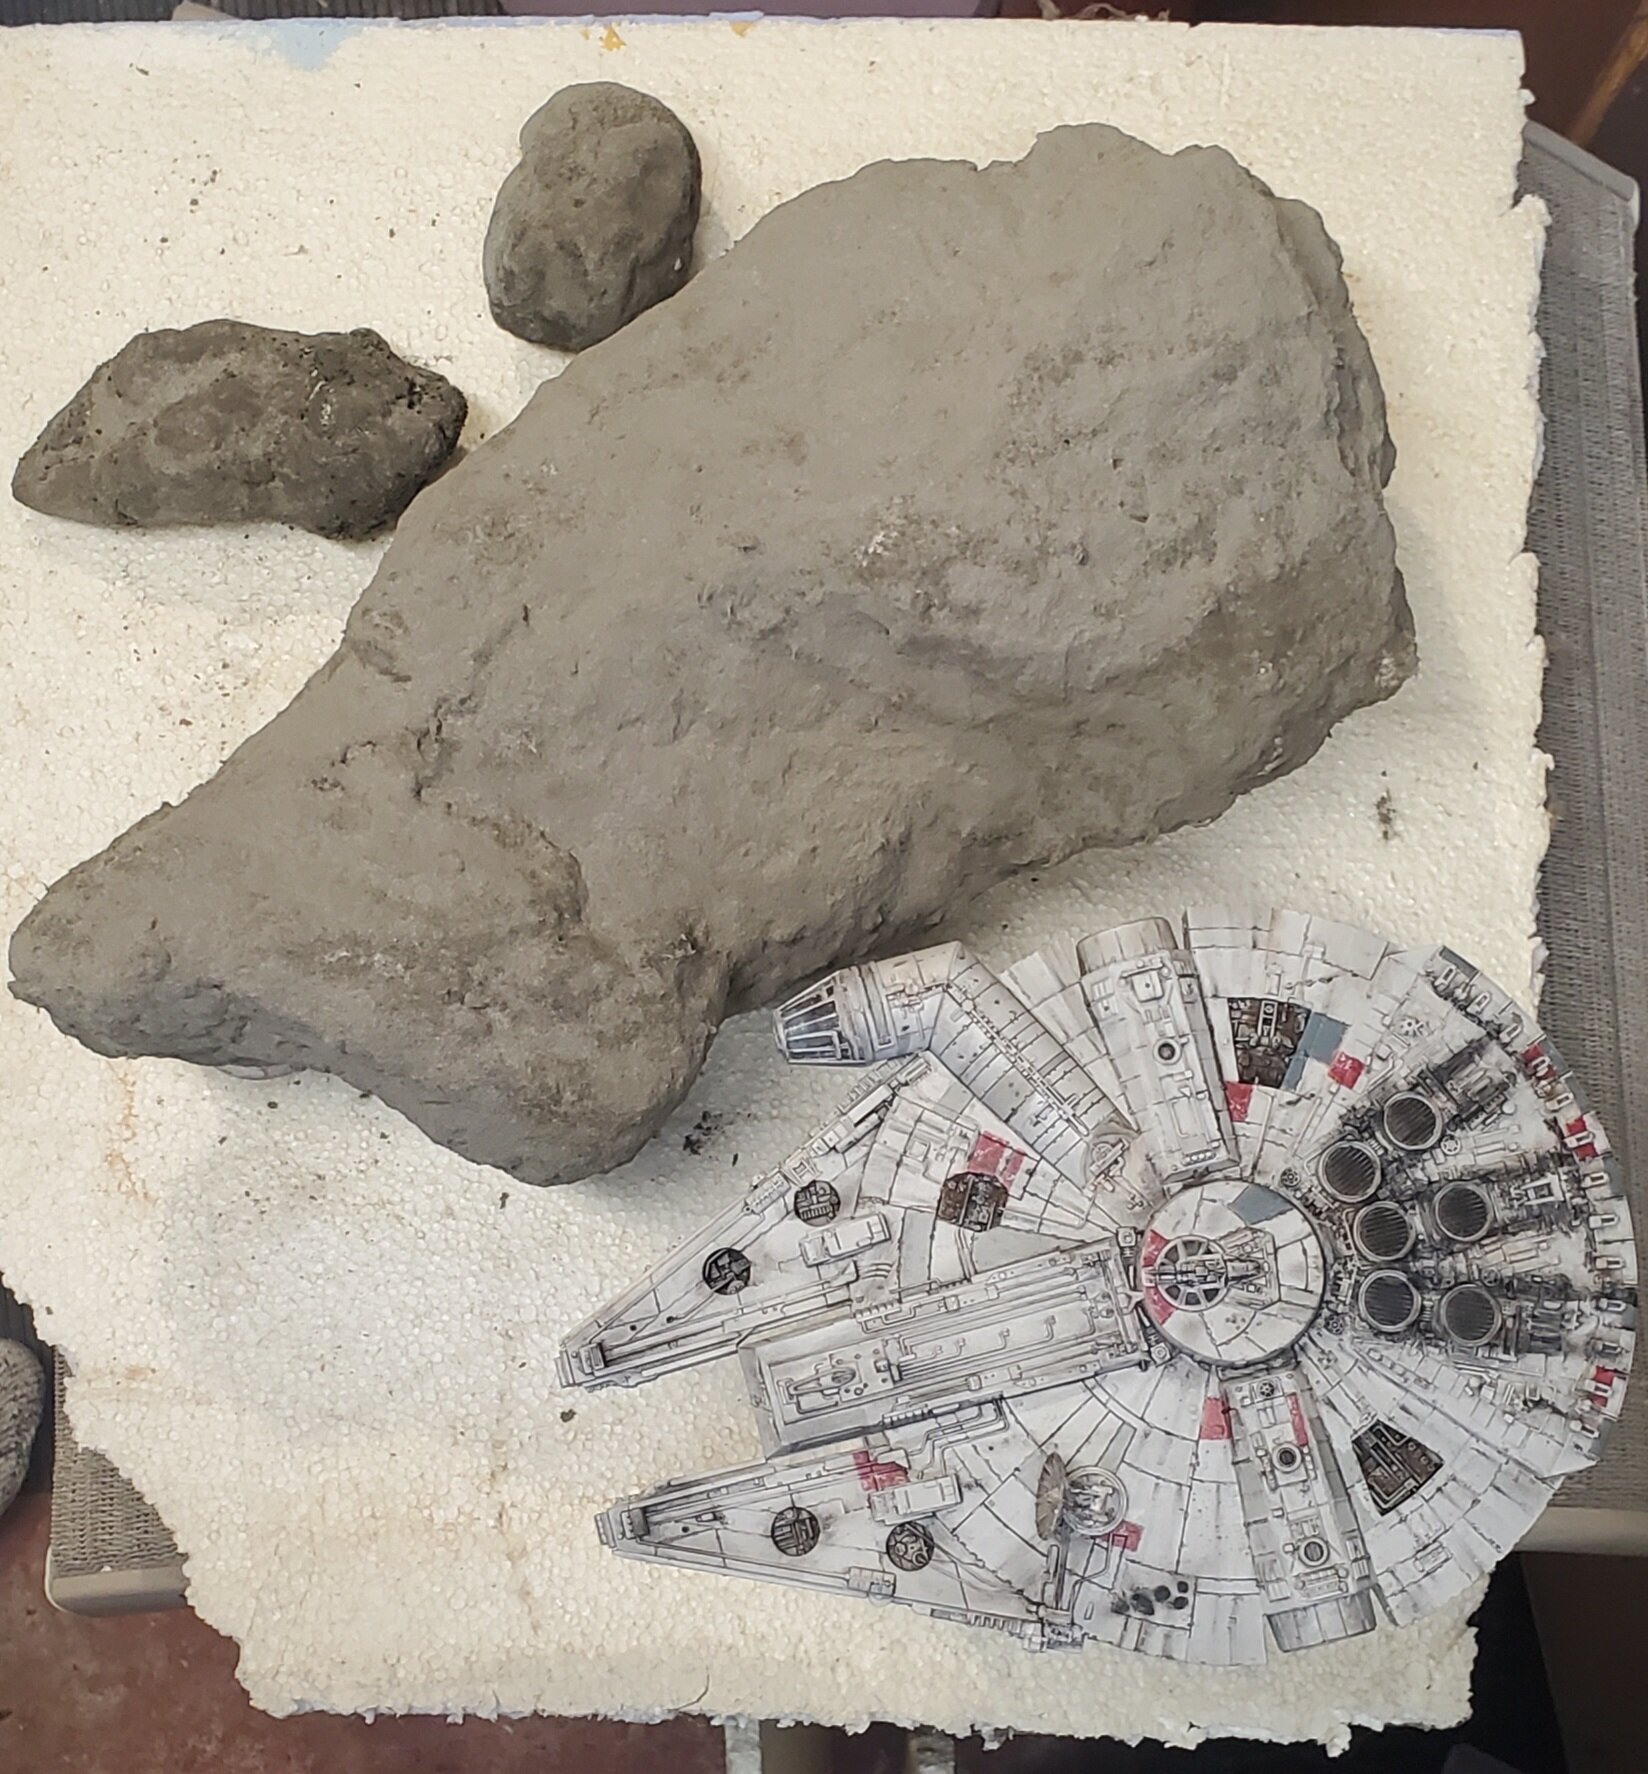
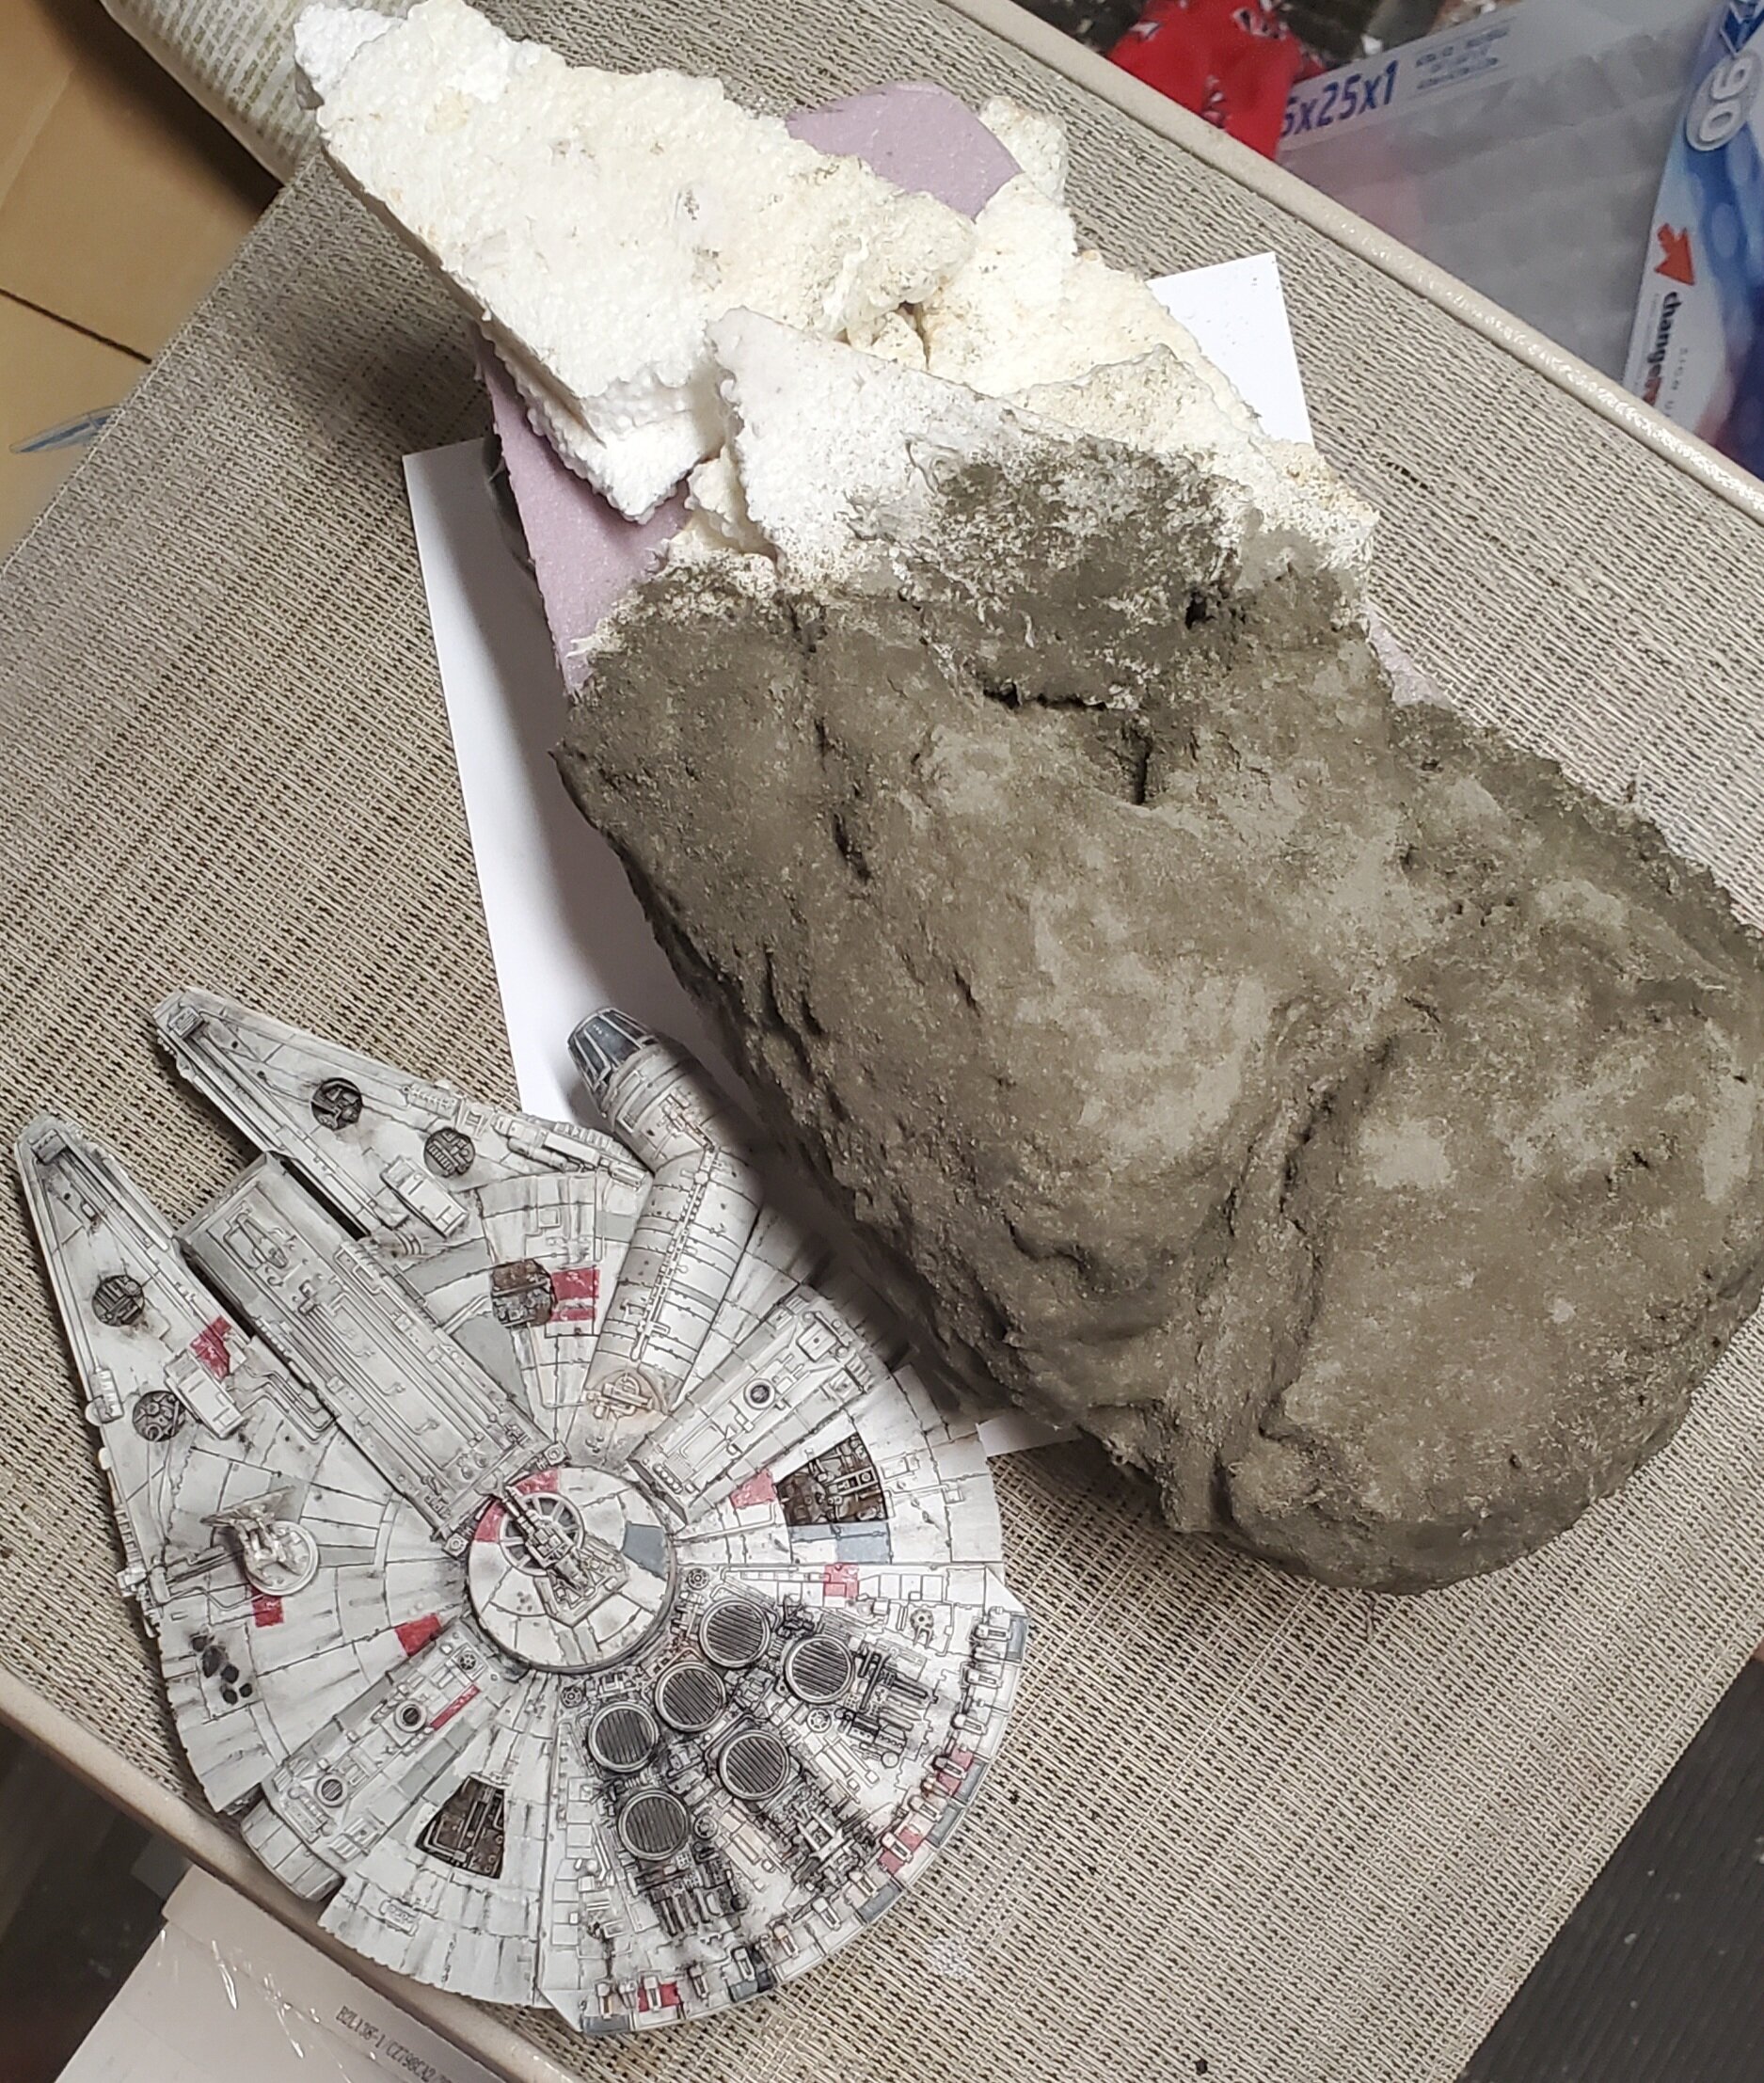
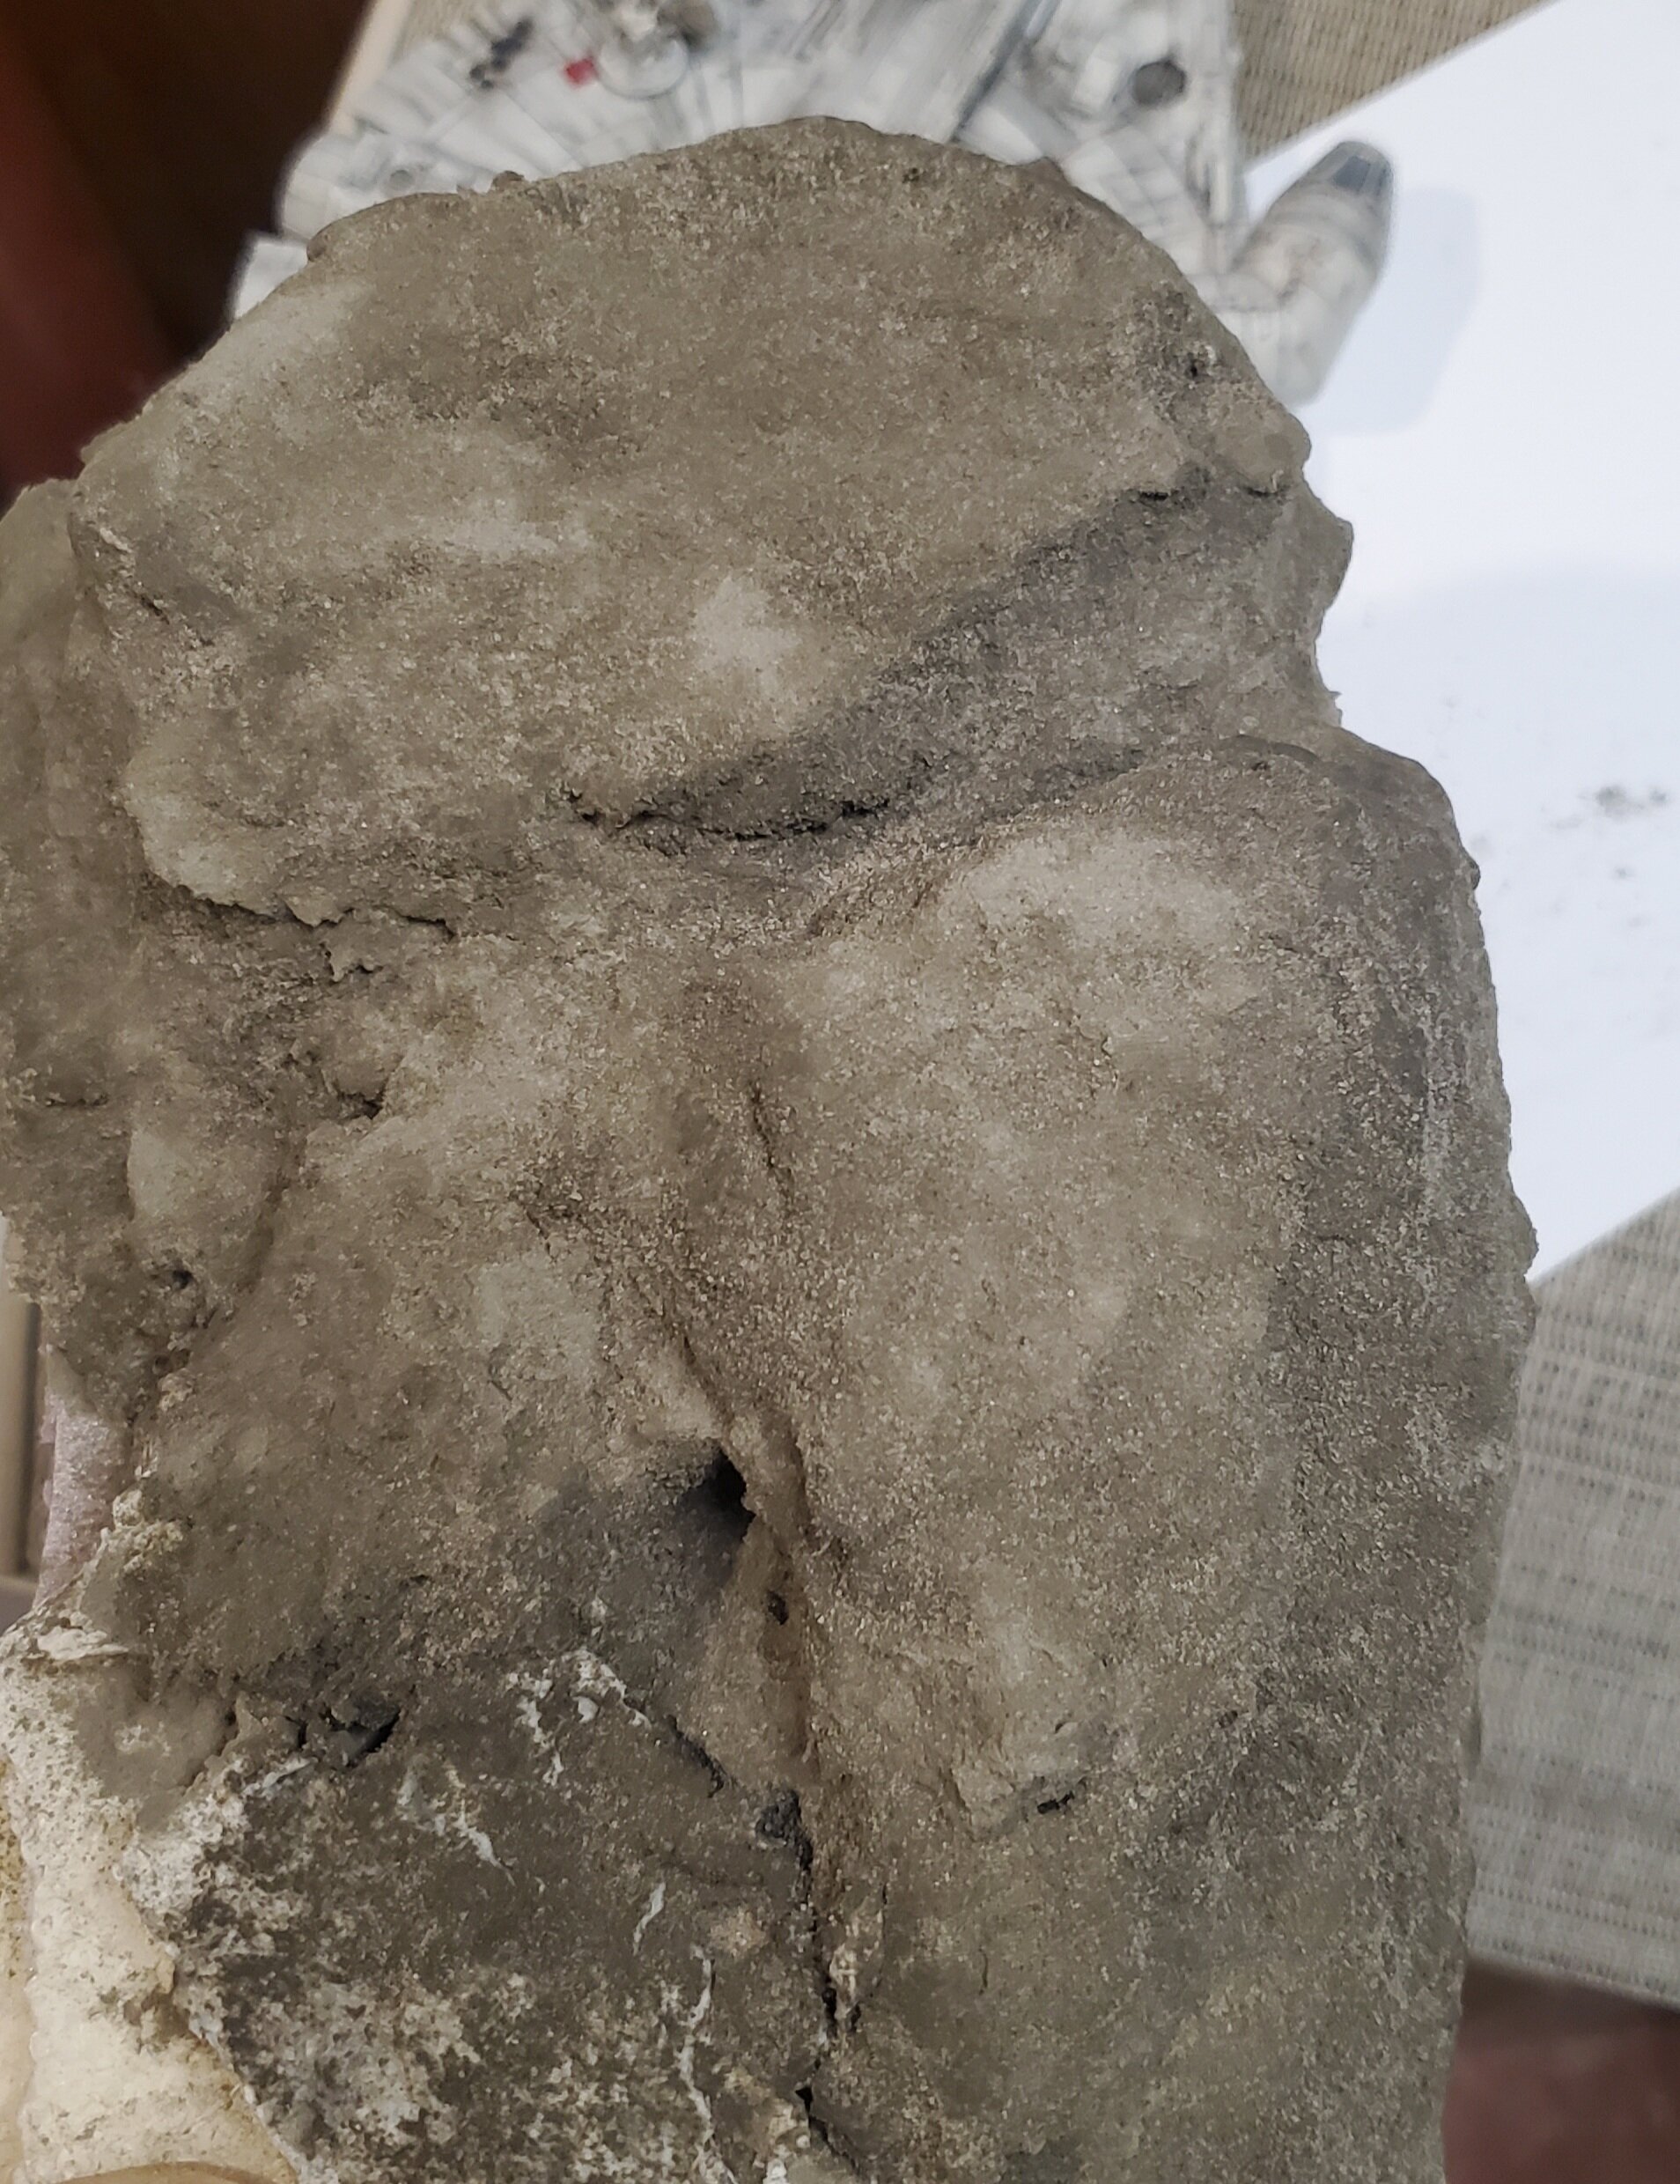
Big one and two smaller 'roids - maybe one more mid sized to build.
-
Looks really great NB4M! @MechTech dude! Your work is simply inspiring. (And your tools are enviable!) Always a pleasure to see what you've been up to. @arbit wish I had the patience to learn 3D modeling. The things that 3D printers make possible, I mean the sky is the limit, and your designs look so good. Fist asteroid underway.
-
Thanks arbit. I noticed that as well. Gonna balance it out a bit when I do the weathering on the bottom of the ship.
-
Got my payment request today ☺️ 🤗 😊 😁
-
So clean and Smmoooth! Lookin killer!
-
Finemolds 144th. Got a Bandai in the wings. Thinking maybe a cloud city landing platform dio for that one.
-
Well, not to be stingy.

-
Jesus! That looks soo cool!
-
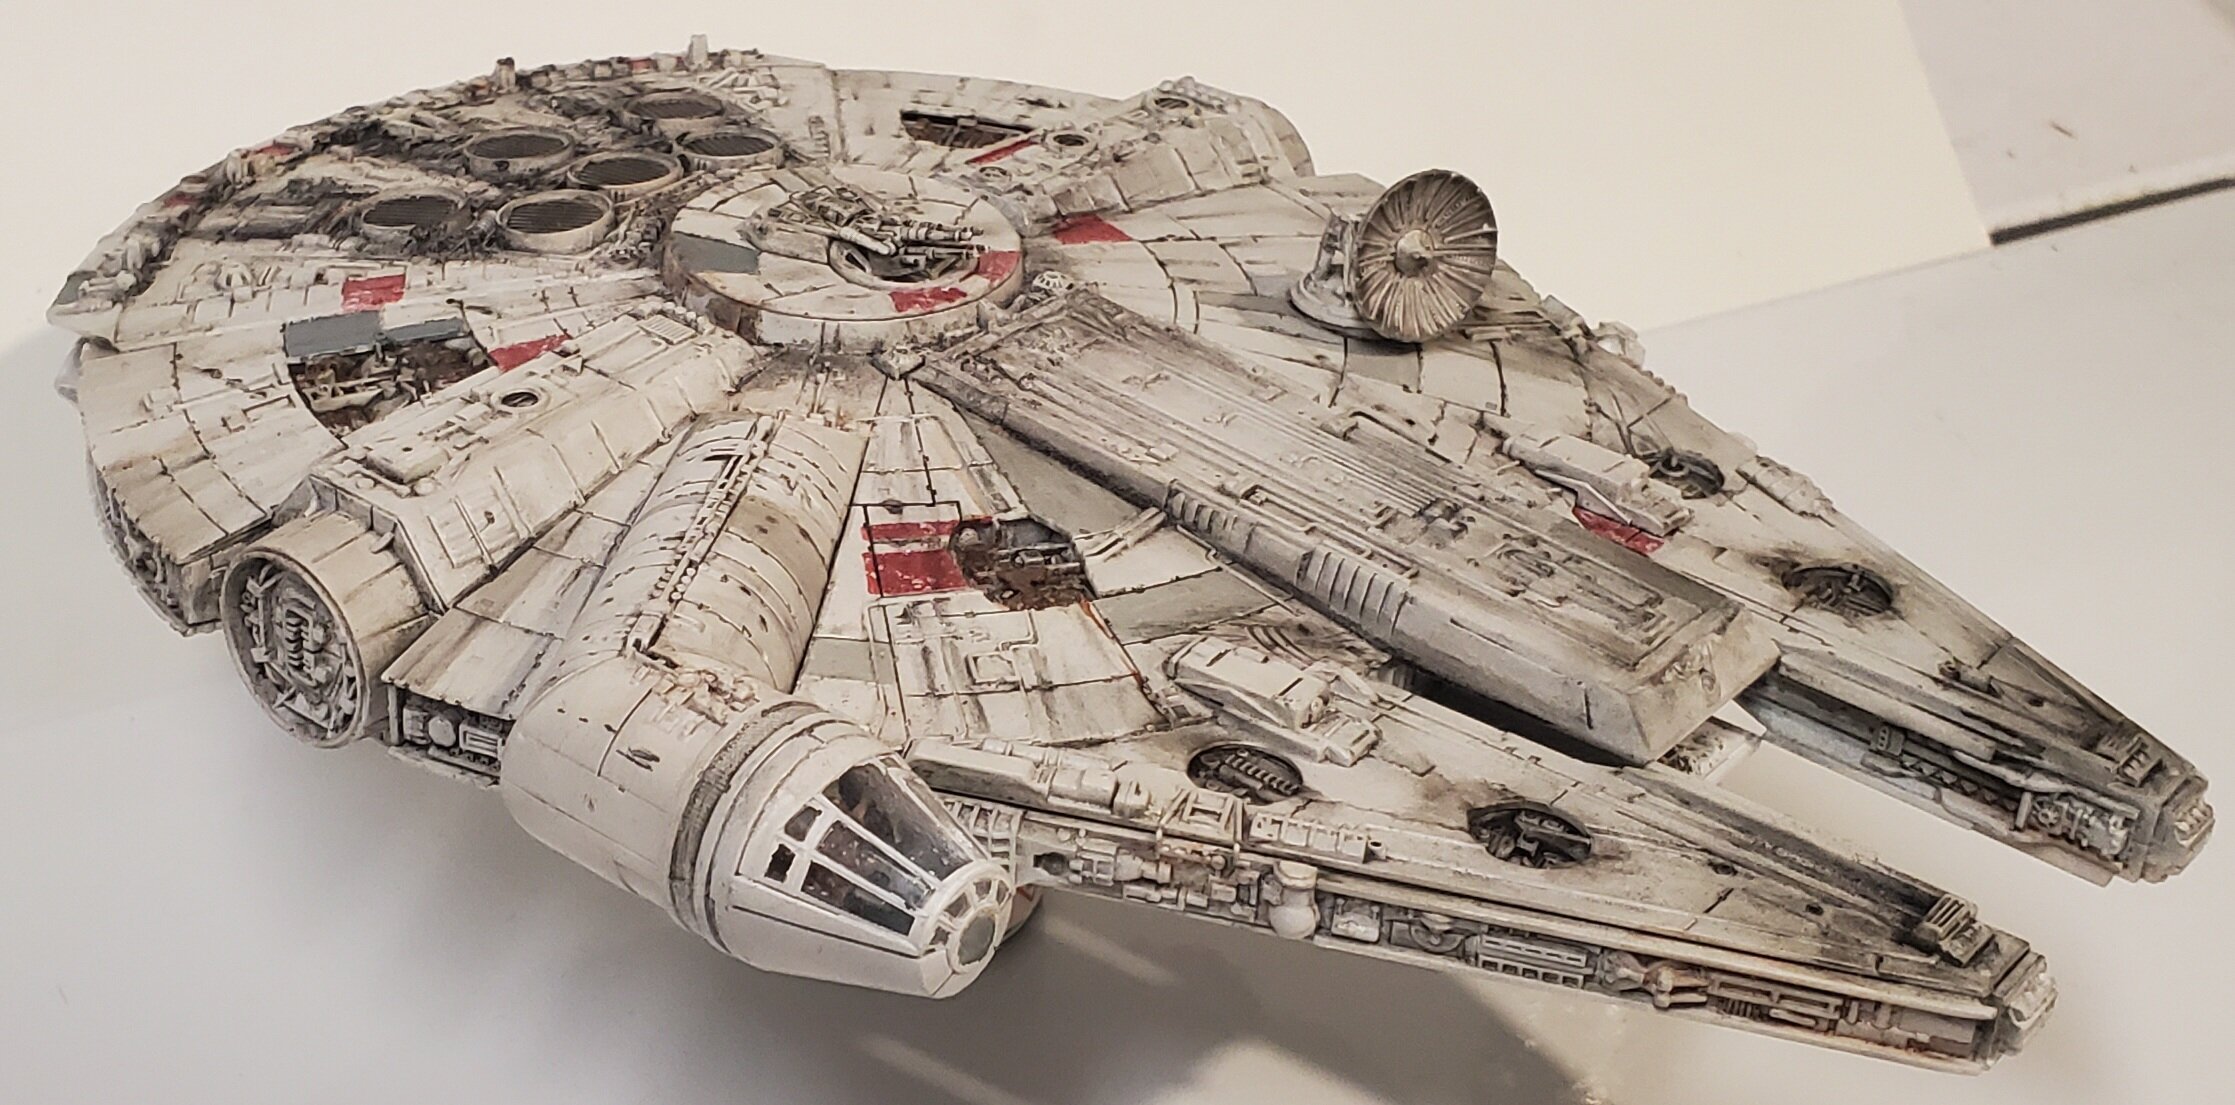
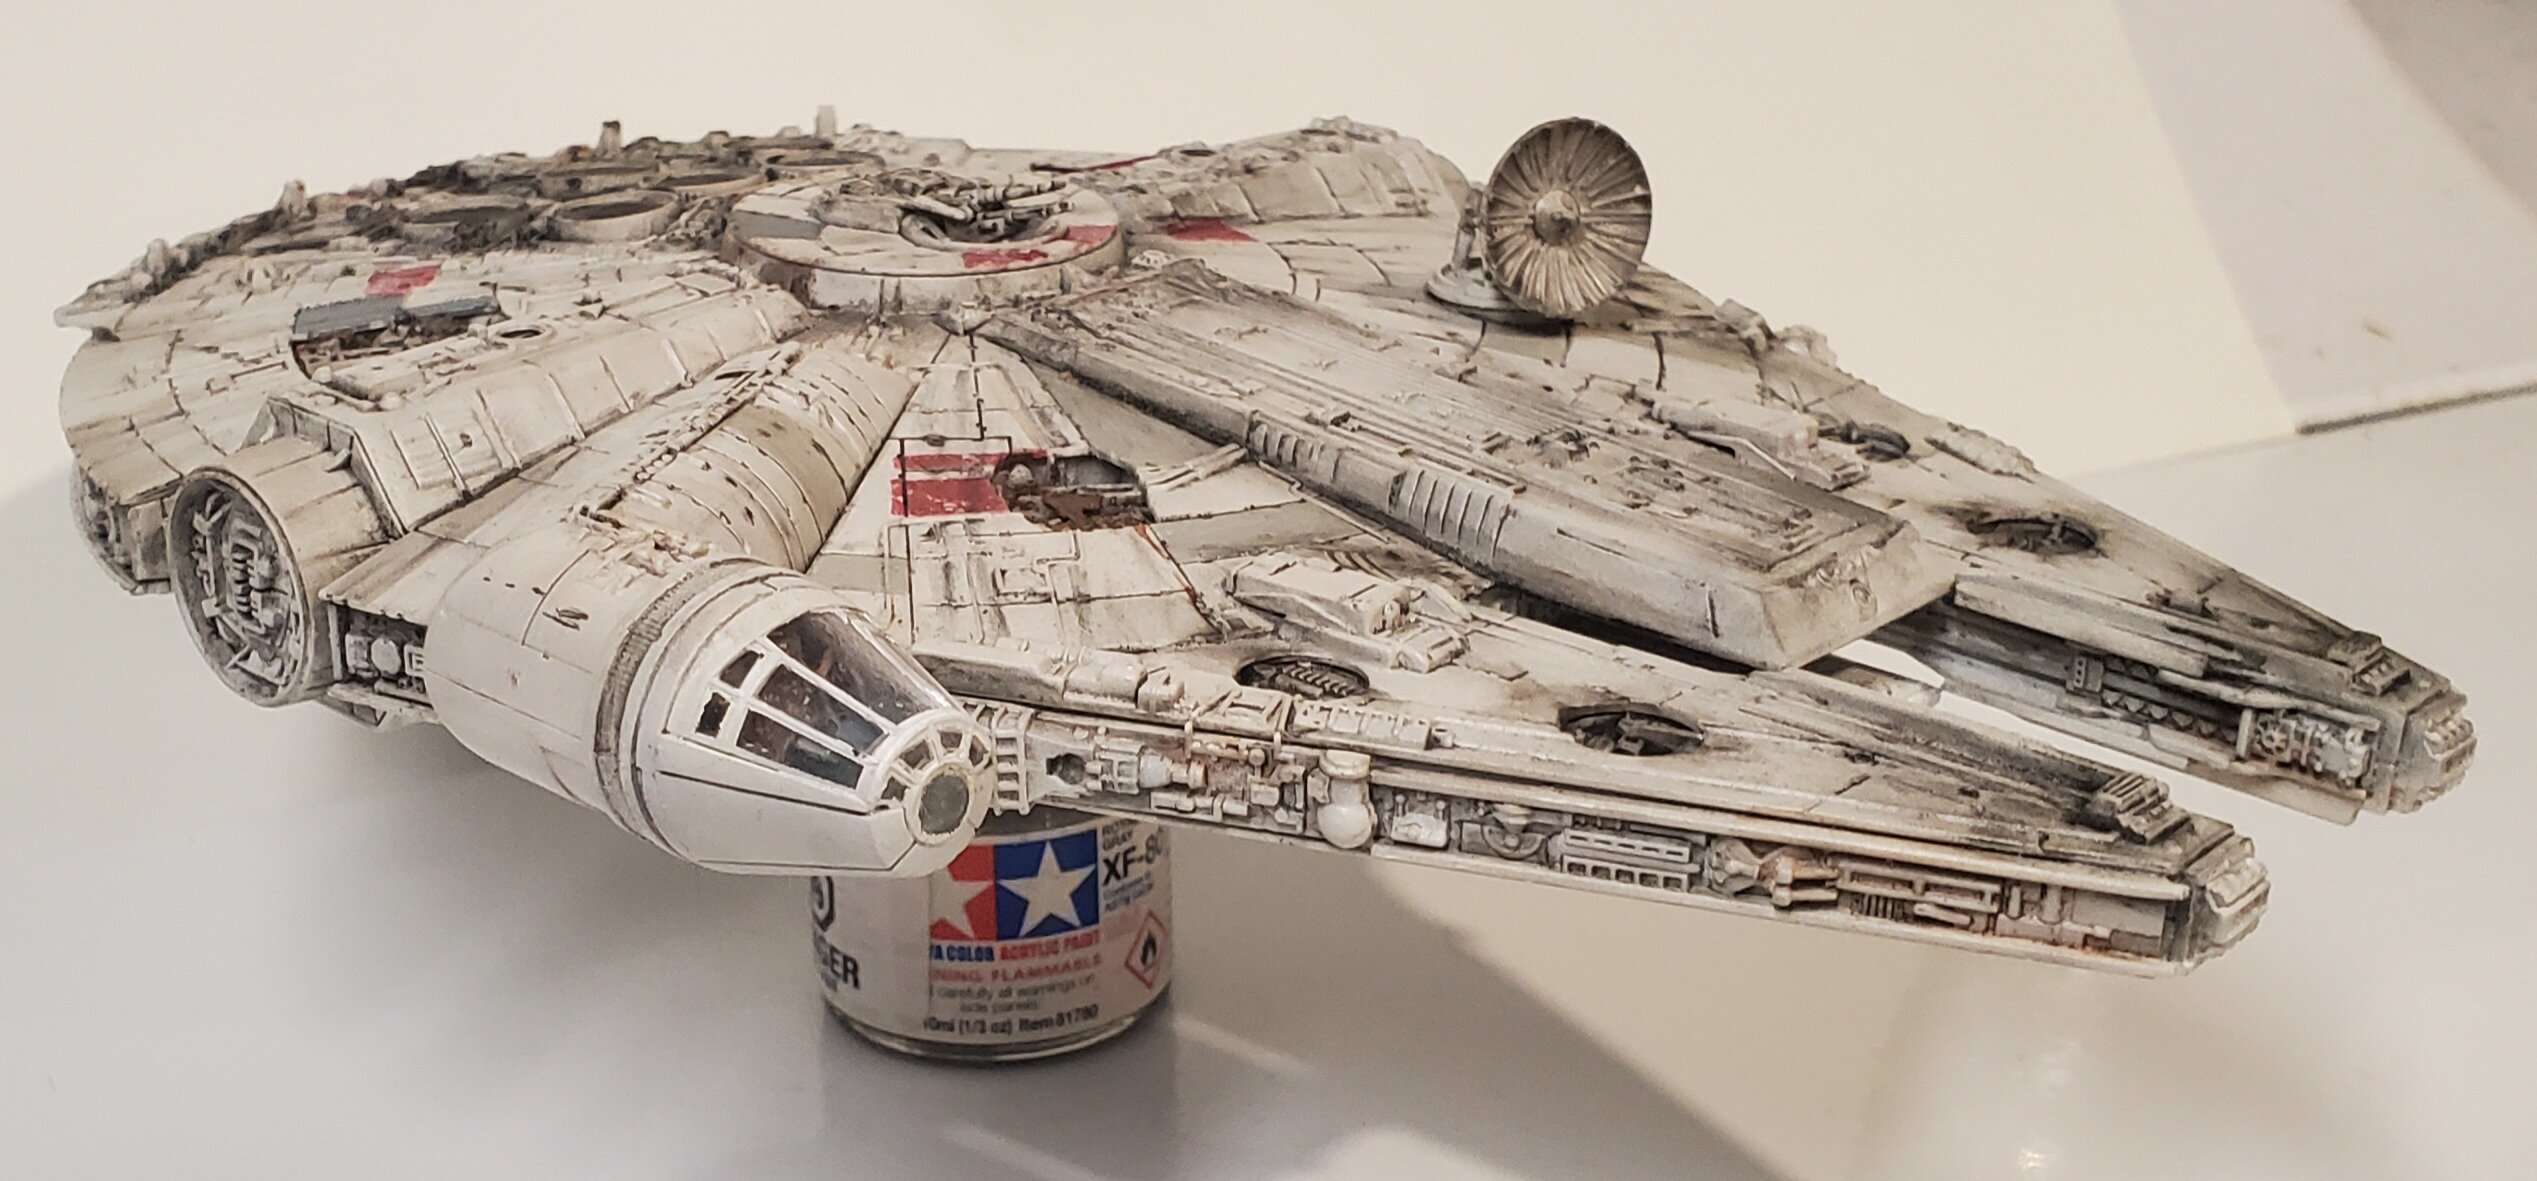
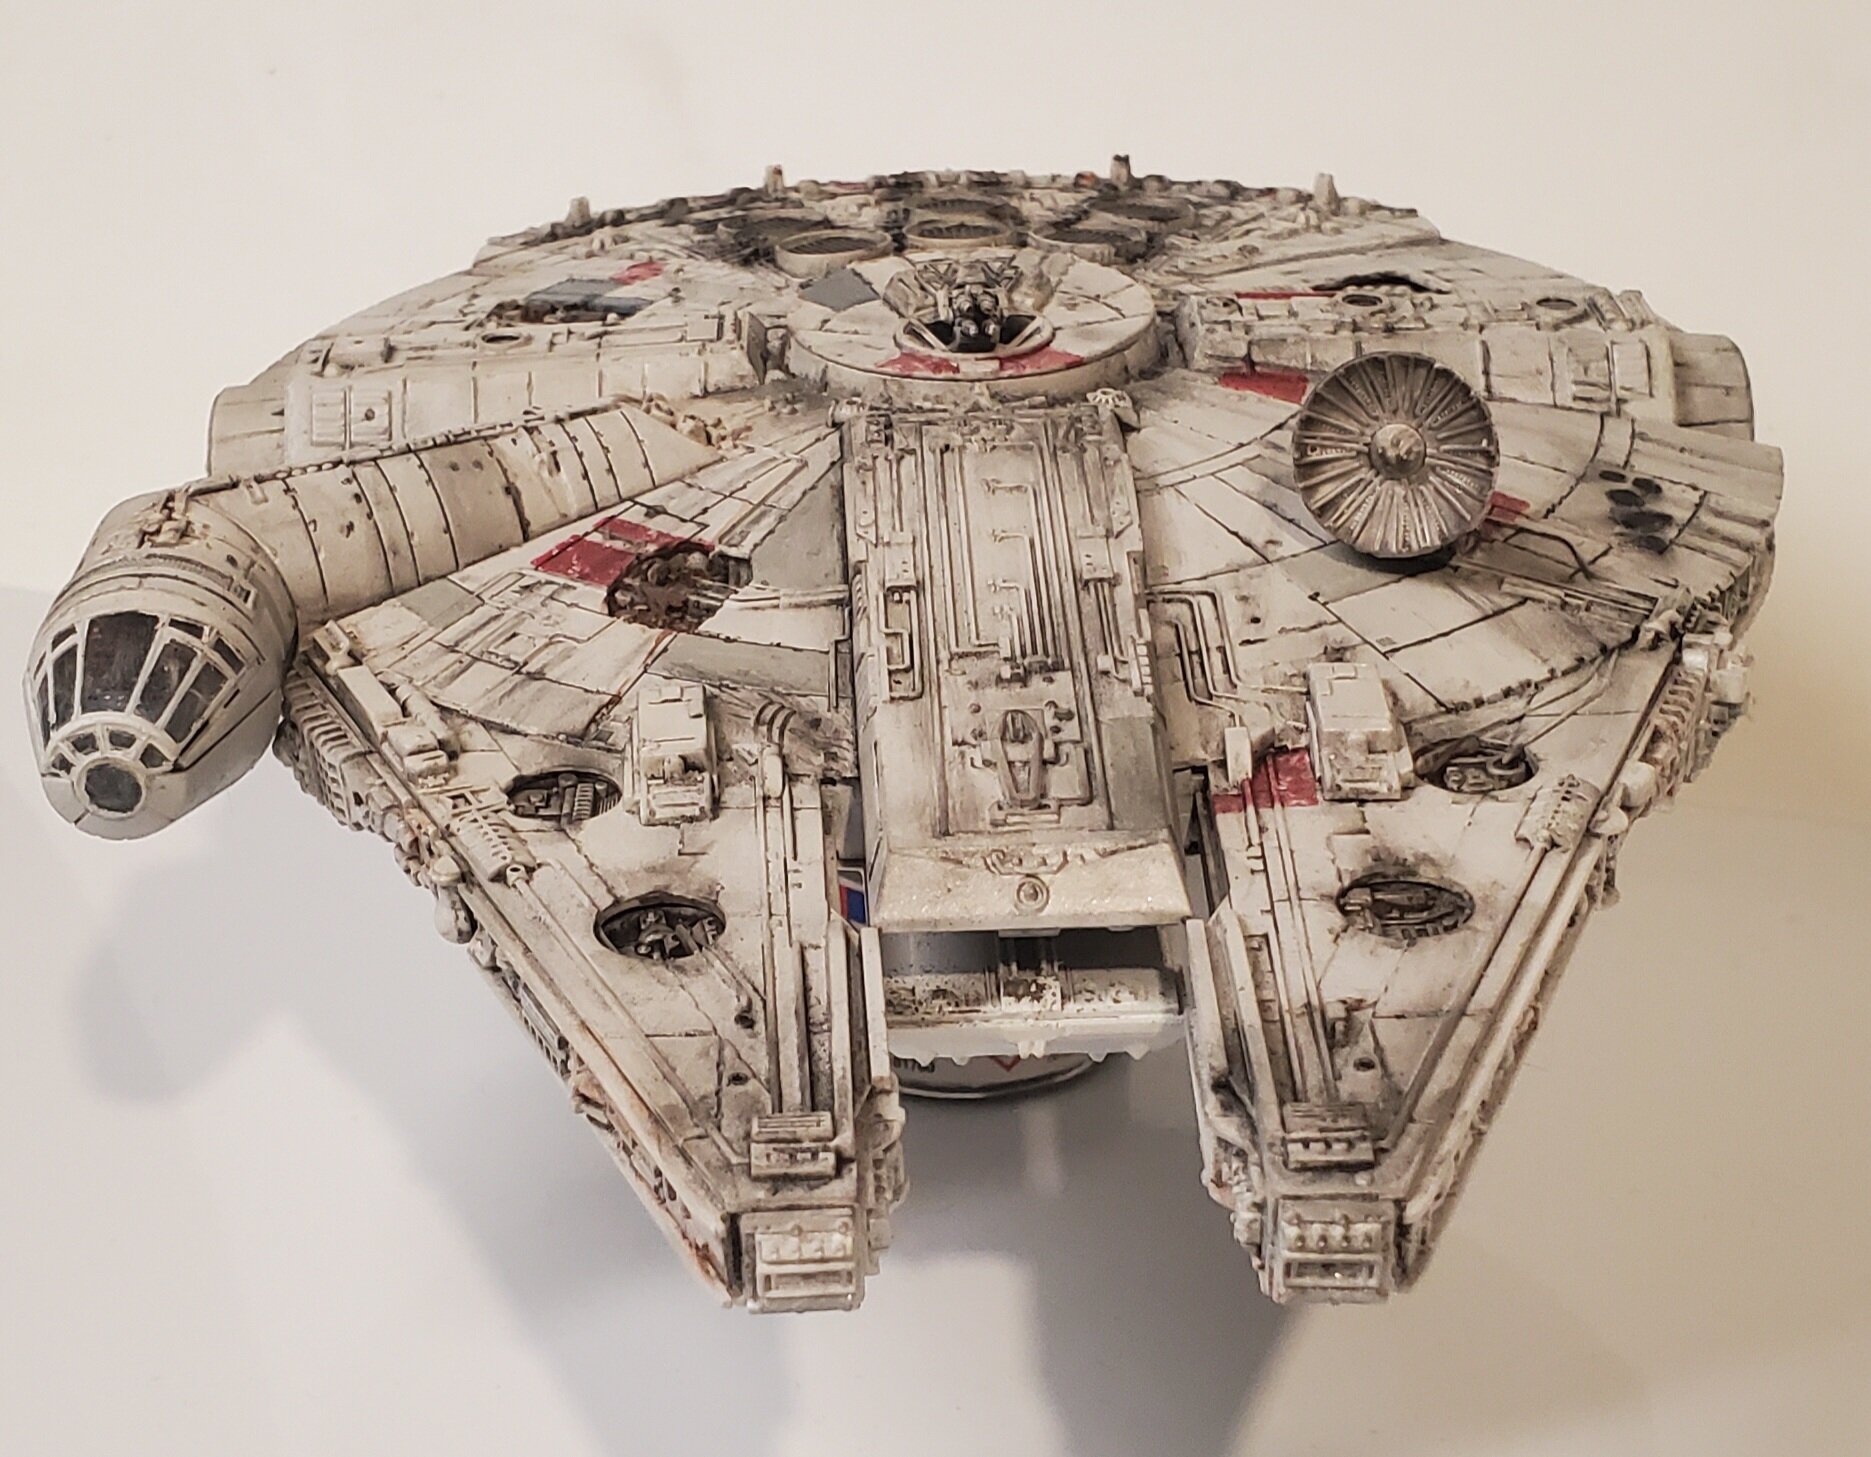
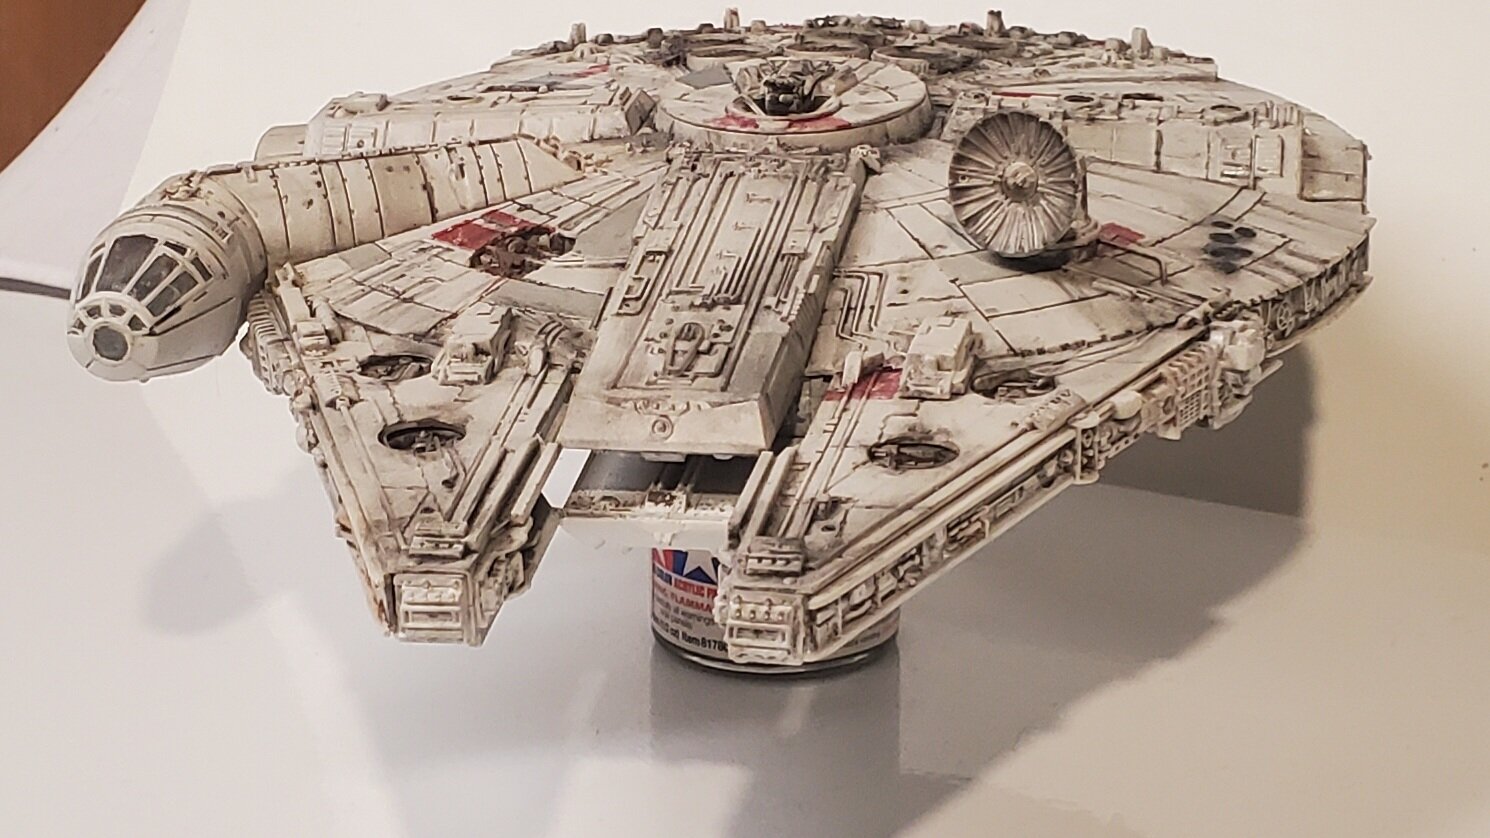
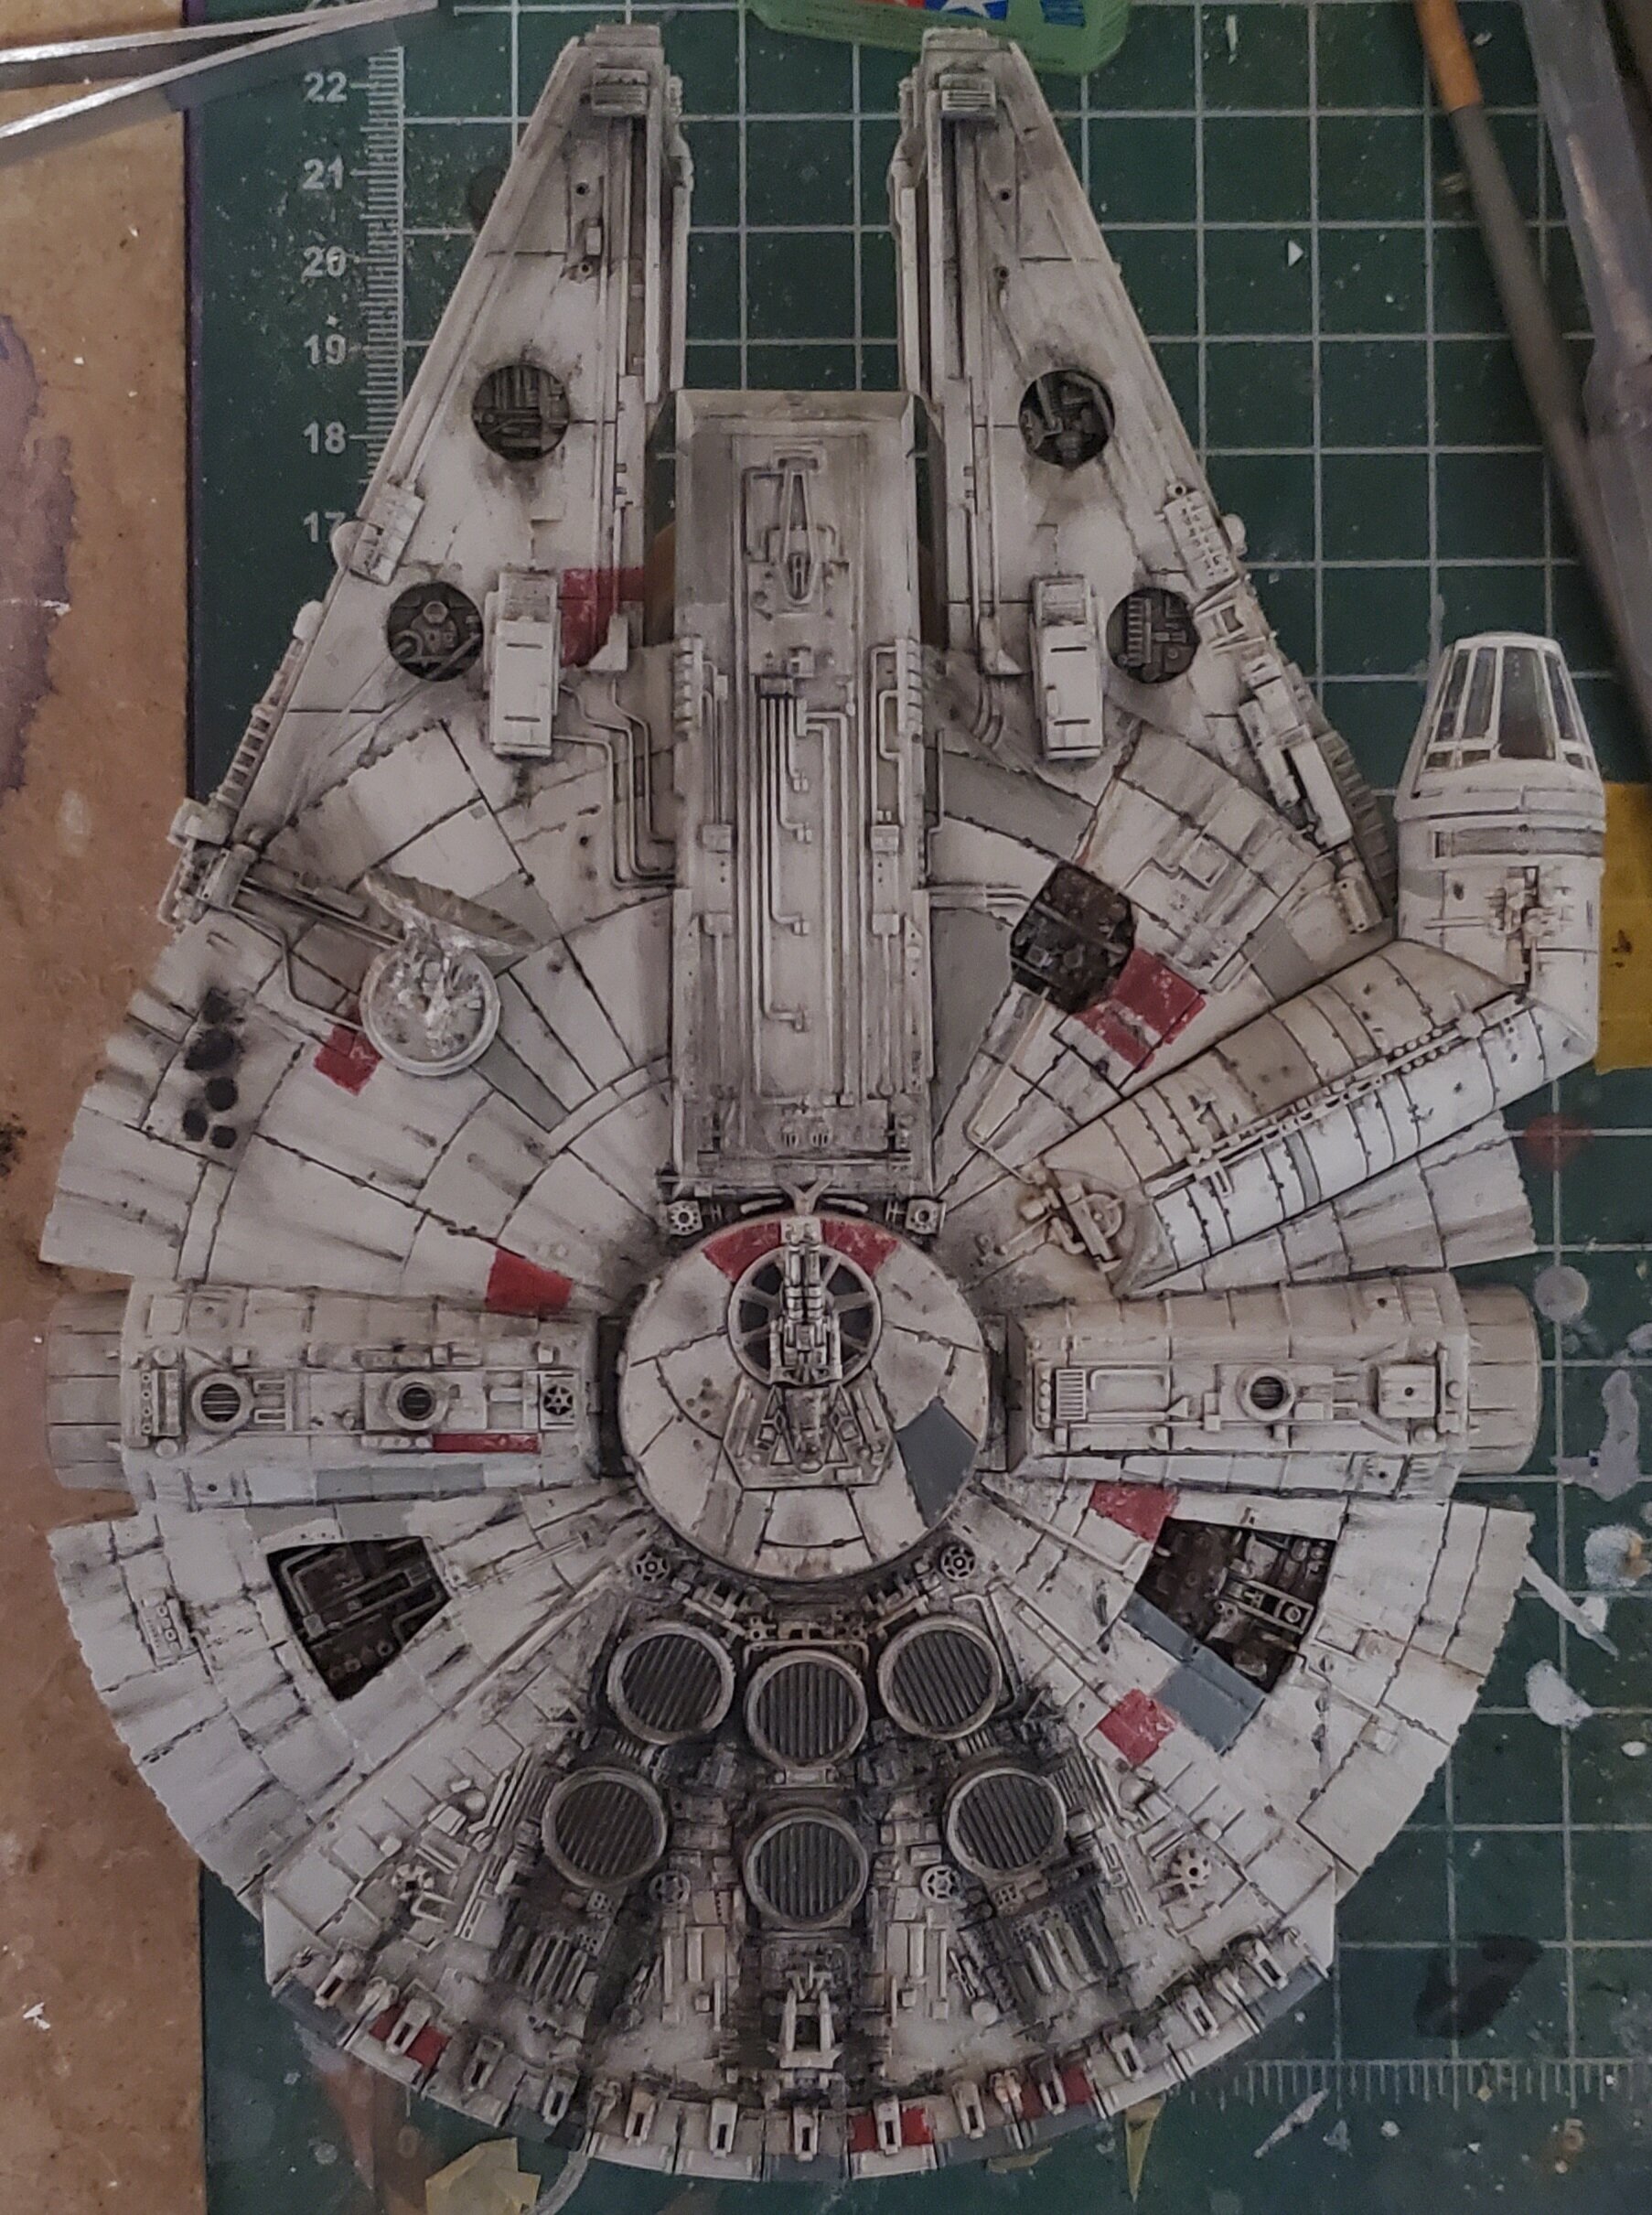
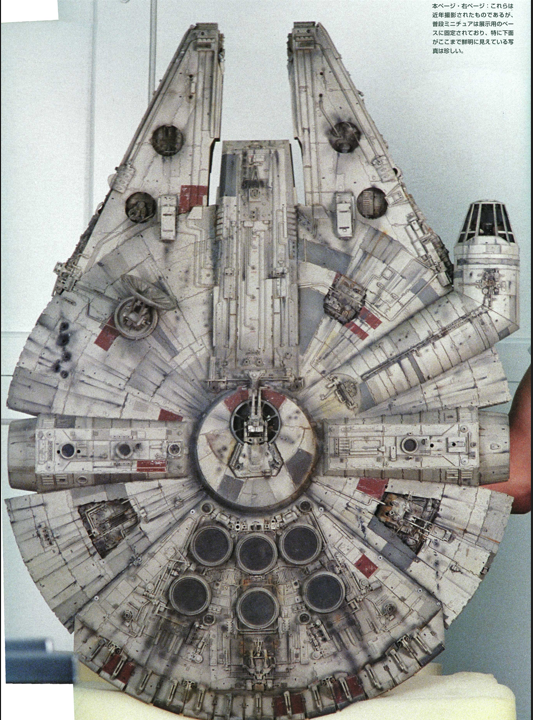
Ahh! Very clever! Thanks for the explanation. That was very instructive and helped clarify a lot. The top and side-walls of the old girl are done and dusted. Matte coat on and window masks removed. If you hold the ship right up close you can see Han and Chewy in there, but Leia and 3P0 are nigh on invisible. Oh well. Now I gotta do the bottom and then fashion and paint some Asteroids. Here's the main ref. I used for the weathering details.
-
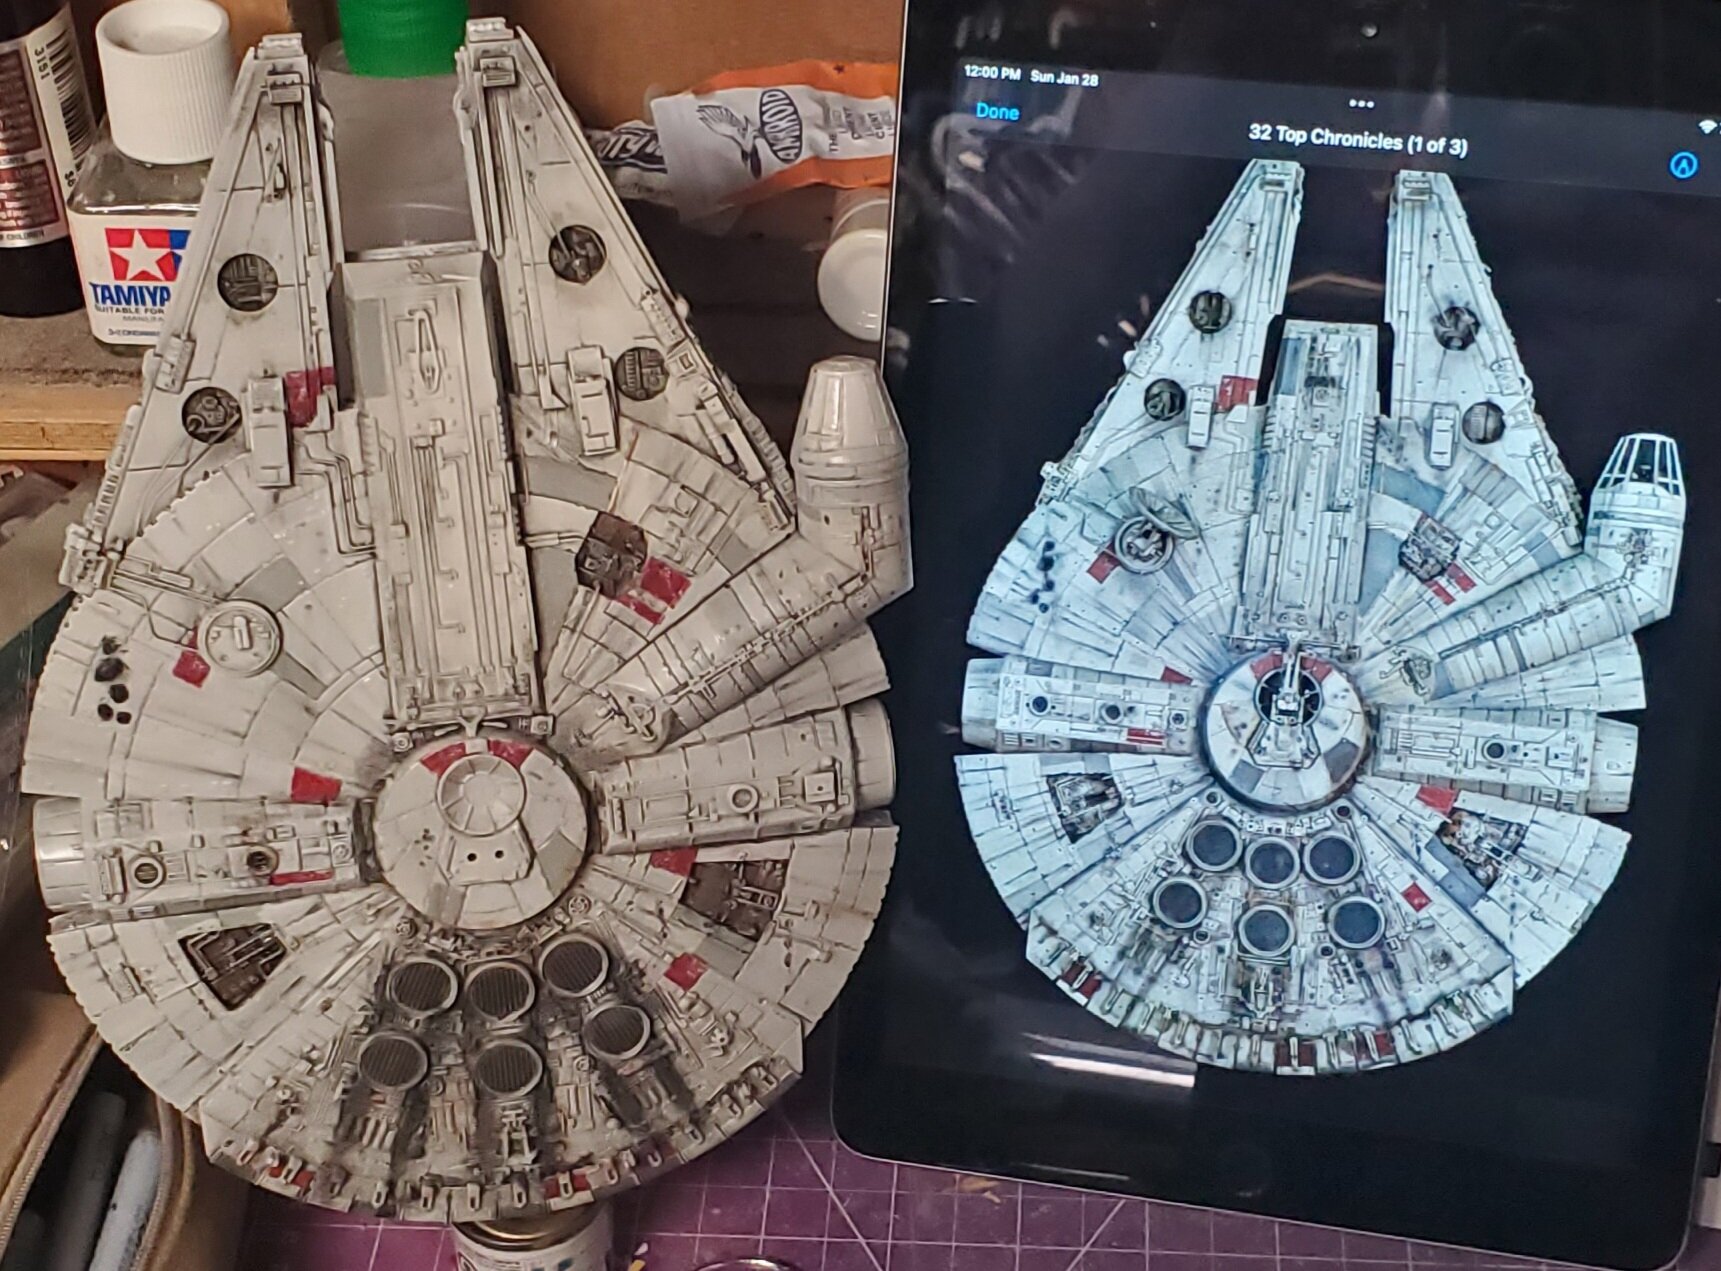
@nightmareB4macross plastic weld? Is that MEK based ? or an epoxy? I'm very intrigued by the process of securely bonding different plastics together. Do you thoroughly scuff the two surfaces to give the adhesive some bite? I figured it wouldn't be used like a toy, but still the different assemblies that are being twisted, folded, extended and turned have some fairly good heft to them. Don't get me wrong I'm not doubting your assertion ( I'm certain you wouldn't be doing all this work if you weren't sure of your process). Just interested in learning how you work with such desperate materials being used in such high stress application. More weathering on the fastest hunk of junk in the galaxy. This time with a ref . Pic. Think I'll need to darken some of the grey panels a bit.
-
Nice workmanship there NB4M. So tell, about this, are your new parts Styrene? If so are they gonna be strong enough for the weight, stress and forces involved? How are you bonding them to the old plastic of the toy (ABS?)?
-
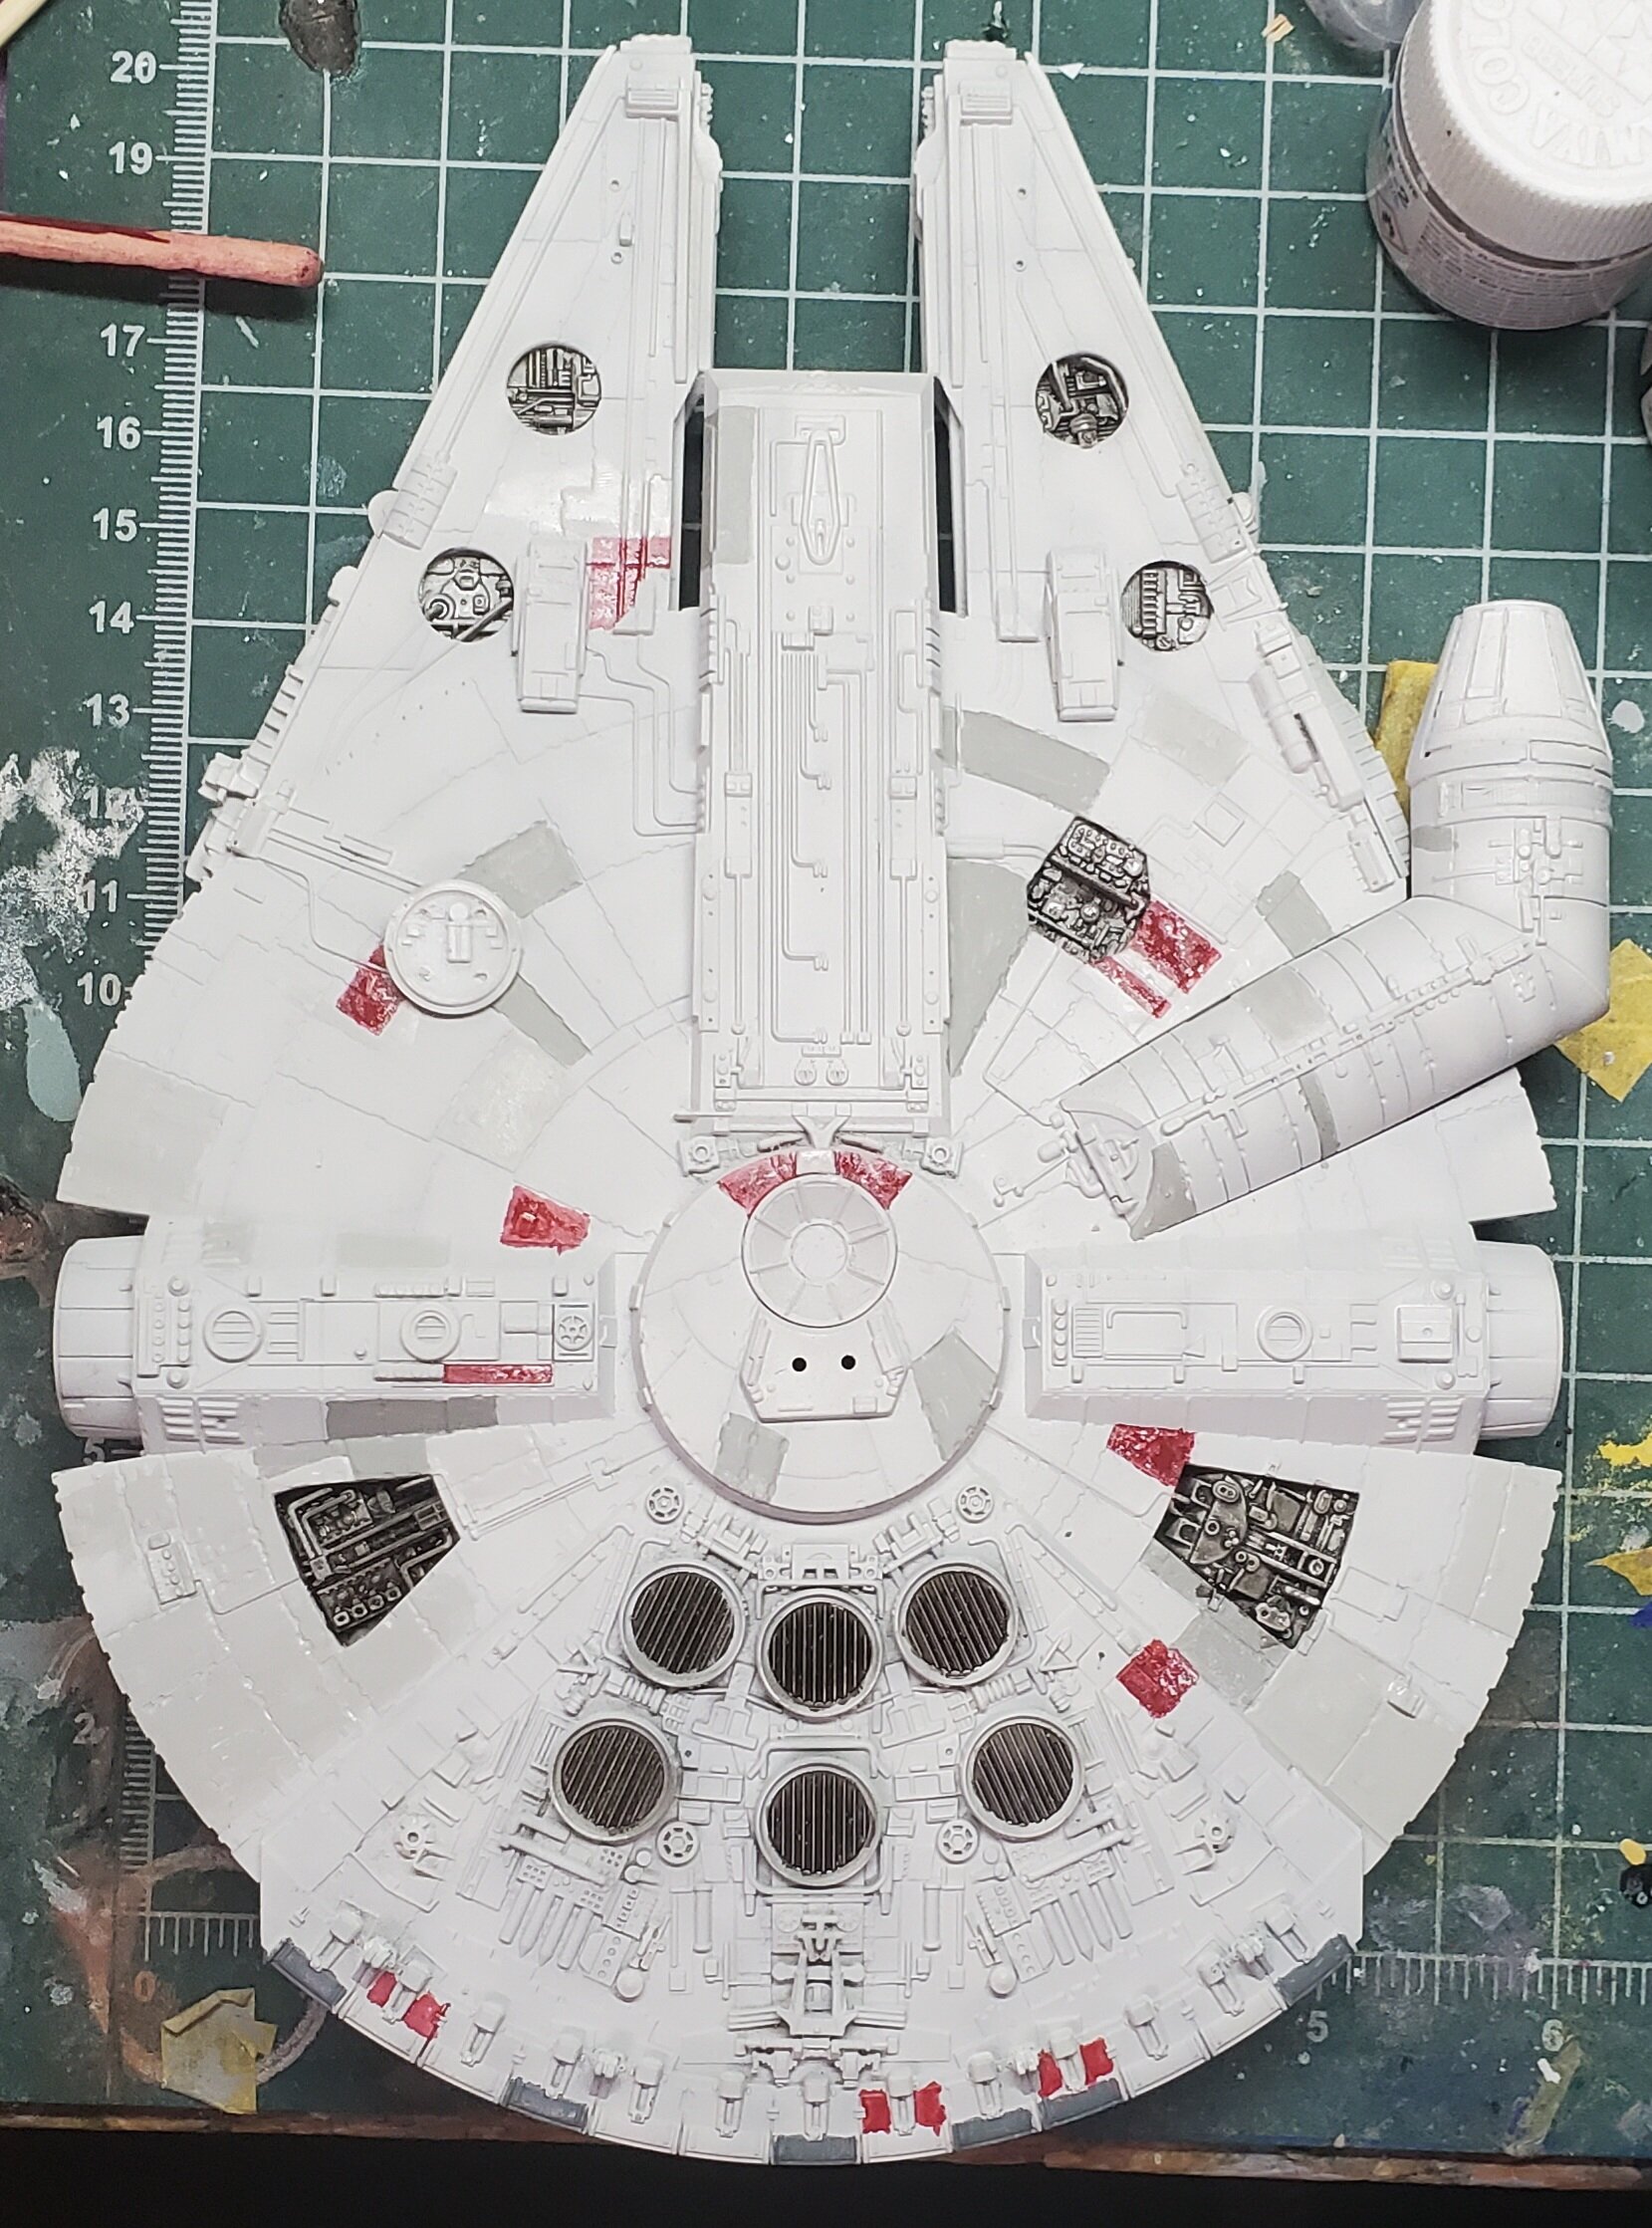
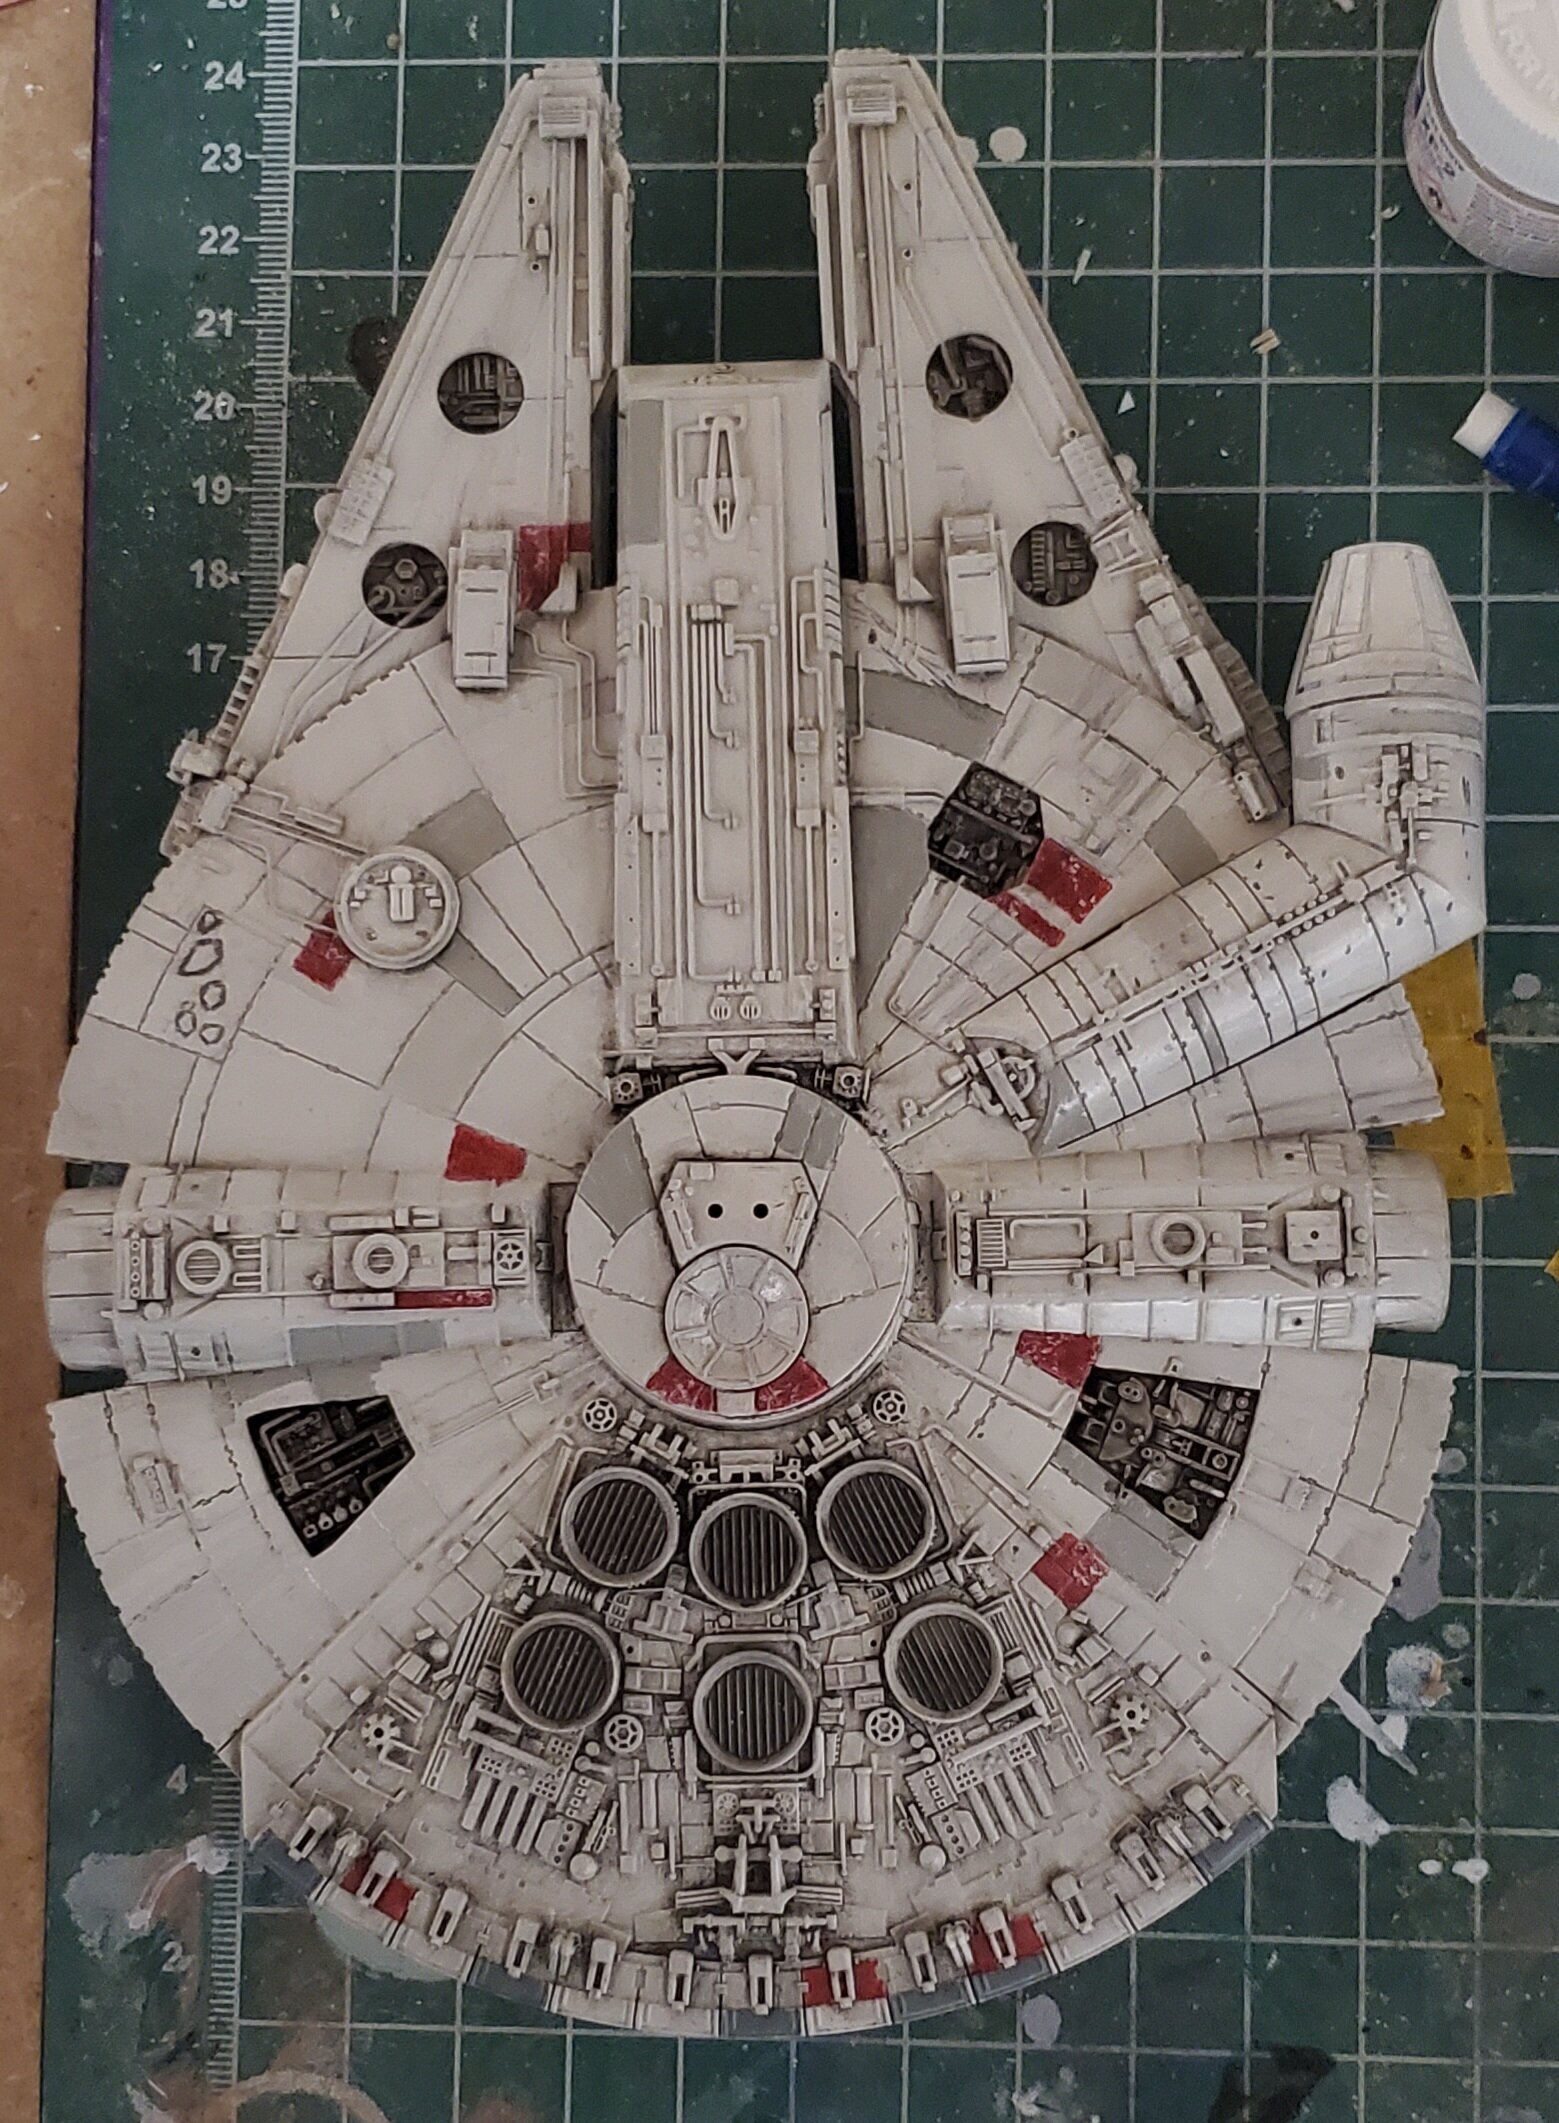
Detail paint done ( sorry 'bout the glare, forgot to turn the bench lamp off) Gloss coat and first go at oil wash.
-
Very smooth paint application. Planing on doing any chipping?
-
After doing some quick and dirty tests, I wound up going with olive green (RAL 6003) for the curious. There's just a hint of it on the upper hull. The lower hull is a bit more noticeable however.
-
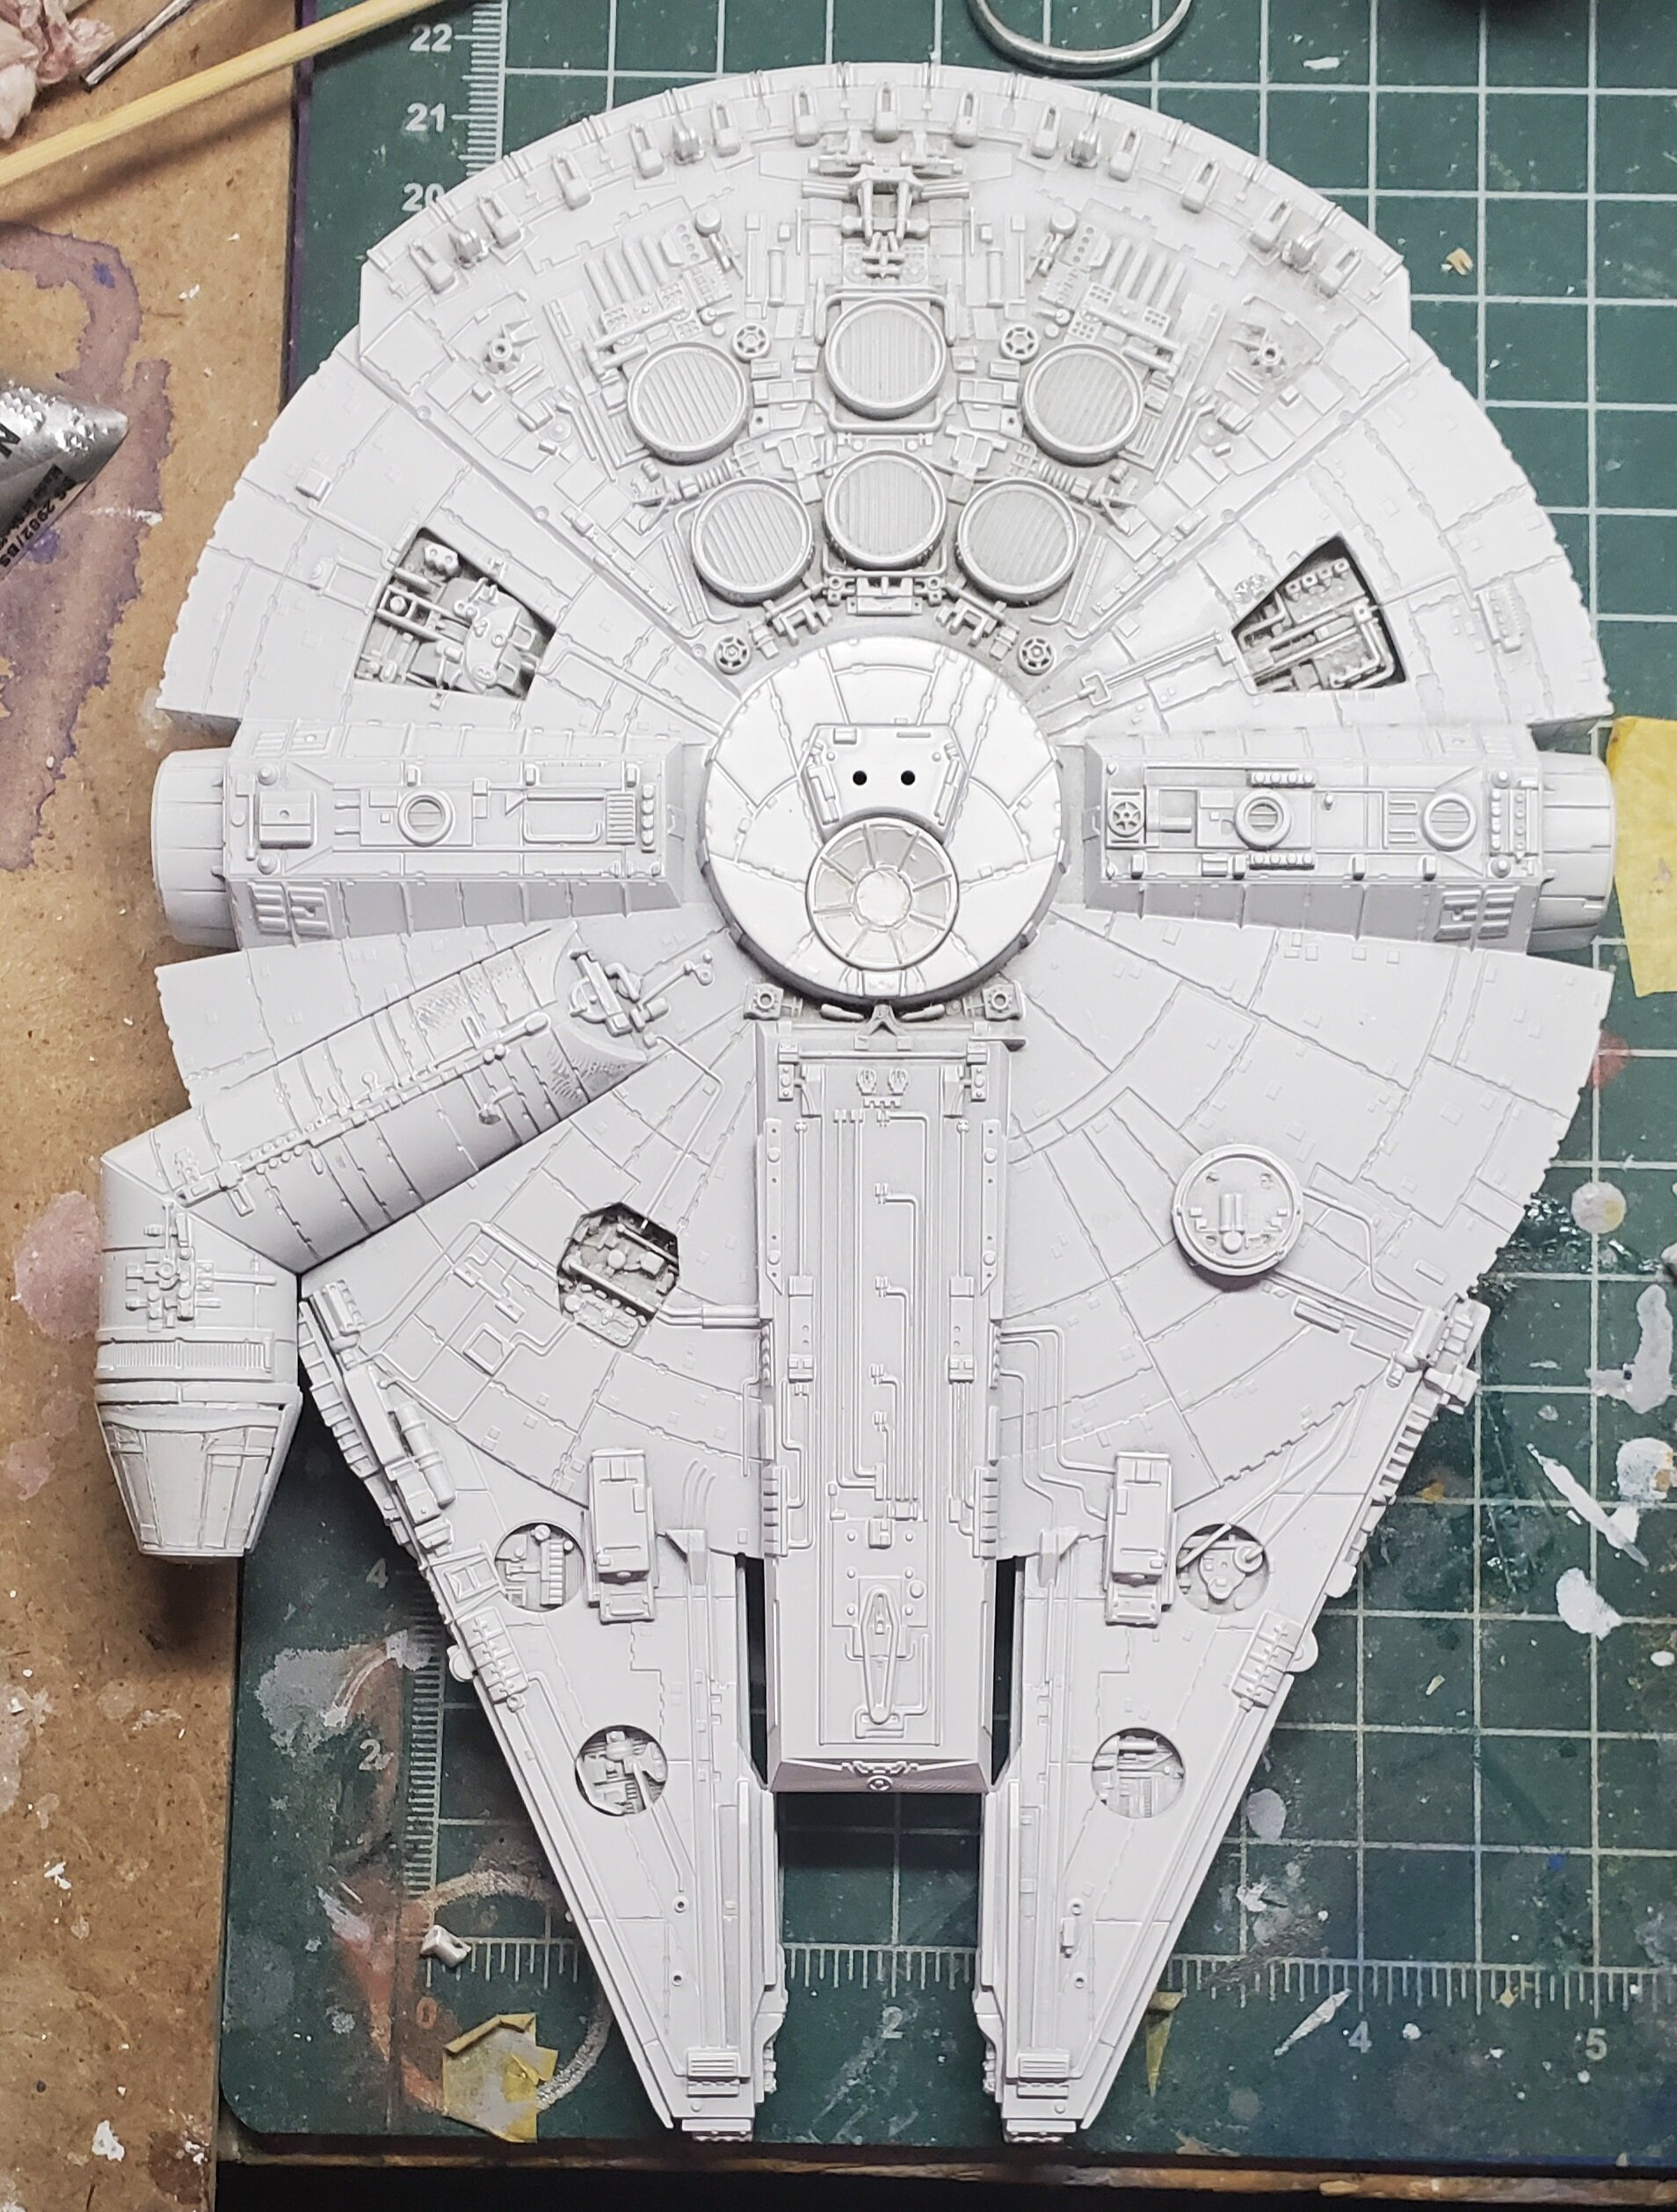
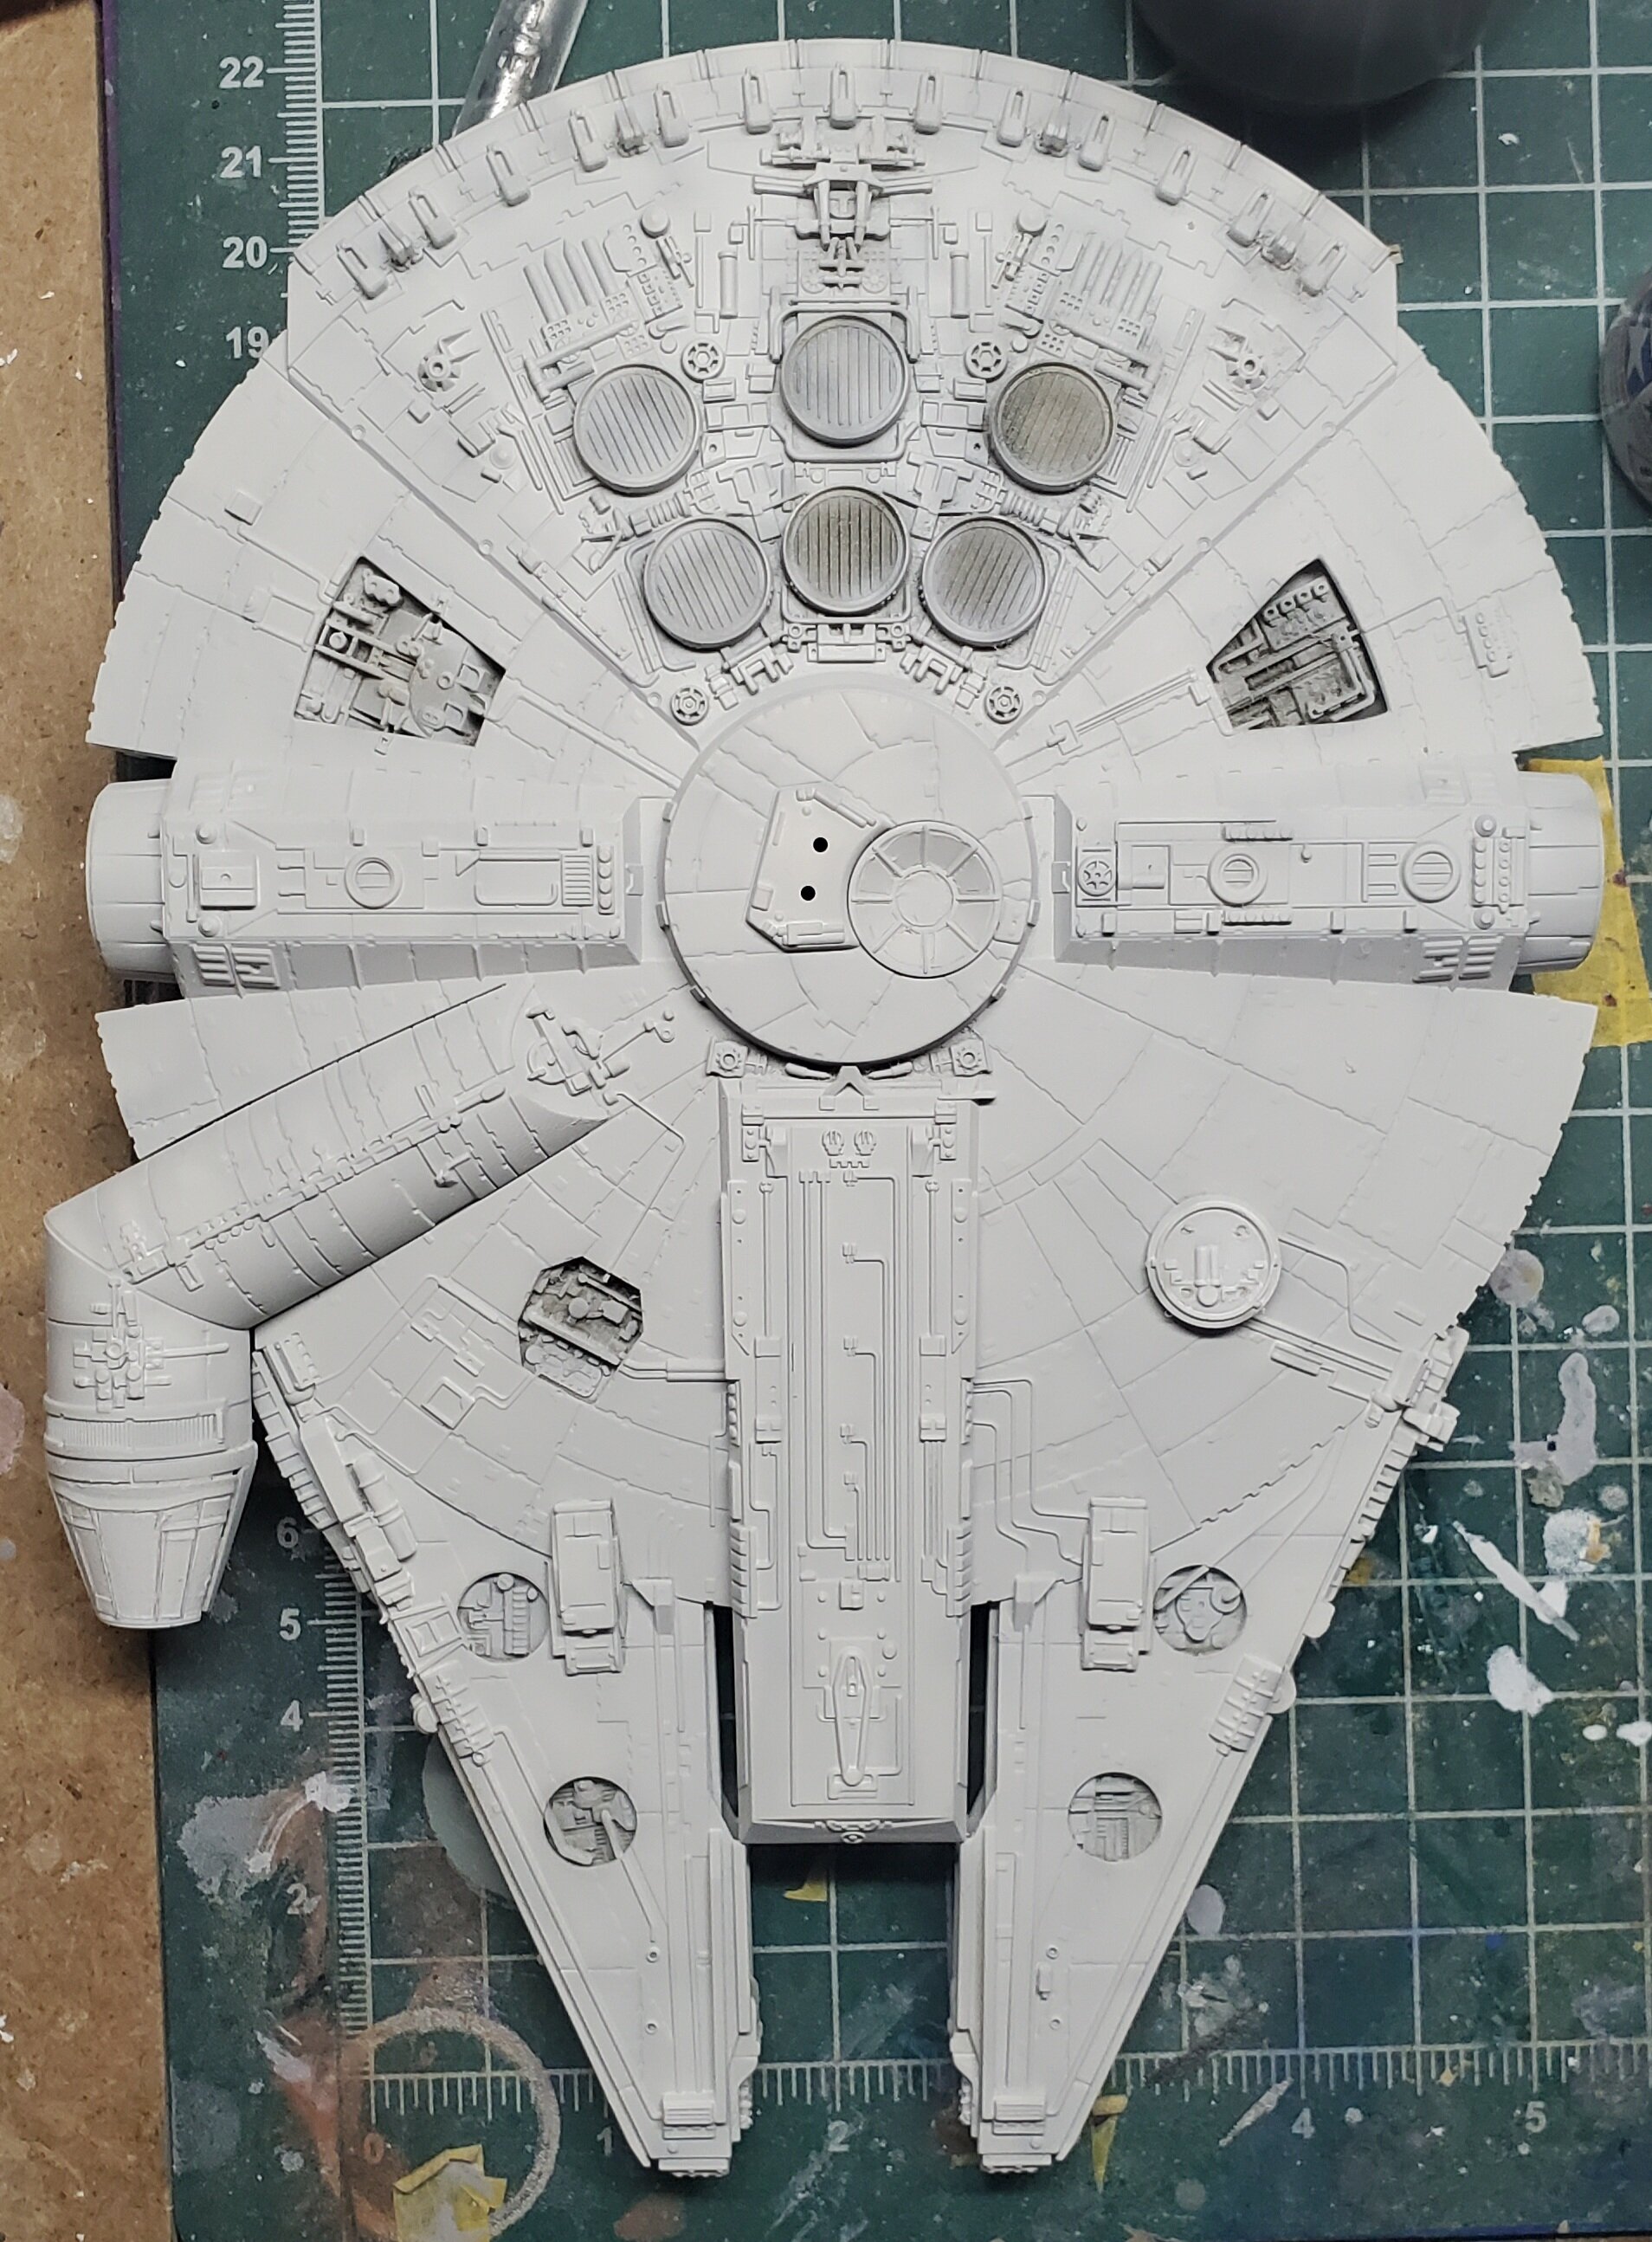
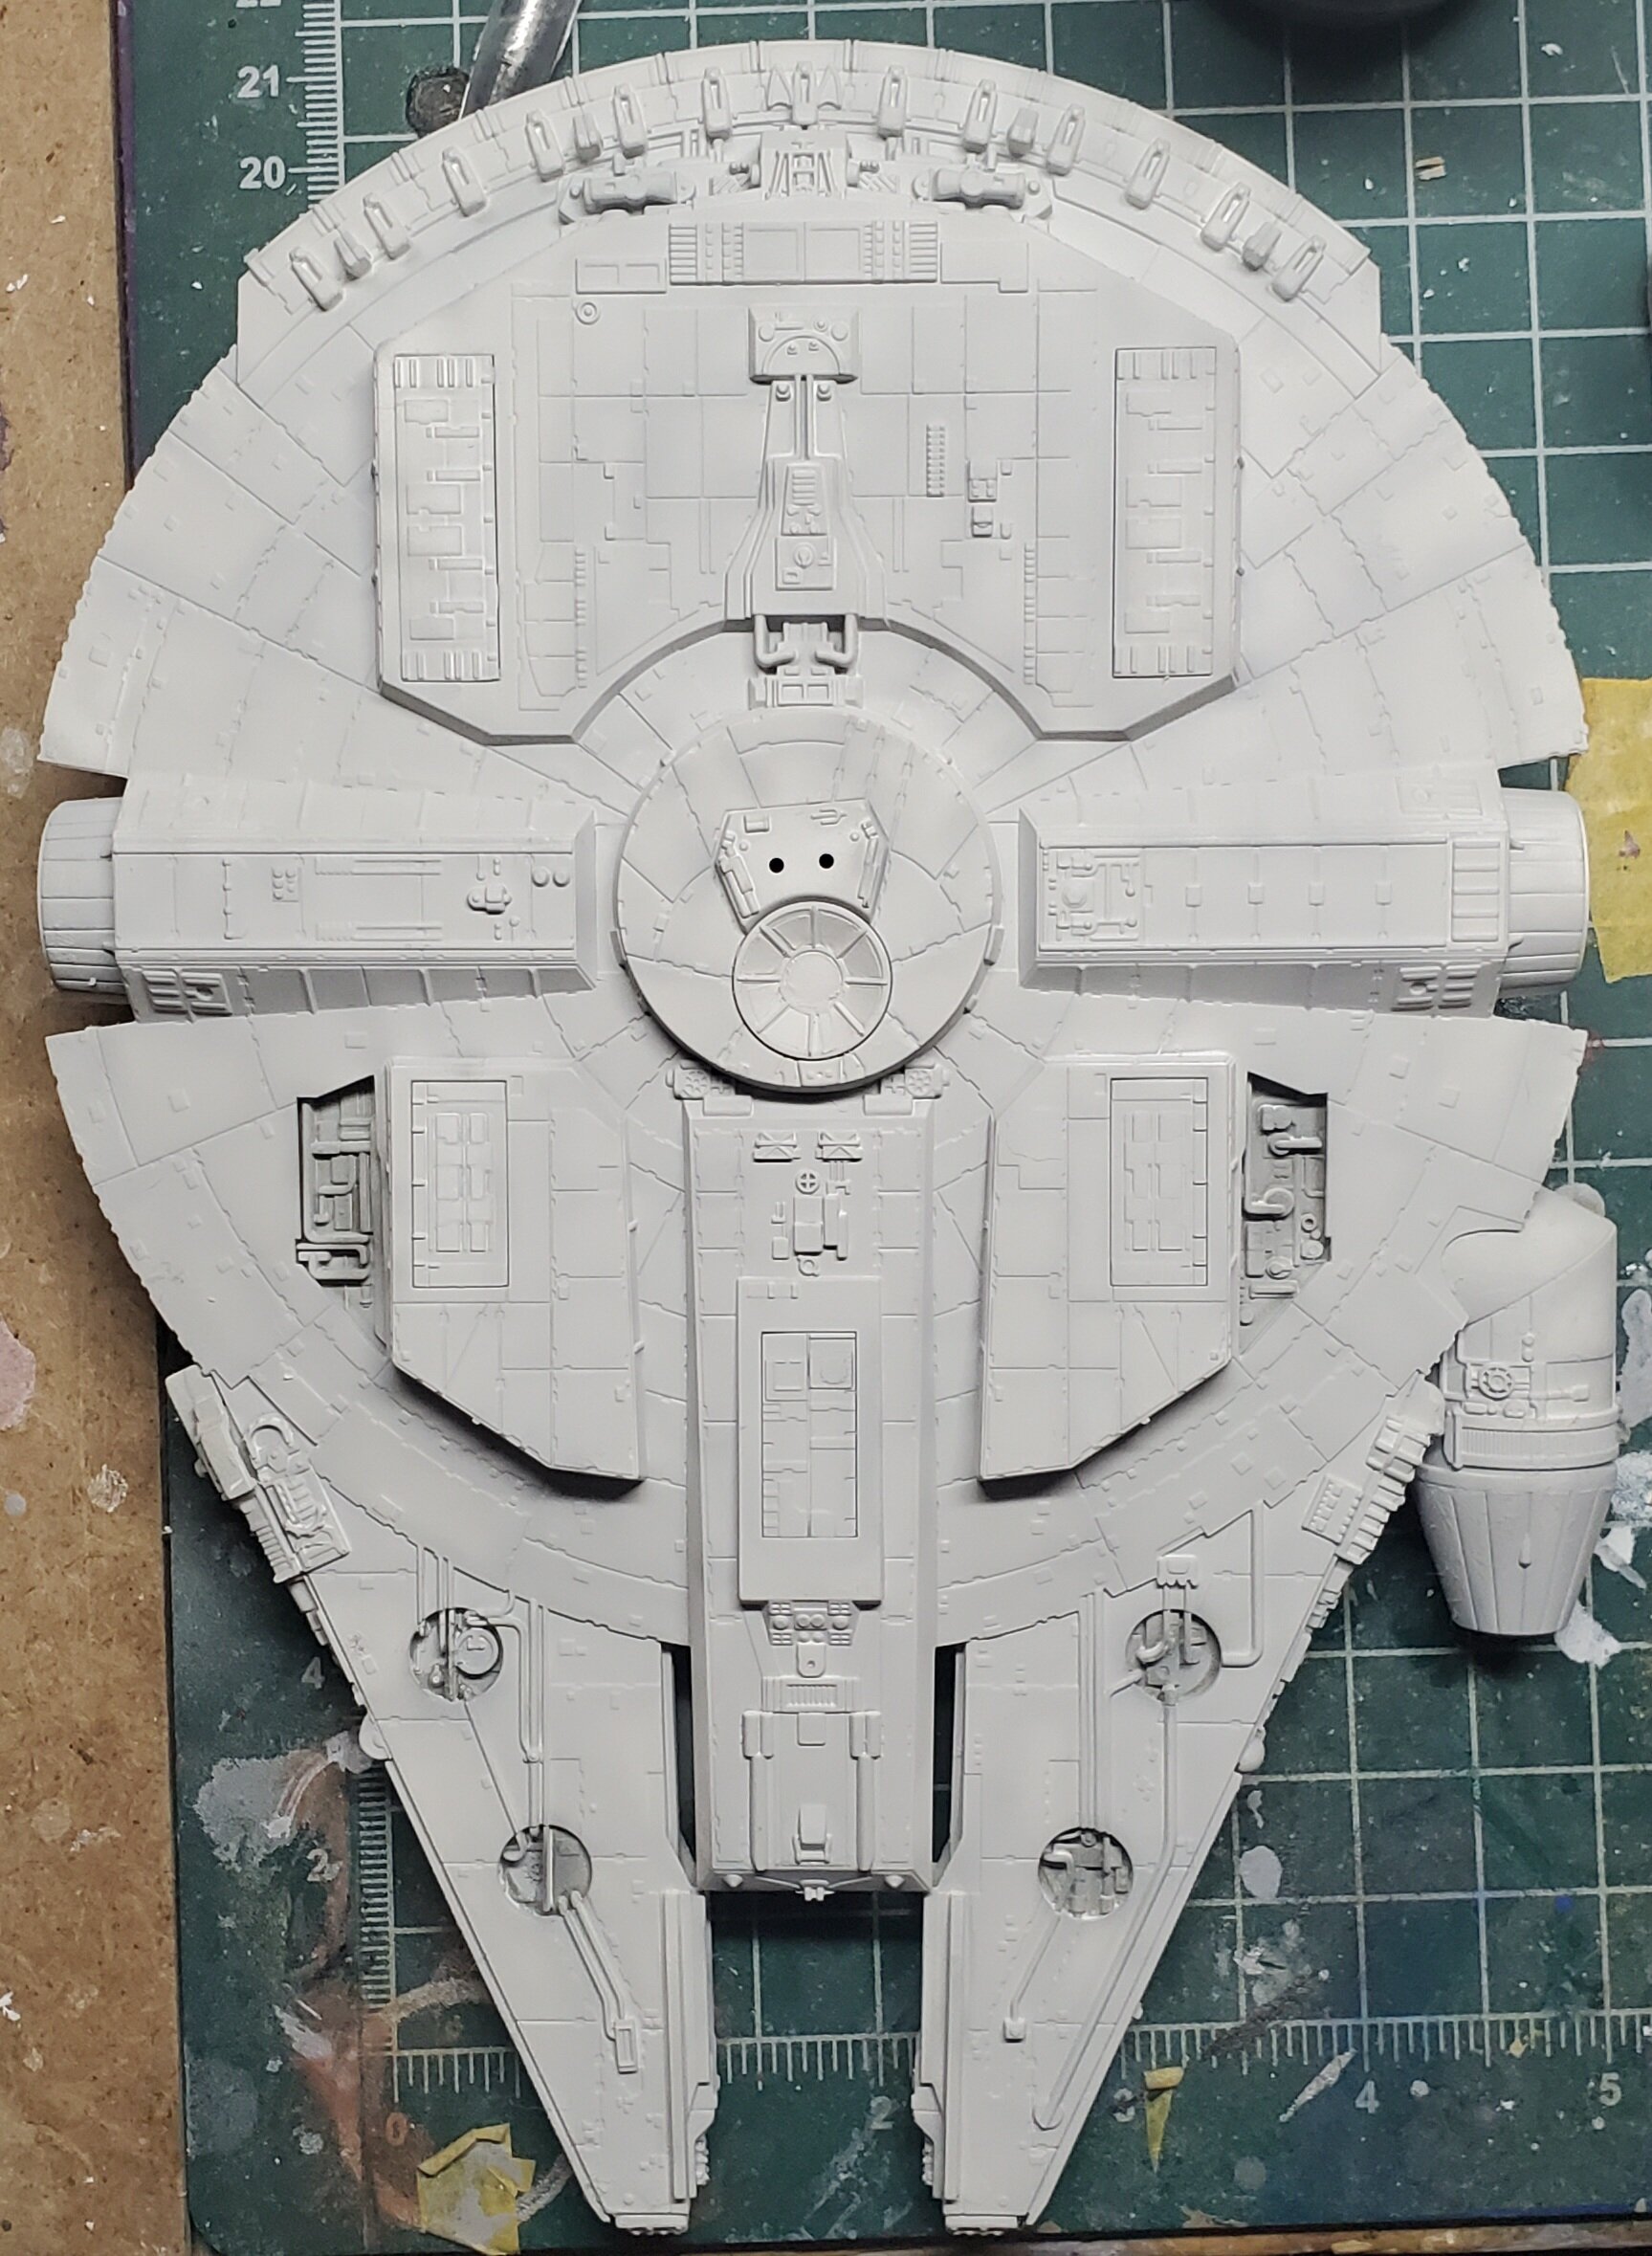
Nice job on that canopy! No hint of the seam line to be seen. Those masks look like they will do an A1 job. Started the next build this weekend and it's not from a 40 or 50 year old animal series 😱😜. Gonna do a dio with this one flying through an an asteroid field. Basic build is done (OOB). And I decided to use some Tamiya white rattlecan primer I had lying around. It went on a little thicker in places than I'm use to with the Mr. Surfacer And my airbrush, but that was mostly on the bottom, which won't be too visible in the set-up I have planned - so not too worried 'bout it. Now the question is what colour to use for the preshade? I would usually go with something dark like Panzer Grey, but was thinking maybe a brown might be good to warm up the tone a little. Never done a Millennium Falcon before, so what do you folks think? I've already mixed up my own base colour for her. It's about 6-7ml of white with 4-5 drops each of light grey and wooden deck tan (all tamiya). Also wondering if it might be an idea to skip the presiding at this scale (1:144) as it may spoil the scale effect .