arbit
-
Posts
2597 -
Joined
-
Last visited
Content Type
Profiles
Forums
Events
Gallery
Everything posted by arbit
-
Thom, The Kirishima looks perfect. Nyanko, Were there any Zentraedi among those pirates?
-
It looks a bit different than the SHE, with some screws hidden. But I always thought that the SHE and Tamashii were the same version?? Personally, i love my Yamato version, although I know it gets a lot of hate. I think people just misunderstood it, and it was ahead of its time. Mine is tight in both forms, and made of high quality plastic. Classic Yamato quality. People complained it was floppy during transformation: Of course it is. Look at all the valks we have had since. They're a mess during transformation and you need about 3 hands to get them anywhere.
-
I need to learn how to paint... Do you sand the paint between layers, or use micro mesh?
-
Or, it looks like some Glaugs were killed to develop it...
-
Classy choice! Destroid all the way.
-
Thom, what are you planning for the panel lines?
-
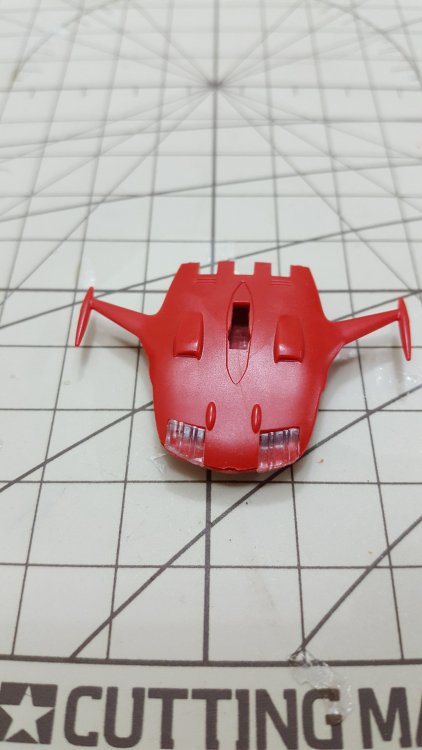
Oops...I also thought it was a 21. Yes, very unique schemes, now we just need to get you a better camera so we can actually see them! It is an old kit, but your work on the SDF-1 looked great from the start. Congrats! But can she gloss coat? That's a very delicious red coat. If you are not sure about the chest, try on the backpack. That's were I put 'em on my SDF-1 Jolly Rogers custom.
-
I have an unscienetific theory that the styrofoam or packaging itself causes yellowing. A couple time I recall having perfectly white toys, then after storing them a while, when I open the box, voila, they are yellow. My stuff is never in direct sunlight and it is always indoors.
-
Glad you posted this. It is absolutely fabulous, marvelous, beautiful, unbelievable. I would love to see the same done for the Megaroad.
-
Would an Ivanov be dark gray not black?
-
T-Rex last worked with Arcadia on the super parts. What else have they done? Could be a whole new sculpt, like we just saw with Sentinel on Mospeada.
-
Cool. I had just read on Tim Eldred site that it was always called Okitas Battleship, and never had a name til 2199!
-
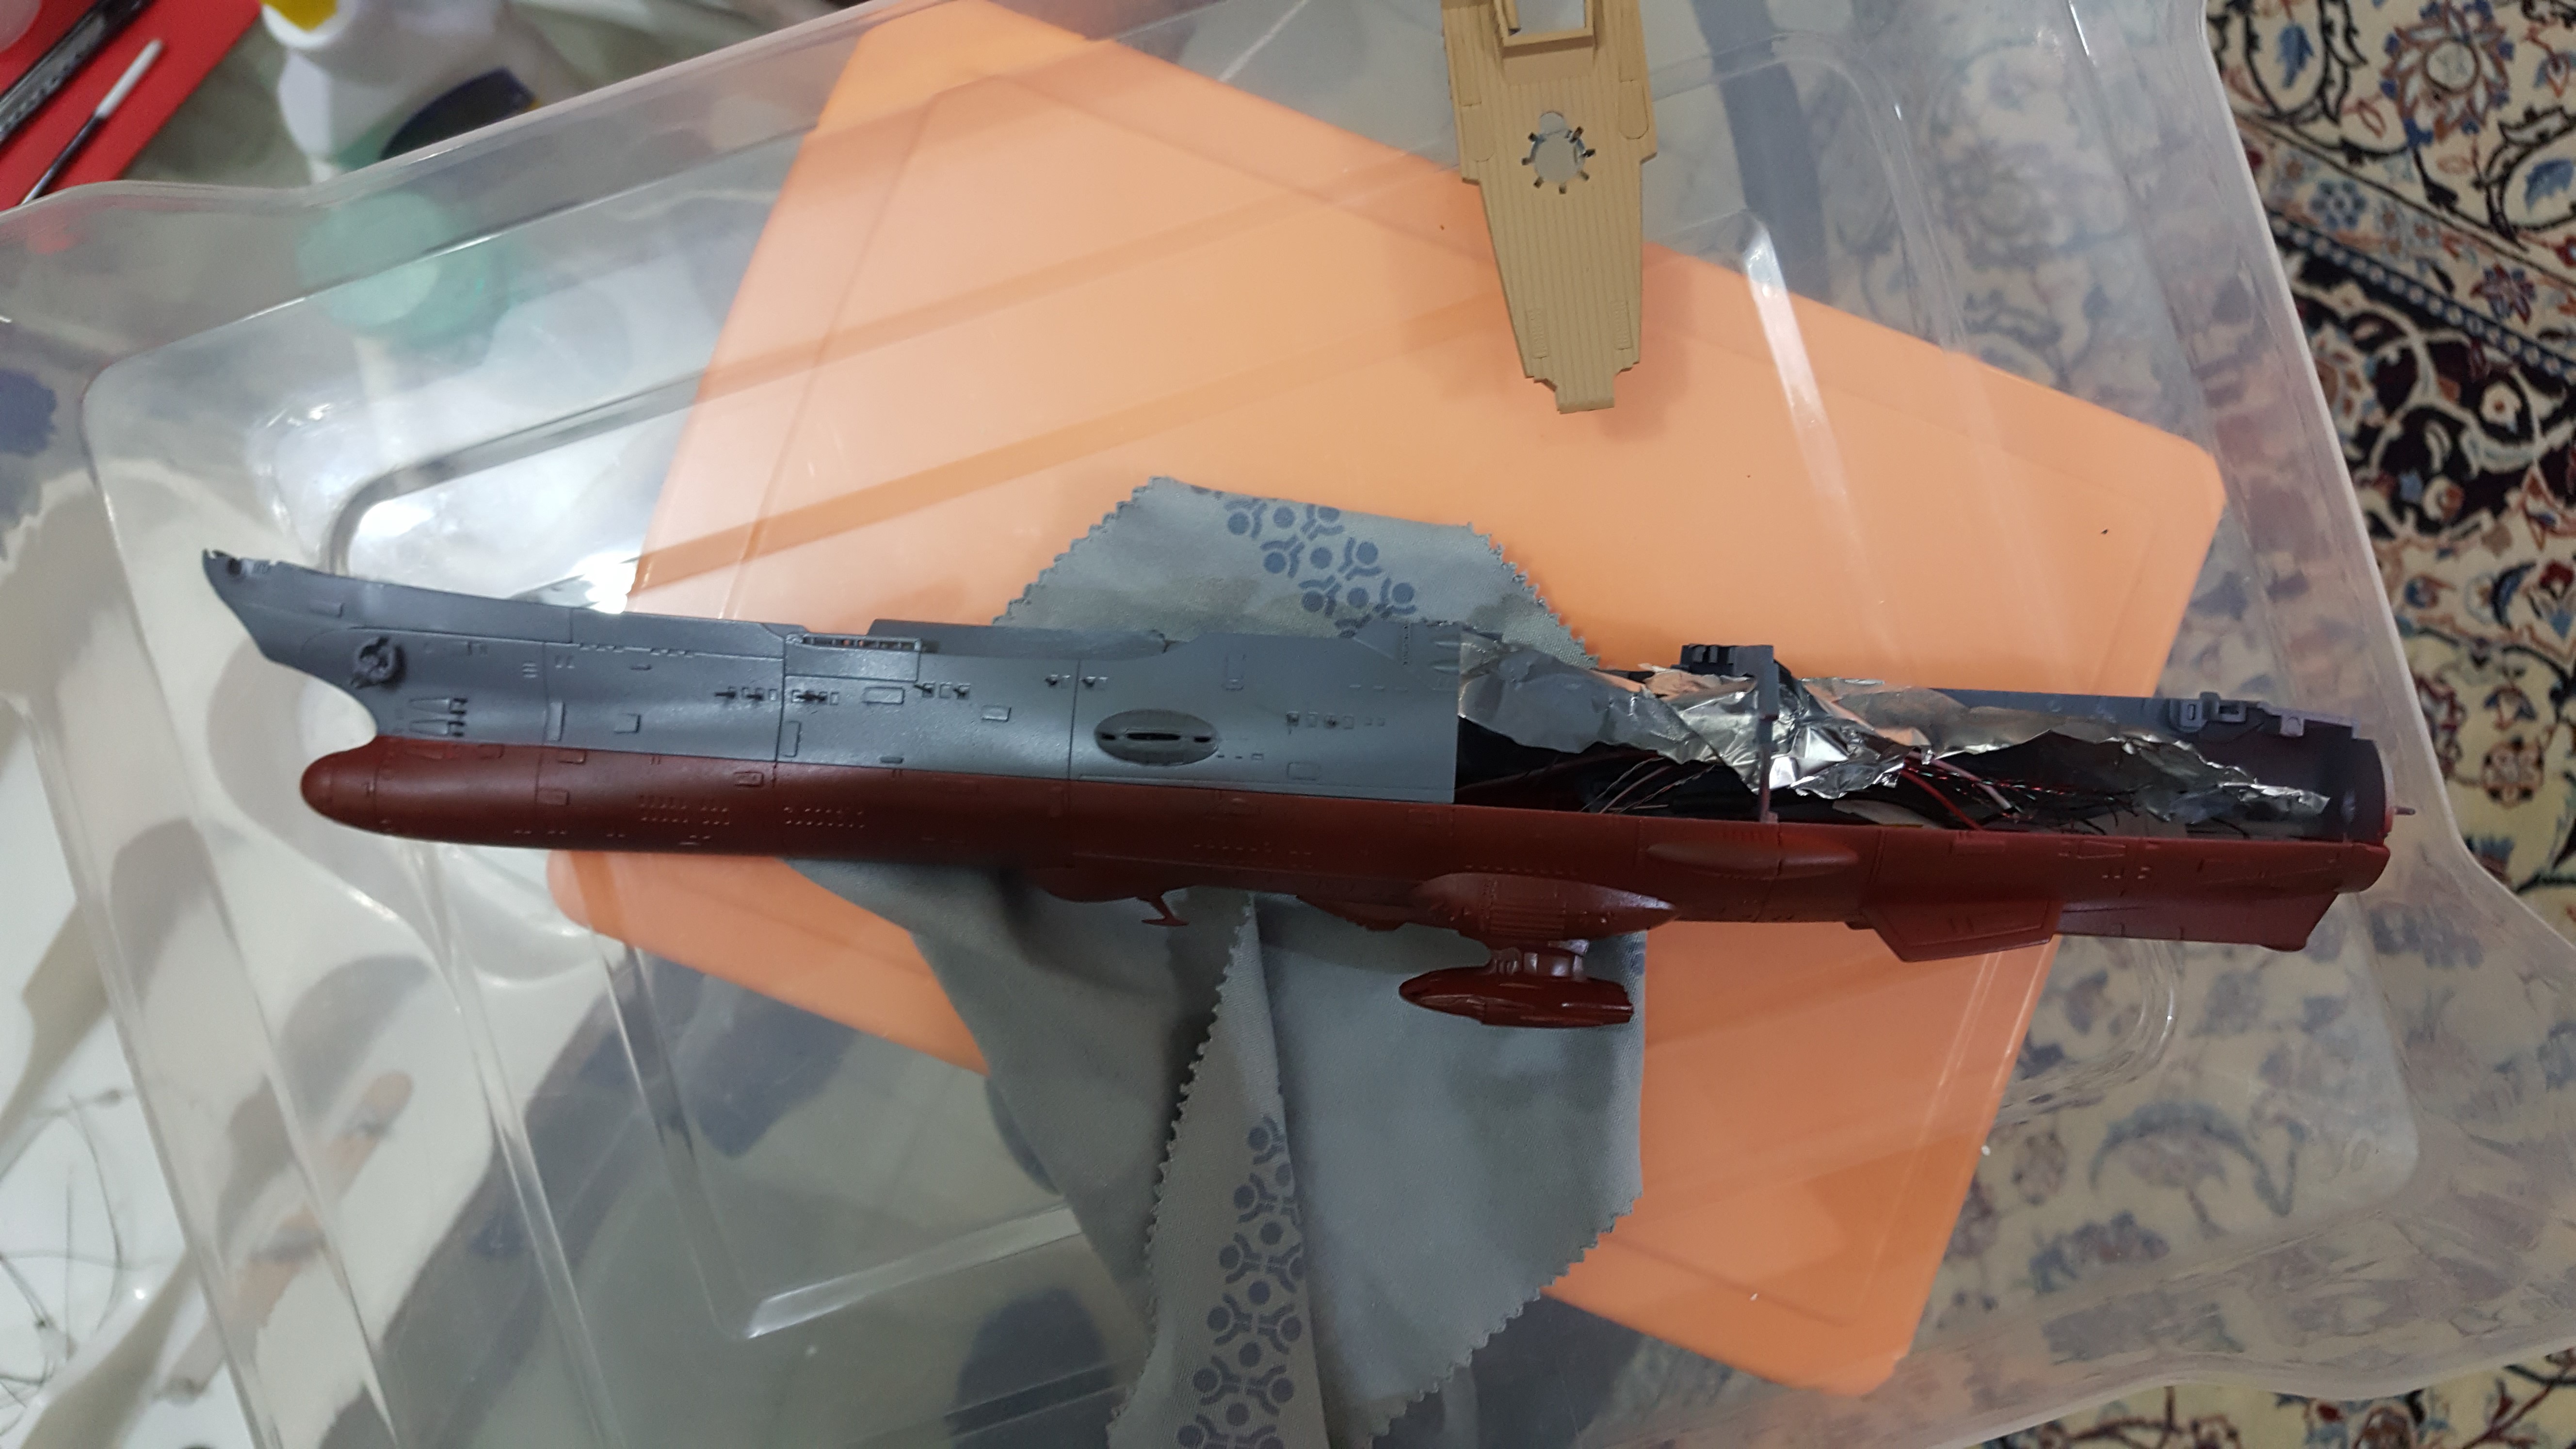
Found the 99soft 3-pack with free shipping on Ebay. Also caved in and got the IJN Yamato for the kitbash. I thought I would be sick of the thing after working on it for a year. Nope! It's like a one-stop diorama, with so many gimmicks that I now understand why my 8-yr old self went bonkers. Watching 2199 with my son may also have something to do with it.
-
Lego 1/60 valk. Everything is awesome!
-
It's a VT-1 because I want it to be.
-
Thanks!
-

Macross World Podcast - feedback & comments
arbit replied to Tochiro's topic in Movies and TV Series
More great coverage from Scramble News Network. -
Minecraft valk.
-
It is solid overall. I was thinking only of the anti-aircraft guns as being "flimsy". They are so thin at this scale, and easy to break. The 1/500 is better suited for the smaller details.
-
Thanks. I am testing 60rpm and 30rpm.
-
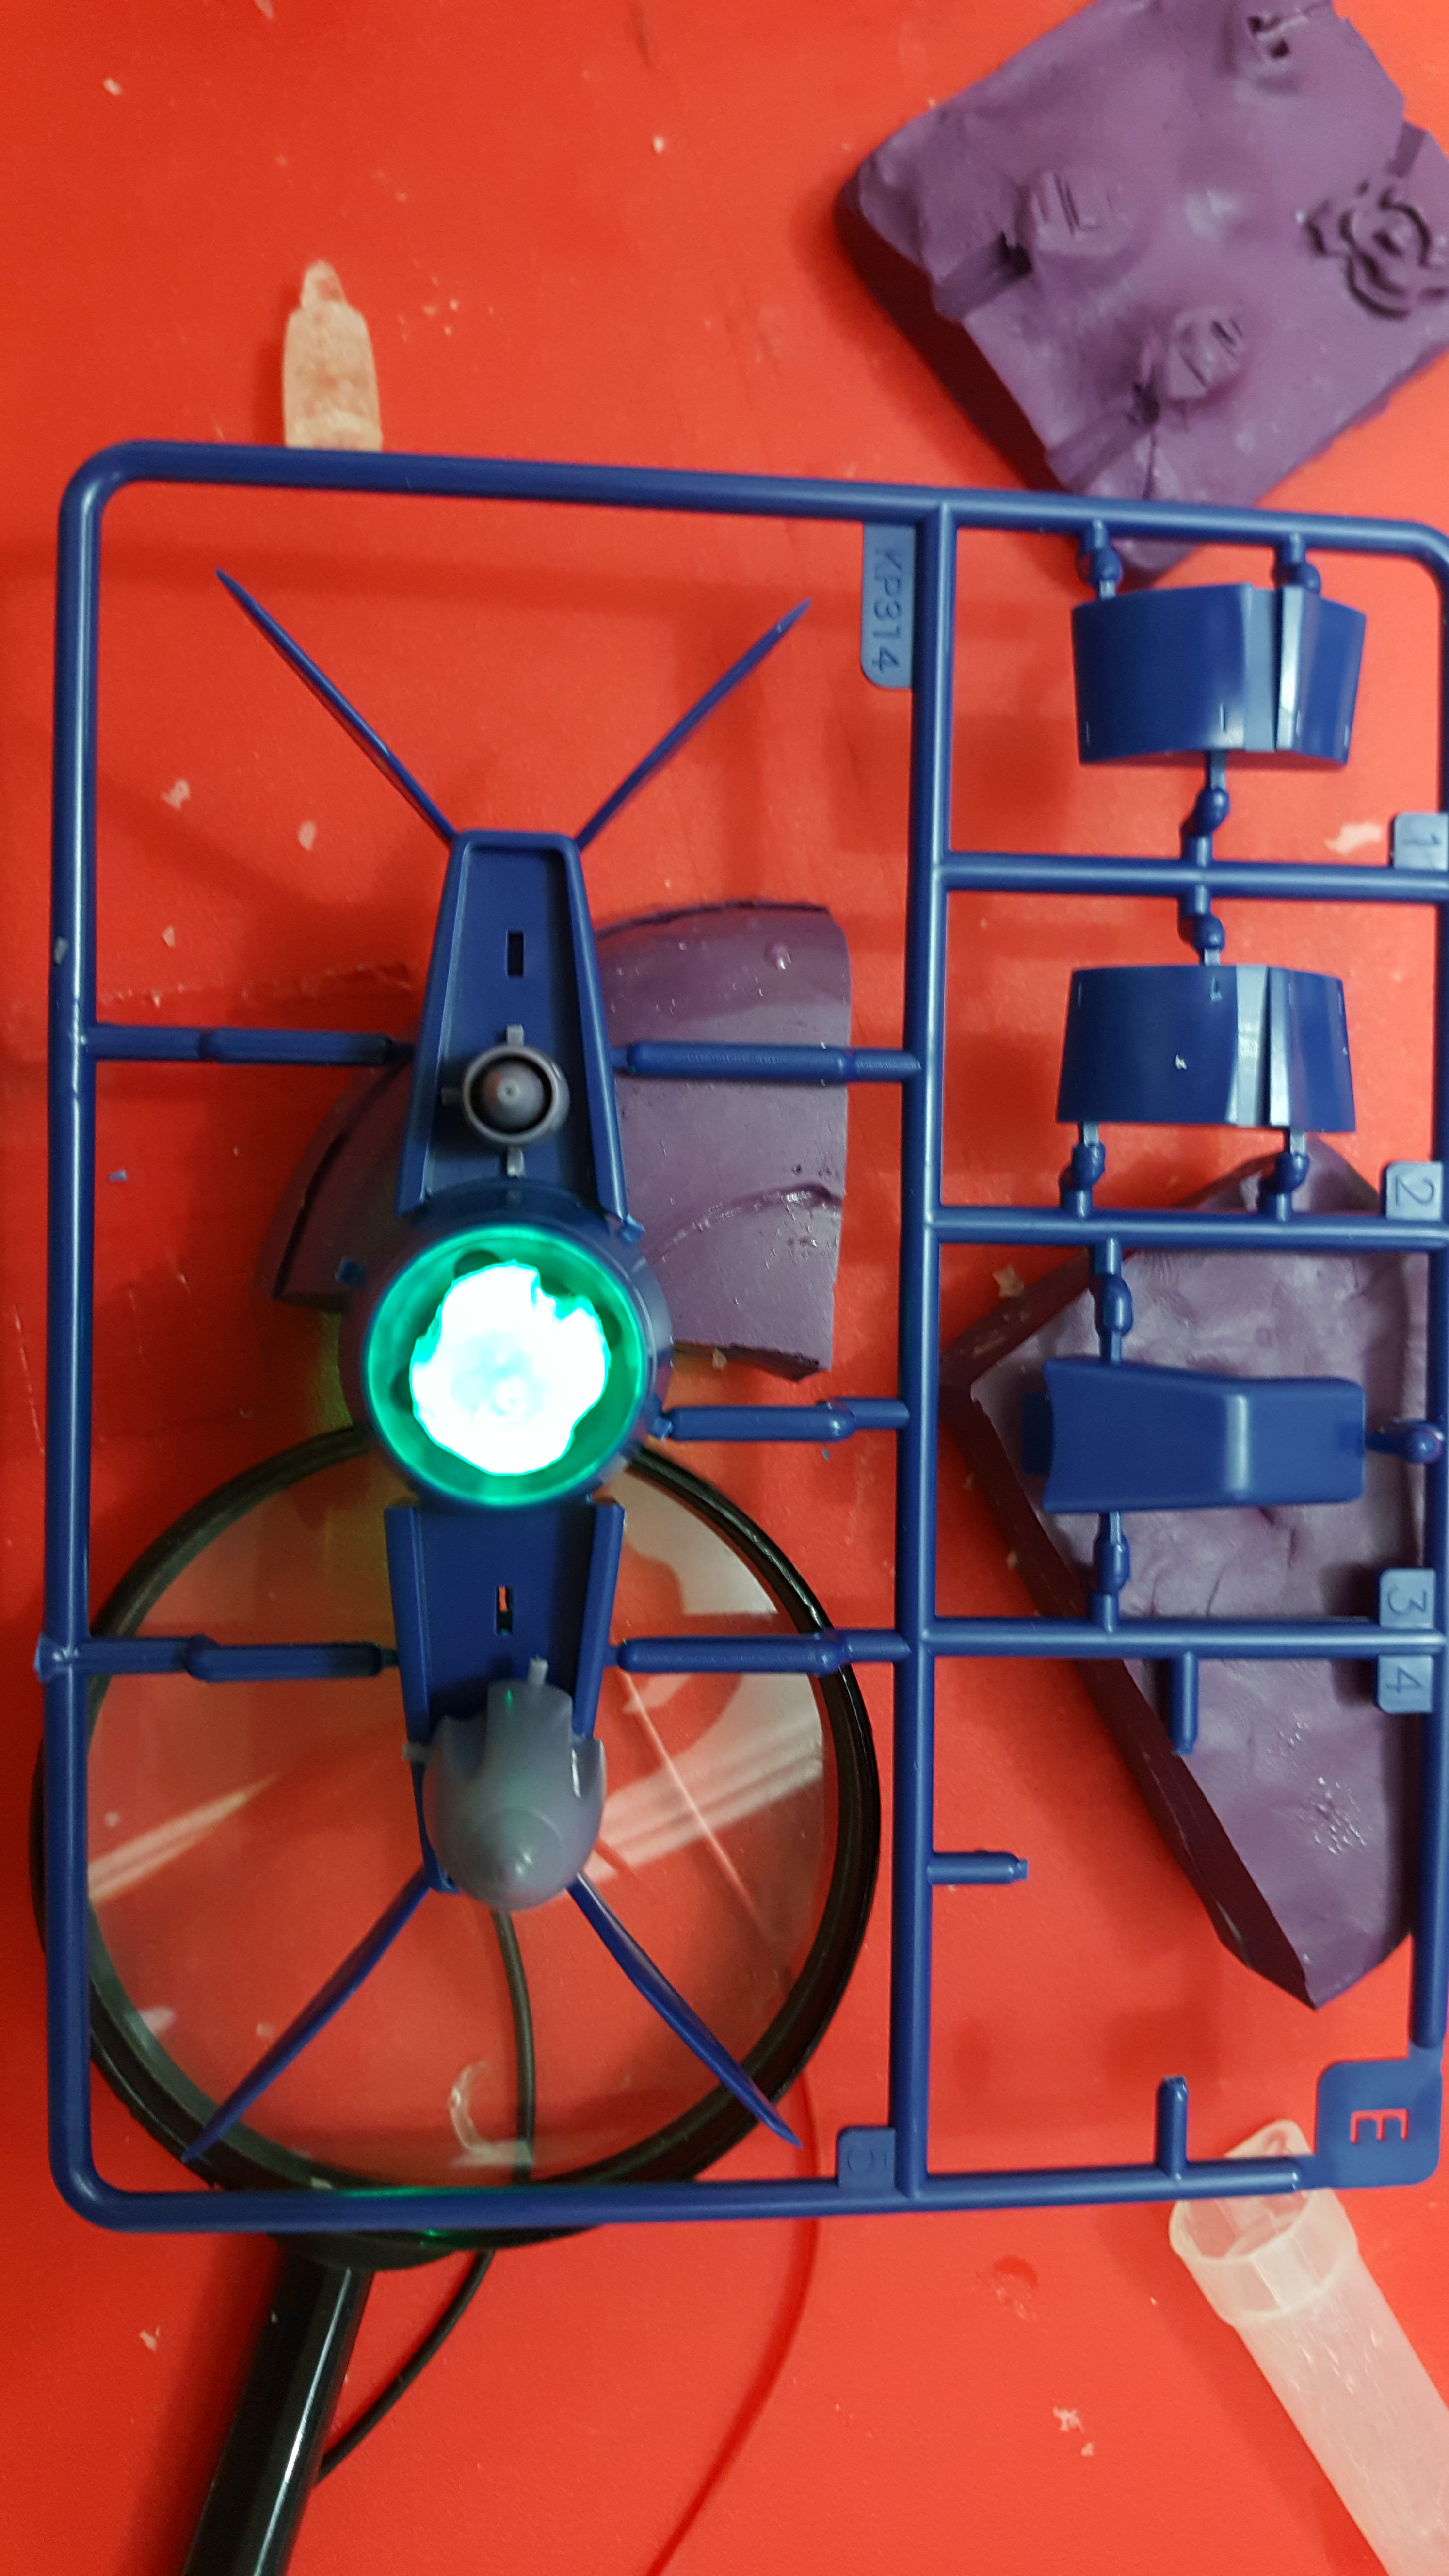
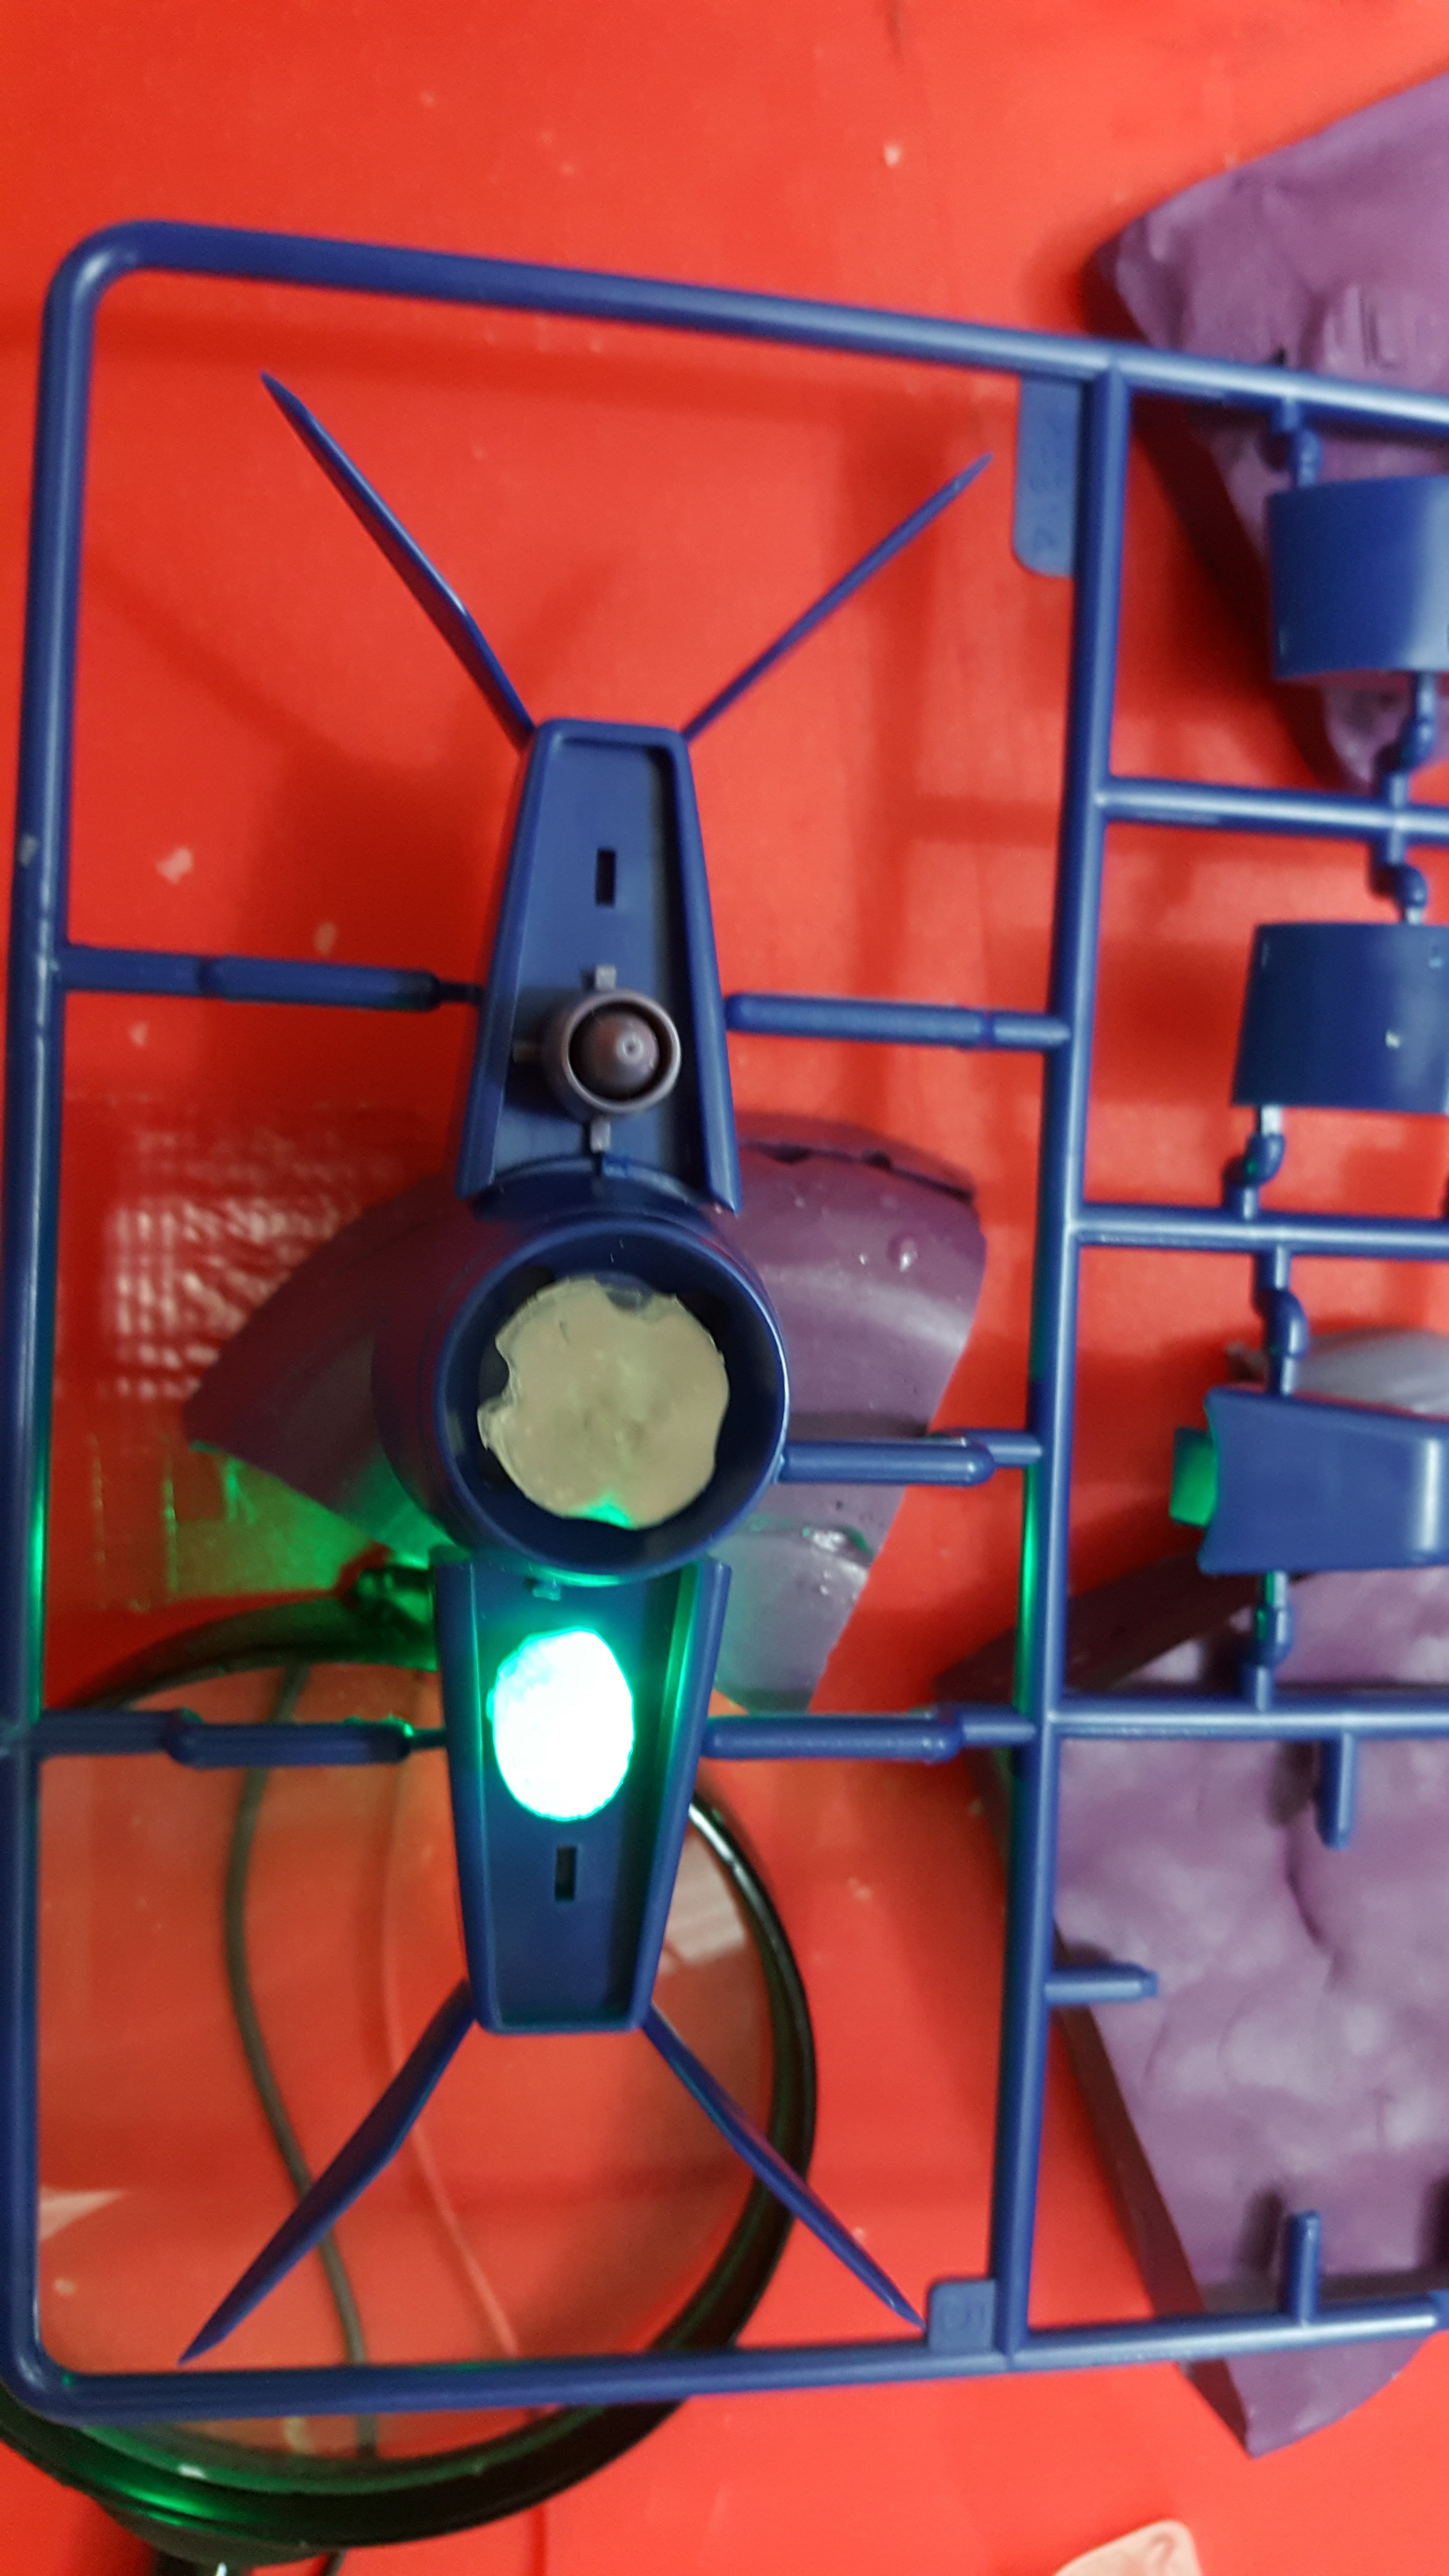
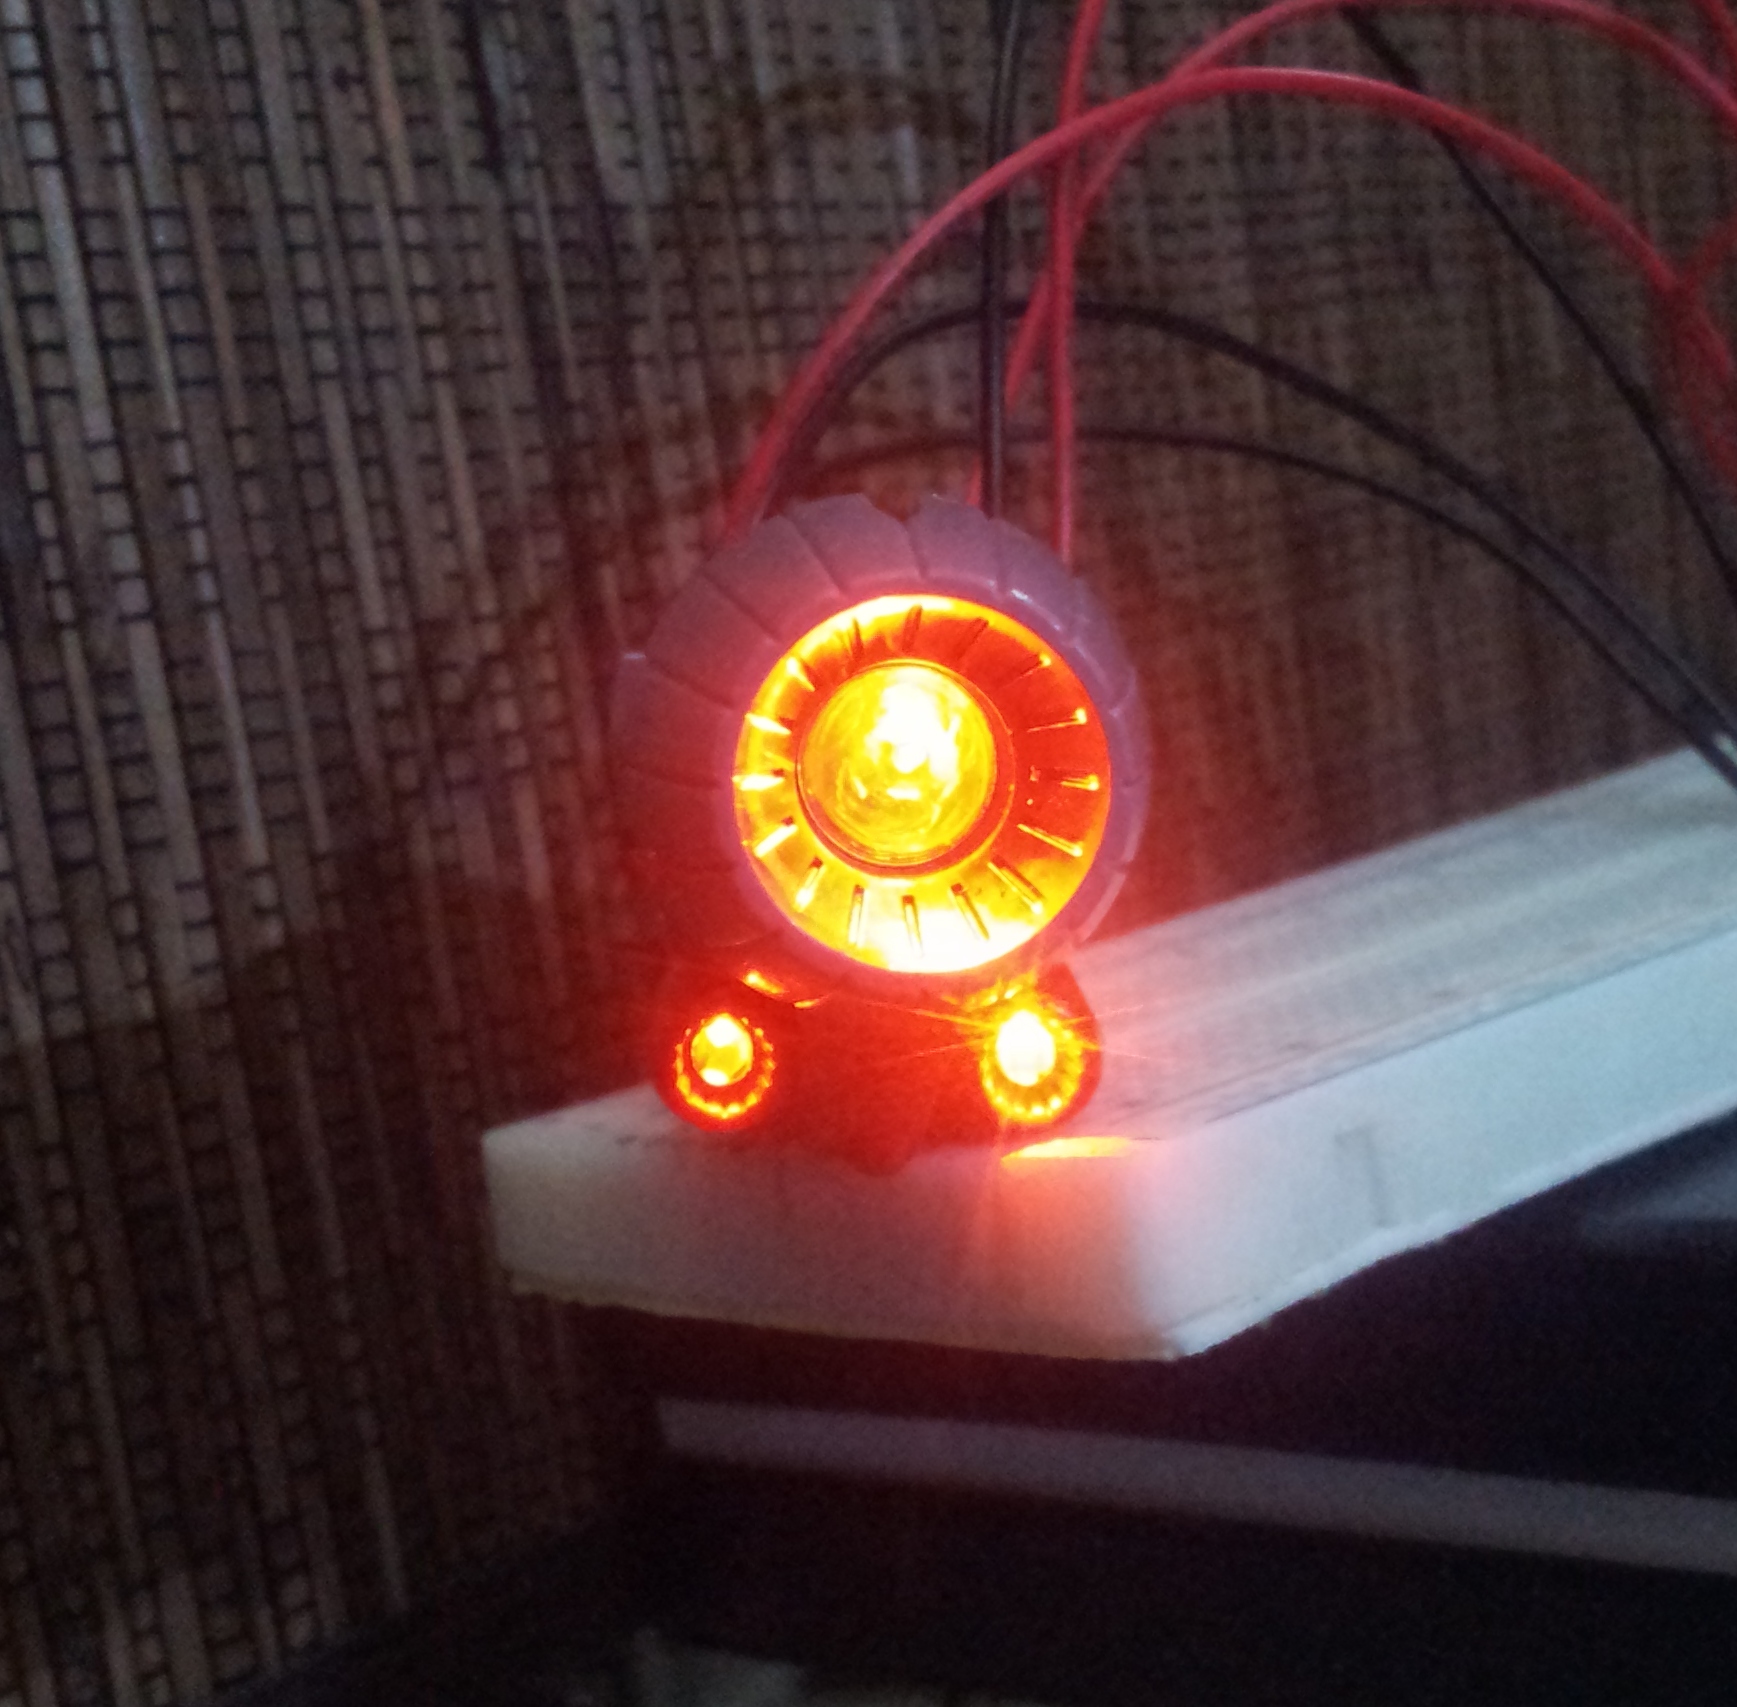
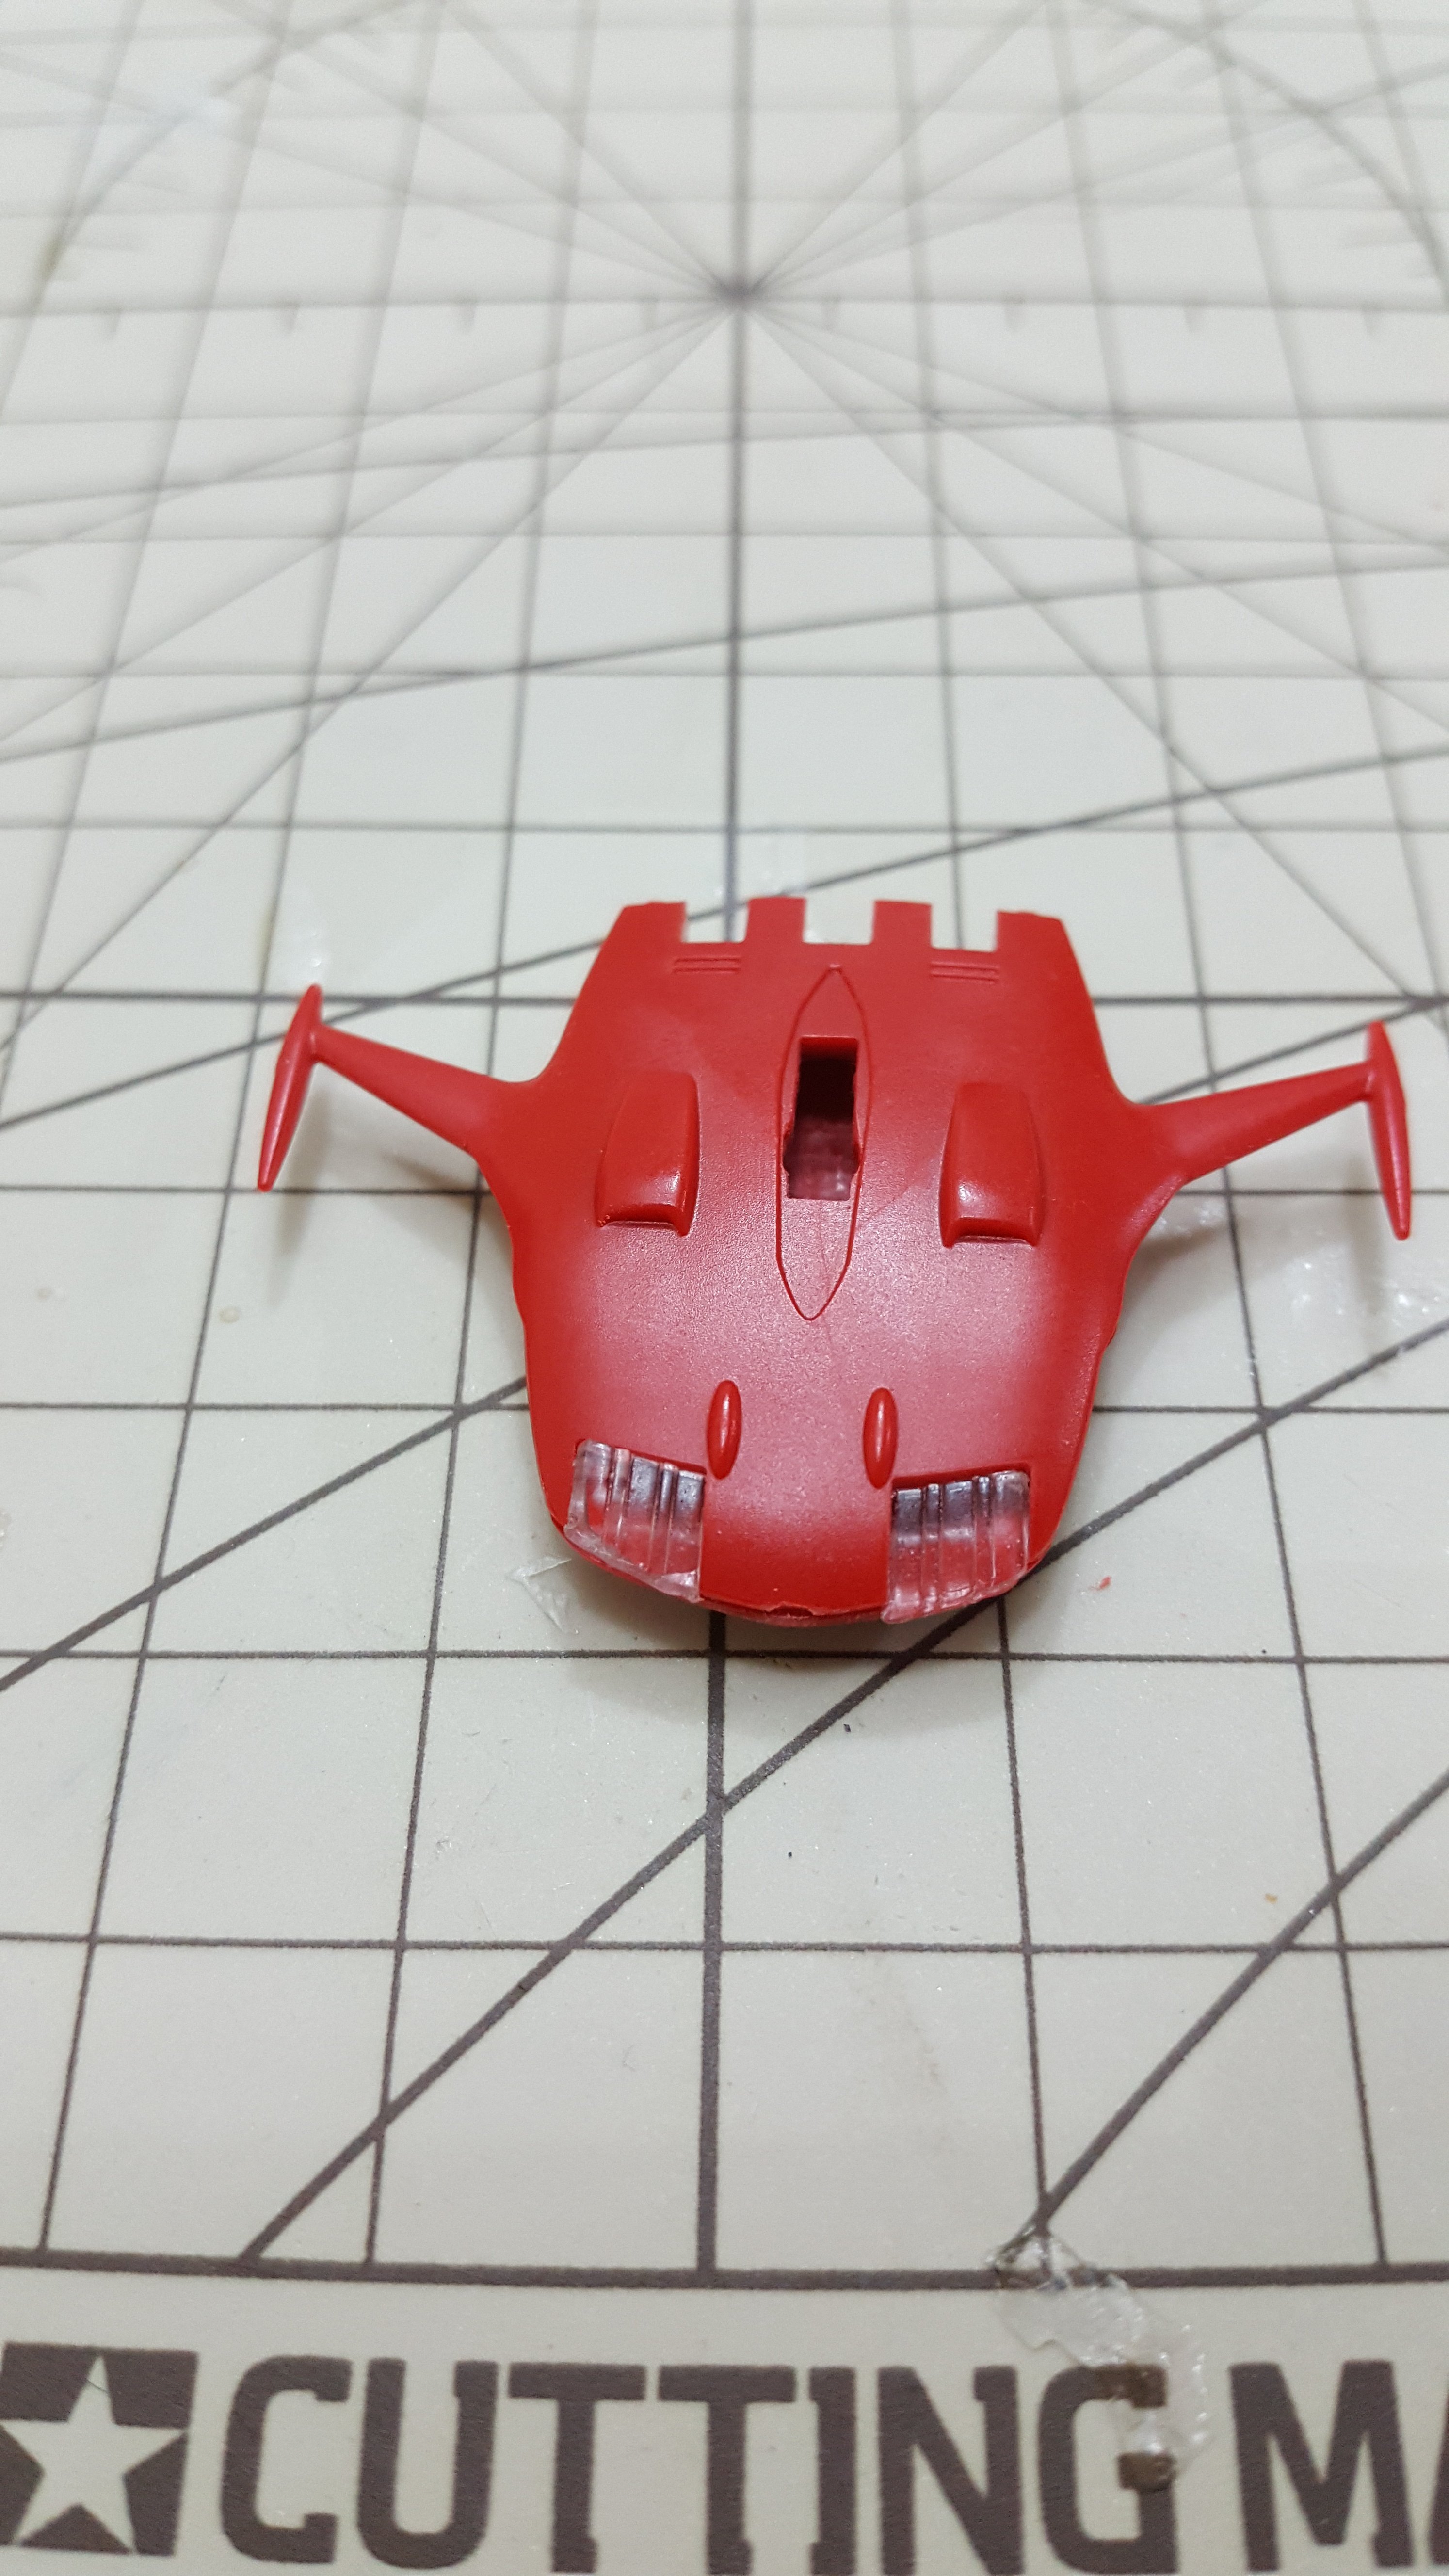
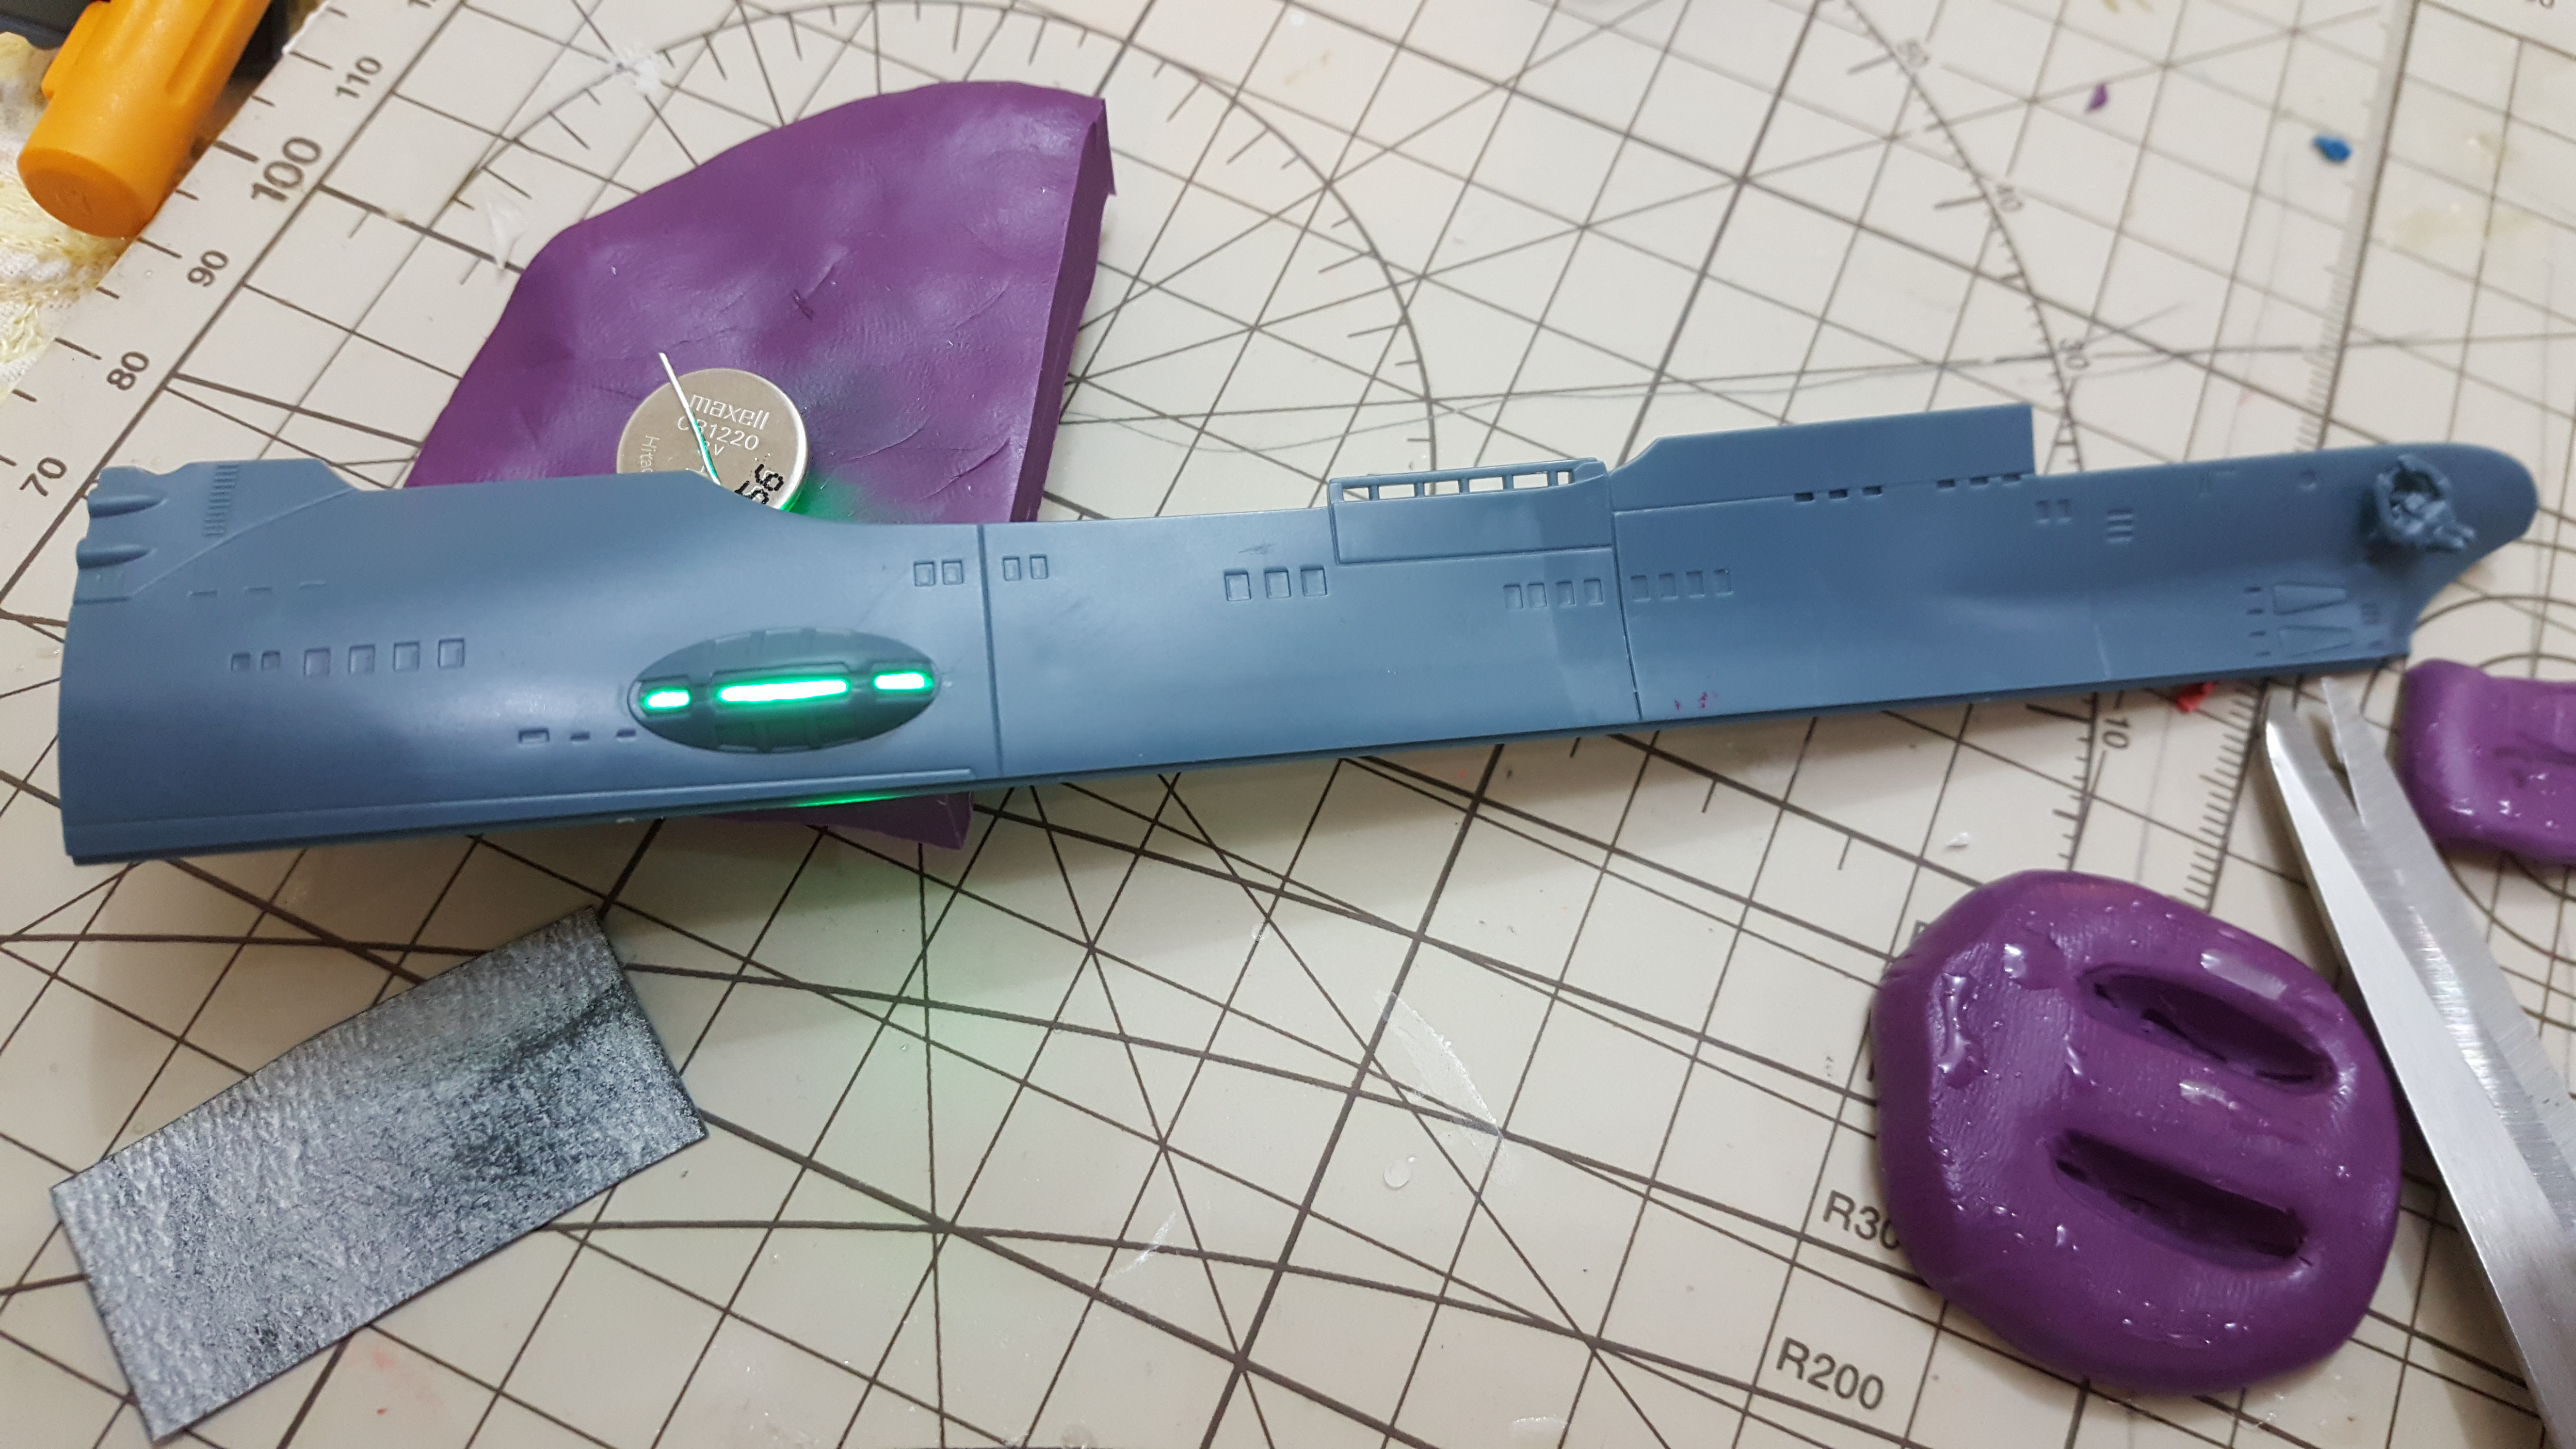
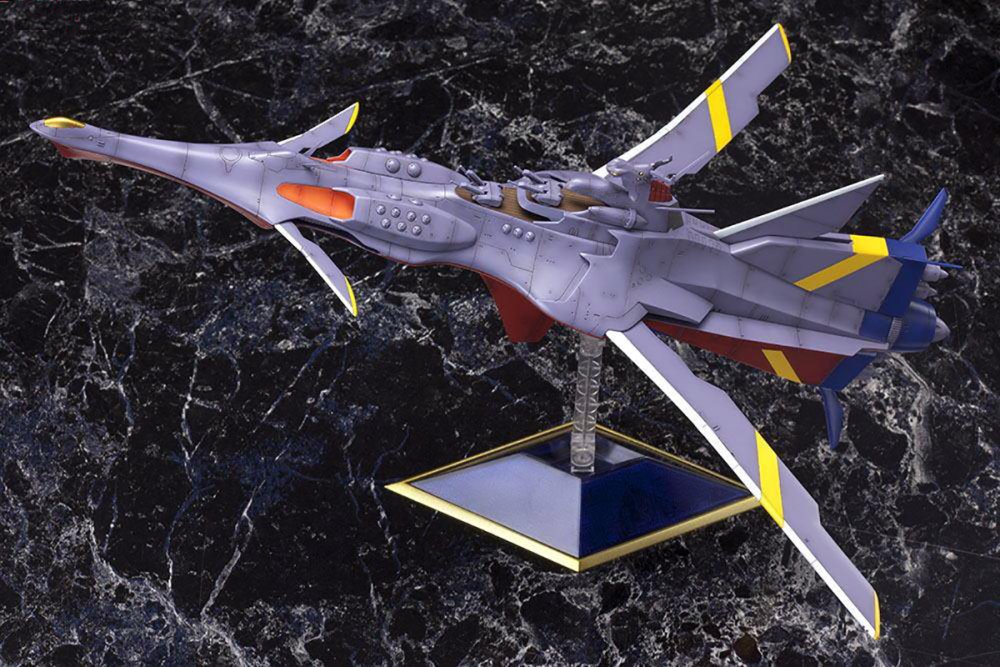
On my workbench now, the N-Nautilus started before. Playing around with different ideas for lighting the engine. No final plans, just experimenting.


-
I need some. Cant find it. Looks amazing.
-
Keep watching, after the thinner, he uses a white goo.
-
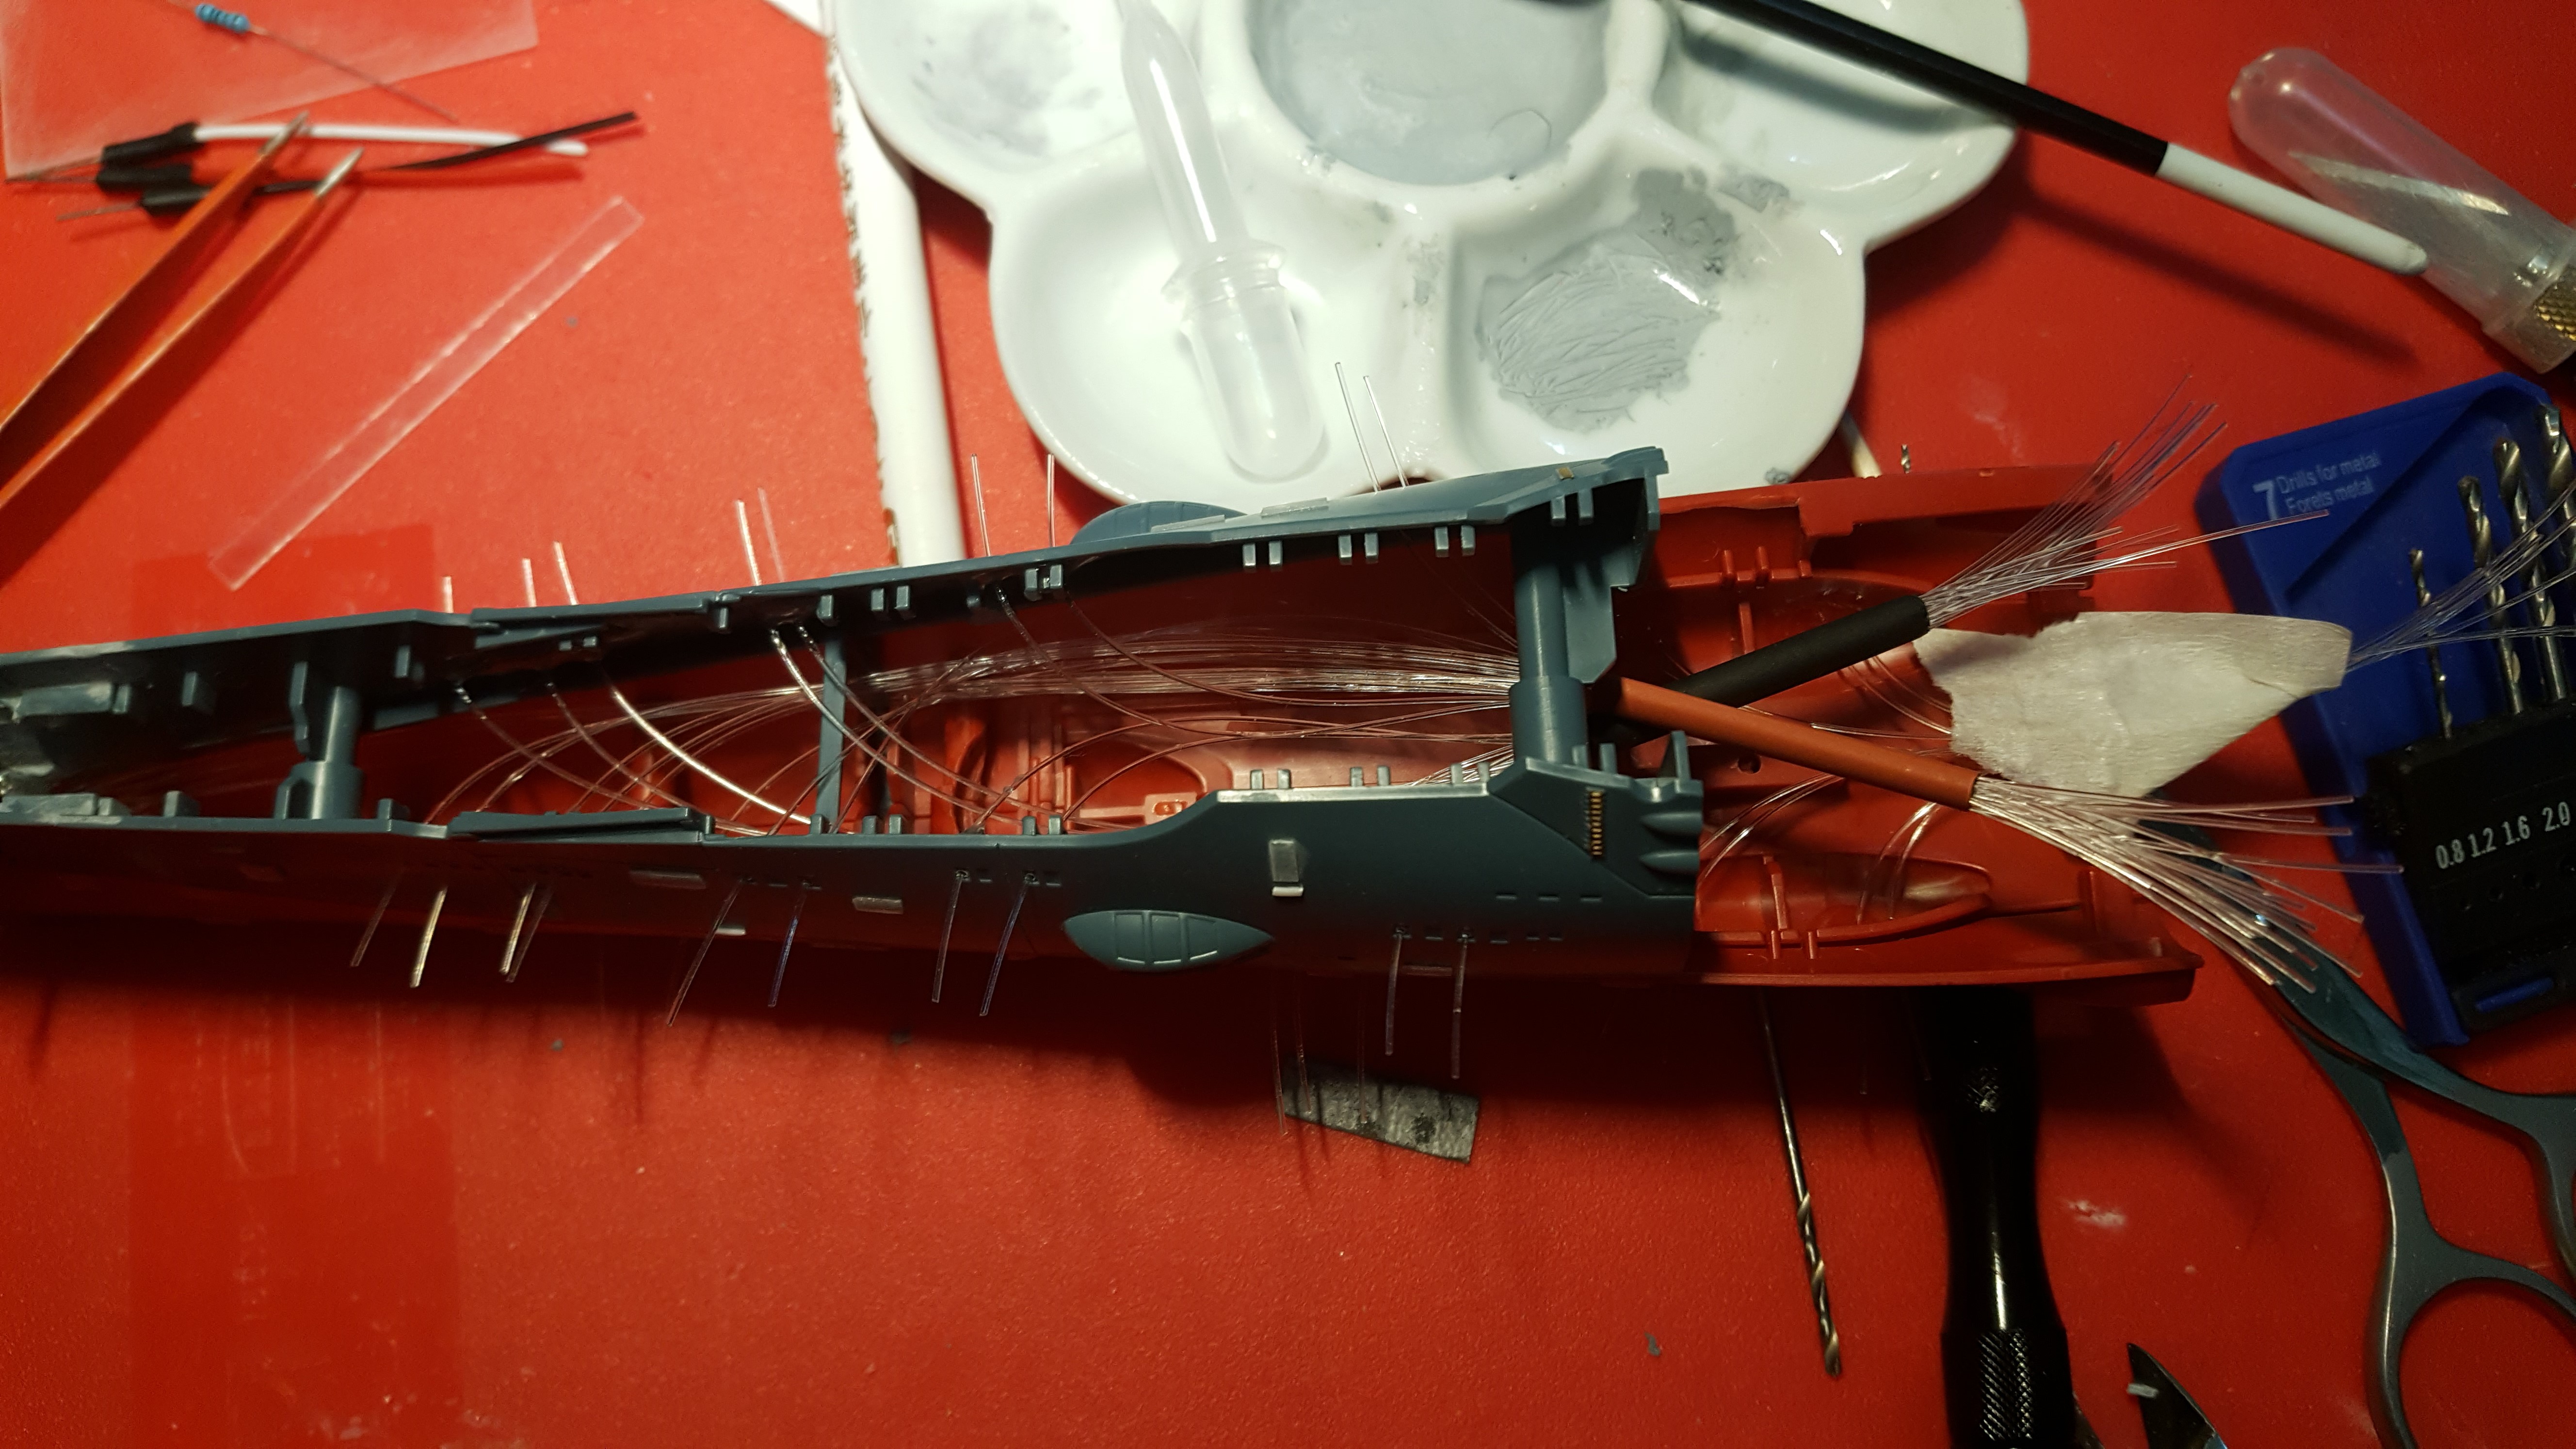
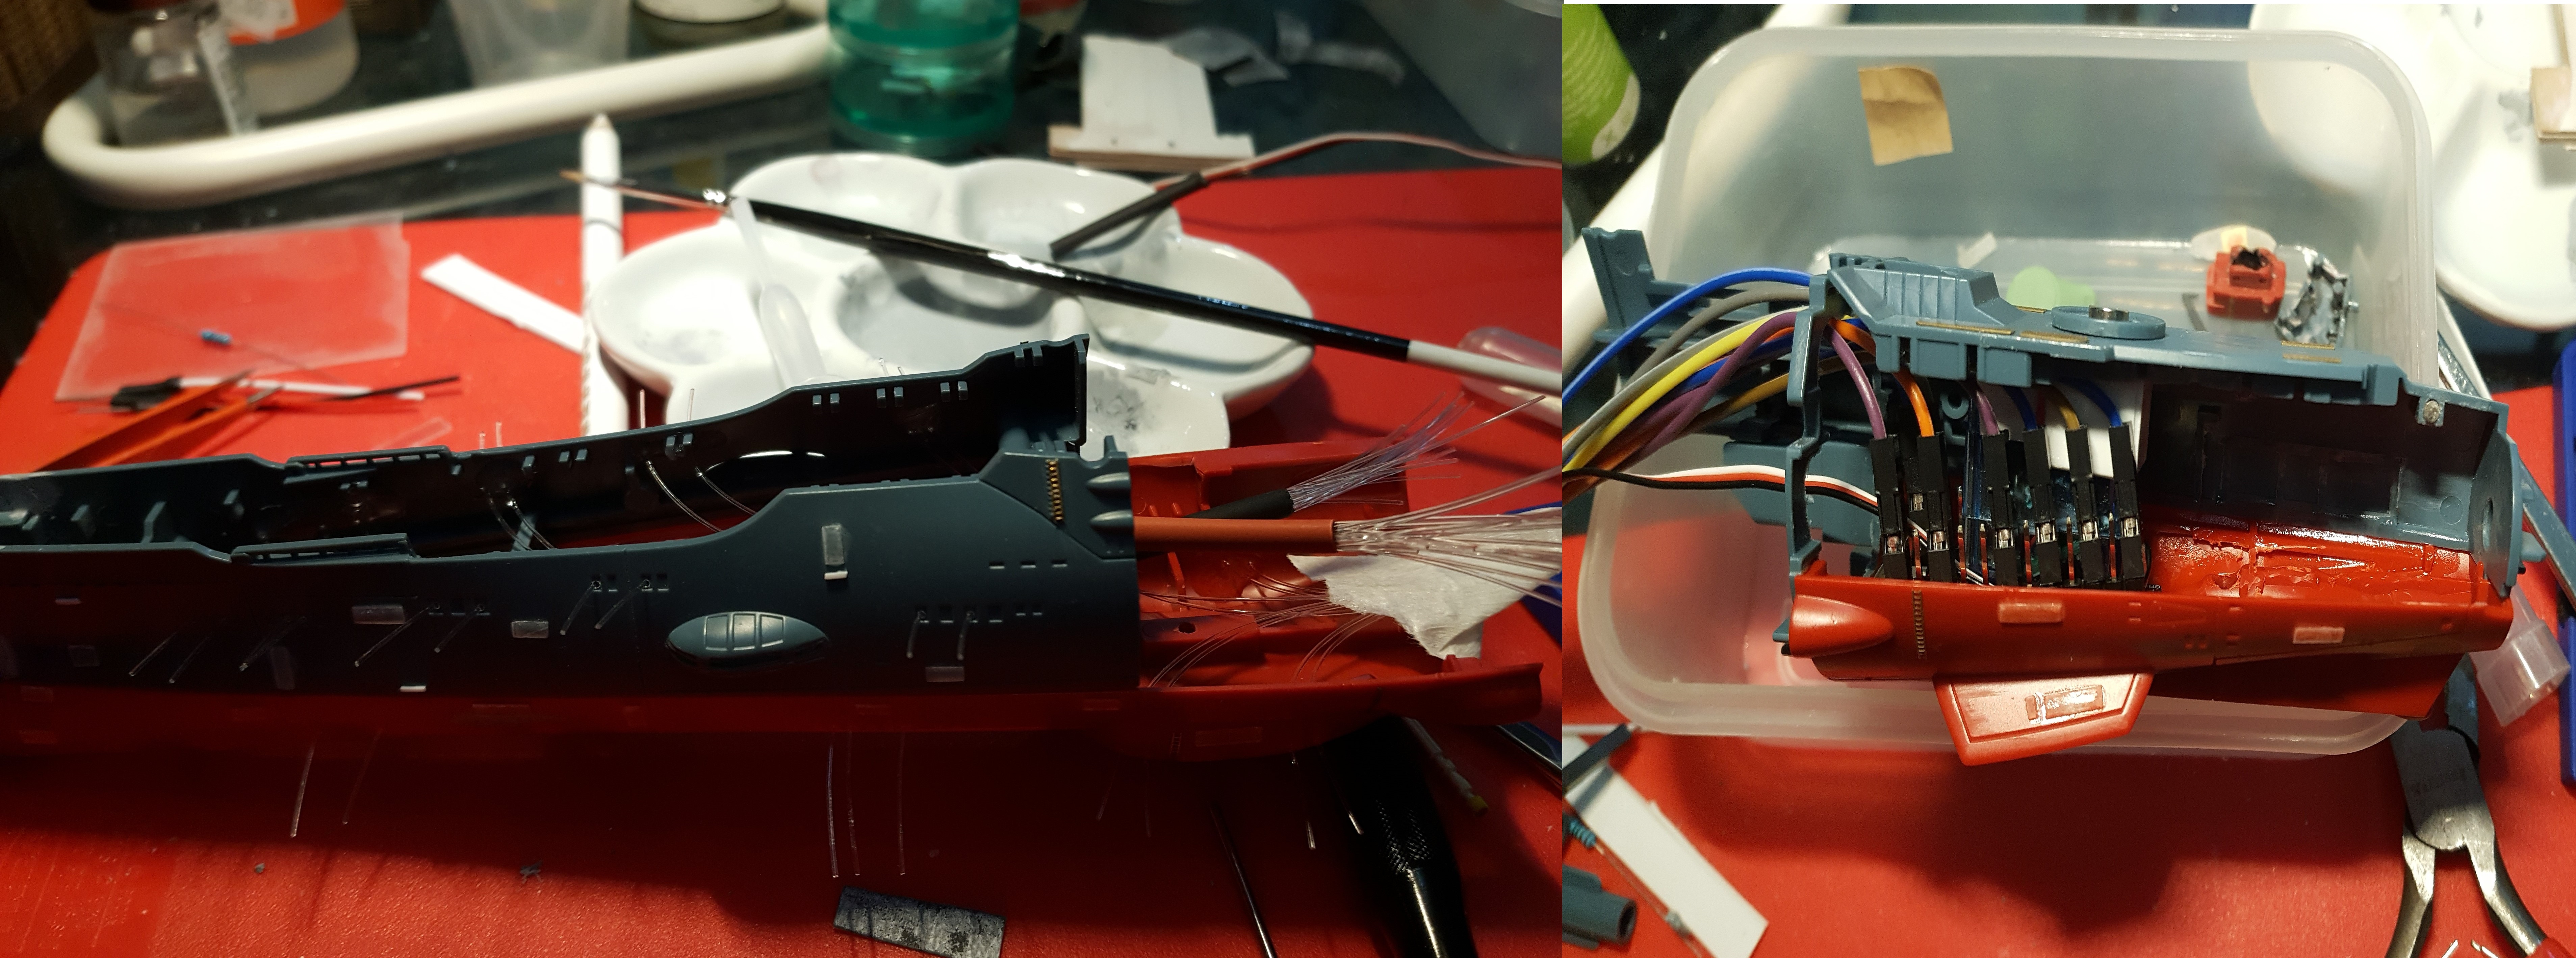
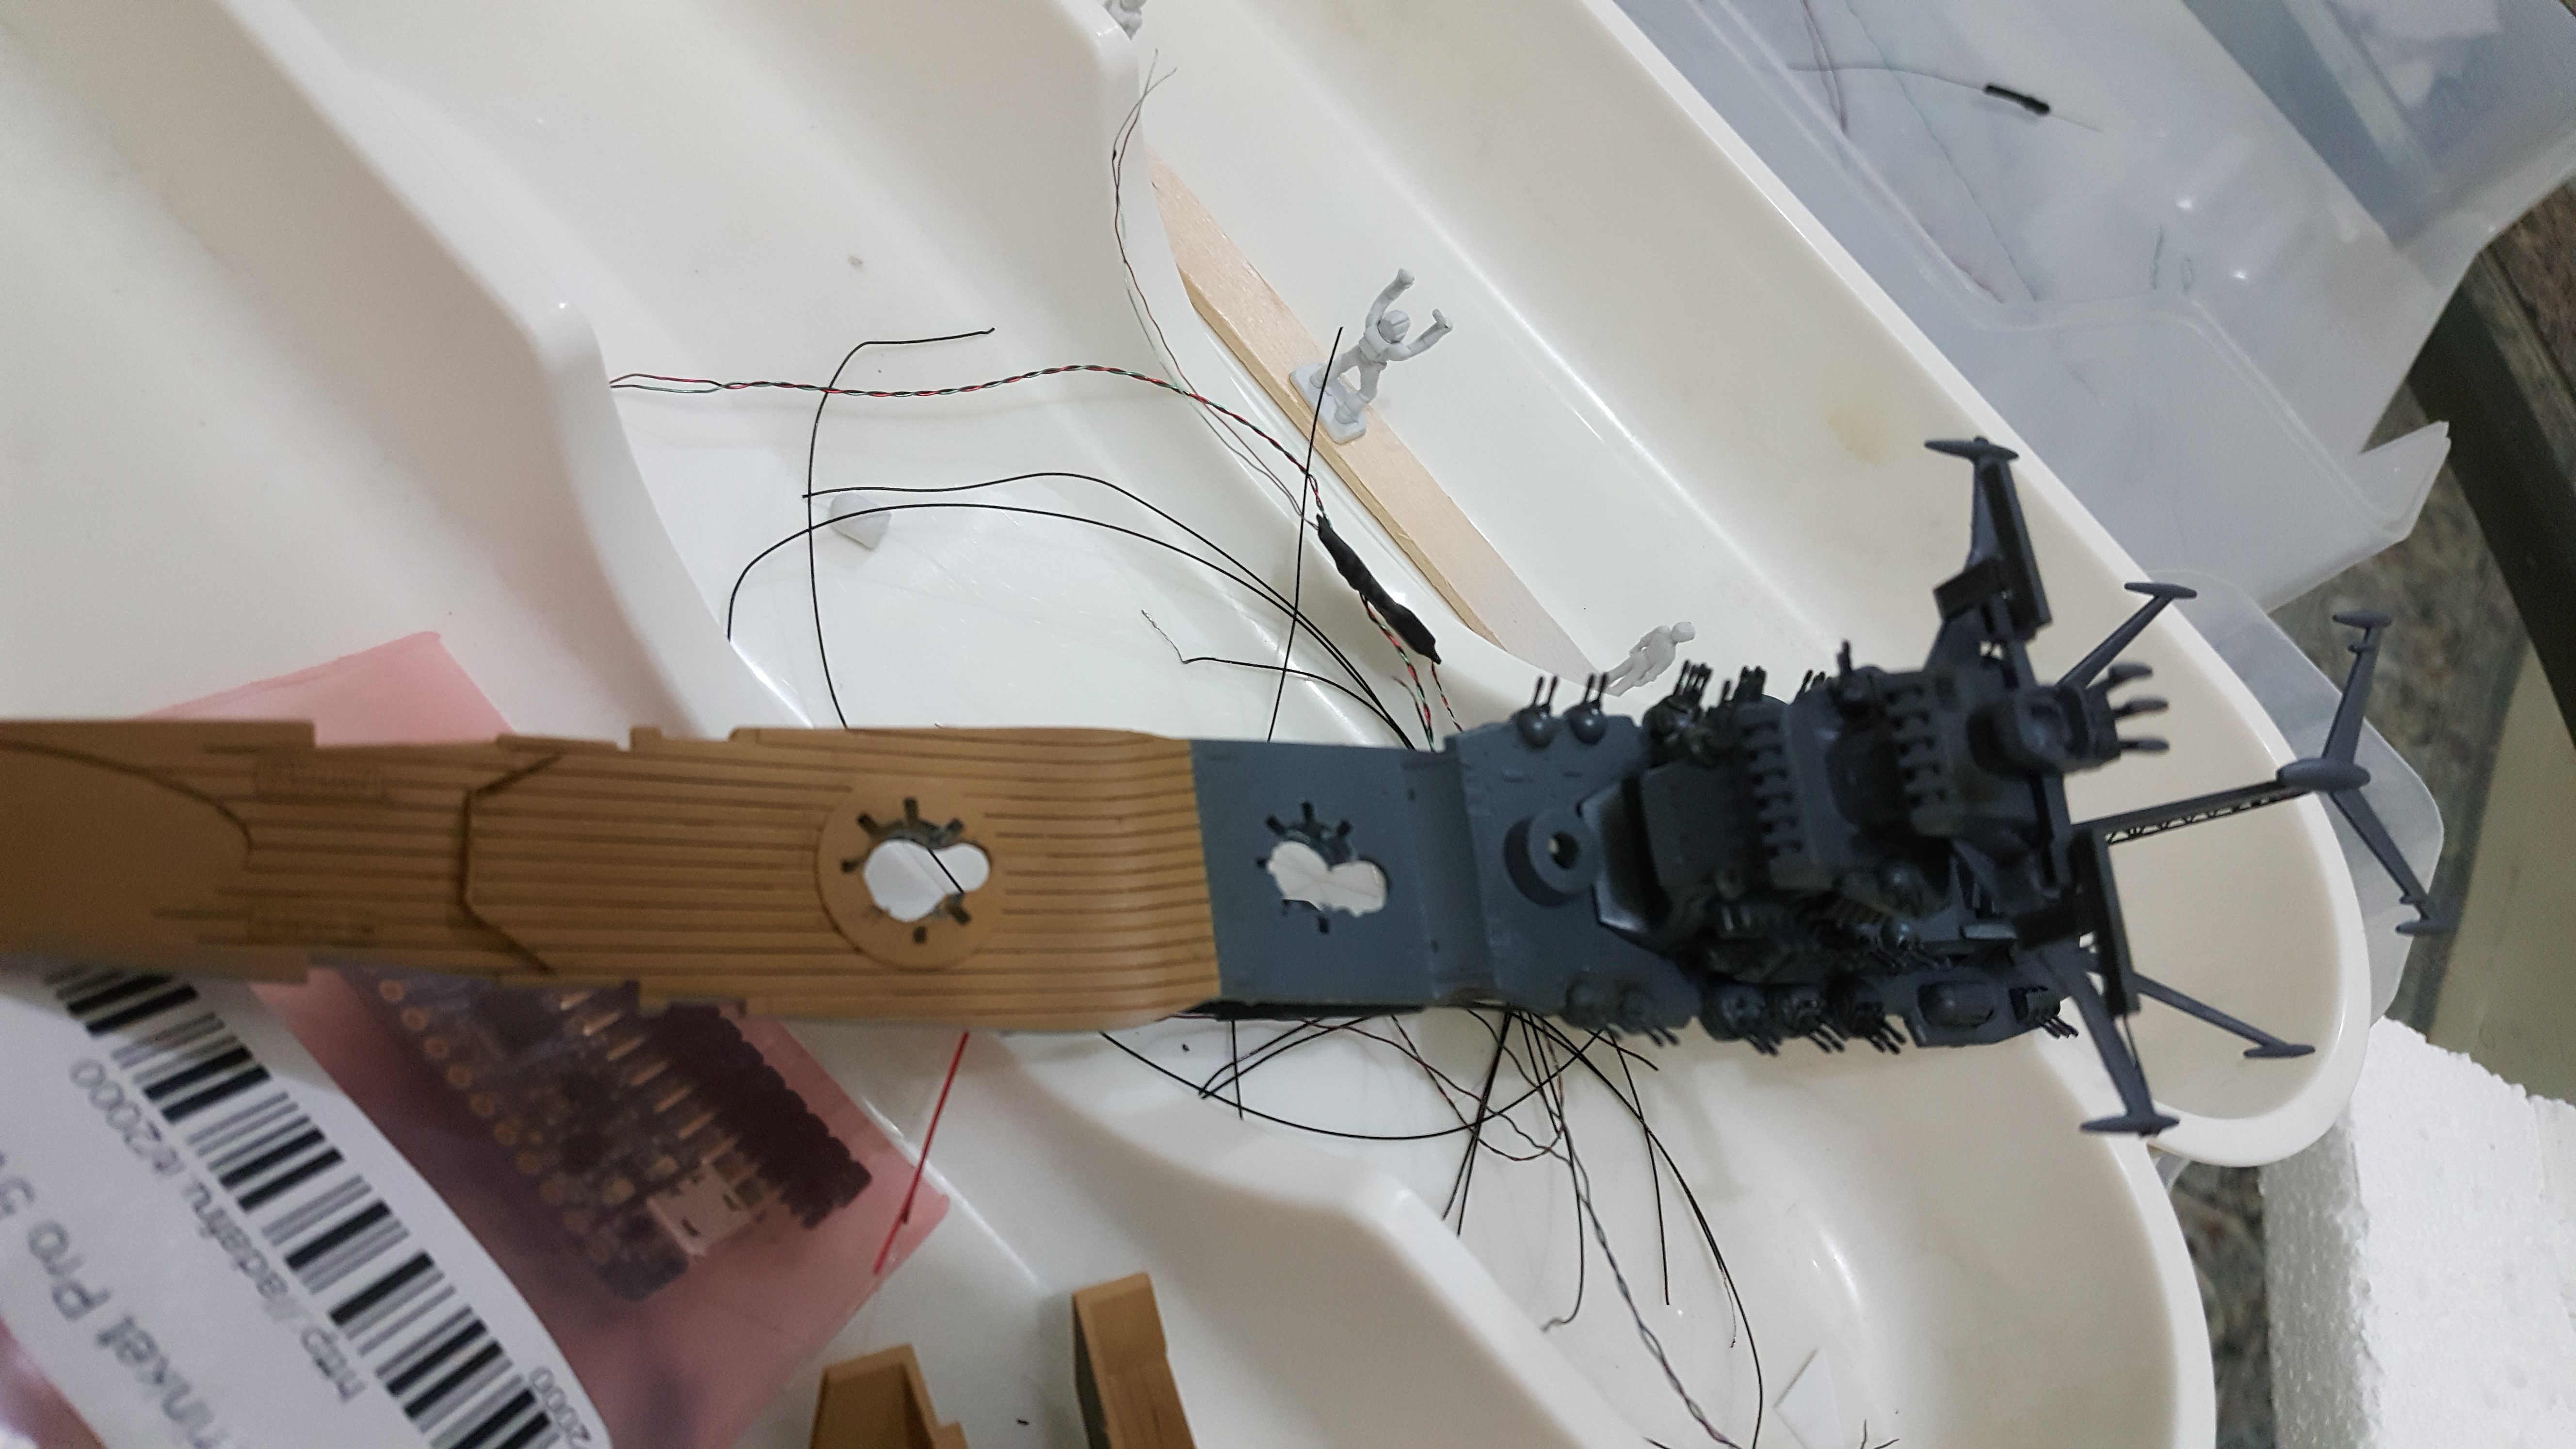
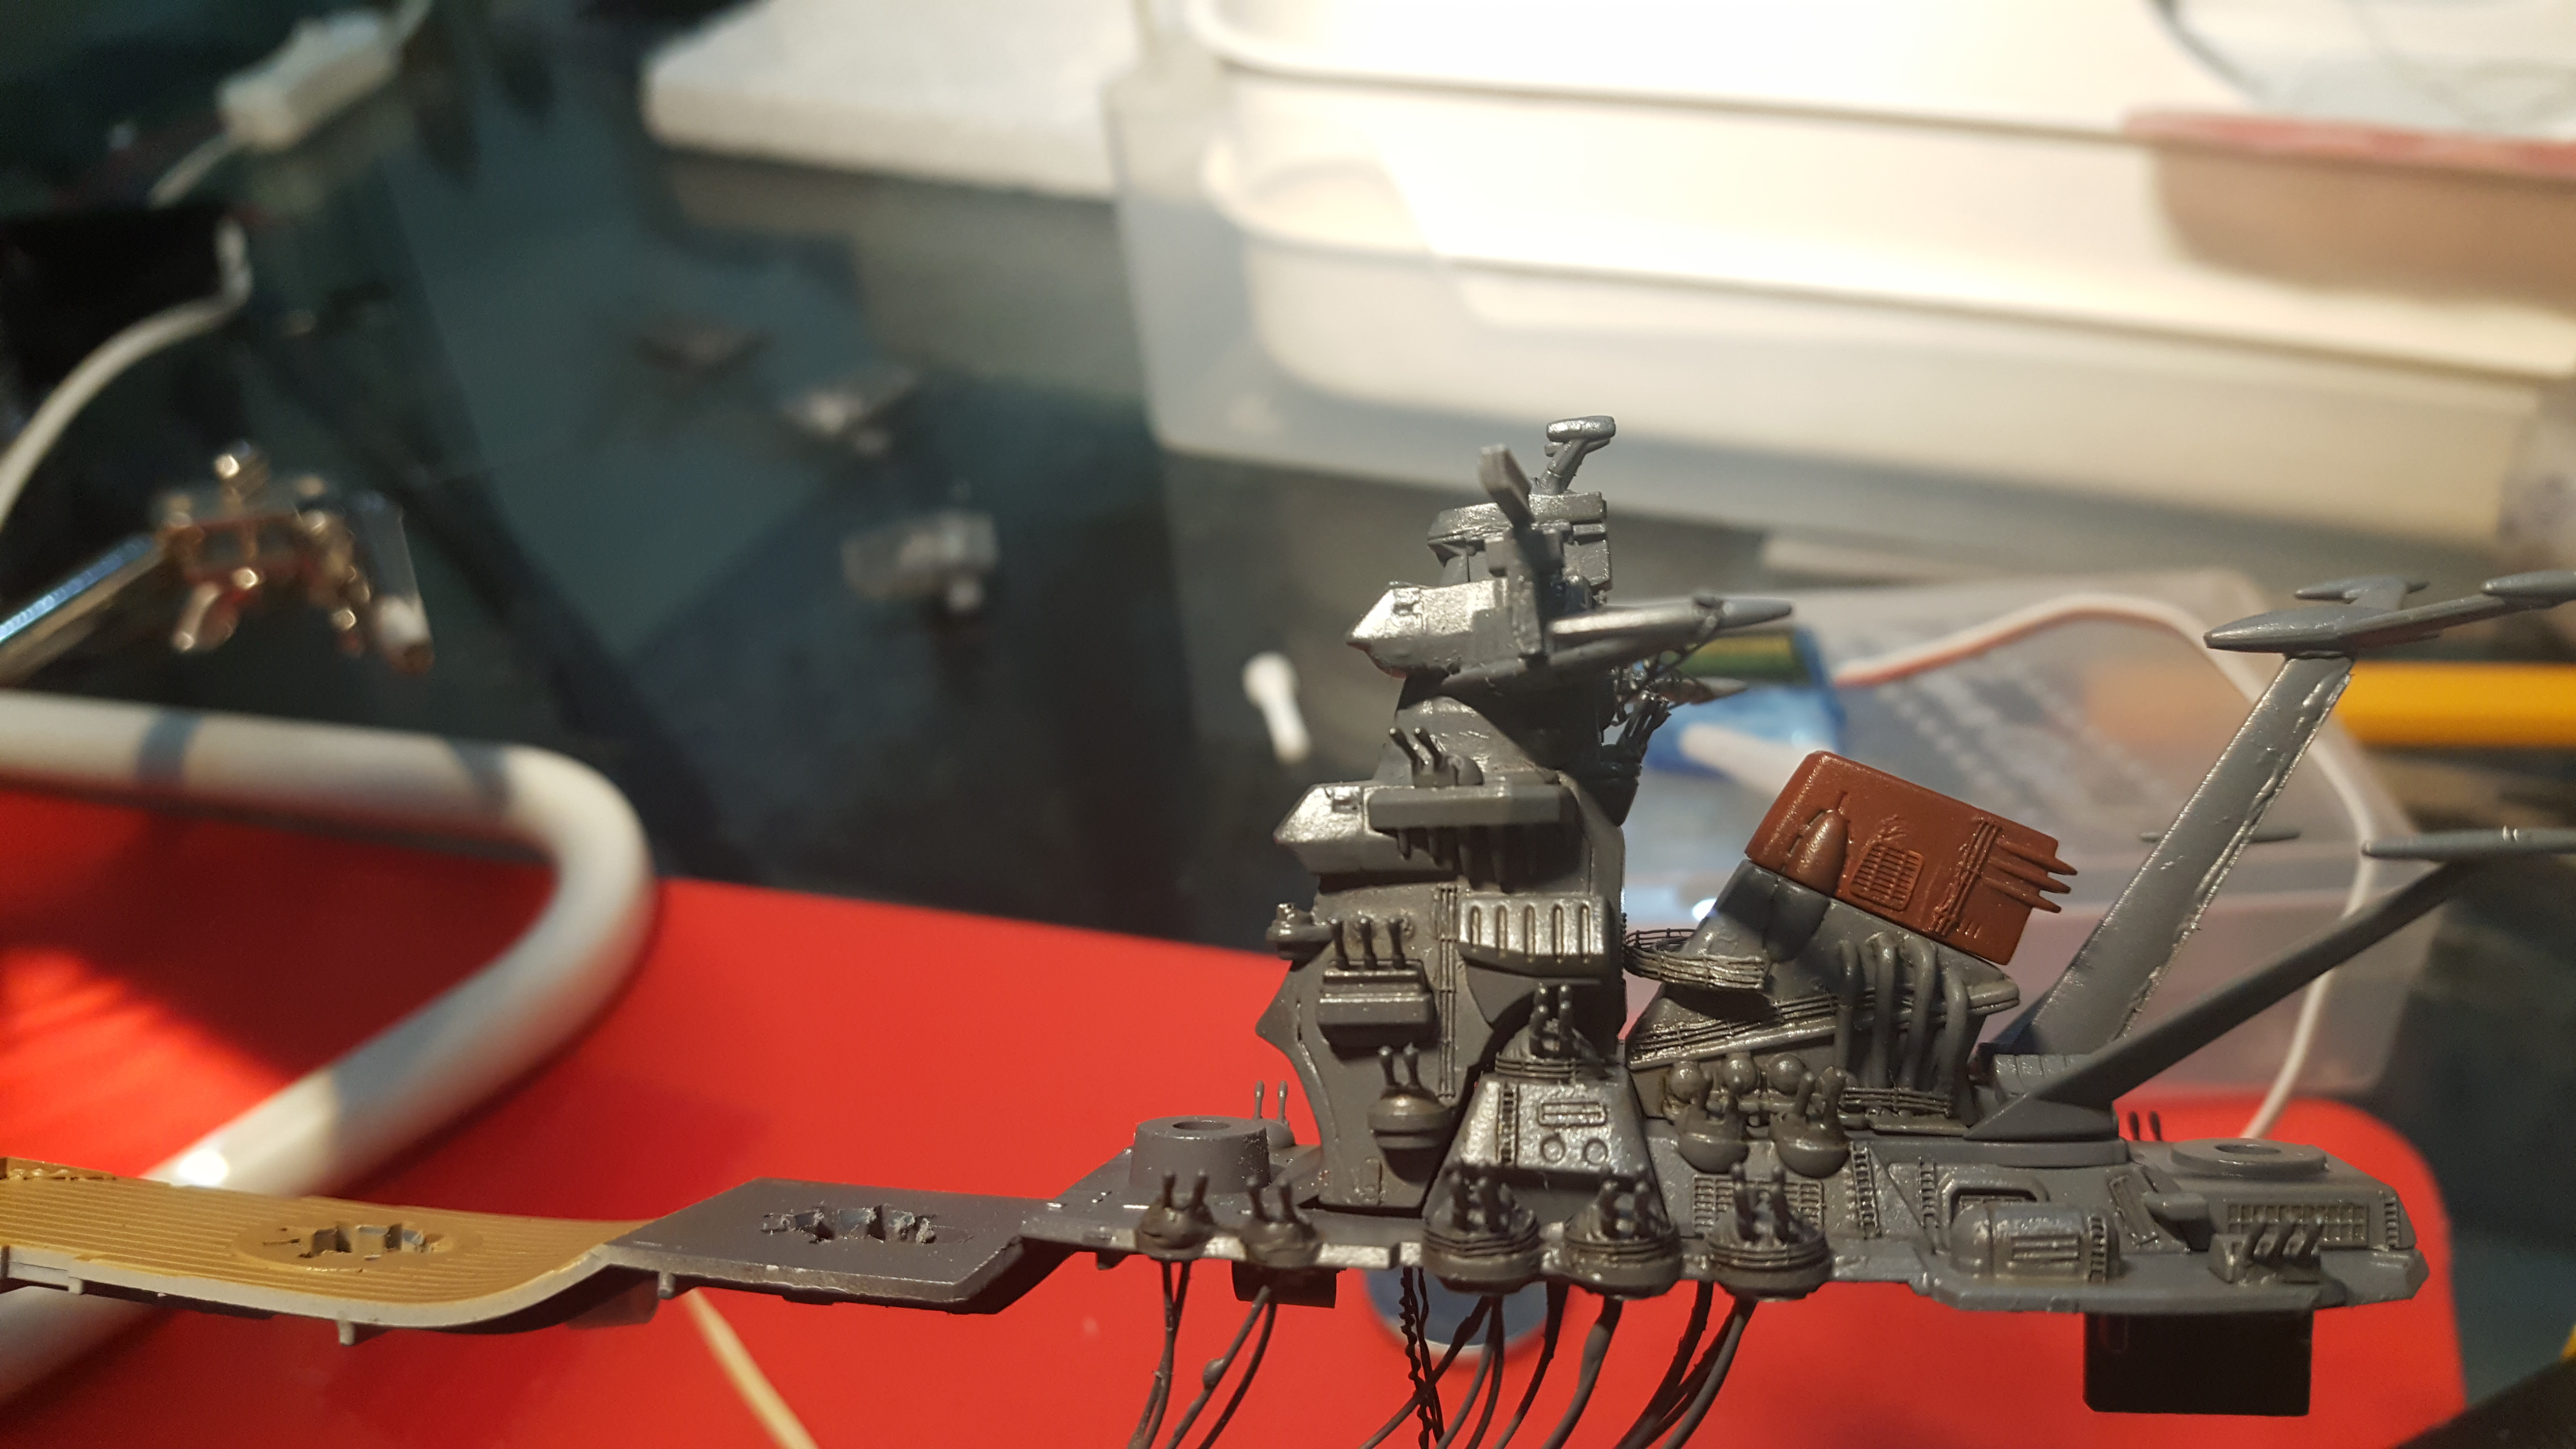
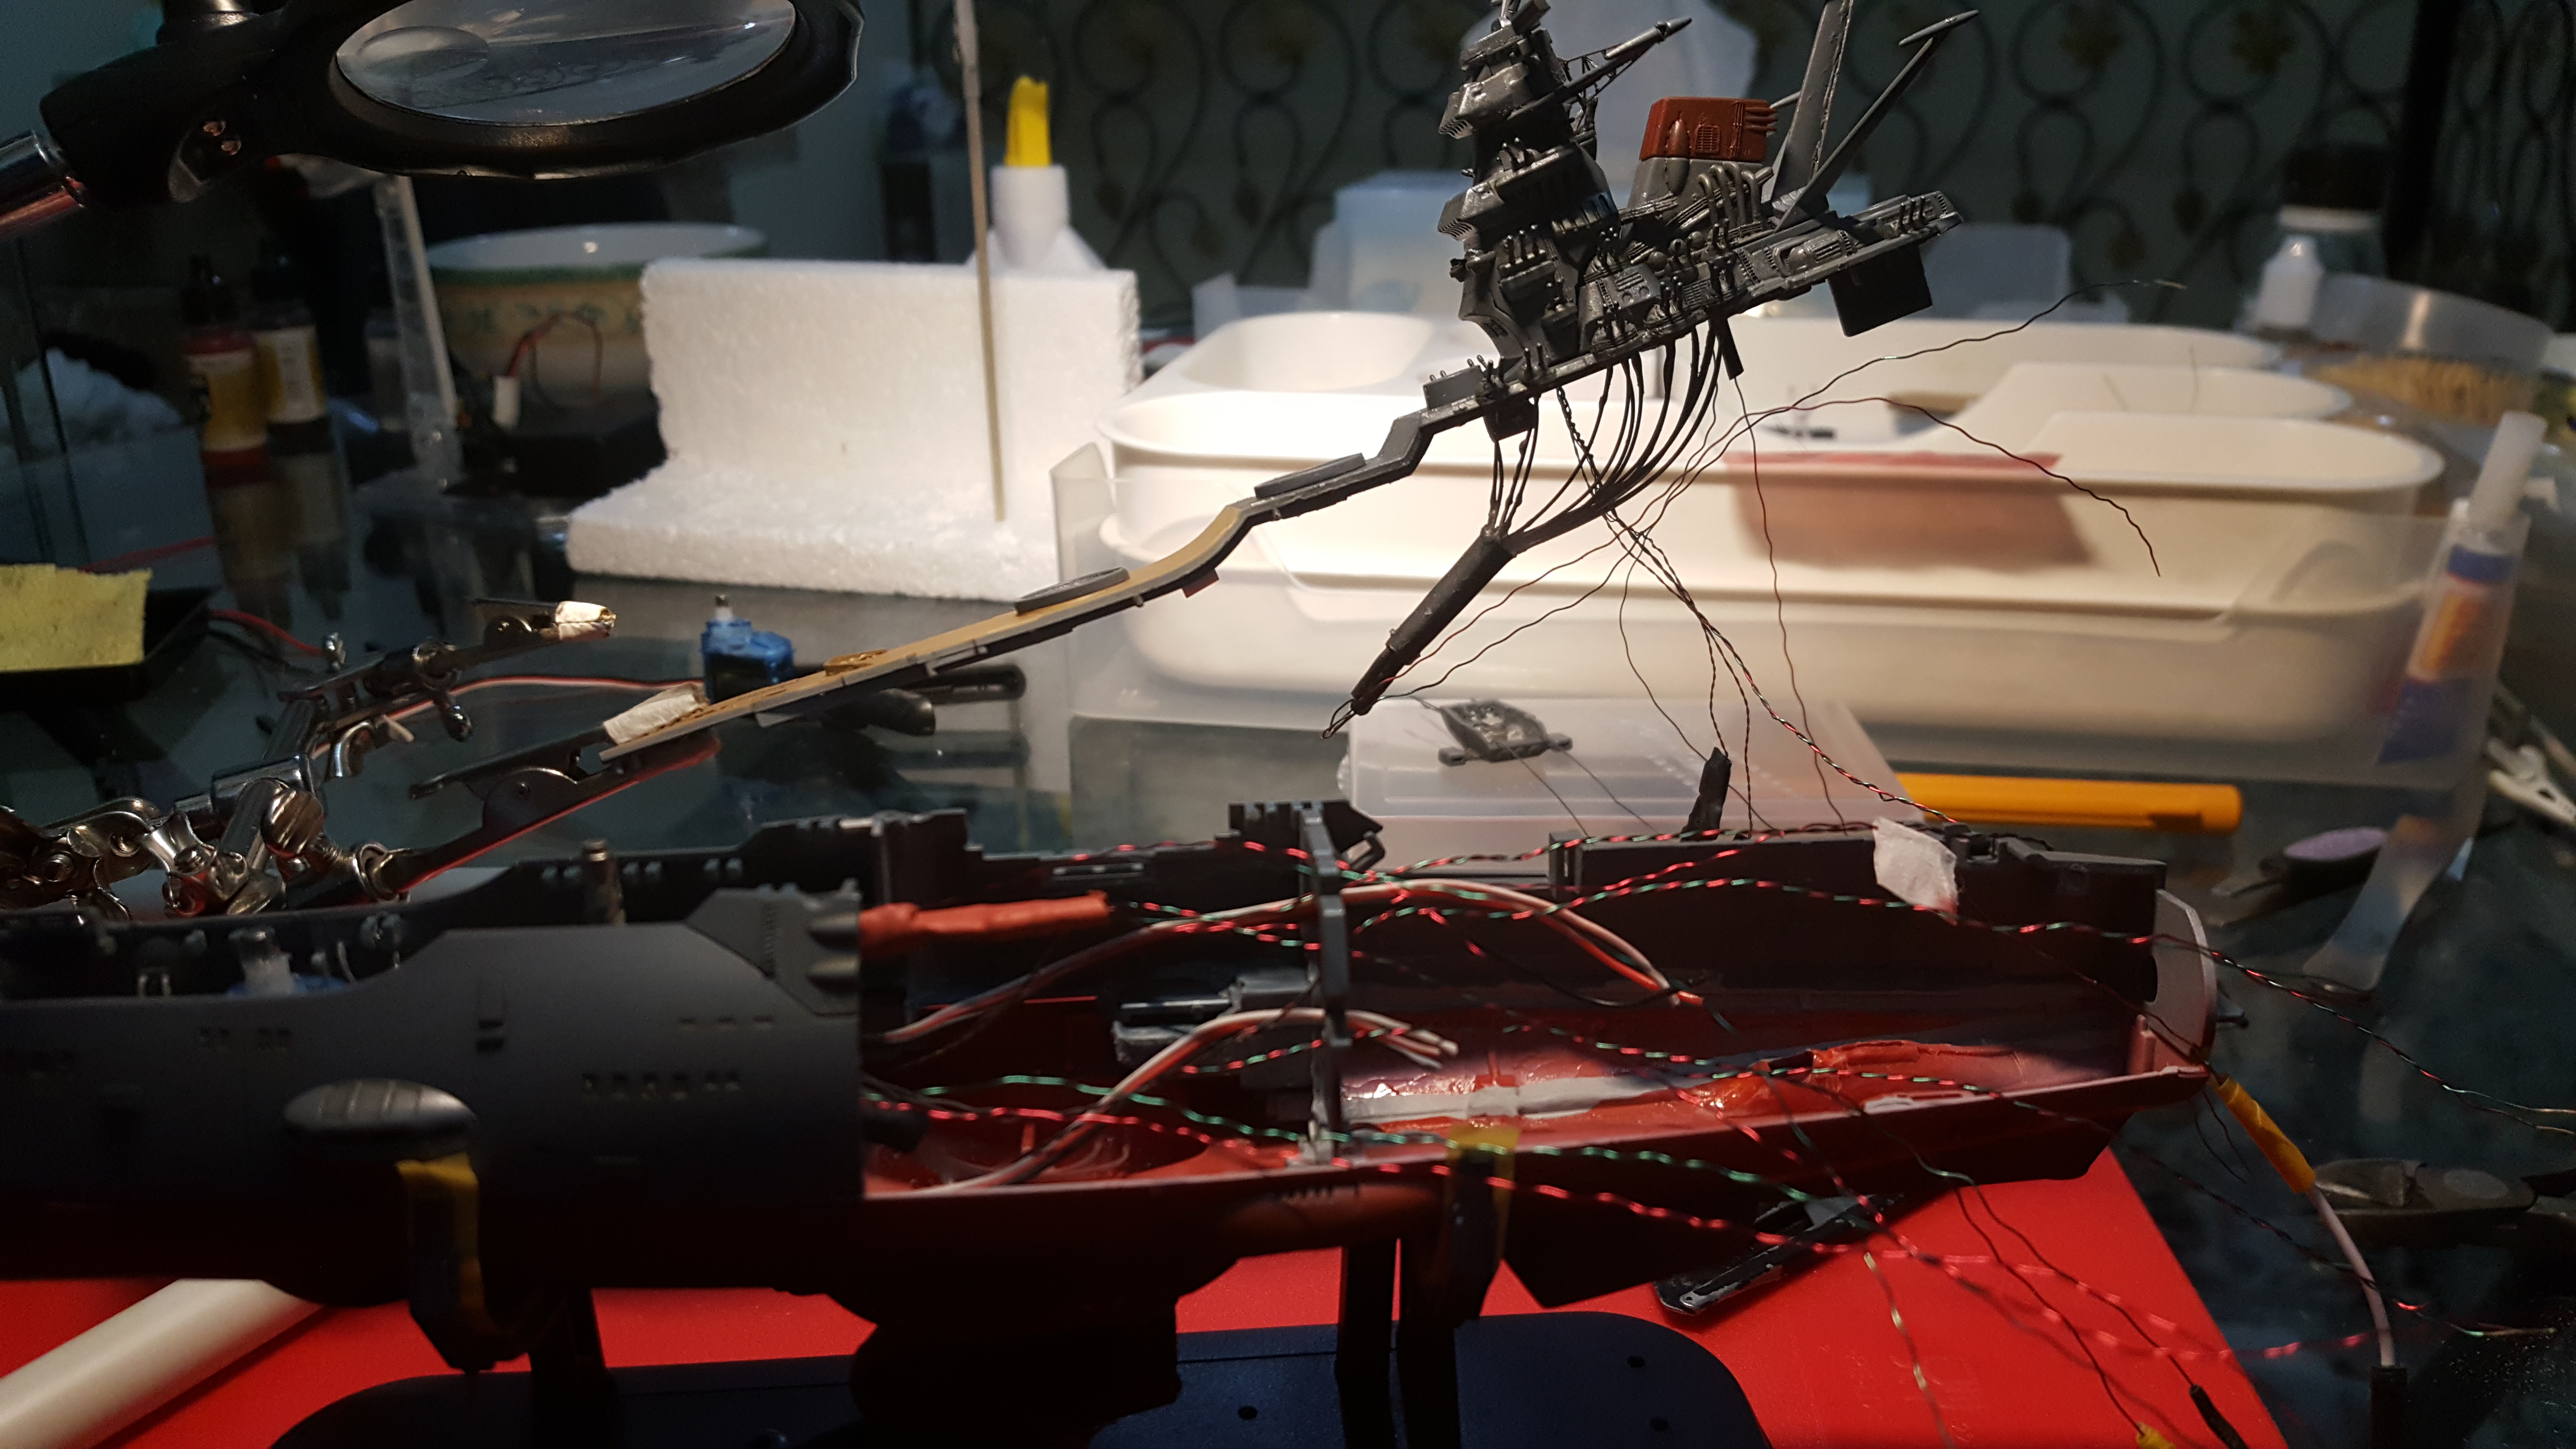
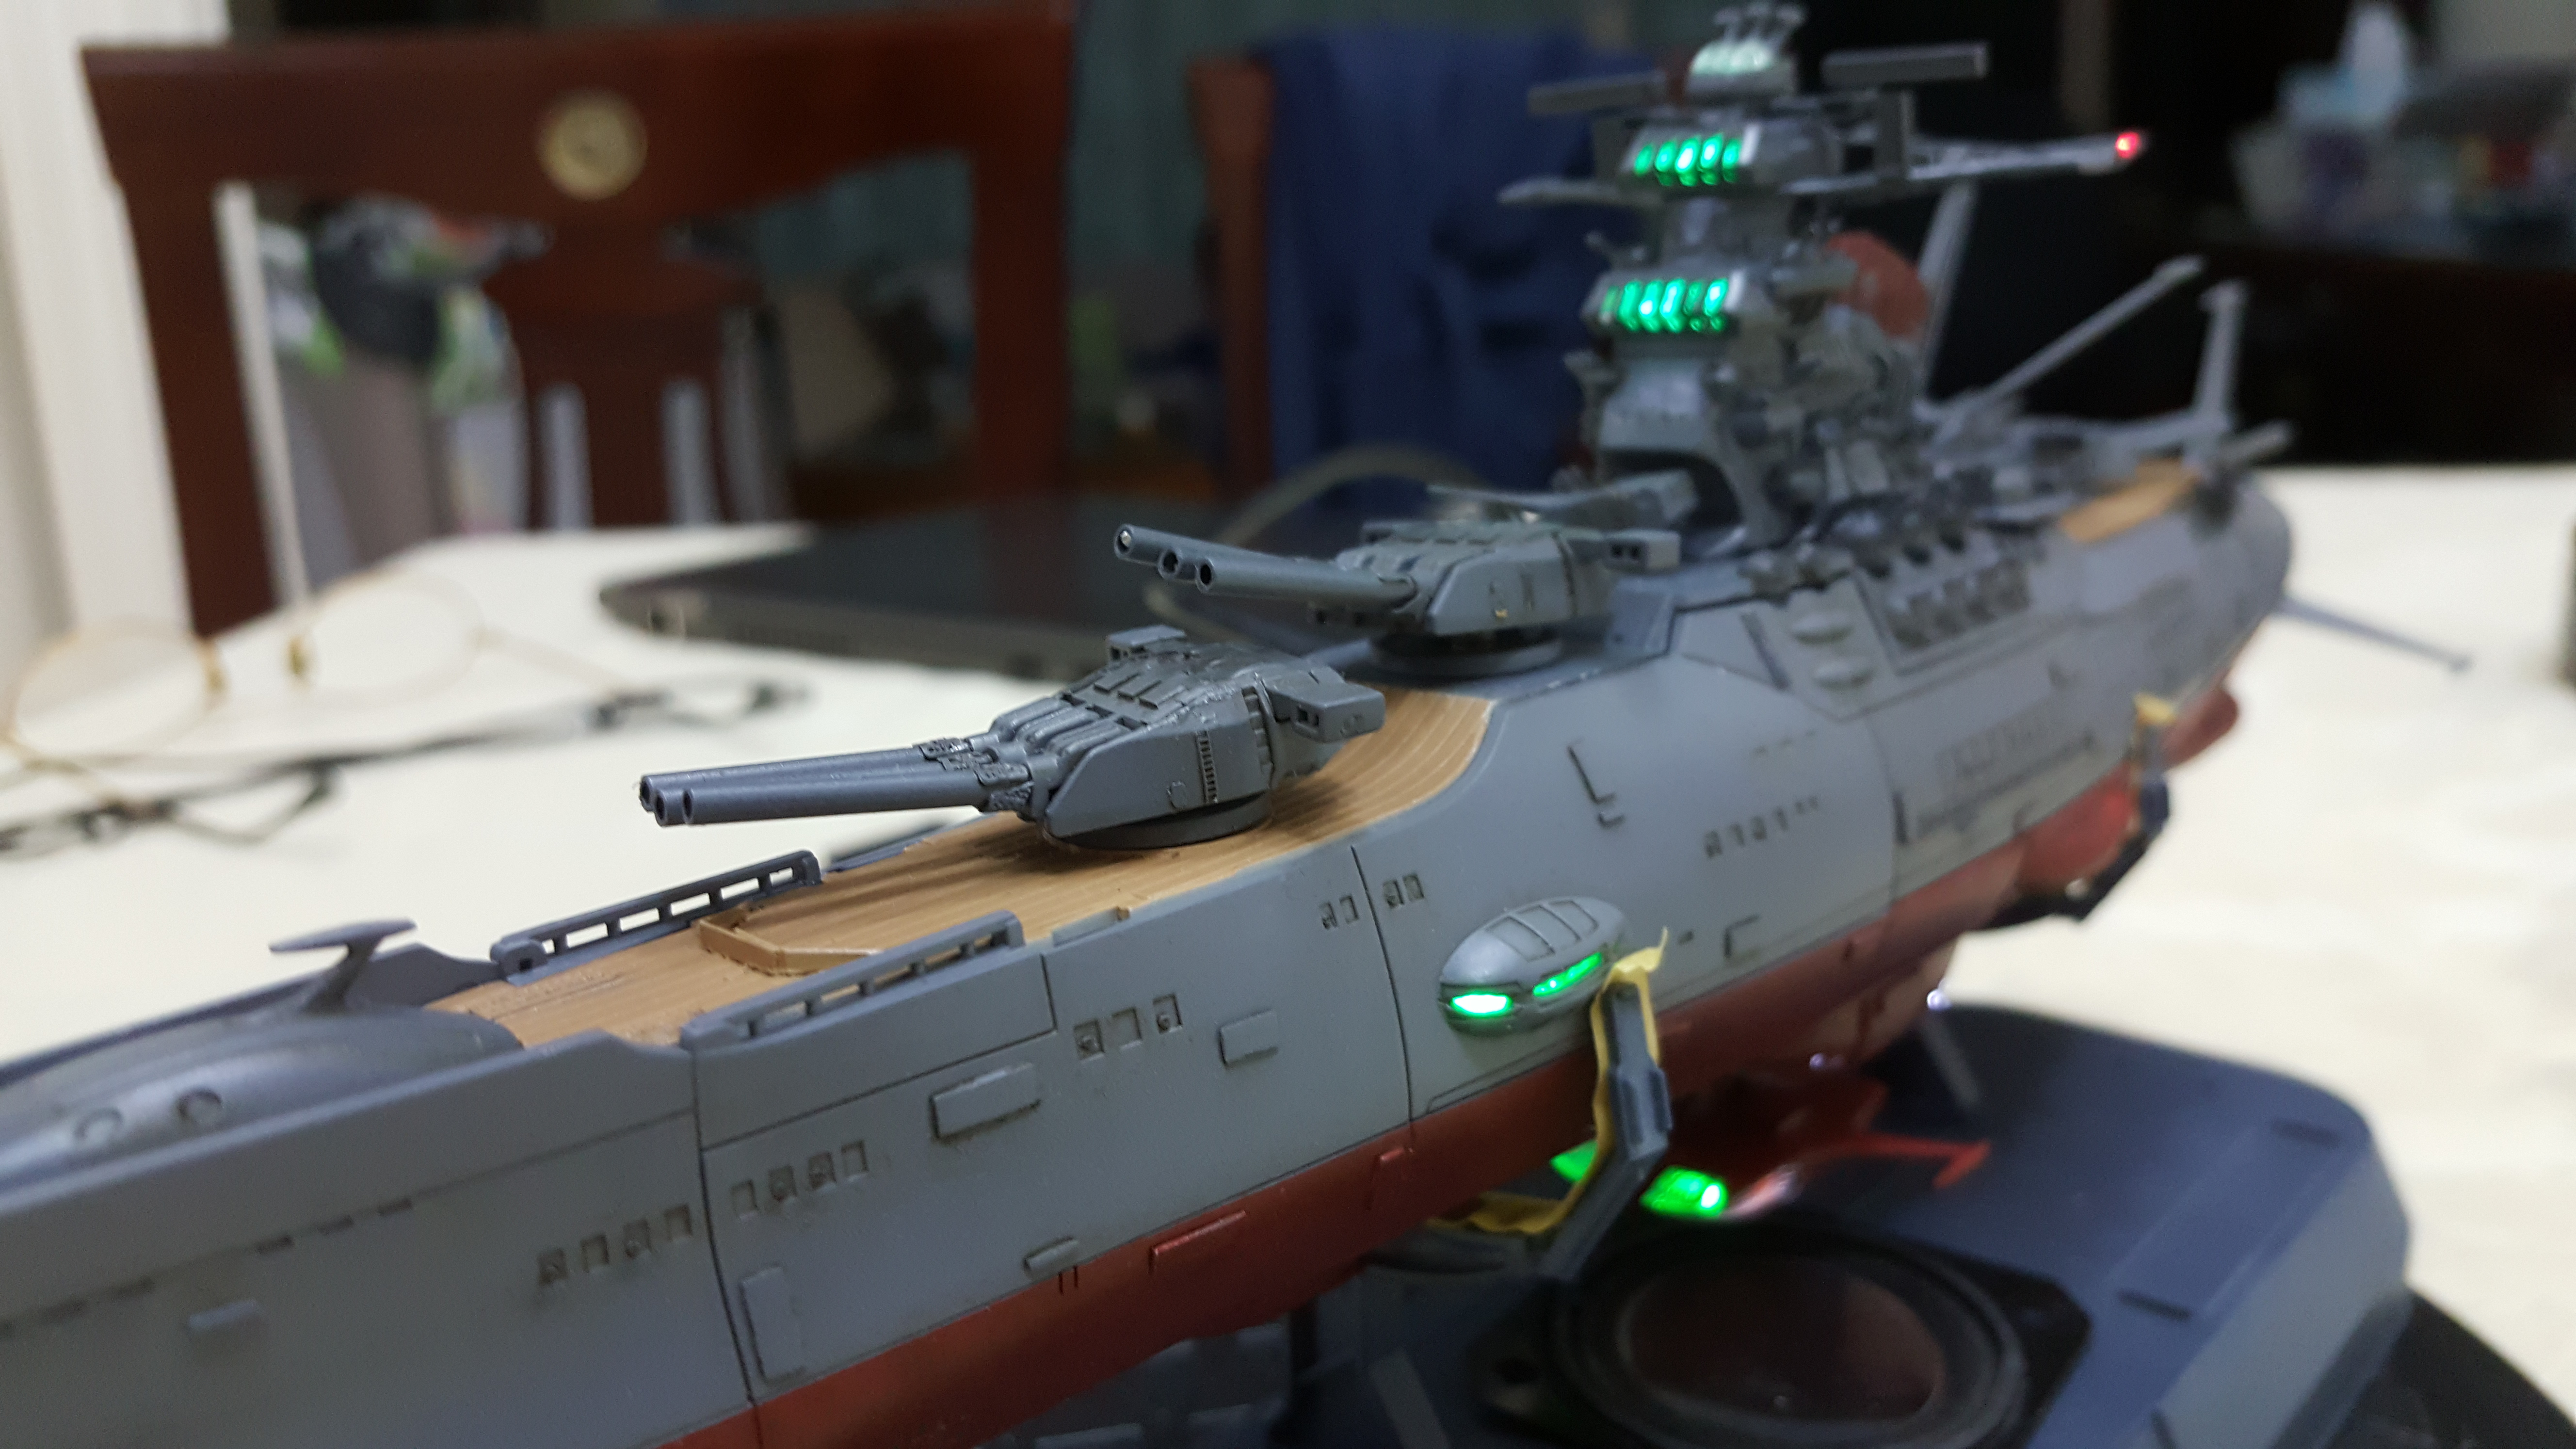
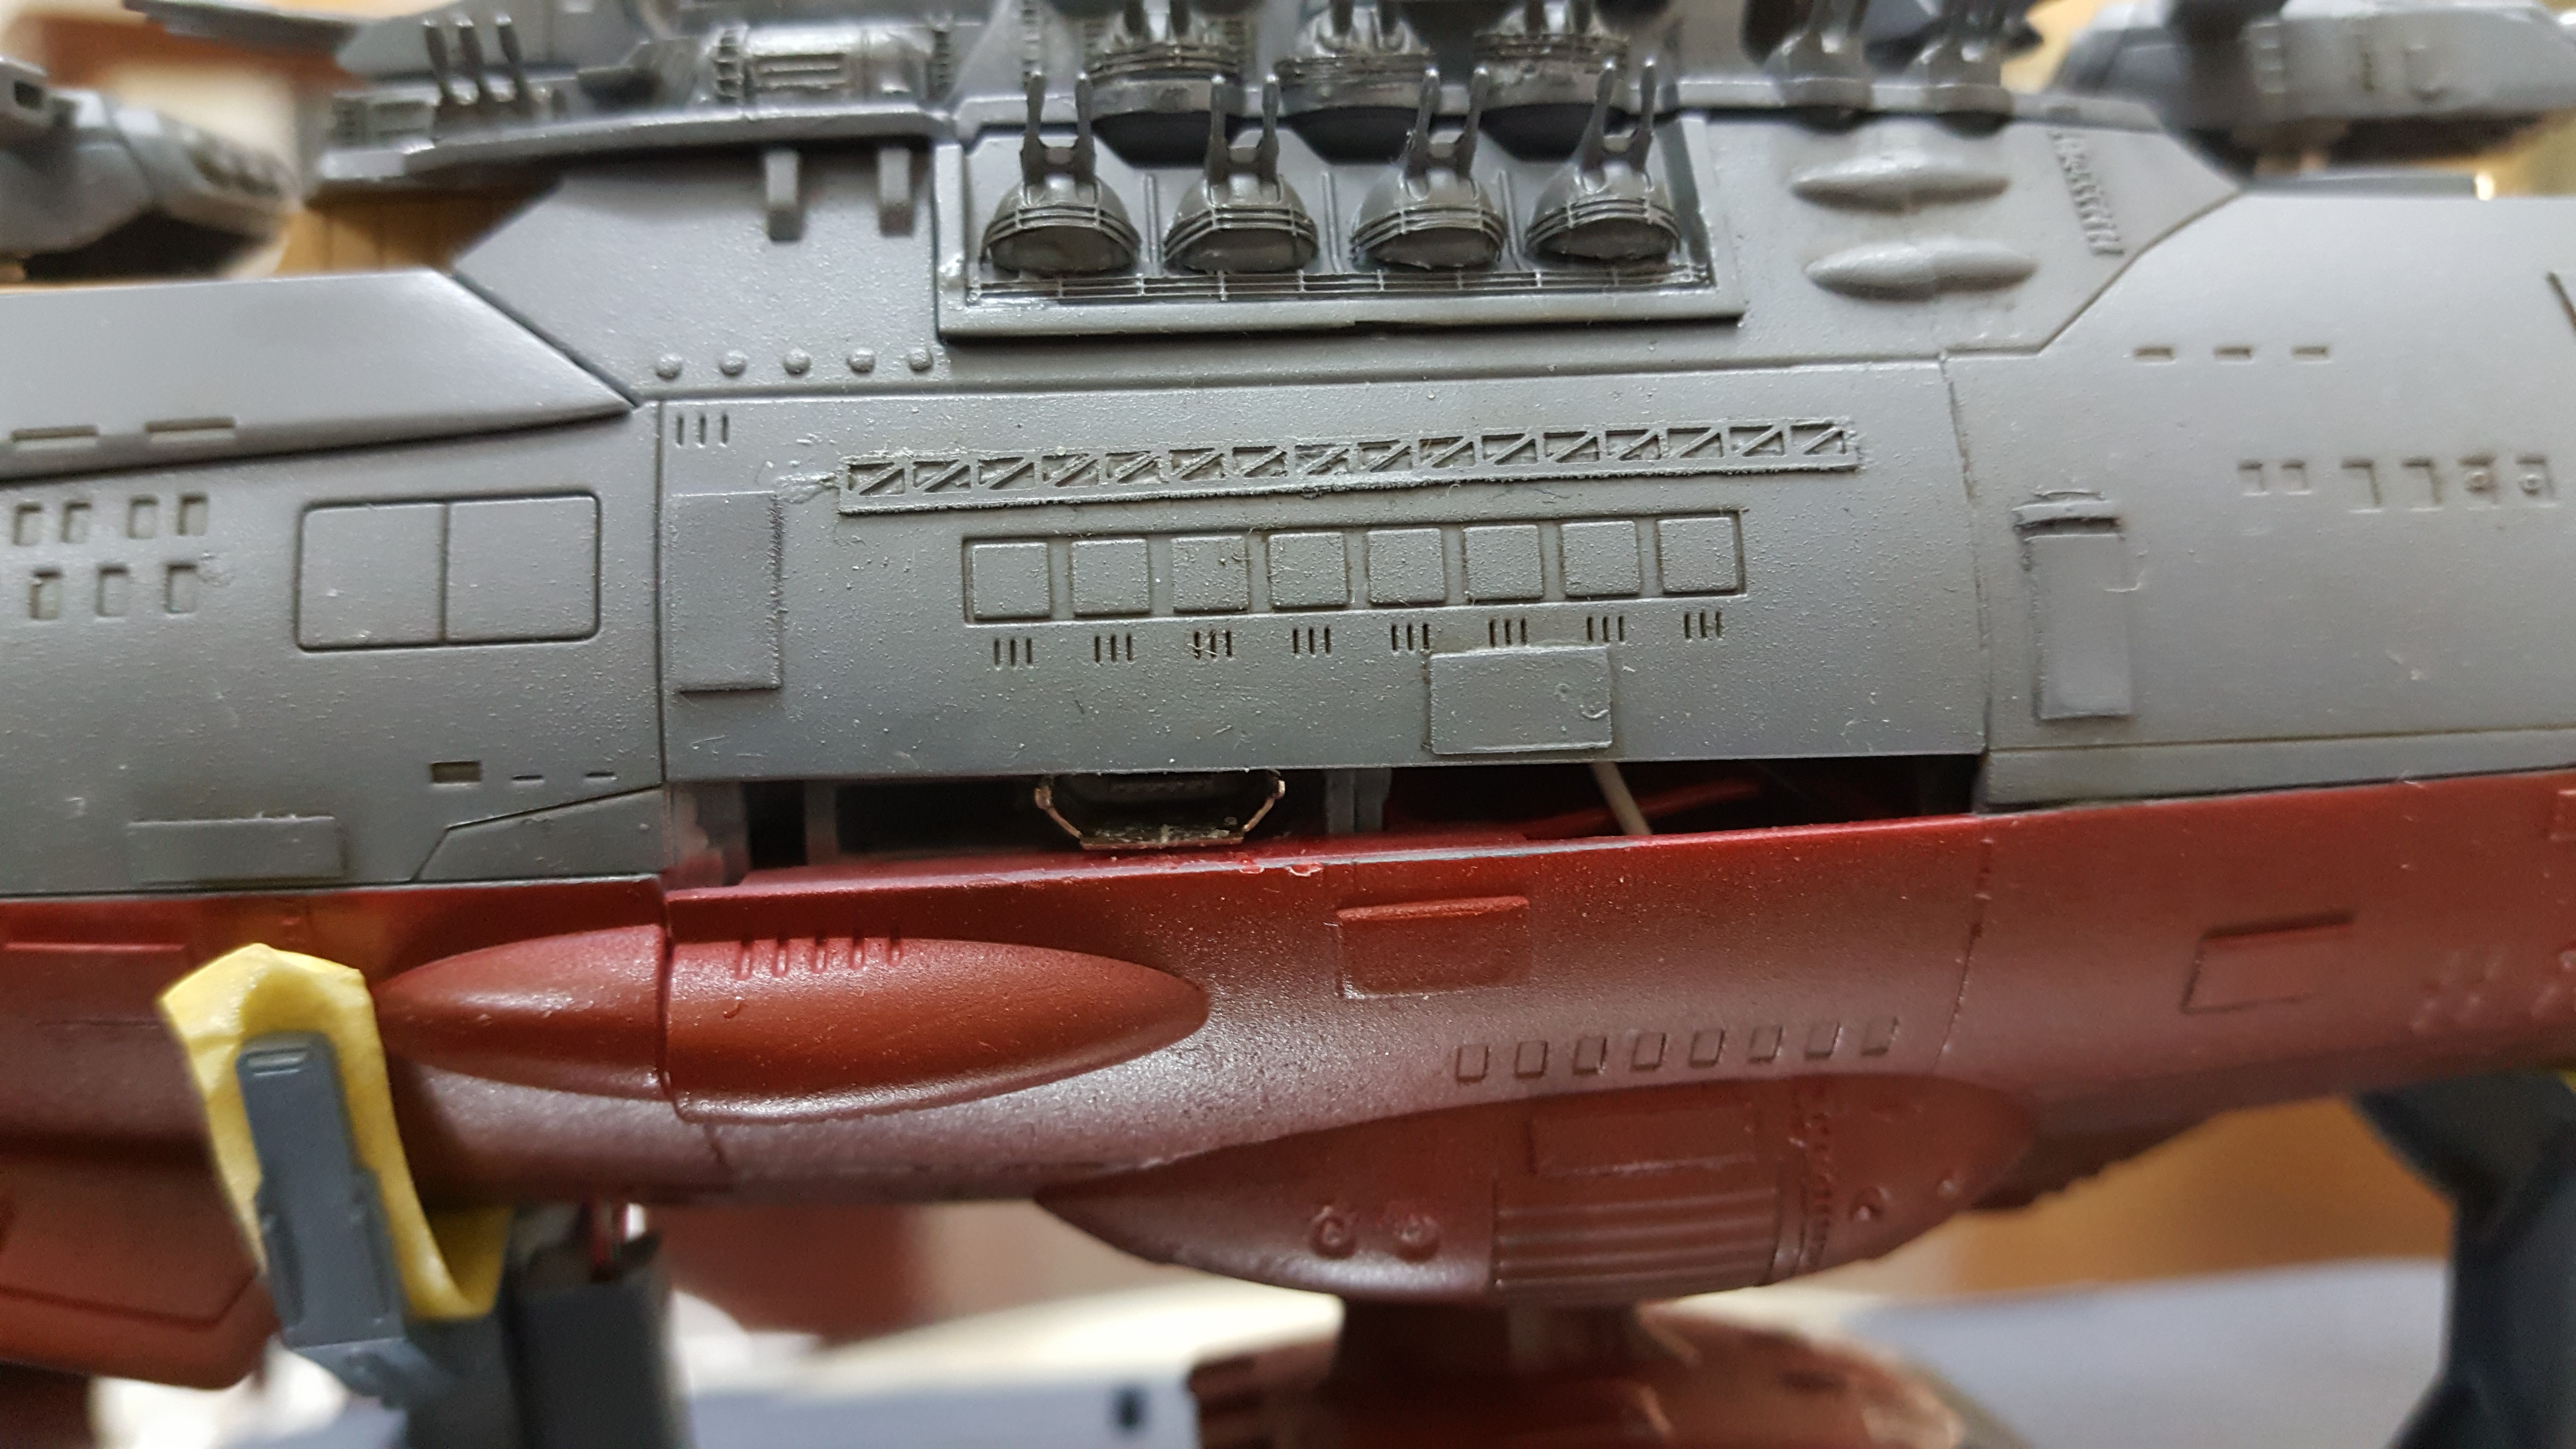
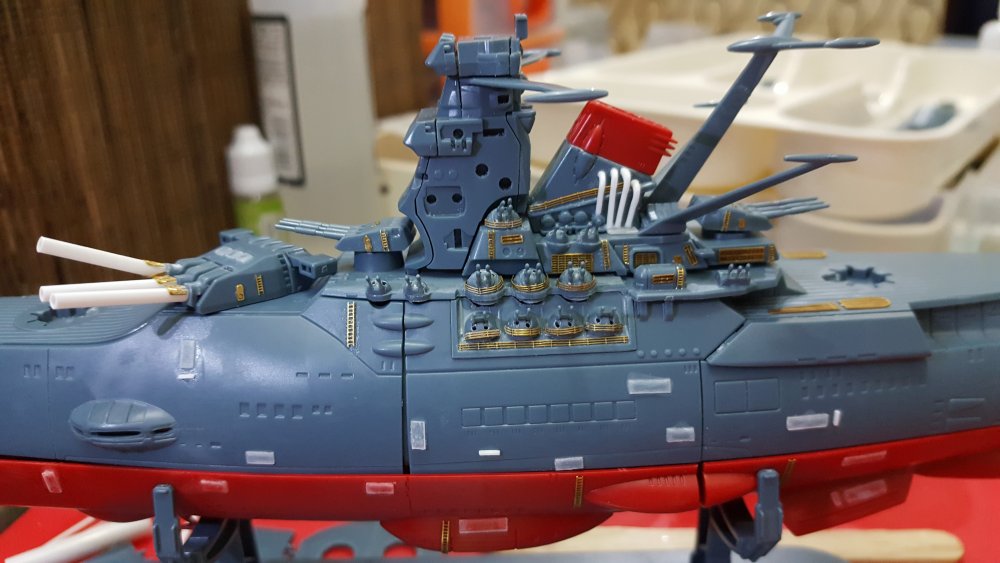
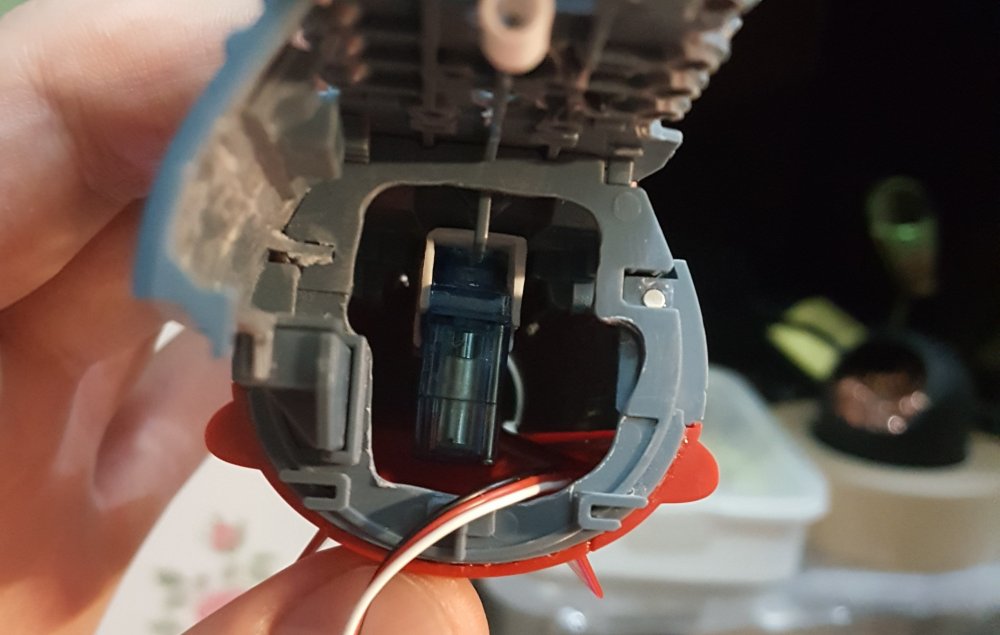
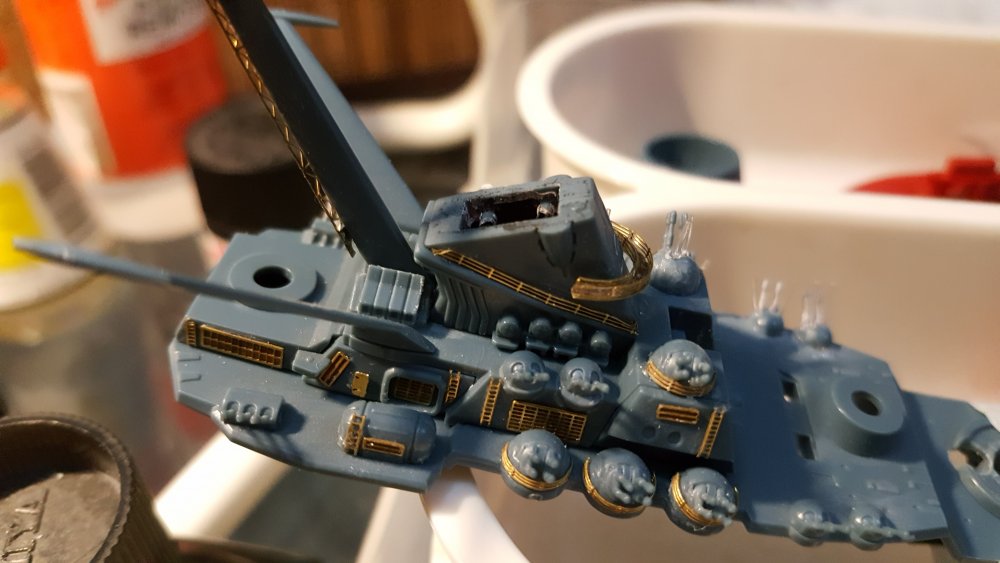
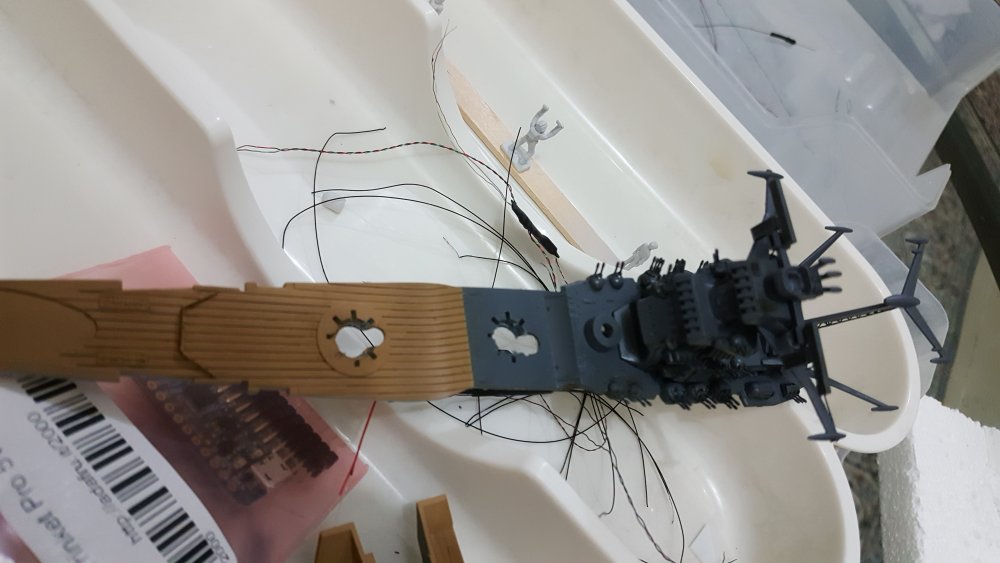
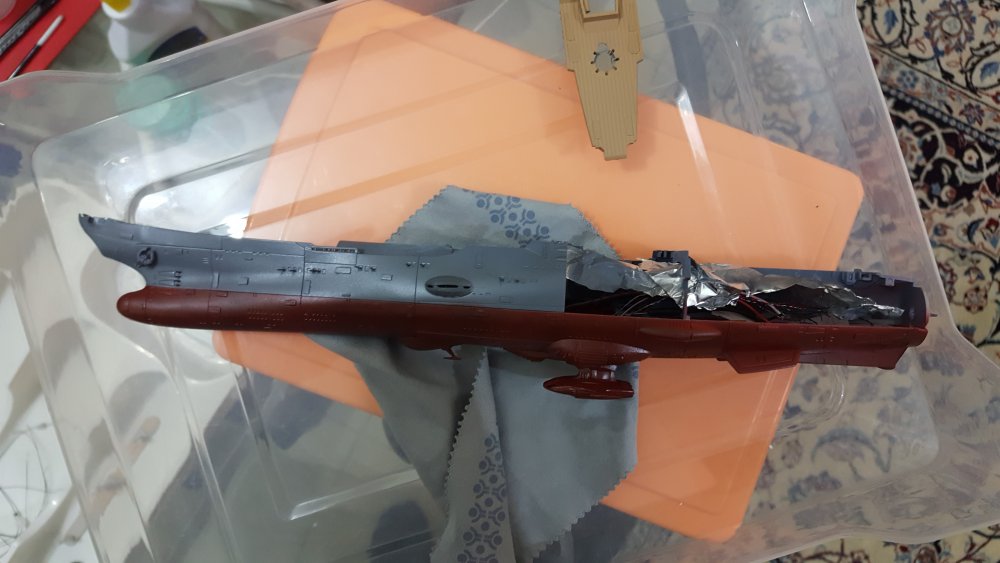
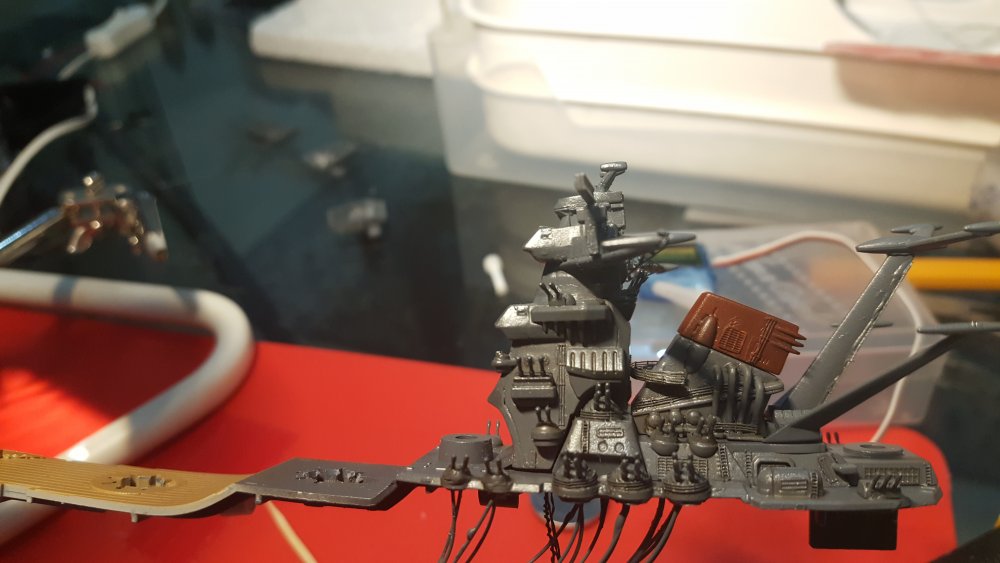
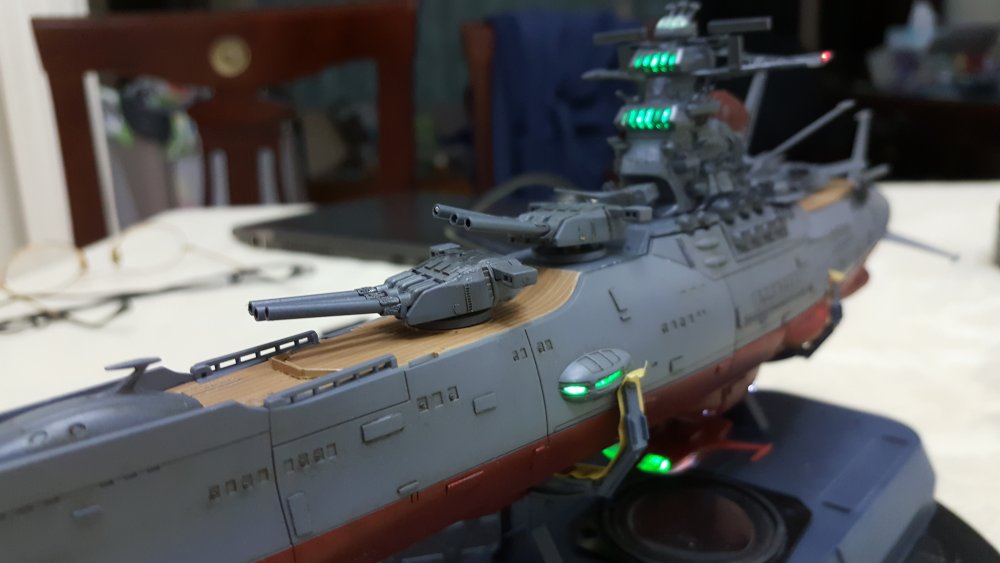
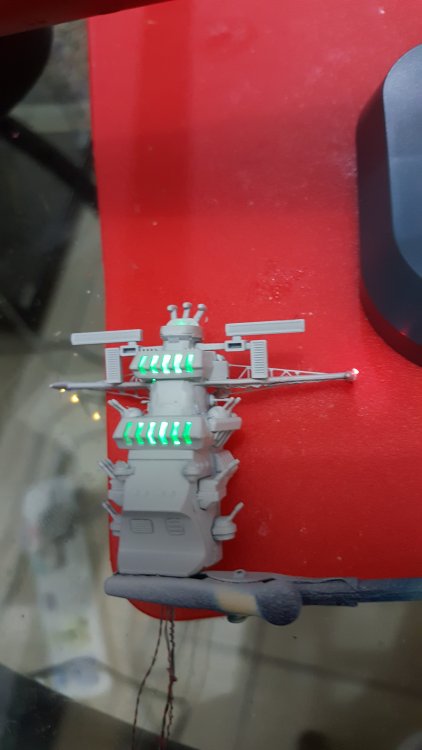
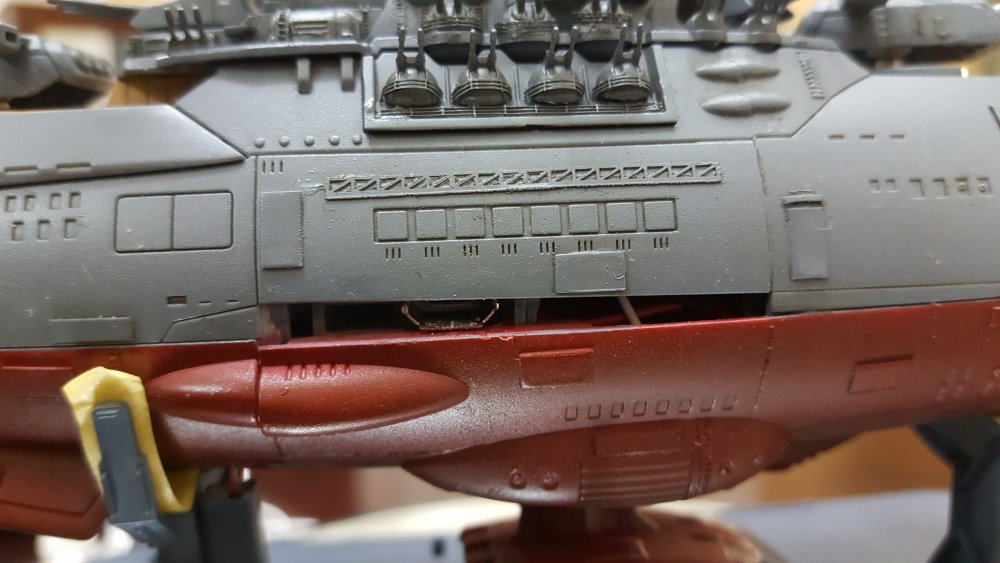
This is the build summary for the 1/1000 Yamato Arduino Custom, in case anyone needs some ideas: First I tested all the wiring and sounds with the Arduino on the breadboard one at a time, until it grew to this mess. All the effects are directly from the existing Arduino libraries. This can all be set up in a few minutes on the breadboard even if you have no electronics background what so ever. Everything you need to learn Arduino, and the add-ons and power requirements, is on the Adafruit website. They also have soldering tutorials and the best led resistor tutorial. You don't need to know anything to start except to get an Arduino Genuino Uno starter kit. I was a complete beginner and learned Arduino as I went for this build. Hollowed out the engine as needed and used candle flicker leds. Hollowed out the bridge with a Dremmel, used a marker to color desired areas in order not to touch the exterior. Hollow styrene tubes for the guns... Couldnt find hollow brass tubes. Slow Flash SMDs for the warning lights. I used flashing SMDs because it is too difficult for me to program the Arduino to continuously flash a light, while doing all sorts of other effects at the same time. Recast third bridge and port lights in clear resin. Eduard 1/1700 IJN Yamato photo etch set. Really flimsy stuff. But I fell in love with ship photo etch. So much fun. Drilled about 20x 0.5 mm holes for fiber in the Pulsars (Kind of a short cut due to the small scale, but my favorite effect!). Fiber optics drilled. I used 0.5 drill and 0.5 PMM fibers from the Fiber Optic Store. I used the exact same wiring as planned on the Arduino, but I switched to a smaller Adafruit Pro Trinket for minimizing space. Every centimeter of the interior hull is hollowed out with a Dremmel for space. I installed styrene tube tracks for the moving leds cables leading to the turrets. The turrets have smds, small enough to fit in the tubes. Wiring electronics for leds is actually easy, but when you introduce moving parts like servos, everything becomes more difficult. I used the tracks to allow some movement without messing with other wires. I also customized Styrene blocks to hold 3x micro servos for moving the guns. Magnets connect servos to the guns, not permanent connections. I started priming and painting only when all the customizing, drilling and wiring was done. Still, I ended up drilling more to hollow out the hull till the last minute to help all the wiring fit. Streaking grime wash and dry brush gun metal everywhere. 15 hour soldering marathon to put it all together (Not fun!). I used styrene trunking to lead wires for speaker, amp, battery and other stuff from the hull to the base. In retrospect, I should have put ALL the electronics and boards in the base, and lead all the wires down there, because it is too difficult to solder wires to the Trinket inside the model. Micro USB out the side to recharge battery and reprogram Trinket. With the Pro Trinket (mini Arduino), I have control of about 10 functions plus the sound on an SD card. I can change the entire "sketch" by reprogramming and uploading it, without opening the model. And Done. Overall, 1/1000 is too small for this project. I barely pulled it off and it needs a lot of maintenance due to the cramped space messing with the connections. The kit itself is also flimsy, I don't recommended it, neither as a kit, nor for electronics. 1/500 would be perfect for wiring. 1/350 even better!


-
This project is up and running. Please visit the workbench for updates.