Jarrod
-
Posts
162 -
Joined
-
Last visited
Content Type
Profiles
Forums
Events
Gallery
Everything posted by Jarrod
-
sigh..
-
back
-
Fighter top

-
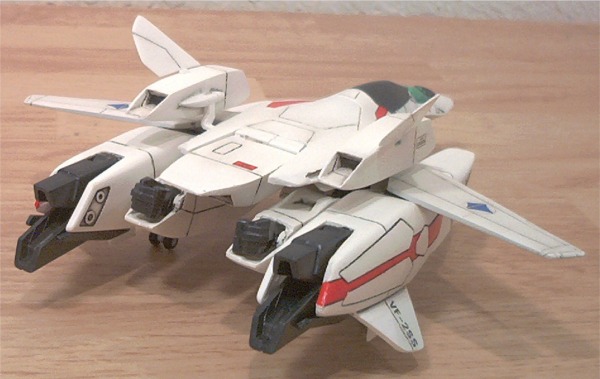
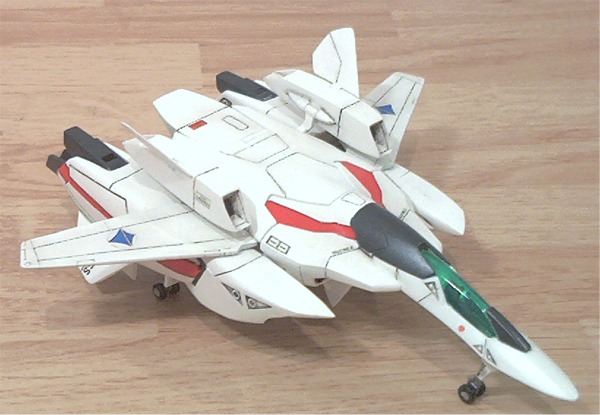
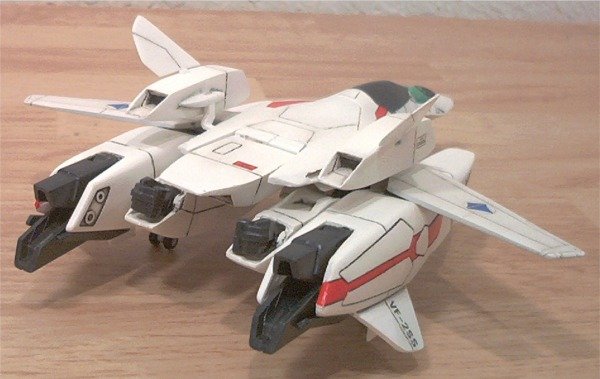
Wow, two finished projects is less than a week! Anyway for those who remember this tread http://www.macrossworld.com/mwf/index.php?...c=891&hl=jarrod oh so long ago, the VF-2 is finally done. On with th pics:

-
Perhaps I should have phrased that better...the wings themselves were not extended, that is indeed how they look in the anime; the wing spines were added to in order to fill a gap. If you look in the very first pic, the white peices are my modifications, all the blue is the orignal kit. Jarrod
-
and the last one. Jarrod
-
And a few more cause...well I love this kit
-
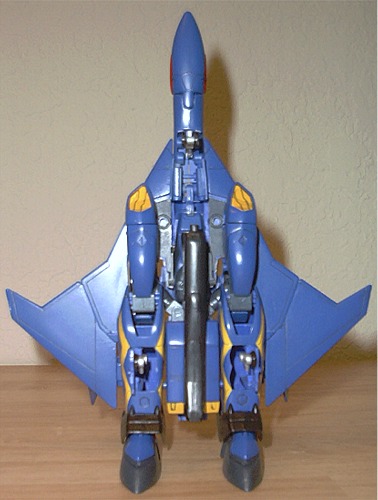
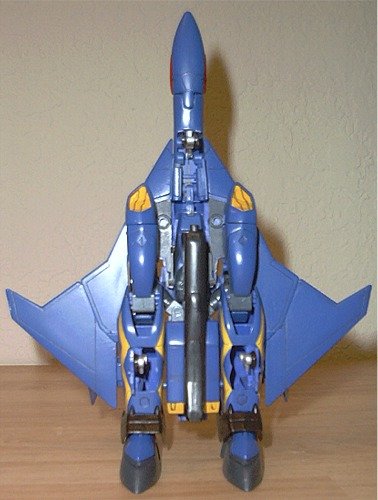
rear
-
sigh...attach image first...THEN add reply

-
straight front
-
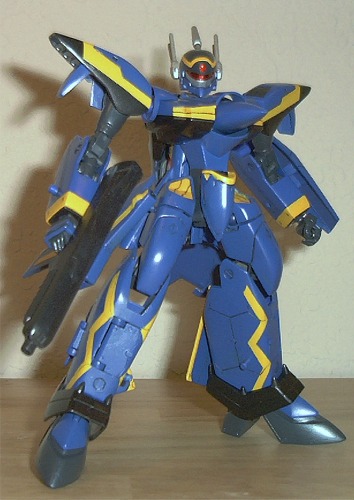
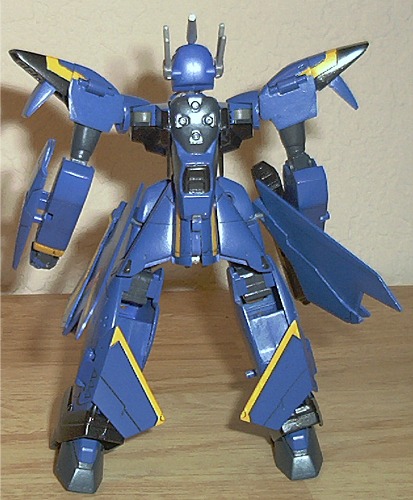
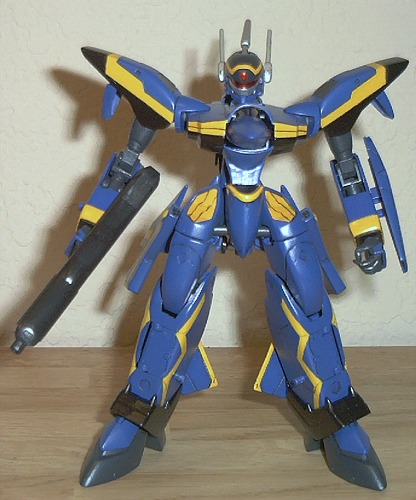
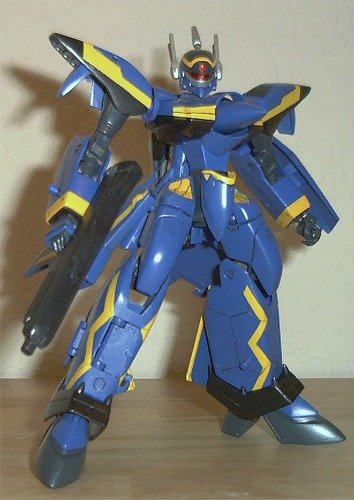
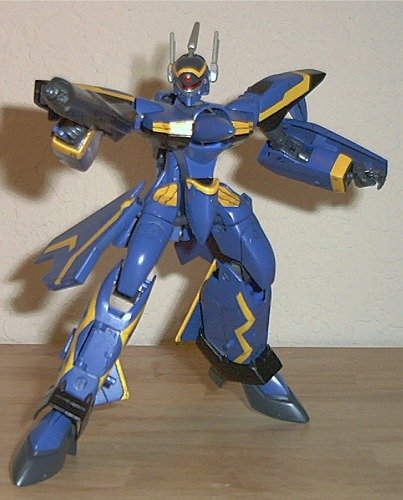
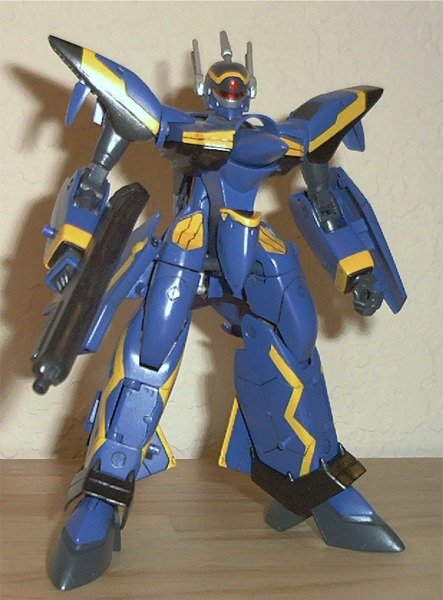
Battroid mode....the reason I love this kit. I don't know why I love the VF-19S Battroid so much, but I do. I think its obvious Bandai designed this kit with this mode taking priority, it's very anime accurate and well proportioned.
-
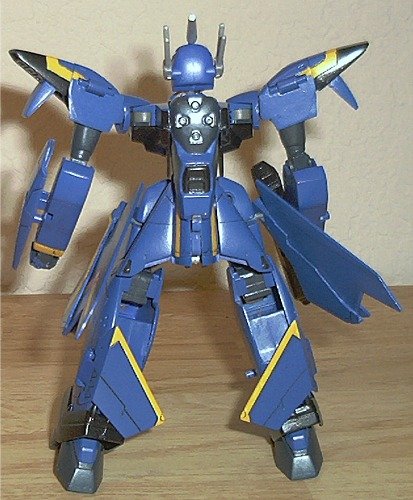
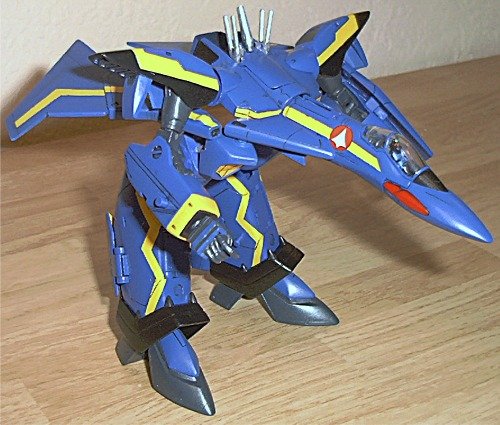
Gerwalk...a very unstable one at that...
-
ahem...underside
-
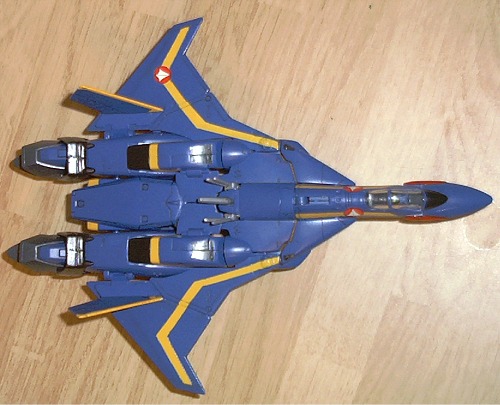
underside
-
#3

-
#2
-
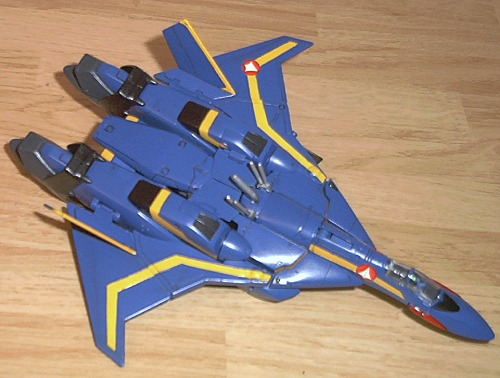
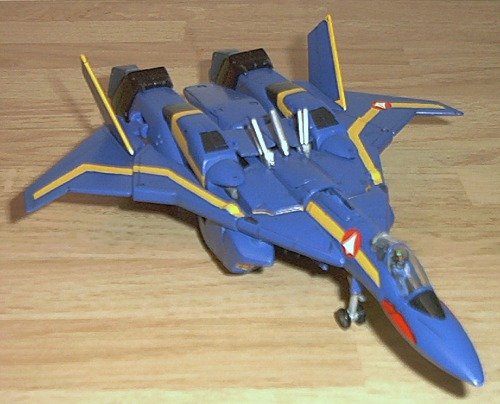
Fighter mode:

-
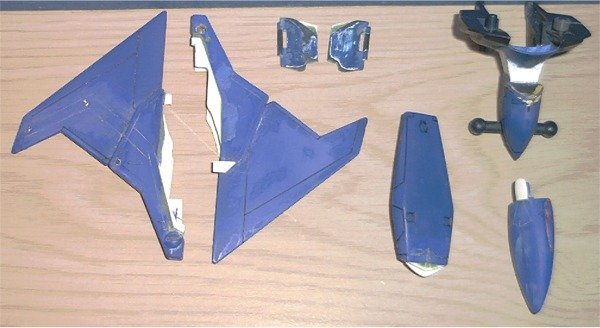
I originally got this kit back in '97 for the 15th Ann, back when my modeling skills consisting of snapping together, spraying on the dull-coat, and drawing all over it with a Gundam marker. Recently however, I've decided to re-do a few of my old kits properly(ie, glue, putty, paint, wash, etc) and for the VF-19 I decided to do a few simple modifications to it. The pic below shows them. The only mod I did for the Battroid mode was the waist piece; I removed the original midsection and added a taller, slimmer piece(I never really understood why flared out like it was). The rest of the changes were to improve the appearence of the fighter. The main wing sections were extended to meet the legs and fuselage, removing the very unsightly(and completely unneccasary) gap the existed originally. The shield and shoulder flaps were also modified to fit together better. After painting, proper UN Spacy decals were added as well. Well, on to the pics:
-
Try pushing them in more. The legs kinda go on with two "clicks" the first is the ball joint clearing the plastic hole, the second is the ball joint snapping into the socket. It can take some force somtimes, just make sure you support the the ball joint when you're pressing it in. Jarrod
-
The valk in question is mine....I still get a bit excited knowing people still remember and talk about If you want to check out all of my works, go to the home page in my sig. Anyway, to add the original topic, having built both, the only redeeming feature of the old kits(IMO) is the fact that they transform. And sure they may have been great kits back in the day, but Hasegawa's simply blow them away now. As for using the the oldies to make a transformable Hase...you might as well just start from scratch...the two kits are so diffenerent when it comes to proportions and details that they simply aren't compatible. Jarrod
-
Wow, I thought this thread had pretty much died! Anyway I'm still up for the step by step, but like I said I'll need a new kit and recast parts to use.(Dax, PM me if you're serious about providing the parts). wmcheng: The tailfins fold flat against the back underneath the backpack, I have a pic showing this earlier in the thread(1st post on 2nd page on my view). I'm using all the recast parts to make the normal Valk from Rob's kit, altho the tailfin pods and backpack were altered. As for extra parts, do you mean for transformation or for the custom? I added a number of custom parts to allow the wings to fold away and for the backpack transformation, but that's all. Everything else transforms like the original kit. Btw, for those interested the project is at a standstill right now, I've done some puttying and clean-up, but otherwise no new work has been down. I've got about 3-4 projects I'm switching between right now:) Jarrod
-
What color is the kite insignia on the Valkyrie II exactly? I know the Bandai kit comes with blue on a white circle, I've also seen one done red on a white circle(this one also happened to have red chest stripes). However, the eyecatch in the anime of the red striped Valk appears to have blue kites, or possibly red, or black or grey, its rather hard to tell,and, in the anime, its shown various places(uniforms, flags, etc) to be various combinations of red, yellow, and..black(?). So anyway my question is, is the kite on the Valkyrie the same color as the chest stripes, or is it always blue? Jarrod
-
Yeah, I really didn't think it would work. However, that template idea isn't so bad....I'd still need some new parts to start with tho. Given that, I could probably do a step by step instructional post...how and where to cut the peices, etc. possibly even make some/most of the parts myself(it's really actually quite simple to just cut and glue some styrene once there's a pattern). There would have to be enough interest tho, not to sound selfish or anything, but I'm not going to spend of all my time producing this if in the end only one other person gets any use from it. Jarrod
-
Well guys, there's no way I could recast my parts as they are, I built them right onto the backpack, and they are now an integral part of it. However, if someone was willing to send me an unused backplate and wing peice, I believe I could make a recastable attachment...BUT I wouldn't be able to recast it myself, if it's even possible(it would be rather delicate, good sized plate only 1mm thick) On top of that, everyone would have to alter their own backplate, or I could alter one and that one could be recastedk, plus I altered the the center backpack part(the one that flips up in battroid mode), and the tailfin pylons...so we're talking alot of new parts. But I'm up to it if someone else wants to help. Jarrod
-
Well you don't NEED to lengthen them...I thought it looked a bit better. And it's pretty simple, I cut the tip of the wing off(where the diagonal panel line is) added a piece of strip styrene, then glued the tip back on. Afterwards the styrene was sanded down to the shape of the wing. You can find sheet and strip styrene in various thicknesses at any hobby shop, it usually runs about $2 for 2 good sized sheets or a bag of strips(you can also get it in tubes, rods, I-beams, different textures, etc). Its very easy to work with, you can cut it with scissors, clippers and an x-acto knife; any kind of plastic glue or super glue work well on it. The stuff is made for making custom/scratch parts. Jarrod