mickyg
-
Posts
2631 -
Joined
-
Last visited
Content Type
Profiles
Forums
Events
Gallery
Everything posted by mickyg
-
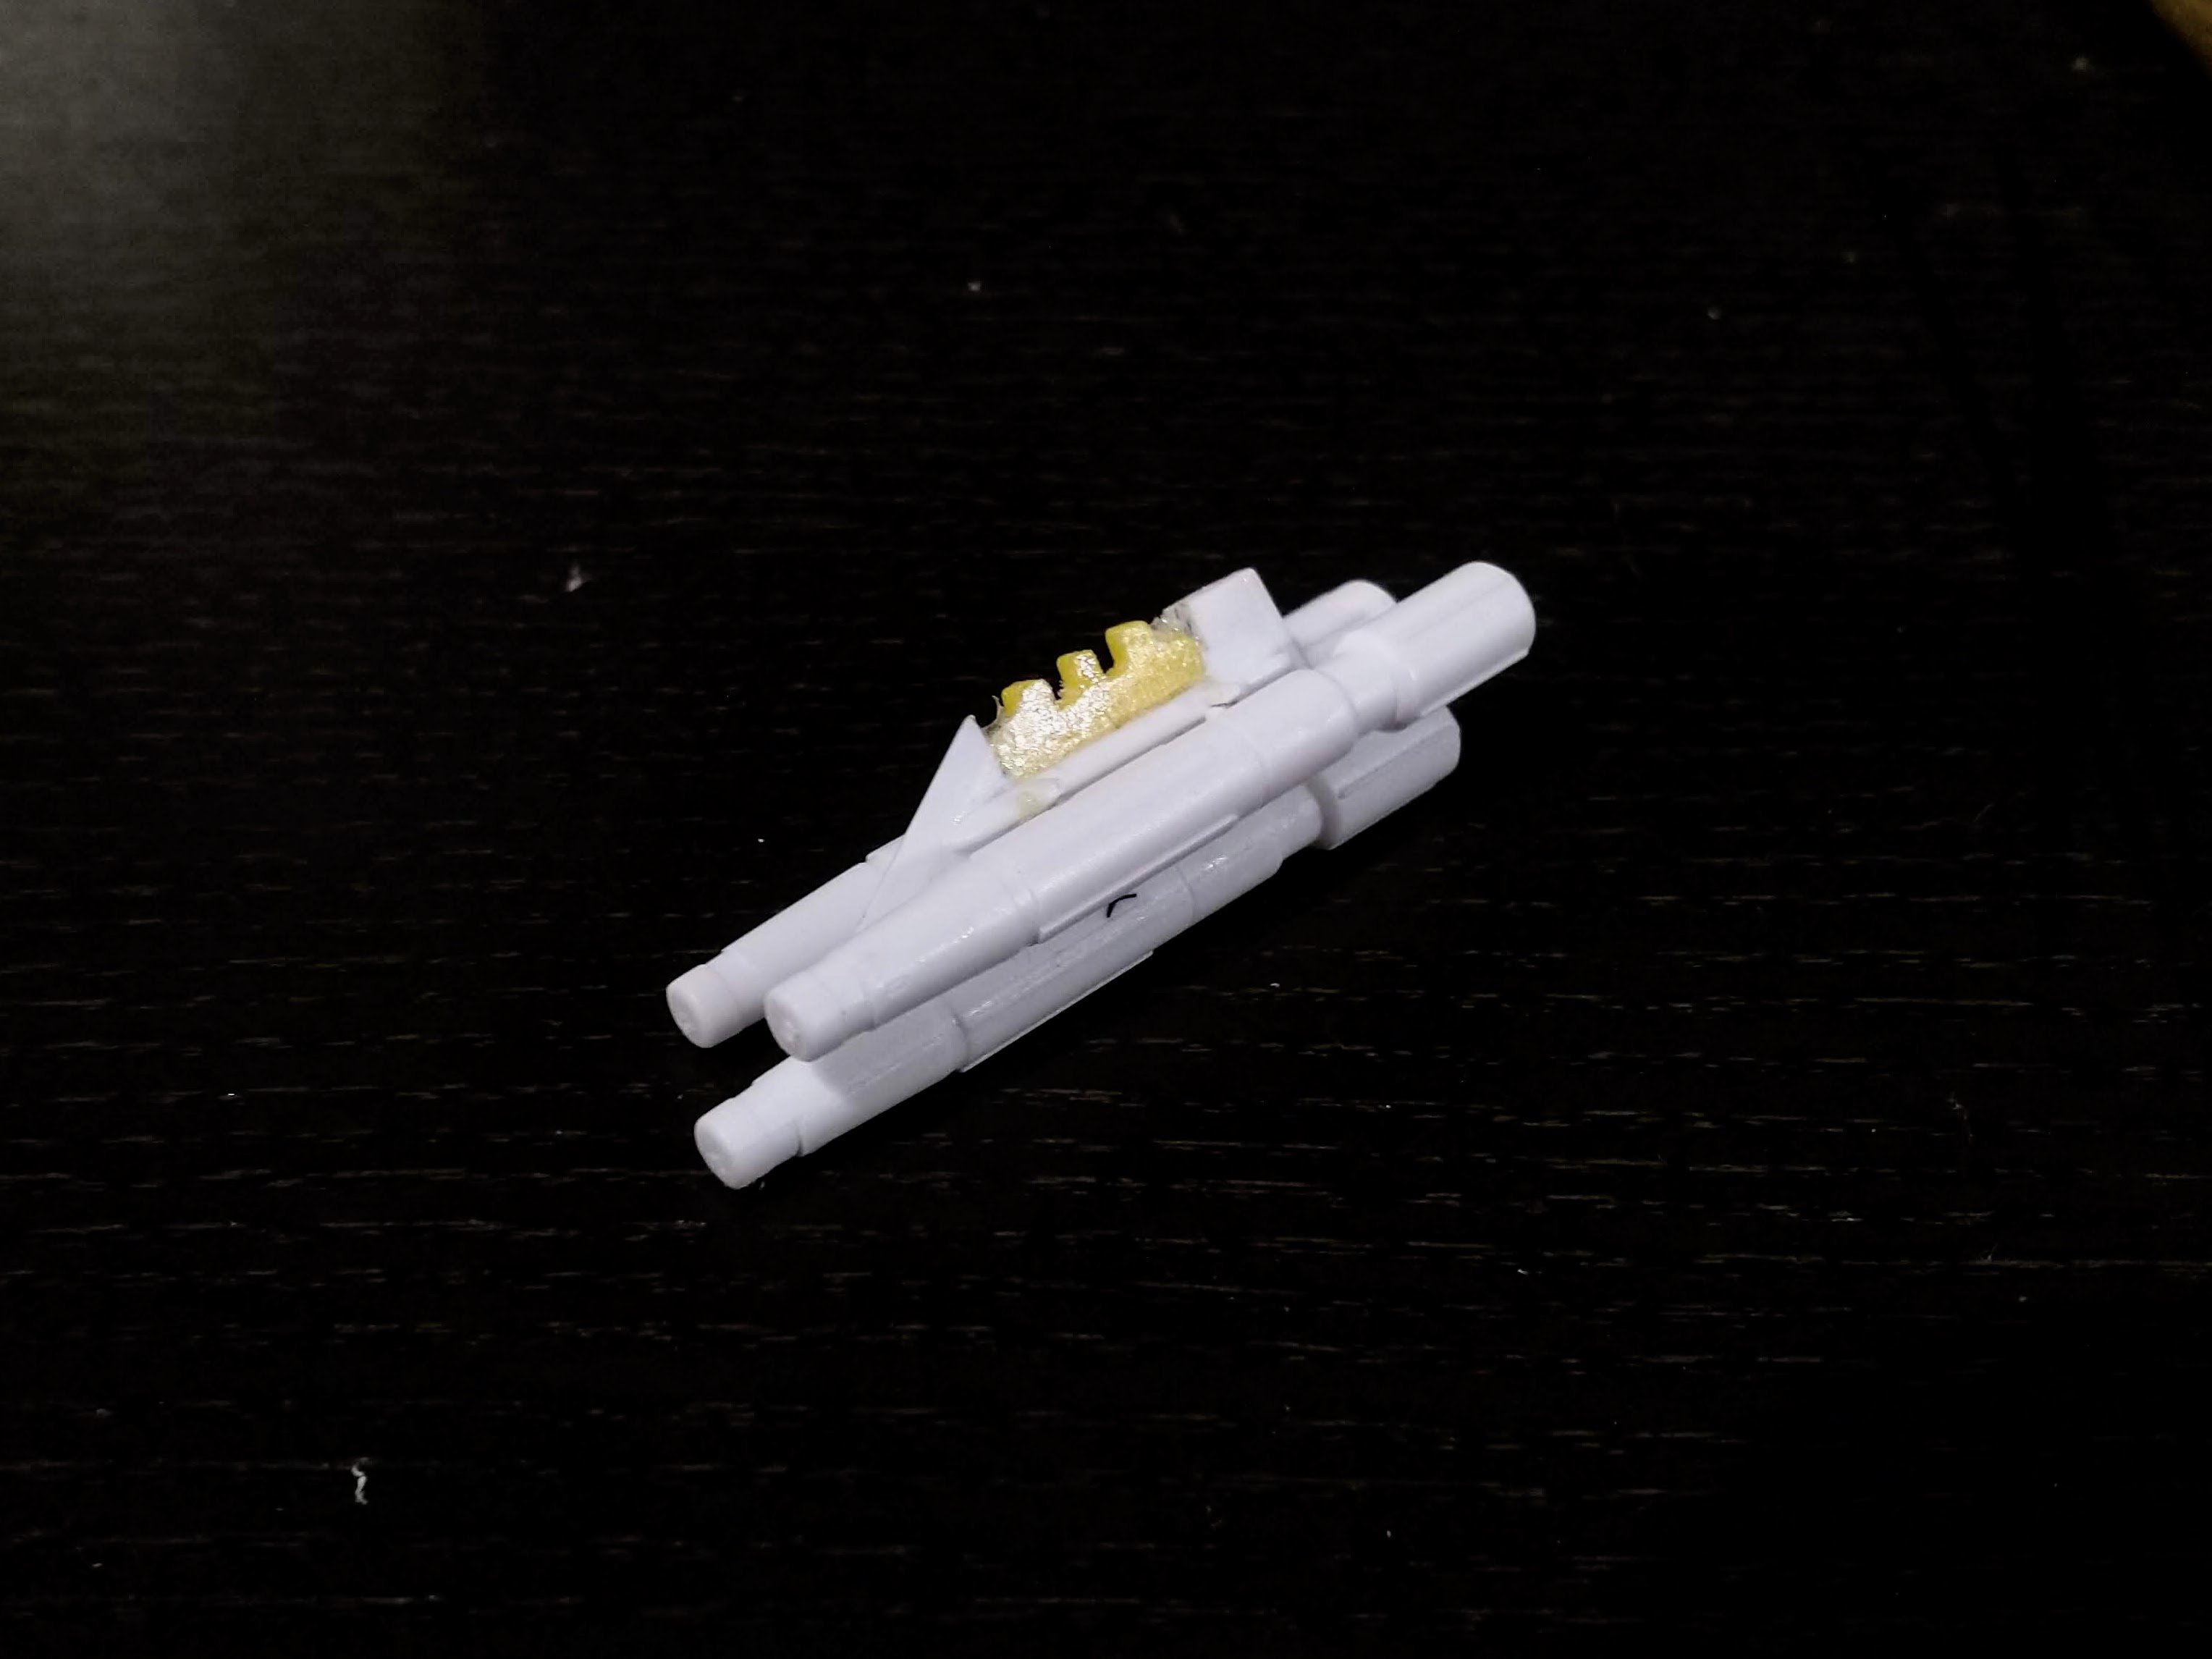
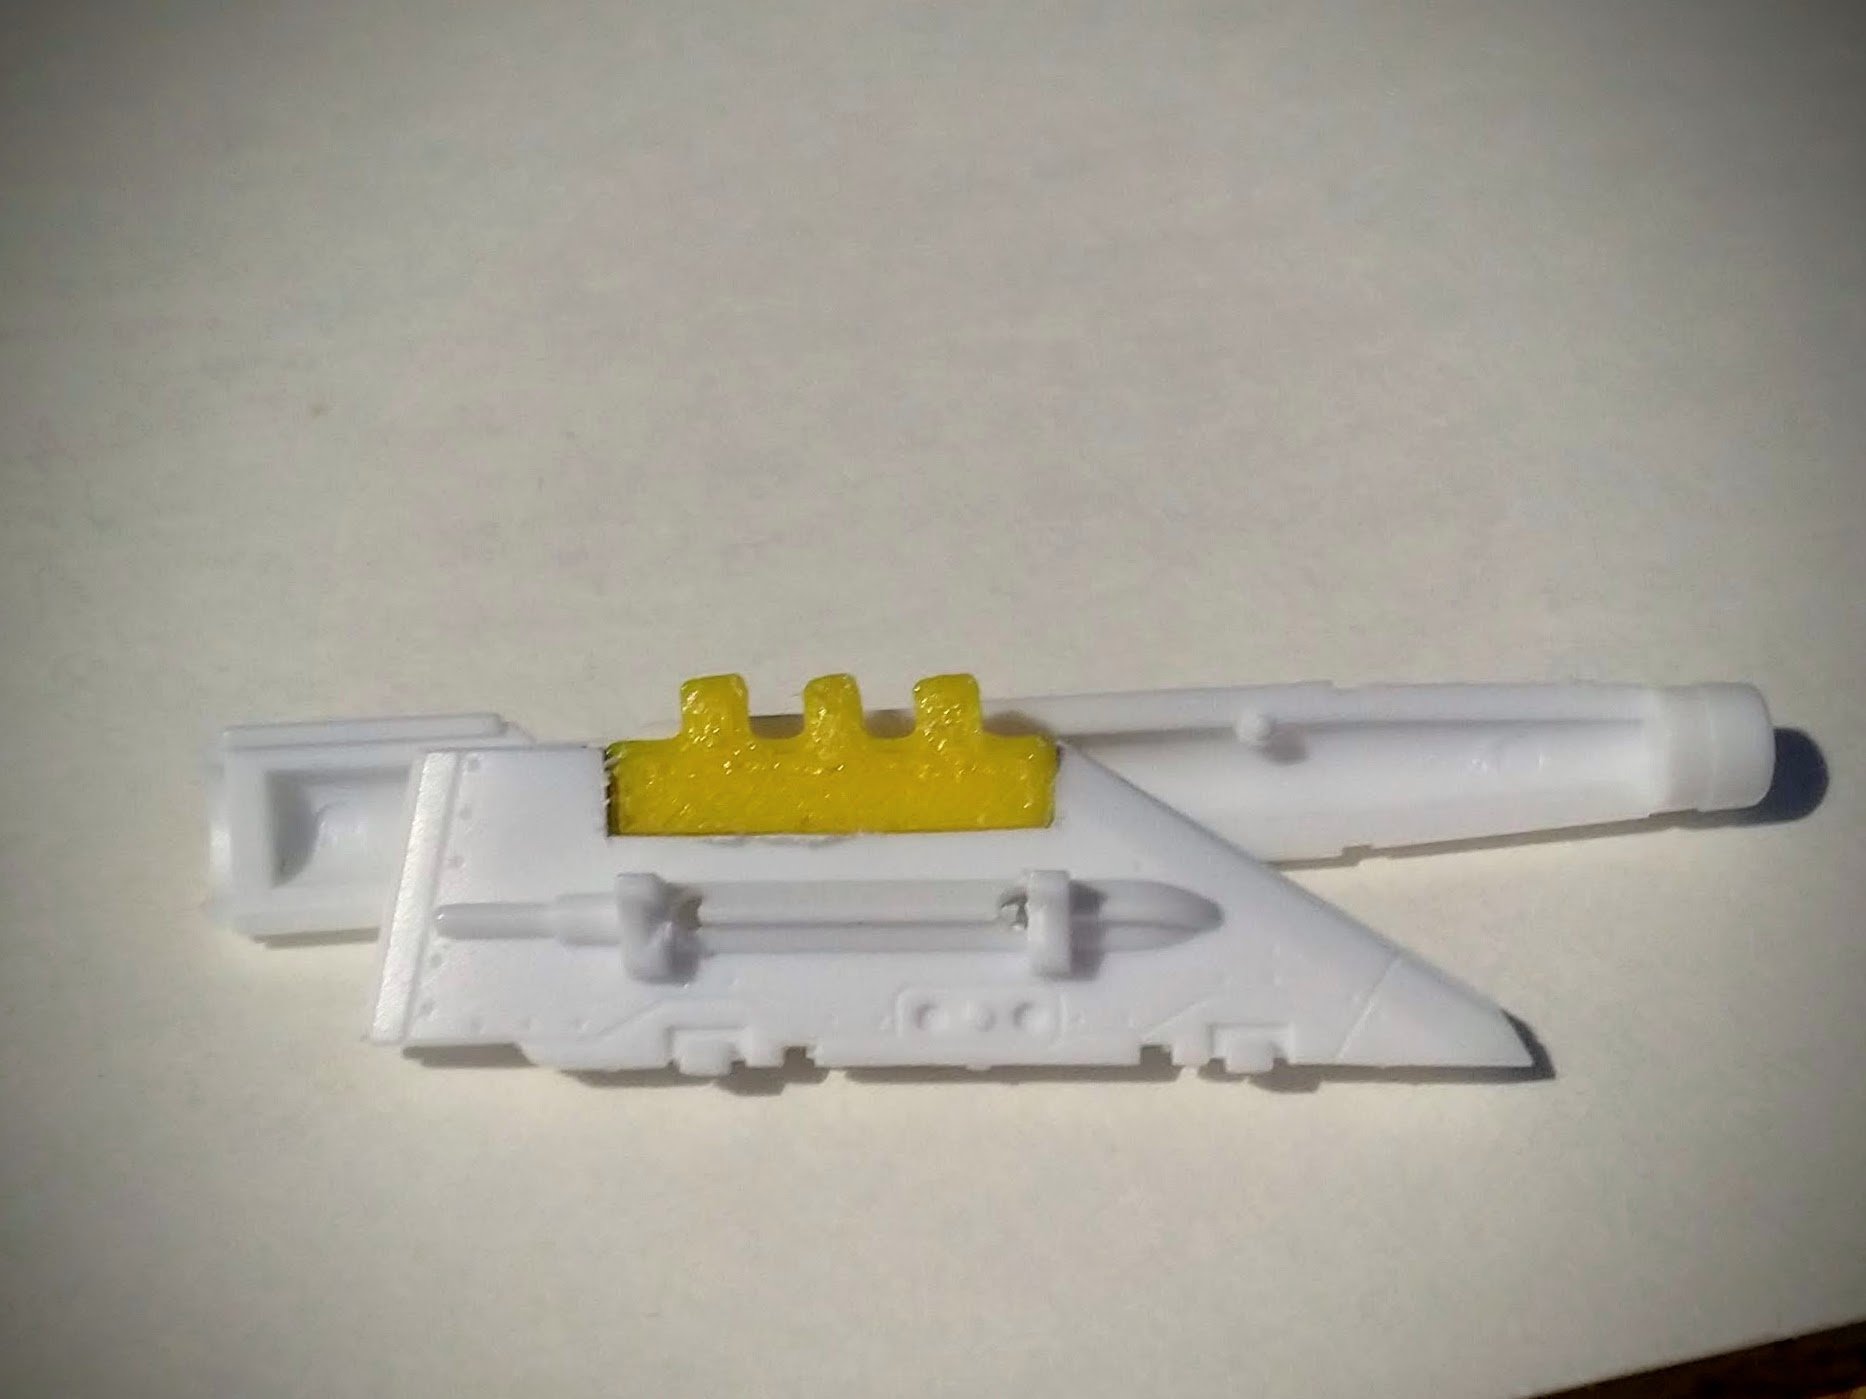
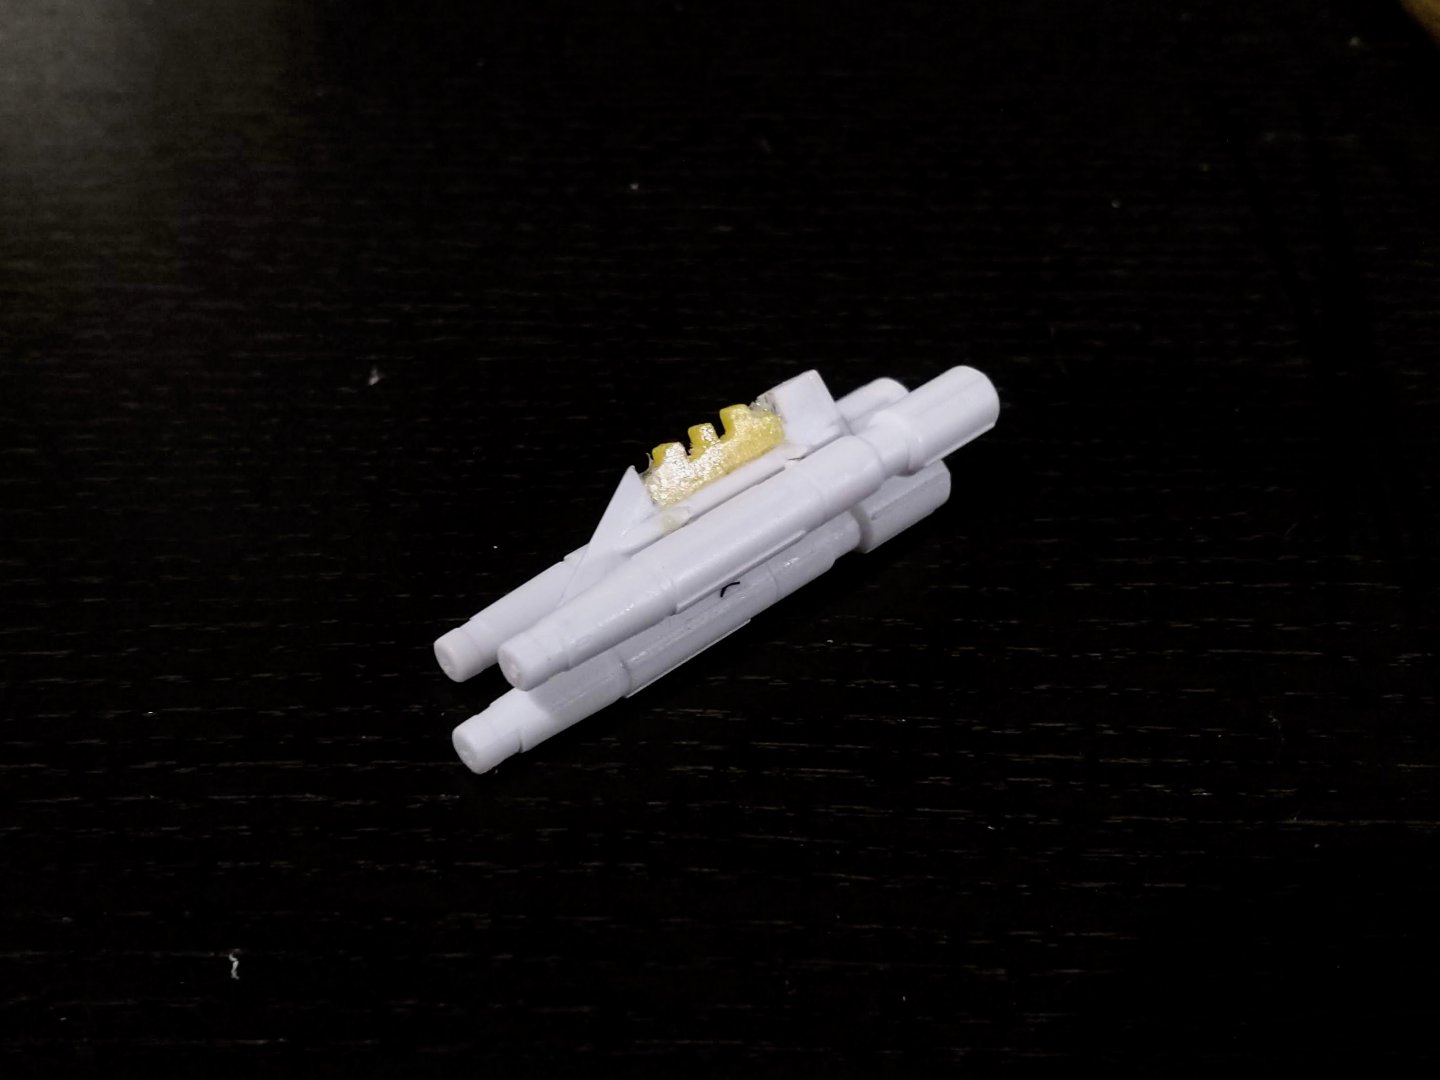
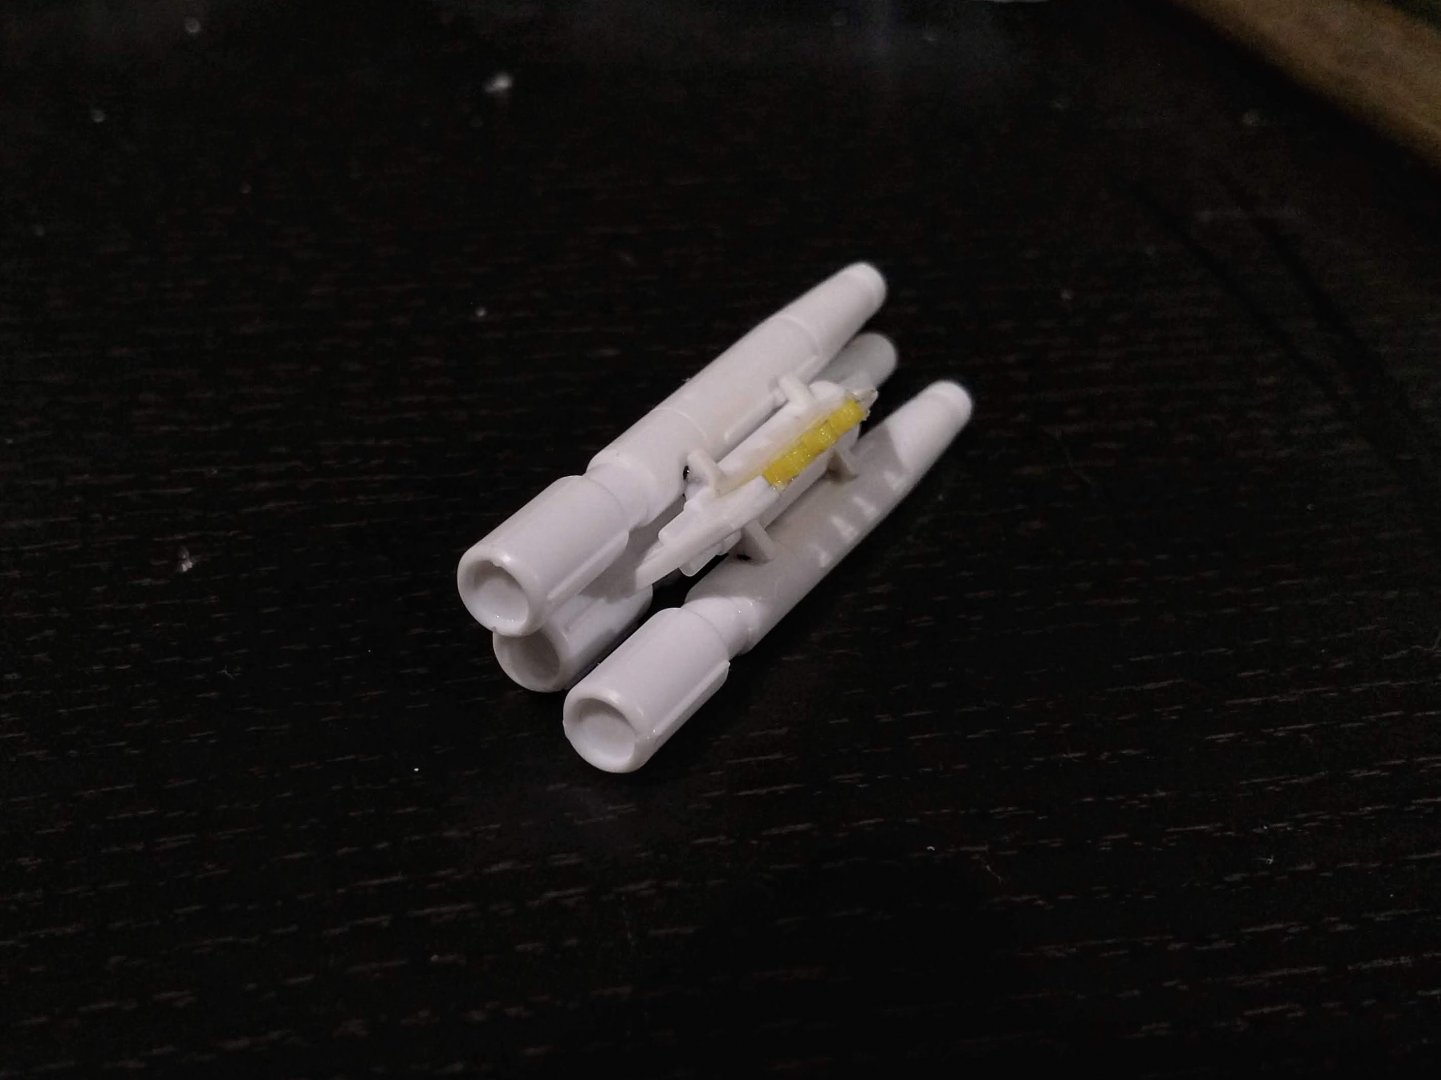
Thanks for the ray of hope arbit! Yeah, I think the key is to drill a bit oversize and then glue the connection method (wire, rod, magnets, etc) into each side while fitting it "perfectly." I didn't have that extra measure because of course I drilled the holes almost exactly the right size for the magnets. I managed to glue the missile halves together last night and take some new photos. So there's some small progress happening. I'm using Gorilla Glue for holding the magnets in and also for the 3D printed part to the PS plastic on the model parts. Super glue would work too, I'm sure but I am fresh out. Plus, glue that activates in the presence of moisture and bubbles up like that polyfoam insulation in a can, is cool! I used it to create a level surface on the 3D printed part by applying some to the part that I'd previously glued, sprayed water on two pieces of thick plastic sheet, then using a bulldog clip to hold the plastic level with the pylon. After removing the plastic sheet, the result is a smooth surface that is slightly transparent. It looks porous but isn't. Under primer and paint, it should look like the rest of the plastic when I'm done. The yet to be primed and painted, finished assembly: And fitted. As you can see, the flaps still work and don't foul on the pylon or the missiles. I don't know how the Reaction Missiles or the Micro Missile boxes would look but don't plan to fit these anyway.

-
Lots of great things being built here! I've managed to make some progress on my little DX VF-1J Missile project with whatever "workbench" space I can find. Lately that's been the kitchen table or the small space in front of my keyboard on my desk at home. At any rate, I've gone from this: To this: And in hindsight, that pic shows almost nothing of my progress! So until I take some more well thought out ones, the written word will have to serve as a substitute. I'm experimenting with 1mm x 1.5mm neodymium magnets. They didn't seem appropriate for holding the pylons to the wing. I think I might've been able to make it work but the 3D printed adapters seemed to be a stronger option and so I went with them instead. The magnets seemed more appropriate for holding the missiles onto the pylons. Of course that meant drilling tiny holes into the missile bodies and attempting to use the missiles as guides for the holes in the pylons. That worked, but only just. You people who drill perfect holes in plastic have a gift. In the end, the guides that Hasegawa built into the parts seem to work OK for locating the ordnance and the magnets seem to hold everything in place as planned. I still may just glue at least one batch, given how much effort was required to do one pylon. That's 12 holes required for each pylon. And why do they need to be removable again?


-
I'm working on a DIY set of missiles for the DX VF-1 and can reaffirm that the other DX release missiles do fit. But there's a caveat - they seem to do very minor damage to the hardpoint on the bigger VF-1. I have no idea if the upcoming missile set is going to incompatible with the VF-31 toys as a result. I expect there will be a slight change in the design for these new missiles that might render them incompatible with all the rest of Bandai's stuff. We've just not seen enough of the set to know for sure. The Shapeways stuff is likely to be the safest bet. I'm totally with you on the 31F though - I'm in exactly the same boat as I have the toy and the super parts, but no missiles because they were never available. Well, not separately at least. I have the super parts for Mirage's ride but that's just the one set to go between two Valks.
-
That is unfortunate. I'll have to check both my Brera and Grace versions soon to see if this an issue on either. As I recall, the plastic is exactly the same between whether it's green or magenta.
-
I just realised the 3d printed part is sitting too high for the pylon to but up against the underside of the wing. Bummer... Looks like I'll need to move it down a bit more - maybe to the tops of the side rails instead.
-
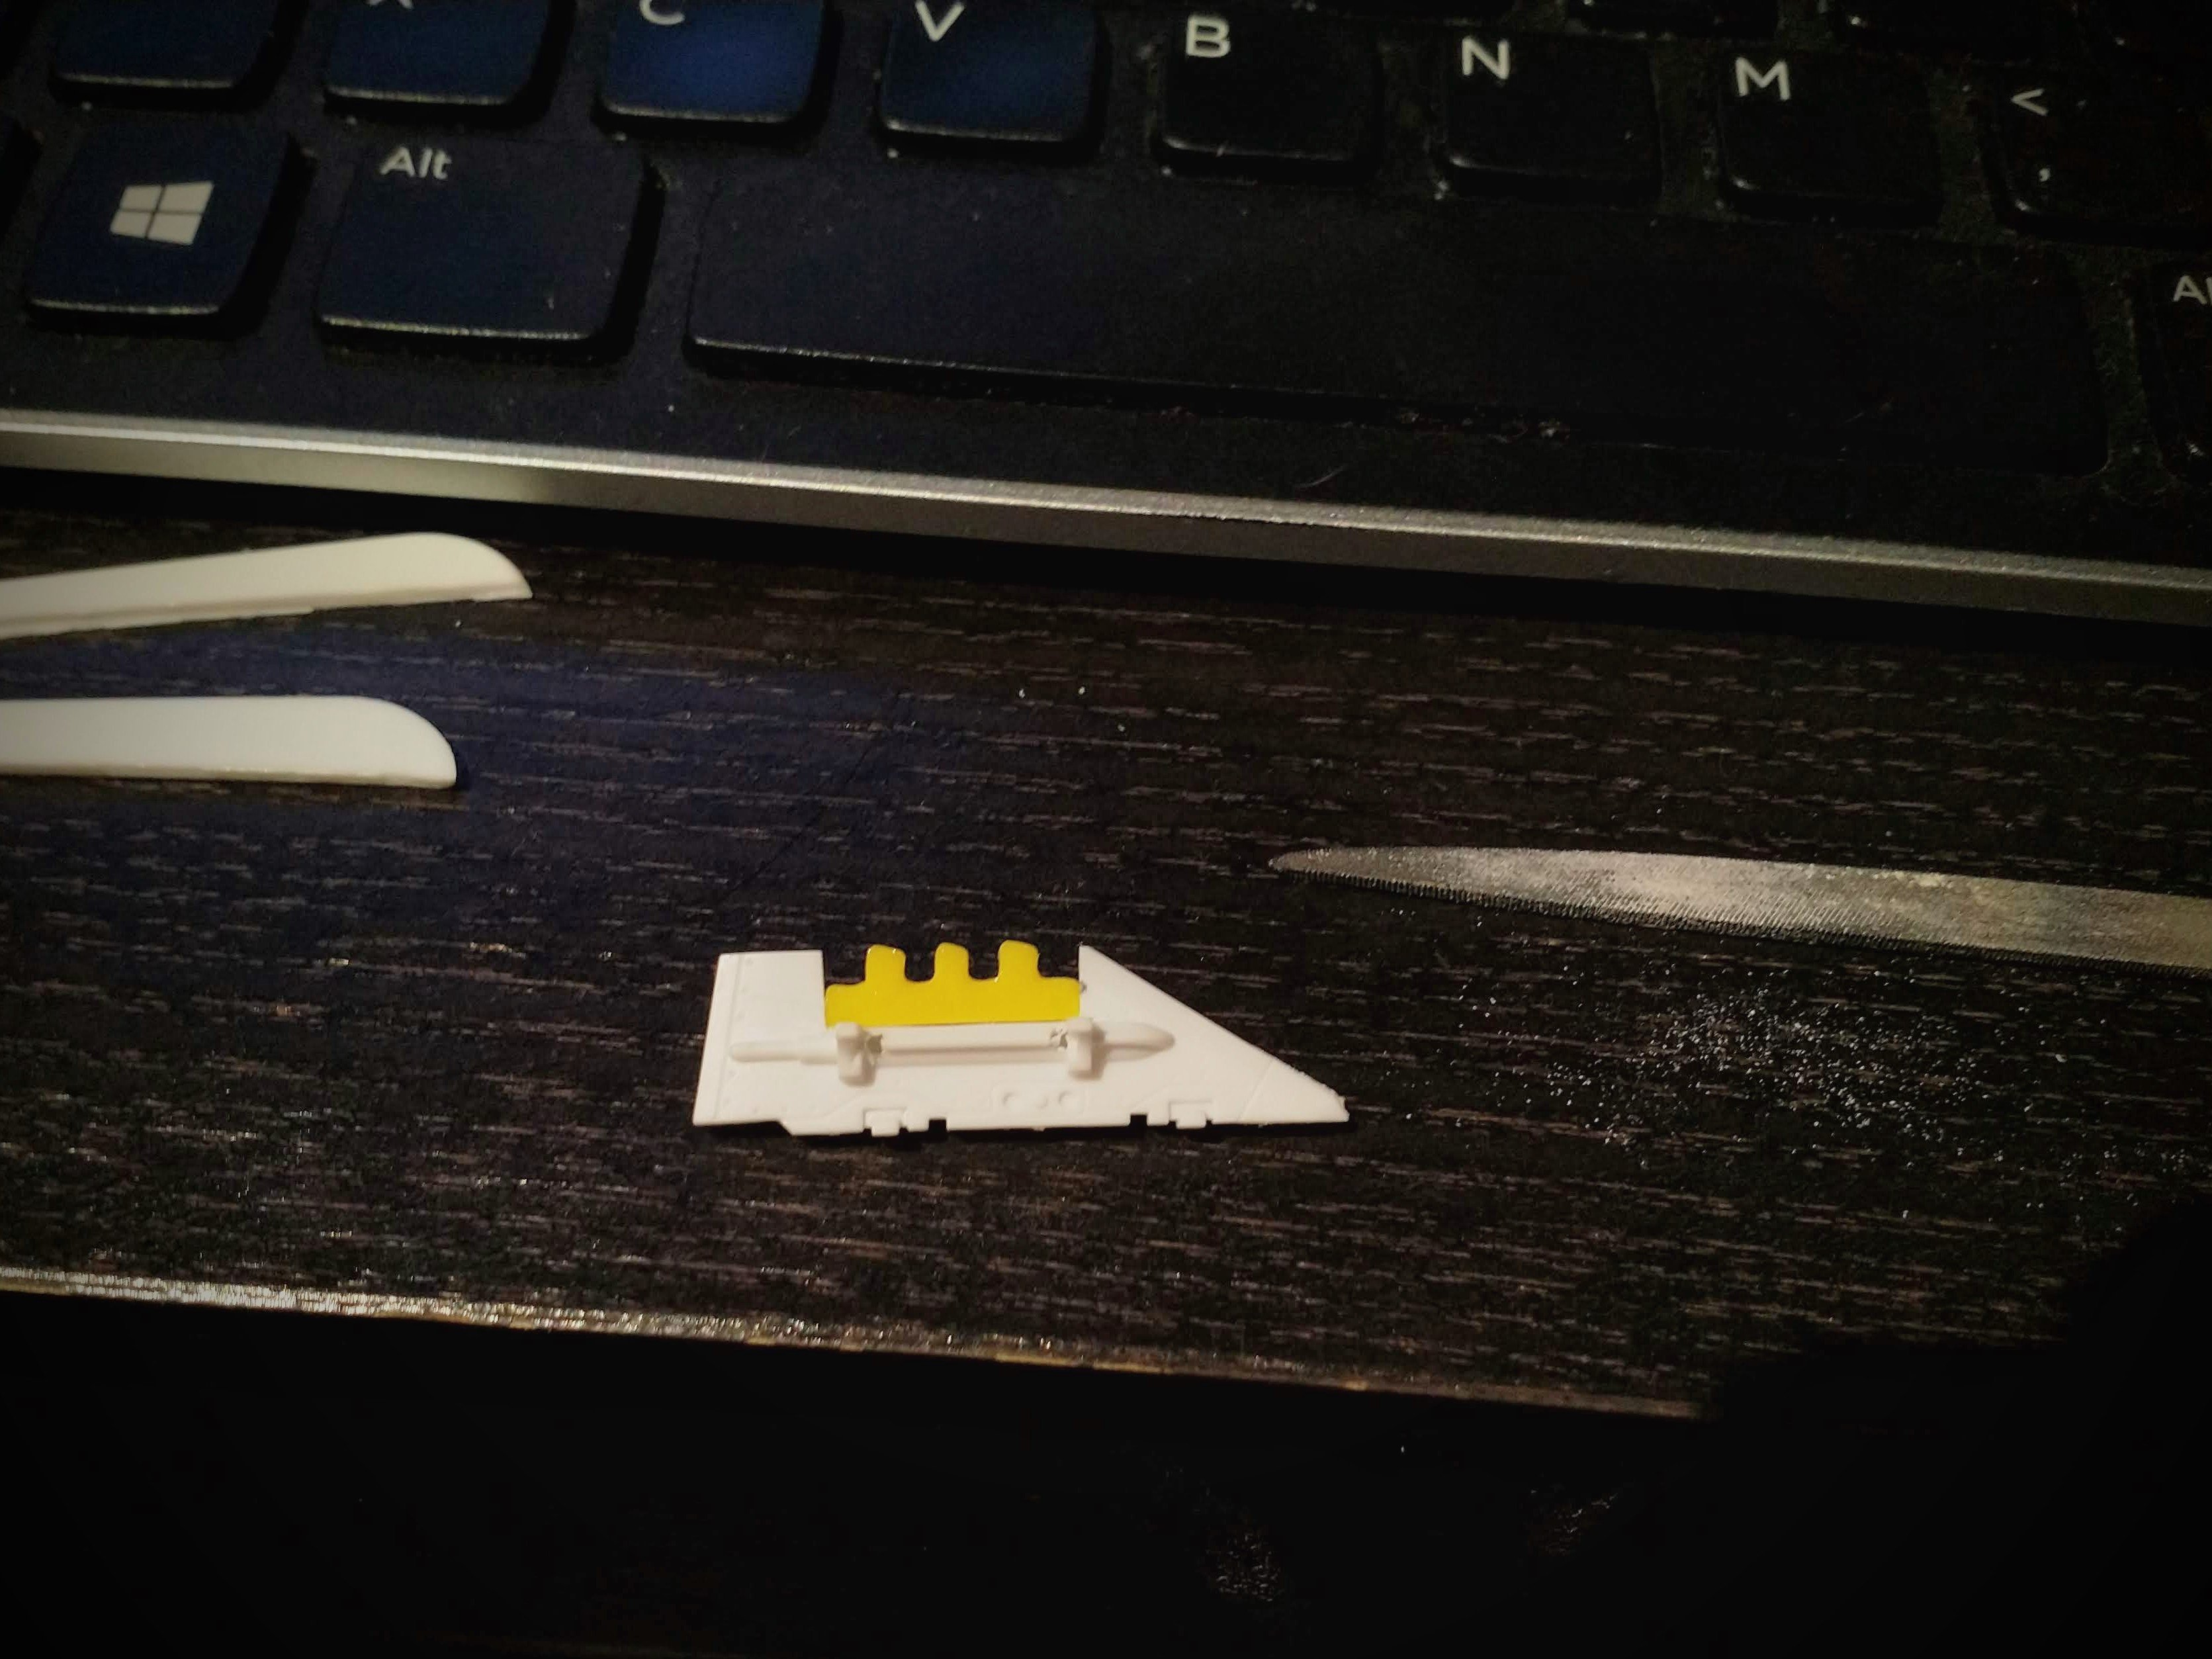
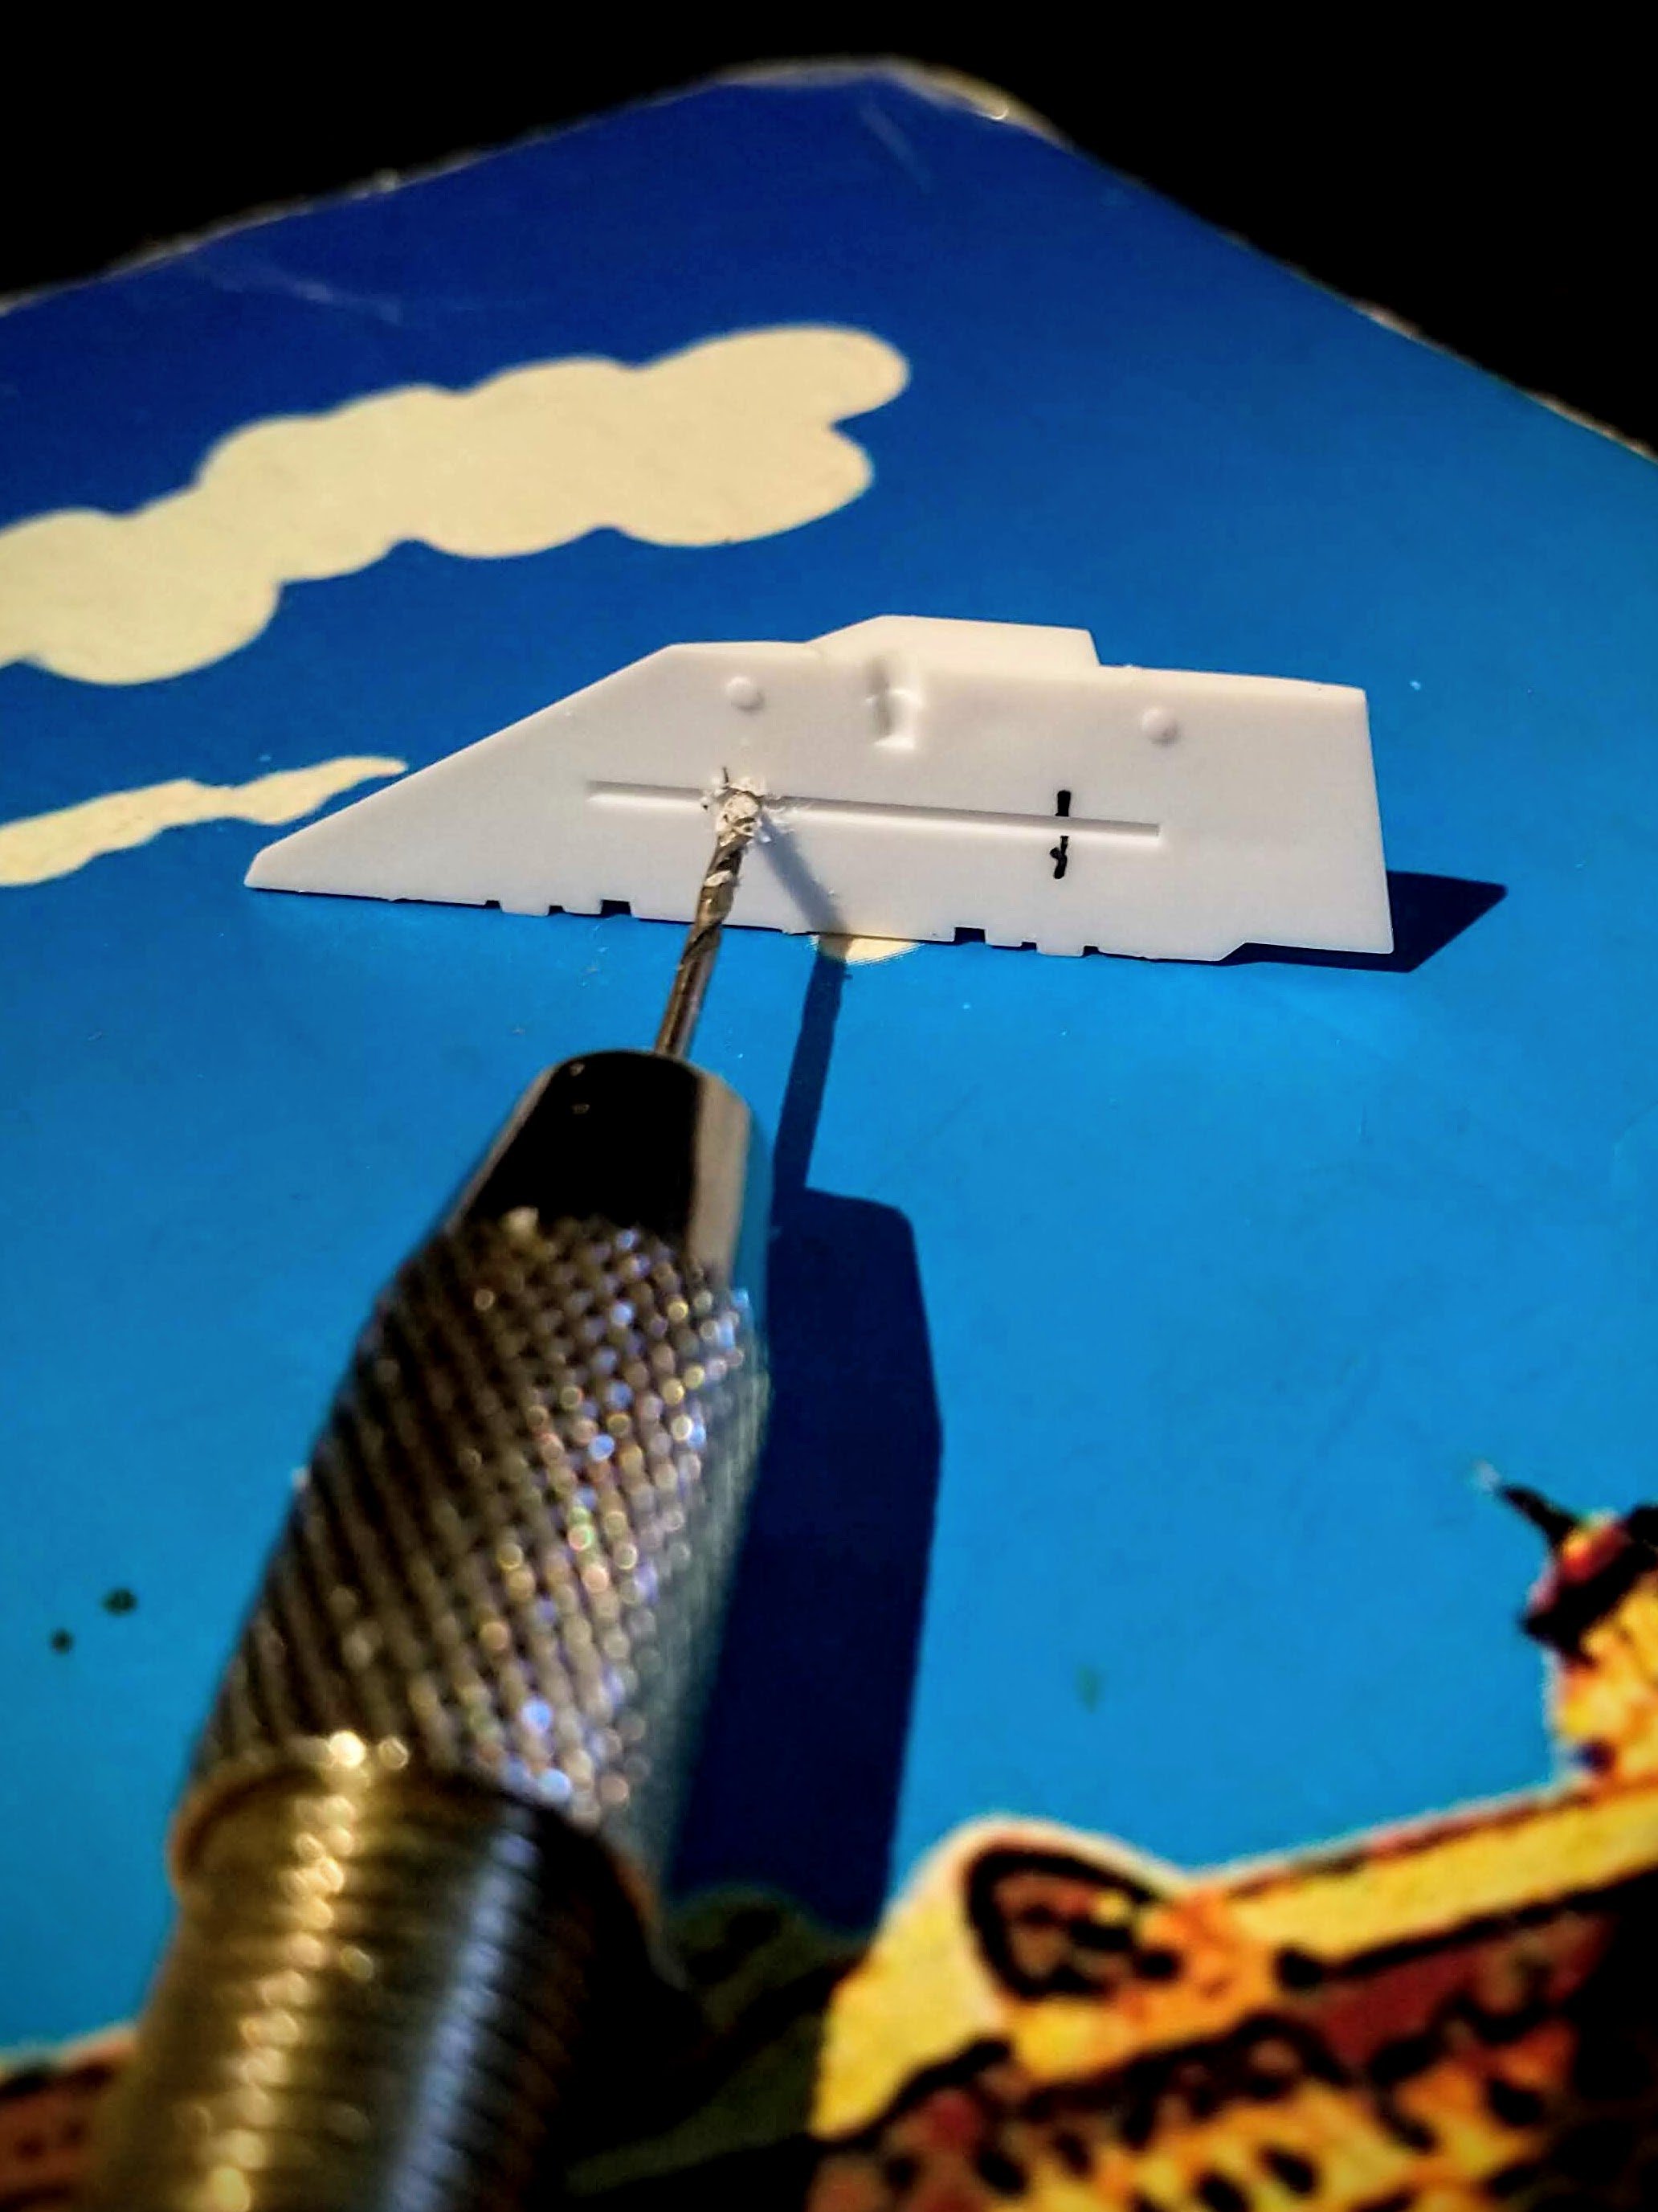
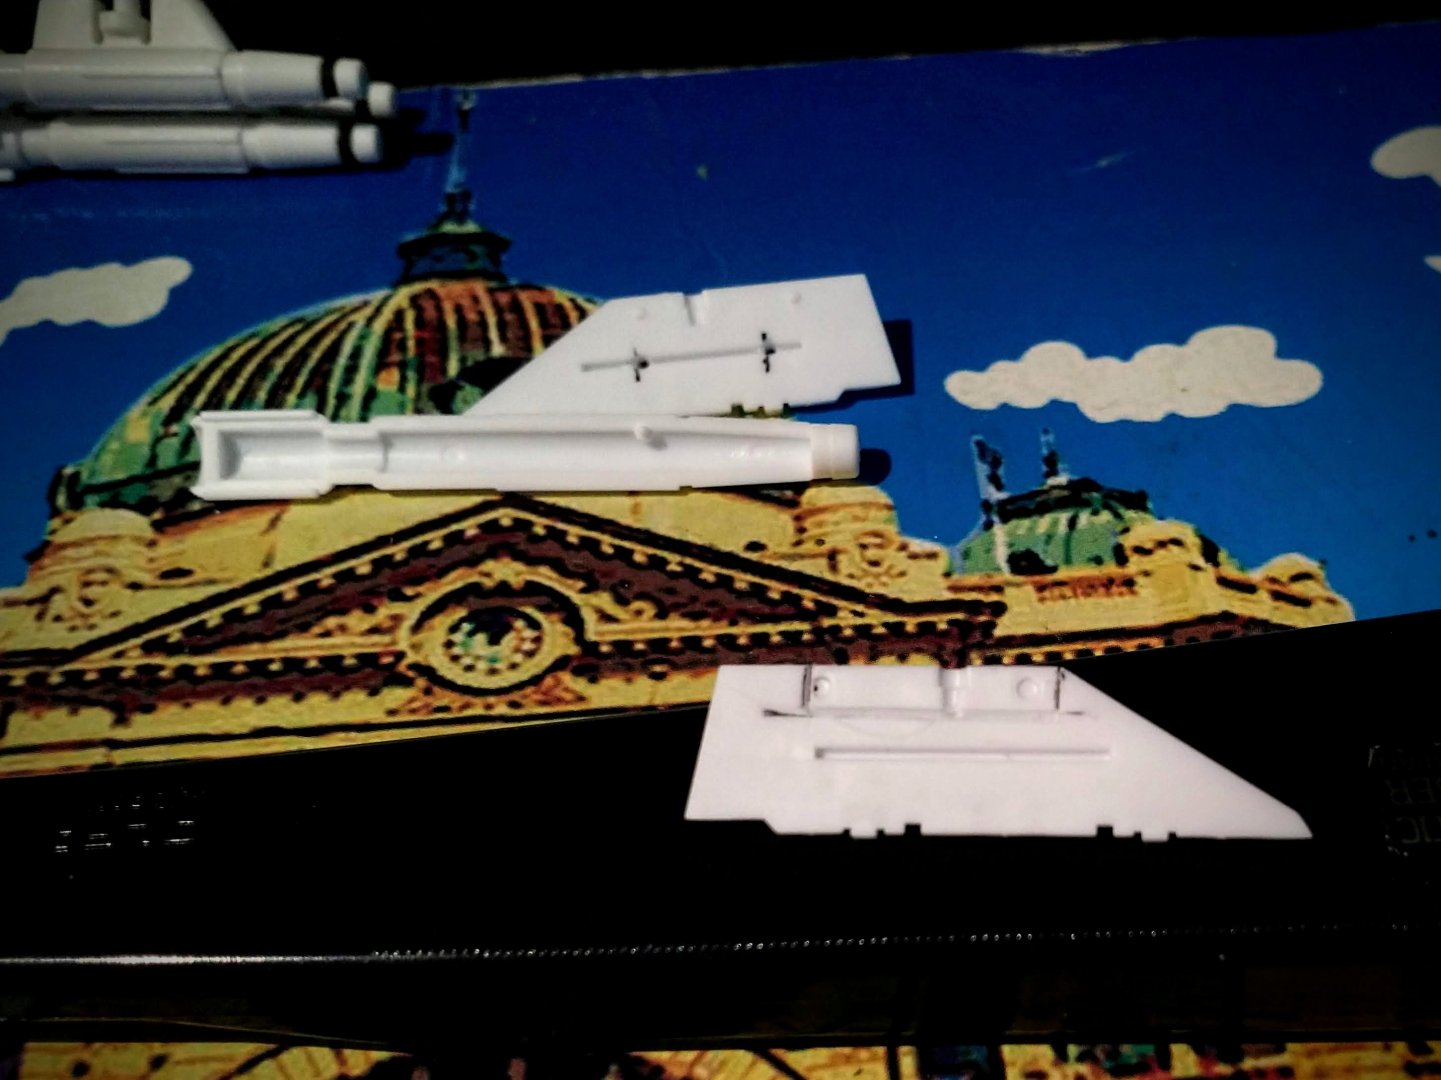
Yeah, I hate those "you can only choose good fit on one side or the other" dilemmas in a lot of kits. Still, you're progressing well with it. Keep those pictures coming. I've been working on a modification to allow the Hasegawa 1/48 VF-1 Missiles to work on the Bandai DX toy. I didn't want to shell out the big bucks for the Missile set from Bandai so went this route of modifying the model kit parts. It'll have a bit better "realism" and give me complete control on the finish of the parts but that's about it. The effort so far on my first pylon alone is sitting at about an hour. To do the 4 required, that's 4 hours. And that's just to make the cuts to fit everything together. If you can put money against your time, the Missile set from Bandai is an absolute steal! Here's where I'm at: The pylon has been glued together and the yellow 3d printed piece just wedged in there for testing the fit. I'll glue it in properly and add some detail over the cutout so it looks a little more interesting when finished. I experimented with holes to help attach the missiles and actually purchased some 1mm x 1.5mm neodymium magnets for this specific purpose. Unfortunately the method for attaching the missiles is so tricky, the magnets just aren't going to work. Here's how I'd planned to mount them: The sad thing is that the holes were nearly perfectly aligned and straight - something I almost never get right. Oh well... The bit I've cut out is shown here: Just a simple rectangle, marked out and then cut with some very thin photo etch saws.


-
Looks beautiful Lolicon! I like the extra touches like that light on the tail stinger too. Which semi-gloss clear did you end up using?
-
All I know is, I keep coming back here to see what you all come up with. I mean the comic is one thing, but the commentary is just the best thing ever!
- 1934 replies
-
- 1
-

-
- robotech
- titan comics
- (and 1 more)
-
Ah, that helps a LOT. Not to disparage Pulltoeject's great advice but I notice a couple of things right off the bat that could use some further comment. Firstly, those aren't scratches, but Shizuka, you probably already knew that. That's Yamato's rainbow tint, disintegrating away on the inside of the canopy the way only their tinting can. It's common. And I'm fairly certain it's something you can fully strip off with alcohol. Second, it looks like the panel lining on the kite along the fuselage was done with something that reacted with the red paint. I'm also tipping it was an alcohol based product. In short, the Tamiya thinner might work, but I'd still start with good old Isopropyl first. Pulltoeject's advice about using it basically dampened is definitely recommended. I'd start on the side of that nosecone where it's just a white plastic background. If the black starts to come off, you're in good shape to tackle the rest. That kite though... That's almost assuredly going to require something special not to make it look worse. Probably best to try and avoid it altogether.
-
Depends on what the colour is. I had a few second hand ones I bought that had some lines I wanted to remove and I had really good luck with Gundam eraser, which I think is mostly alcohol based. So you could try a Q-tip and rubbing alcohol. If that doesn't work, you just sort of up your solvent aggressiveness until you find something that works. Just bear in mind that the the paints on the Yamato and Arcadia valks aren't indestructible. It's worth testing whatever you try on a painted part first, just to make sure you don't remove the panel line colour along with the paint!
-
I'd love an excuse to do another one of these Shizuka but the shipping to and from Oz would destroy any chance at it being affordable. There are bound to be quite a few options closer to your neck of the woods. Good luck!
-
 Seto, with respect to your postscript note, did you mean DC? I'm sure those characters are from Marvel... And on-topic: I really like that line of reasoning and would have to agree that there's still a LOT to work with for this next movie.
 -
B, fair point. We don't know much of anything at this stage and it's all conjecture. And I am certainly guilty of dragging my feelings about the previous movie into this thread. Possibly due to the lack of much to go on with the new movie, and also due to having watched TLJ with my kids recently (7 and 10) and answering questions they had about it. And I think I was having a lousy day the other day when I posted too. You're never going to get complete objectivity when writing whilst under the influence of negativity. I do enjoy reading the often witty comments that people share, even when it's clear they haven't got a lot of nice comments to make. I guess we just have to make sure we don't potentially poison the well for others before they even get a chance to drink. It's one of many reasons I try to keep my distance from a thread or news when it gets close to a movie's release date. There's just way too much I can pick up from reading some well written thoughts on a subject. I'd rather make up my mind myself when I see something for the first time. The teams that put together trailers have a very hard and extremely important job to do before the release of a movie. How do you generate interest, remain truthful to the movie, and not bias people too much in the process (one way or the other)? Here's hoping we get to see something soon for this movie.
- 2093 replies
-
- 1
-
-
- joonas suotamo
- mark hamill
- (and 17 more)
-
I always go down. I think I got that from the Yam-Cadia though.
-
Oh, undoubtedly. Especially in the context of the movie. I just want to believe it somehow has a place in the next movie, I guess. Actually, I'm sort of not caring anymore. I saw TLJ more than once and really tried to give it a chance each time and just came away so apathetic in the end. I'm hoping my enthusiasm returns but it may just be that I'm no longer the target age group for these movies or those nostalgia glasses just totally ruined anything "new" from here on. I don't hate these movies, but I don't really care about them that much either.
-
Yeah, I noticed that too. What's your plan for modification? A file, I presume?
-
Nice work! These are classics and there have been countless buildups of them all over the place but I always find new ways of doing it better. Yours are a real help!
-
Agreed, Battroid is an odd looking thing from some angles, but if you look at it from down low, it's not bad.
-
Well, there was a LOT of what I'd hoped was foreshadowing of the X-wing sitting there, under water in the TLJ, only for it to be completely ignore. Having it return in the next movie would at least make the investment (maybe it was CG though) make sense?
-
Ditto! @derex3592 Thanks for the tip on step 12 - it's tight without sliding it, but there's a gap. Doing what the instructions say to do eliminates the gap altogether.
-
Shuri‽
-
I'm in agreement. Kylo destroyed his helmet in TLJ. Why would he have it back for this movie?
-
Collected mine and opened it. First, quick impressions are that she's a cute little thing. Paint is a bit blurry where two colours meet but nothing too terrible. The detail is impressive at this scale, even panel lines aren't grossly out of proportion (they could be smaller bit it's not that bad). Only real gripe is the moveable canards and tails: just like on the bigger Yamato/Arcadia variant, they are easy to bump out of alignment. Overall, very nice effort by Bandai!
-
Mine's arrived but it'll be a while before I get a chance to go grab it from the mail room here at work. I'm vicariously experiencing it through all the pics you're all posting.
-
Captain Marvel, in theaters Mar. 8, 2019
mickyg replied to azrael's topic in Anime or Science Fiction
Thanks Thom - that makes a LOT more sense now. In fact, now that you mention it, I'm surprised I didn't put that together because it's spot on!- 213 replies
-
- 1
-
-
- Captain Marvel
- Marvel
- (and 4 more)