mickyg
-
Posts
2631 -
Joined
-
Last visited
Content Type
Profiles
Forums
Events
Gallery
Everything posted by mickyg
-
Hi Derex and welcome from a fellow long time reader, fairly recent poster! I did some model building about 10 years ago myself and NEVER panel lined or applied any kind of weathering whatsoever. And you could tell, too! So this advice is basically from a complete noob. The oil wash I did came out really well and it was the first time I'd ever done anything like it. Kinda scary to do on such an expensive toy, I know! At any rate, it wasn't really difficult, not terribly complicated and I think the results are pretty good. Plus, it's cheap! I think I spent less than $10 on all the supplies. To to recap my method (which can be found by several others on the board as well, frequently in the model buildups that WM Cheng posts): Get some artist oil paints in 3 colours: black, white, brown Grab some oil thinner - turpentine or a derivative is what you'll need but I highly recommend the low odour type. If you're doing it indoors, it won't stink up the house! For white parts mix up a light grey colour (lots of white, a little bit of black) and mix that up with at least the same amount of thinner. Aim for a milk consistency. For darker colours, experiment with the wash colour. I ended up using the same shade for the black, red and white on mine but it depends on what you're after The consistency of the wash needs to be pretty thin. You're wanting it to "run" down the panel lines when you apply a "spot" to the surface. I highly recommend testing this out on a model or something so you get the hang of it. It won't kill your VF but might save you a bit of extra, unnecessary cleanup and some frustration in the long run (I should take my own advice!). Moving along, with a brush, dip it into the wash, but don't saturate the brush Then apply the wash by touching it to a panel line. I found the wash tended to flow quite easily and occasionally pool up where it dripped. Not too big a deal but be prepared for that. Let it dry for a couple of hours at least (even 24 worked OK for me) and wipe off the excess with a cotton swab or paper towel. Any areas that are stubborn, you can dampen the towel or swab in thinner and have better luck. If you want an easier time of this, you can also precoat the whole thing in a gloss clear coat. I didn't and probably needed to spend a bit more time wiping the wash off than if I had. Still, not necessary to get the job done though. I can post up some better quality pics if that's of any use to you.
-
Ok, this is far too cool not to comment on - This thing is awesome! Talk about testing aerodynamics! The thread where IAD shows us how this was built is HERE. IAD - if you haven't already put a thread up on this forum, you're missing out on some much needed feedback from this community. Your work is nothing short of amazing! So anyway, maybe the SV-51 is more aerodynamic than a VF-1 but nonetheless, this proves that just because it's anime, it doesn't mean it can't fly.
-

Bandai 1/72 Scale Macross Frontier Model Kit Thread Ver.3
mickyg replied to azrael's topic in Hall Of The Super Topics
Thanks David and SVF! I'll order the model and paints on Monday and get started soonish (still have a Legioss that I'm sick of but need to finish - but that's another thread to start...). -
Bandai 1/72 Scale Macross Frontier Model Kit Thread Ver.3
mickyg replied to azrael's topic in Hall Of The Super Topics
I've been watching this thread closely and am very inspired by all the work in progress and completed pics everyone's posted up. Vifam, I noticed you posted up some translations for colors on almost all the models, except Mikhail and Luca. Huge thanks. I've just finished my own translation for Mikhail using a Gunze color translation posted here. If anyone would do me the favor of translating the headings (which part the color is for), that would be great. Oh, and as some of these colors might be out of date or slightly different, if anyone wants to check my work, please do. For example, "gull gray" doesn't appear to exist on its own, only light or dark. And another that springs to mind is "indy blue/bright blue" used interchangeably, I think... Anyway, I look forward to starting my own build and possibly progress pics soon. Here's my contribution: column 1: 1: Bright Blue (Indie Blue) (90%) + Violet (10%) 2: White (100%) + Gull Gray (small amount) 3: Blue (50%) + Bright Blue (30%) + Midnight Blue (20%) column 2: 1: Blue (50%) + Bright Blue (45%) + Midnight Blue (5%) 2: Neutral Gray (95%) + Midnight Blue (5%) 3: RLM Field Gray (60%) + Neutral Gray (40%) column 3: 1: Tire Black (75%) + Neutral Gray (15%) + Midnight Blue (10%) 2: Bright Green (50%) + RLM74 Dark Gray (40%) + Neutral Gray (10%) 3: Pink (70%) + Purple (30%) column 4: 1: Tire Black (80%) + Dark Earth (RAF) (20%) 2: RLM75 Gray (90%) + Violet (10%) 3: White (60%) + Cream Yellow (40%) column 5: 1: Neutral Gray (100%) 2: Gull Gray (100%) 3: Clear (55%) + Clear Blue (25%) + Clear Red (20%) column 6 1: Bright Blue (75%) + Sky Blue (20%) + Violet (5%) 2: White (100%) + Violet (small amount) 3: RLM74 Dark Gray column 7 1: Violet (95%) + Cobalt Blue (5%) 2: Shine Red 3: Yellow -
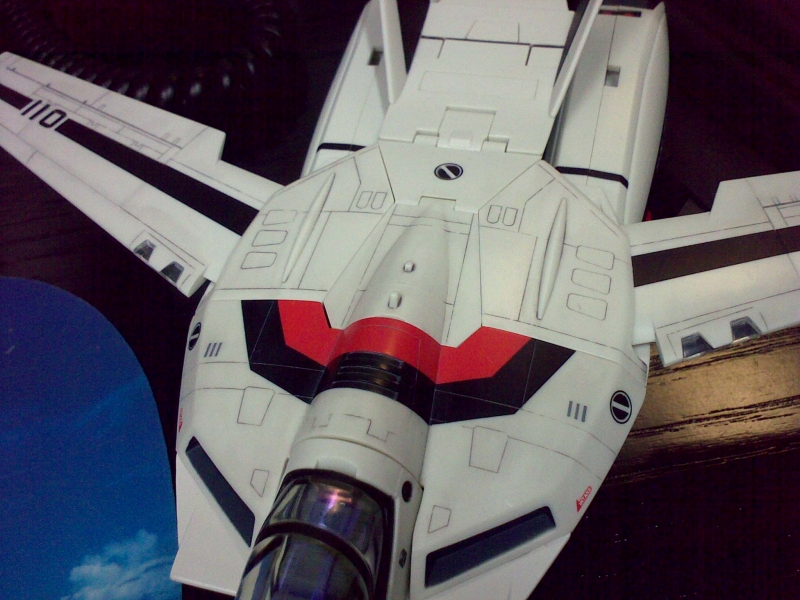
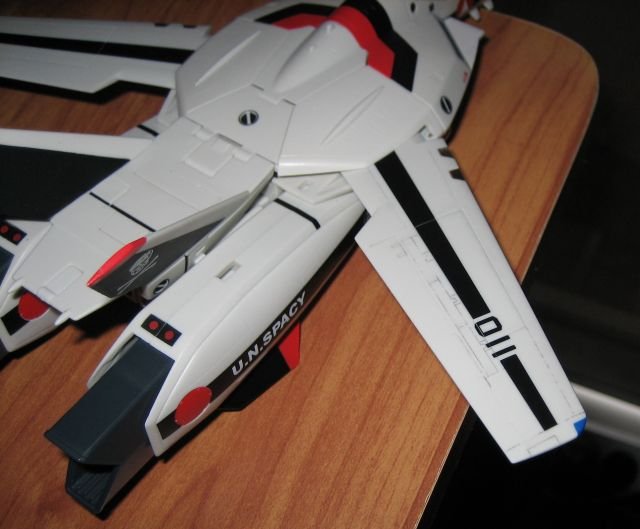
Thanks Noy! I think... Here's the end result after taking the plunge! There's still a lot more to do but I got impatient and wanted to see how it'd look. There's a bit of a "dirty" look to the plastic when it's all done so if you're not wanting that, you might have to put some extra effort in to wipe the panels down after the wash has dried. FYI - this was probably a 50/50 mix of white and black artist oil and then thinned down almost equally with low odor thinner (varsol/turpentine/etc...). You'll know it's right when it separates out and it looks like there's equal portions of thinner to paint. Also, I let this dry for almost 24 hours and didn't have any real trouble wiping it off after that long. Stubborn areas required a bit thinner on the paper towel or cotton swab I was using (just damp). Apologies for the quality. The first pics were taken with a decent camera, these were on my phone.


-
Hi there Red, Just another quick note on the oil wash technique. I think I got bored and decided to dive into this last night. Turns out my previous attempt was a bit flawed. I mixed the thinner and oils but was way heavy on the oils. If you have the proper proportion of thinner to artist oils right, it's actually not bad. Anyway, the "proper" proportion is probably the consistency of milk and the idea is to get the liquid to flow into the panel lines. If I understand correctly, the effect after applying is a lot of blotches where you've applied and connecting lines (the panel lines) between your blotches. Here's some early results on my 1A: Not sure if you can tell but the effect is a bit spotty in some places. I think I didn't thoroughly mix the wash before applying. Oh, and I got rid of the excess using a Qtip dampened with thinner (low odor turpentine). Despite what I mentioned about the porous nature of the plastic, if the wash is thin enough, it comes off just fine.
-
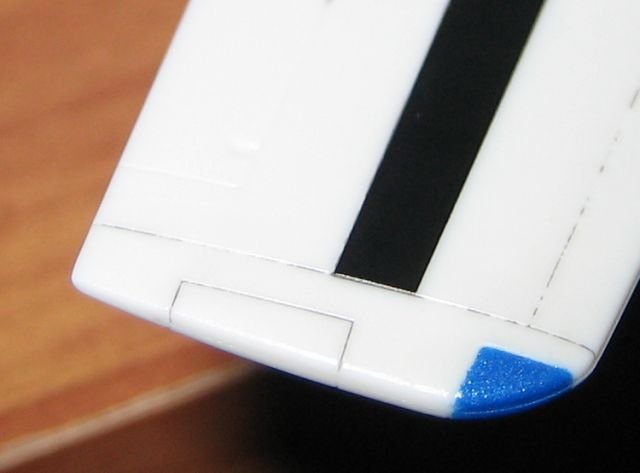
I've done quite a lot of searching here (and elsewhere) and I've yet to find a definitive "how to" on panel lining a v2 Yamato. So although the topic of panel lining and weathering models and other toys has been covered in great detail (and might be a dead horse) I think the v2 deserves its own approach. That said, most of the pics I've seen that the owners have commented on, were done with the Tamiya weathering kit. It wasn't mentioned if they'd done the panel lines with it or just the weathering itself. I picked up a kit the other day and will give it a try this week. I'll let you know how it goes. By the way, the thinned oil approach didn't work out so well for me - it just smeared into the white paint and was so hard to remove that I ended up having to use so much thinner that the lines came off too. I also found the paint never really dried, as I was able to rub it off with a finger 2 days later. The end result after getting off all the wash that the plastic just a touch darker than the original. As I mentioned, I tried this on the triple missle cluster so as not to mess up the valk. I think applying a clearcoat with this kind of plastic is going to be a must before going the oil wash method. Whatever the finish is on the plastic of the v2s is just too absorbant.
-
I'll chime in on the panel lines here. I've got a Hikaru VF-1A that I plan to do this on. The plastic on these has an almost matte finish. I'm not sure if it's a matte clear coat or if the plastic is just textured that way. At any rate, it tends to soak up paint pretty well and with washes, it's hard not to discolour the plastic around the lines. I would recommend experimenting on some portions of the valk that won't be terribly visible. In my case, I'm trying first on the triple missle clusters. What I found, using thinned artist oil, is that the plastic will absorb a lot of paint, to the point that you'll need to use a great deal of thinner to wipe it off, and at the same time, probably remove most of the panel lining in the process. Needless to say, I haven't gotten it to stage that I'm ready to try it out on the valk itself yet! I will be experimenting on how long I leave it on before wiping it off and a few other things (how much to thin the paint beforehand, etc...) before I post my findings. Check out W M Cheng's various buildups, he's got a fantastic technique and that's what I'm trying to emulate with mine. He hasn't, to my knowledge, done any v2 1/60s though. Anyone care to chime in on their experiences? Maybe putting a clearcoat down first is advisable? One more thing, don't go with the gundam marker approach. There's one member here who did this on his VF-1D and wasn't at all happy with the results (it soaks in really fast and doesn't come off like it does on other plastics). Hope that helps!
-
Bandai 1/72 Scale Macross Frontier Model Kit Thread Ver.3
mickyg replied to azrael's topic in Hall Of The Super Topics
Start OT: I actually already had that page open, just to check that my version was actually "long life" and not the other one. Been looking for "one go" and can't find it anywhere in Melbourne. I'm guessing you're not in Victoria? End OT: Keep the photos coming everyone! Loving the G coverage too! -
Bandai 1/72 Scale Macross Frontier Model Kit Thread Ver.3
mickyg replied to azrael's topic in Hall Of The Super Topics
Alrighty, been lurking WAY too long here! Time to ask a question - General Chaos, I take it you're in Australia? You did mention previously that you used this drawing ink with Future right? I can't find a source for the stuff and have been experimenting with some substitutes (Pascoe's Long Life). I'm not really liking the results (not as clear as Future and it seems kinda brittle). Anyway, did you actually use Future or something else? I ask because your tint looks great and I'm hoping to achieve the same look with my VF-25G. Fantastic work by everyone that's shared their pics - really gives those of us holding off something to look forward to and a bit of confidence to go for it as well! -
Yamato 1/60 SV-51 - Macross 0 Nora type
Images added to a gallery album owned by mickyg in 1/60 Customs
-
Yamato 1/60 VF-1S v2 "No Paint Kit"- Custom Aggres
Images added to a gallery album owned by mickyg in 1/60 Customs
Work in progress pics (and maybe a finished one if I'm lucky!)