spanner Posted August 24, 2015 Share Posted August 24, 2015 Mostly done weathering my 19 Adv. Still have to do the feet and super parts. I'll do a proper shoot once I finish it all up. This thing just has a retarded amount of detail in all the hidden areas. Every time I think I've got it all, I find little hidden areas I missed doing a wash on. I bet they even molded details in areas you can't see unless you took the thing apart. as good as the Bandai came with all its fancy details but if it came like this!?!? Mind Blown! This looks sensational! Quote Link to comment Share on other sites More sharing options...
mickyg Posted August 24, 2015 Share Posted August 24, 2015 Beautiful! I wish I had the time to do mine up. Looks great! Quote Link to comment Share on other sites More sharing options...
chyll2 Posted August 24, 2015 Share Posted August 24, 2015 still waiting for Flory's model washes, my VF-19 Advance will receive lots of love from me (RIP re-sell value lol) Quote Link to comment Share on other sites More sharing options...
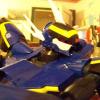
MacrossJunkie Posted August 24, 2015 Share Posted August 24, 2015 (edited) Glad you guys like it! Hmmmm... you should start again, finish doing the super parts and the feet then send it to me and I'll send you a new one. J/K.. sorta..Great work MJ it looks amazing! Hehe. Well, I was debating doing my second one with the broken head laser also. I could do that one and trade it as good as the Bandai came with all its fancy details but if it came like this!?!? Mind Blown! This looks sensational! I love that gif!Here are more pics with everything finished.Sorry for the lack of GERWALK pics. I messed with it for over an hour trying to get things locked in without scratching things.Even without the boosters on, it was just frustrating so I gave up and moved on to battroid. Bonus pic: Isamu has hated ghosts ever since THAT incident in 2040 at Macross City. However, some joker stuck a transmitter on his booster pod when he wasn't looking and now he has a pet ghost. Edited August 25, 2015 by MacrossJunkie Quote Link to comment Share on other sites More sharing options...
spanner Posted August 25, 2015 Share Posted August 25, 2015 They look incredible! Fantastic work MJ! Great to see the Bandai and Arcadia side by side! Quote Link to comment Share on other sites More sharing options...
abbadon Posted August 25, 2015 Share Posted August 25, 2015 Those look fantastic, MacrossJunkie! Quote Link to comment Share on other sites More sharing options...
ChaoticYeti Posted August 25, 2015 Share Posted August 25, 2015 That is a really impeccable detail job. Well done. Quote Link to comment Share on other sites More sharing options...
PsYcHoDyNaMiX Posted August 25, 2015 Share Posted August 25, 2015 Excellent work! I really love the yf-19 and vf-19. Your work puts everything into so much more perspective! Quote Link to comment Share on other sites More sharing options...
Saburo Posted August 25, 2015 Share Posted August 25, 2015 Superb work MJ! Quote Link to comment Share on other sites More sharing options...
no3Ljm Posted August 25, 2015 Share Posted August 25, 2015 Love it MacrossJunkie! Quote Link to comment Share on other sites More sharing options...
takatoys Posted August 25, 2015 Share Posted August 25, 2015 Please MacrossJunkie, put your pictures of the Arcadia and Bandai on the poll I created. By the way, which one do you like more? Quote Link to comment Share on other sites More sharing options...
MacrossJunkie Posted August 25, 2015 Share Posted August 25, 2015 (edited) Please MacrossJunkie, put your pictures of the Arcadia and Bandai on the poll I created. By the way, which one do you like more? Takatoys, you're more than welcome to link any of my pics you feel are appropriate. You can grab the links off of Flickr from these two albums: YF-19 and VF-19. An easier alternative way may be to just hit quote on a post and pull the corresponding links out of my posts from the ones at the top or my older YF-19 posts 1 2 As for which I prefer, that is a tough choice. I believe I had voted for the Arcadia in the poll, but the preference is very minimal. The main factor was that my favorite mode is fighter and the Arcadia's fighter mode proportions are great. The slopes and shapes are more pronounced like on the nose and neck, whereas on the Bandai, it's almost straight in comparison and the gullet area has a hump in the middle (Not Bandai's fault, just how it was designed and showed in the movie). The Arcadia version also doesn't have that unsightly gap in the wings with the tab when FAST packs are installed. The Arcadia also has the option for being a 2-seater and the GERWALK mode just looks tons better due to where the rotational joints in the legs were placed. On the other hand, the Bandai just has so much more detail that it's ridiculous. Huge points for that. Also, I didn't need to spend hours upon hours trimming, lining up and applying stickers since everything is tampo printed and there's an amazing amount of it. The ankles are nice and tight where I almost have to prop my Arcadia 19's up in battroid mode because they could fall over with a slight breeze due to the supremely loose ankles (although the rear right landing gear on my Bandai can't hold under the weight of the valk and always collapses the moment I set it down no matter what). The tranformation methods, while more difficult in some cases, are ingenious and very creative solutions to difficult problems. Edited August 25, 2015 by MacrossJunkie Quote Link to comment Share on other sites More sharing options...
VF-18S Hornet Posted August 30, 2015 Author Share Posted August 30, 2015 (edited) Well I just paid for my VF-0A Shin, it's going to sit in my private warehouse till next payday and I'll pay for shipping on Thursday so that it will arrive on Monday, hope I have better luck with this one, and speaking of luck I got my hands on some gorilla glue. It says that it can adhere plastic to metal haven't tried it yet been busy with other things but hopefully Monday will be they day I get started, on those repairs on my 0D he;s getting tired of lying on his back. MJ saw your pics on Flickr, I love them especially that faceoff between the Arcadia YF-19 and the Bandai VF-19A Advance. Edited August 30, 2015 by VF-18S Hornet Quote Link to comment Share on other sites More sharing options...
mickyg Posted August 30, 2015 Share Posted August 30, 2015 Is this in relation to the half plastic, half metal ball in the hip to thigh mechanism? If so, I can save you some money, that plastic "cap" is not glued in many ball joints made this way. The pressure of the walls of the socket is what usually holds it in place. I dismantled my VF-19Advance (warning: don't do this as it's a royal PITA to get back together) to see if I could loosen it up some on the side that is always too tight. It had that half/half ball like the 0D and it was not glued. And I recall some shoulder joints like this too. In short, the lack of glue is not responsible for the joint pulling out. If I had to guess, I'd say it's poor tolerance between the ball and socket sizes. As in, the socket is too big for the ball somehow. That, or the lip inside the ball, closest to the opening isn't tight enough around the post side of the ball. Glue will help with getting it back together but I don't think it'll help keep it that way. Quote Link to comment Share on other sites More sharing options...
VF-18S Hornet Posted September 2, 2015 Author Share Posted September 2, 2015 Good news I was able to do the fix yesterday and the glue worked I just let the pictures show you. Okay the shots with the results of my labor is not in my computer as it's still in my camera, these are some of the shots I will be posting in the repair thread soon with some instructions. Gorilla glue works Quote Link to comment Share on other sites More sharing options...
spanner Posted September 2, 2015 Share Posted September 2, 2015 Nice work! its good to know that there is a fix available for this.. not that I ever intend it to happen to any of my Zero's.. Quote Link to comment Share on other sites More sharing options...
no3Ljm Posted September 2, 2015 Share Posted September 2, 2015 (edited) Good news I was able to do the fix yesterday and the glue worked I just let the pictures show you. Okay the shots with the results of my labor is not in my computer as it's still in my camera, these are some of the shots I will be posting in the repair thread soon with some instructions. Gorilla glue works Thanks for sharing this Hornet. Also, can you repost it in the Macross Maintenance thread so that it will help others. And can some mod please 'pin' that thread for others to check since it's related to quick fix on our beloved Valk collections. Thanks. Edit: By the way, how did you manage to open up the thigh section in order to open up the intake area? I had a hard time just by trying to open it up and the back part, which has the blue paint, won't buldge somehow and I don't want to force it by prying it from the front. Any photos that you have when you dismantle or assembling the thigh section? I just want to tighten the knee joint and that's the part I need to open. Thanks. Edited September 2, 2015 by no3ljm Quote Link to comment Share on other sites More sharing options...
Mr Bomber Posted September 2, 2015 Share Posted September 2, 2015 Glad you guys like it! Hehe. Well, I was debating doing my second one with the broken head laser also. I could do that one and trade it I love that gif! Here are more pics with everything finished. Sorry for the lack of GERWALK pics. I messed with it for over an hour trying to get things locked in without scratching things. Even without the boosters on, it was just frustrating so I gave up and moved on to battroid. Bonus pic: Isamu has hated ghosts ever since THAT incident in 2040 at Macross City. However, some joker stuck a transmitter on his booster pod when he wasn't looking and now he has a pet ghost. wow Macrossjunkie, it looks really awesome! congratulations! im tempted to try that myself on mine. Quote Link to comment Share on other sites More sharing options...
ChaoticYeti Posted September 2, 2015 Share Posted September 2, 2015 Good news I was able to do the fix yesterday and the glue worked I just let the pictures show you. Okay the shots with the results of my labor is not in my computer as it's still in my camera, these are some of the shots I will be posting in the repair thread soon with some instructions. Gorilla glue works Hahaha! I just had to do this for my brand new VF-0A! Seeing this first would have been mighty helpful, but I through ok. Quote Link to comment Share on other sites More sharing options...
VF-18S Hornet Posted September 7, 2015 Author Share Posted September 7, 2015 (edited) Thanks for sharing this Hornet. Also, can you repost it in the Macross Maintenance thread so that it will help others. And can some mod please 'pin' that thread for others to check since it's related to quick fix on our beloved Valk collections. Thanks. Edit: By the way, how did you manage to open up the thigh section in order to open up the intake area? I had a hard time just by trying to open it up and the back part, which has the blue paint, won't buldge somehow and I don't want to force it by prying it from the front. Any photos that you have when you dismantle or assembling the thigh section? I just want to tighten the knee joint and that's the part I need to open. Thanks. Hahaha! I just had to do this for my brand new VF-0A! Seeing this first would have been mighty helpful, but I through ok. Hi sorry it took me long to respond getting home from my job, and I never seem to have any time to mysyelf after a 40 minute commute from Philly I will have some detailed instructions worked up soon using word and upload them, sadly I didn't take picture during the dismantling, just after but to answer your question on how I seperated the leg from the intake joint. I simply used small screwdrivers both a flathead and a philliphead. There is a tab covering the screw in the thigh of the toy, just remove the tab and start unscrewing, the same with the uncovered screw in the intake. As for the prying I used the small flathead in between the outer armor and the inner parts of the uppler and lower joints to open up the front just wide enough to get the intake joint out; however, this seems to only work for the front seam of the leg which works fine cause the pin that is in the intake connects to the lower thigh for the gerwalk to work must also be removed. The only reason I say this works is to not place to much stress on the pegs to are tightly secured in the rear of the outer leg armor. Despite all the wiggling and prying the rear would not give more thant he front didI think they glued it during assembly, happy Labor Day Edited September 7, 2015 by VF-18S Hornet Quote Link to comment Share on other sites More sharing options...
derex3592 Posted September 13, 2015 Share Posted September 13, 2015 Had some time today, so I got my new Isamu 29 all panel lined up and ready to go! Quote Link to comment Share on other sites More sharing options...
spanner Posted September 13, 2015 Share Posted September 13, 2015 great work Derex! looks awesome! especially this shot! Quote Link to comment Share on other sites More sharing options...
derex3592 Posted September 13, 2015 Share Posted September 13, 2015 (edited) Thanks! Basically I wanted to show the top of it and was to lazy to go back to fighter mode...lol. Also, got some stickers on my Zola Patrol 19. I just kinda had fun, so I know they may not "be correct". And a 29 group shot! Edited September 14, 2015 by derex3592 Quote Link to comment Share on other sites More sharing options...
spanner Posted September 14, 2015 Share Posted September 14, 2015 Your 19P looks great with stickers! I would do the same to mine but I have mine in Battroid and don't want to change it back as I prefer to have the 19Kai in fighter. I wish they tampo the UN Spacy on the VF-19.. And your 29 group looks fantastic! Just missing Alto's 29 and its complete! Do you think you will get the Alto? Quote Link to comment Share on other sites More sharing options...
derex3592 Posted September 14, 2015 Share Posted September 14, 2015 (edited) No. It's just toooo much red. Can't be that red unless ur a karaoke ninja named Basara.... Also, I did TRY to panel line the Zola 19, but ended up bailing out about half way in and washing it off as the Yamato lines were just damn shallow to hold the wash, which sucks as it was gonna look pretty cool. Arcadia could learn a few things from Bandai about how to do perfect panel lines. Edited September 14, 2015 by derex3592 Quote Link to comment Share on other sites More sharing options...
spanner Posted September 14, 2015 Share Posted September 14, 2015 No. It's just toooo much red. Can't be that red unless ur a karaoke ninja named Basara.... Also, I did TRY to panel line the Zola 19, but ended up bailing out about half way in and washing it off as the Yamato lines were just damn shallow to hold the wash, which sucks as it was gonna look pretty cool. Arcadia could learn a few things from Bandai about how to do perfect panel lines. yeah I guess they do look a little too red but still they ain't too bad.. I keep mine in fighter mode which looks a lot better! I think you should have another think about getting one! At least for the sake of finishing the collection seeing you're essentially 80% there already owning the others. And I think you'd appreciate it more once its in your hands! And yes I have heard some folks having trouble with the shallow panel lines on the Yamato 19's.. but it has been successfully done though! a shame you bailed on it as it would have looked the bollocks! Quote Link to comment Share on other sites More sharing options...
Saburo Posted September 14, 2015 Share Posted September 14, 2015 (edited) VF-27β photos are done. Edited September 15, 2015 by Saburo Quote Link to comment Share on other sites More sharing options...
spanner Posted September 14, 2015 Share Posted September 14, 2015 Gorgeous photos Saburo! Geez you always manage to bring out the best in what ever ends up in front of your camera! Beautiful work as always! And these photos just reaffirm my feeling that the (v1.5+) VF-27 and the Grace version in particular is indeed my favorite Frontier Valkyrie! Quote Link to comment Share on other sites More sharing options...
spanner Posted September 14, 2015 Share Posted September 14, 2015 VF-27β photos are done. Hey Saburo do you think you could do a few more shots just like these above but with the clear canopy, boobed pilot (Grace) and with the engine intake covers removed? This is how I have mine on display and I think it would be cool to have some photos by you done the same way! I'd love to use them as my pc wallpaper.. If not then its all good. Quote Link to comment Share on other sites More sharing options...
Saburo Posted September 14, 2015 Share Posted September 14, 2015 Gorgeous photos Saburo! Geez you always manage to bring out the best in what ever ends up in front of your camera! Beautiful work as always! And these photos just reaffirm my feeling that the (v1.5+) VF-27 and the Grace version in particular is indeed my favorite Frontier Valkyrie! Thank you spanner! The VF-27 is my favorite of the Frontier Valks. especially the VF-27y (if they would only release ghosts for it). Hey Saburo do you think you could do a few more shots just like these above but with the clear canopy, boobed pilot (Grace) and with the engine intake covers removed? This is how I have mine on display and I think it would be cool to have some photos by you done the same way! I'd love to use them as my pc wallpaper.. If not then its all good. I can do that, but do you want the commander head on the fighter or the standard head? The reason I ask is because I swapped for the standard/CF head to display because the antenna/head gun was cracked when I opened the box. Quote Link to comment Share on other sites More sharing options...
spanner Posted September 14, 2015 Share Posted September 14, 2015 Yeah the ghosts for Brera would be so cool! But I doubt they will ever make them.. That sucks that the head laser thing was broken.. Maybe then use the CF head, I don't mind.. unless you can swap the head laser from Brera just for the photo shoot! hehe! im kidding, I don't expect you to do that. Looking forward to the photos! Quote Link to comment Share on other sites More sharing options...
abbadon Posted September 14, 2015 Share Posted September 14, 2015 Wow, those look great, Saburo! The filters you're using are really making the colors pop. Quote Link to comment Share on other sites More sharing options...
no3Ljm Posted September 14, 2015 Share Posted September 14, 2015 Great pics! Quote Link to comment Share on other sites More sharing options...
Sildani Posted September 14, 2015 Share Posted September 14, 2015 Great pics Saburo! Thank God I got my 27, I'd be eating my heart out if I hadn't, then seen those pics! Quote Link to comment Share on other sites More sharing options...
VF-18S Hornet Posted September 14, 2015 Author Share Posted September 14, 2015 Thank you spanner! The VF-27 is my favorite of the Frontier Valks. especially the VF-27y (if they would only release ghosts for it). I can do that, but do you want the commander head on the fighter or the standard head? The reason I ask is because I swapped for the standard/CF head to display because the antenna/head gun was cracked when I opened the box. noticed the crack in of you pictures, was it some manufacturing defect of a clumsy employee at Bandai dropped when he was putting in the tray. Well anyway my 0A has arrived today can't wait to open it up, but what I seeming from the VF-0d and A thread is that people is haveing the same problem with the A's half ball socket comming off like it did with the 0D. I hope I get lucky with this one, if not this time I'll take picture of the disassembly. Quote Link to comment Share on other sites More sharing options...
Recommended Posts
Join the conversation
You can post now and register later. If you have an account, sign in now to post with your account.