Budokhan
-
Posts
39 -
Joined
-
Last visited
Budokhan's Achievements
Cannon Fodder (1/15)
5
Reputation
-
Many thanks! Reposted it there, wouldve done in the first place but couldnt find that forum...User Error 404
-
Hey Folks! I'm building a custom 1/72 Super Strike Stealth-Fold VF out of Bandai's Latest variable mode plastic kit ( I know, its not the greatest kit to work with but I still like the engineering of it ) & was wondering if anyone has a spare VF-1J head they could part with for cash? I realize the only new BANDAI kit so far that has the VF-1J head ( I think ) is the new MAX & MILLIA combo kit but maybe someone has one who like me, has other plans for one of those & can give up a noggin? I'd sure appreciate it ! Much thanks in advance!
-
Thanks very much for the kind words, glad you like 'em! Thanks for the compliment on my Vipers, coming from an uber talented guy like you, thats high praise indeed! Those're some mighty fine inspirational ideas you wrote there, I do have a home Photoetching set I should really make good use of & I think these little guys would make a great first use for it! If you wouldn't mind granting a tad more advice, would you have an ideal thickness & material you prefer for such a project? Also guys, Im sure many of you have seen this already but I having not been keeping up to date so much over the last few years on all things Macross-related, just caught wind of this via a great friend of mine over in Japan! : http://www.hasegawa-model.co.jp/product/mc05/ I cant wait for this to come out as Its pretty much exactly what I had planned for my kit & lets face it...its Frakkin Hasegawa which pretty much means its gonna be gorgeous!!! Edit: I just found this guy for cheap here: http://www.1999.co.jp/eng/10308073
-
haha! Thanks! Yeah, you pretty much need a pair to see 'em! But yeah, the plan is to eventually mold,cast & paint up a bunch of 'em in various schemes. I could probably get away with minimal paint work too..like only the wing,rudders & strongback stripes, the canopy & the feet/afterburner cans. I do! I do! I actually made this little guy via satellite imagery redirected back down to my workbench! Thank ya veruh much! Thank you! Thanks for the kind words! Photo-etched huh? Hmmmmm....Ya know, I bet I could get just a top-view silhouette to use for the outline for a PE buck & build very carefully onto it to get a better representation! That way, I'd actually have thin wings & not big blocks that went straight down the the ground. But to answer your question, yes, the ultimate goal is to make a gang mold of at least ten, cast those up to the max & paint 'em all up to be mounted either on the carriers (whichever ones I wind up using that is ) and/or having them mounted in flight patterns for C.A.P. around the SDF-1. I've done something similar a number of years back for some scratch-built Micro-Vipers that are in scale with the old school Revell/ Monogram BSG so I think The Valks would look cool done that way too ! & a very large thanks too for inspirational idea of PE! Hadnt given that a thought before!
-
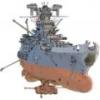
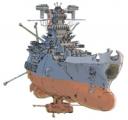
Hey Folks! Just wanted to share a tiny bit of scratch-built fun! A bunch of years back I got an old 1/5,000 IMAI SDF-1 Cruiser Fortress kit & thought it'd be neat to have a few Valks lined up for launch on the carriers. Bear in mind that the Tiny valk itself is no more than 1.74 mm in length (.0685") & really has no surface detail, just waay too small to even try ya know? It was made by Supergluing a super thin piece of sheet styrene down to a thicker sheet & then, using powerful opti-visors, little by little carving away til I had a semblance of a Valkyrie! Id love to cast it up & see if I couldn't add tiny Fast-pack boosters to the top of it. I had thought about getting a pair of ARMD carriers in scale to swap out for the Daedalus & Prometheus to go for more of the DYRL look but no dice. I Guess I could scratch-build one & cast it up twice but if someone had already made one up, it'd make my life a lot easier! Anywho, just thought id share, hope you guys enjoy the mini-madness!
-
Thanks very much for the info about the HUD & the much appreciated links! & thanks again too for the wonderful compliment on the reworked pilot figure, I'm hoping that eventually I'll have the ability to mold & cast him up & offer him for sale! If you have that Bandai kit, have a go at that mod, its not really hard to do & will help make the kit look loads better!
-
Thanks very much! Go for it dude, if there's anything I can help with, don't hesitate to hit me up! Thanks very much my friend, glad you like the pilot rework! Ya know, I actually was thinking about putting an LED into the cockpit to lite the controls! I'd have to modify the main console to be almost a solid piece with an aperture in it to accept the LED & then clear-cast the whole shebang. The only place i can see however, to put the batteries & switch would be the tip of the nose but its so tight in there I'd have to get some smaller than usual button batteries & a real tiny slide switch. Something I was pondering on & maybe you guys would have some better insight into this, I was considering scratchbuilding an HUD for the top of the main console but I'm not sure if the DYRL version Valks had it too or was it mainly just TOS that had them? Also, I'd love to get my hands on one of those "Jasmine Model" photoetch sets as they seem to have a buttload of detail bits! http://www.jasmodel.com/PRODUCT/272003/272003_E.htm
-
Thanks very much for your kind words about the pilot figure! The little guy was fun to work on! I hear ya on the whole hip issue, I was so happy to finally be able to transform it when it was finished into Battroid mode that when the whole hip thing just kept popping open, I nearly lost it! lol I was like..."Okay, maybe I can post pics of him when he's done & label him the world's first schwasted Valkyrie!" I already fixed the issue with the hinged section under the nose & the waist swivel joint that pulls down but I'm still noodling over the best way to fix the the hip/leg connector peg sexction. Maybe we can all bounce ideas off eachother & come up with a way that'll benefit everyone trying to fix this kit? Thanks again man! looks like ya found me over here at MW!
-
Ok, so after a bit more carving & gouging & scraping & cutting than I thought I would need to do,I got the cockpit opened up enough to fit the Hasegawa pilot! The first four shots show the cockpit with the unmodified figure & the last two show the cockpit with the reworked figure. I think he fits in pretty good despite the fact that he's slightly more bulky than the kit supplied figure! The big hole in the floor will eventually be replaced by thin sheet styrene & detailed up to look like a cockpit floor. That's it for now guys! Cheers!
-
Thanks man, so much! I'm hoping he's worth the wait too!
-
Hey Brett! Thanks so much for the great compliment! Its truly not that bad of a kit. Like most kits, it just needs a bit of TLC is all to make it shine! Thank you very much for the kind words! The "flesh" colored material you see on the grey primed pilot figure is a form of sculptor's wax that I used to use when I was in the toy industry. Its great stuff! It takes a bit of heat to melt it, can be applied in built up layers to the rough dimensions needed, carves & holds detail really well! Thanks! Got more I'm gonna post shortly! Thank you Thank you! As far as his noodle goes, by the time I'm done with all the proportion corrections, it'll look just fine! Besides, its gettin "remodeled" slightly to look a bit menacing hehehe Hahaha! my E-ville plan has worked! Seriously tho, give it a shot, this kit aint half bad with a little TLC! Coming from someone as talented as yourself, thats one helluva great compliment! Thank you very much!
-
Hey gang! So I was figuring out the proportions I'd need to make the arms look right & here's what I got so far: I temporarily beefed up the top & side of the shoulder & all the way round the upper forearm with pieces of 0.027" thickness styrene sheet. Also, the new hands he's getting, "Hobby Base 1/100 square fingered" help to make him look more proportionate too. It def looks better imho & now he doesn't look like he's got hydrocephalus so much !! Lemme know what you guys think! Cheers! ~BK
-
Im hopin I can pull it off too, Thanks!! & that pic came from the "Macross Chronicle Vol.7" magazine. I DL'ed a copy of it from somewhere & then put that page with the pic thru photoshop to clean it up. If ya want, I can send ya the full size file thru PM? lemme know?
-
So I kinda got the new afterburner parts figured out, just roughly for now tho. Parts are held there with double back tape & blue tack just so I can get a feel for where everything's gonna land. Plus,I figured where to store the batteries. The stabilizer fin on each side will be part of the slide switch for that side's LED liting. I hadda remove a fair amount of the inner directional vanes from the back ends & some meat from the walls to accommodate the new setup: Originally, I had wanted to come up with a mechanism that would allow the separate ducts to "push" apart slightly when the feet were opened but I think,in retrospect, that mighta been to ambitious. So instead, I'm just gonna hard mount the ducts together but slightly separated & on a slighlty convex surface which will eventually be backfilled to fit the existing piece & have the aperature for the mini LED: Just a shot to show that everything fits with the feet closed. The 2 smaller ducts are still there, just kinda obscured by the vanes. When its all lit tho, you should be able to see each duct! Cheers gang! ~BK
-
Thanks very much! Currently workin on a replacement part for the afterburner nozzle in the foot that resembles the type seen in DYRL, the one that has like 4 or 5 rectangular nozzles mounted one to another horizontally: Gonna try & make it so that it can be clear cast & lit with super bright white LED!