mechaninac Posted March 20, 2015 Share Posted March 20, 2015 (edited) Regarding tools: Good scissors, #11 X-acto knife and/or razor blades, Steel ruler (to use as a guide for the knife/razor and as a bending tool by itself, or as an aid to the razor blade), Low tack tape (the drafting kind would be ideal) to hold parts together while glue dries, and without causing damage upon removal, Glue (White Elmer's should work); two-part epoxy cement could be useful wherever extra strength is desired Lots and lots of patience. Edit: Something else that I just thought might be useful are plastic sheets to use as backing for large areas; if cut to shape and cemented to the paper model's inside surfaces it would help prevent buckling. Edit 2: anyone else with further input, please contribute. Edited March 20, 2015 by mechaninac Quote Link to comment Share on other sites More sharing options...
Nyankodevice Posted March 20, 2015 Share Posted March 20, 2015 Mine should be arriving in the next few days (non registered SAL shipping). I've NEVER done this kind of papercraft before. Any tools I should have on the ready? Cutting knife w/ extra blades, paper glue or my preffered adhesive laquer... Well if u can wait a couple of days.... I'll cover all u need to know in a build thread... Also this isn't my first TV SDF-1 made out of paper Quote Link to comment Share on other sites More sharing options...
CF18 Posted March 20, 2015 Share Posted March 20, 2015 ill cover tools, glues and touchups also handling of difficult areas and strengthening Much appreciated. I can decode plastic model instructions easily despite known very little of Japanese, but even just the first step of this instruction confuse the hell out of me. Also do any one have access to good scanner to create backup? Would be great for fixing inevitable screw ups... Quote Link to comment Share on other sites More sharing options...
TMBounty_Hunter Posted March 21, 2015 Share Posted March 21, 2015 Is anyone planning an upscaled build? Maybe 1/350? Quote Link to comment Share on other sites More sharing options...
Nyankodevice Posted March 21, 2015 Share Posted March 21, 2015 Is anyone planning an upscaled build? Maybe 1/350? LOL!! i was planning to have it upscaled to A3 papersize which would make the scale around 1/1600 and the model would be around 75cm in lenght Quote Link to comment Share on other sites More sharing options...
charger69 Posted March 23, 2015 Share Posted March 23, 2015 I would buy an 1/3000 upscale Quote Link to comment Share on other sites More sharing options...
Nyankodevice Posted March 24, 2015 Share Posted March 24, 2015 ok guys ive started the new build thread..... link is in my signature down below Quote Link to comment Share on other sites More sharing options...
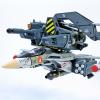
treatment Posted March 25, 2015 Share Posted March 25, 2015 delivered today escorting Squidy! Squidy's gonna join the shelf soon, but really dunno when I'll ever find the courage to cutout and put together that 1/2400 SDF-1 papercraft... Quote Link to comment Share on other sites More sharing options...
sketchley Posted March 30, 2015 Share Posted March 30, 2015 Some instructions included in the book (just scanned this topic, doesn't look like anyone's posted them yet): Pg 53 Tools: knife, ruler, woodworking glue (quick-drying type is useful), double-sided tape (5 mm wide type is useful), bamboo skewers (for spreading glue), 3 toothpicks (for the 3 antenna), cellophane tape, pin set (ones with sharpened tips are useful), tissue (two-ply), handicraft mat, color pens (if coloring the paper cross sections) Fundamental Construction: 1) if you miss when cutting the parts or to confirm construction, make a copy on either normal or thick paper. 2) checking the parts list page, while taking care if its an inner or outer fold, steadily make the fold. 3) before affixing parts, confirm their final position 4) glue on the diamond shapes to the white surface using the instructions 5) until the glue dries, keep the parts firmly together (use the pins in the small places) 6) in places where you can see the white paper, use similar colored pens to finish the papercraft neatly. Preliminary Setup: 1) before cutting, run the back of your knife edge along the cutting line using a ruler 2) cut each part in order. Mark the part number on the back of the parts you cut out. 3) use the double-sided tape on the parts that are written on in green letters (use glue on the diamond triangles that don't have anything written on them in black, and the parts that are written on in red, pink-grey, and blue-grey. (...) Parts List: Black Lines: cut blue lines: "mountain" folds (colour side out) red lines: "valley" folds (colour side in) green lines: roll the parts into a circular shape so the ends meet That's the gist of things (there's always more, of course). Hope it helps. Quote Link to comment Share on other sites More sharing options...
sketchley Posted April 19, 2015 Share Posted April 19, 2015 (edited) Giving this a stab. Seeing as the publisher actually tells us to make copies of the papercraft, it dawned on me that I could make both versions of this kit - the Storming Attack Mode and Fortress Mode! Step 1: Getting the pages out of the book. I initially tried to remove the pages from the binding by using a hair dryer, but I quickly found that was a no-go, as there is stitching in the binding. So, out came the hobby knife. There was definitely a lot of tension as I was slicing to keep from either slicing too deeply into the book and ruining the non-papercraft pages, or slicing into the parts of the pages due to end up in the finished model. As is, I did accidentally slice the back cover a bit. The dust cover should cover it up and prevent anything from making it worse... Step 2: scanning and printing Both the easiest and most frustrating part. A few years ago, we upgraded printers from an Epson (no end of hair being pulled out for other reasons) to a Brother - and I've been less than satisfied with the built-in scanner that comes with it. In short - despite it having the right dimensions for it, it doesn't scan the full A4 height. And lets not get started on the colours (another headache of a Japanese printer/scanner combined with a lack of proper drivers for the Photoshop version I use). So, luckily the cropped A4 scans got all of the papercraft parts in one pass (though the VF strip didn't make it in one piece, but as they're not essential to the finished kit, it's no hair off my chin). Alas, the first test print I did on Deleter A4 135 kg paper came out in an interesting shade of pink. Something I can live with. But it's a bit annoying to have to colour correct the red hue in all subsequent prints. Print Pg 1 - no mods: Print Pg 2 - distilled pink: Step 3: construction When I started putting knife to paper, I had a wave of nostalgia. I have a feeling that I did something extremely similar to papercraft when I was around 10. Though, nothing near as detailed (read: frustrating and time consuming) as this kit. Case in point - the top of the bridge in the picture below took about 1 hour last night to fold and glue! (Mind you, I was watching Mythbusters and doing it during the CMs...) The pink hue is less noticeable, eh? ... and the big question all throughout this remains: do I make both versions from scans, or complete the destruction of half the book, and make only the Fortress Mode version from the scans, and the Storming Attack Form from the book? The pages for the papercraft make up about half the books width, and as I don't think there's any way to remove what's left of them in the book from the spine while retaining the back cover, I'm waffling over preserving them in the book (and running the risk of ruining the pages themselves), or using them and seeing the back cover and dust cover get wrecked. Edited April 19, 2015 by sketchley Quote Link to comment Share on other sites More sharing options...
sketchley Posted July 31, 2015 Share Posted July 31, 2015 And here are the first few pages of the instructions: http://www.monkeybacon.host-ed.me/OTMiscBooks/SDFMacrossPapercraft.php Hopefully they'll be helpful to you guys that are also working on this kit. Quote Link to comment Share on other sites More sharing options...
Greg Posted August 2, 2015 Share Posted August 2, 2015 Not sure if I should wait for the DYRL version or scan, vectorize, and recolor this one. Quote Link to comment Share on other sites More sharing options...
Recommended Posts
Join the conversation
You can post now and register later. If you have an account, sign in now to post with your account.