![]()
Graham's
Review of
Yamato's 1:3000 Scale SDF-1 Macross (DYRL
Type)
Introduction
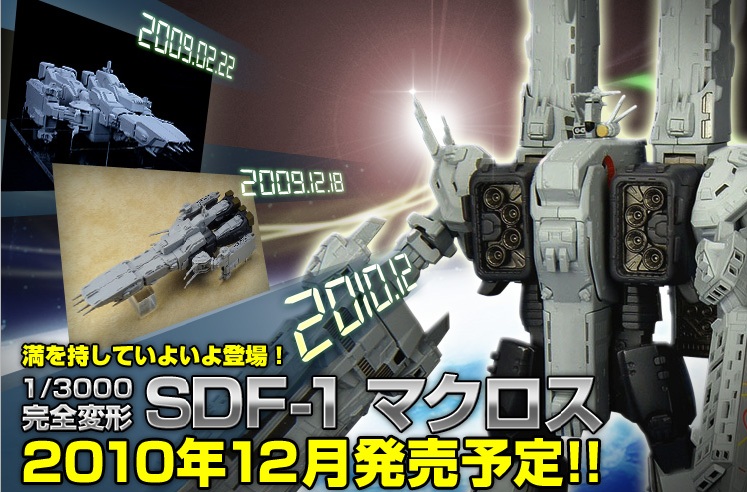
After Yamato’s unassembled and extremely limited 1:2000 scale SDF-1 Heavy Duty Resin (HDR) prototype kit sold better than expected back in 2009, for a price of 210,000 Yen, Yamato decided it would be worthwhile making a foray into a smaller scale, assembled toy version. 1:3000 scale was decided upon as the scale and design work began, with the intent to release the toy by the fouth quarter of 2010.
Yamato's new 1:3000 scale SDF-1 DYRL version is scheduled for release in Japan on 28th December 2010 at a recommended retail price of 32,800 Yen (32,800 Yen after tax for Japan residents).A bit about the design genesis of this toy. Yamato have informed me that the 1:3000 SDF-1 is based partly on the scaled down 1:2000 model and is partly a new design (with new functions). When they first made the 1:3000 prototype, it was completely based on the data of the scaled down 1:2000 model. However Yamato's design team noticed that when scaled down, it looked different even though it was an exact scaled down replica of the 1:2000 kit.
As a result, Yamato adjusted the proportions, mainly of the leg and shoulder area to make it look proportionally better in the smaller size and decided to also add some additional functions such as shoulder and hip joints. They have also added knee joint articulation, which the larger 1:3000 version lacks.
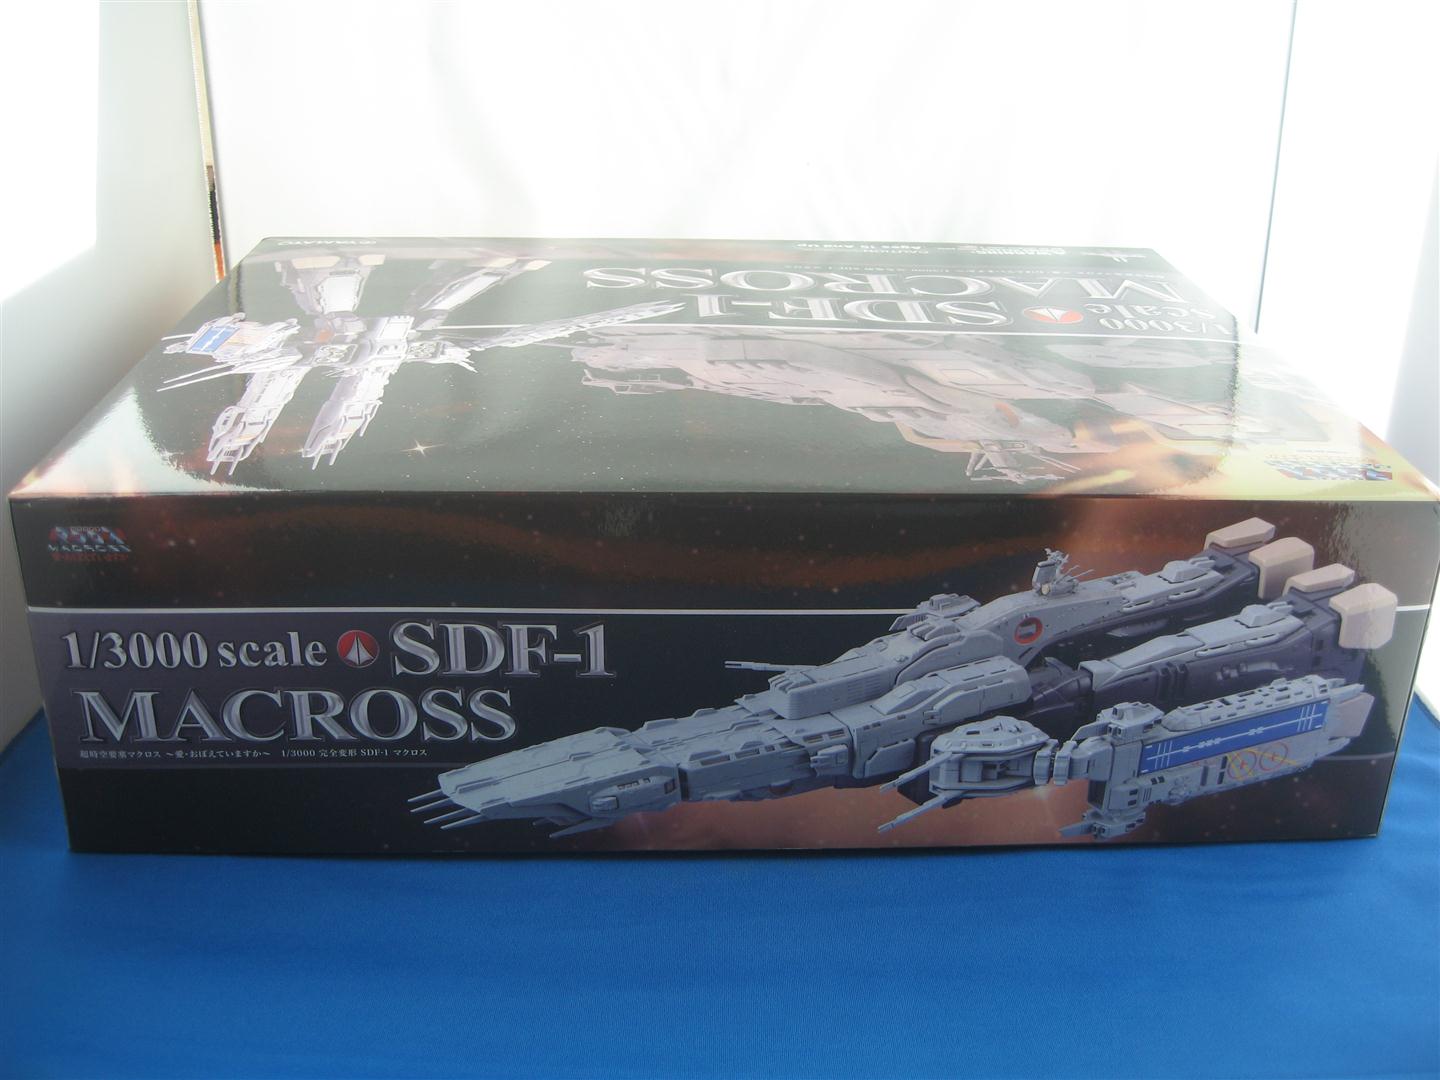
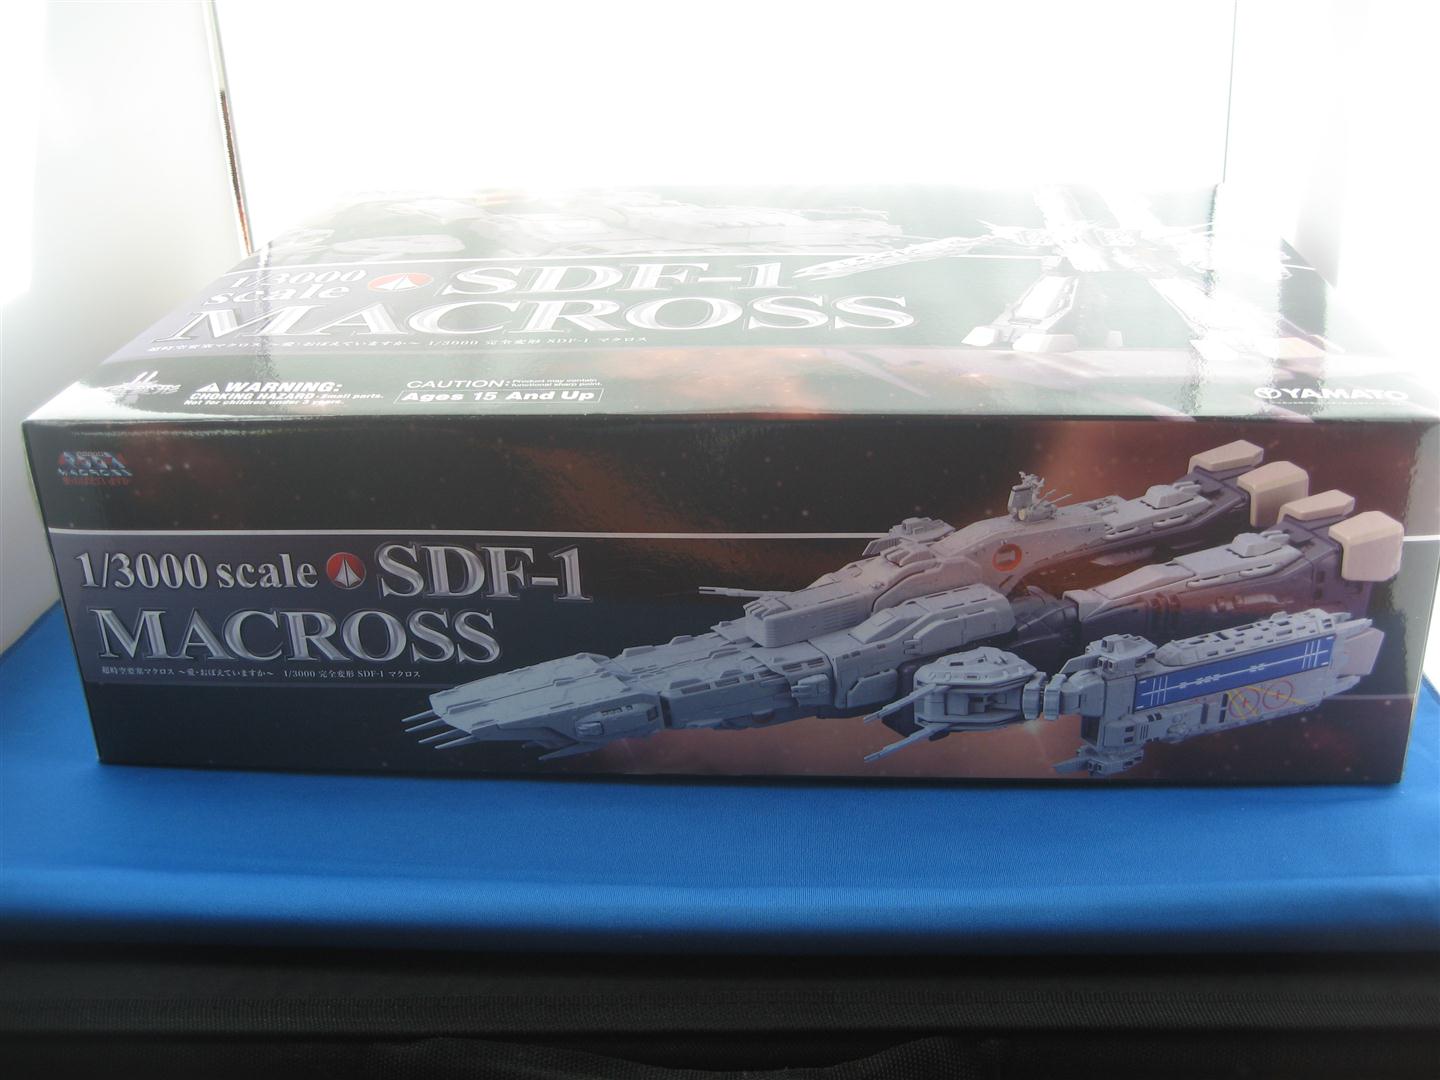
PackingThe outer box of the 1:3000 scale SDF-1 is a closed style (non-window box) made of the same type of relatively thin card stock used for the boxes of other Yamato Macross products.
The box featuring Photoshop artwork of the toy. While I’d love Yamato to use thicker card stock for the box and have box art by Tenjin, these things would only drive up the price of an already expensive product.
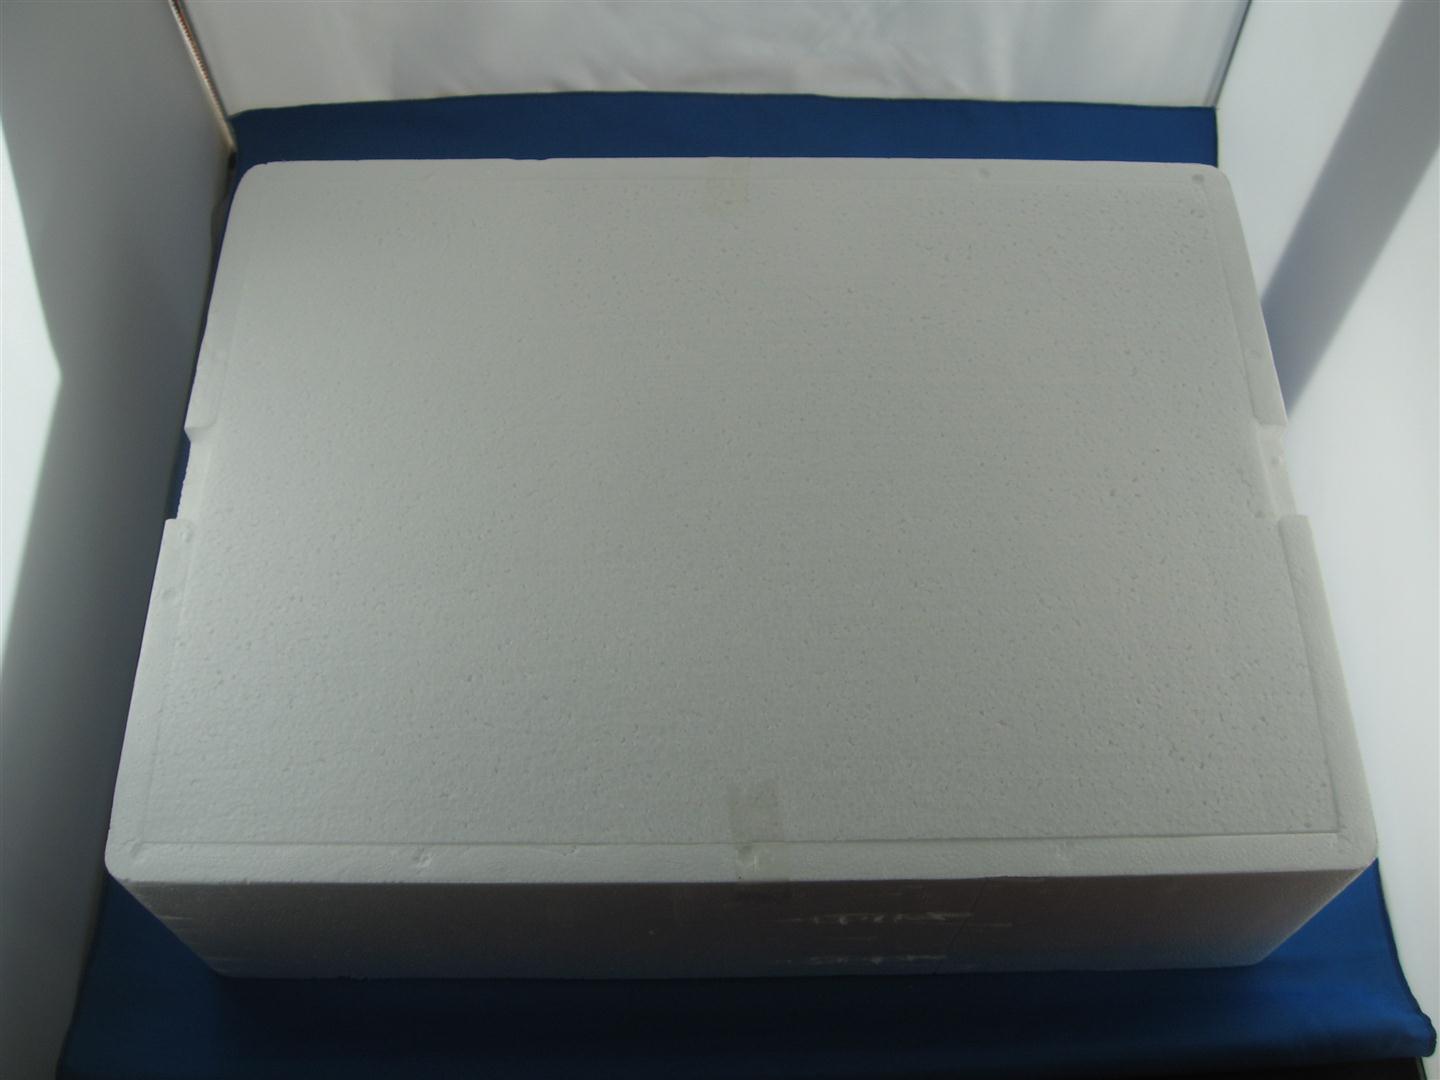
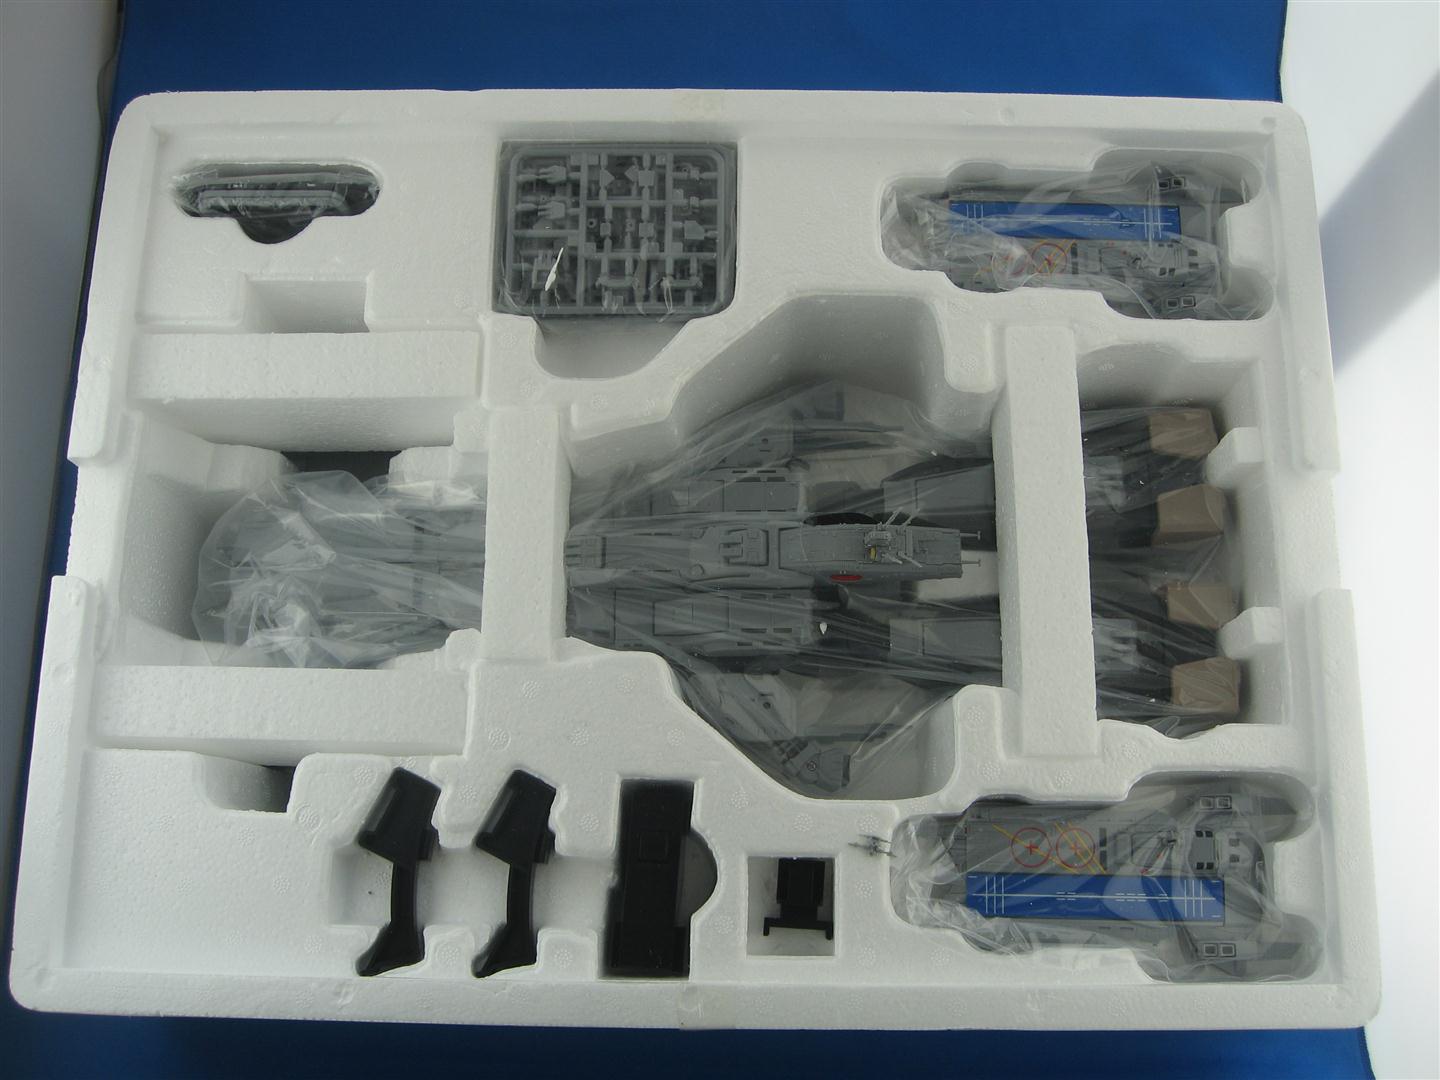
Opening up the outer box reveals a definite treat for old-school toy collectors. Inside the toy is packed neatly in a polystyrene tray with individually shaped cut-outs for the toy and various accessories, all covered with a polystyrene top cover. There’s just something so cool about opening up a toy box and seeing the toy nestled in that white polystyrene. The SDF-1 itself is also packed inside a protective clear plastic bag for extra protection.
SDF-1
BOX |
|||
 |
 |
 |
 |
 |
 |
 |
 |
 |
 |
 |
 |
A word of warning about the top cover. Getting the polystyrene tray out of the card box is quite tough as it is a tight fit. As I was pulling out the tray, my thumb went through the edge of the thin polystyrene top cover, damaging the edge.
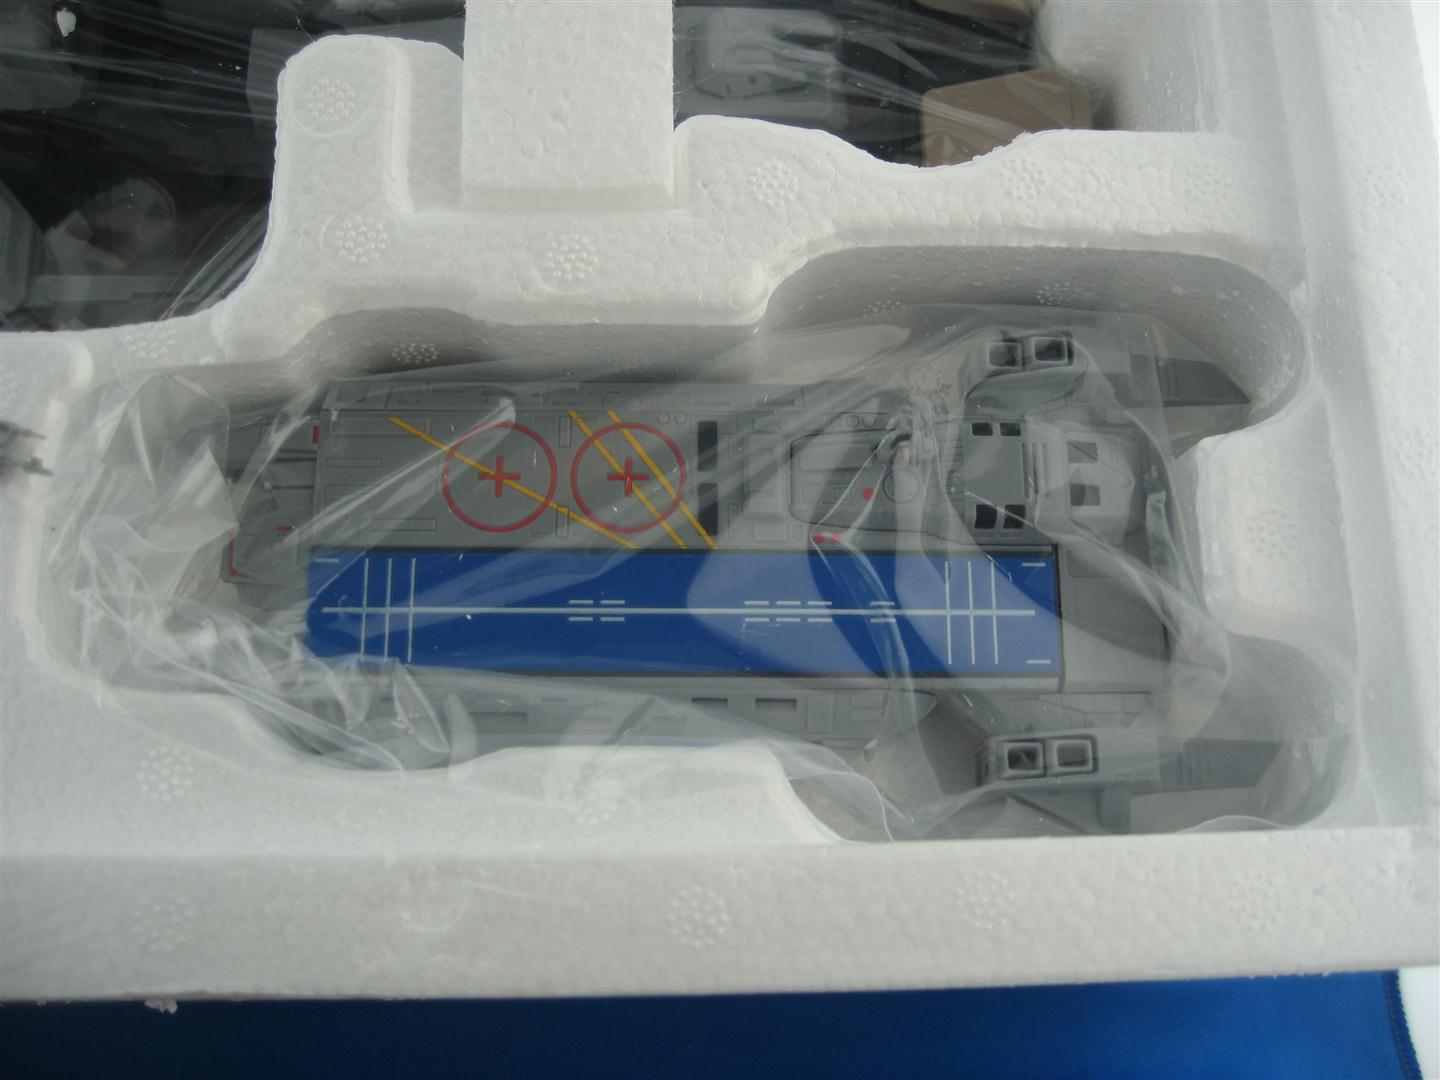
The toy comes packed in the box in Cruiser (spaceship) mode, with four additional polystyrene blocks securing the toy in place and preventing any shifting. The two ARMDs are unattached from the SDF-1 and reside in separate cut-outs. The unassembled display stand is packed under the toy. Given the size of the toy, Yamato have done a good job of keeping the packing reasonably sized, while still providing suitable protection for what is an expensive collectors grade item.
A second word of warning, the plastic bag that the SDF-1 comes in has a hole cut out for the antenna mast. Be careful when removing the toy from the bag as it is easy to snag the antenna mast on the hole and pull the piece off, as it seems to be only lightly glued on. This is what happened to me. Luckily the POM antenna mast piece was not broken and was easily glued back in place with a small dab of super glue.
You get the following contents in the box:
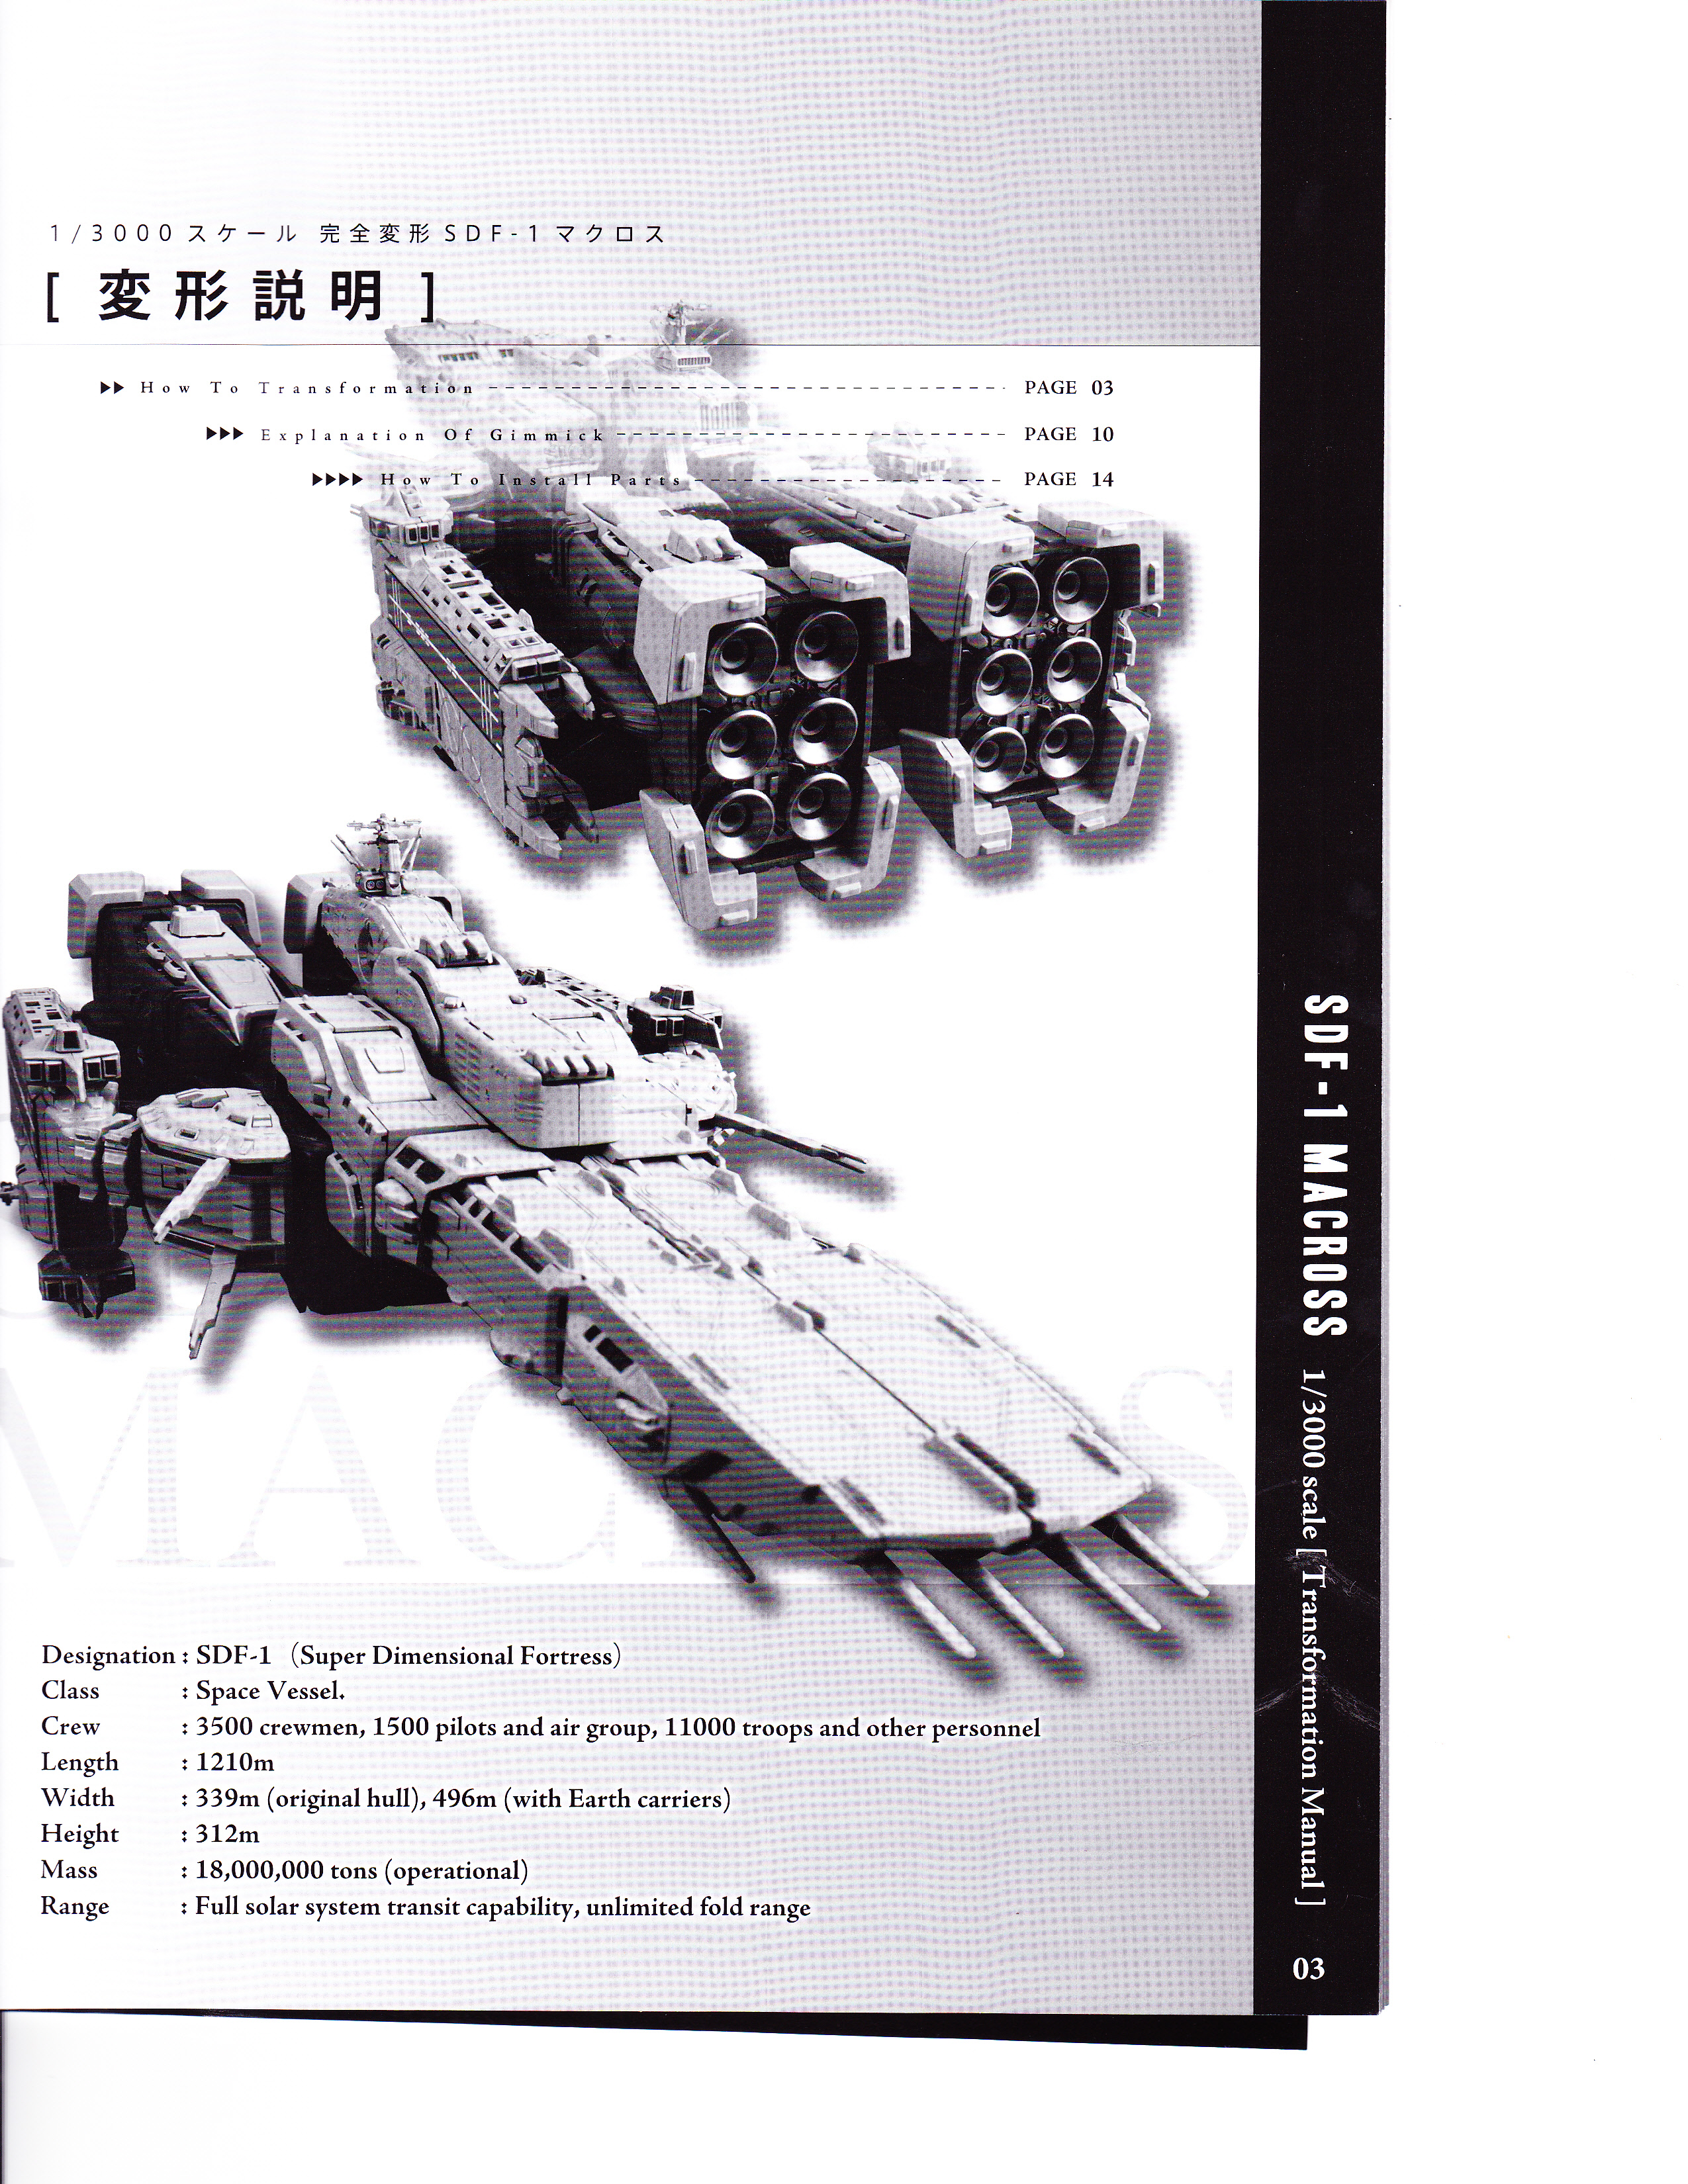
Toy Dimensions
- Height in Attacker Mode = 420mm (in A-stance, from bottom of feet to tip of gun booms).
- Length In Cruiser Mode = 420mm.
- Weight of toy only = Around 981g (weight provided by Yamato & have not checked accuracy as my scales are broken).
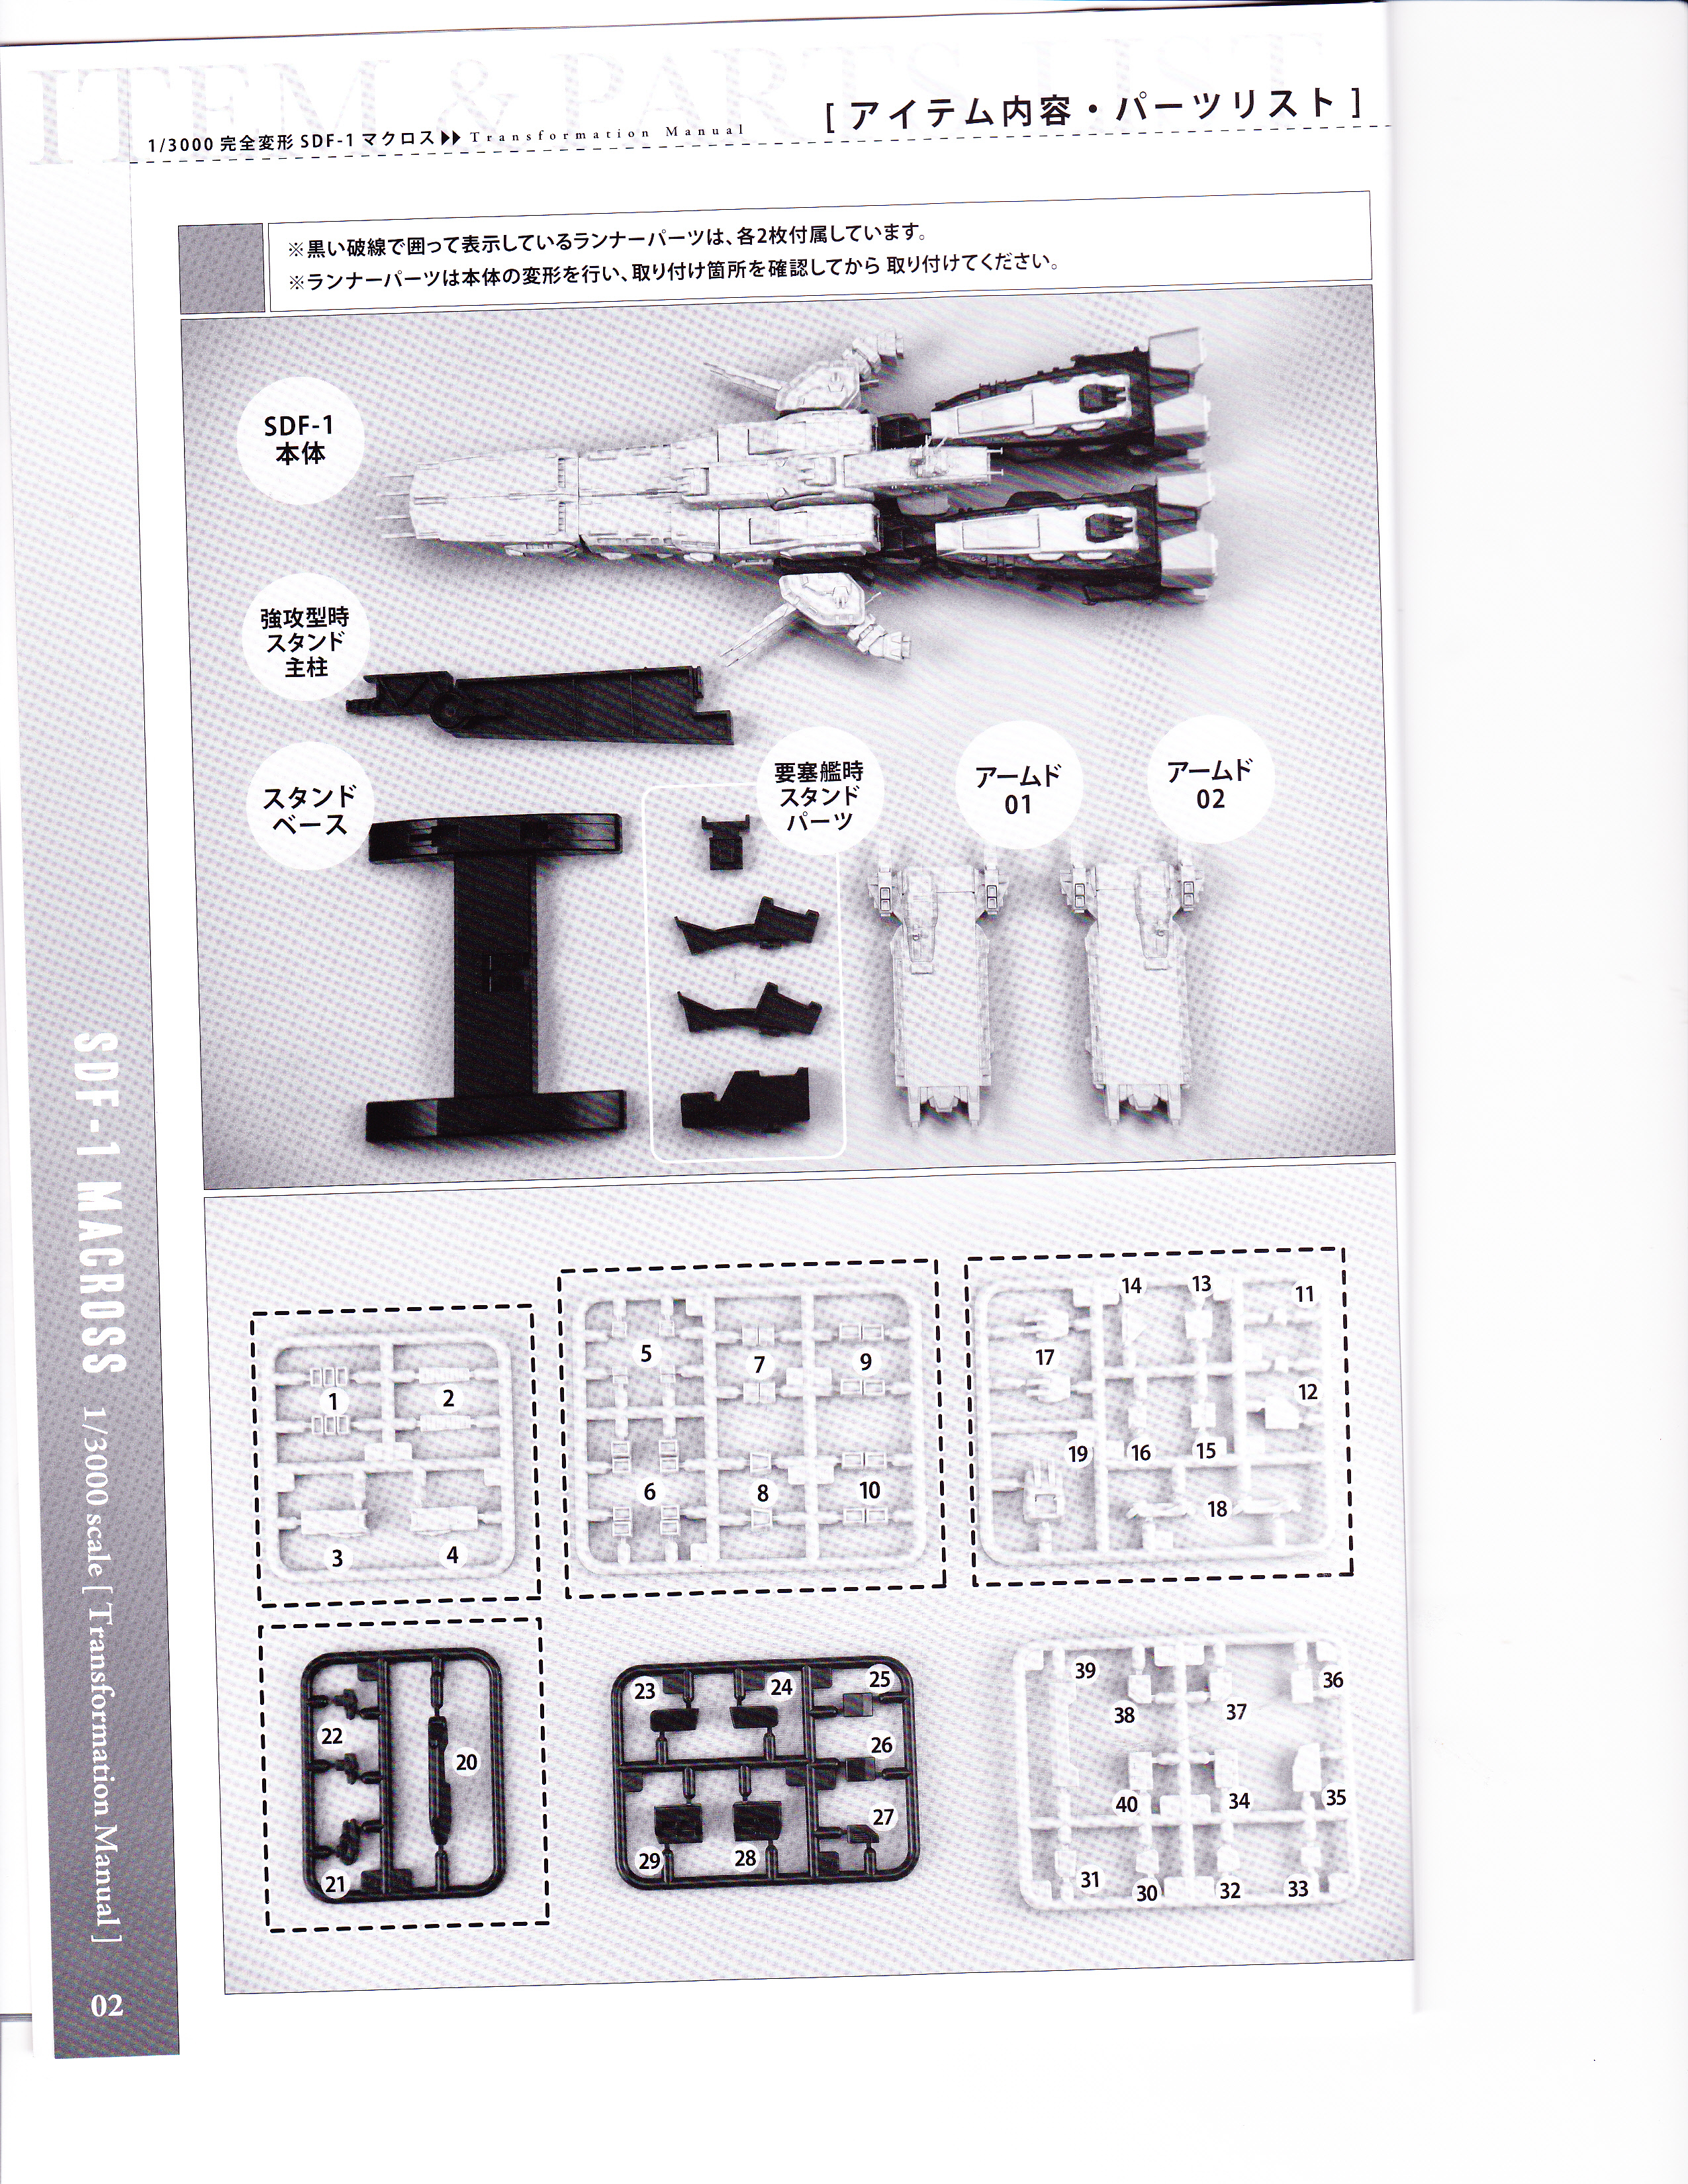
Sprues of Parts
The SDF-1 comes with a total of ten sprues of small parts, including two sprues of unique parts and four different duplicate sprue pairs (for left and right side parts). These parts need to be cut off and attached to the toy. These small parts are mostly thrusters for the ARMDs, gun turrets for the SDF-1, and screw hole covers. Some of the parts, like the thrusters for the ARMDs, are painted. Some of the parts like the thrusters for the ARMDs are painted.
Sprues
of Small parts
|
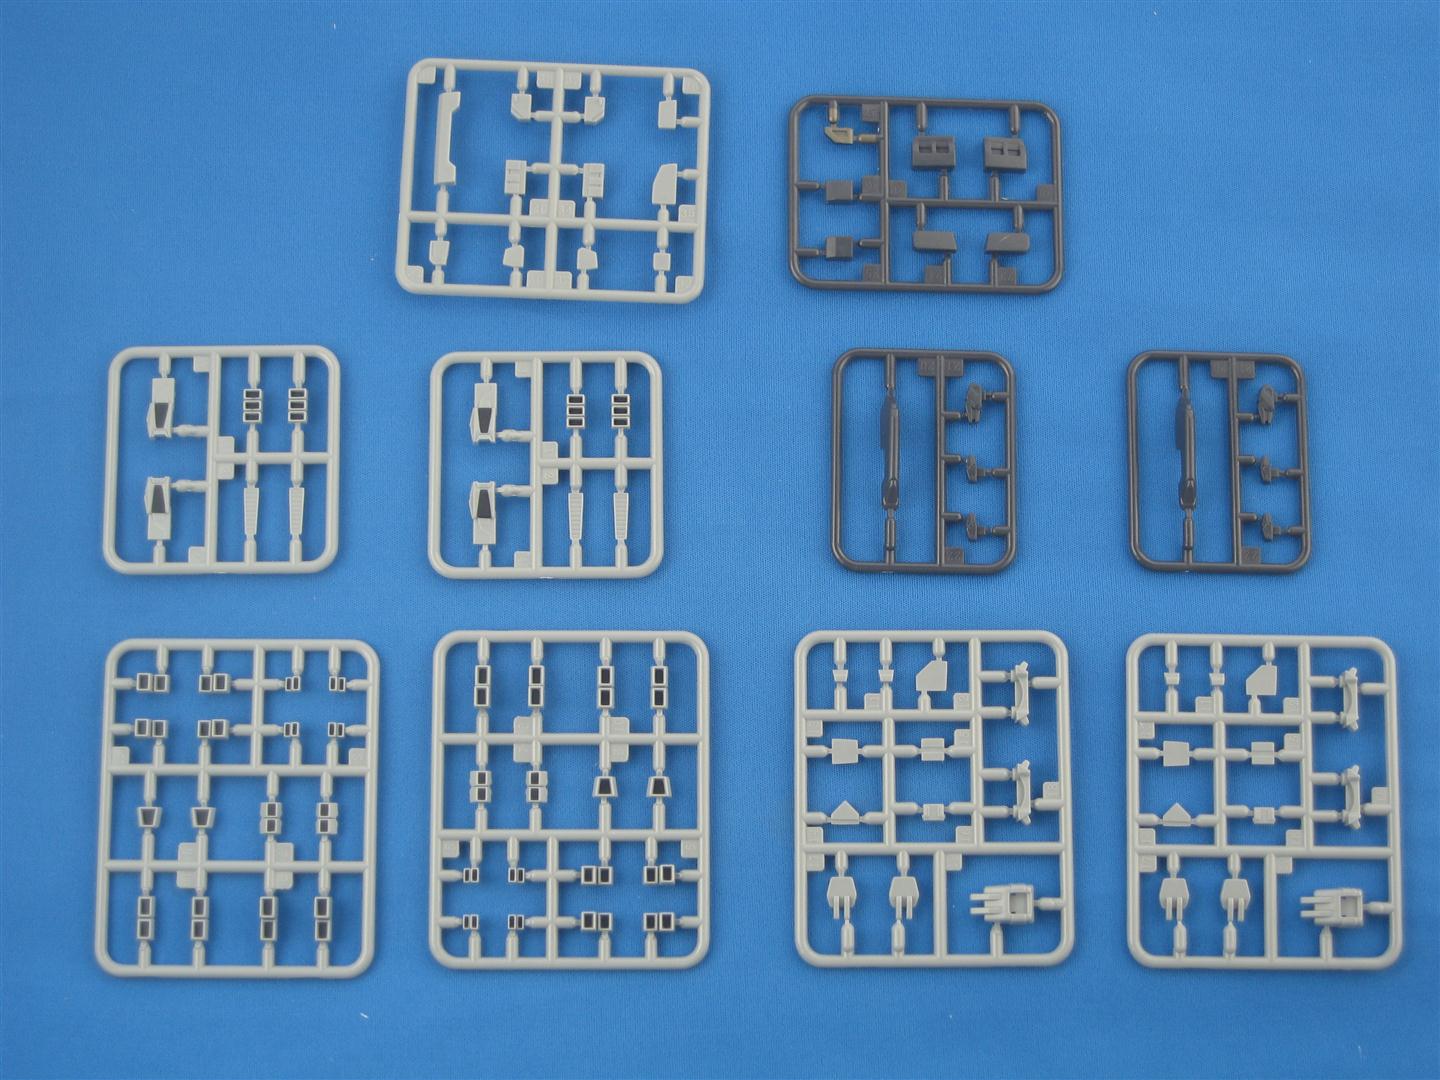 |
While some of these small parts fit quite tightly and are unlikely to fall off, others are less tight. I would recommend carefully gluing them in as some of the parts can be knocked off quite easily.
A quick note, there are 2 small panels (parts numbers 30 & 32 on the unique sprue), which are not mentioned or shown in the instruction manual. I asked Yamato about these and they are actually screw hole covers for parts that are already hidden after the toy is assembled at the factory. Yamato did not notice about this until too late. So just ignore these 2 parts.
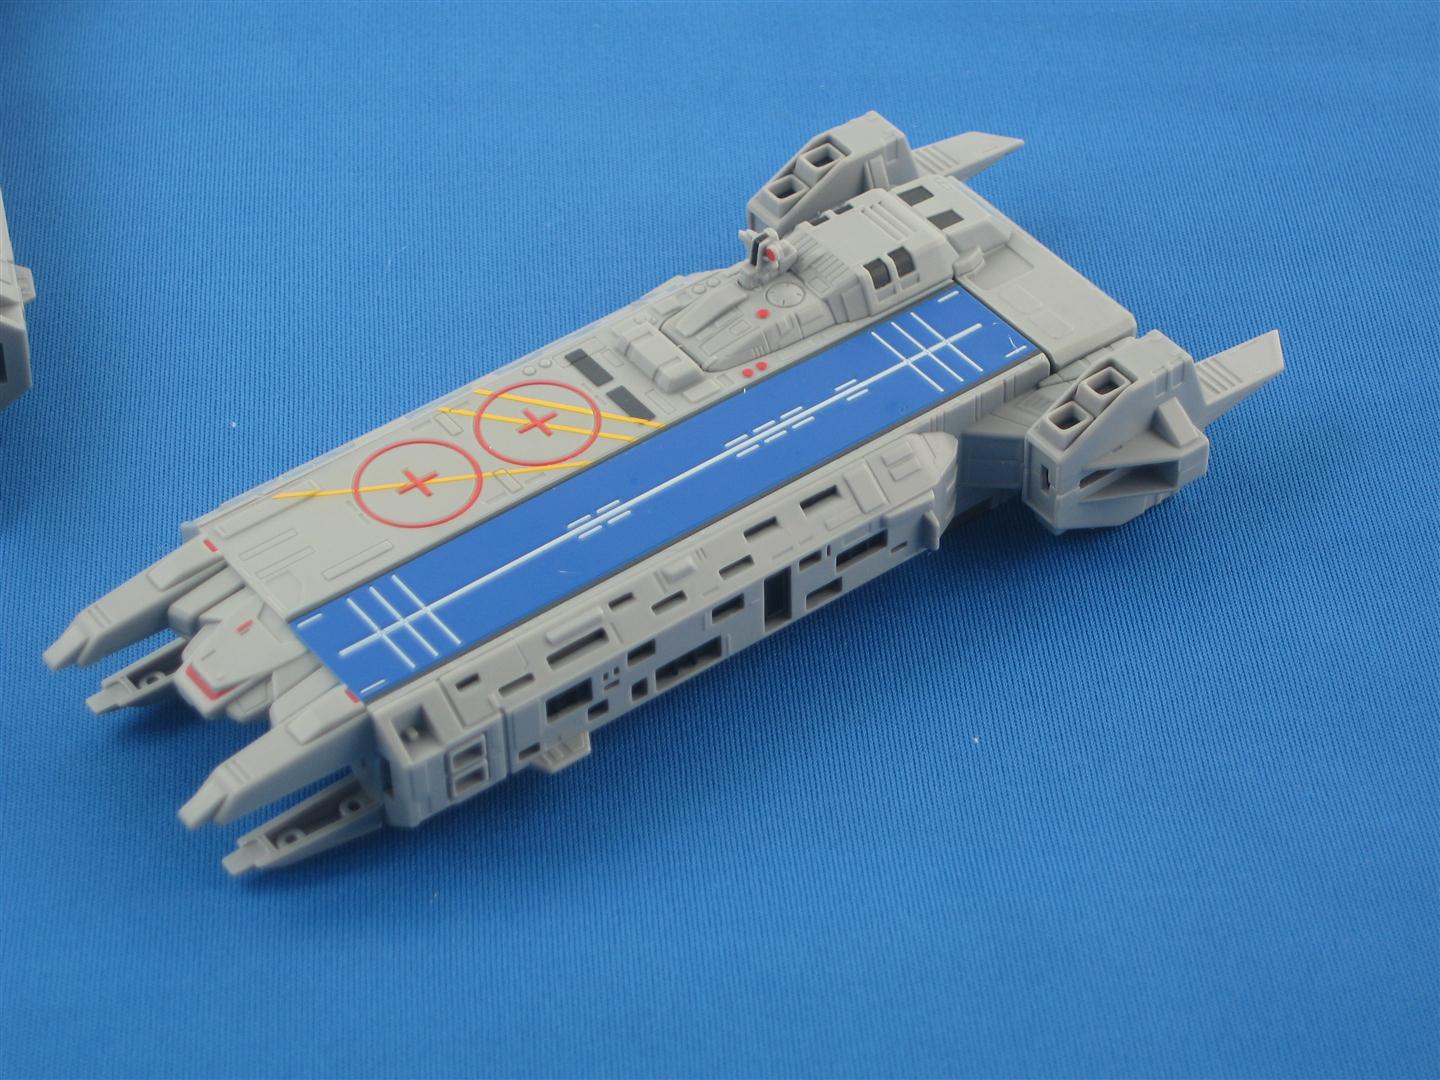
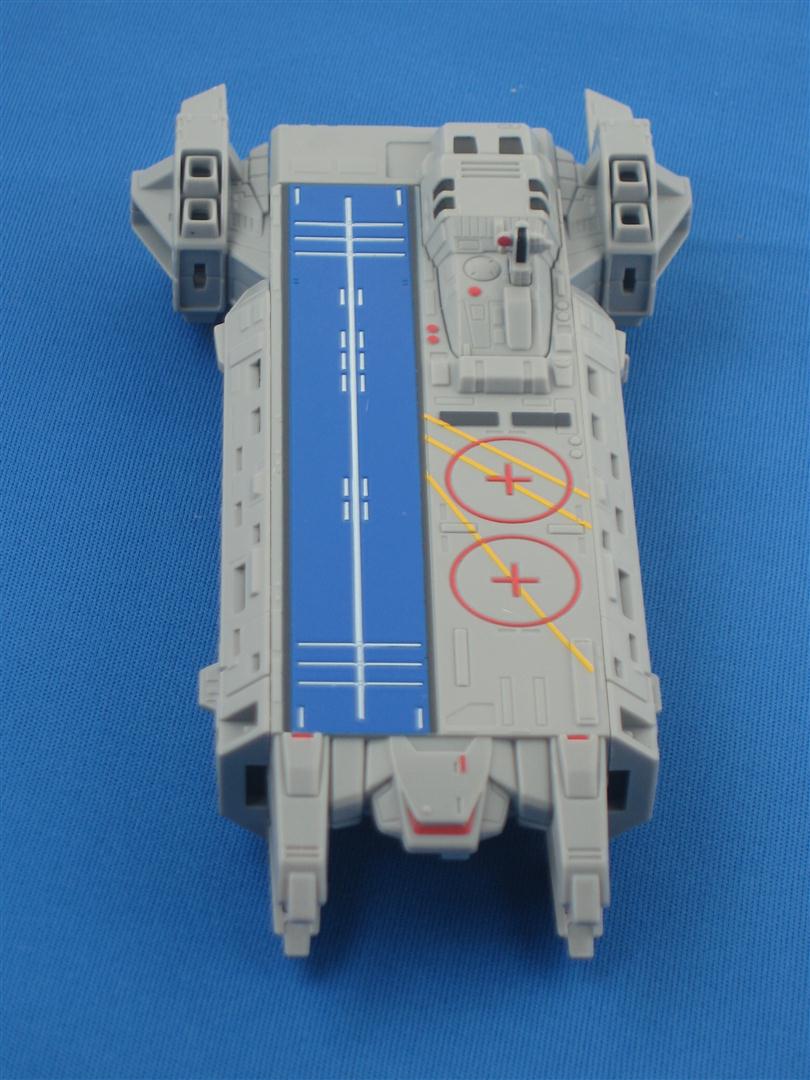
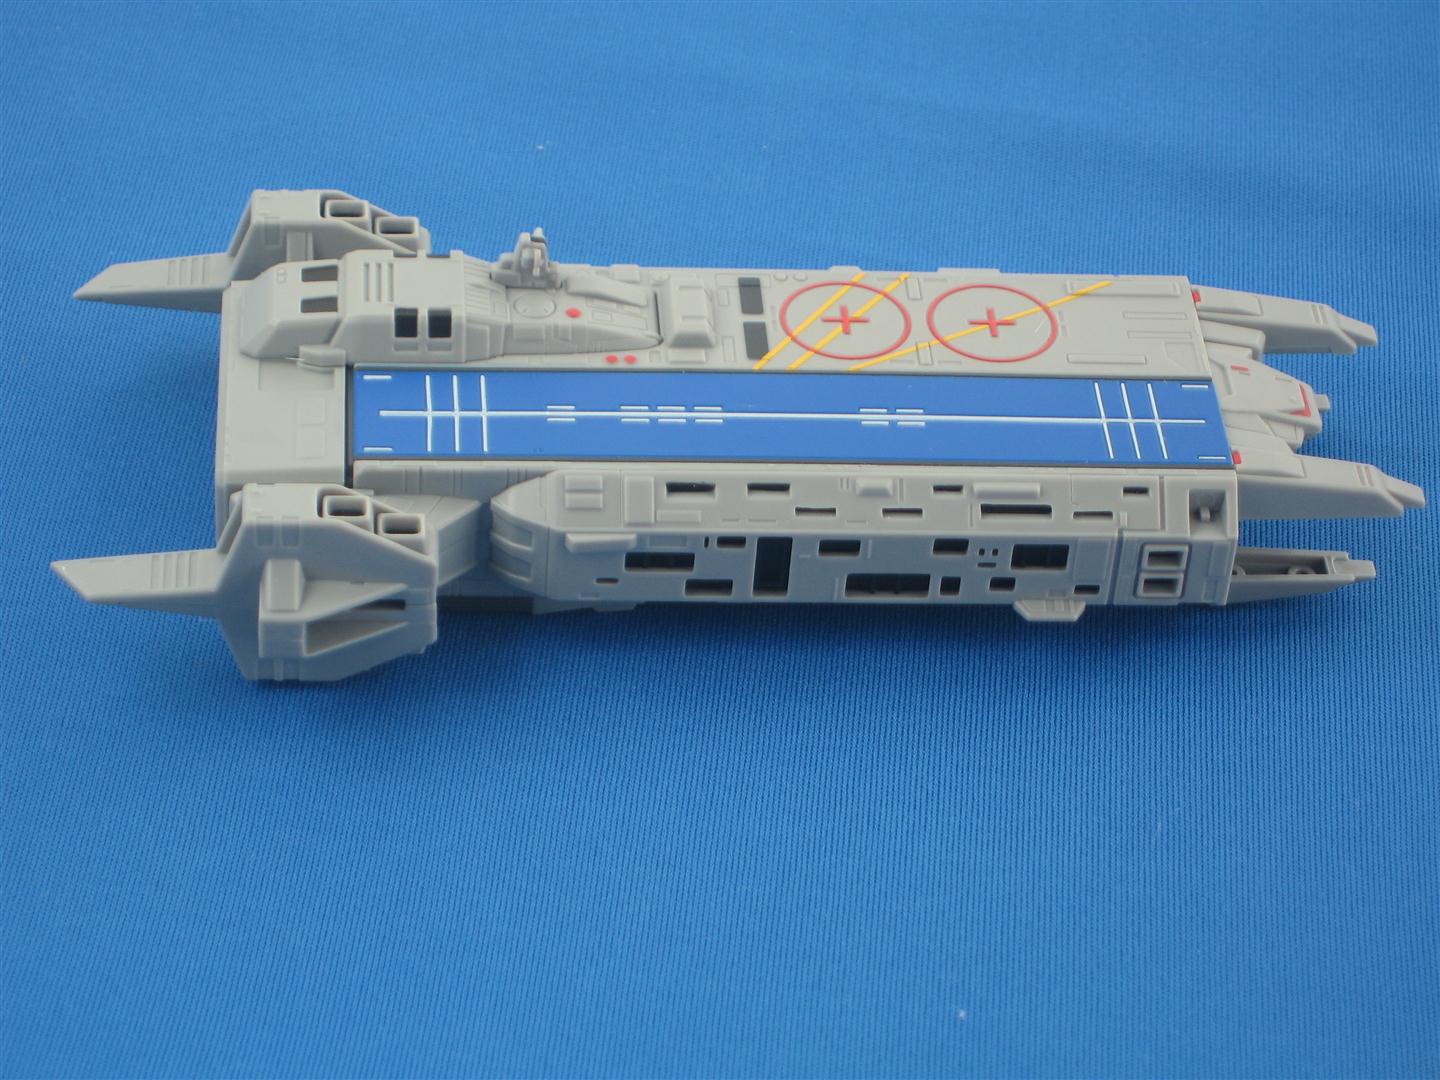
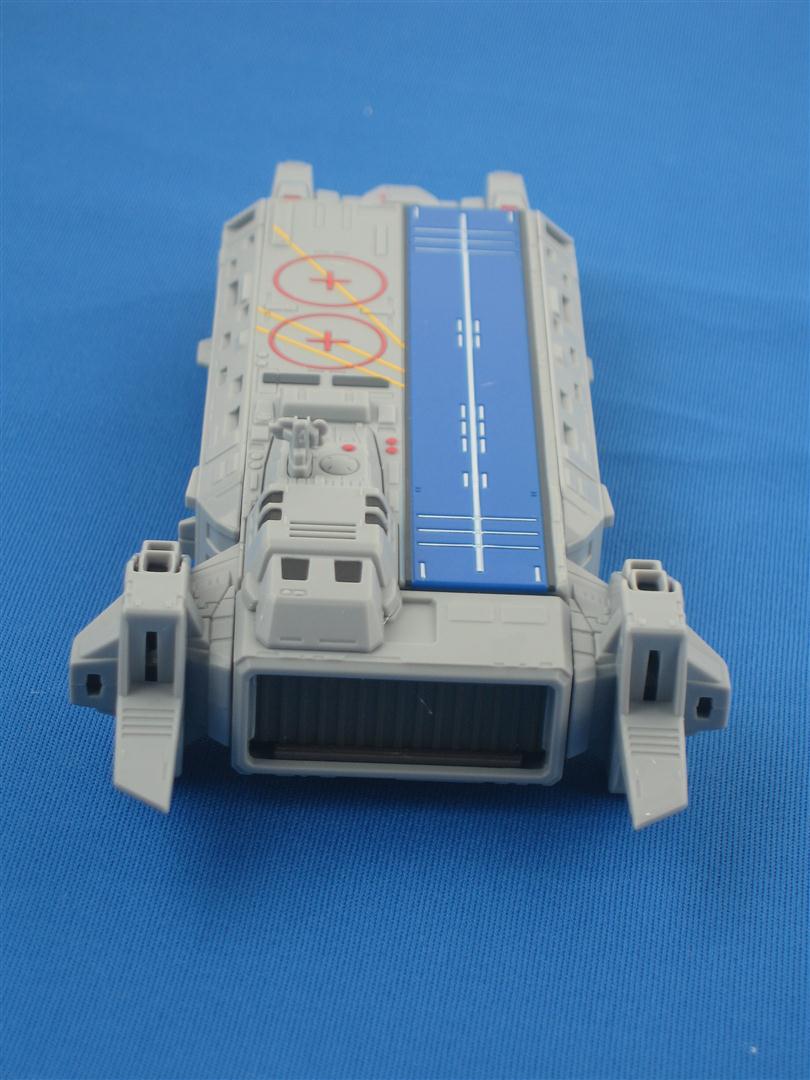
A word of warning. When assembling the parts onto the ARMD, do not follow Yamato’s recommended order in the instruction manual for the parts that go on the front of the ARMD. If you install the front thrusters (part No. 7), before installing the covers for the front lower prongs (part No. 2), you will not be able to get the prong covers on, without snipping off the rear peg on each cover. Instead, install the prong covers (part No. 2) first, before installing the front thrusters (Yamato have just informed me that they will change the instruction manual for the next production run to point this out).Below are some photos of the ARMDs and the SDF-1 in both Cruiser and Attacker modes without the small parts attached. Later on in the review I will post some photos of the toy after all the small parts have been removed from their sprues and fitted to the toy.
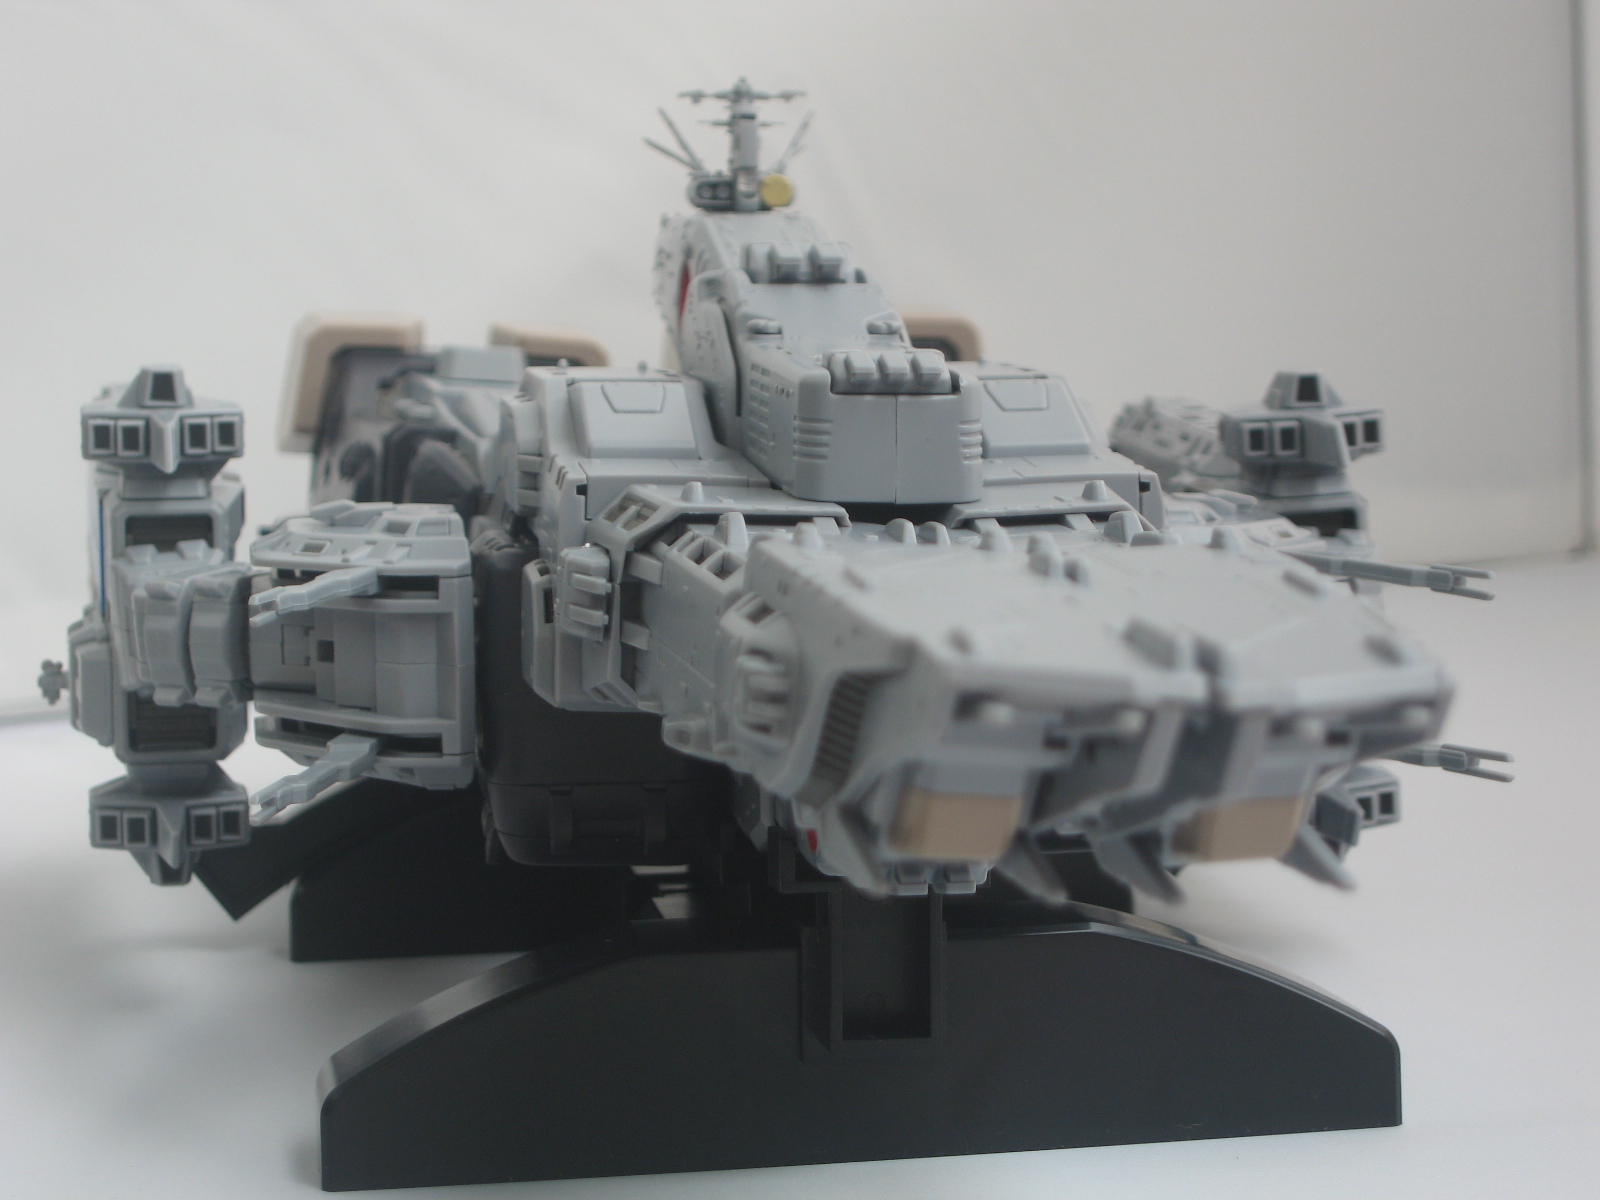
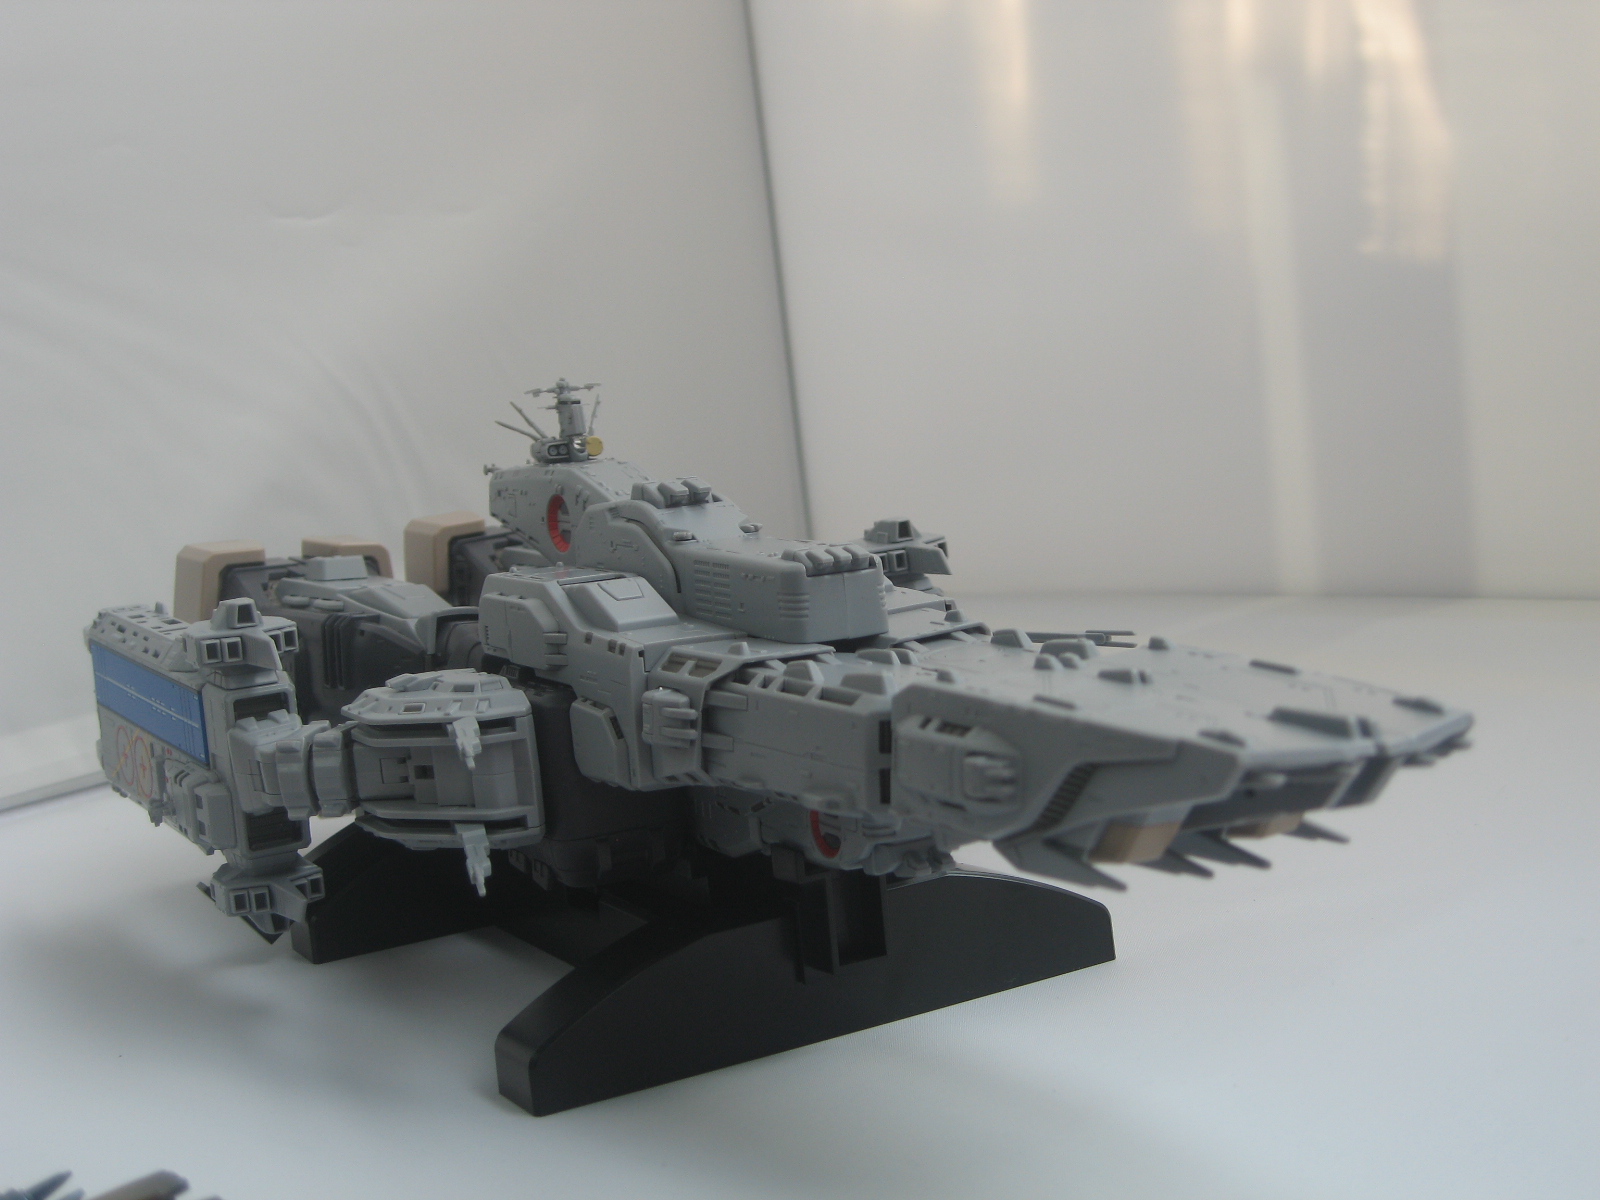
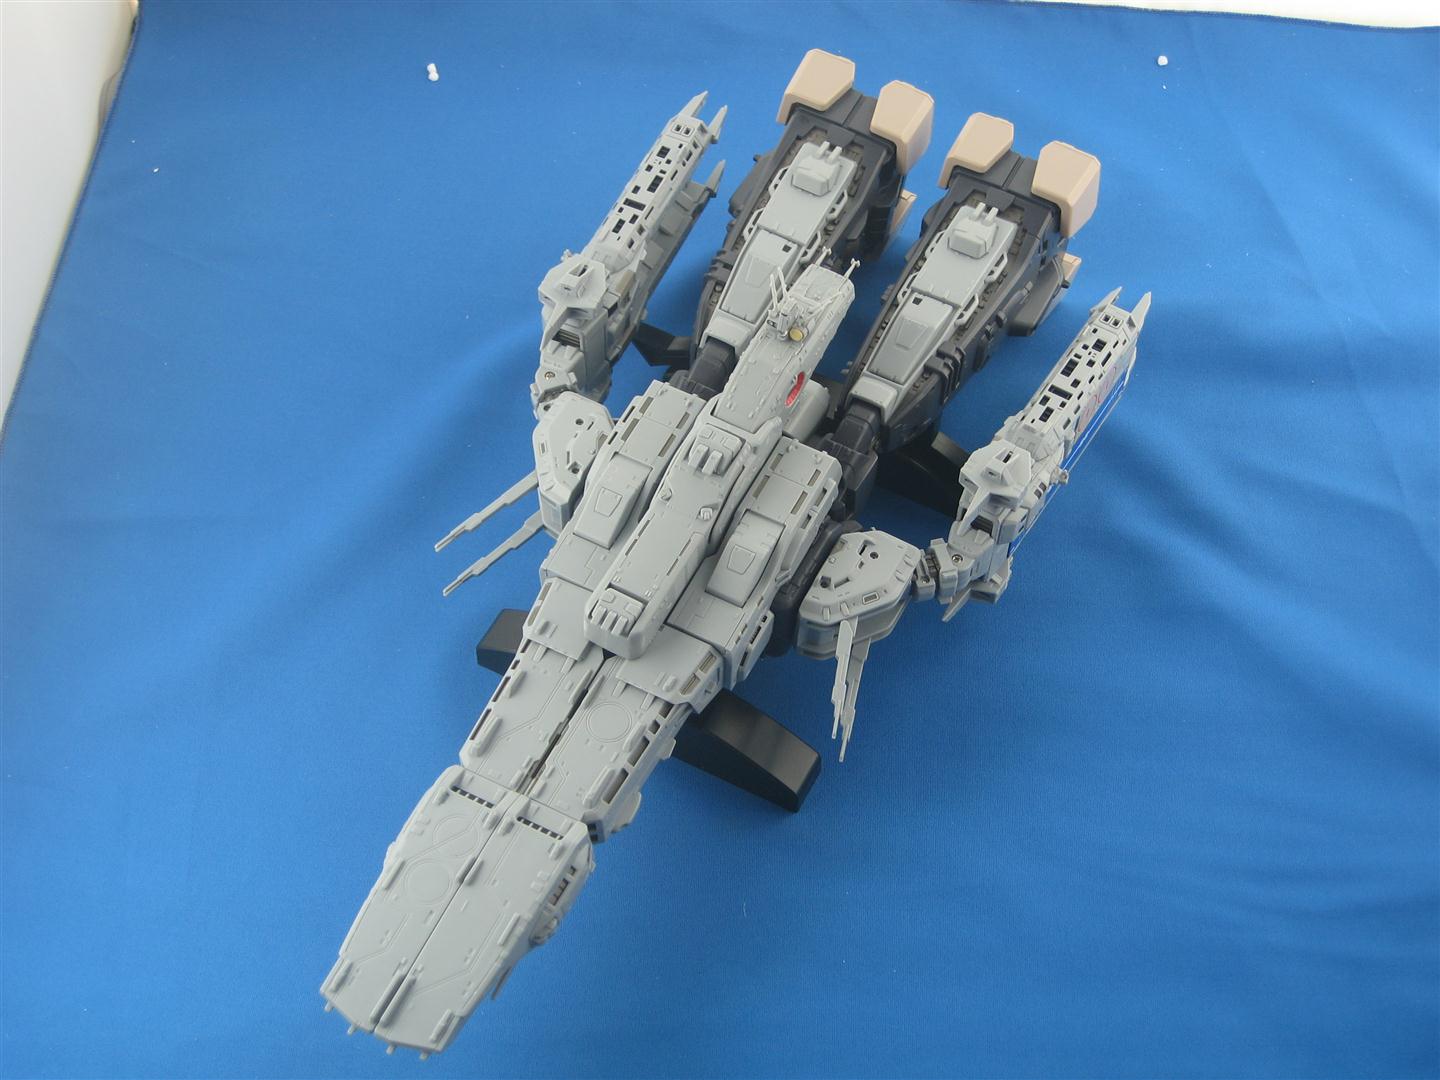
SDF-1
Cruiser Mode (without small parts fitted) |
||||||
 |
 |
 |
 |
 |
 |
 |
 |
 |
 |
 |
 |
 |
 |
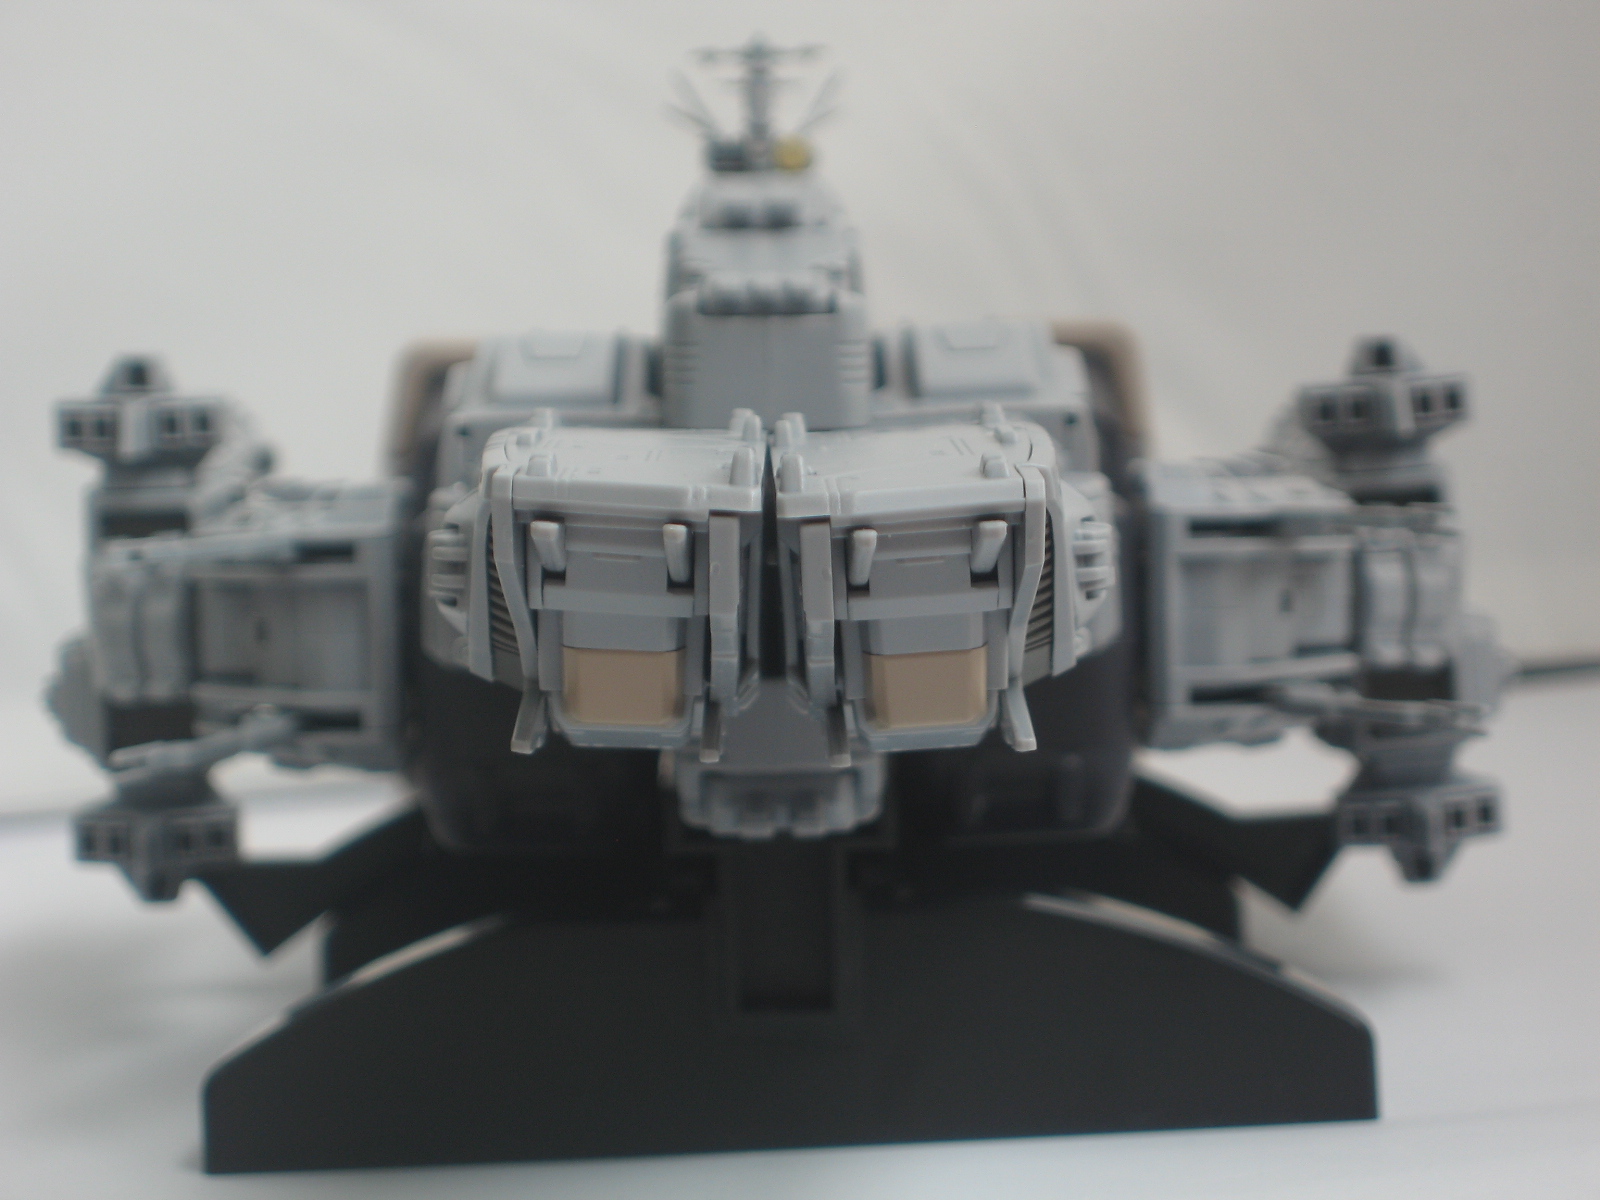
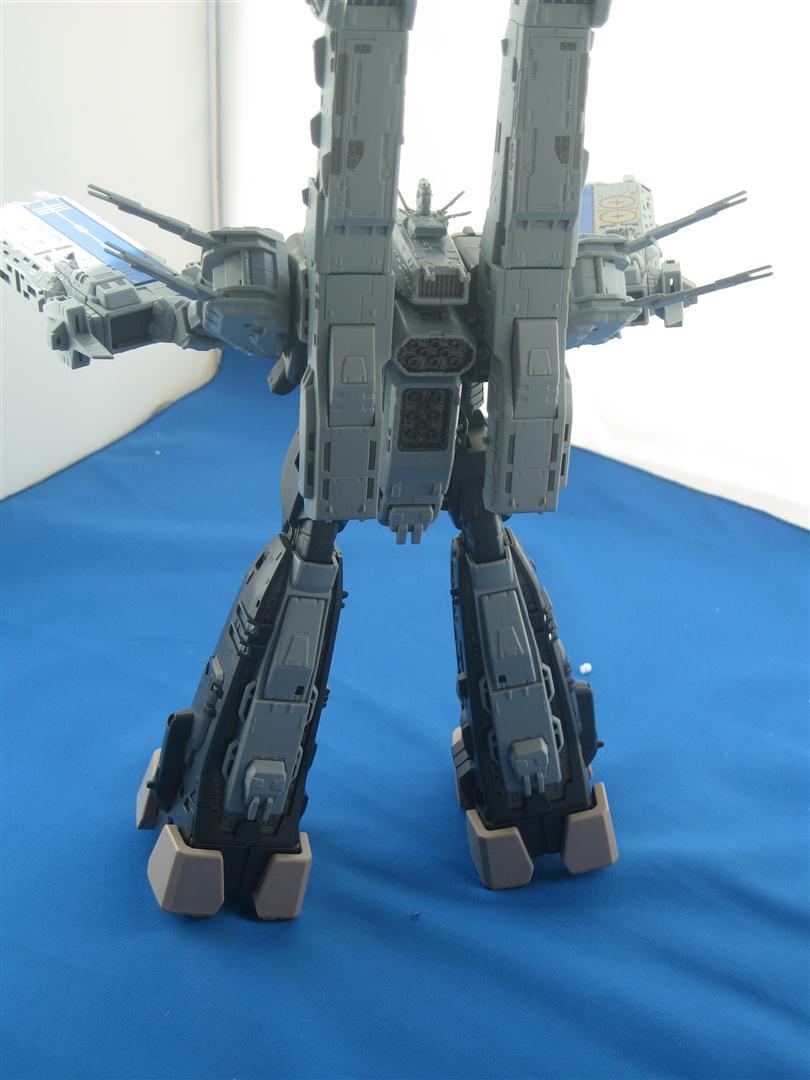
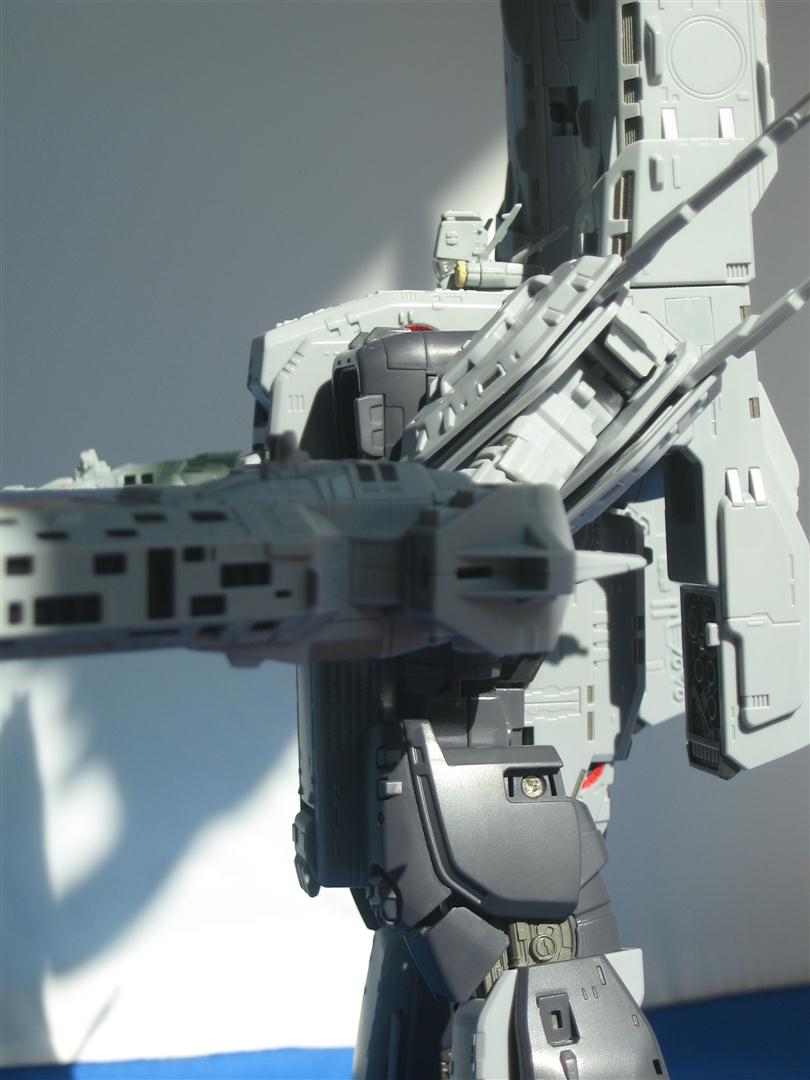
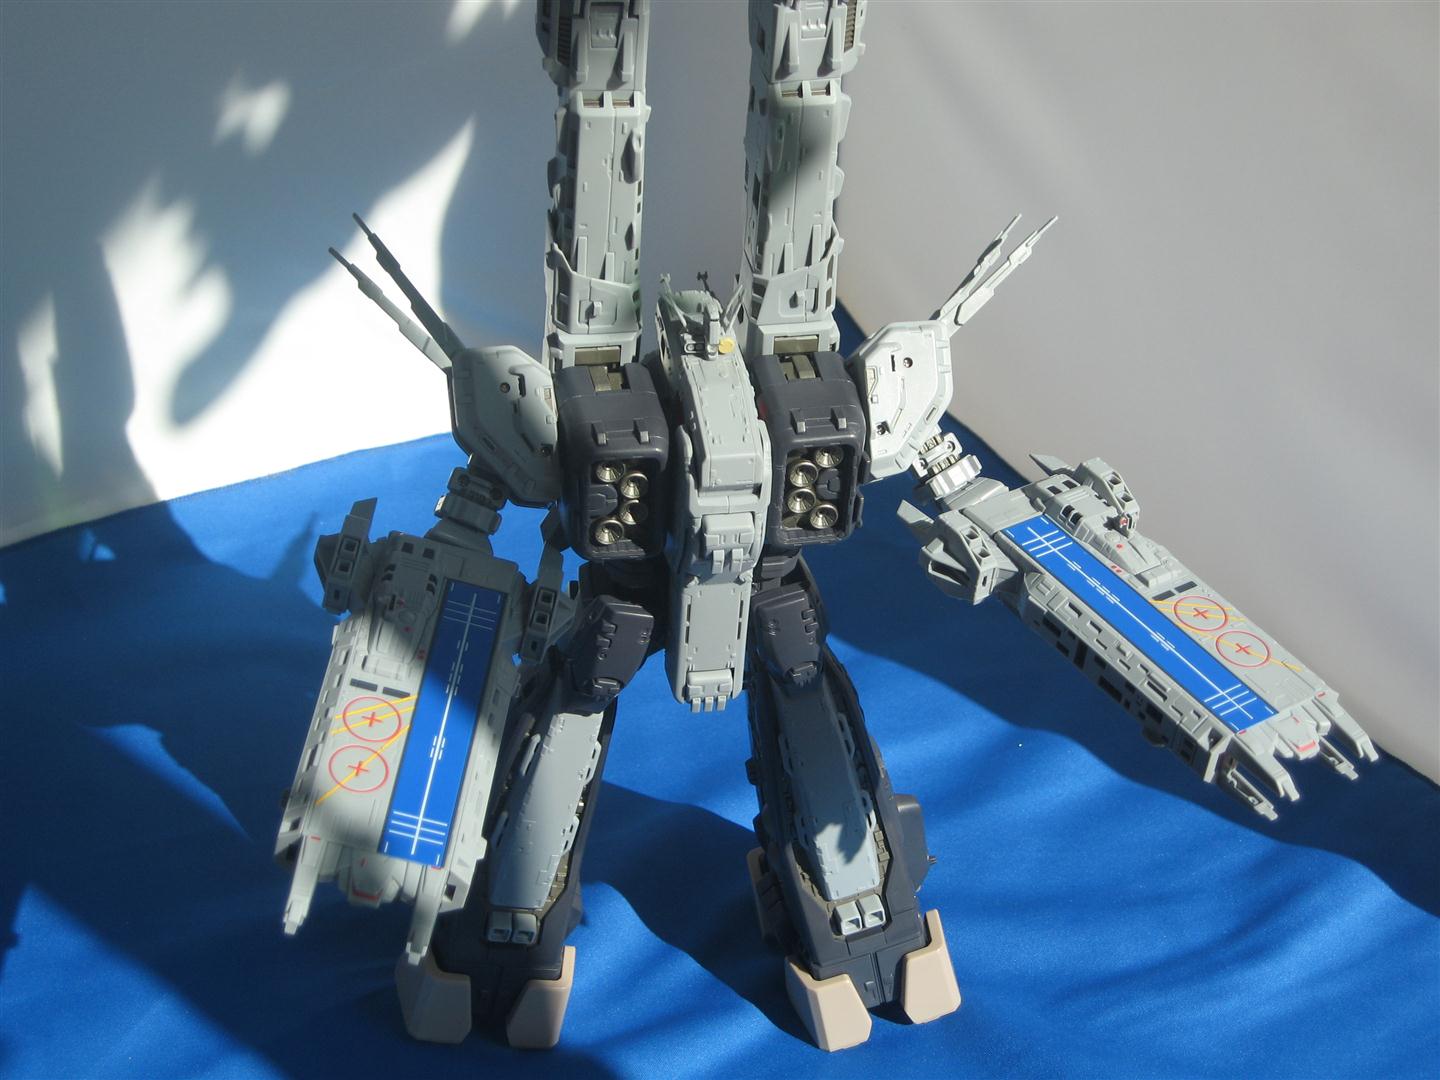
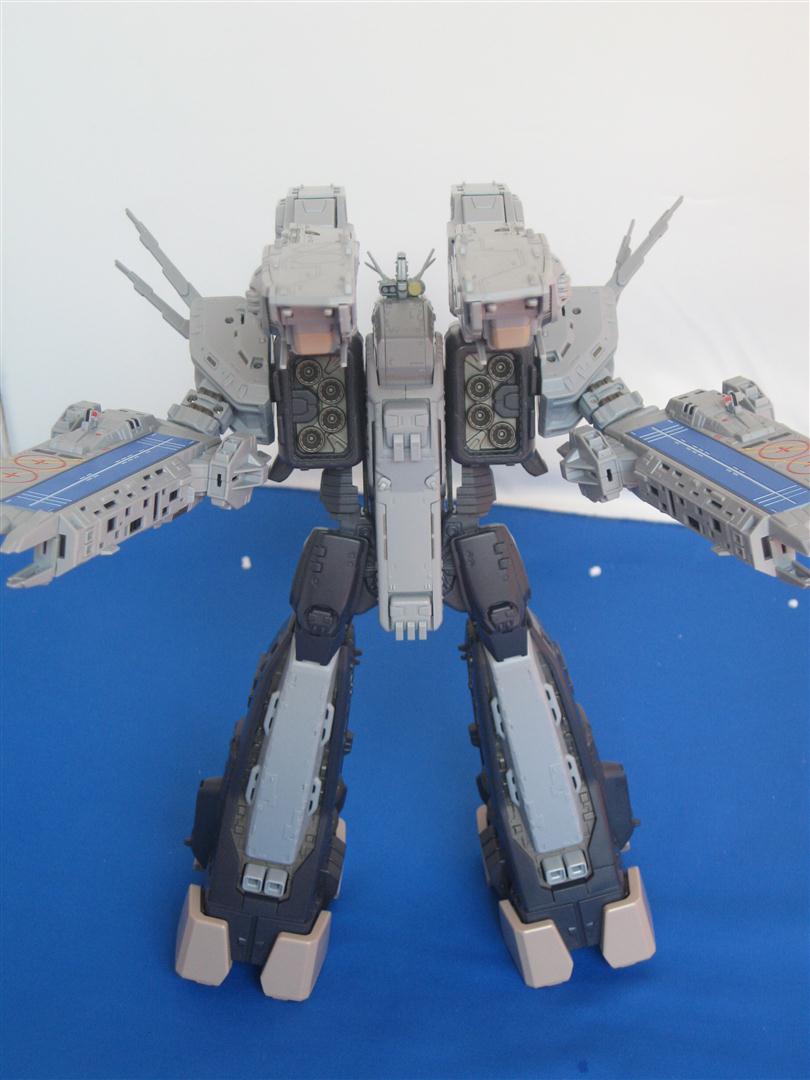
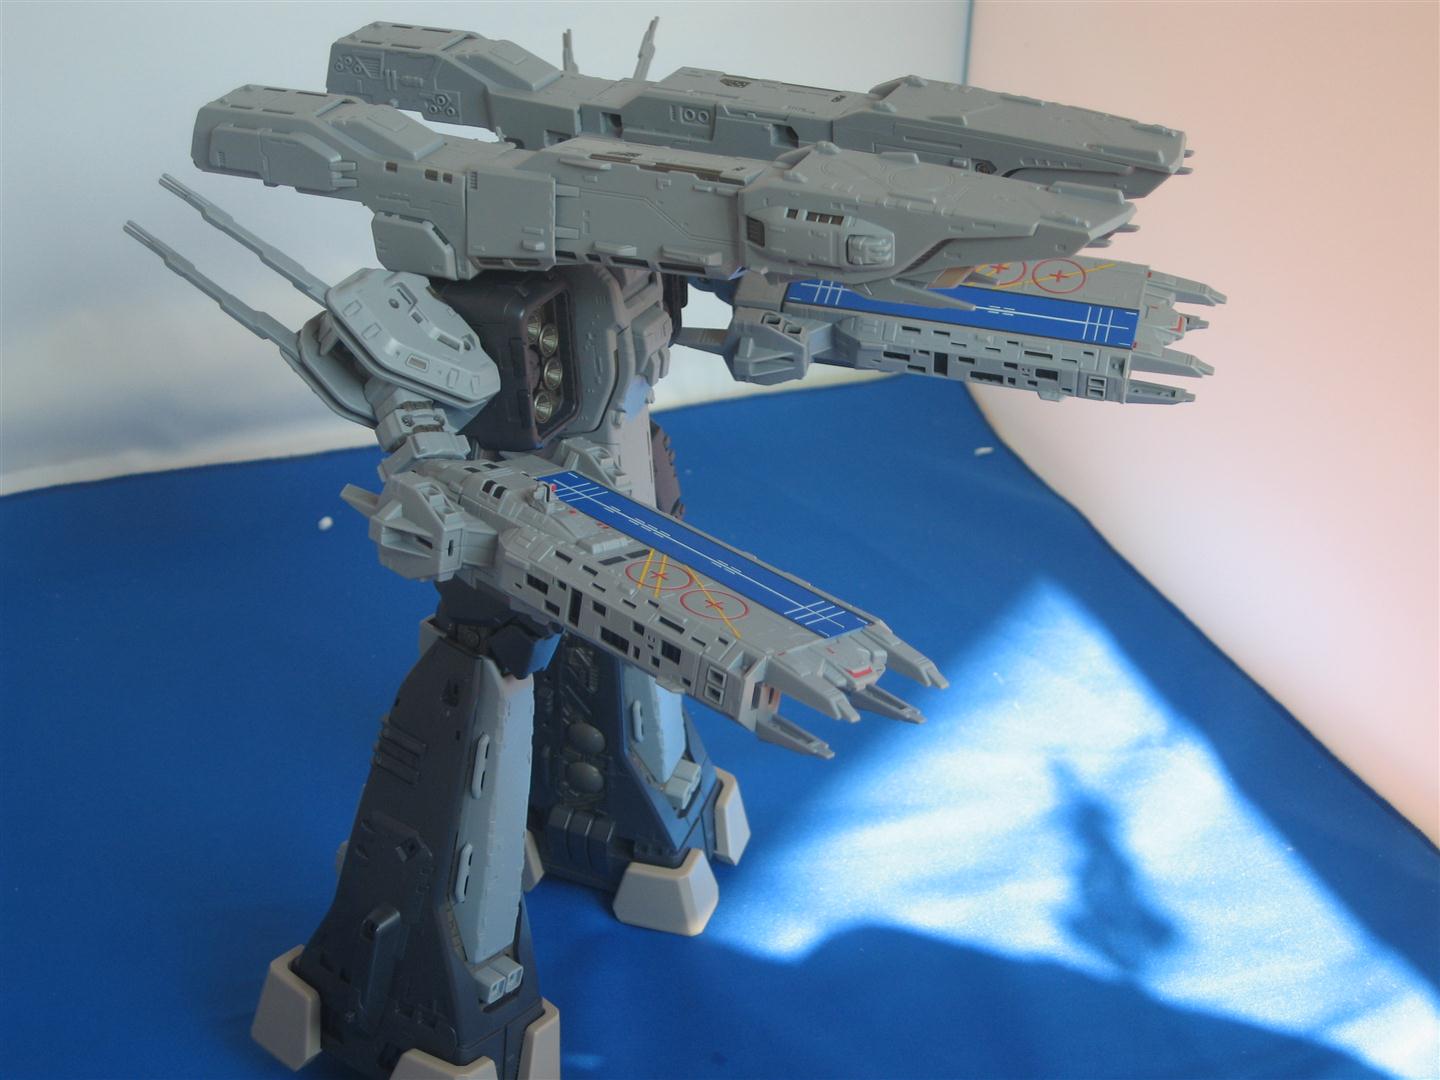
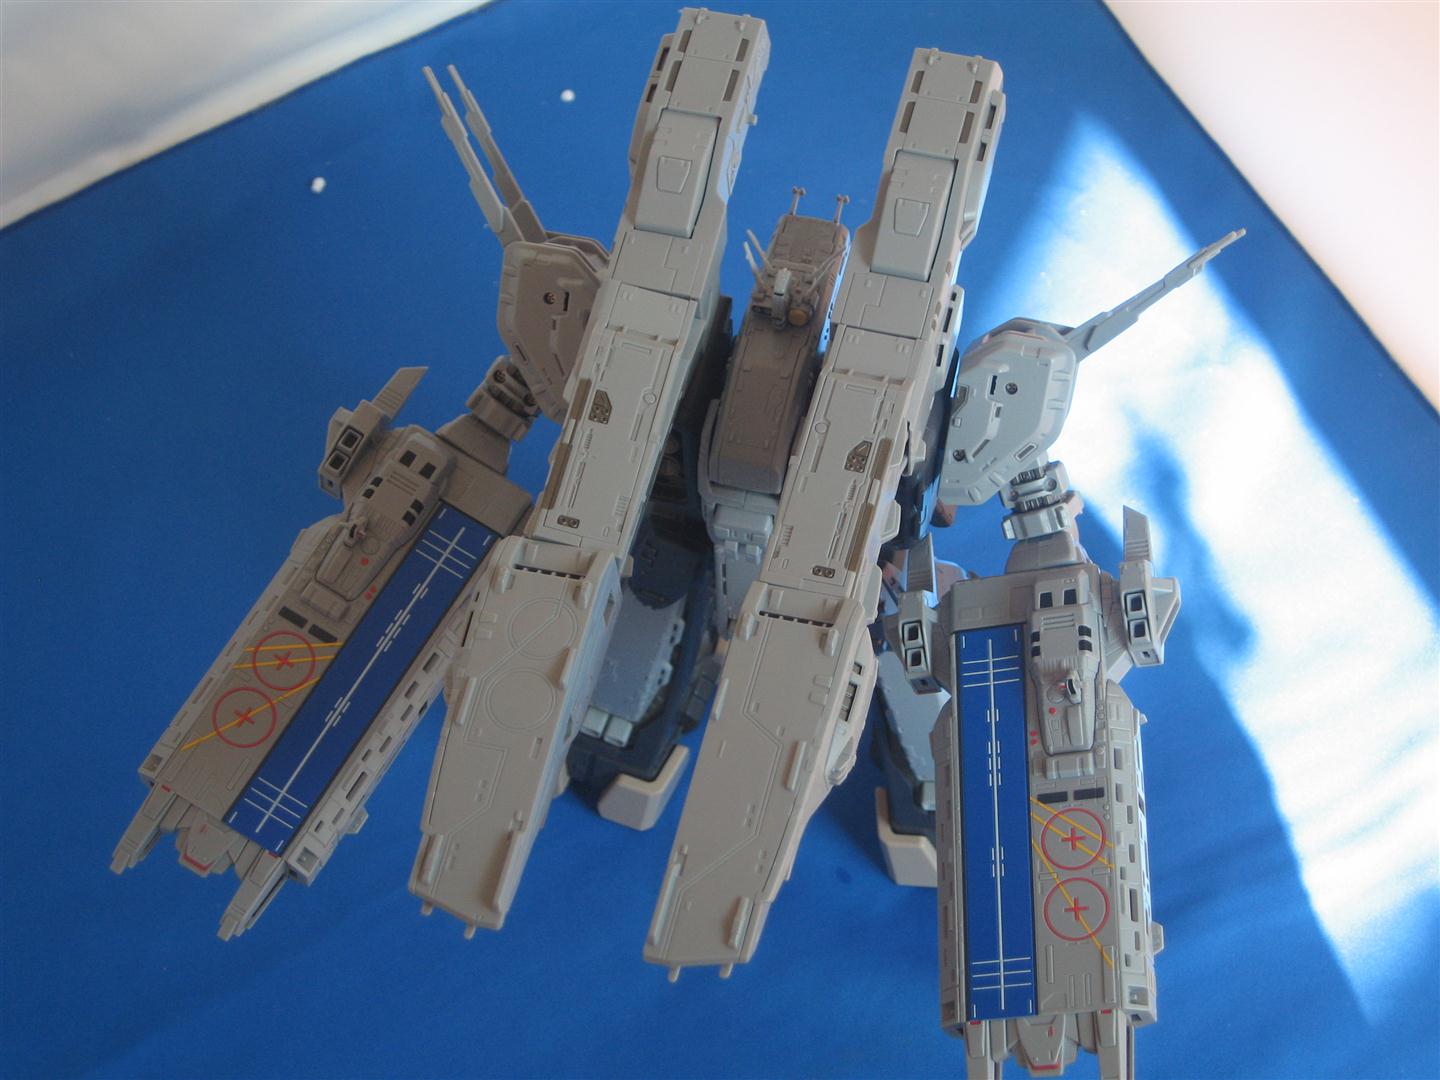
SDF-1
Attacker Mode (without small parts fitted) |
|||||
 |
 |
 |
 |
 |
 |
 |
 |
 |
 |
 |
|
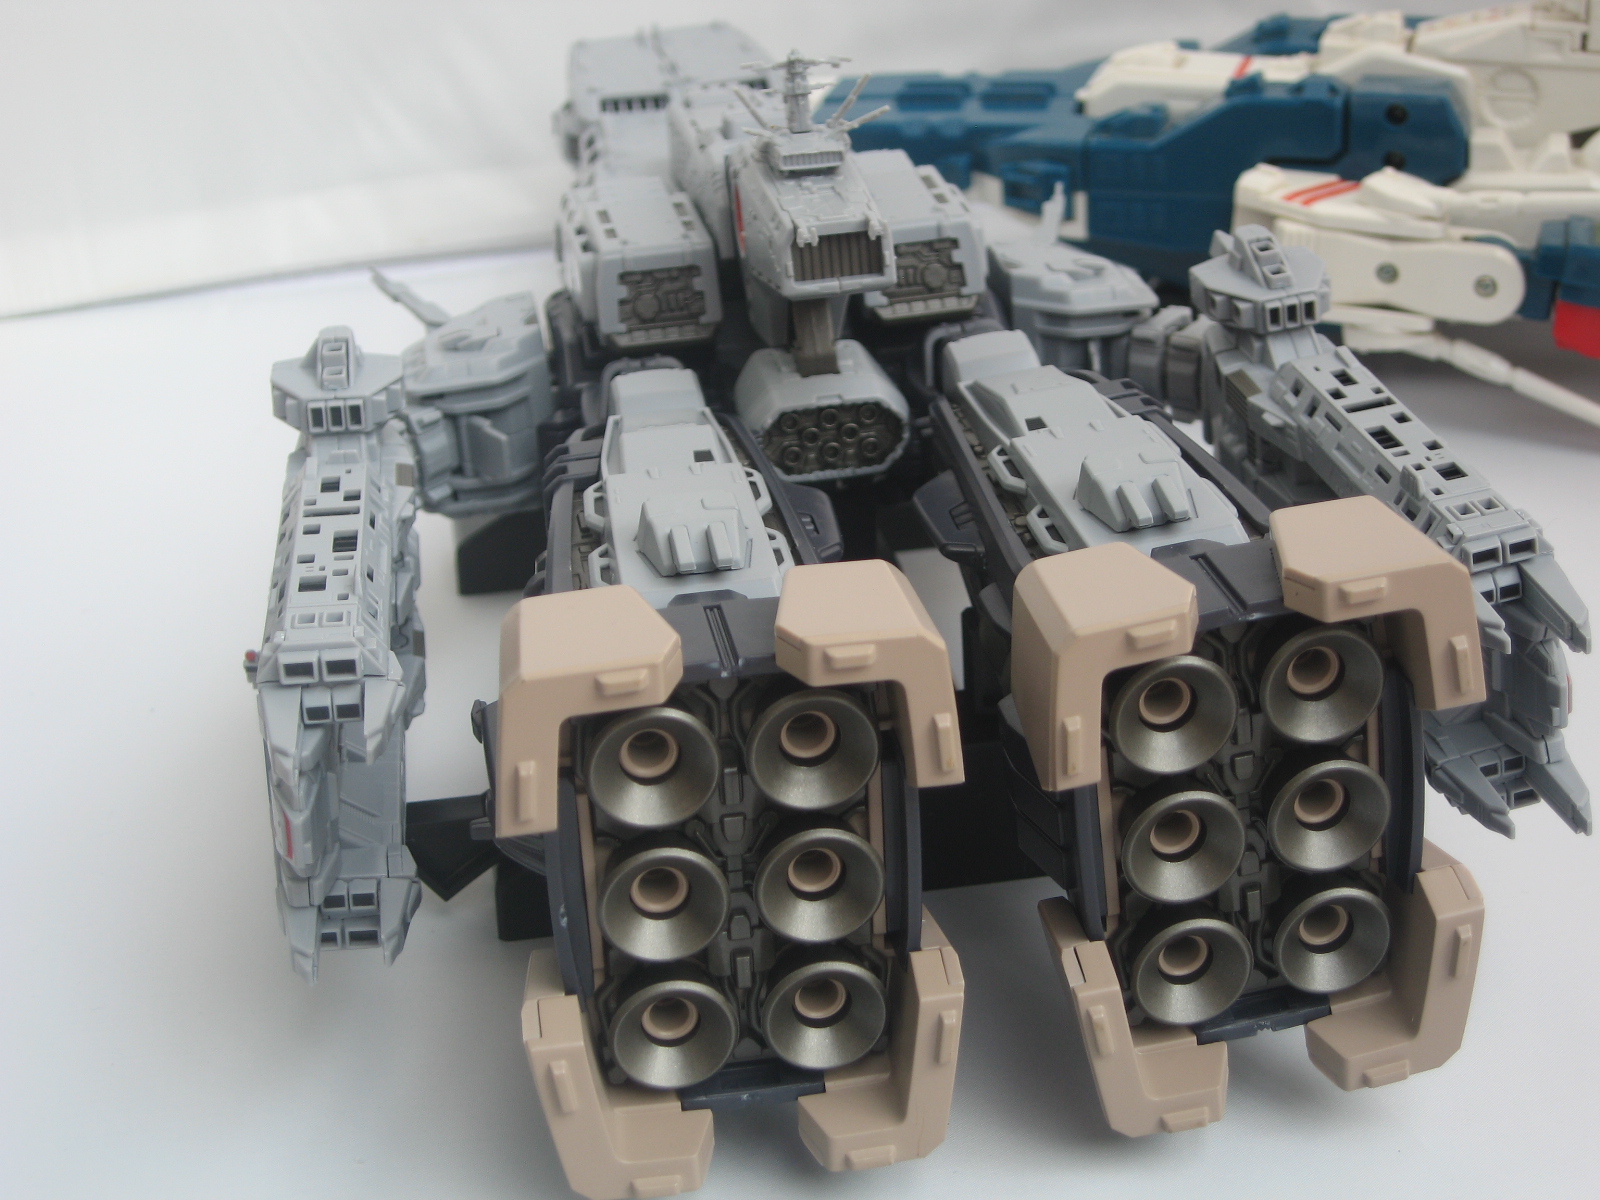
ARMDs
(without small parts fitted) |
||||
 |
 |
 |
 |
 |
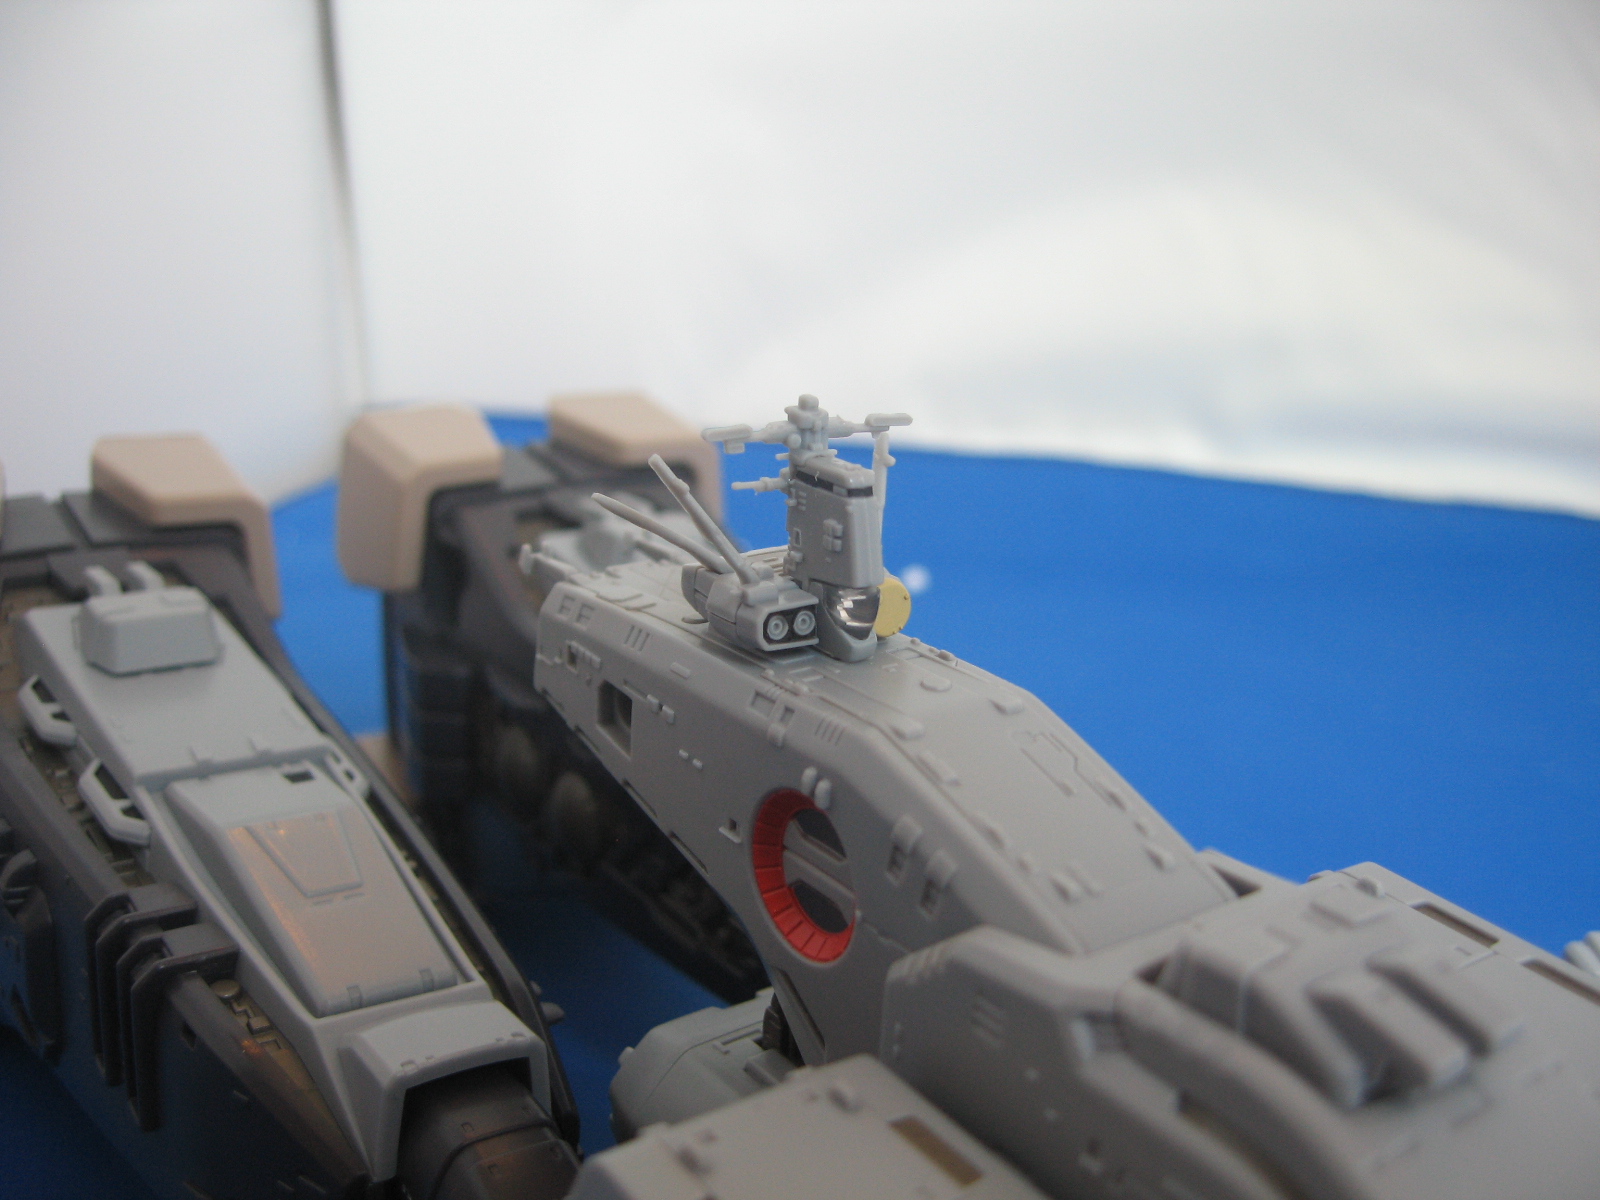
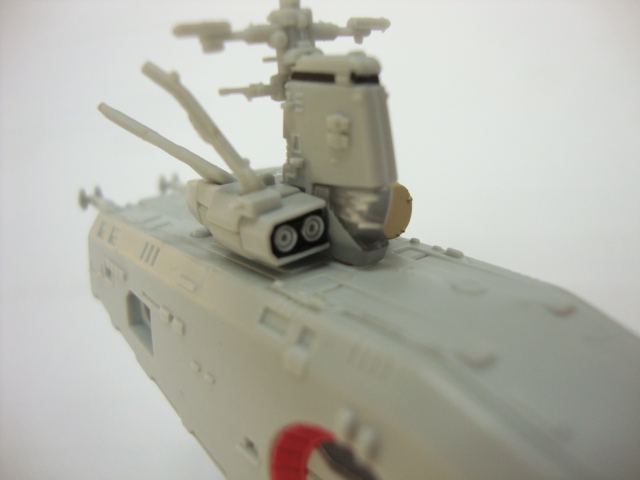
Impressions
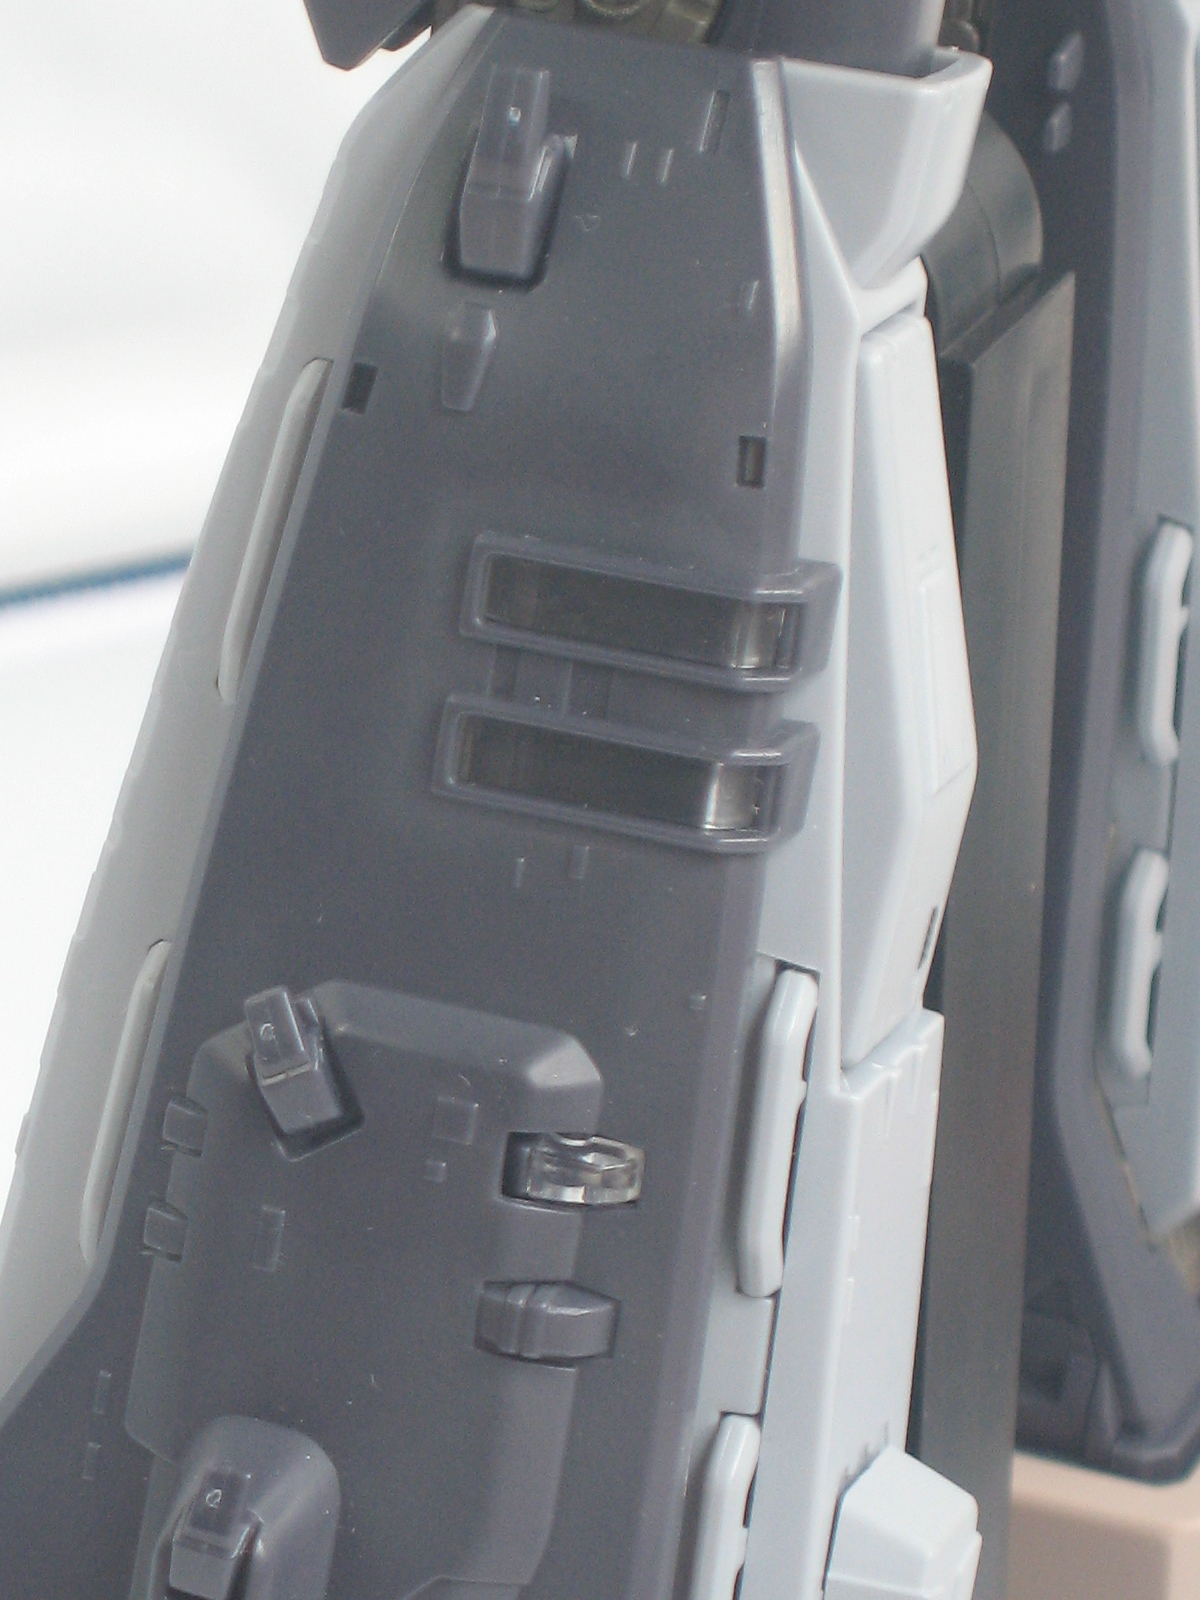
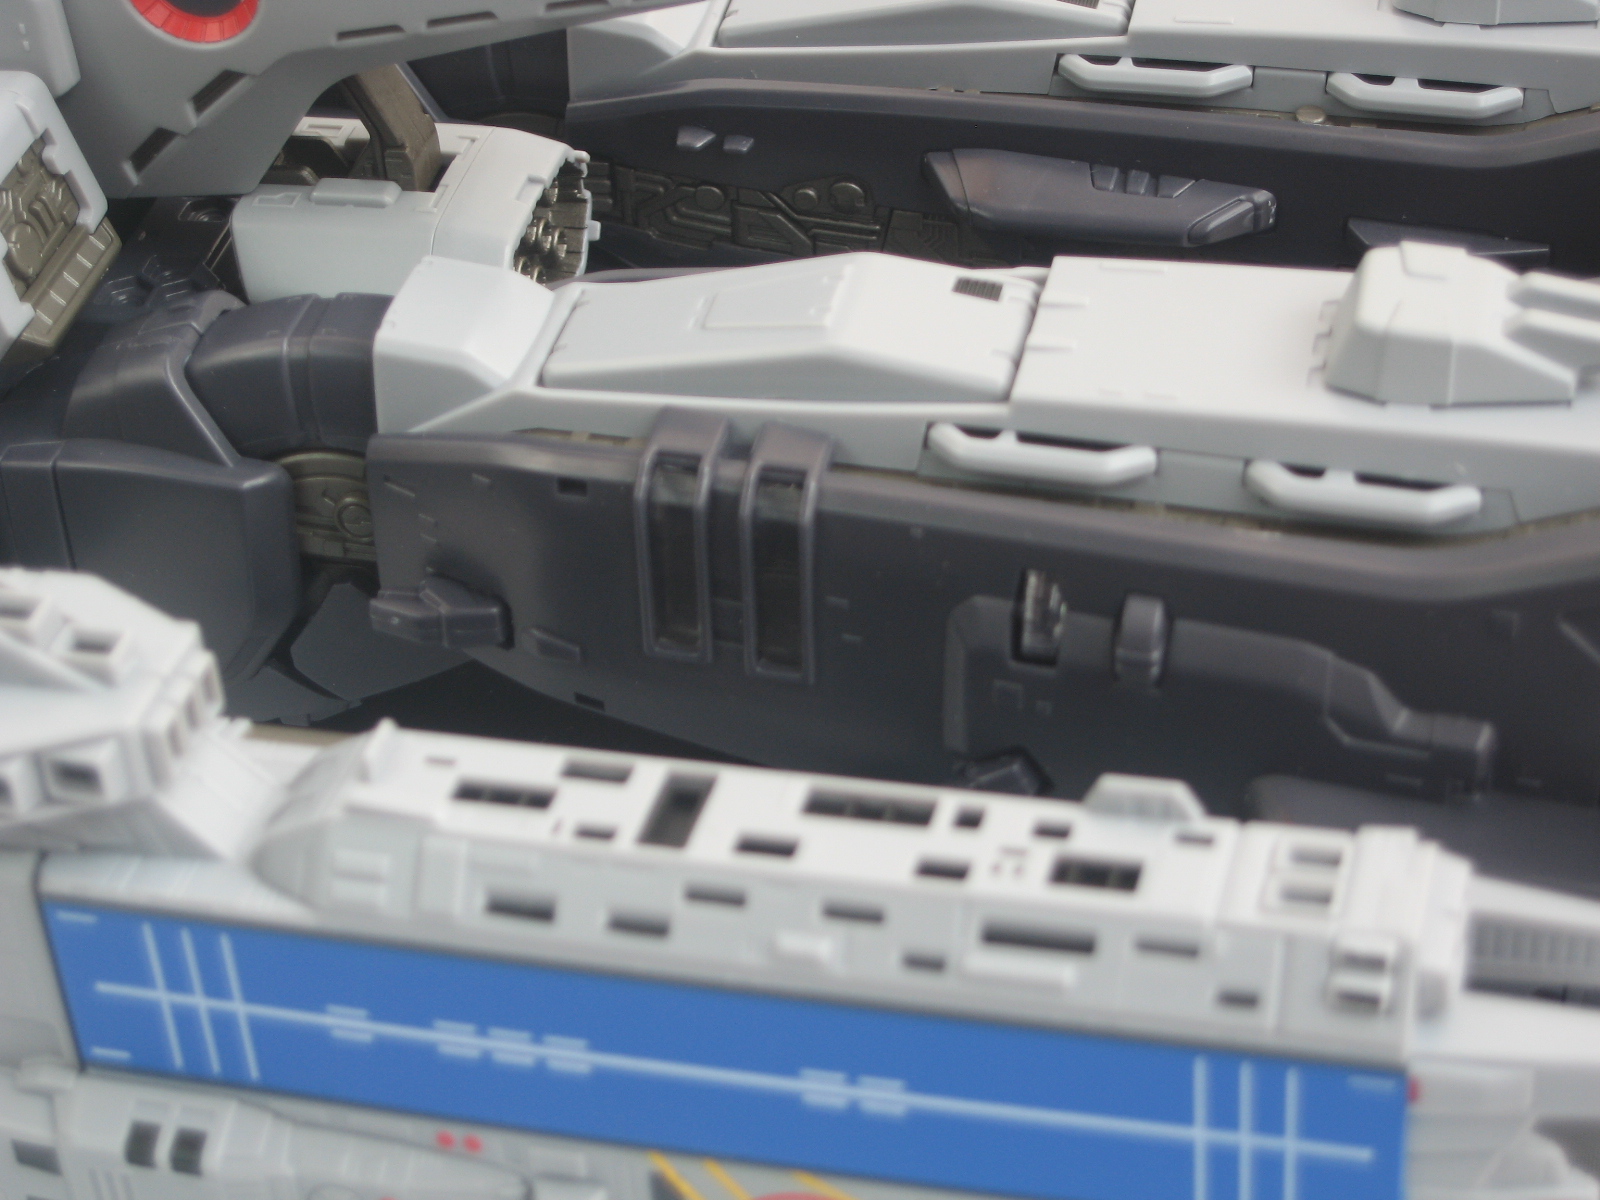
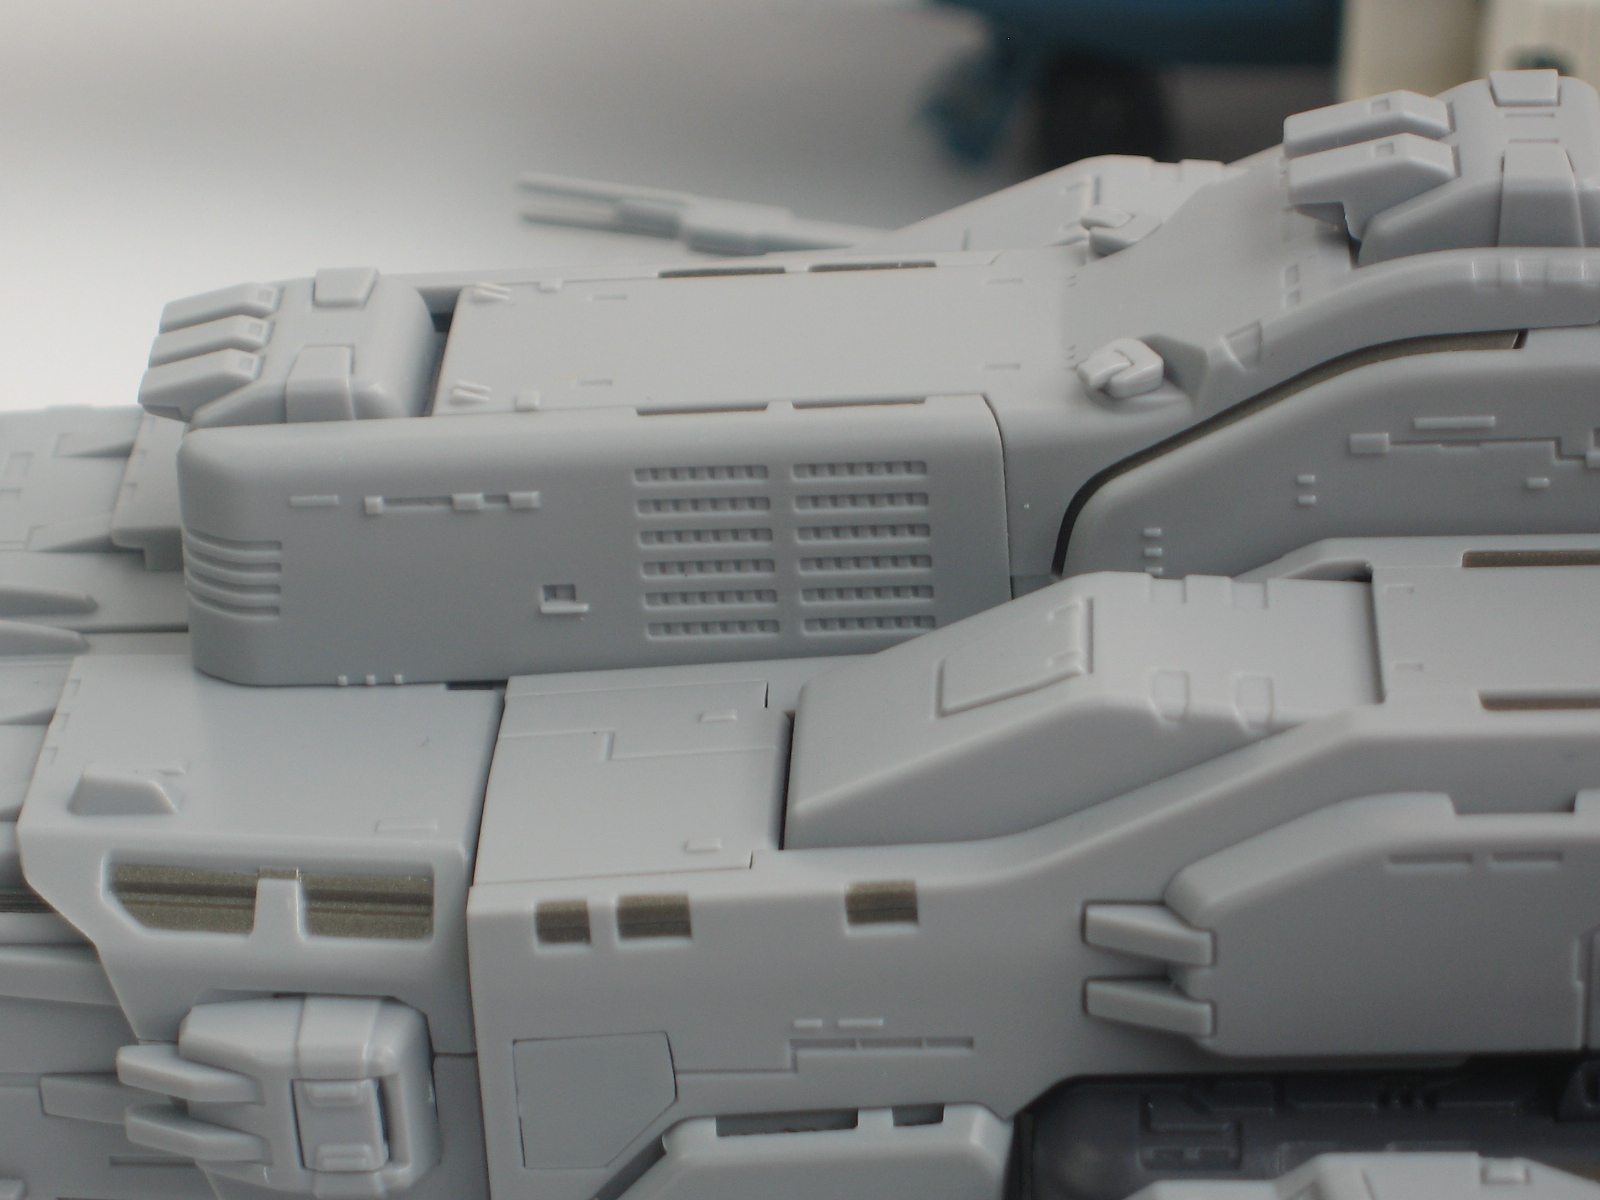
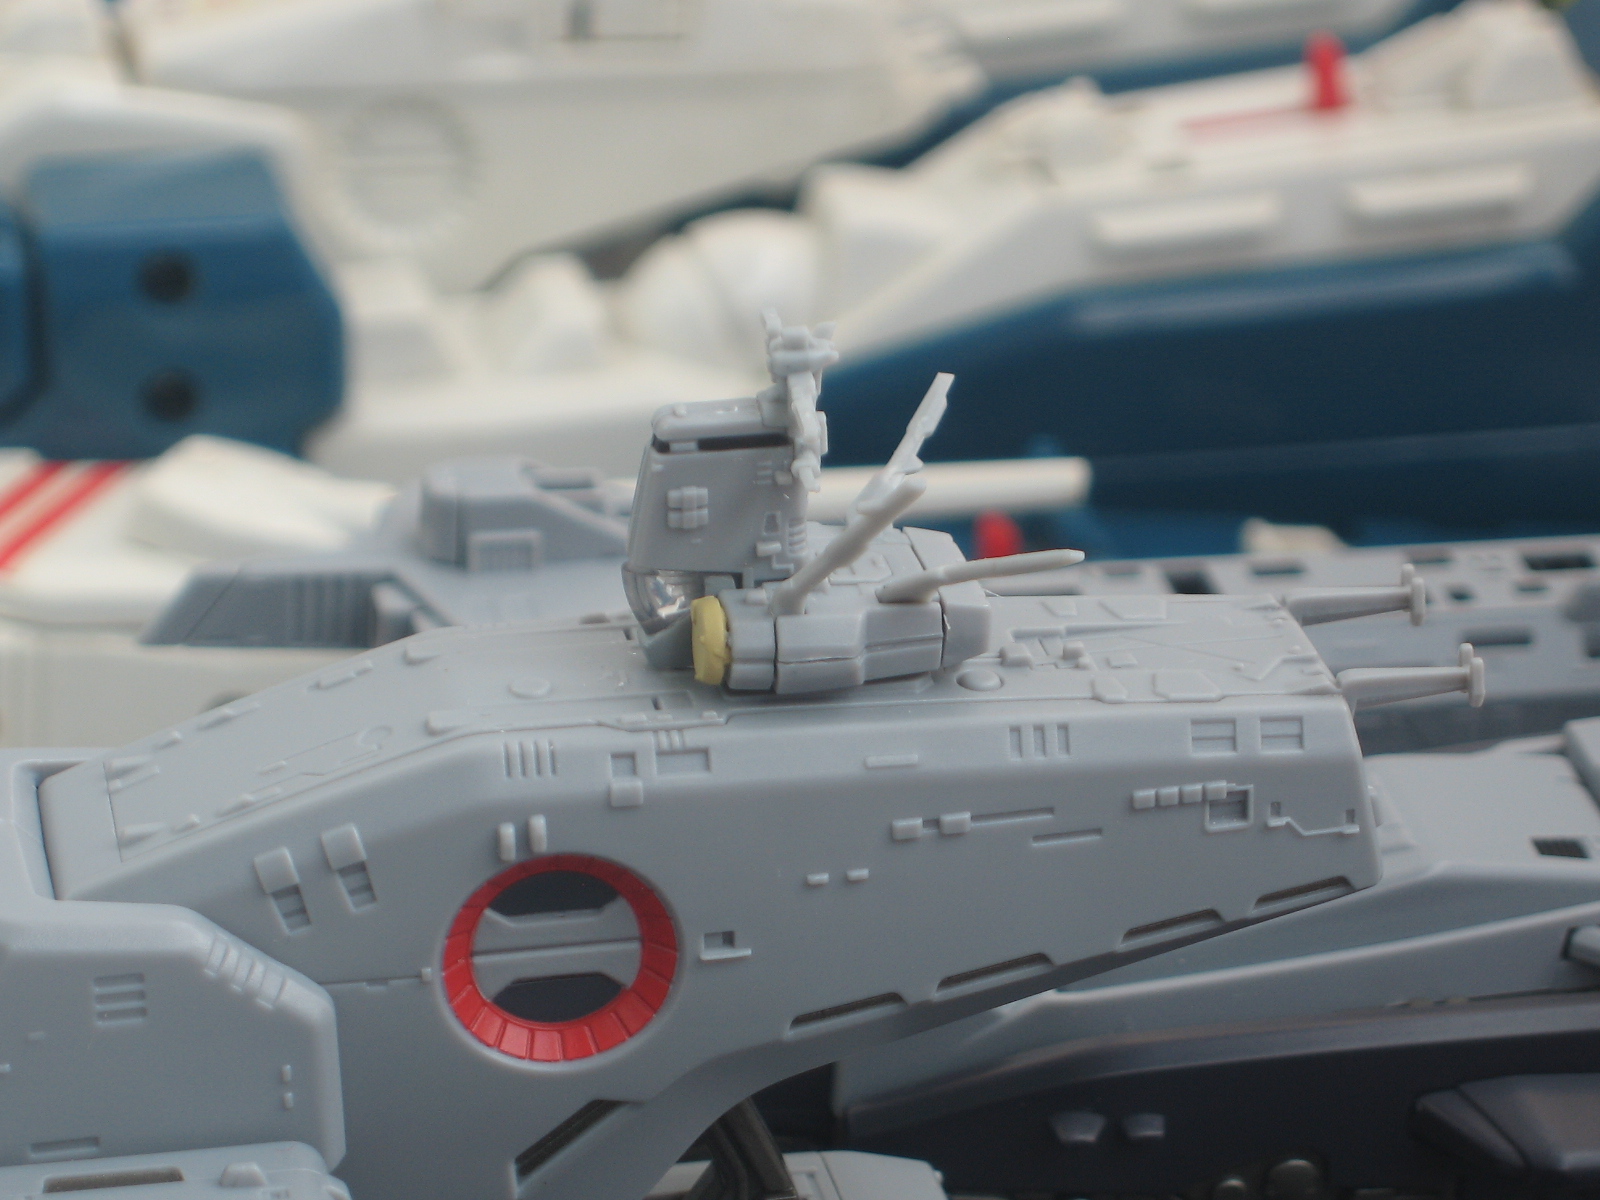
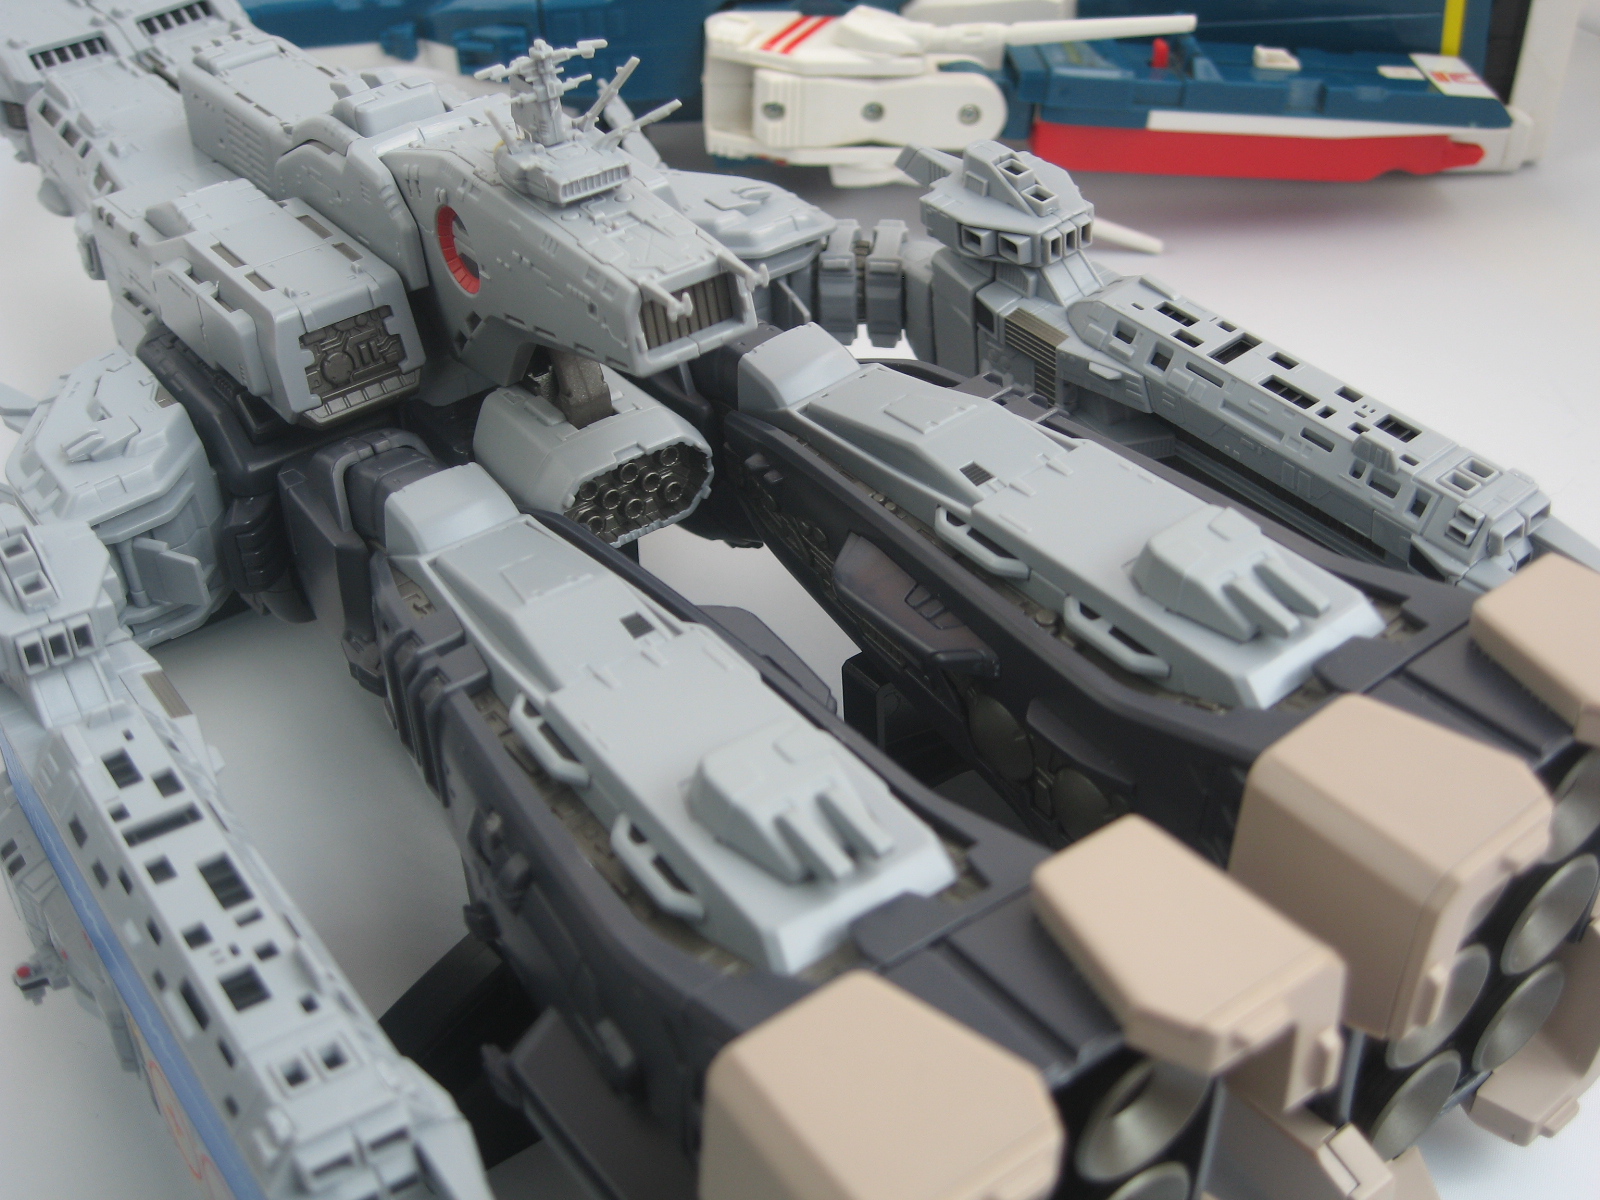
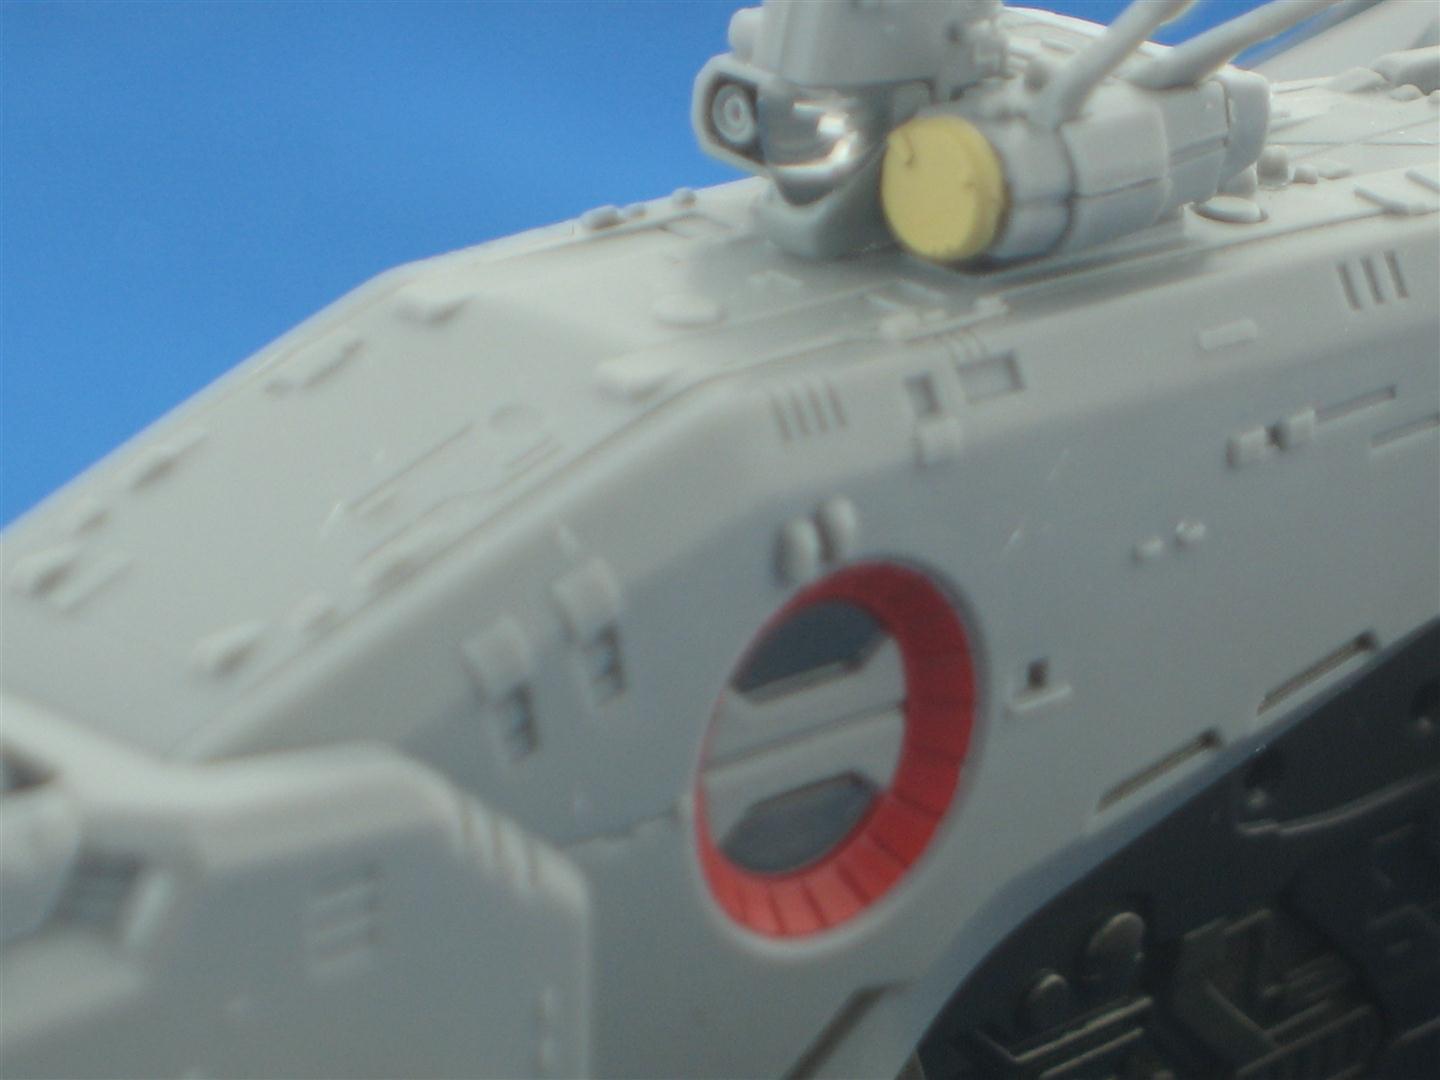
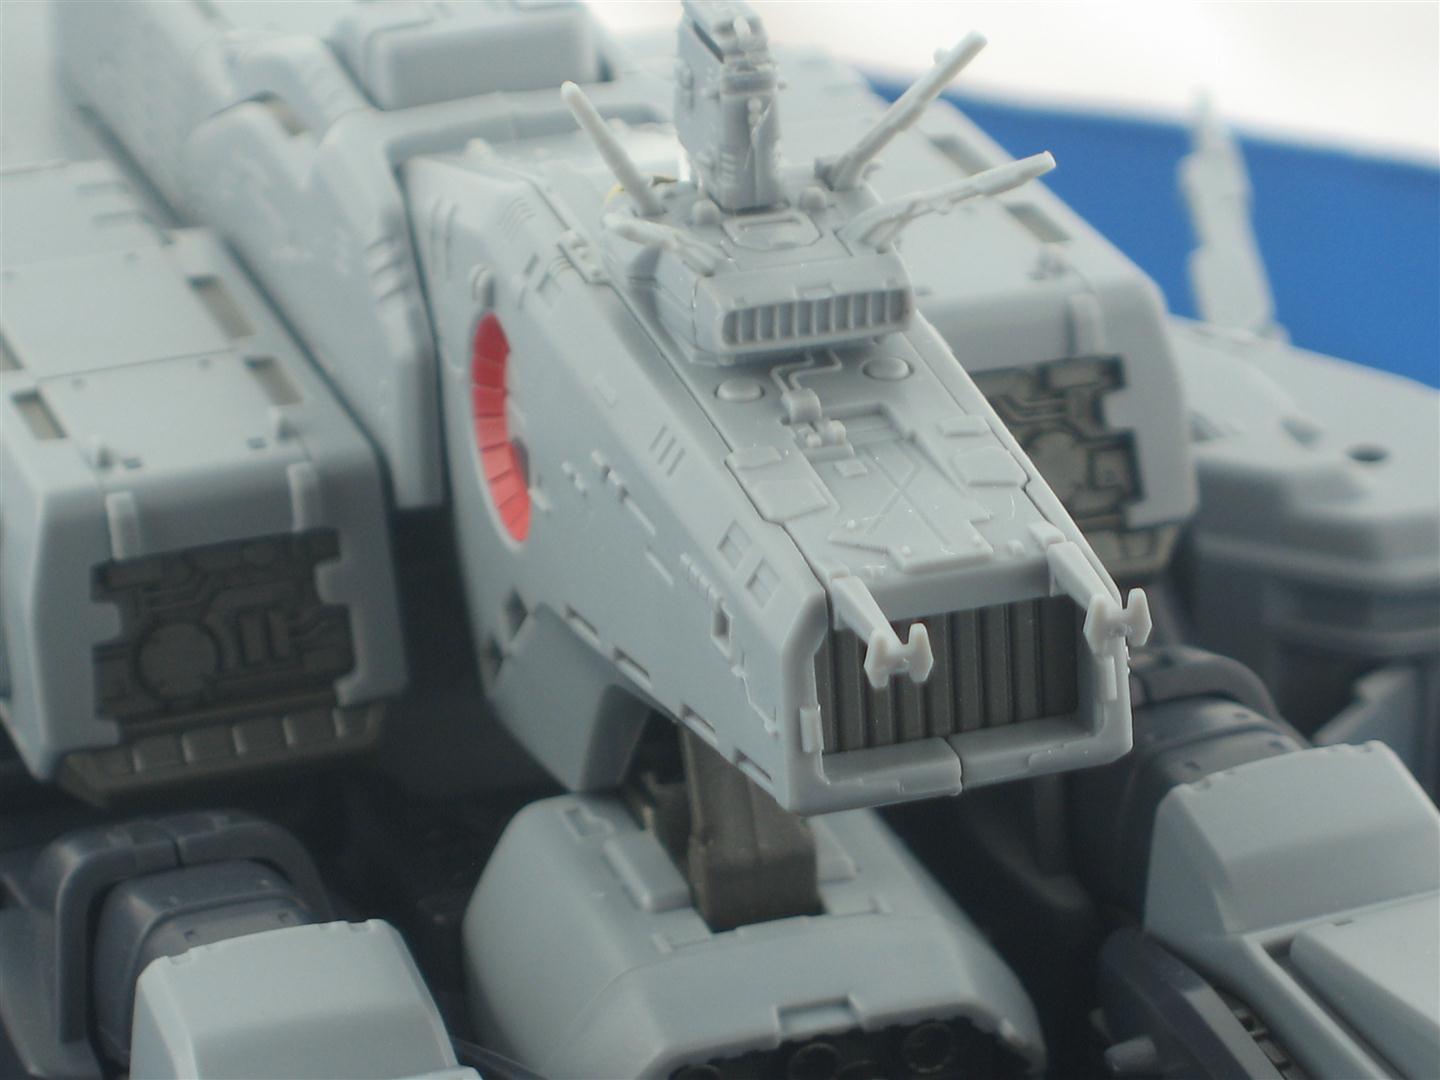
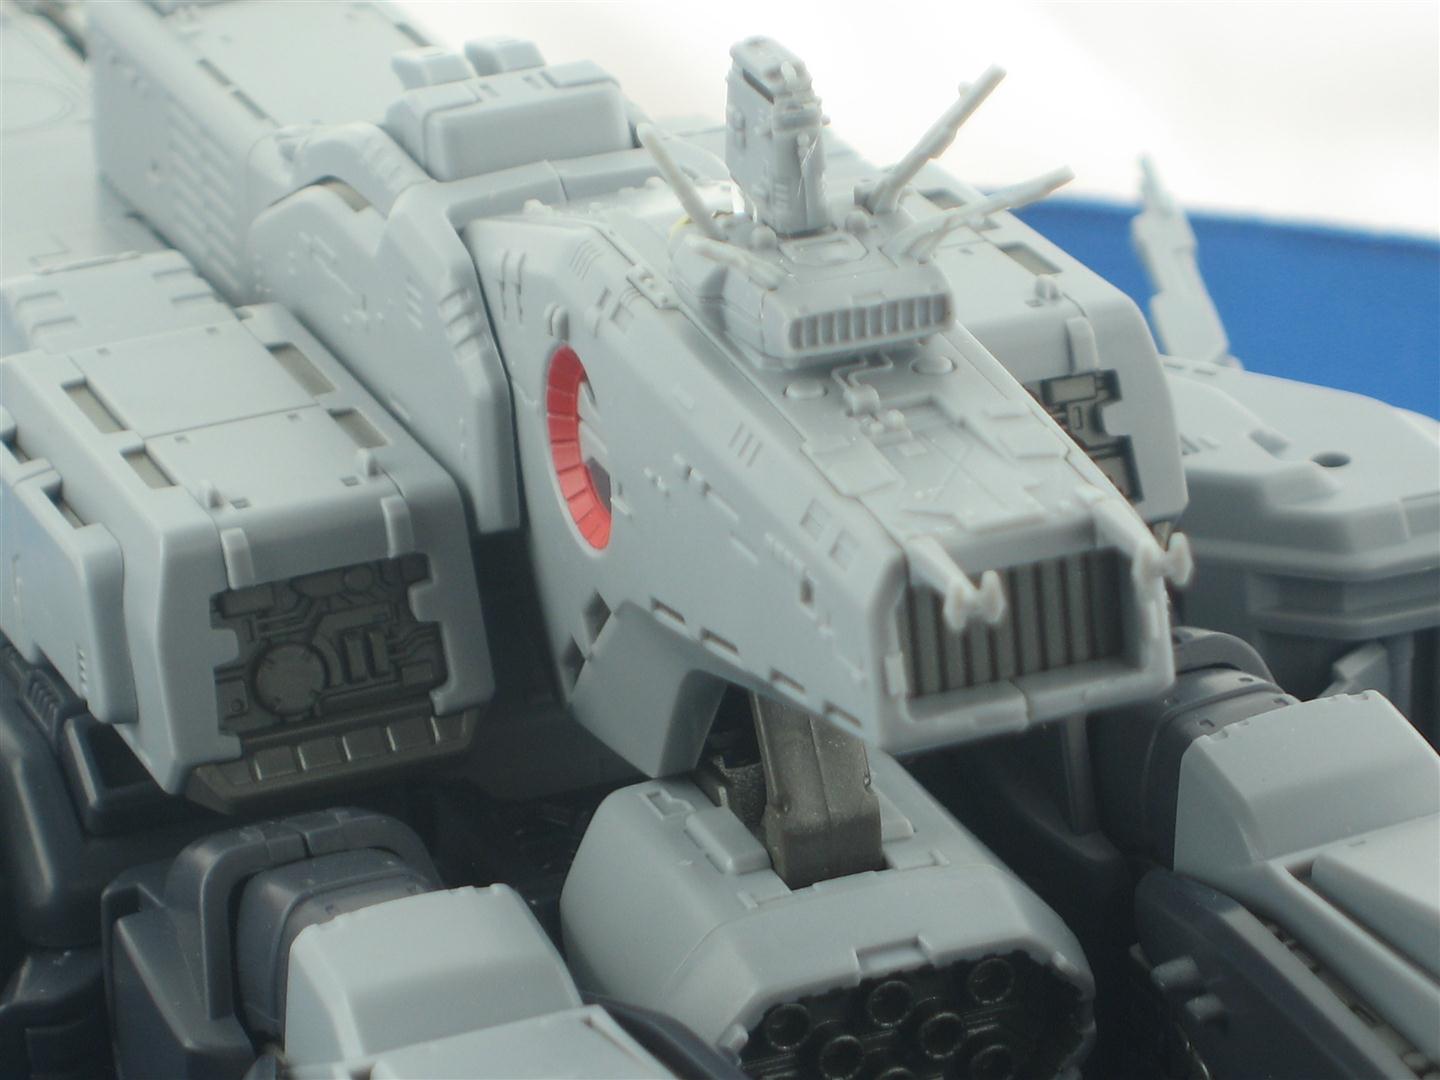
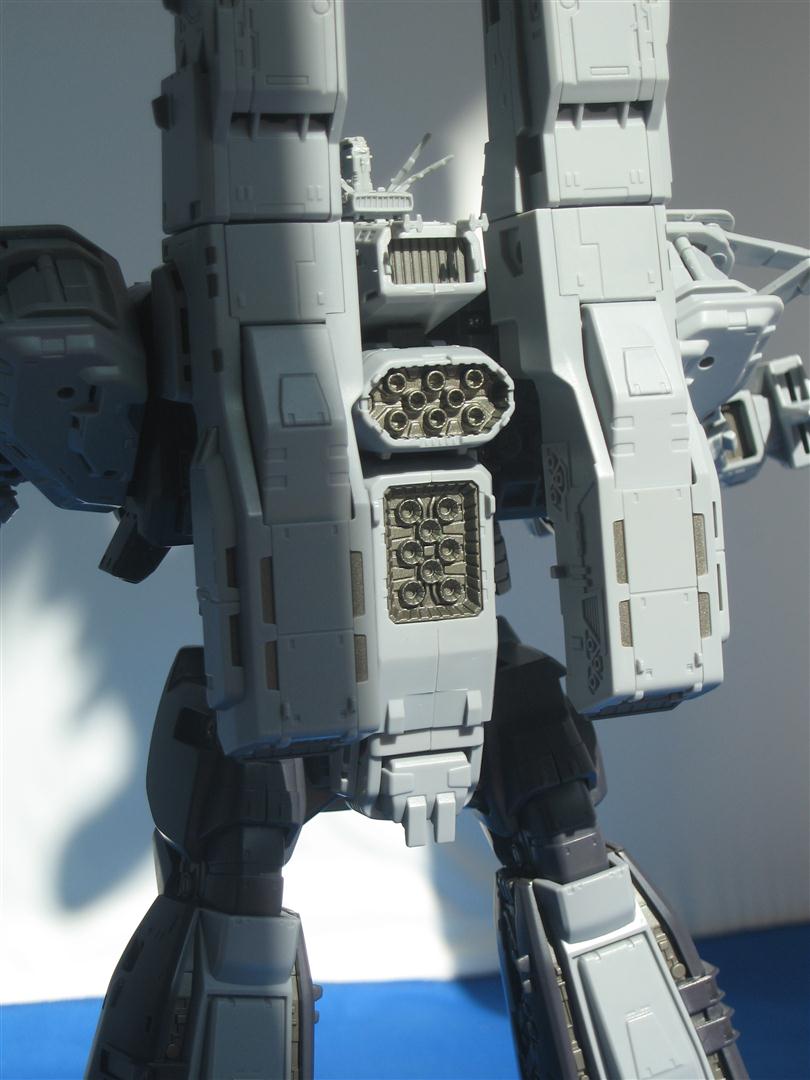
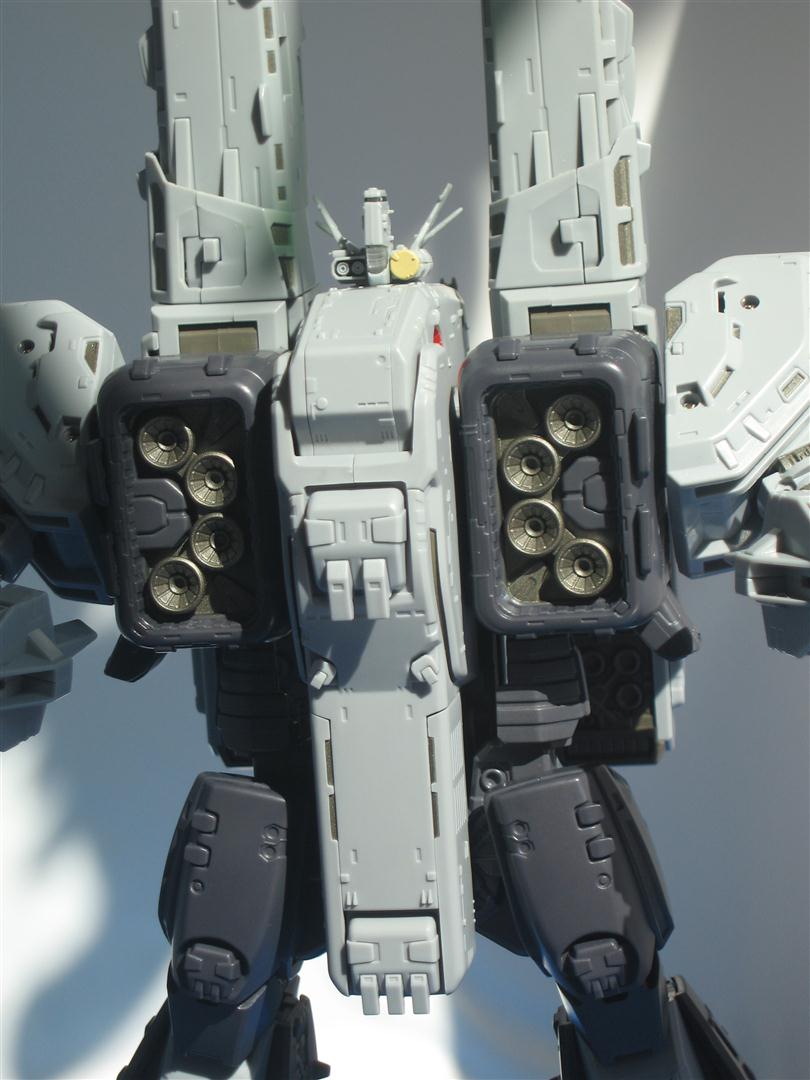
The first thing that will grab you, well it grabbed me anyway, was the sheer attention to detail that has gone into this toy. Yamato have really done a great job packing in all the little details such as gun turrets, thrusters, panel lines, etc.The second thing that went through my mind is that how much of a sense-of-scale this amazing level of detail gives you. It really made it possible for me to imagine just how large a spaceship the real SDF-1 would be. This is something that the older Wave and Takatoku versions were never able to accomplish, at least for me.
Despite being of mostly ABS construction, this is a fairly hefty toy weighing in at just under a kilo (971g to be exact (according to Yamato, as my scales are broken). The toy feels solid and there’s nothing that really gives you the impression of fragility, except of course for some of the small antenna on the head.
Joints & Articulation
Fans of ratchet joints will be happy to know that this toy has plenty. The ratchet joints on the toy are:
- Hip articulation for A-stance (capable of 1 click movement).
The good thing about all these ratchet joints on the arms of the toy is that it means it will be virtually impossible for the arms to sag in either mode and the toy should be able to hold position for its lifetime.
The other joints such as the upper arm rotation point, rotation points on the main gun boom, knee back-&-forth movement are all simple friction joints, but so far are all nice all sufficiently tight. The main gun itself pivots to firing position on some seriously strong hinges.
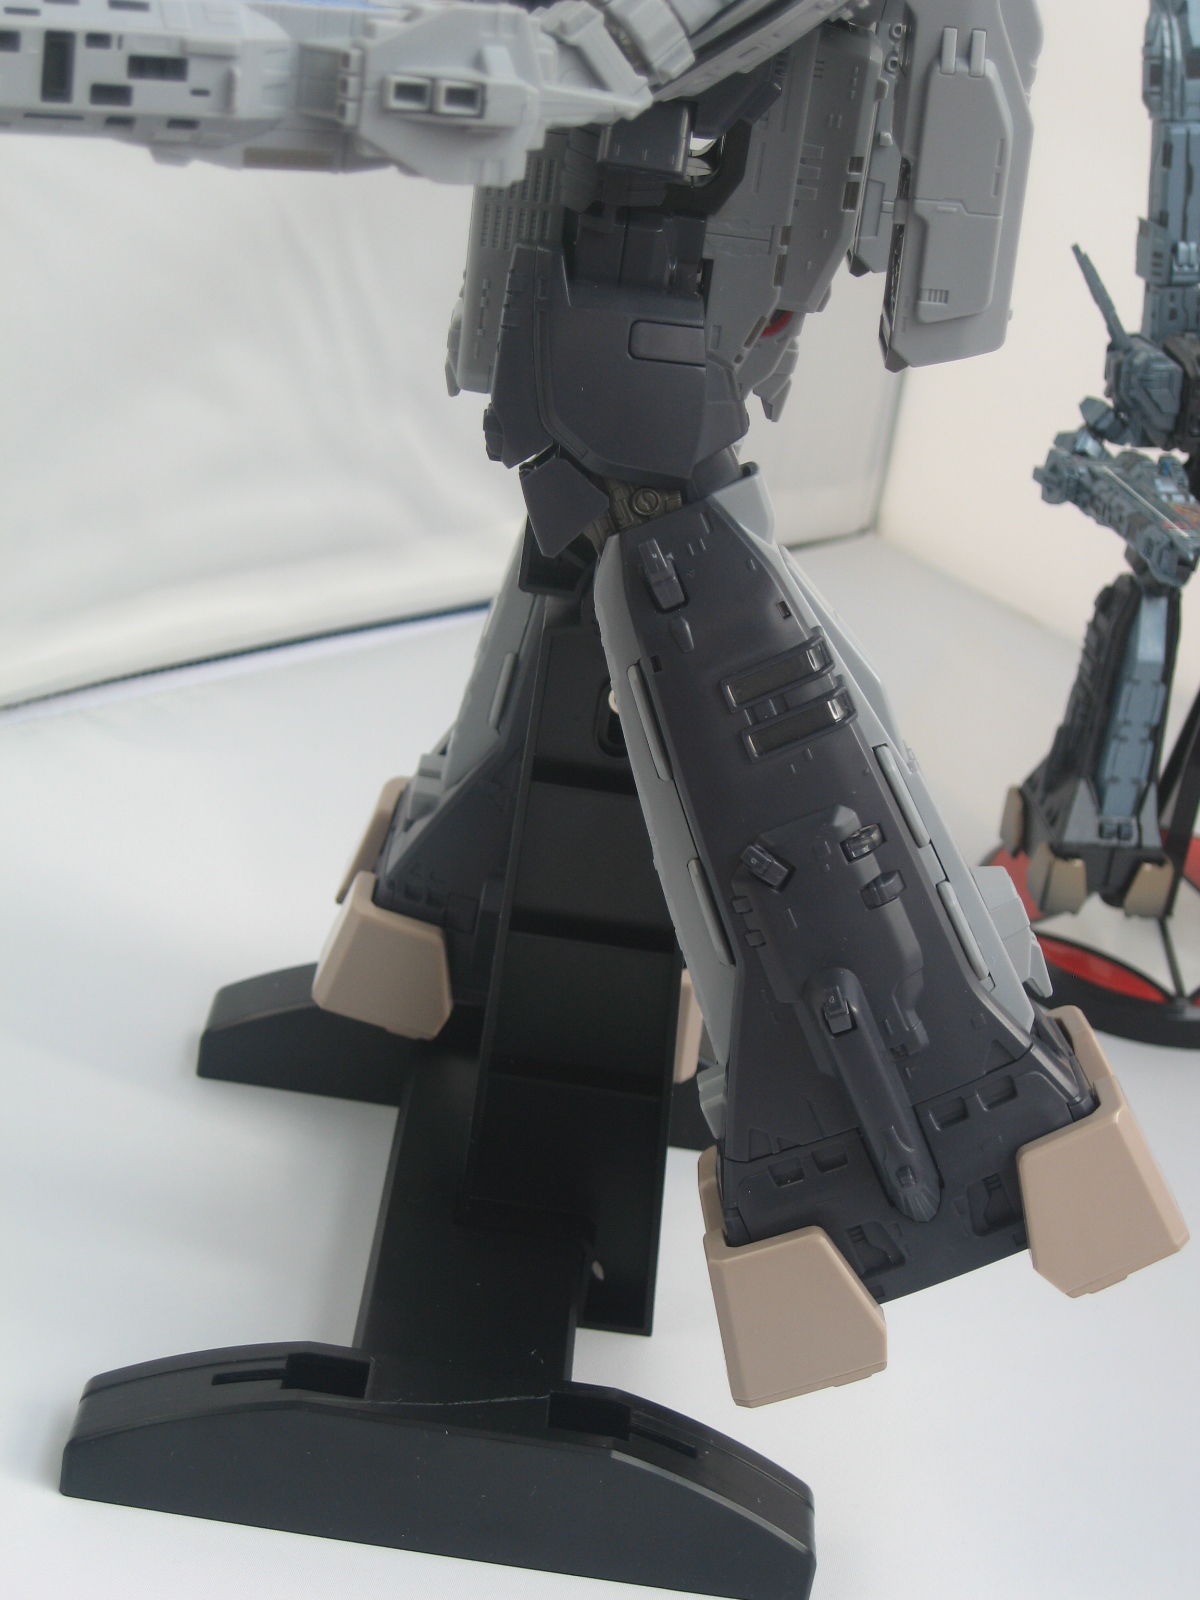
And what I think is a first for an SDF-1 toy, this version has knee articulation, which you can see in the third close-up pic below and also in the video transformation guide The articulation is limited, but it is there.
Is there any articulation that I think is missing or I would like to see added? well, I would have preferred it if some of the gun turrets were able to rotate, but unfortunately they are all fixed in position.
Materials
The Yamato 1:3000 scale SDF-1 is constructed mostly of ABS plastic, but quite a lot of tough POM plastic parts are also used on the joints and other stress bearing parts.
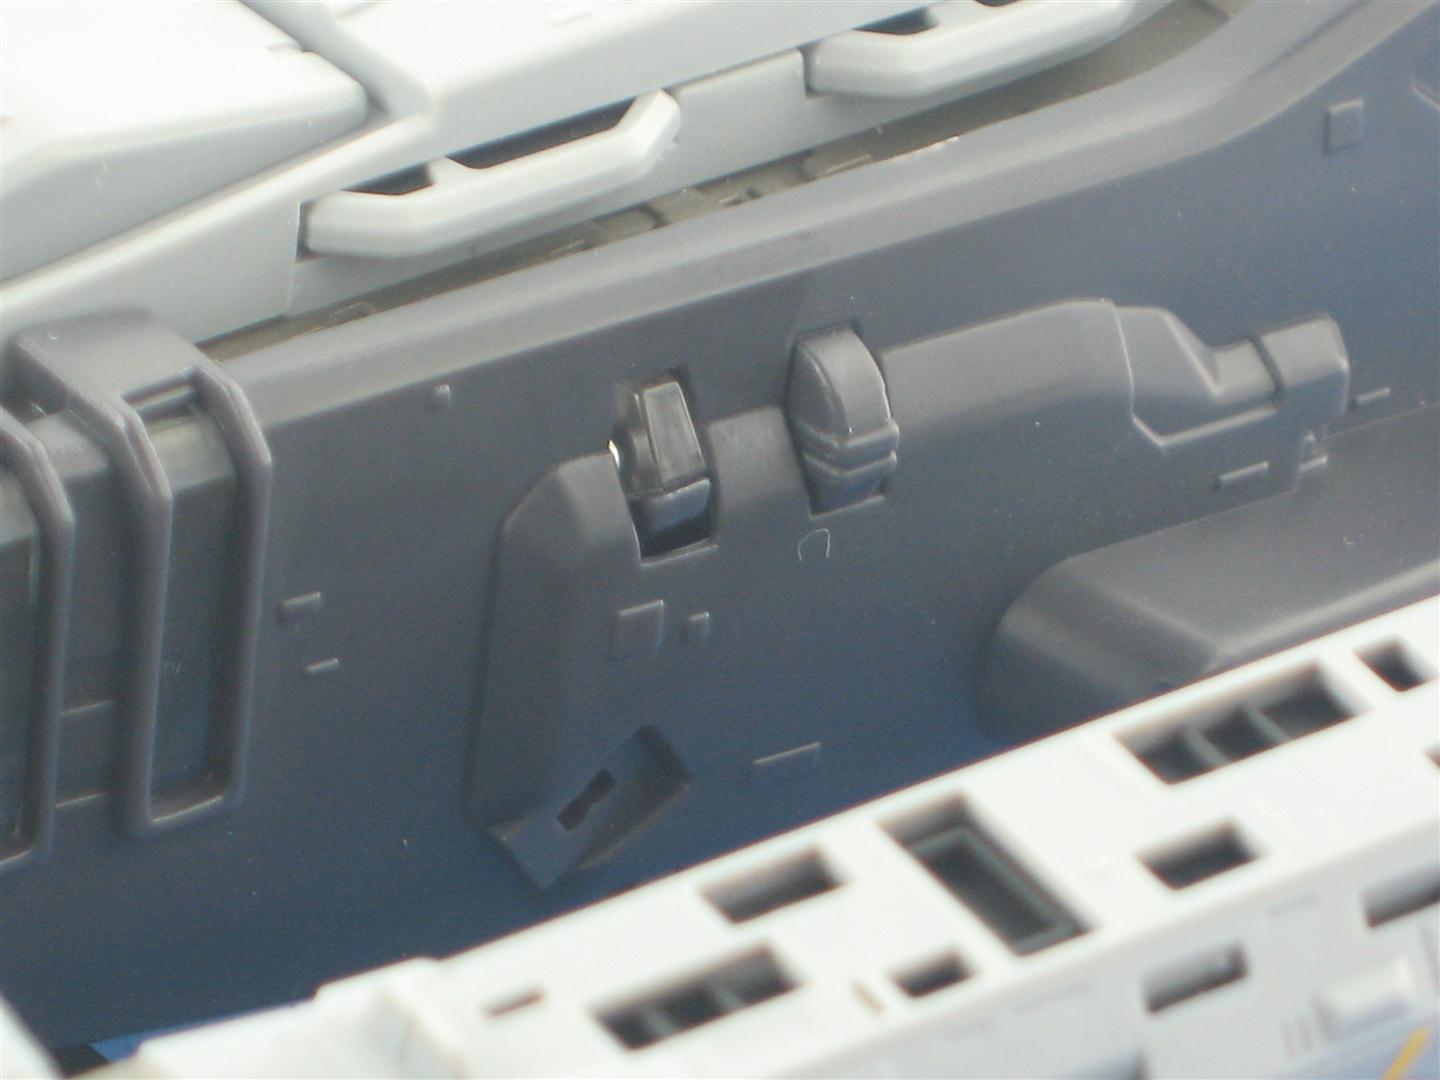
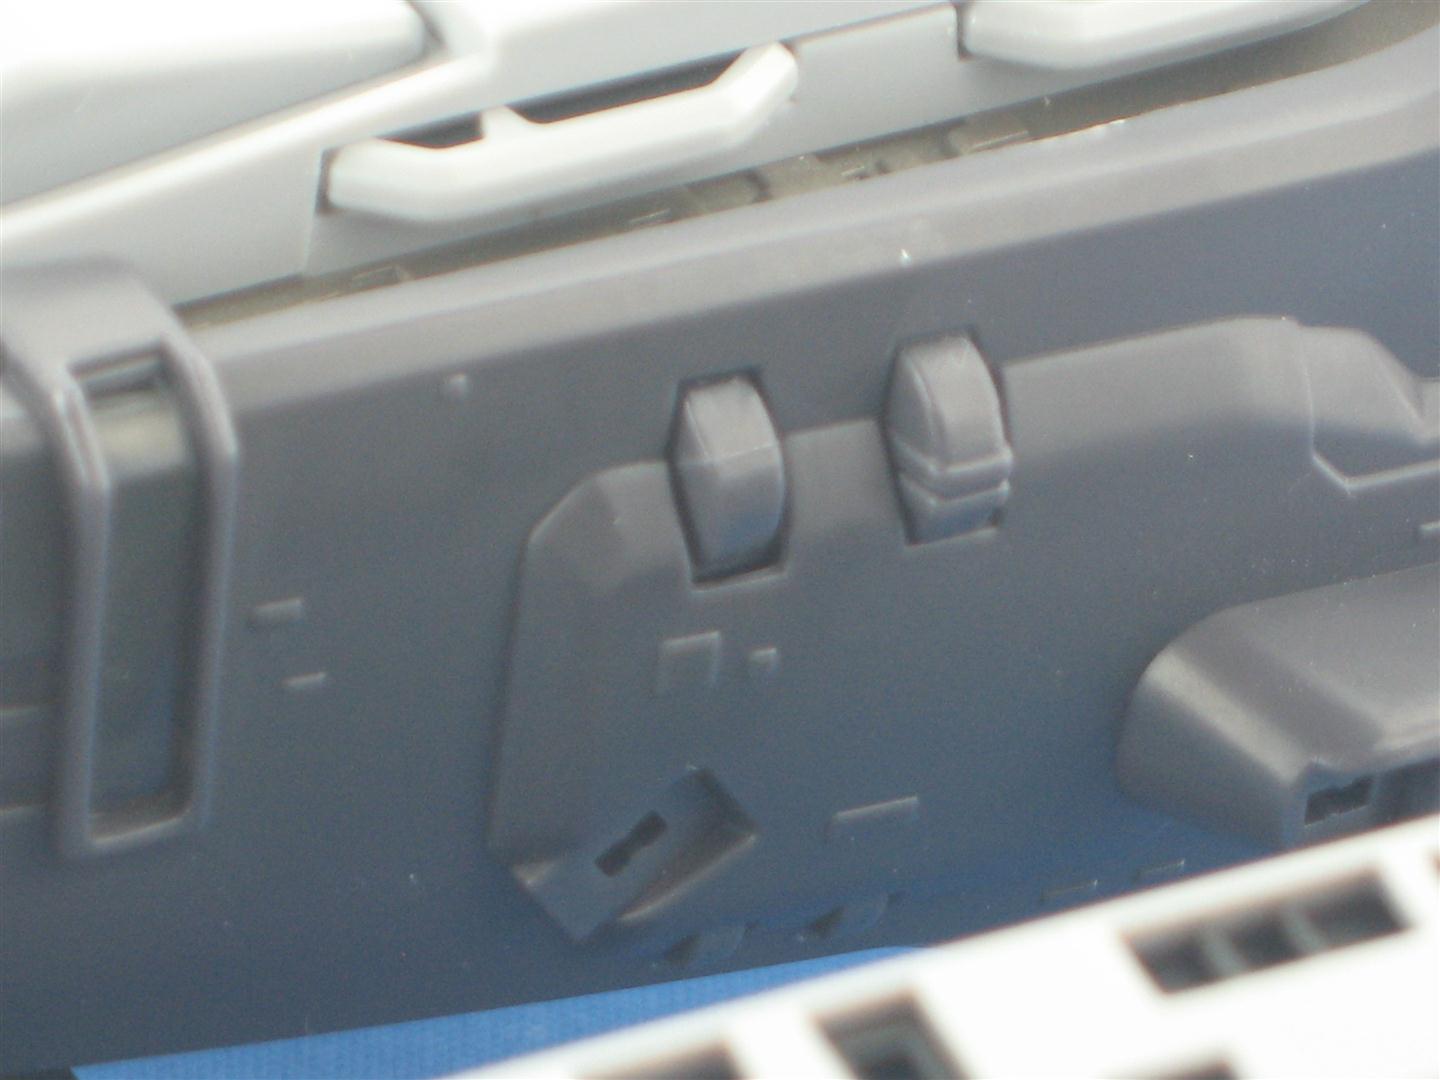
Quality of the ABS plastic used is very high and there were no scratches, blemishes, stress marks, or other defects that I could see.
The metal parts are mainly the U-shaped track inside the main body, on which the main body slides and rotates around for transformation between Cruiser and Attacker modes and also the hip joint section is metal. There are also magnets in the upper arms, where the two ARMDs attach and metal plates in the rear of the ARMDs for connection to the magnets. Besides the above-mentioned metal parts, there are also some additional internal metal parts.Paint Application
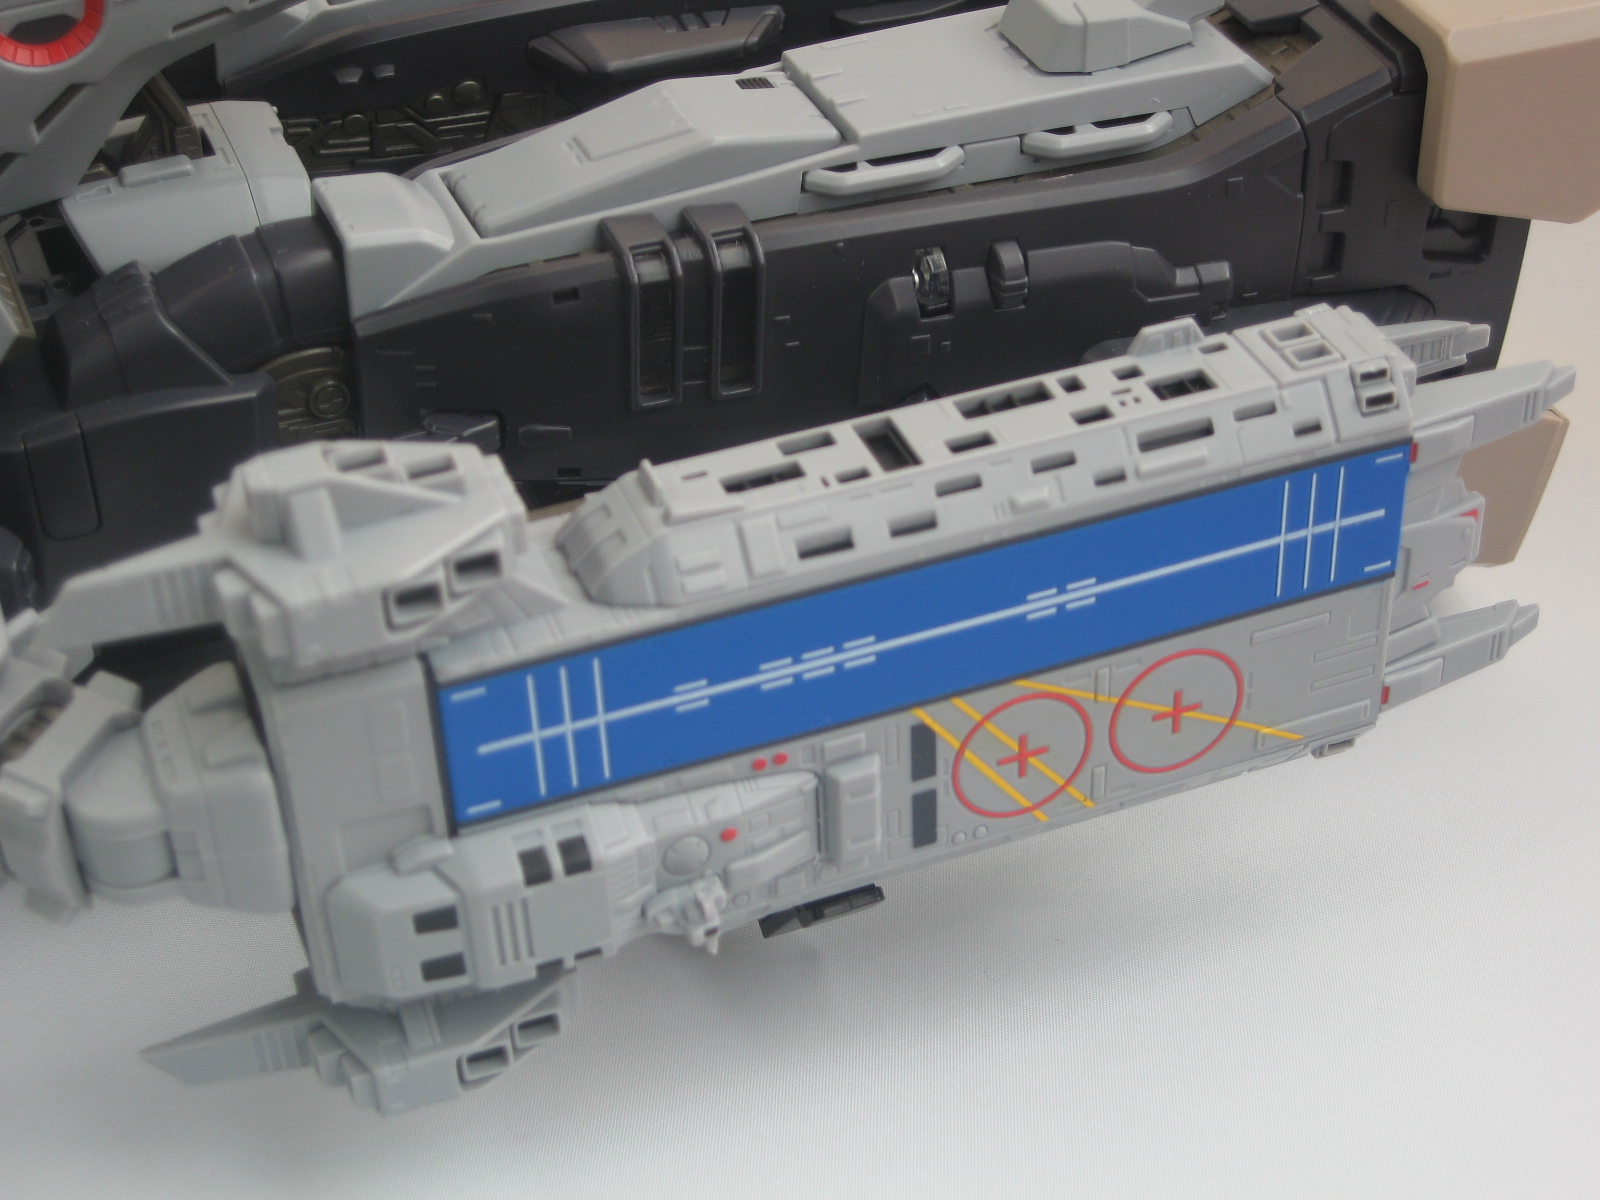
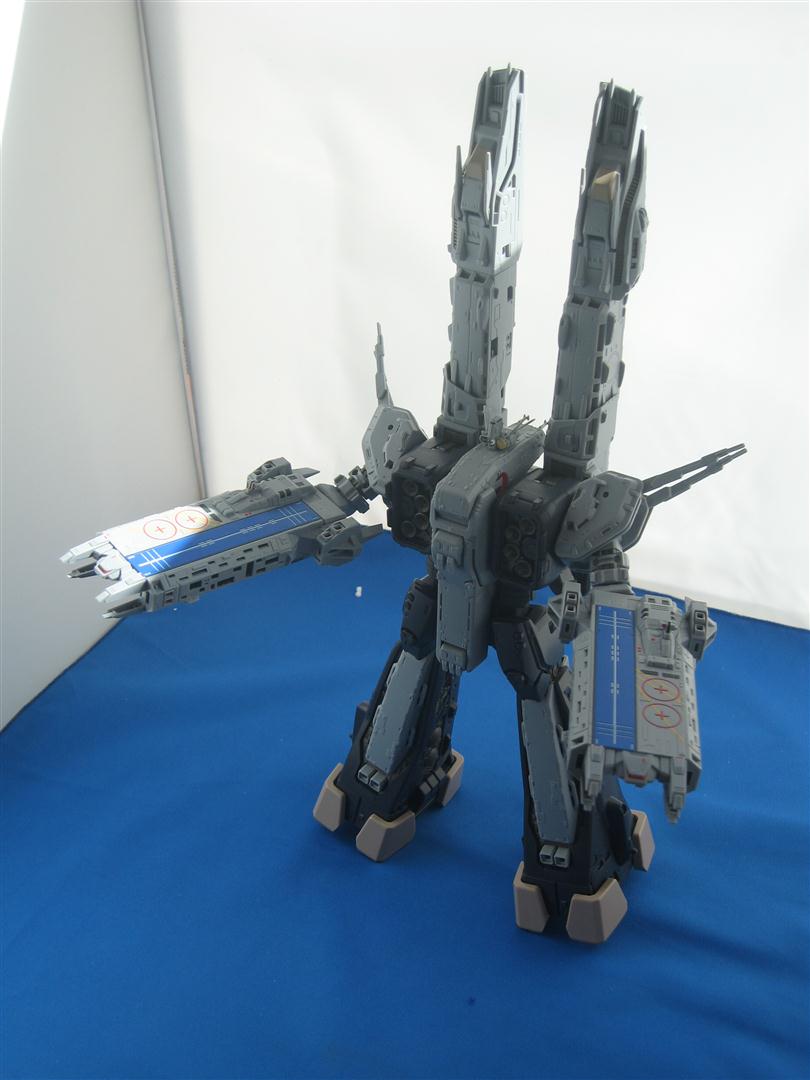
The paint apps on the SDF-1 are fairly limited but everything that should be painted is painted, from the deck of the ARMDs, to the head, to the various black panels and bays and thrusters. The paint apps that are present are very well done in my opinion.The DYRL SDF-1, as it appears in the 1984 movie is not a mass of colour so Yamato have pretty much nailed the paint apps as far as I’m concerned with nothing left unpainted that should be painted. The sole exception is the Macross city, inside the left leg, which is unpainted. I'm especially happy with how the two ARMDs were painted.
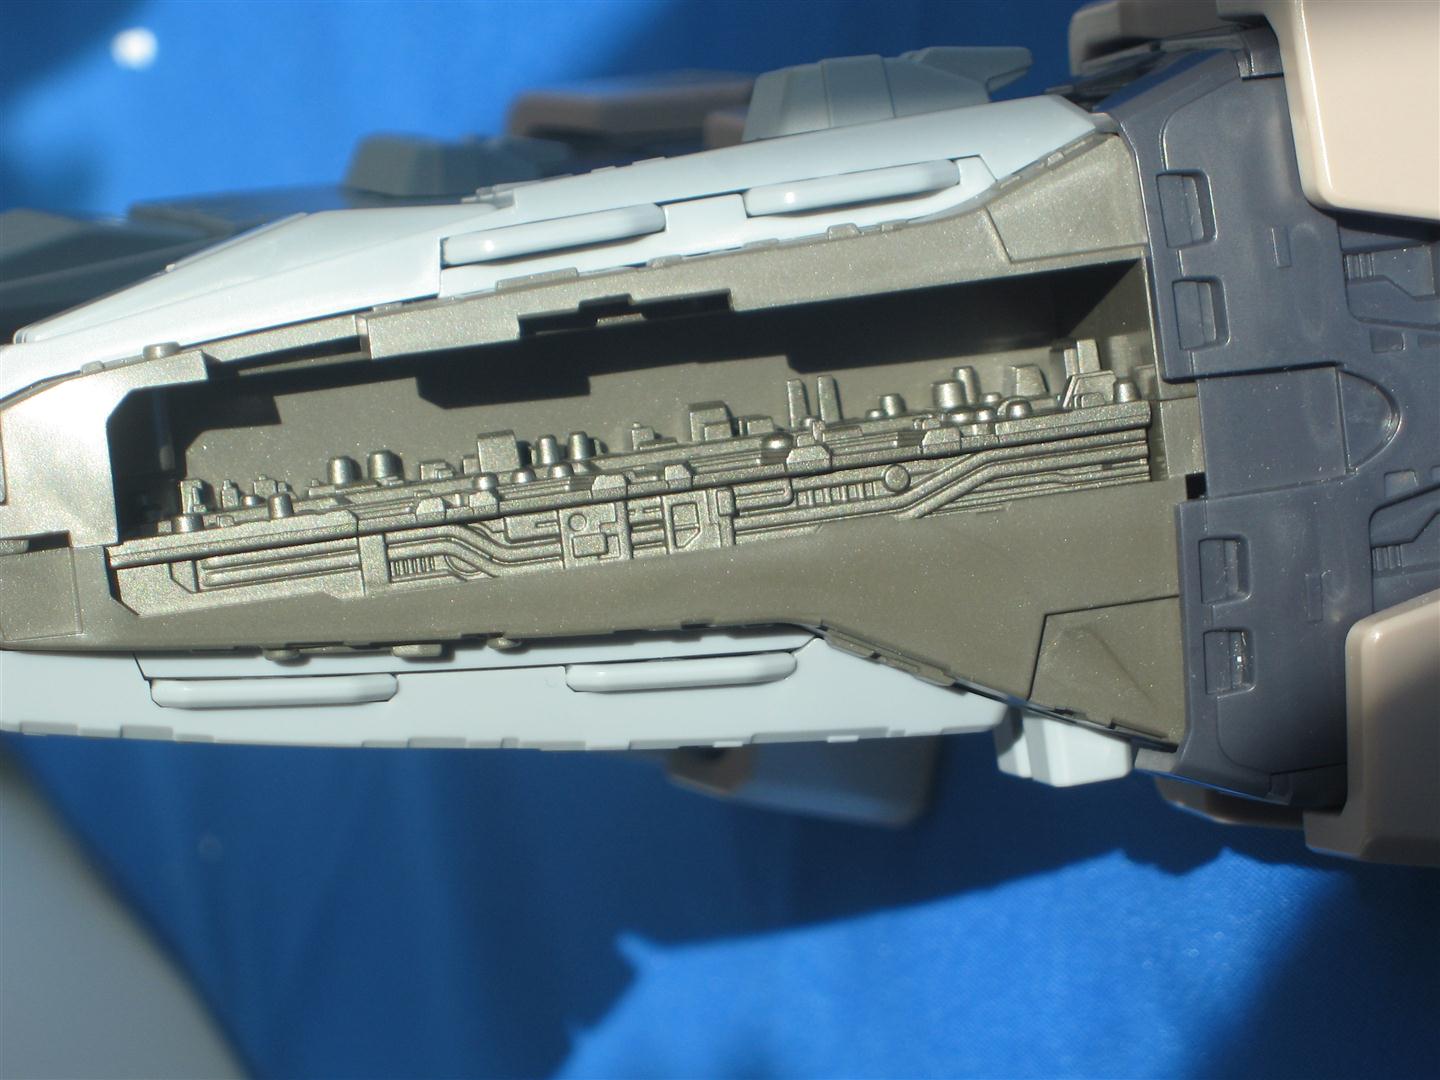
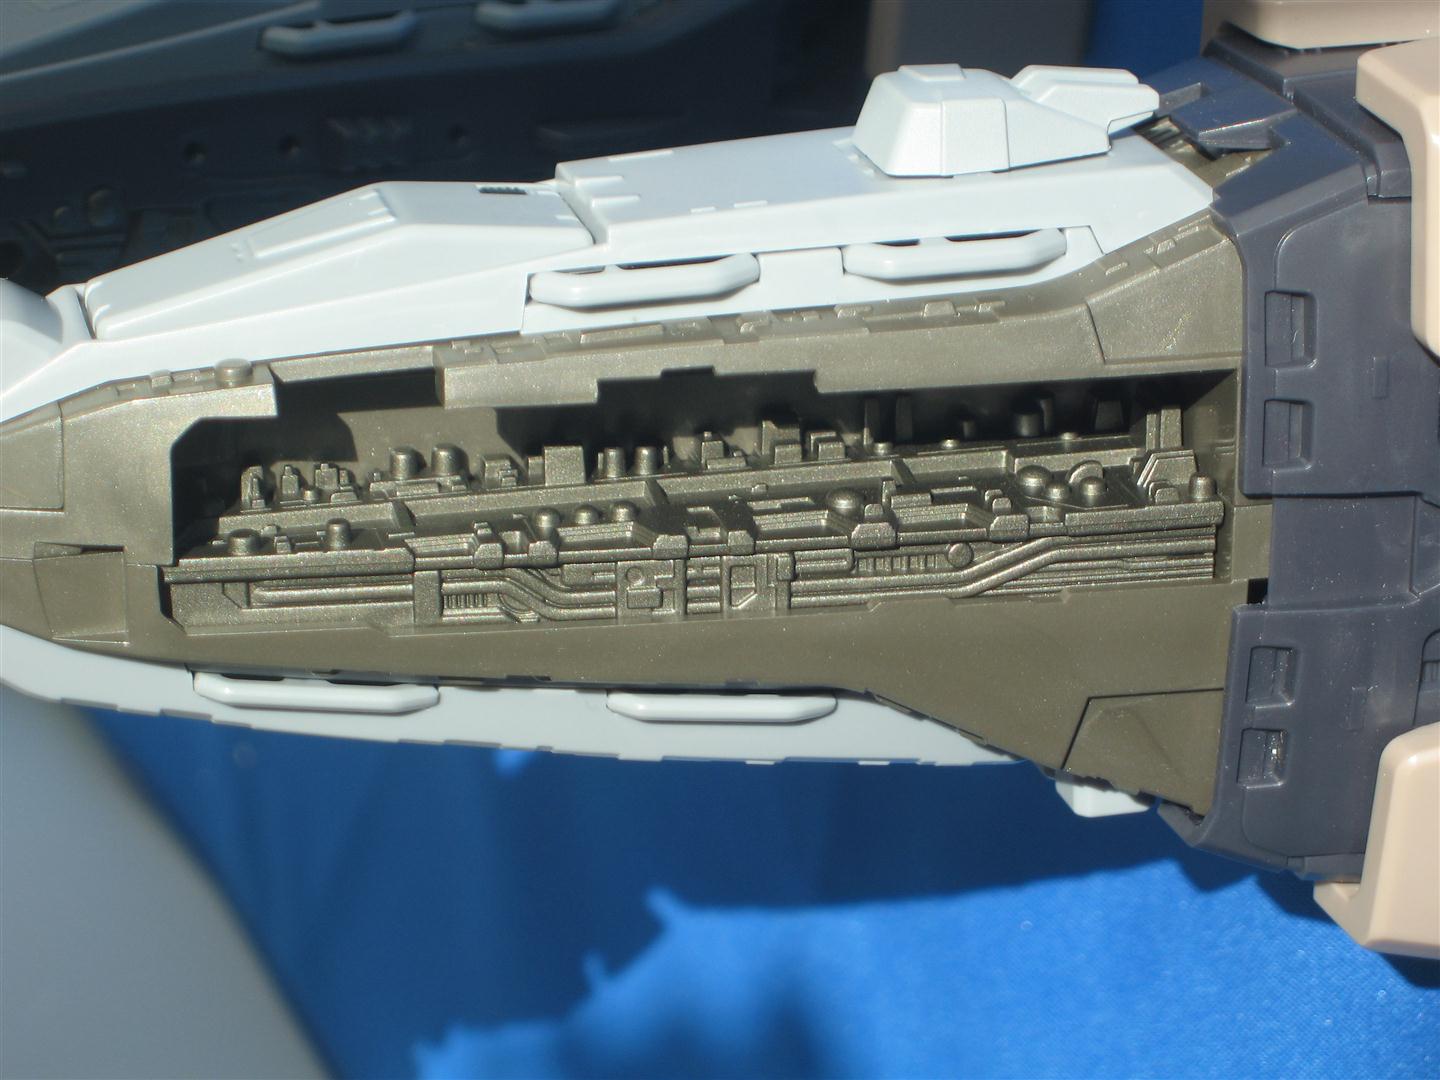
Gimmicks & Features
The Yamato 1:3000 scale SDF-1 has a couple of noticeable features and gimmicks. Firstly, the covering of the outer left lower leg is removable to reveal Macross city within the leg (unpainted, as mentioned above). Also, the two long rectangular windows on both the right and left legs are clear plastic, which is a nice touch.
Secondly, on the same removable left leg panel. One of the two small blisters, which are located to the right of the long rectangular windows can be rotated from its closed armoured state to opened window state.
While not really a gimmick, a nice feature is that not only is the head visor (window) clear plastic, but if you look very closely Yamato actually have built in some the detail of the multiple bridge decks behind the clear plastic.
SDF-1
City Section
|
|||
 |
 |
 |
 |
Face
with bridge decks
|
|
 |
 |
Photos of the toy with all the small parts fitted and close up-Shots
Cruiser Mode Close-Up
(with small parts fitted)
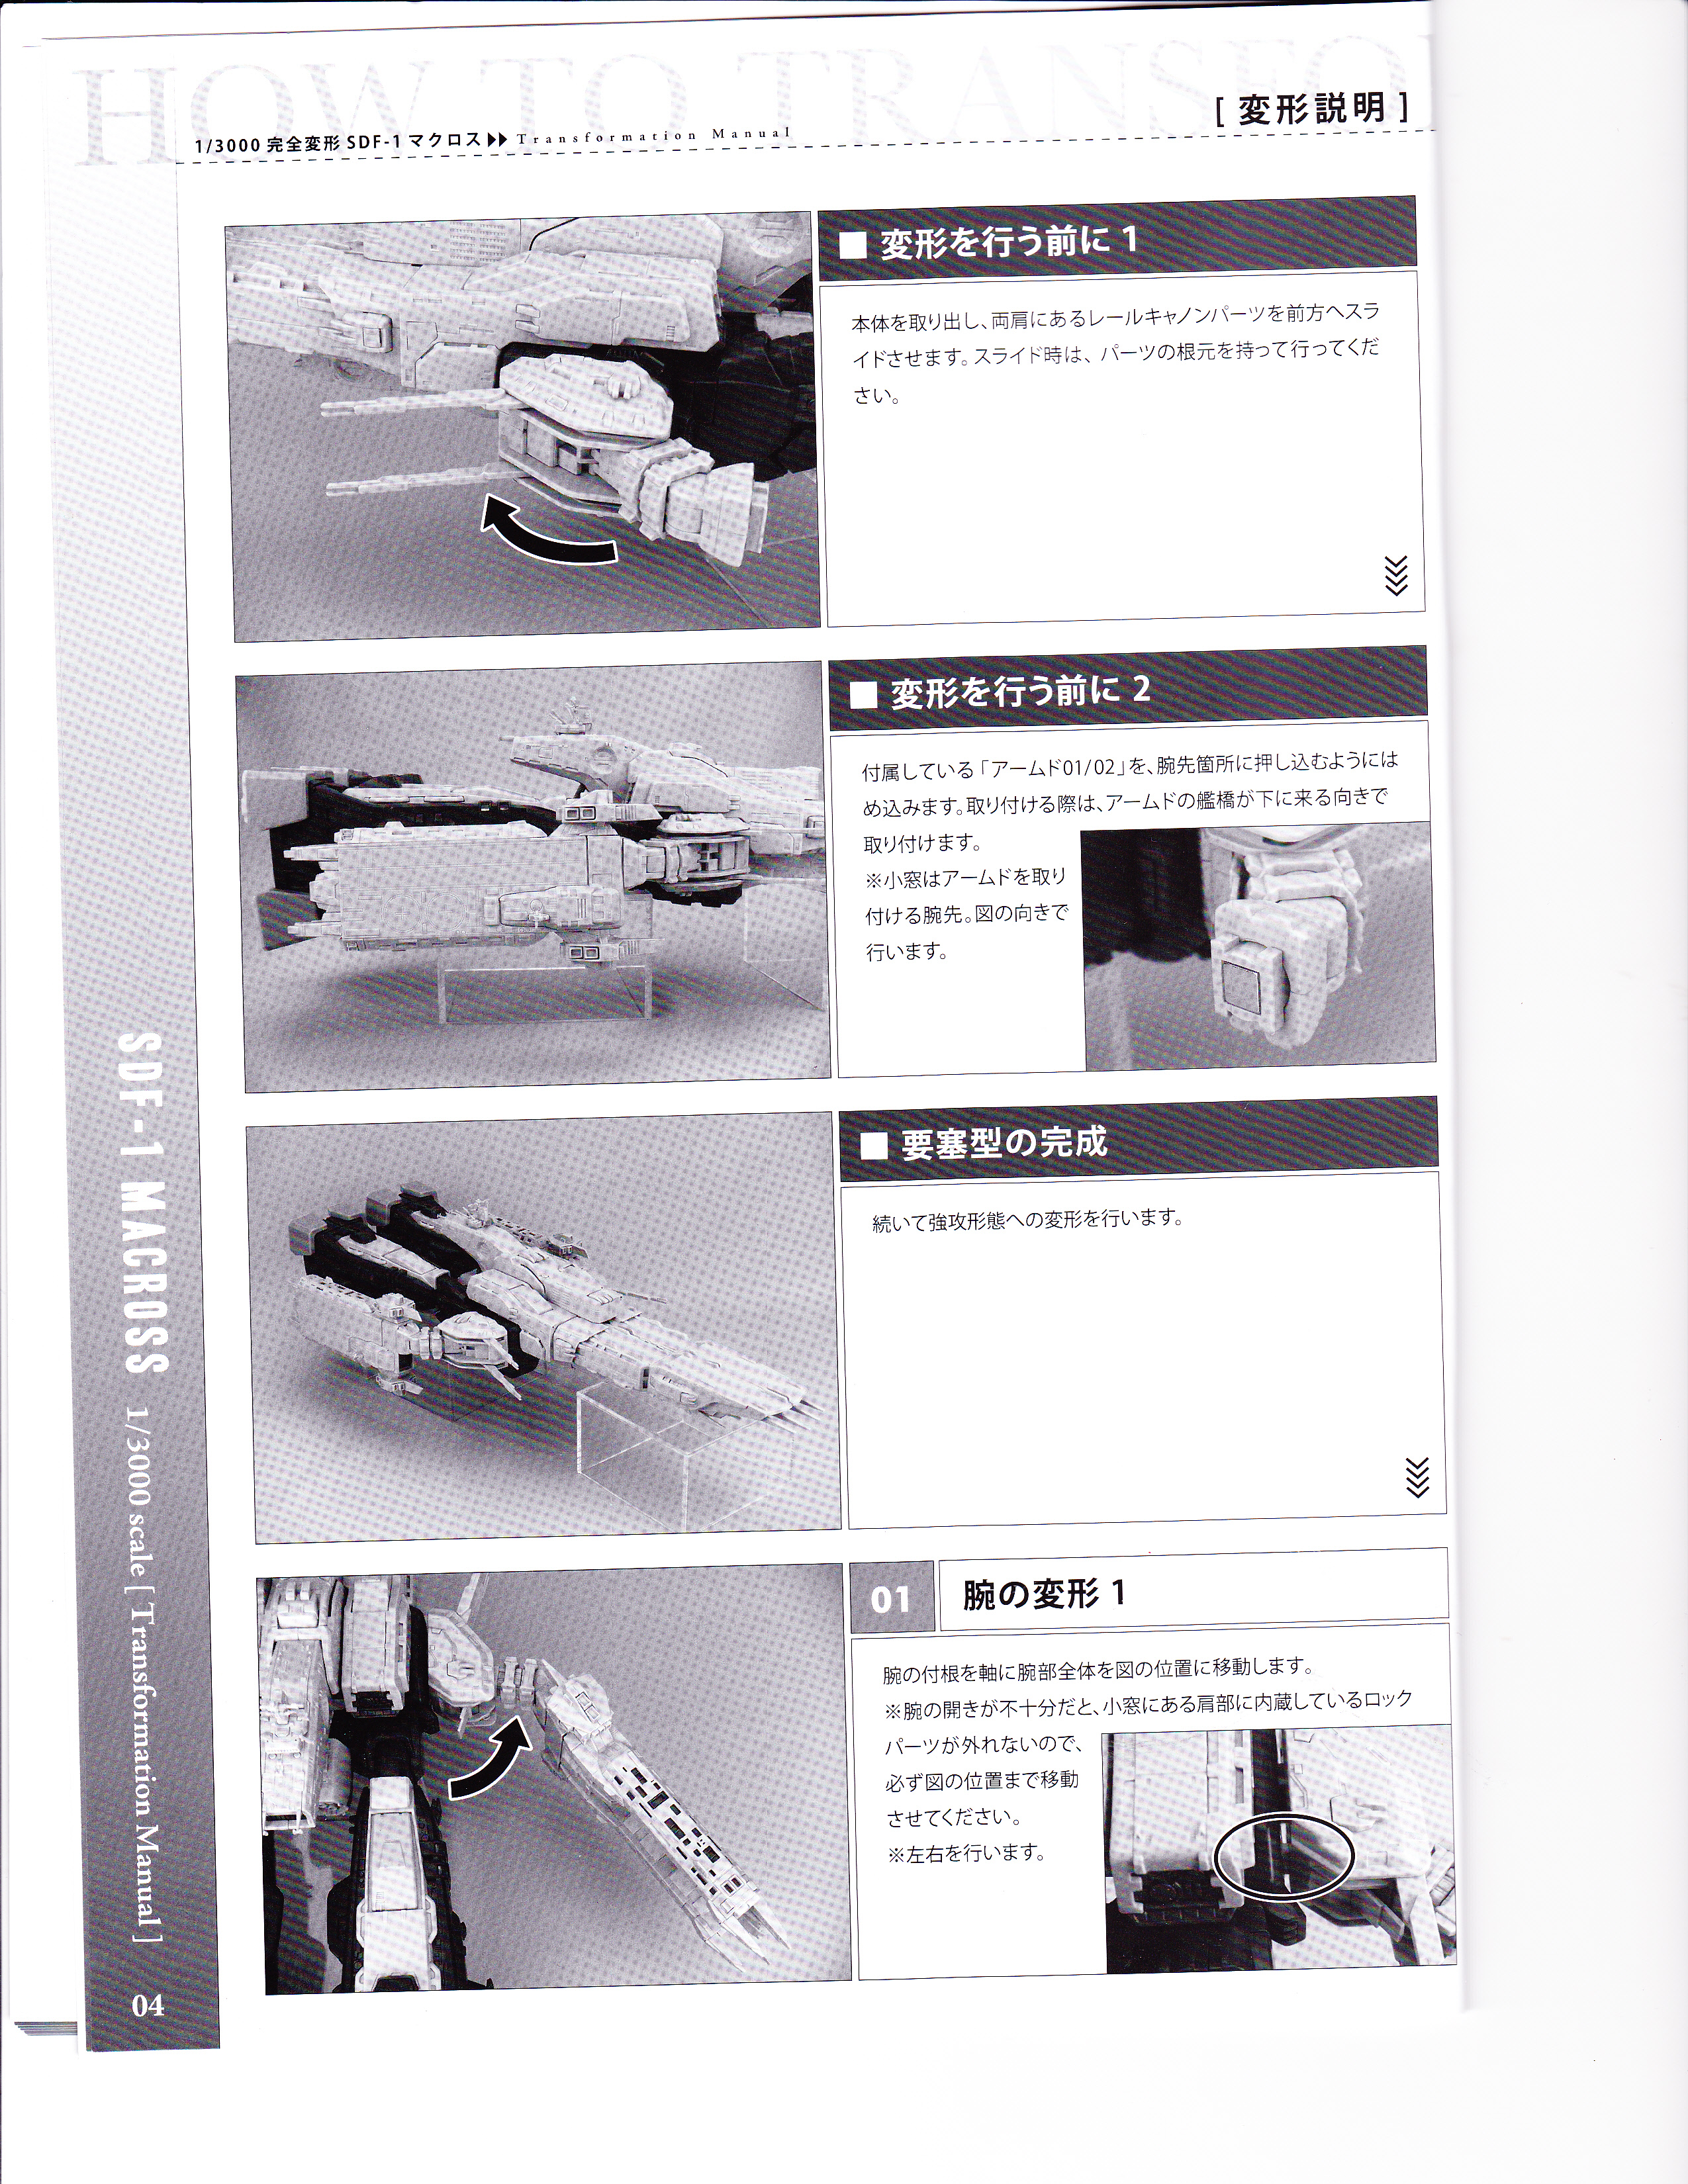
Transformation Comments
Transformation of this toy is really pretty simple and intuitive.
I've added two transformation videos below showing how to transform from Cruiser to Attacker mode and vice versa, so I'm not going to write much about the transformation process here.
Between the videos below and Yamato's instruction manual (also scanned in below), there should be no problems with transforming this toy. If you do have problems with this toy, may I suggest Fisher Price instead of Yamato!
There are only a few steps that really need to be kept in mind when transforming the toy and I have listed these out below:
- When transforming from Cruiser mode, remember that before you can rotate the shoulders, you have to move the upper arms, so they are at a 90 degree angle to the body, to unlock the tab that allows free rotation of the shoulders.
- Remember to unlock the big catch in the main body, to allow the main body to swing free, so that the body can rotate.
- Remember to pull down the legs when transforming from Cruiser to Attacker mode, to allow sufficient space for the center body block to rotate.
The above points are not a step-by-step transformation guide, rather are just points that you need to pay attention to when transforming. While they may sound confusing now, they should all become clear after watching the two videos.
Transformation Videos
Here's the YouTube video of me transforming the SDF-1 toy from Cruiser to Attacker mode:
And here's the YouTube video of me transforming the SDF-1 toy from Attacker mode back to Cruiser mode:
Here’s links to the two YouTube videos of me transforming the SDF-1 toy from Cruiser to Attacker mode and then back again:
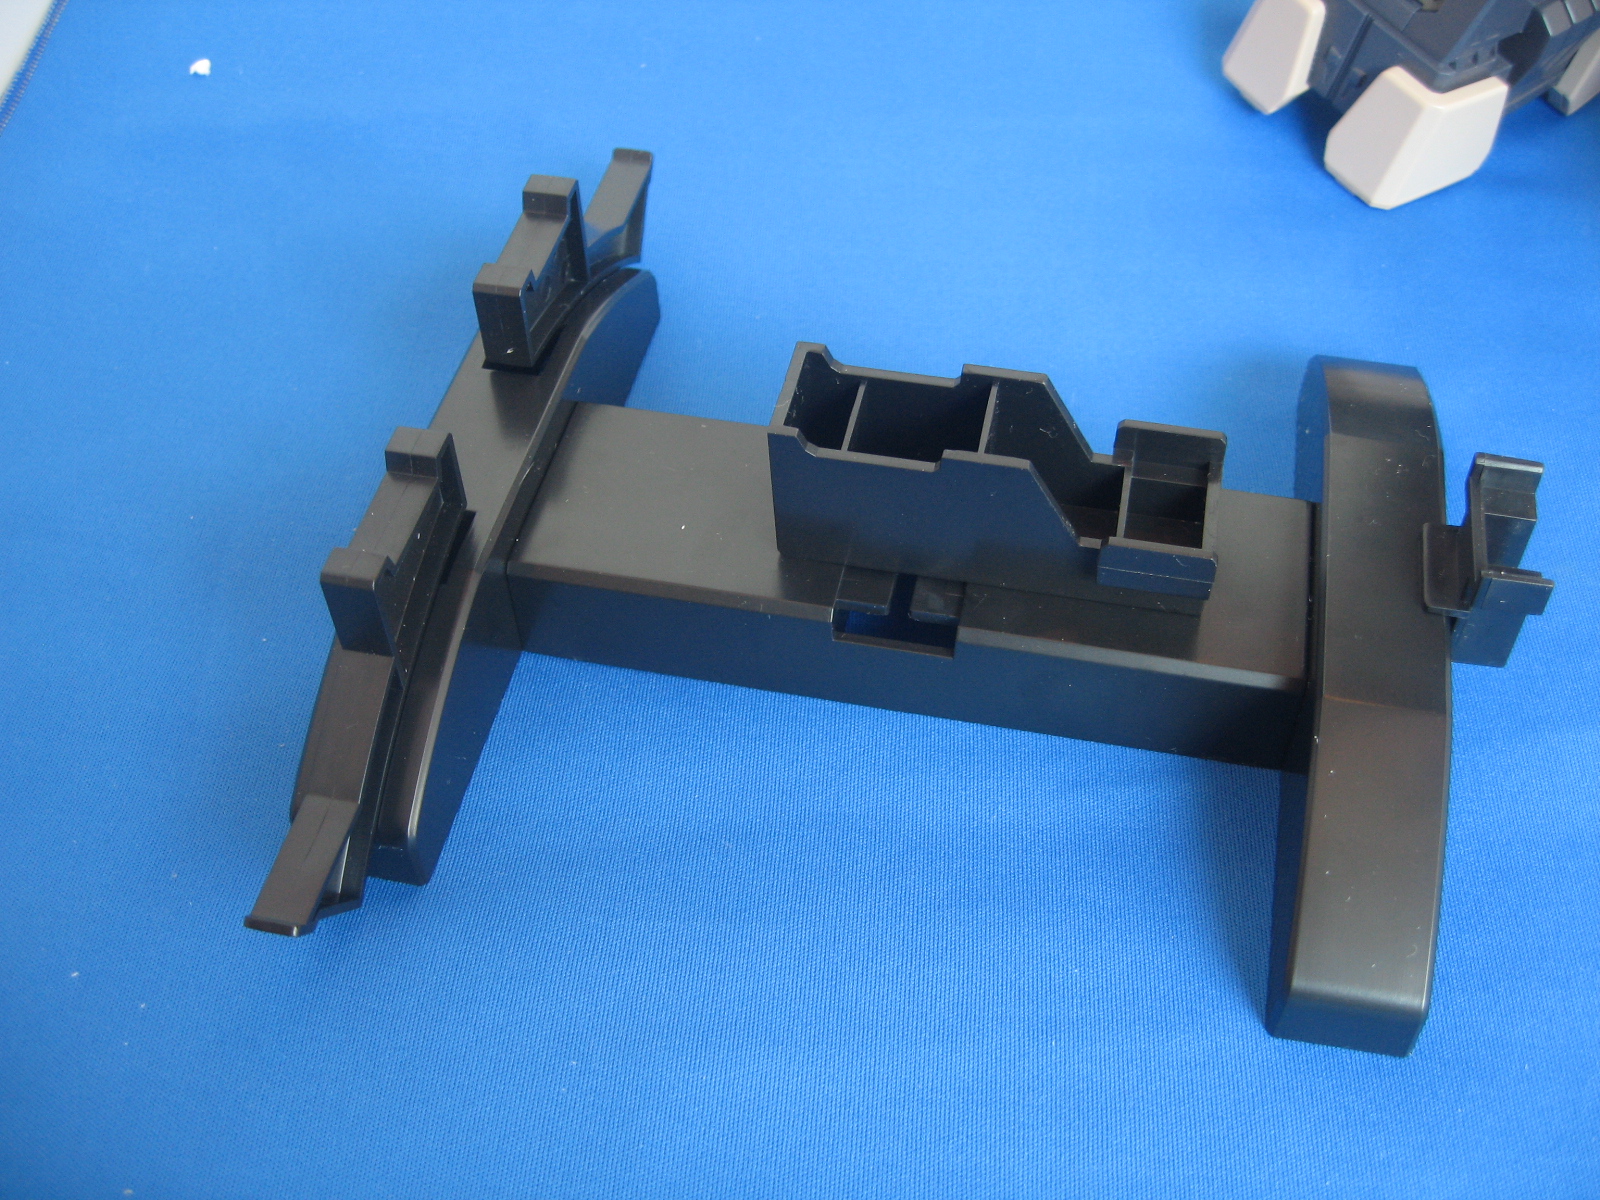
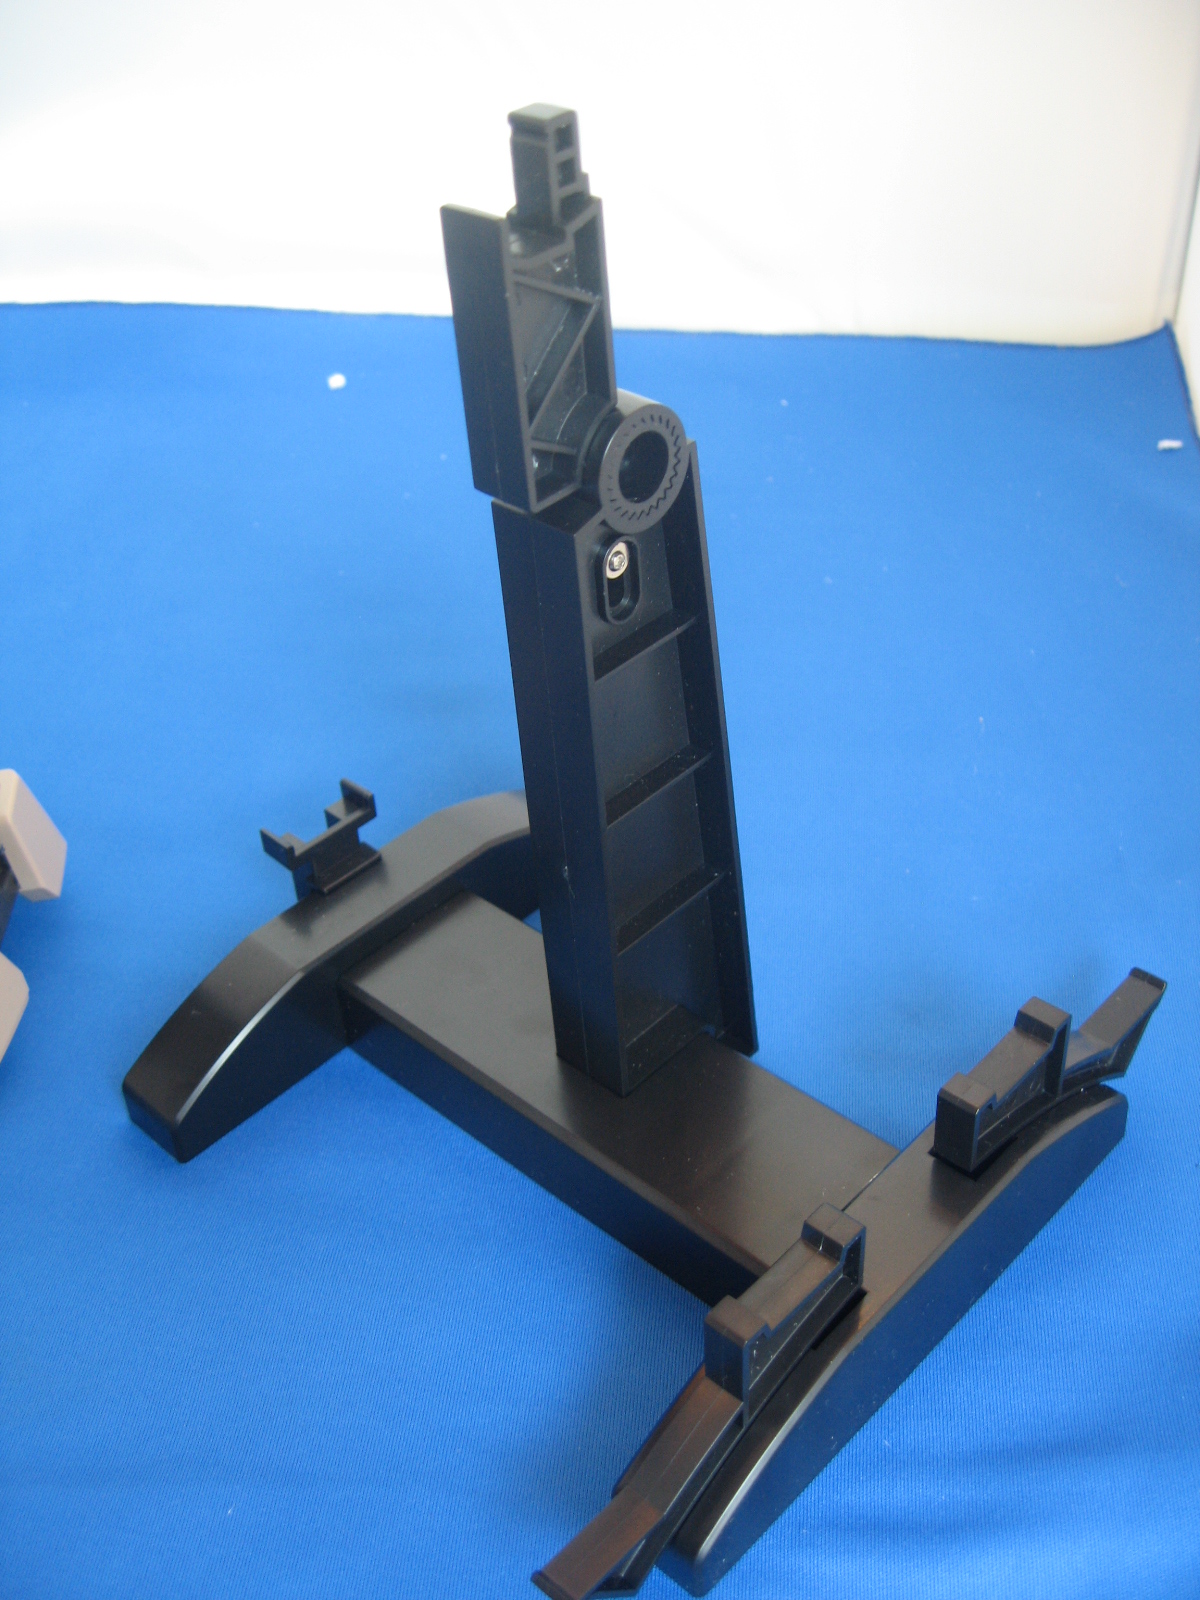
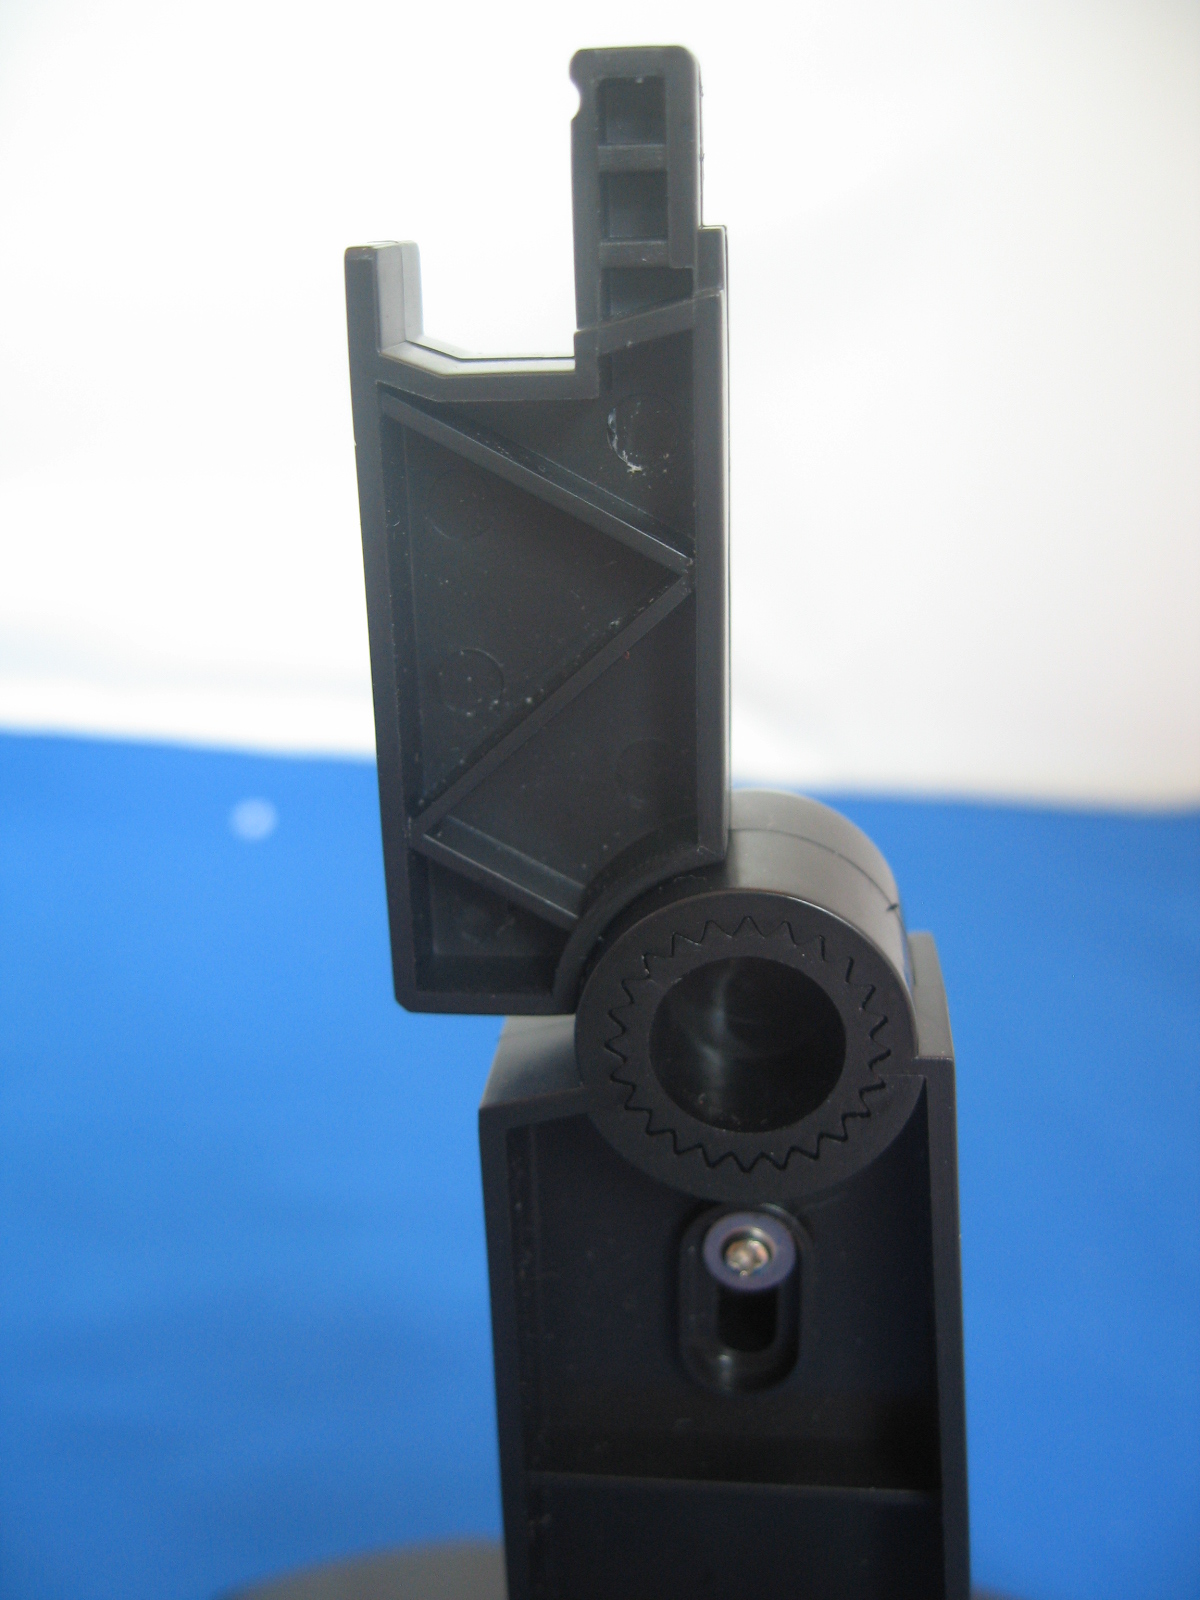
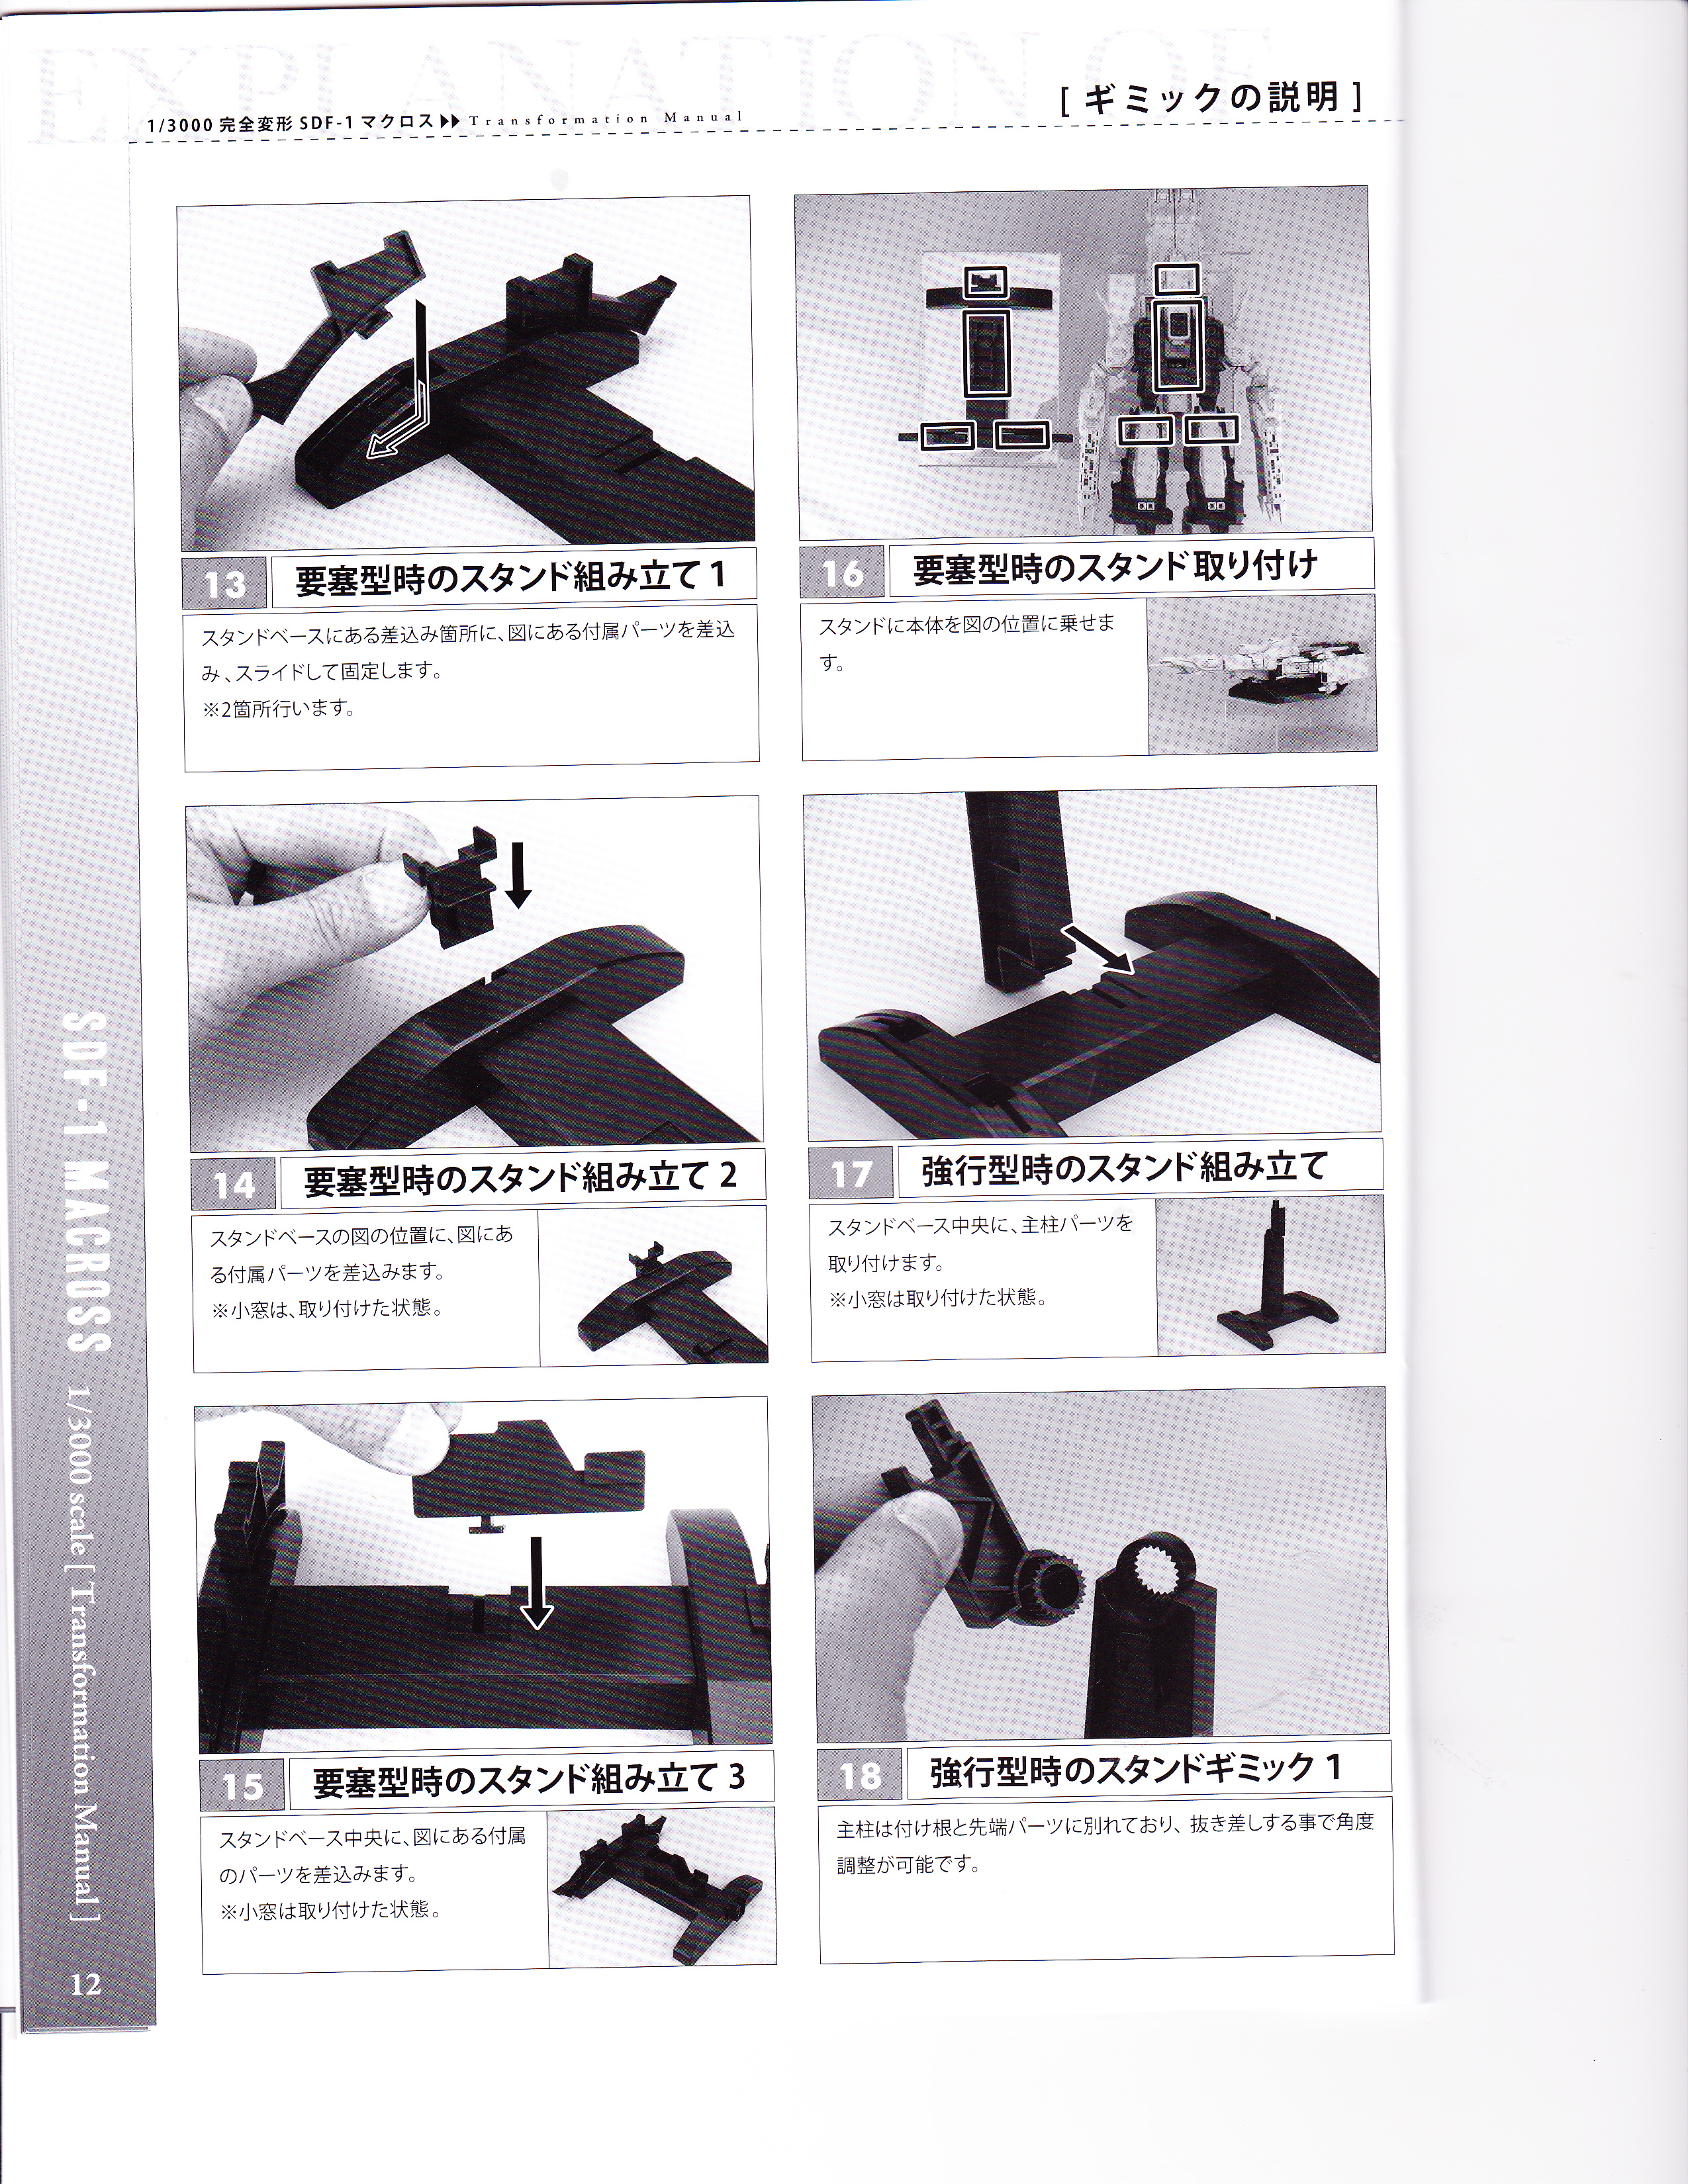
Display Stand
The Yamato 1:3000 scale SDF-1 comes with a 6-piece black ABS plastic display stand which can be assembled two ways.
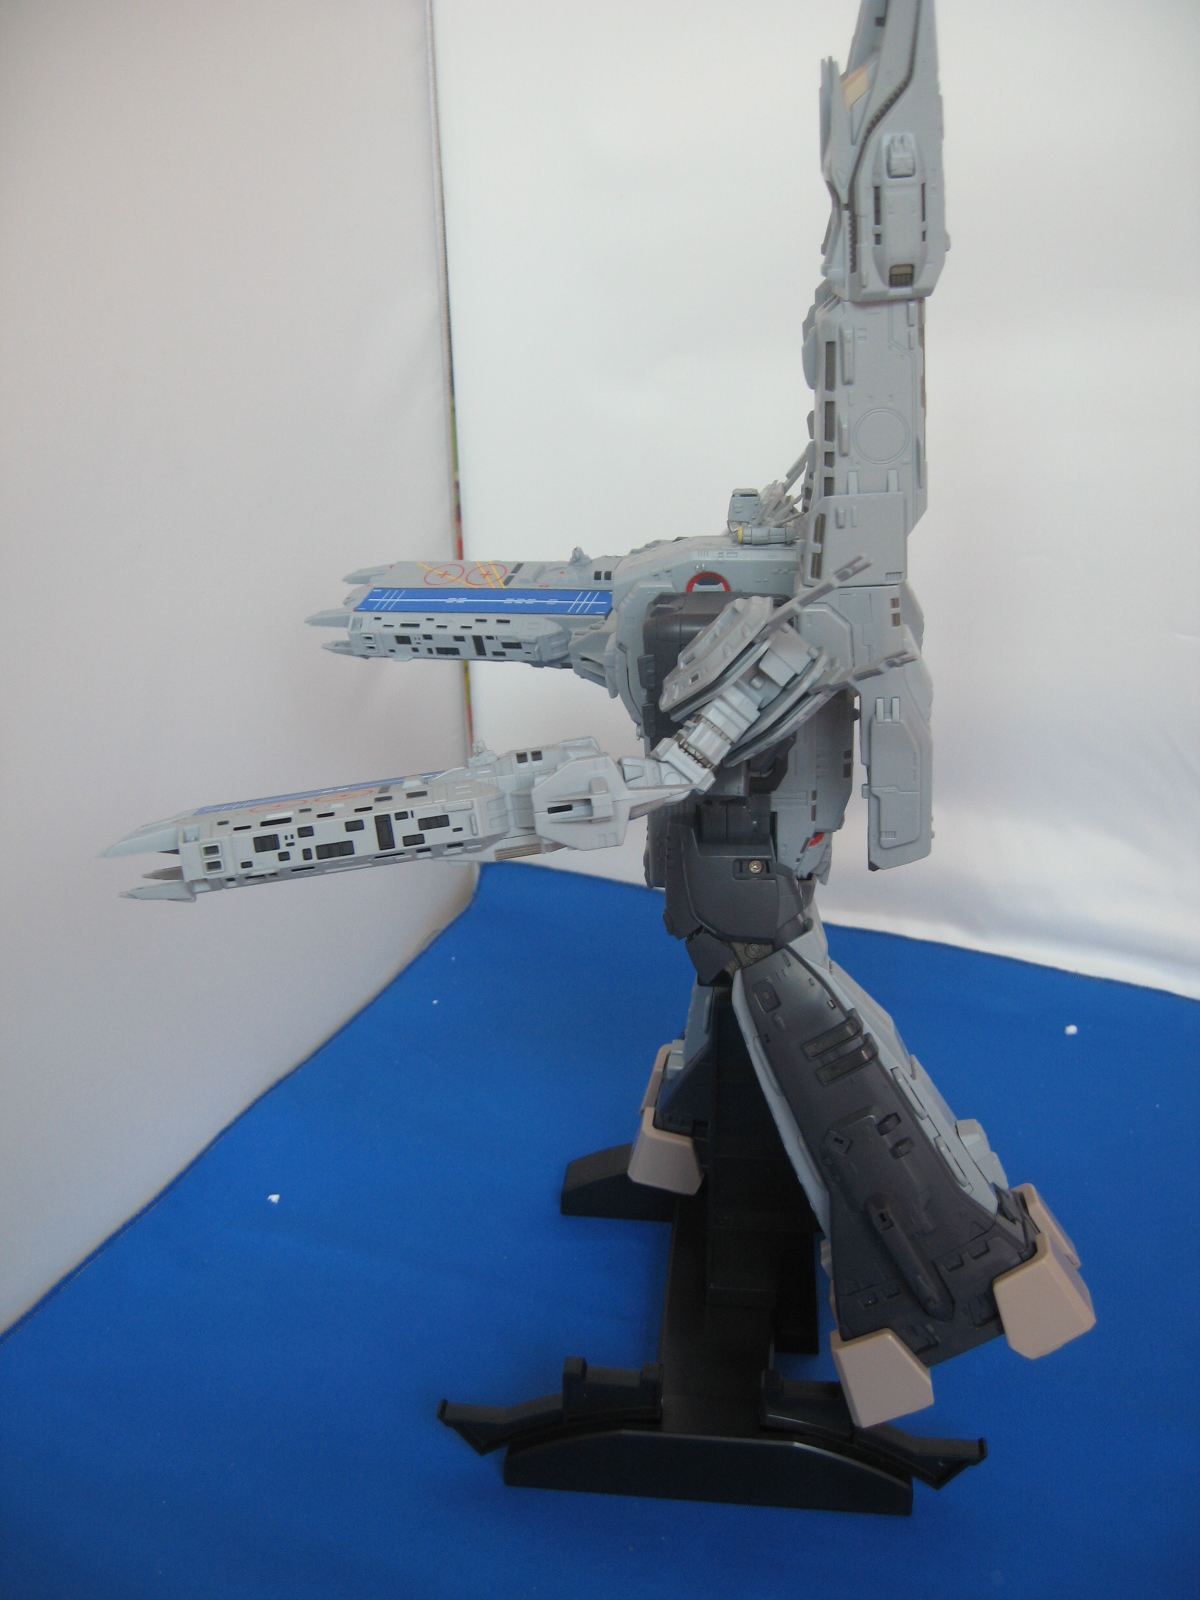
First, it can be assembled as a cradle-type stand, onto which the Cruiser (spaceship) mode sits a job the stand does very well.
Secondly, the stand can be assembled with the vertical arm in place to hold the SDF-1 in Storm-Attacker (robot) mode. A small cover on the bottom of the SDF-1 has to be removed to reveal a cavity into which the display arm slots into. At the angle the stand comes from at the factory it seems very stable and secure.The head of the display arm is adjustable for different angles. To adjust the angle, remove the head and then slot the star-shaped teeth of the joint back into the star shape socket at your preferred angle. Note, I haven't tried any different angles yet.
SDF-1
Stand |
||||
 |
 |
 |
 |
 |
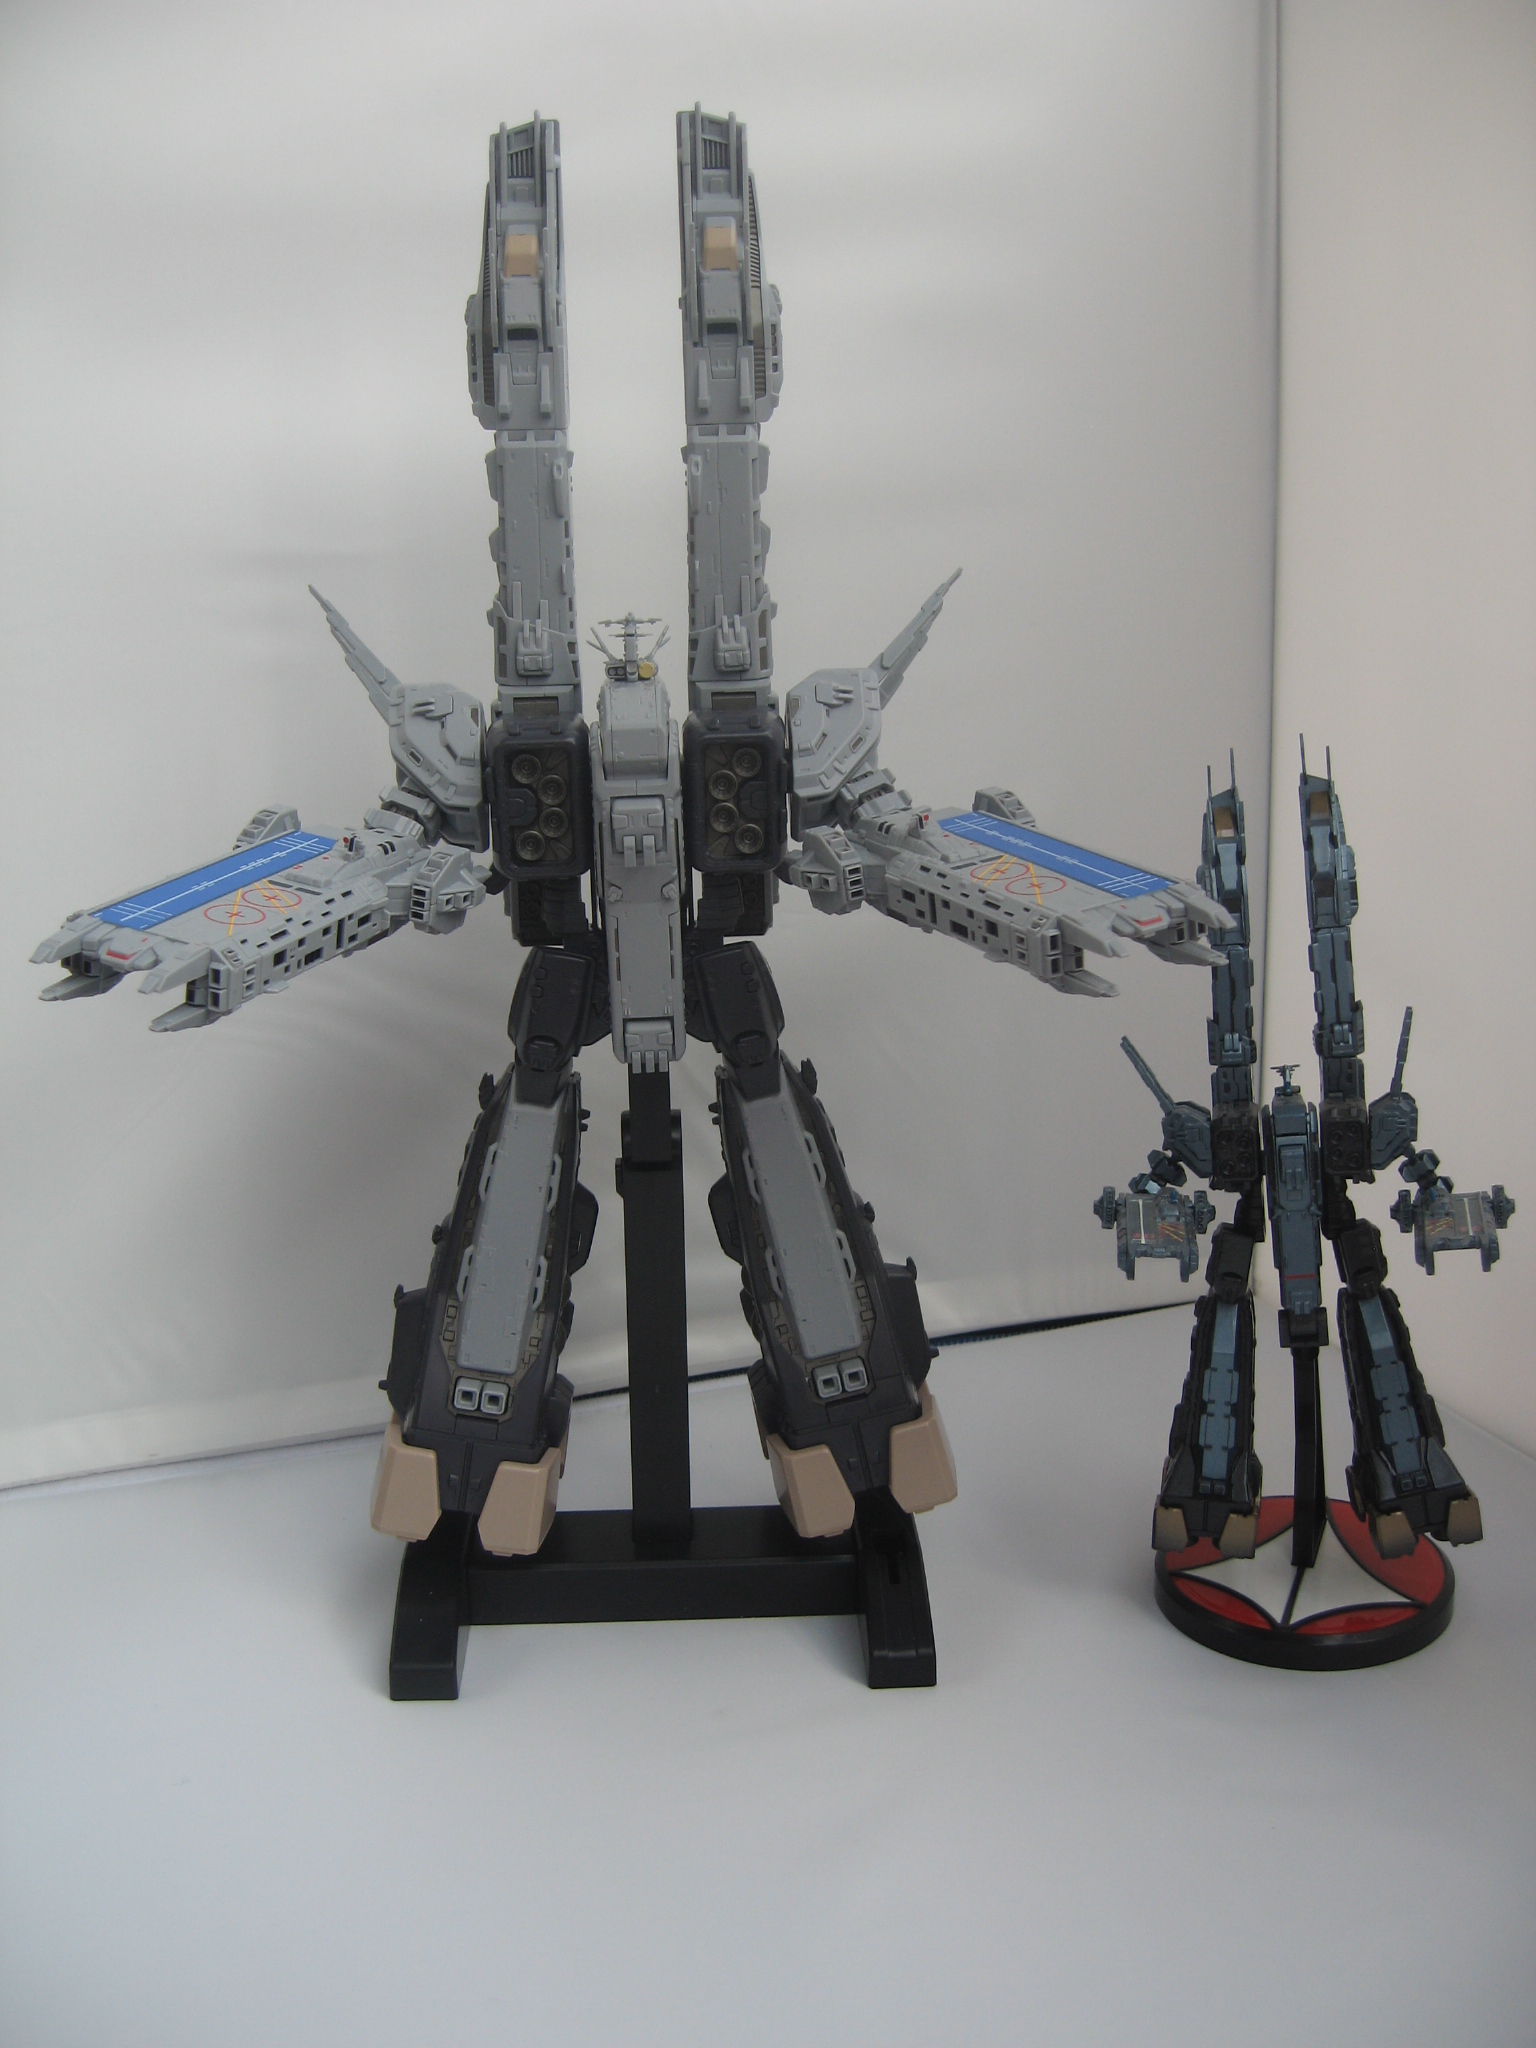
Comparison with other SDF-1 toys
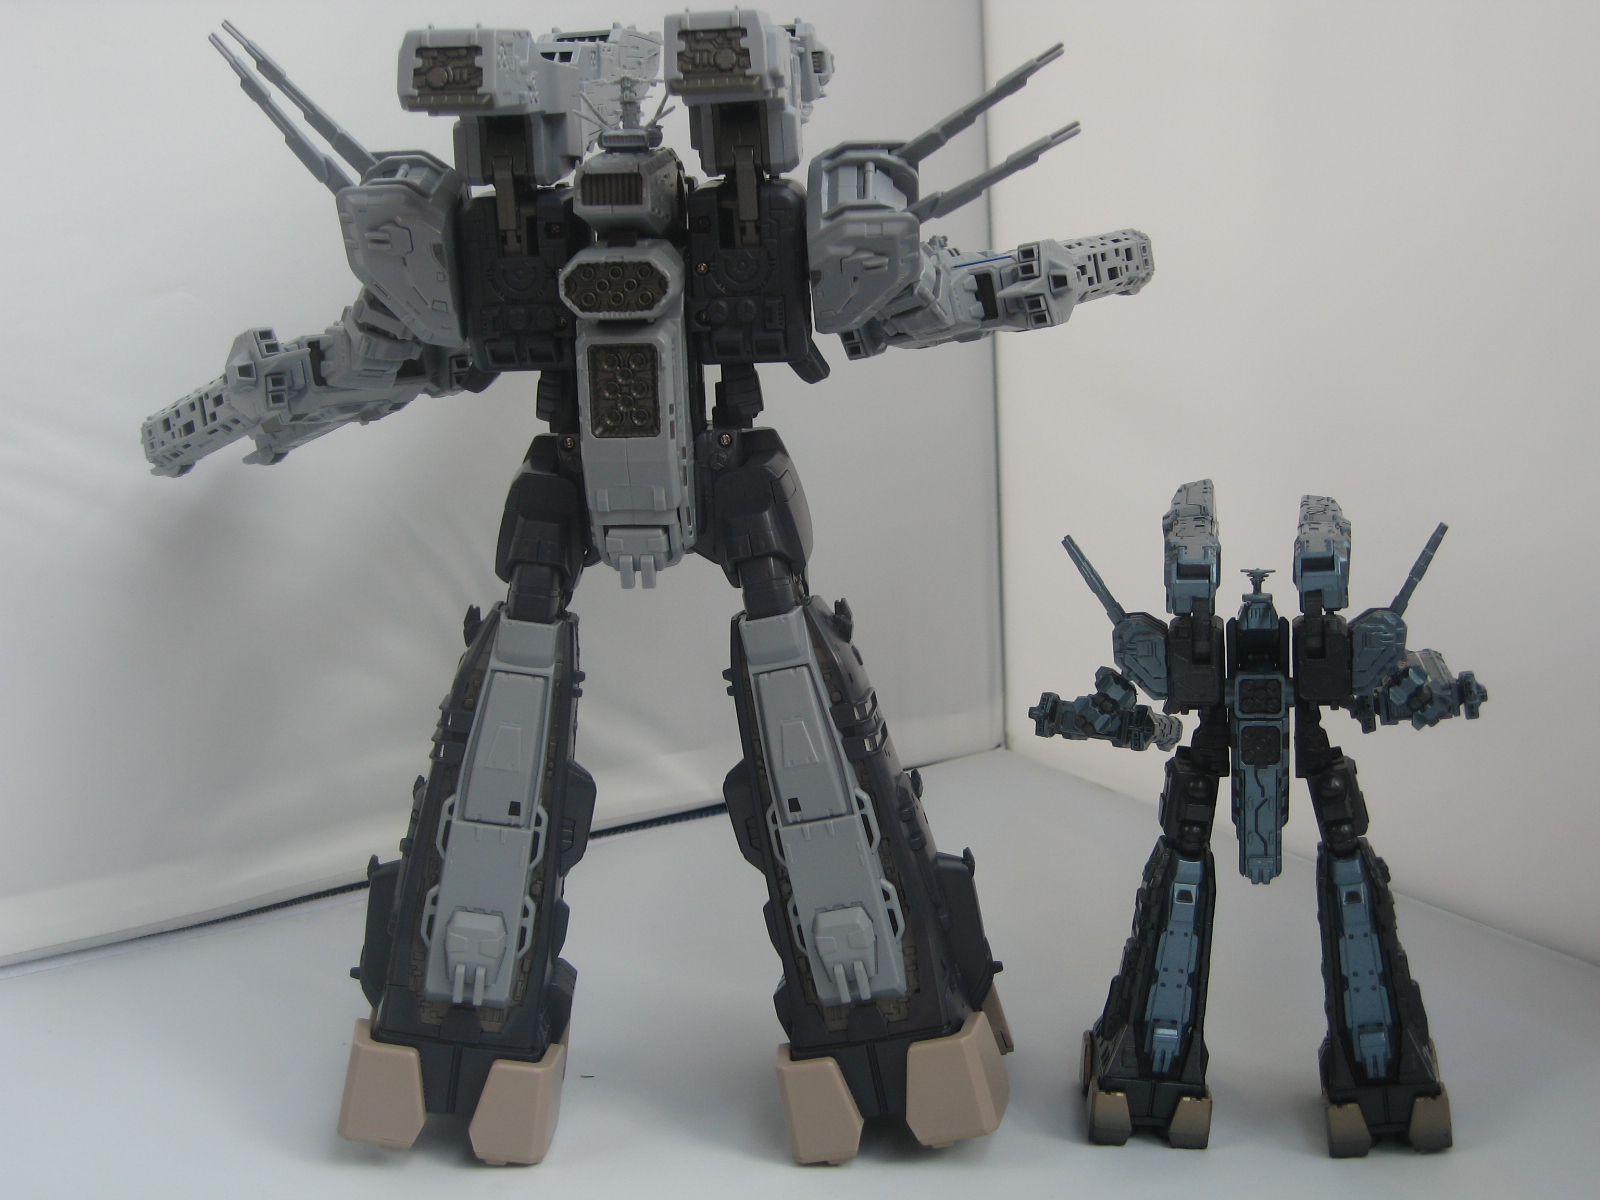
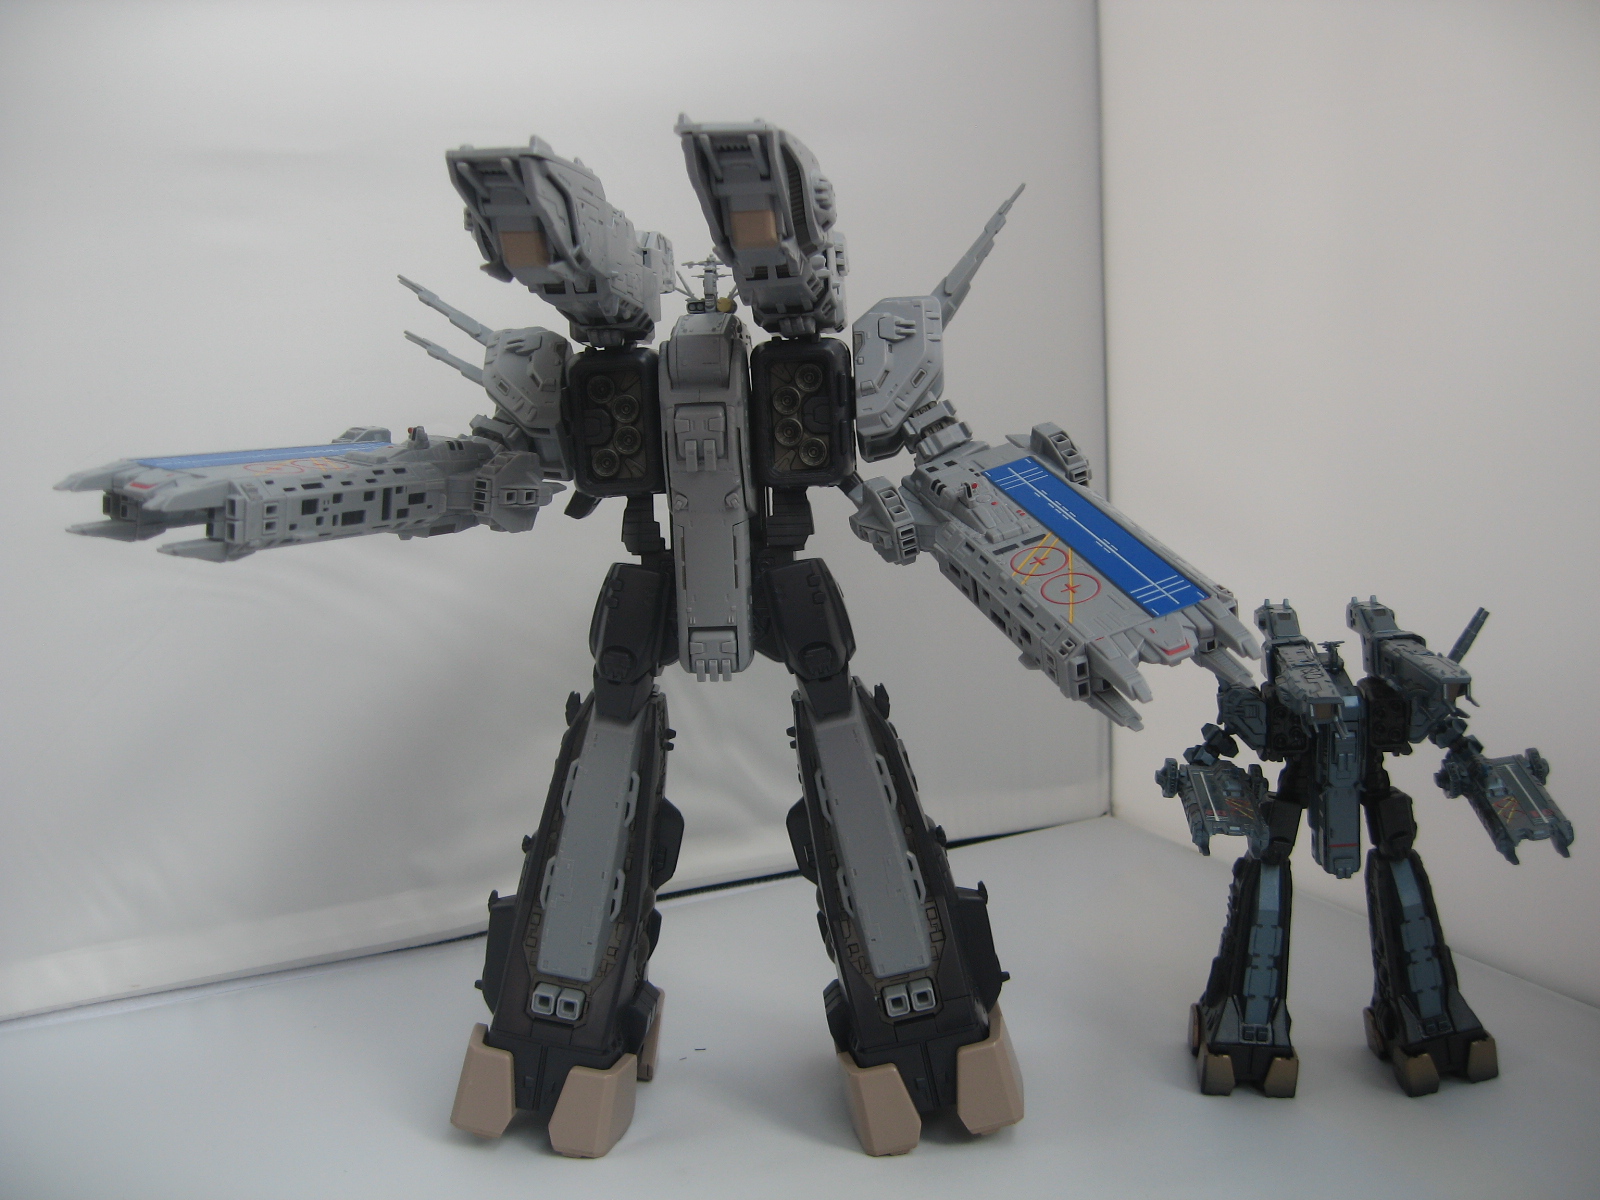
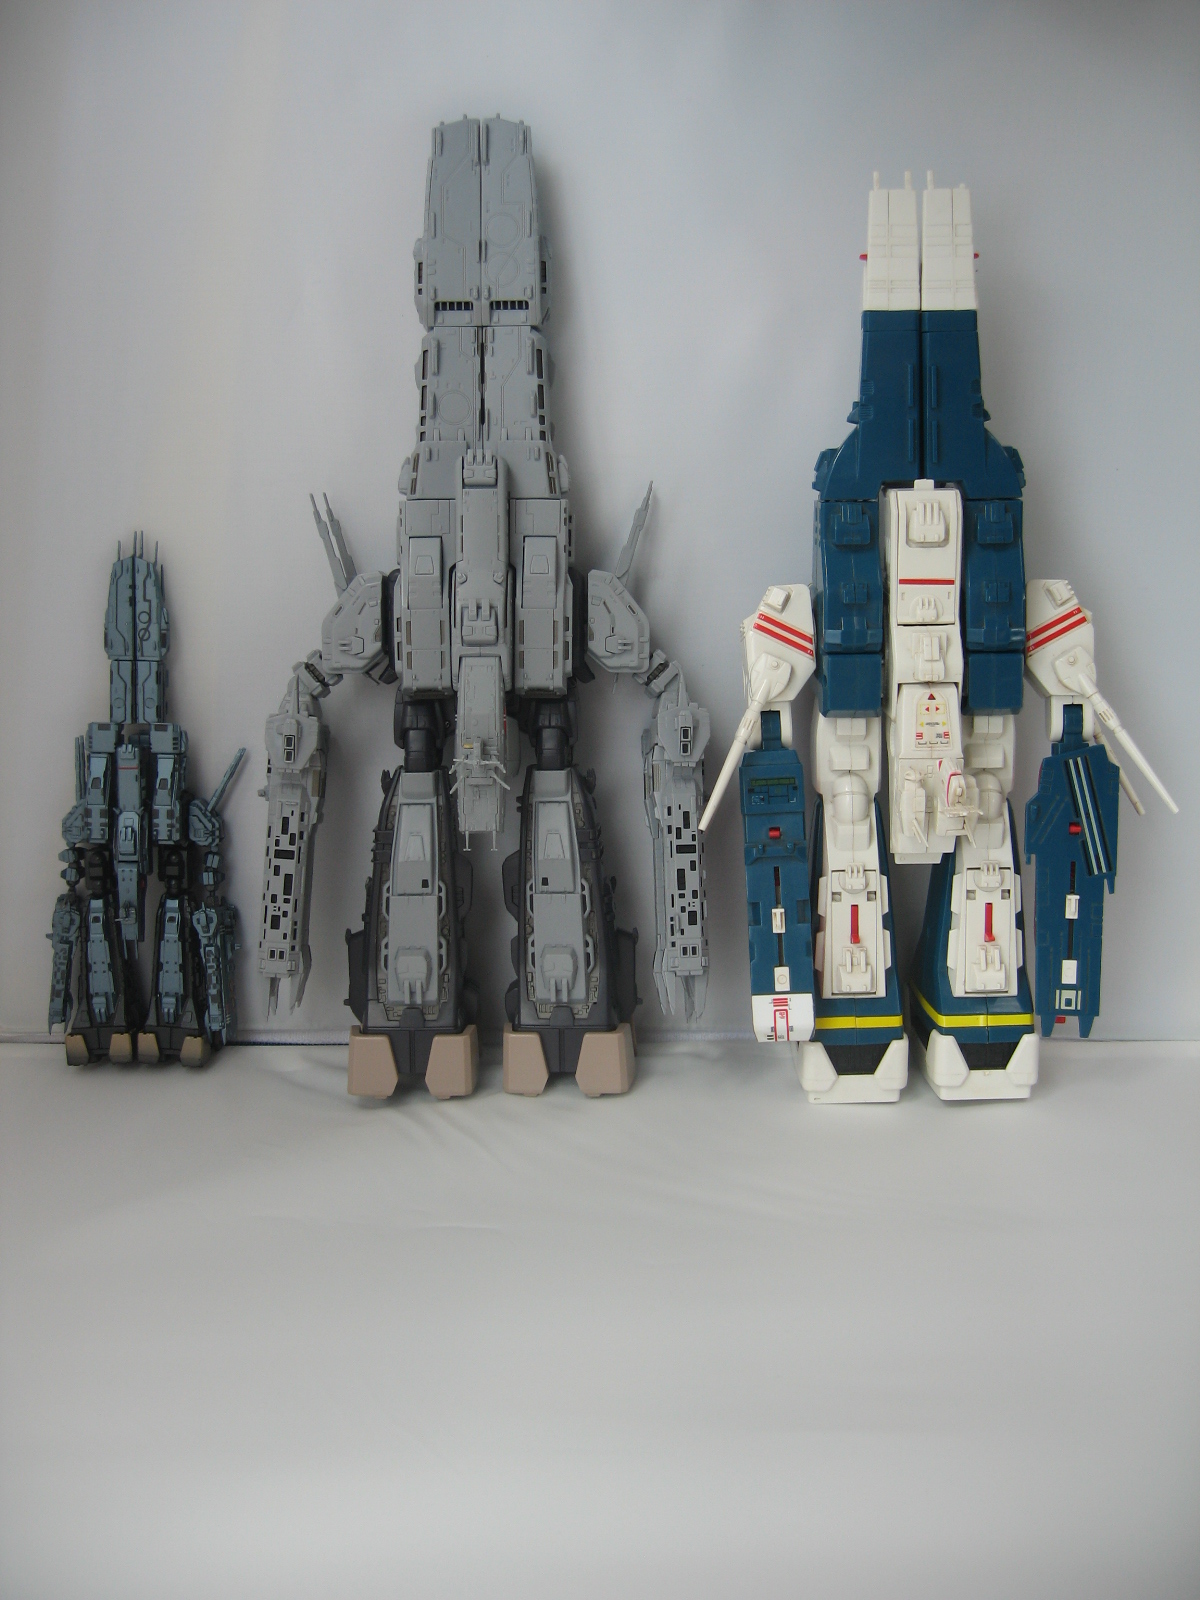
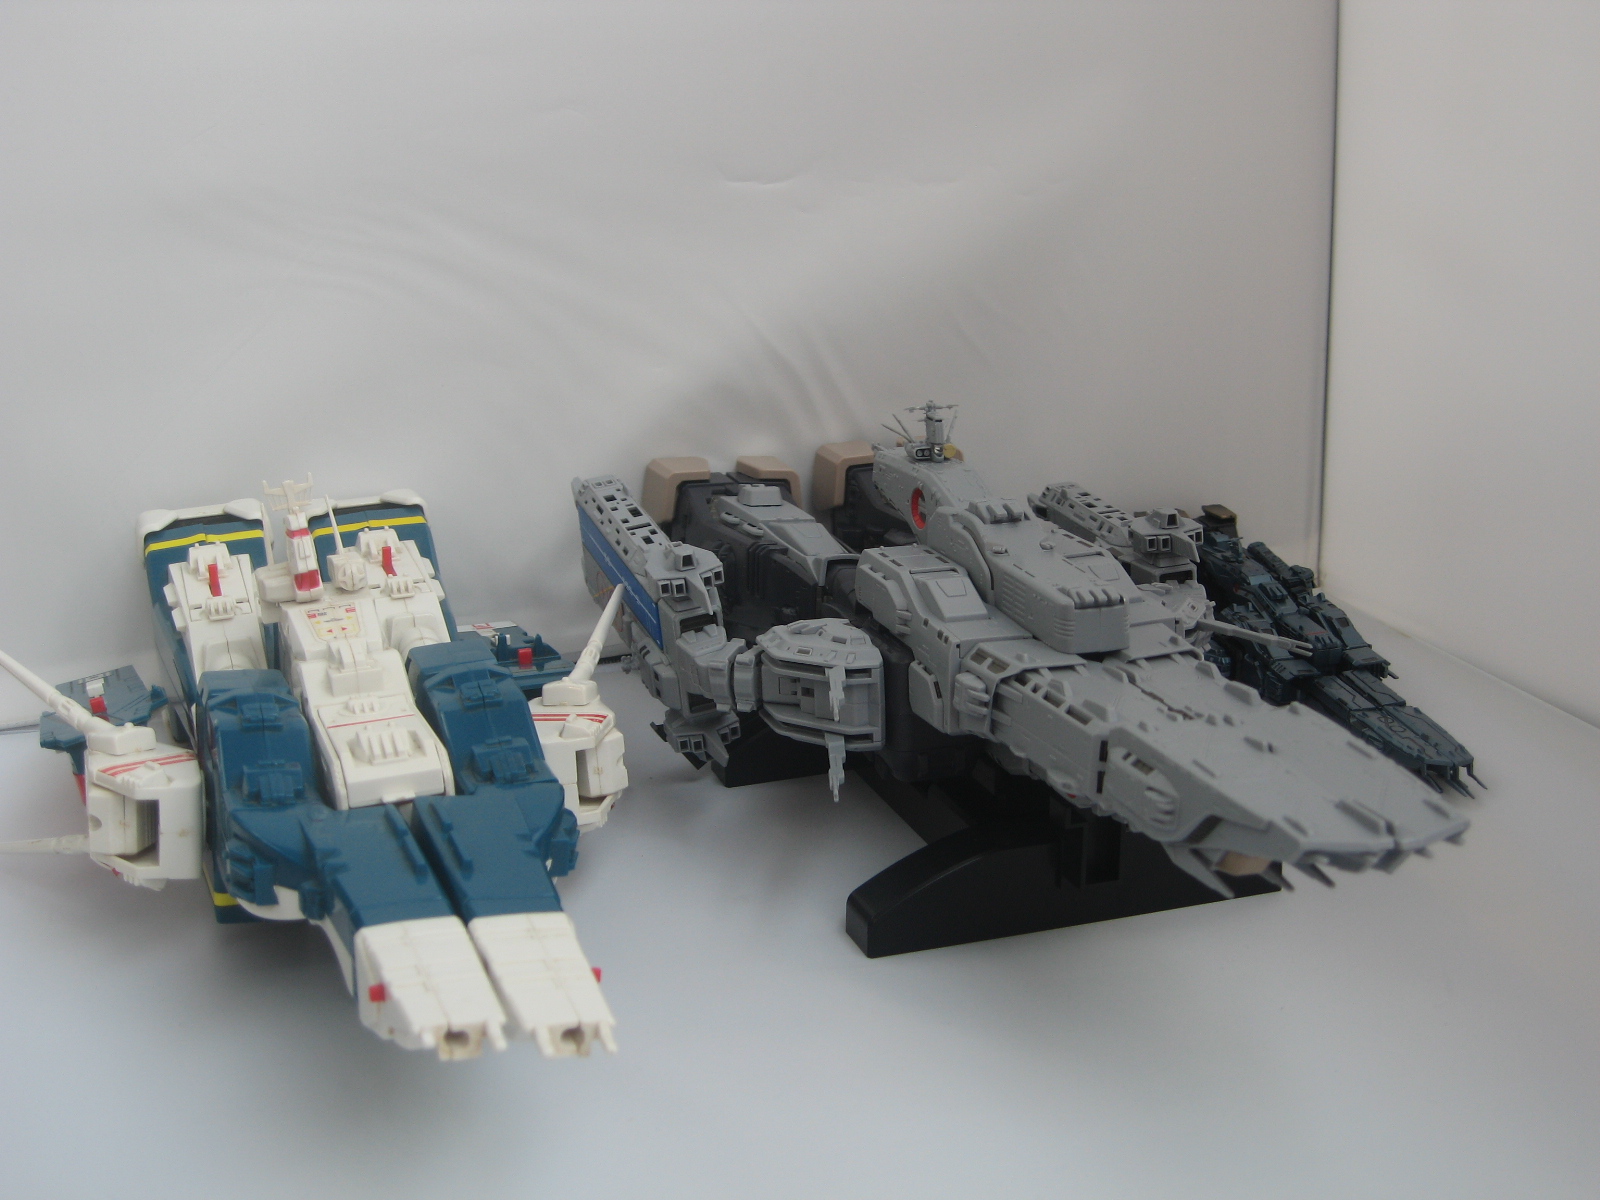
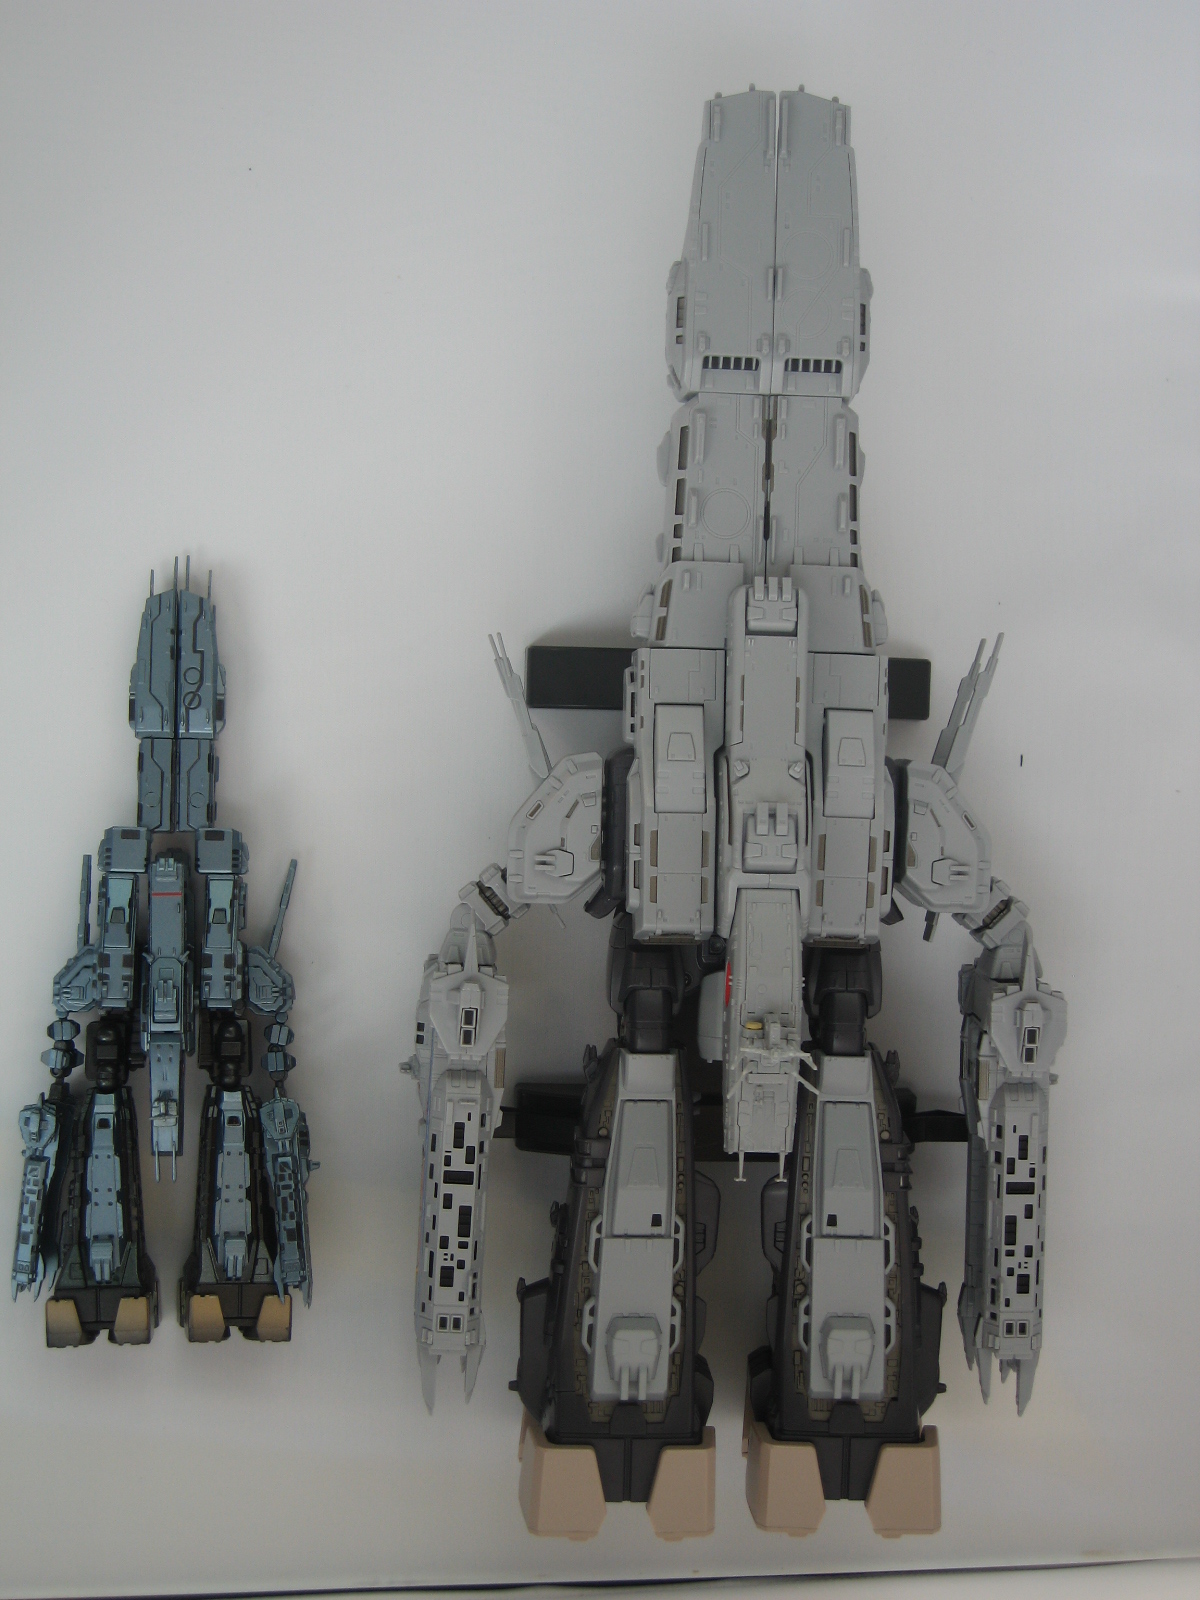
Simply put, there is no comparison. In my humble opinion the Yamato 1:3000 scale SDF-1 simply blows all other versions out of the water. Anyway, here are some photos of Yamato’s latest offering together with the Wave 1:5000 DYRL version and the old Takatoku 1:3000 TV version.
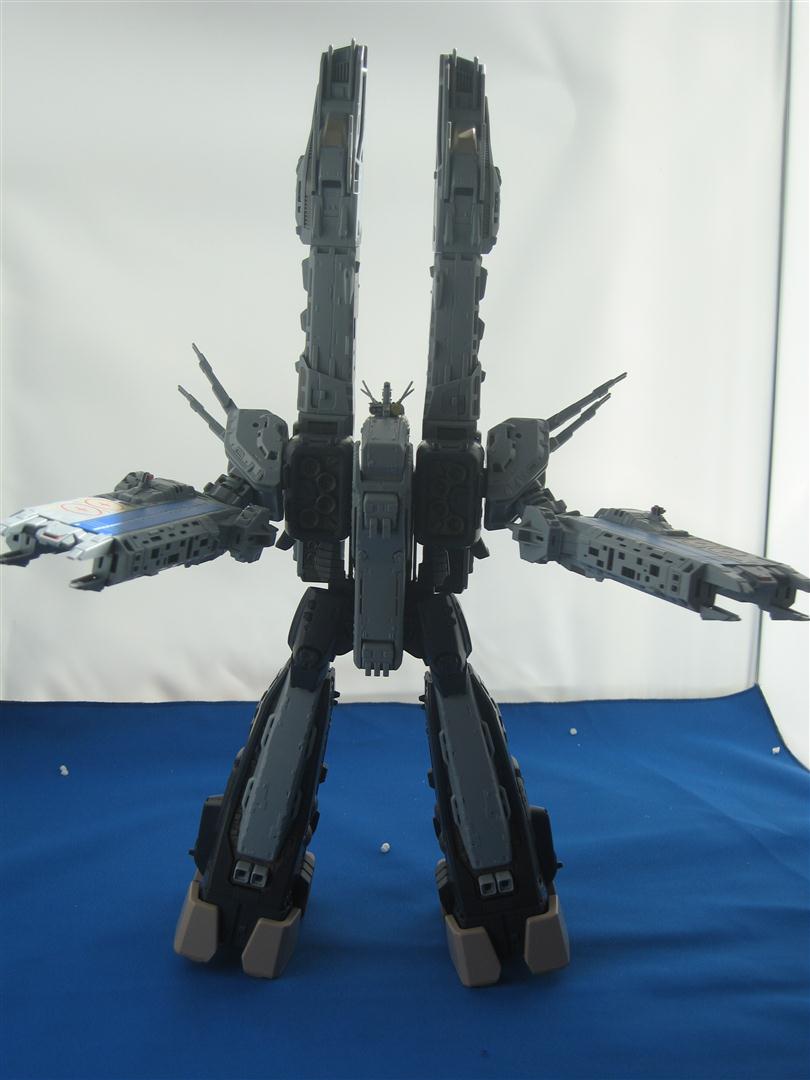
Attacker Mode Comparison
Yamato 1:3000 DYRL type SDF-1 (w/small parts fitted)
VS
Wave 1:500 DYRY type SDF-1
& Takatoku 1:3000 TV type SDF-1
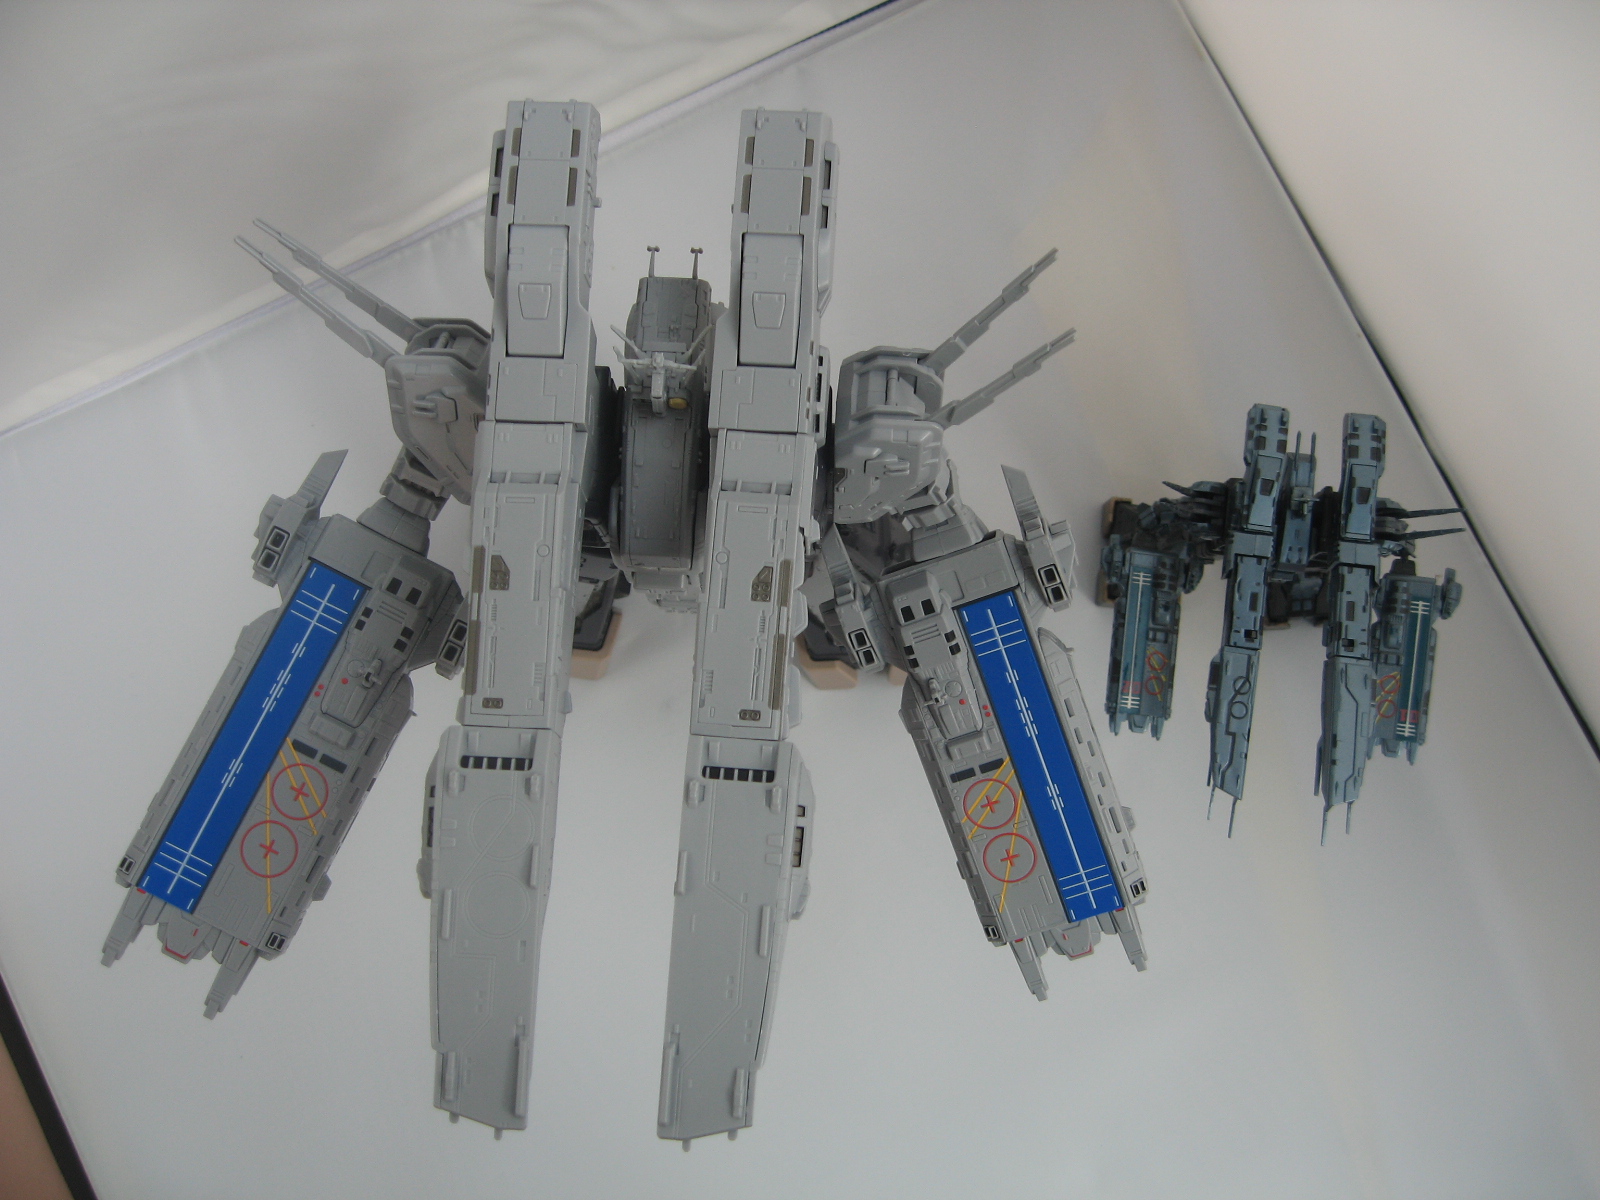
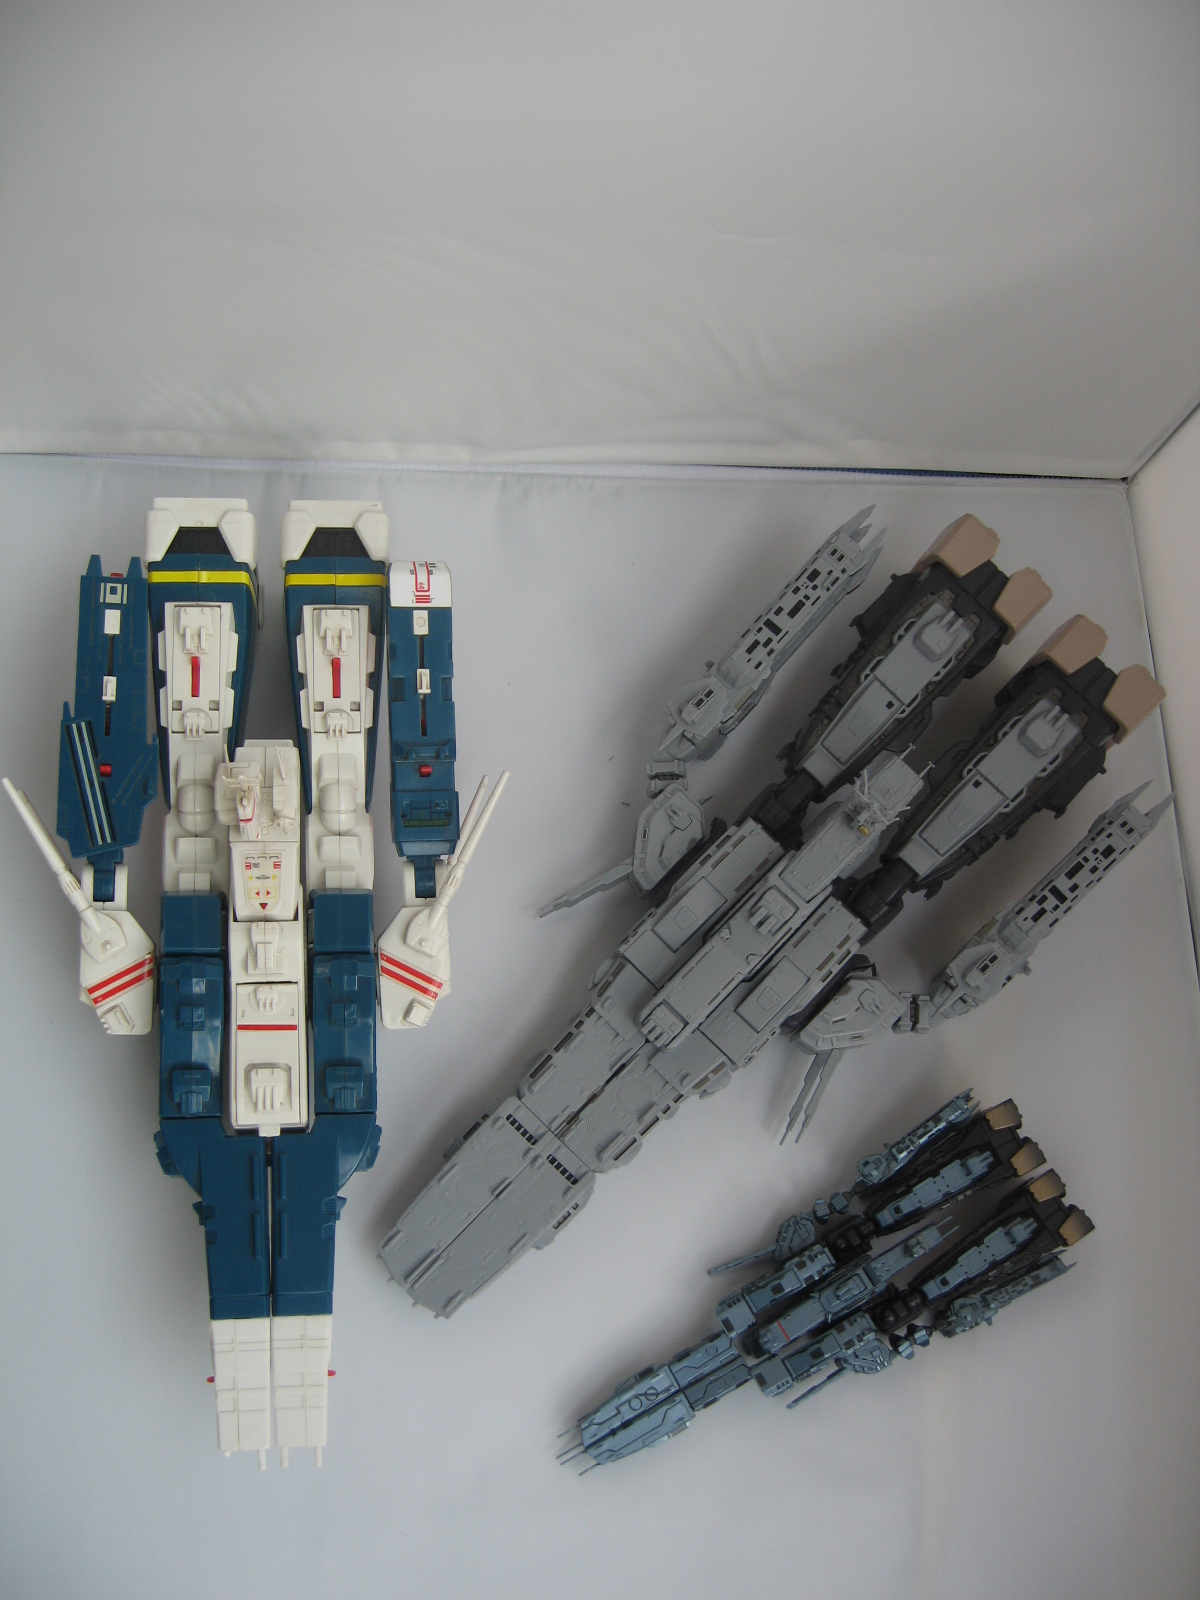
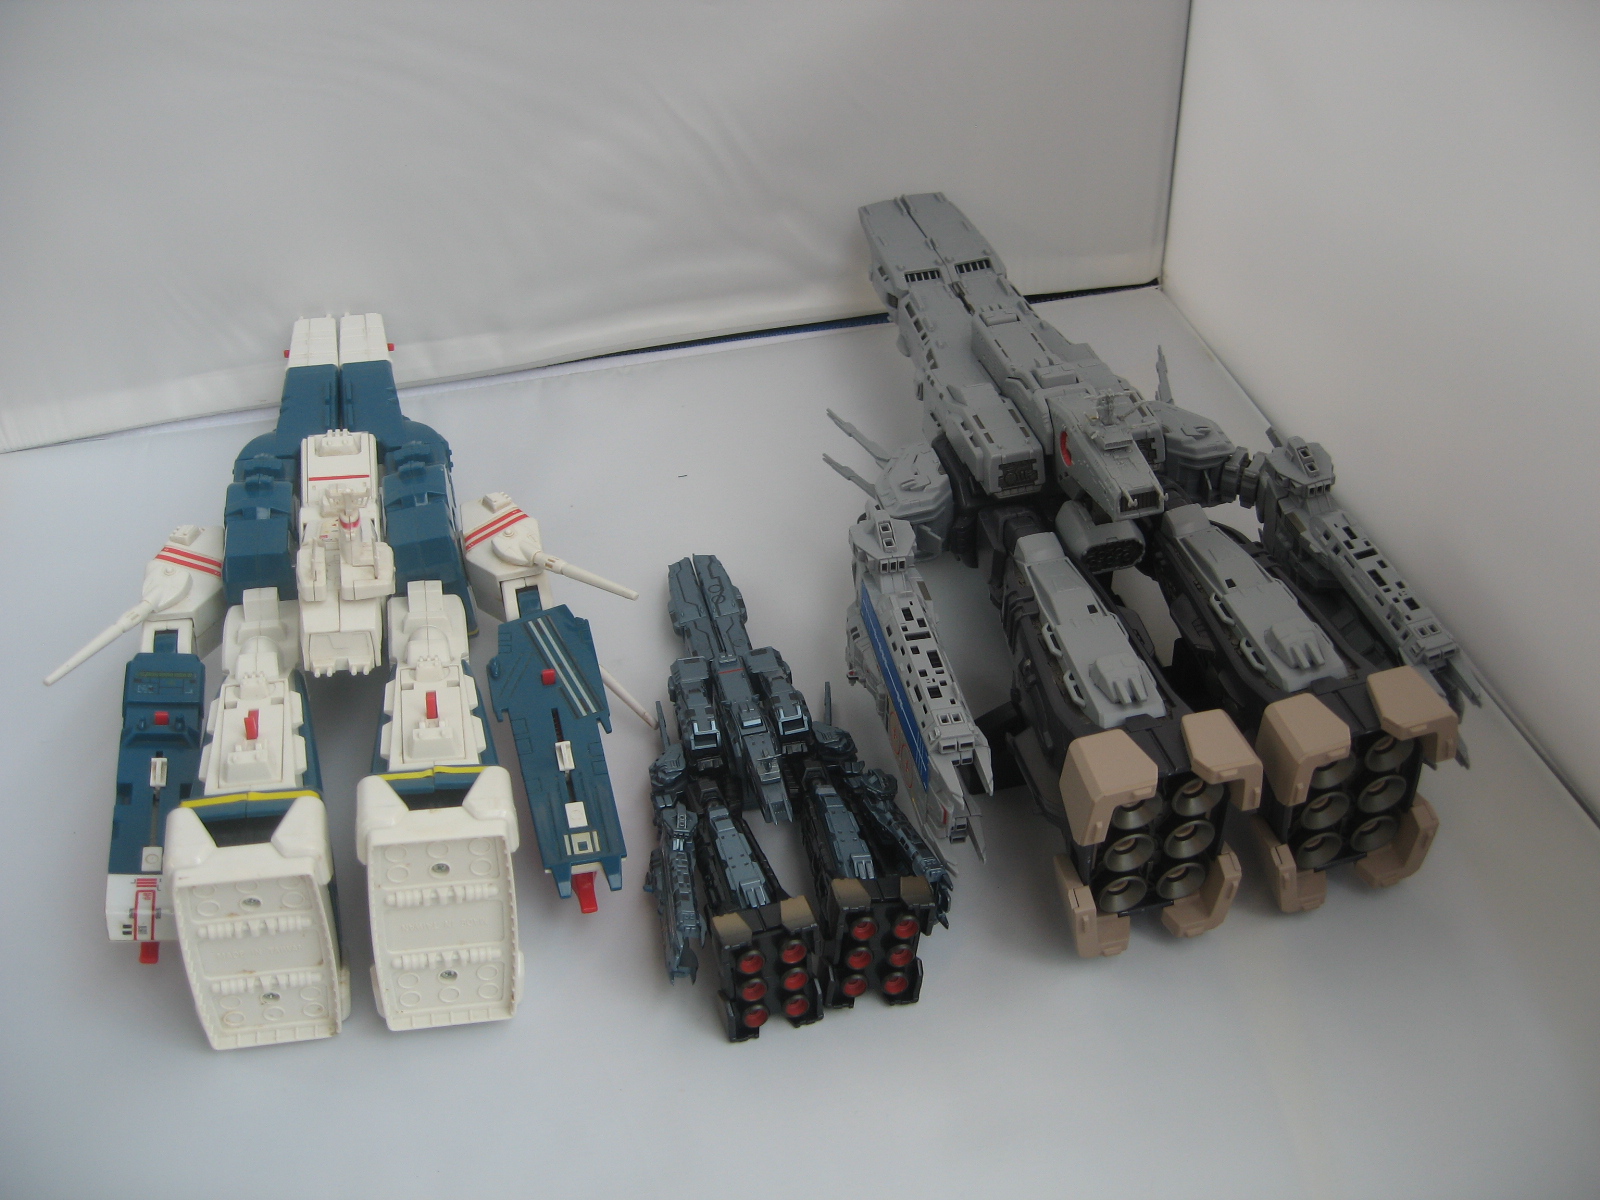
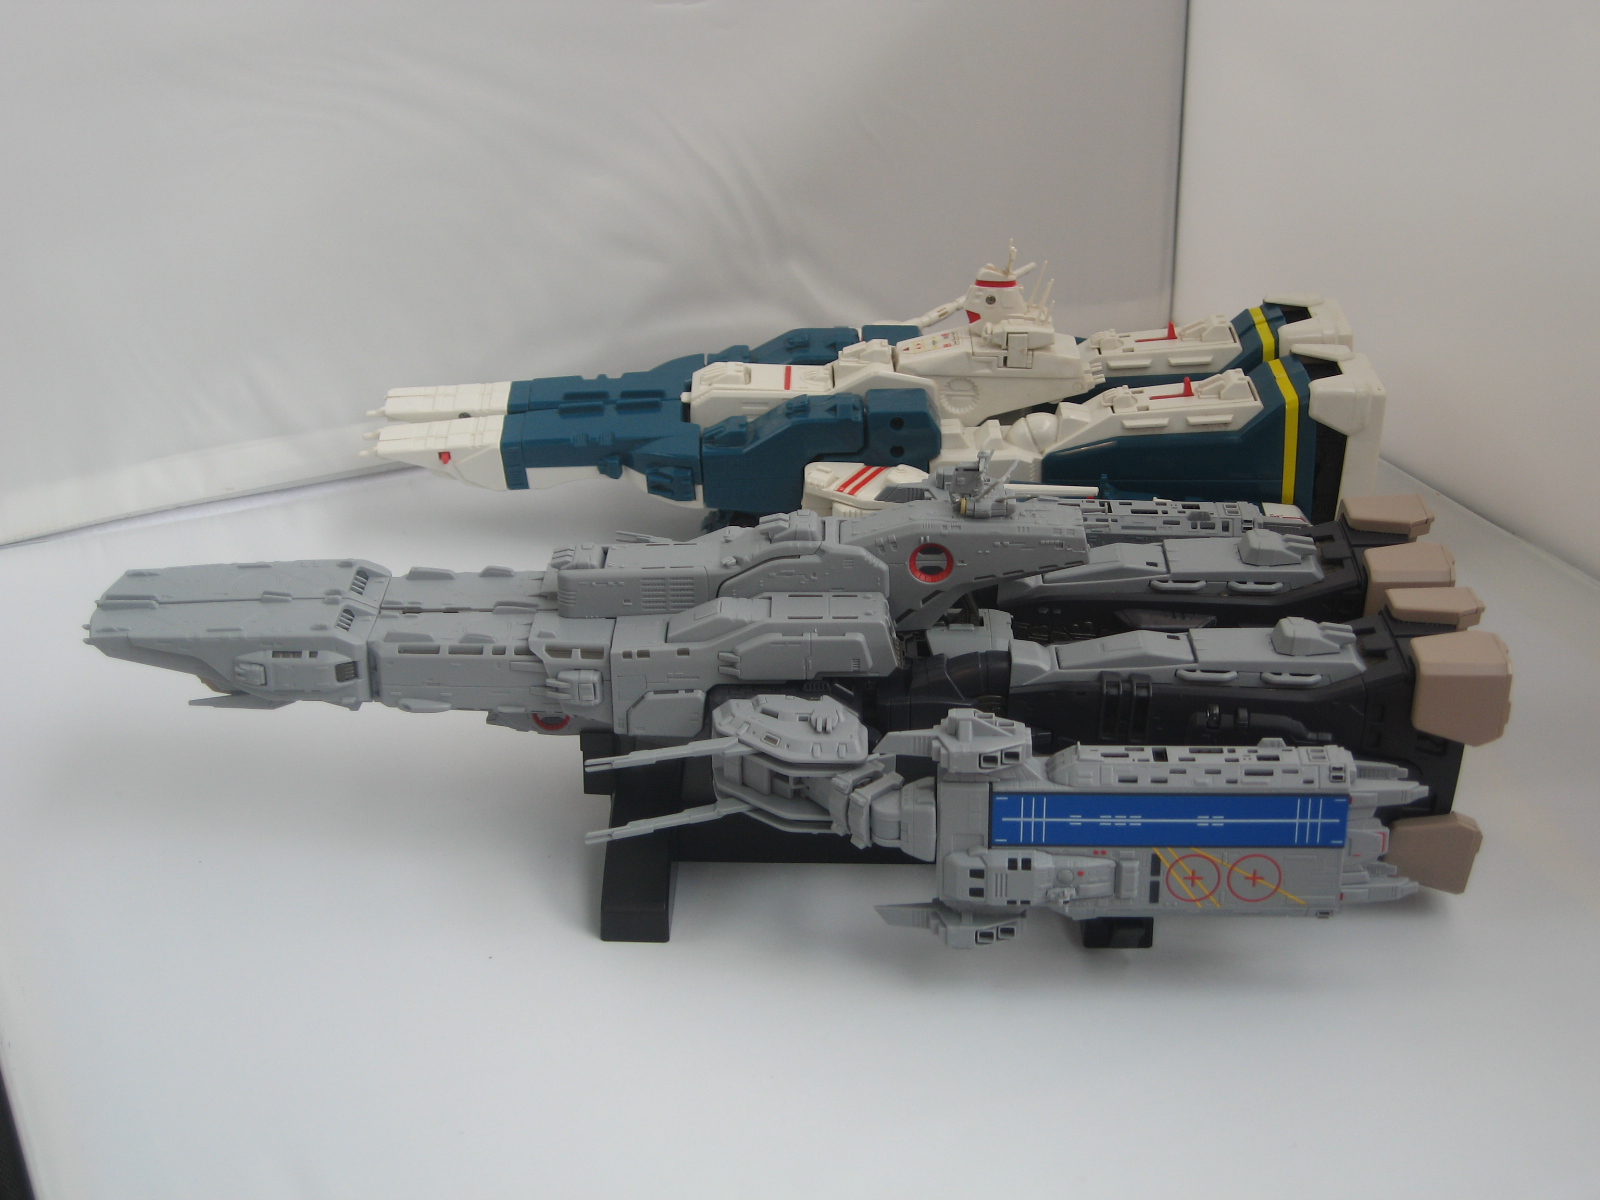
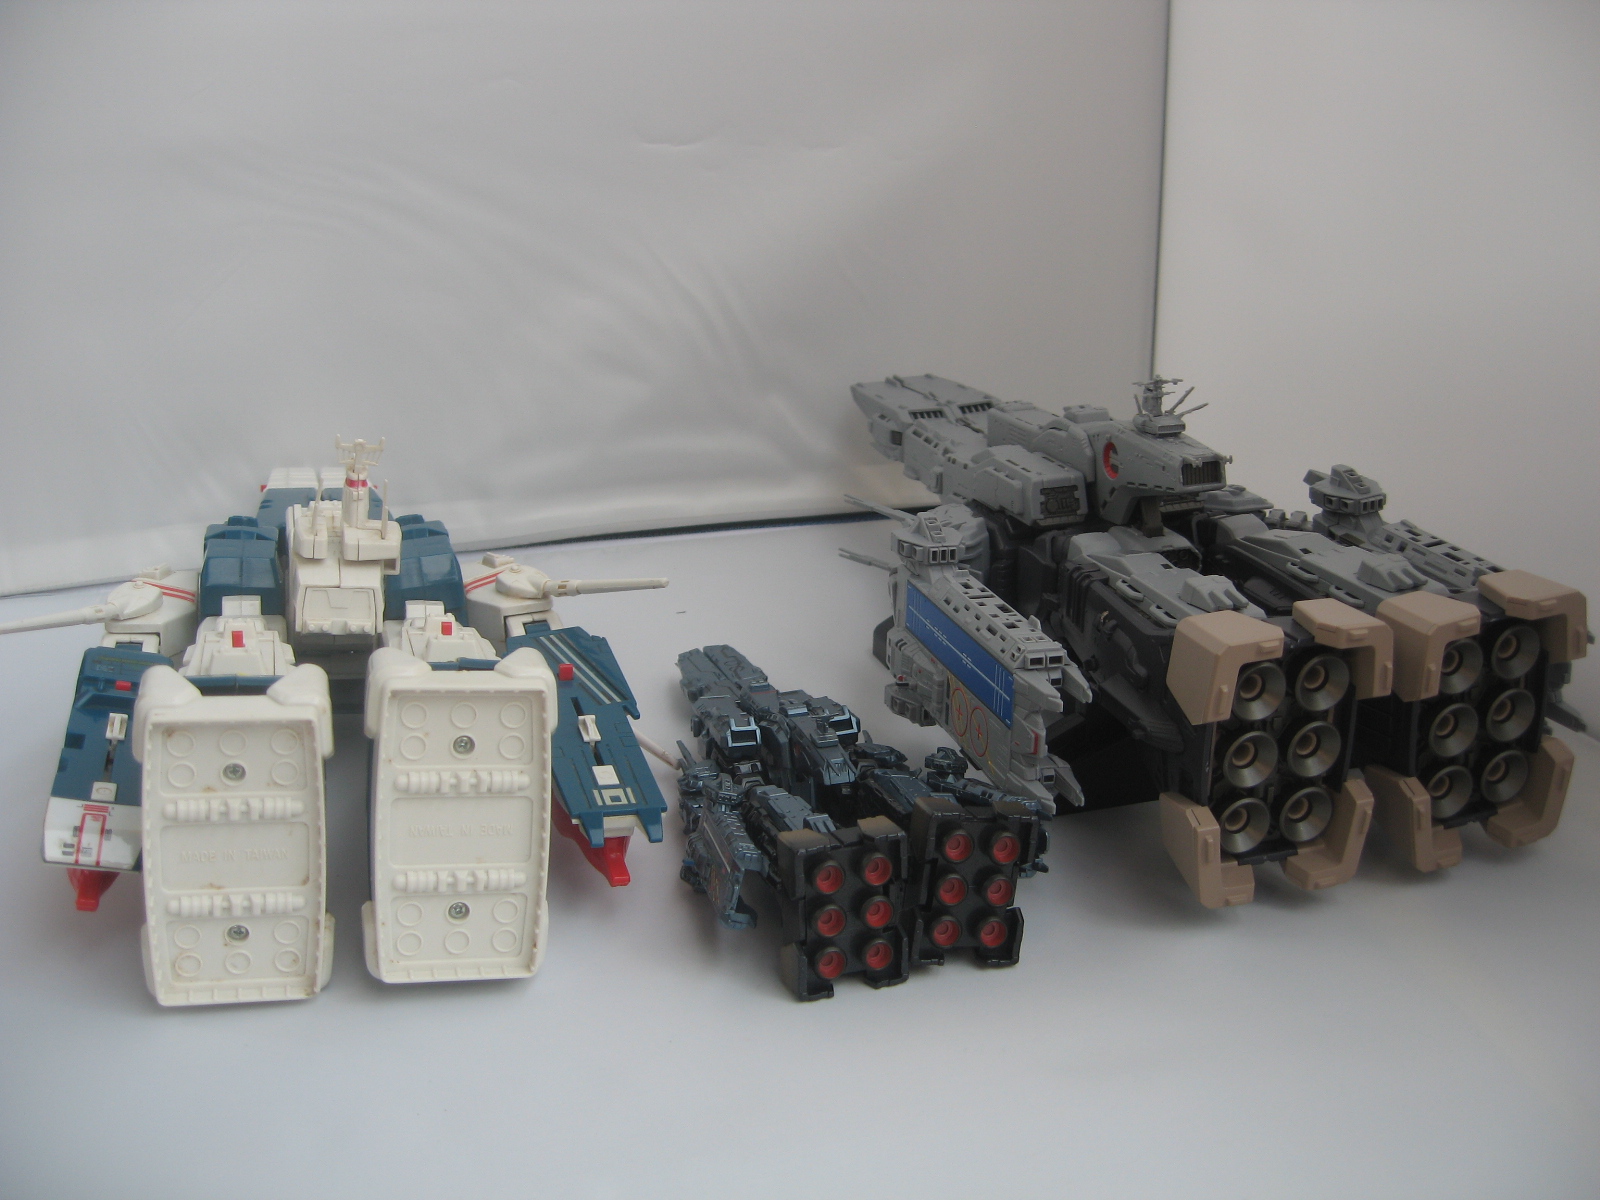
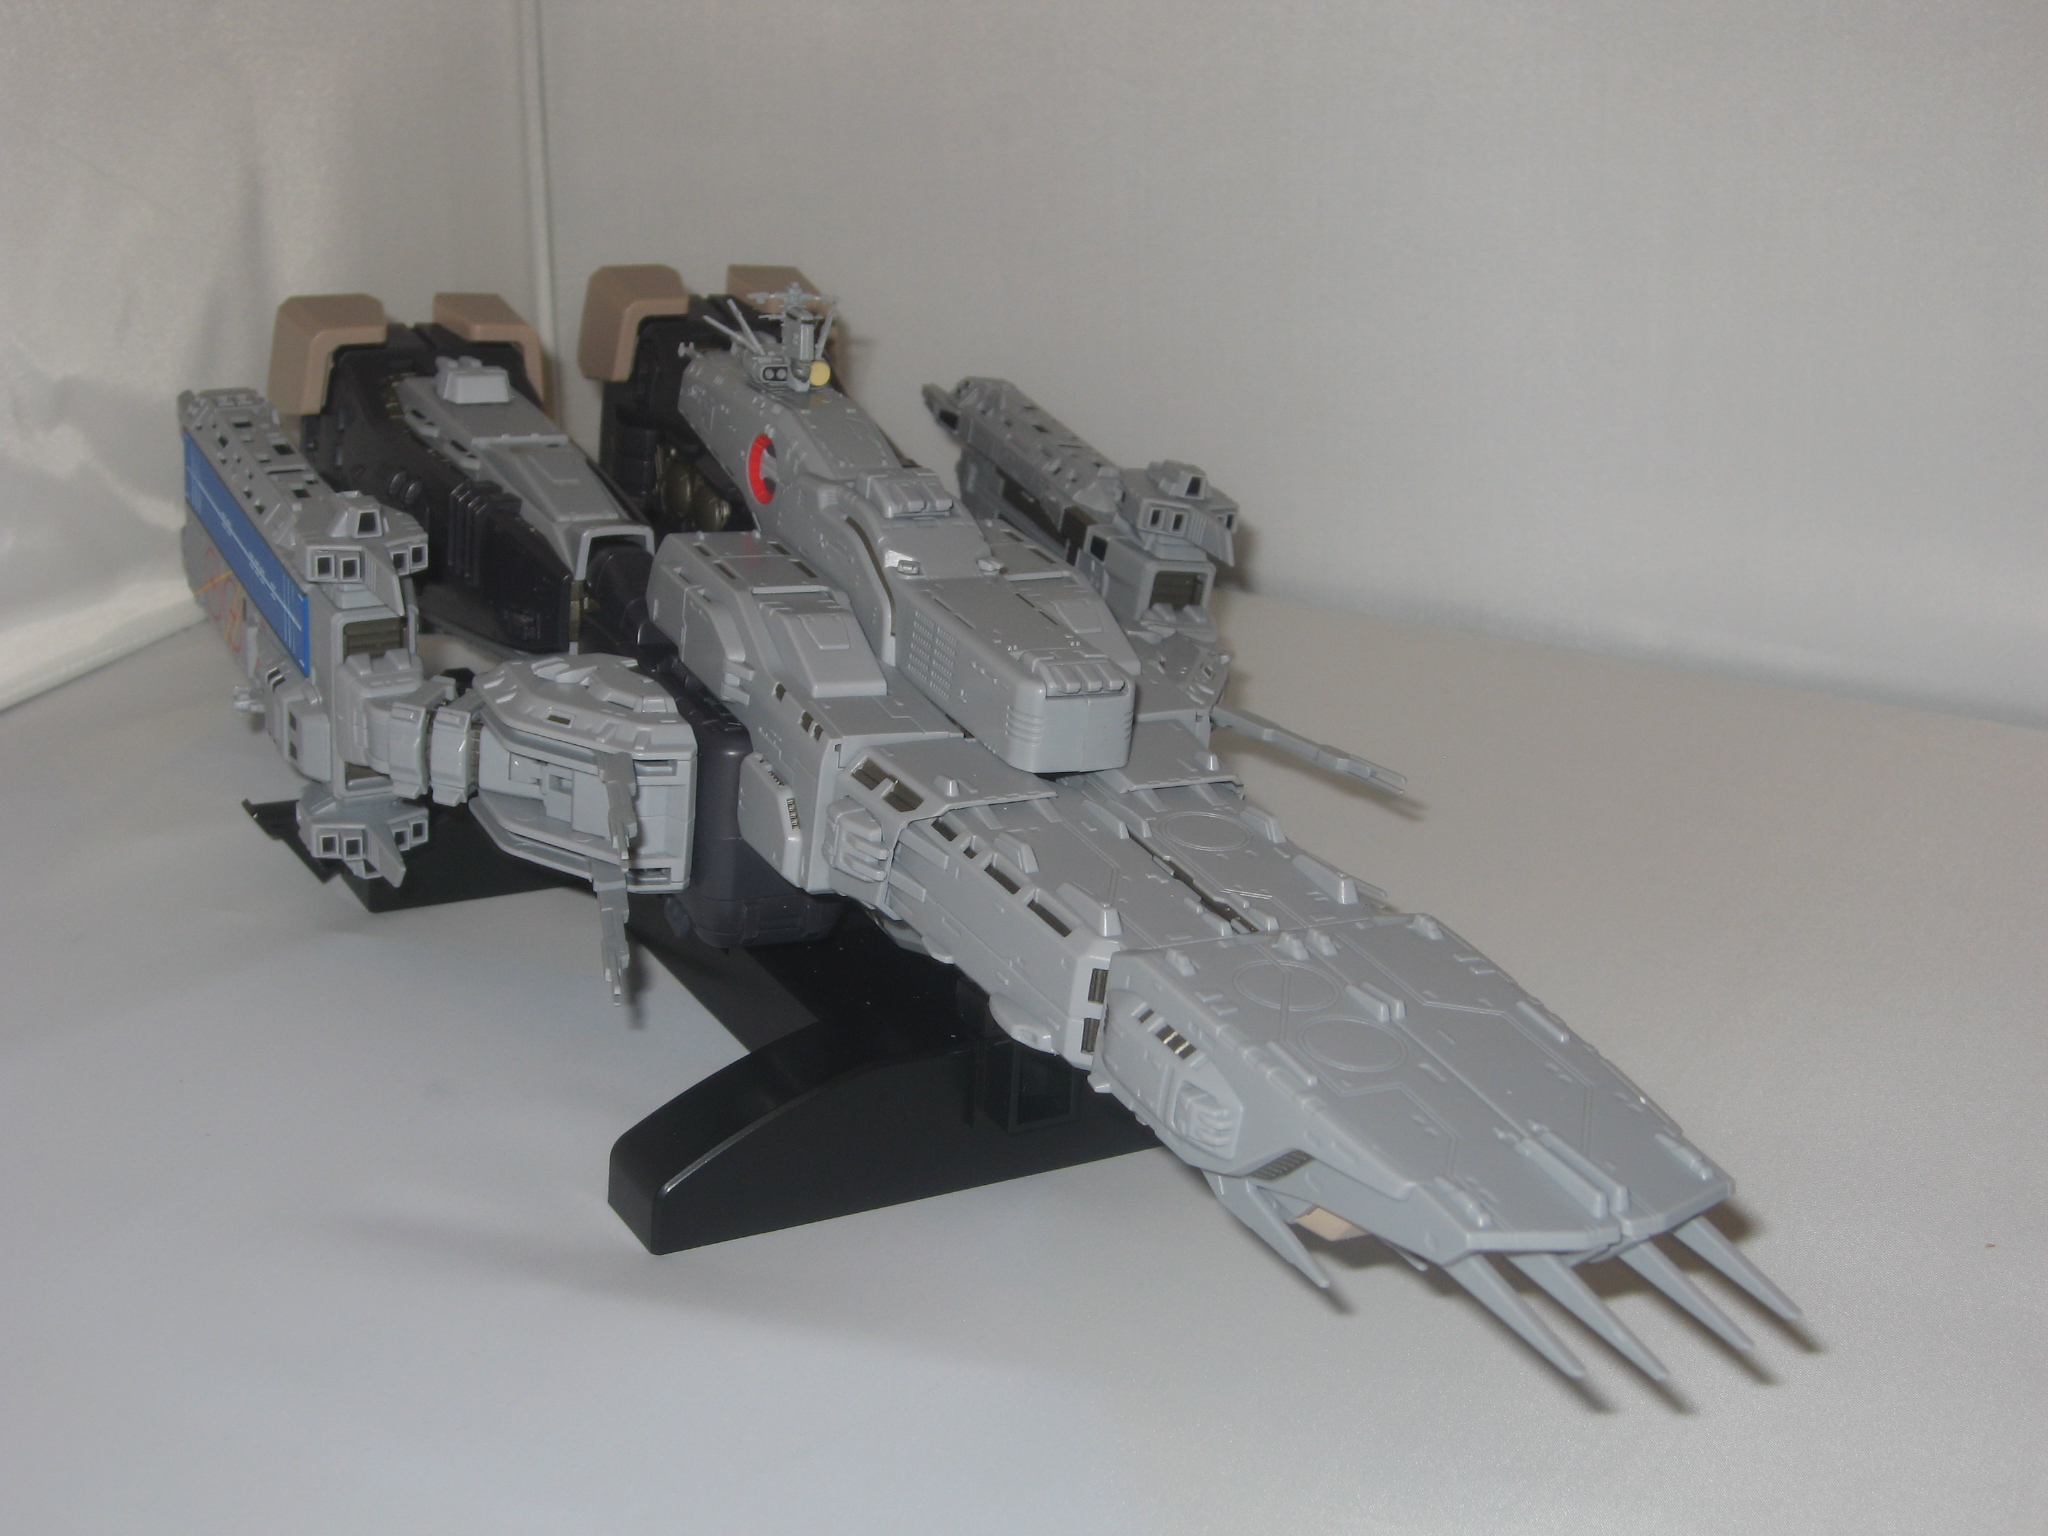
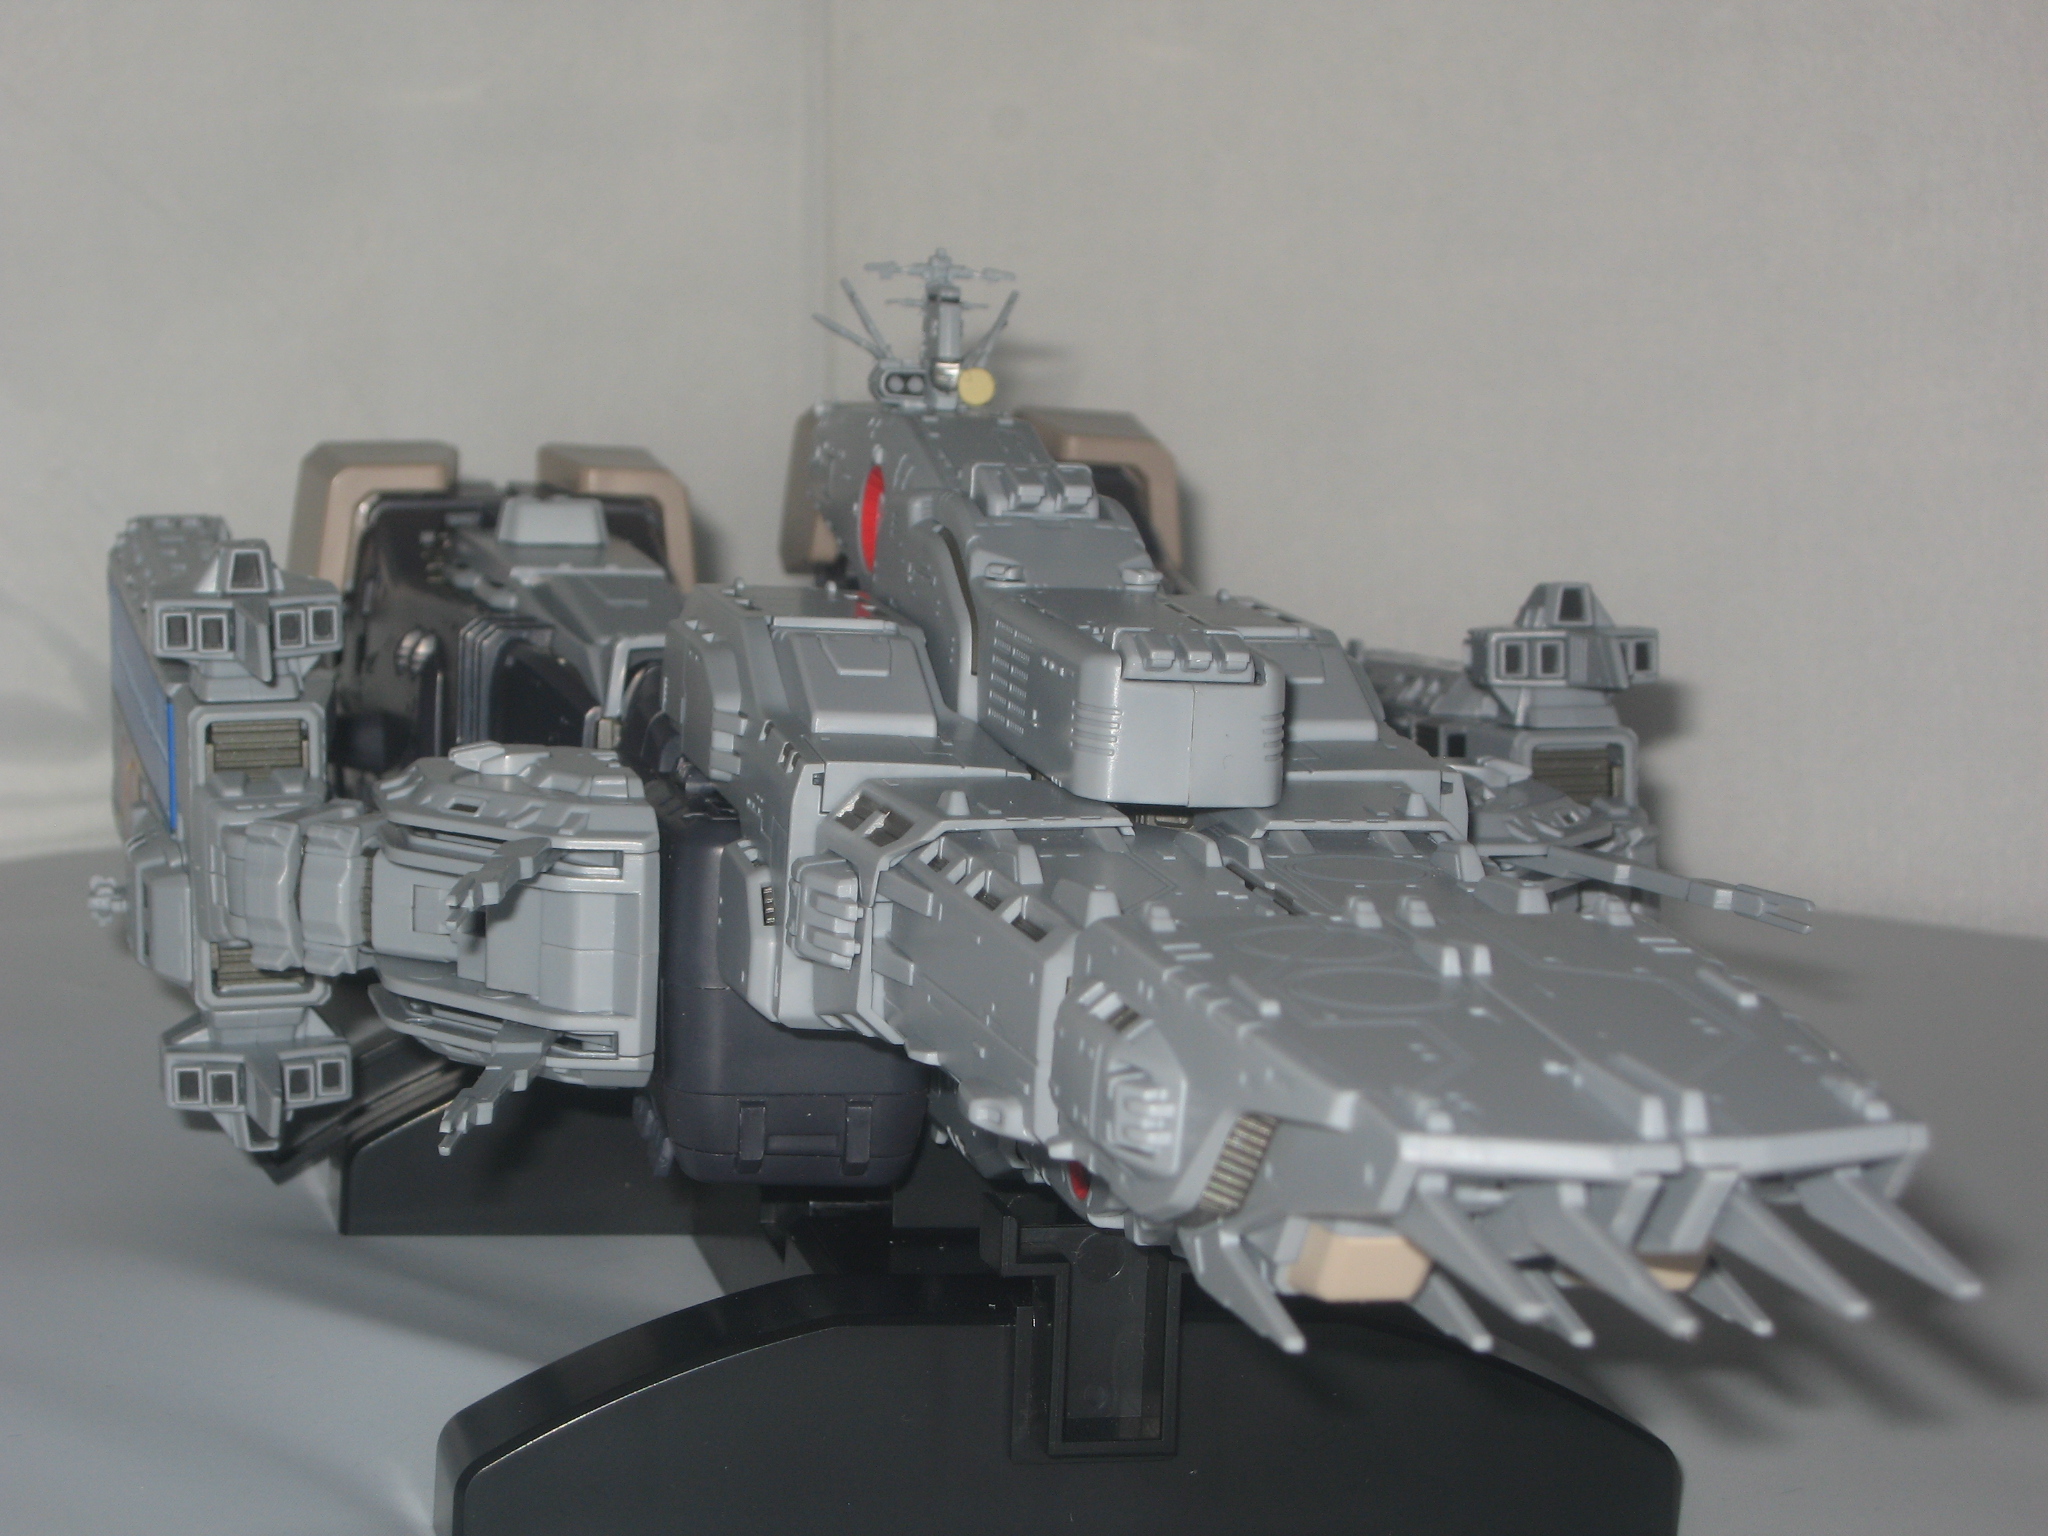
Cruiser Mode Comparison
Yamato 1:3000 DYRL type SDF-1 (w/small parts fitted)
VS
Wave 1:500 DYRY type SDF-1
& Takatoku 1:3000 TV type SDF-1
Comparison with Yamato’s 1:2000 scale SDF-1 Macross
I’ve only seen Yamato’s mega-expensive (210,000 yen), 1:2000 scale SDF-1 once first hand during a visit to their Tokyo office in March of 2010, that is the extent of my sole experience with it. However, I will say of the two scales, I would definitely prefer the smaller 1:3000 version, for the following reasons:
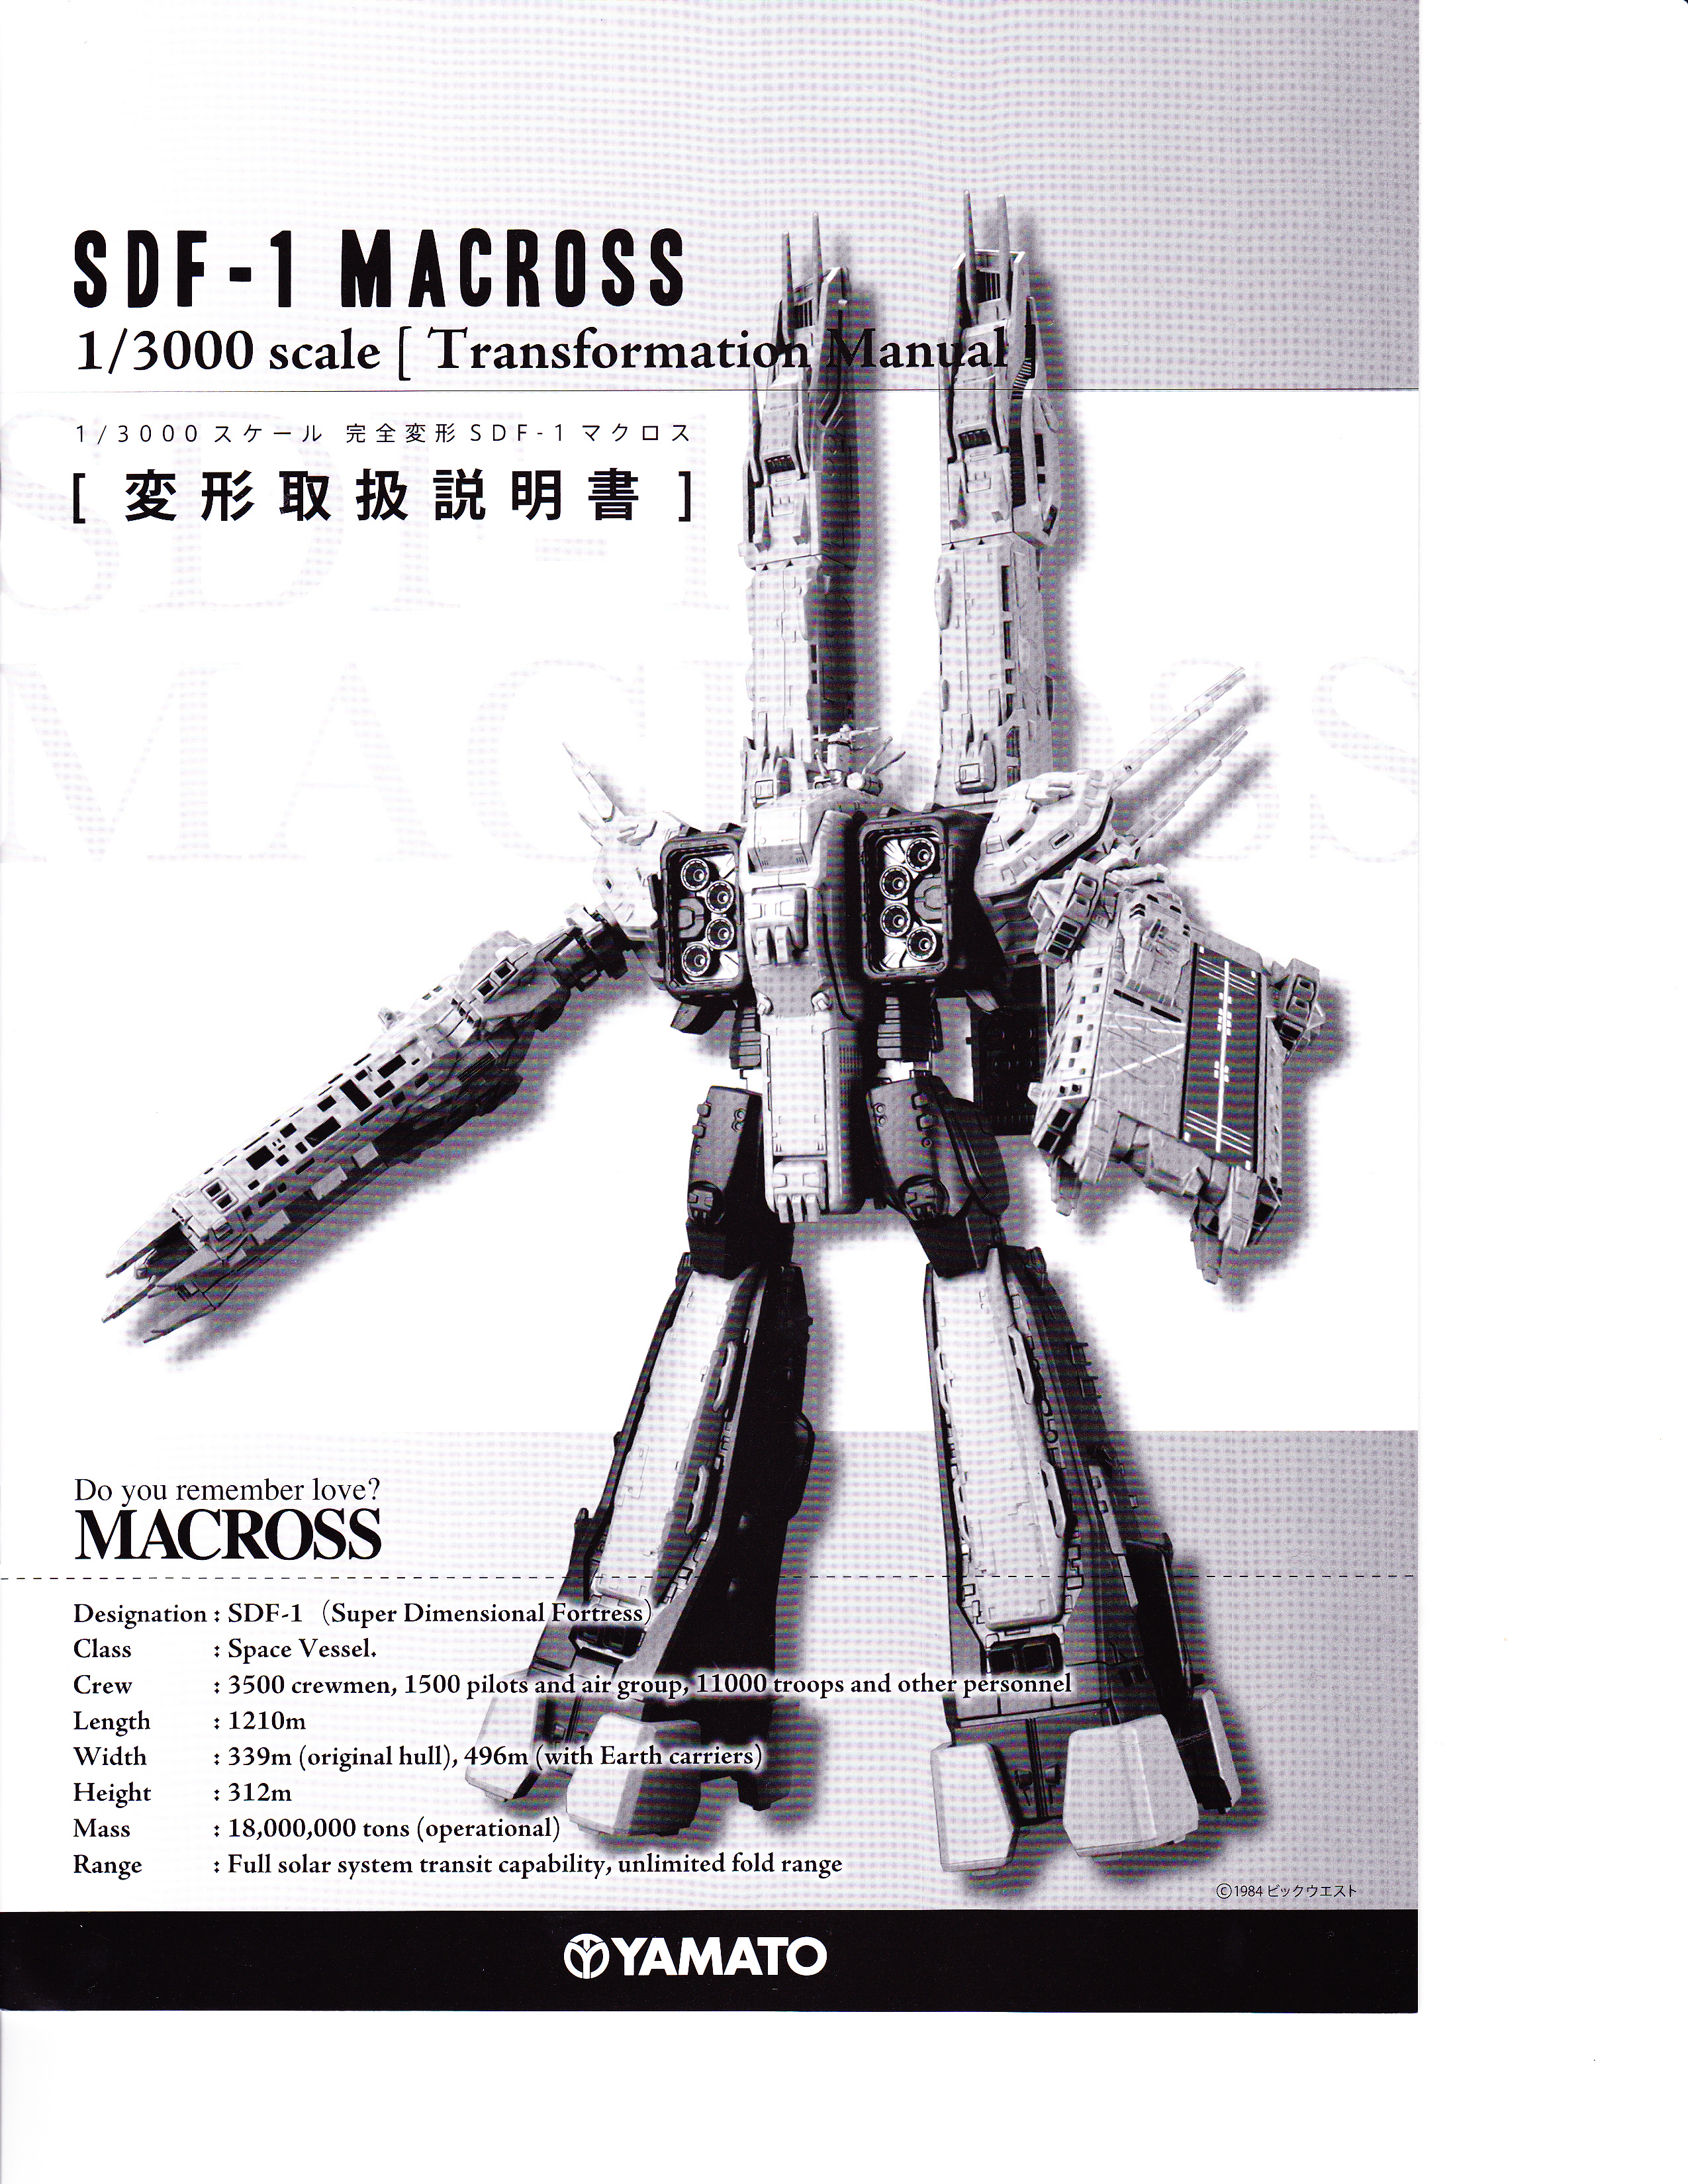
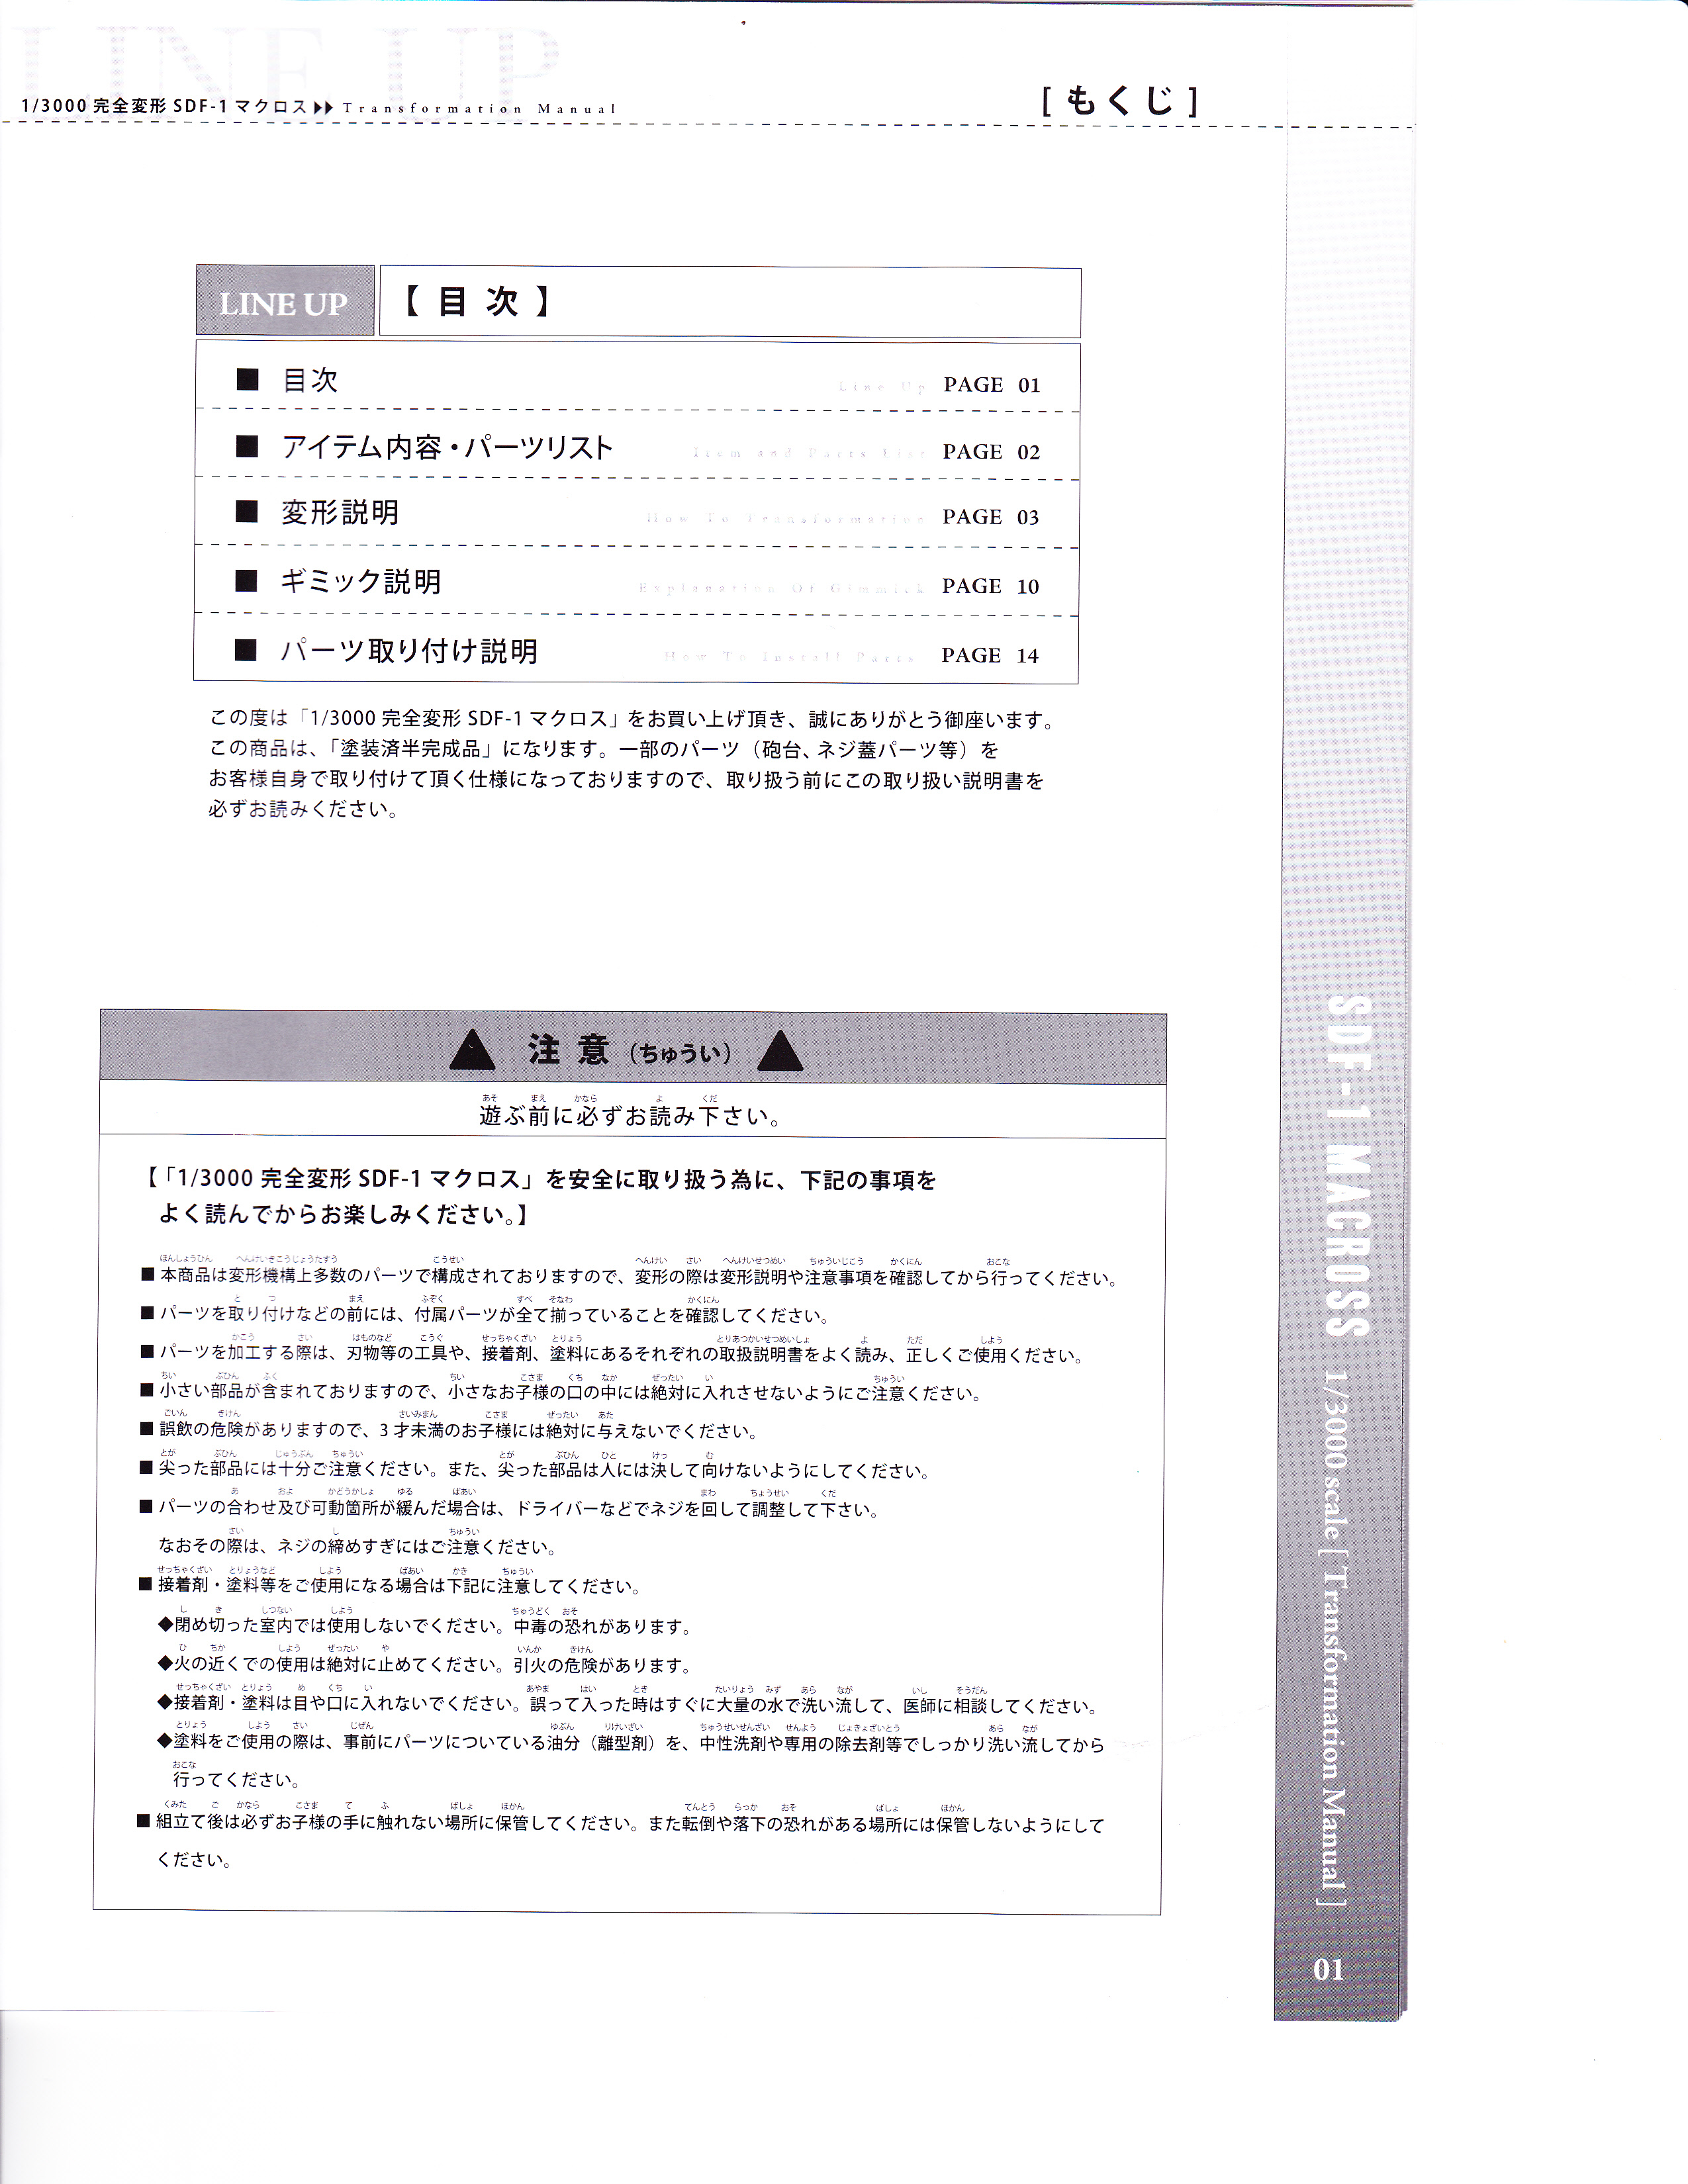
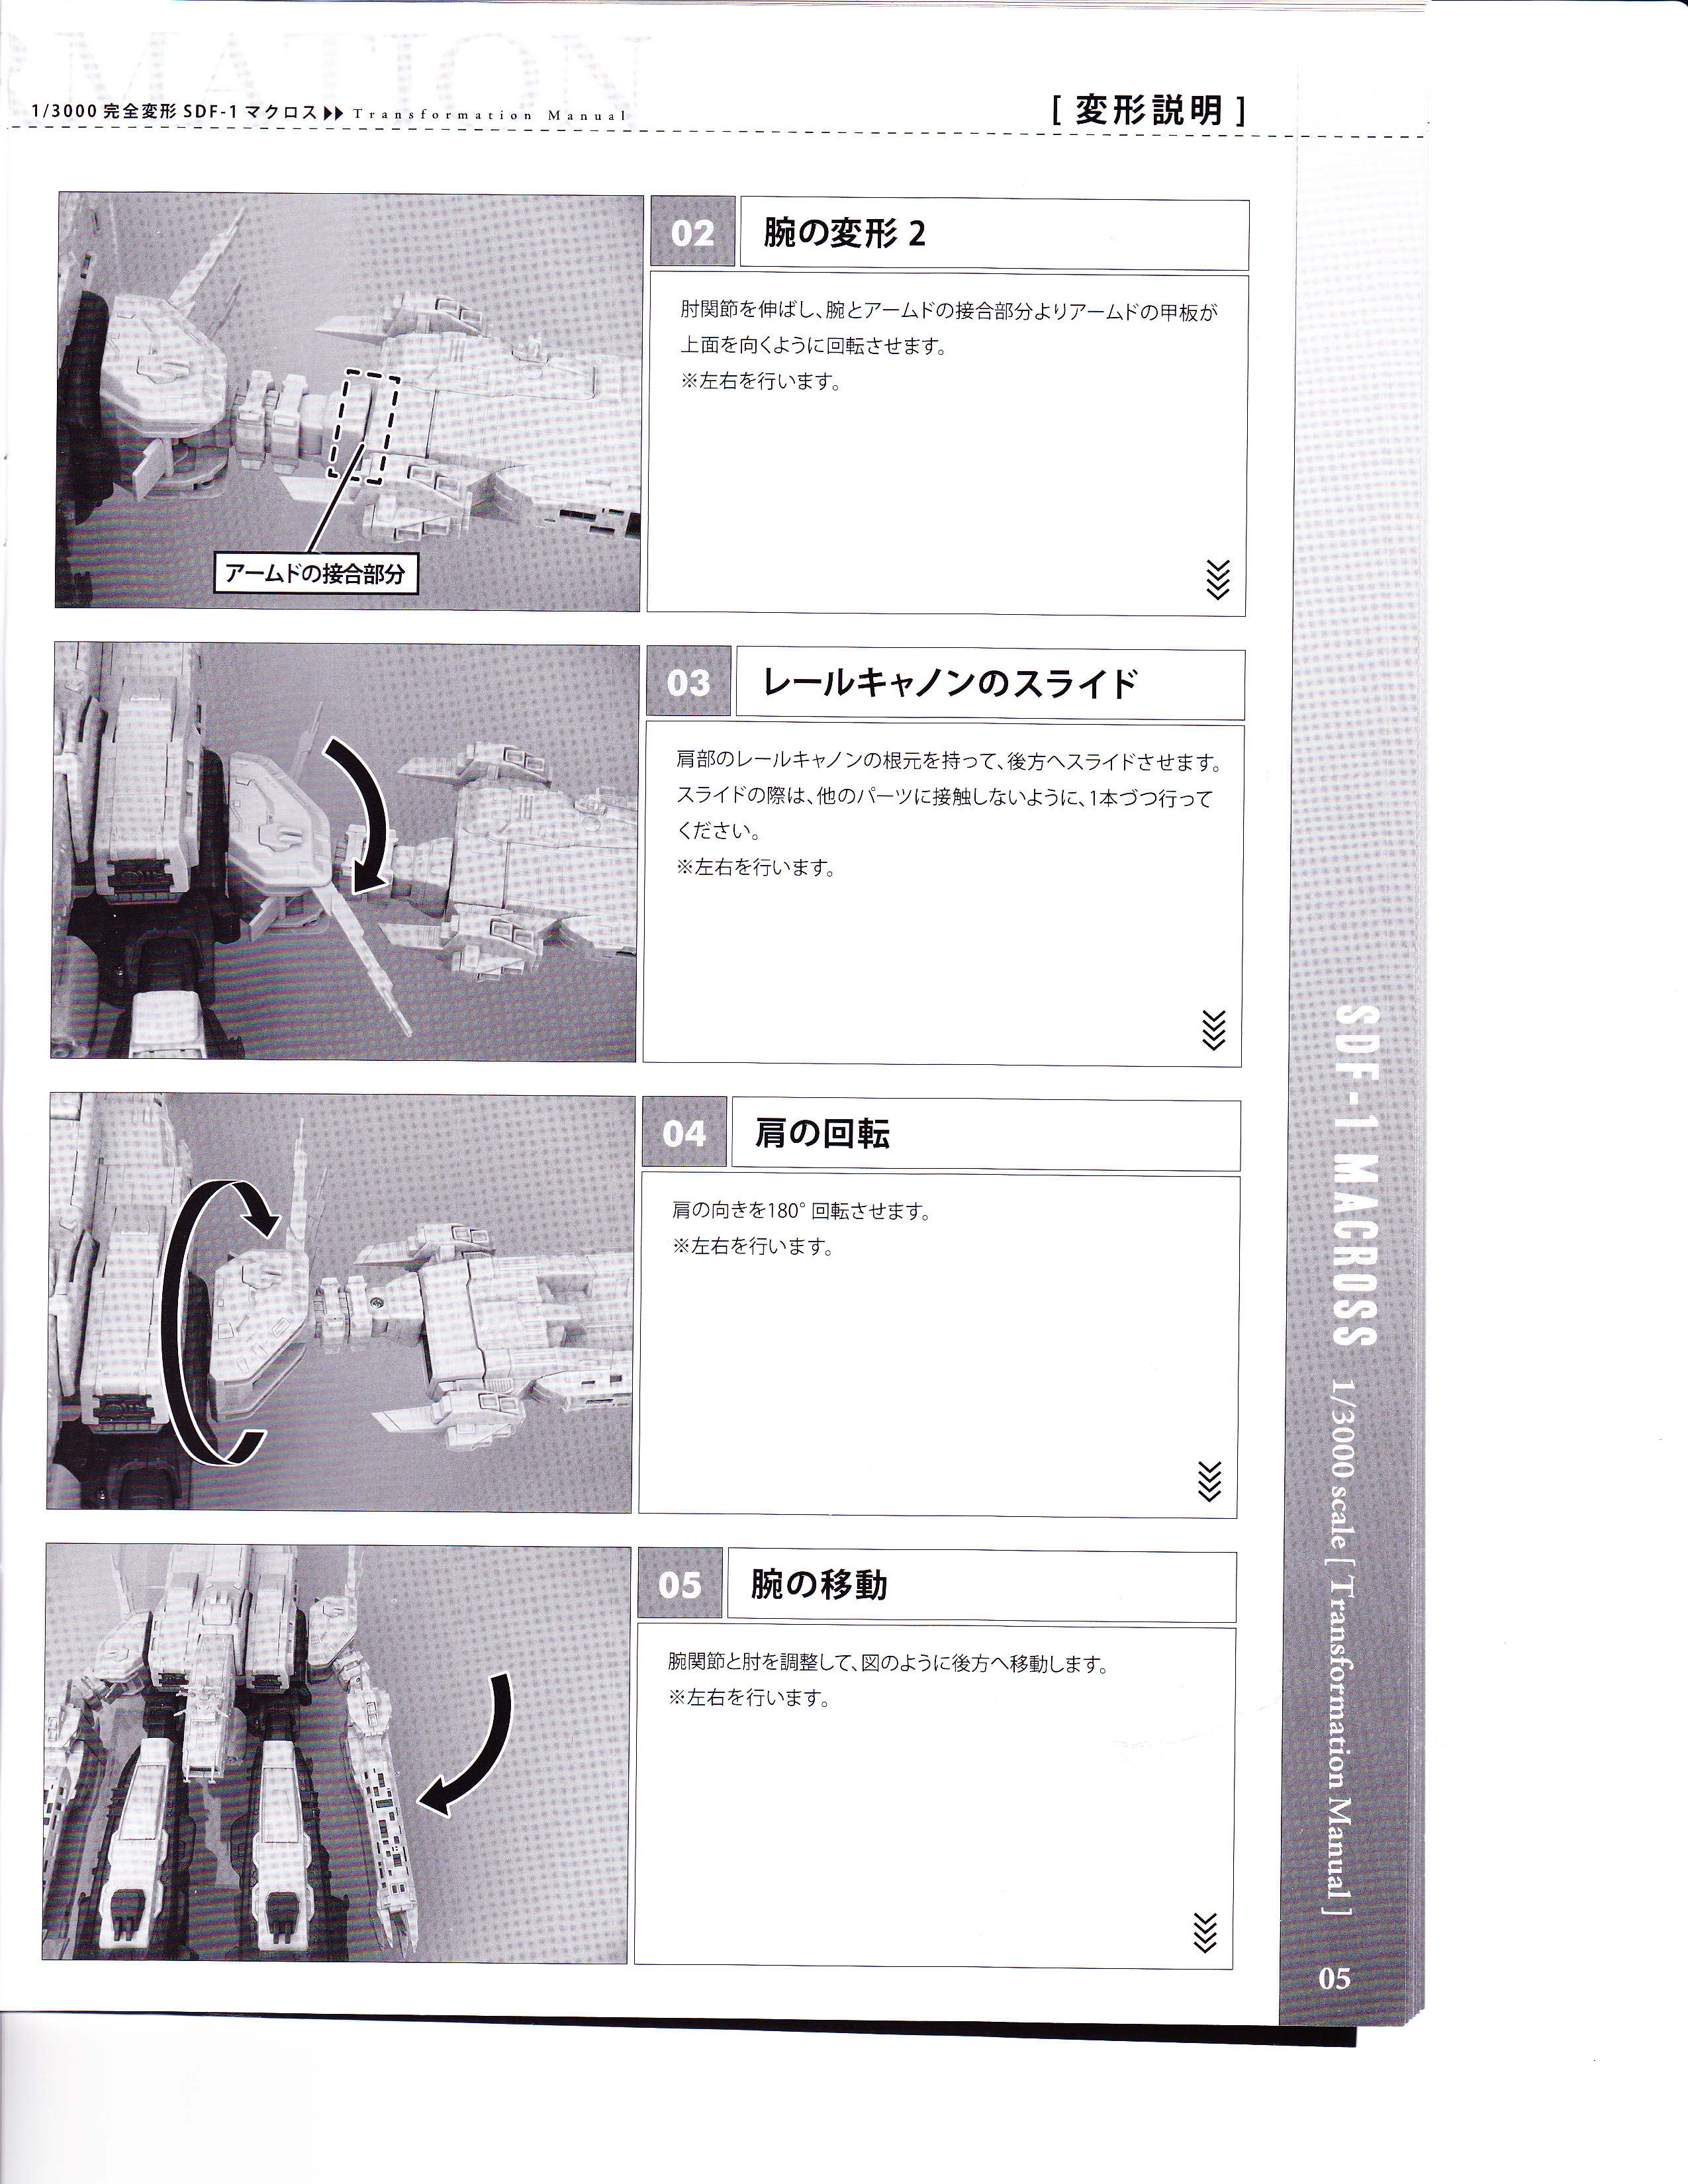
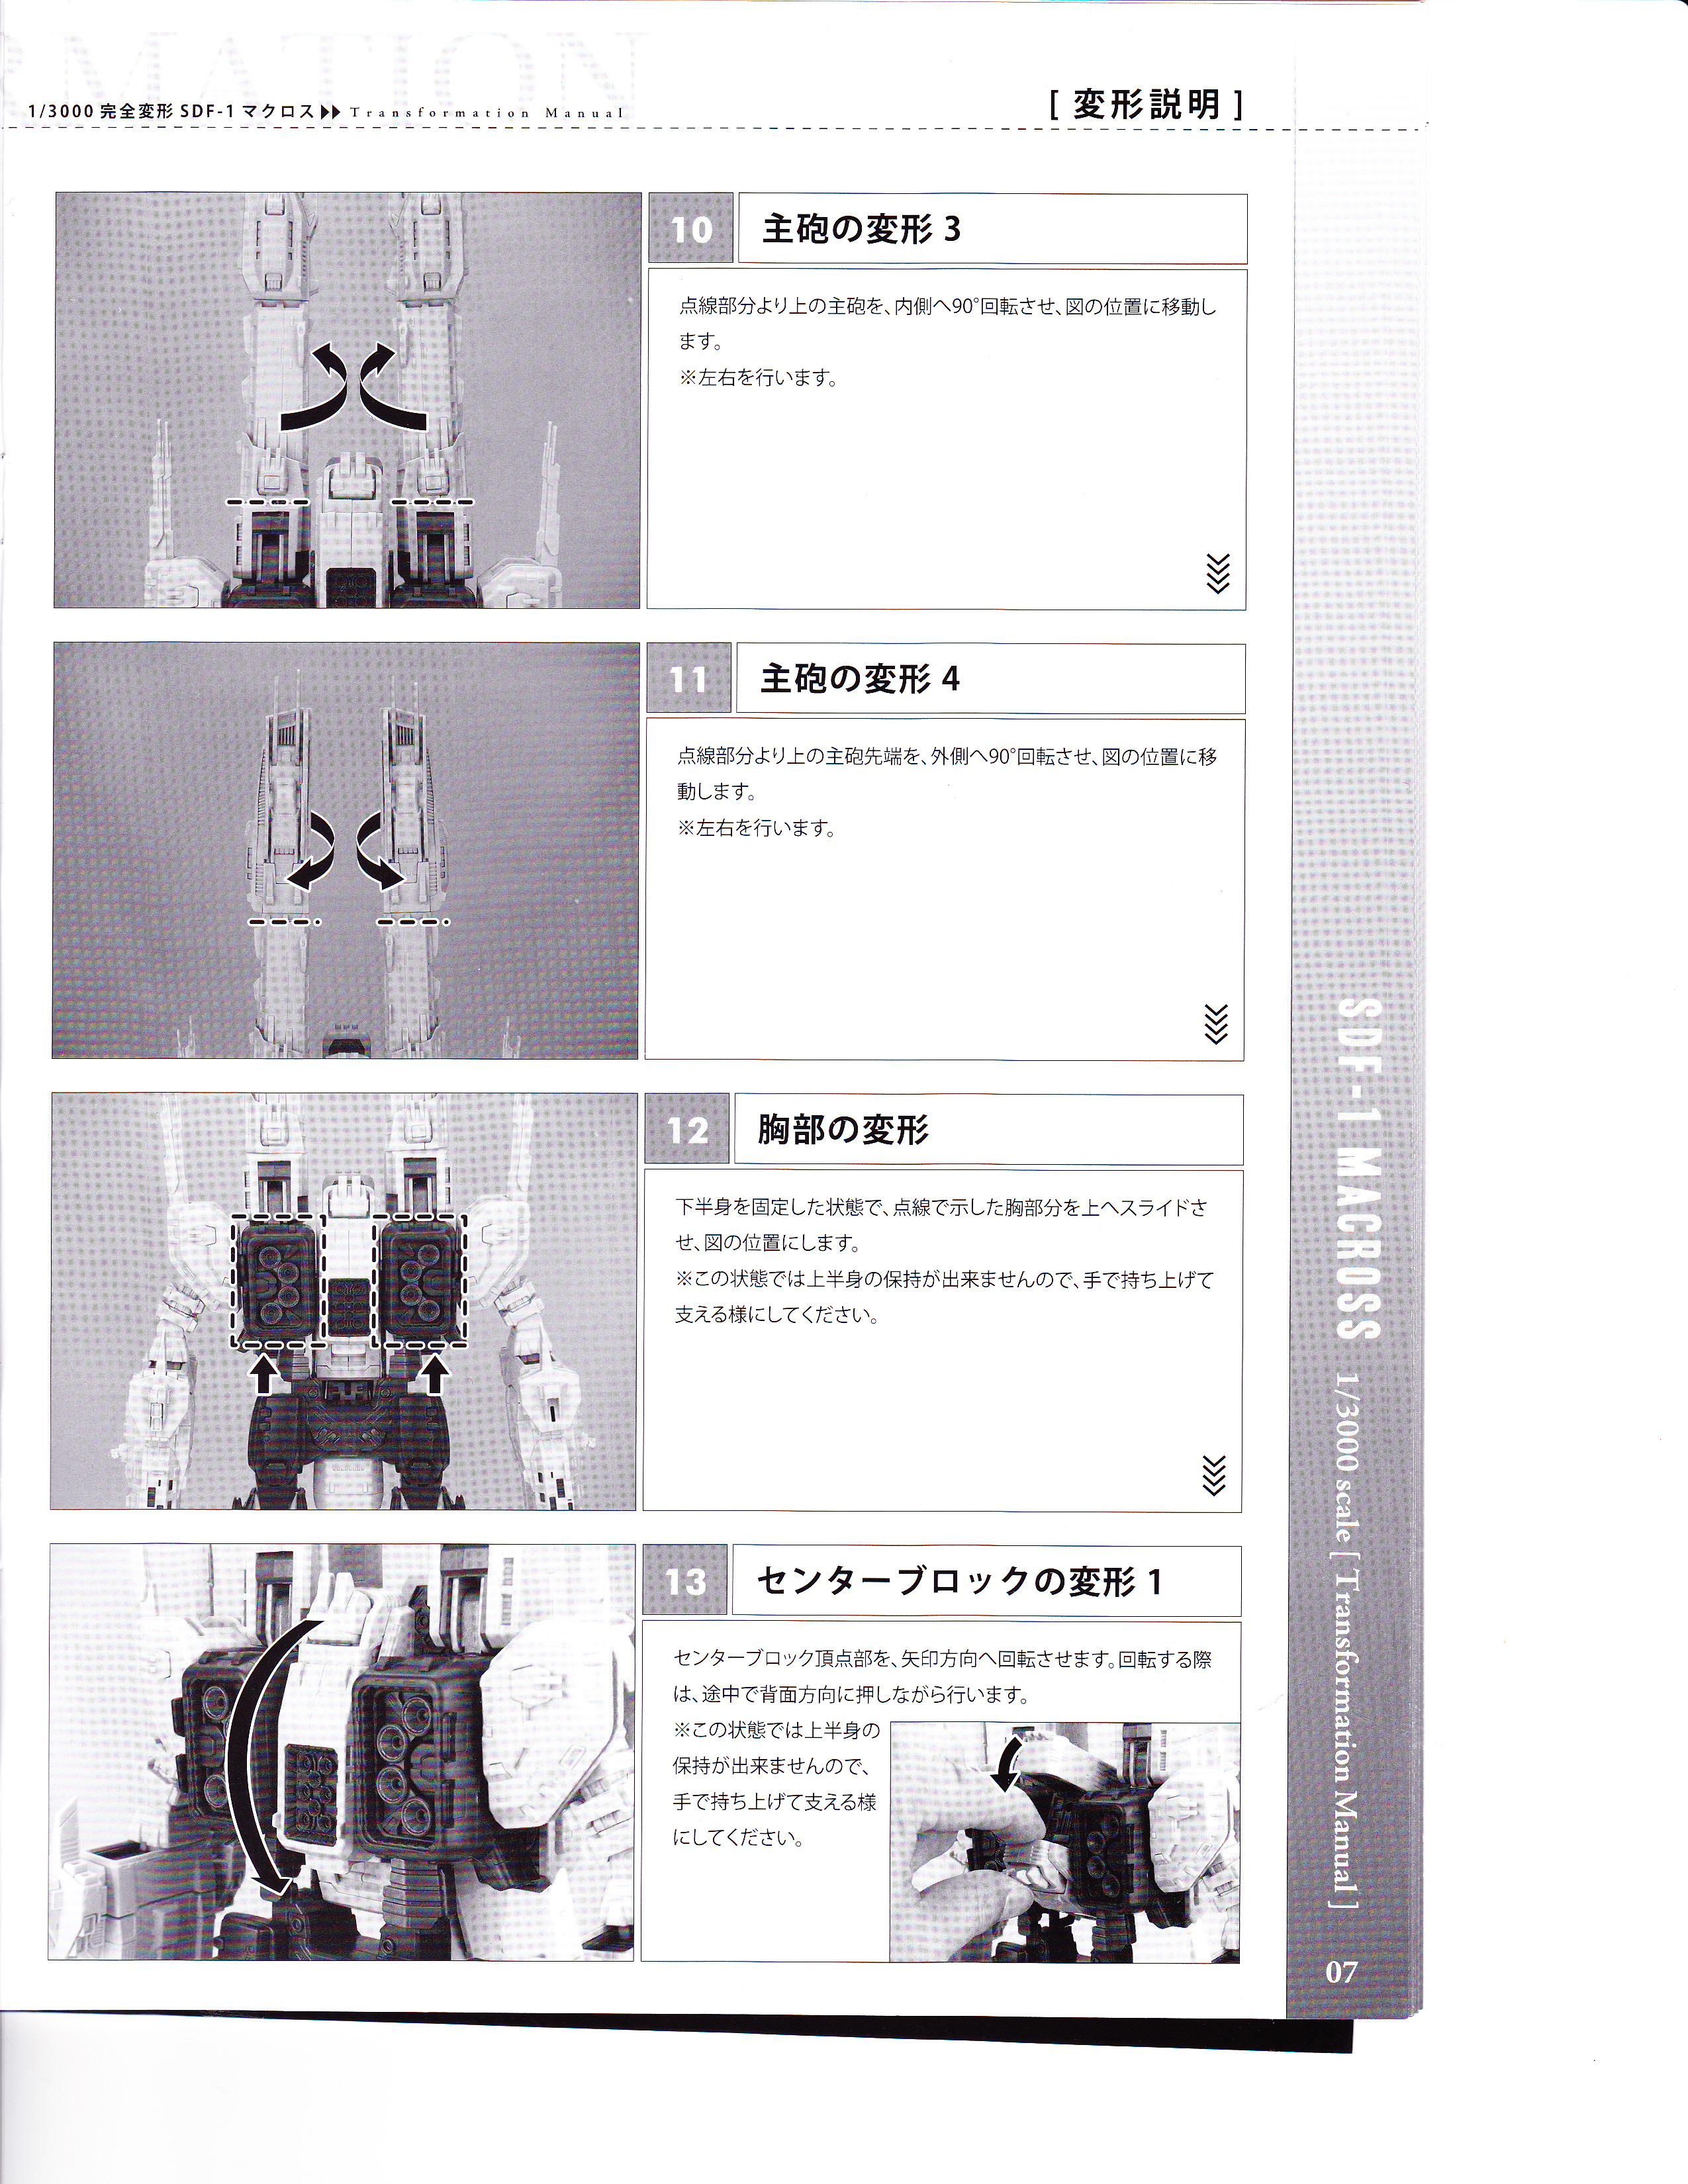
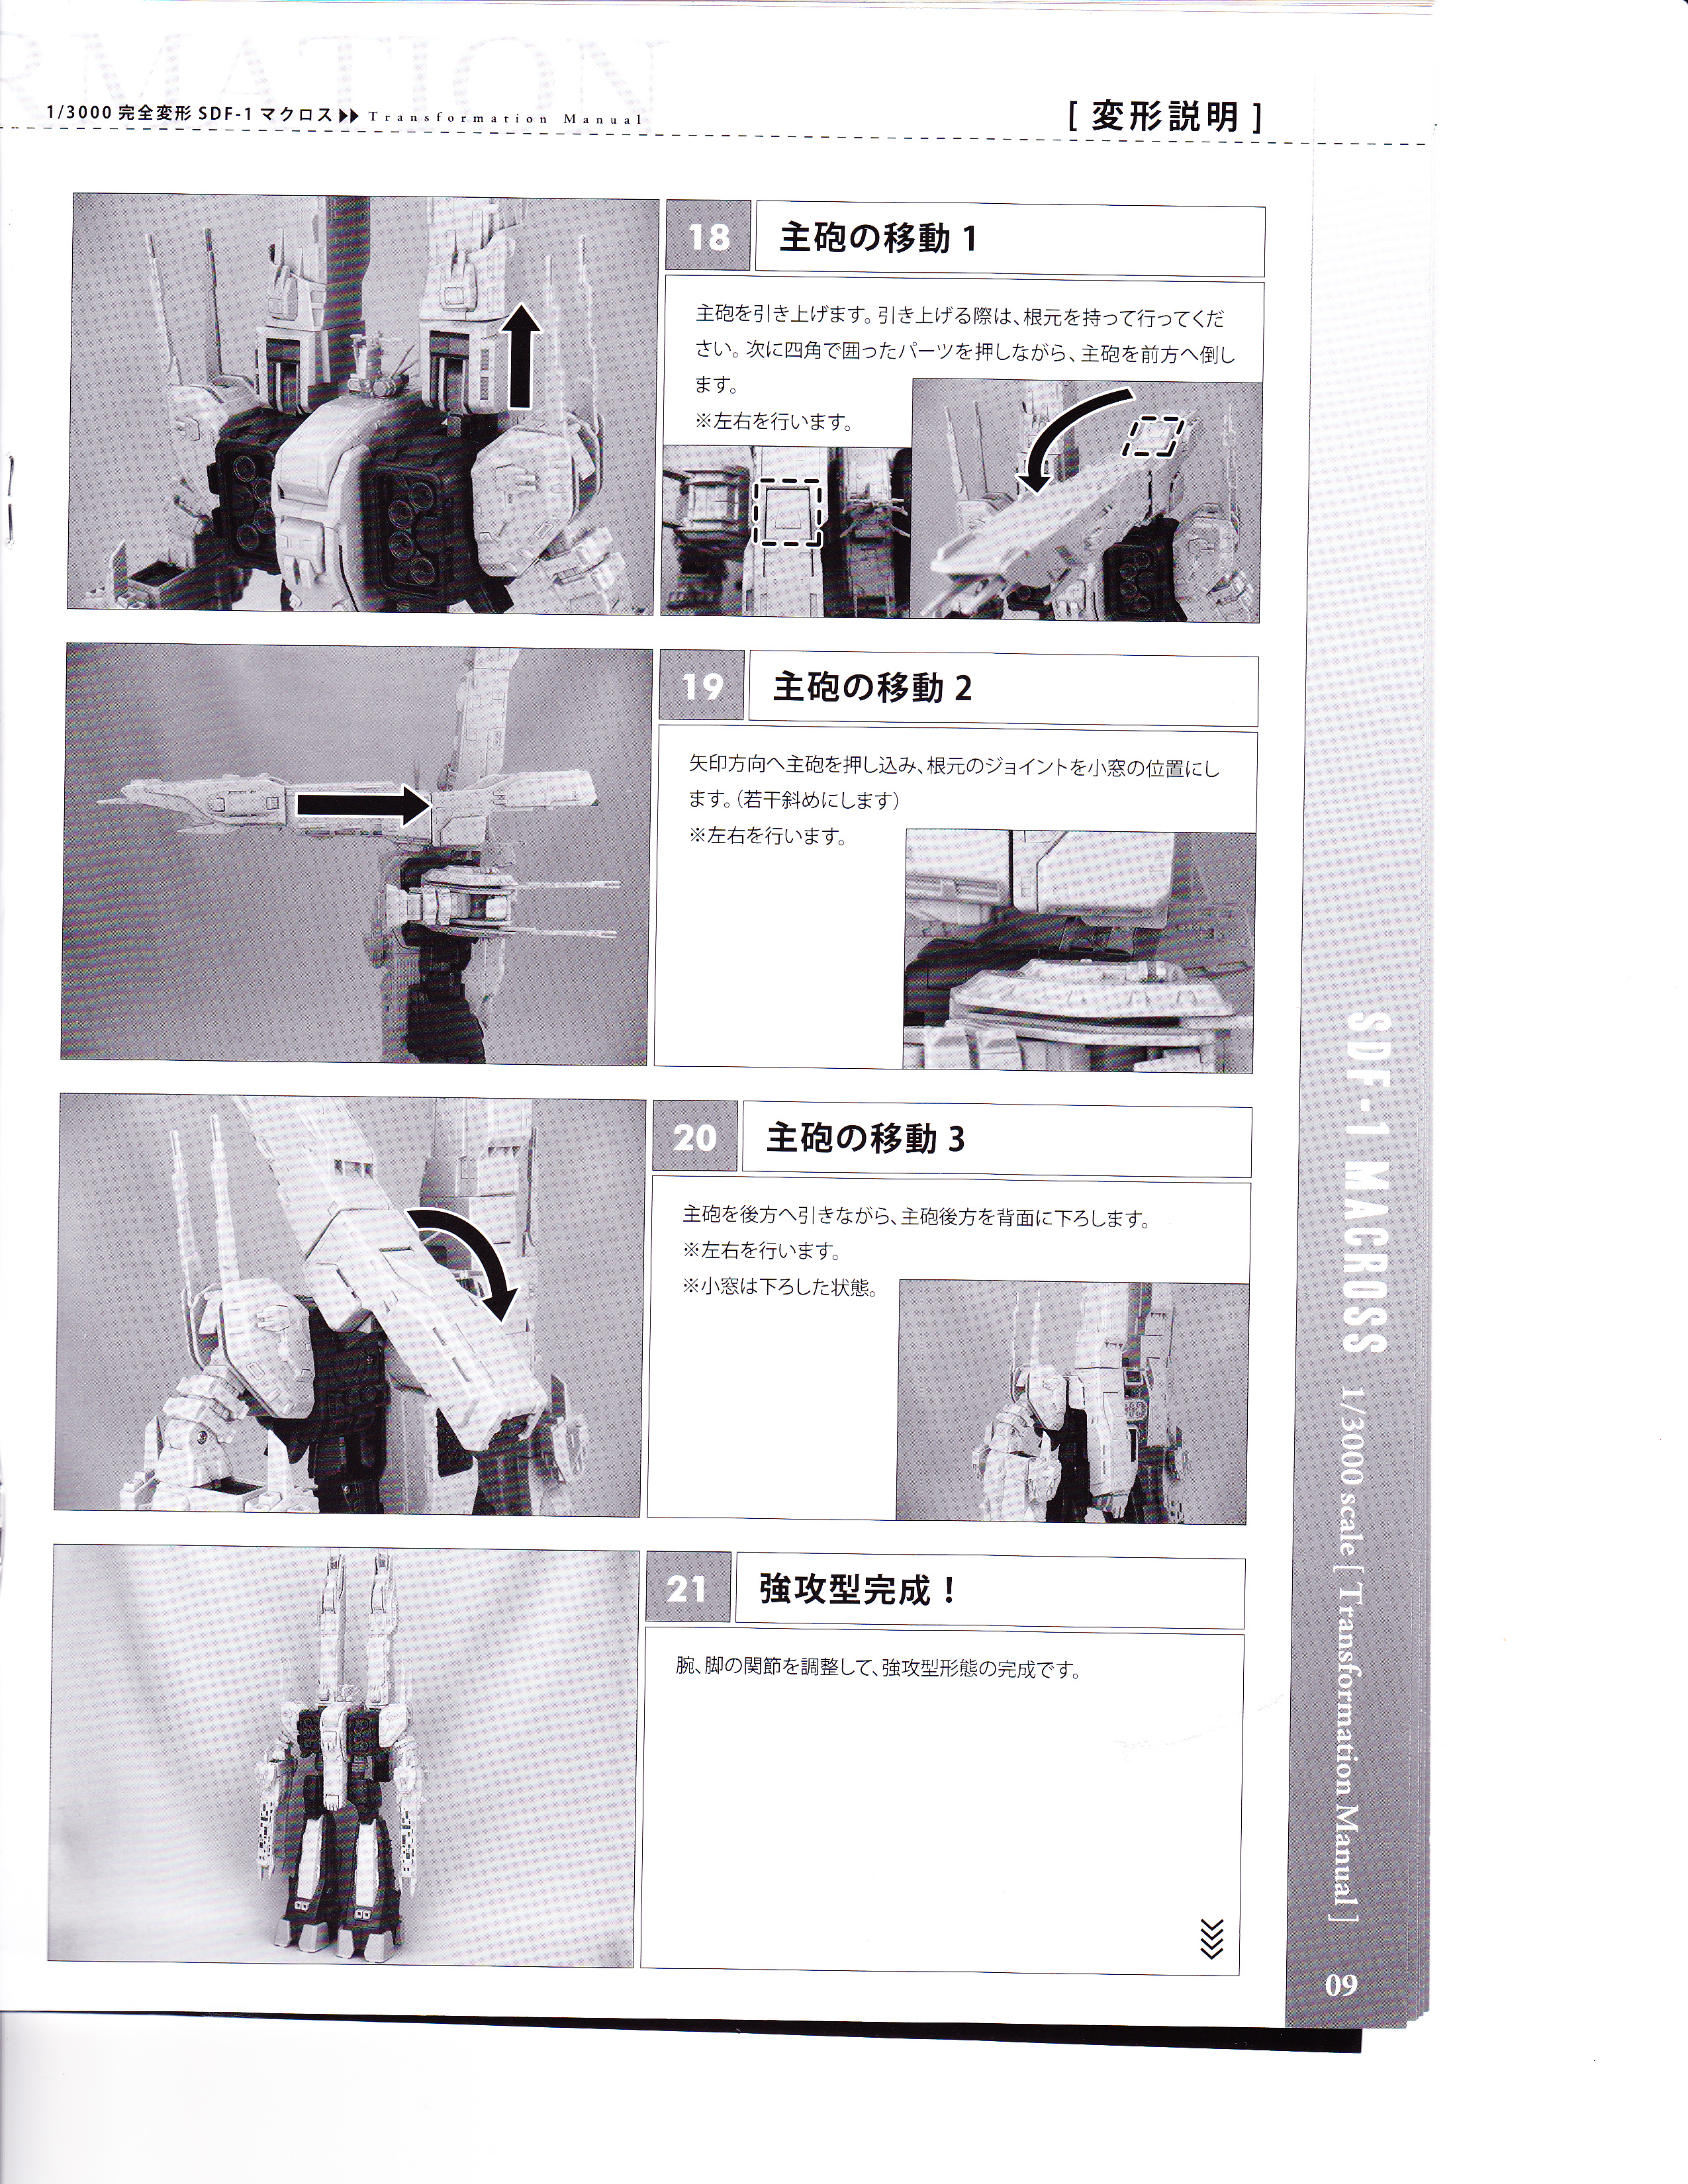
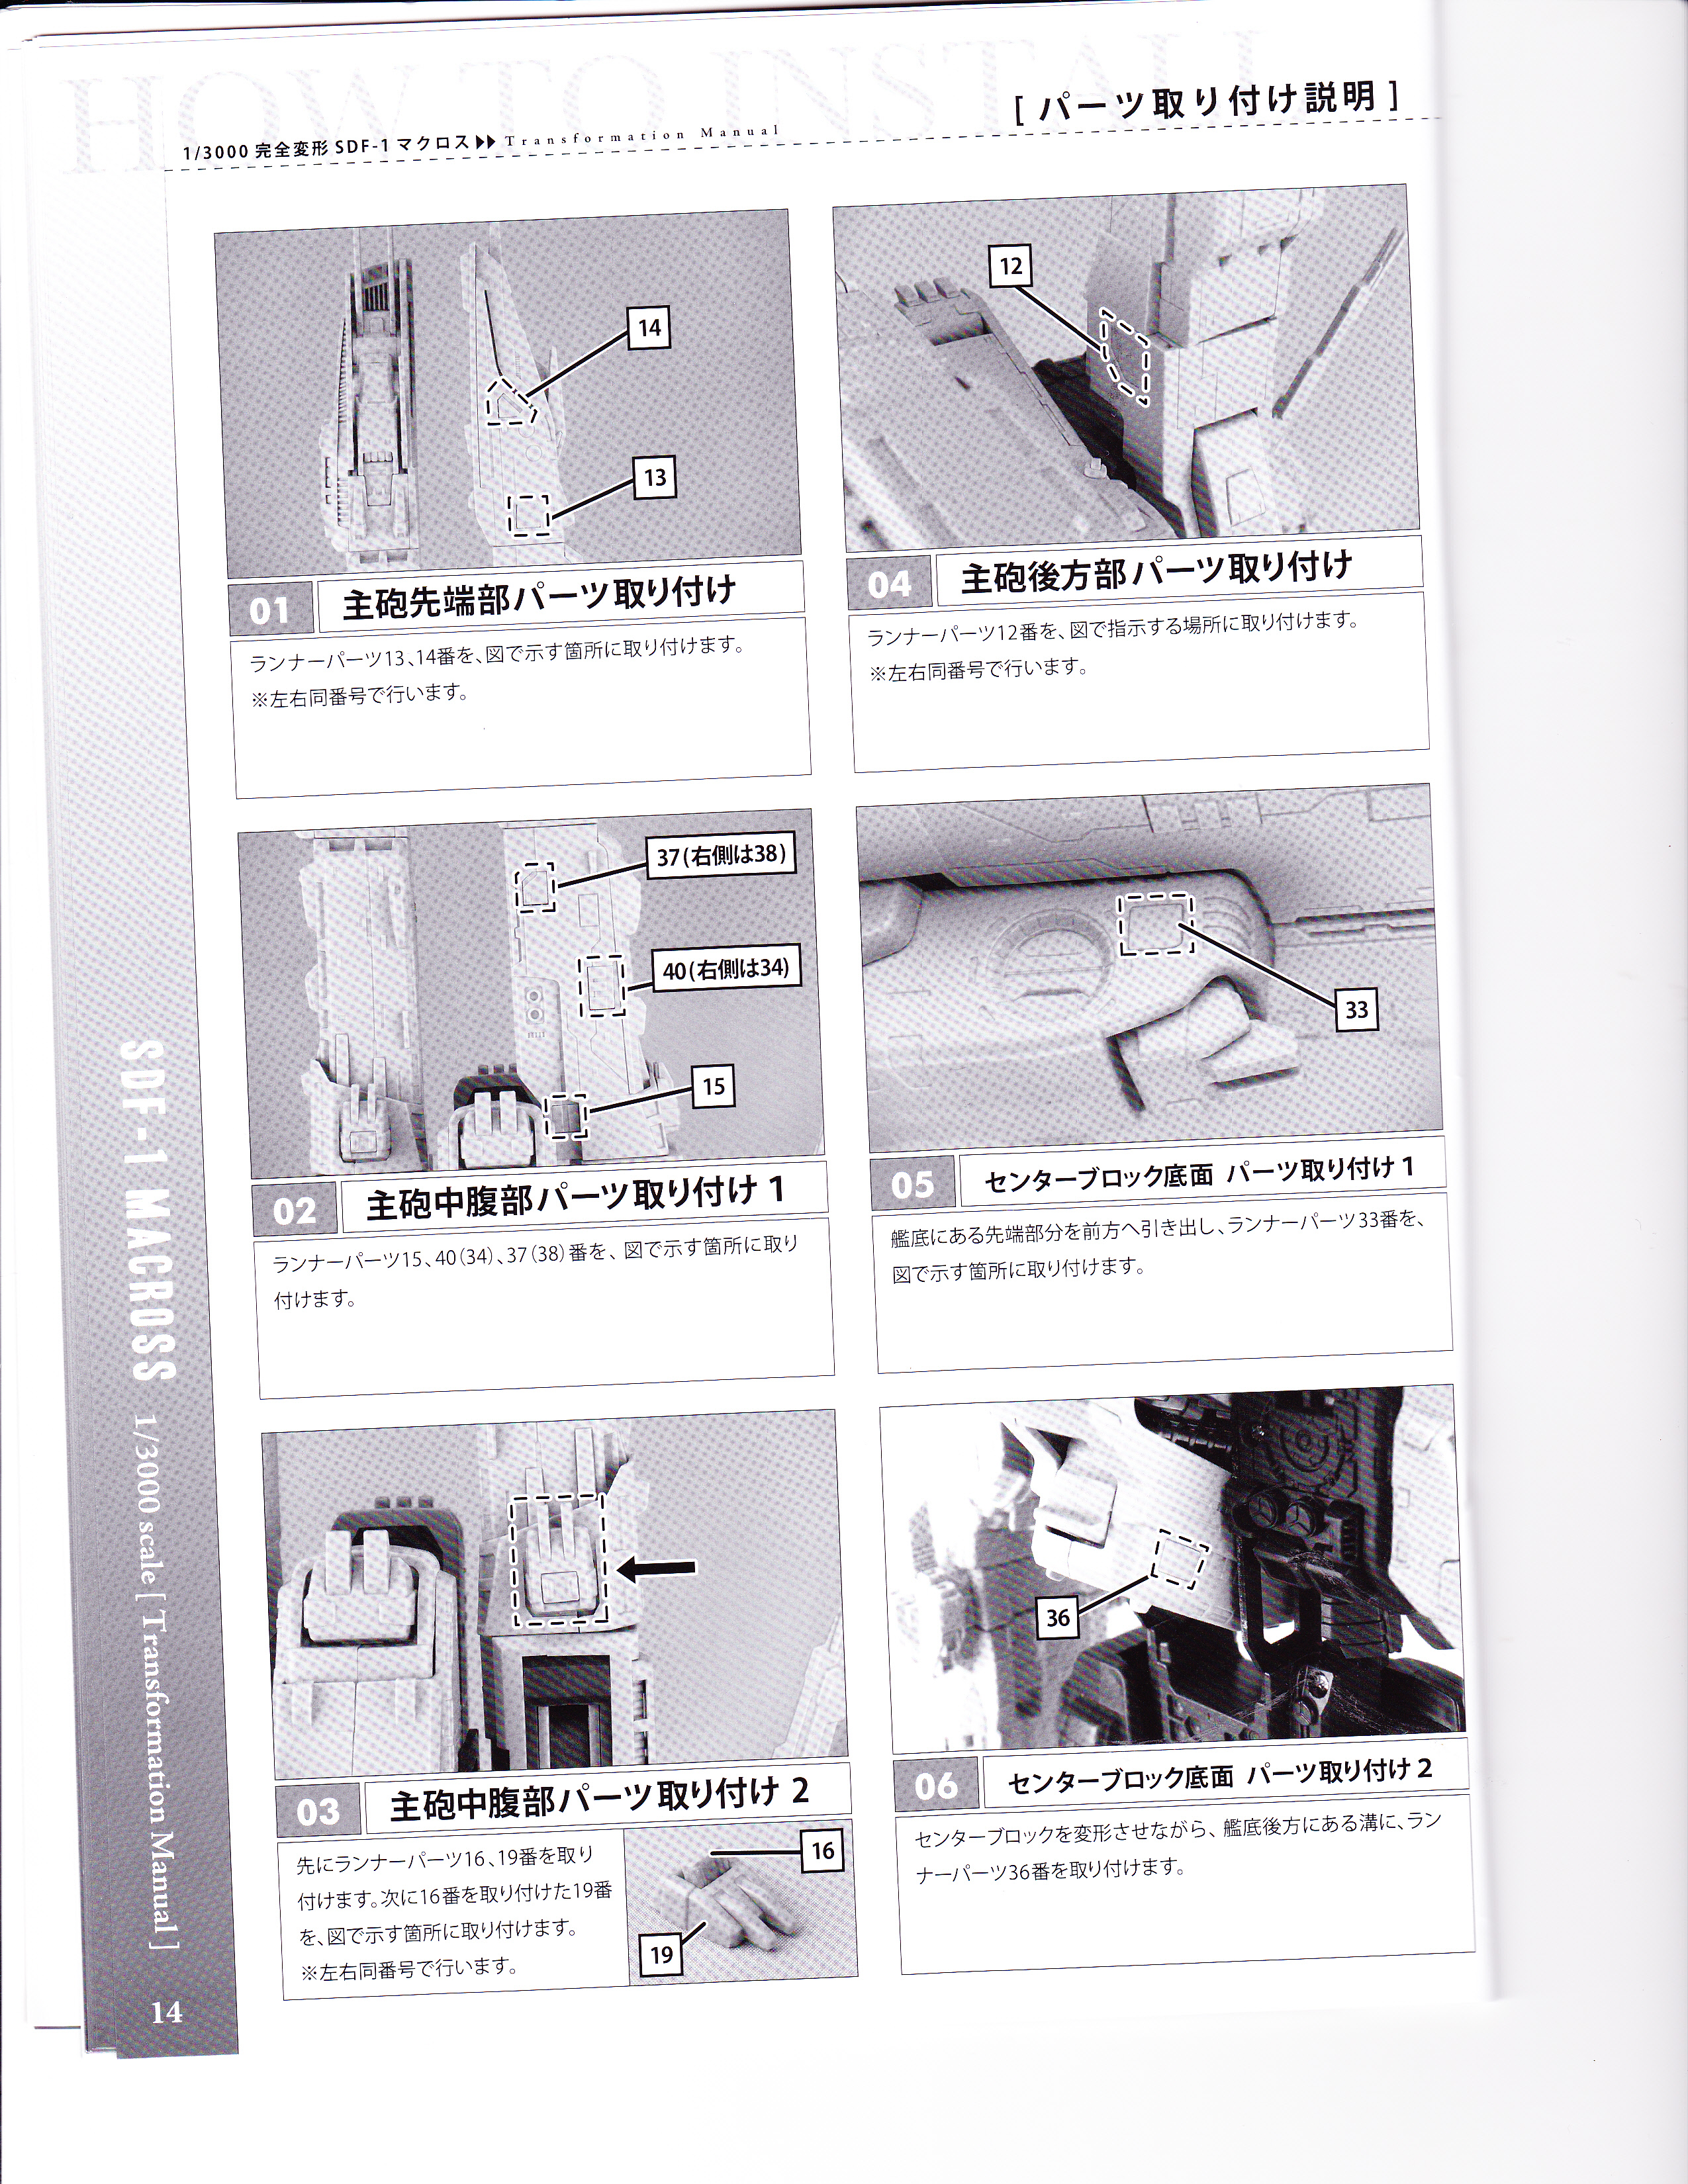
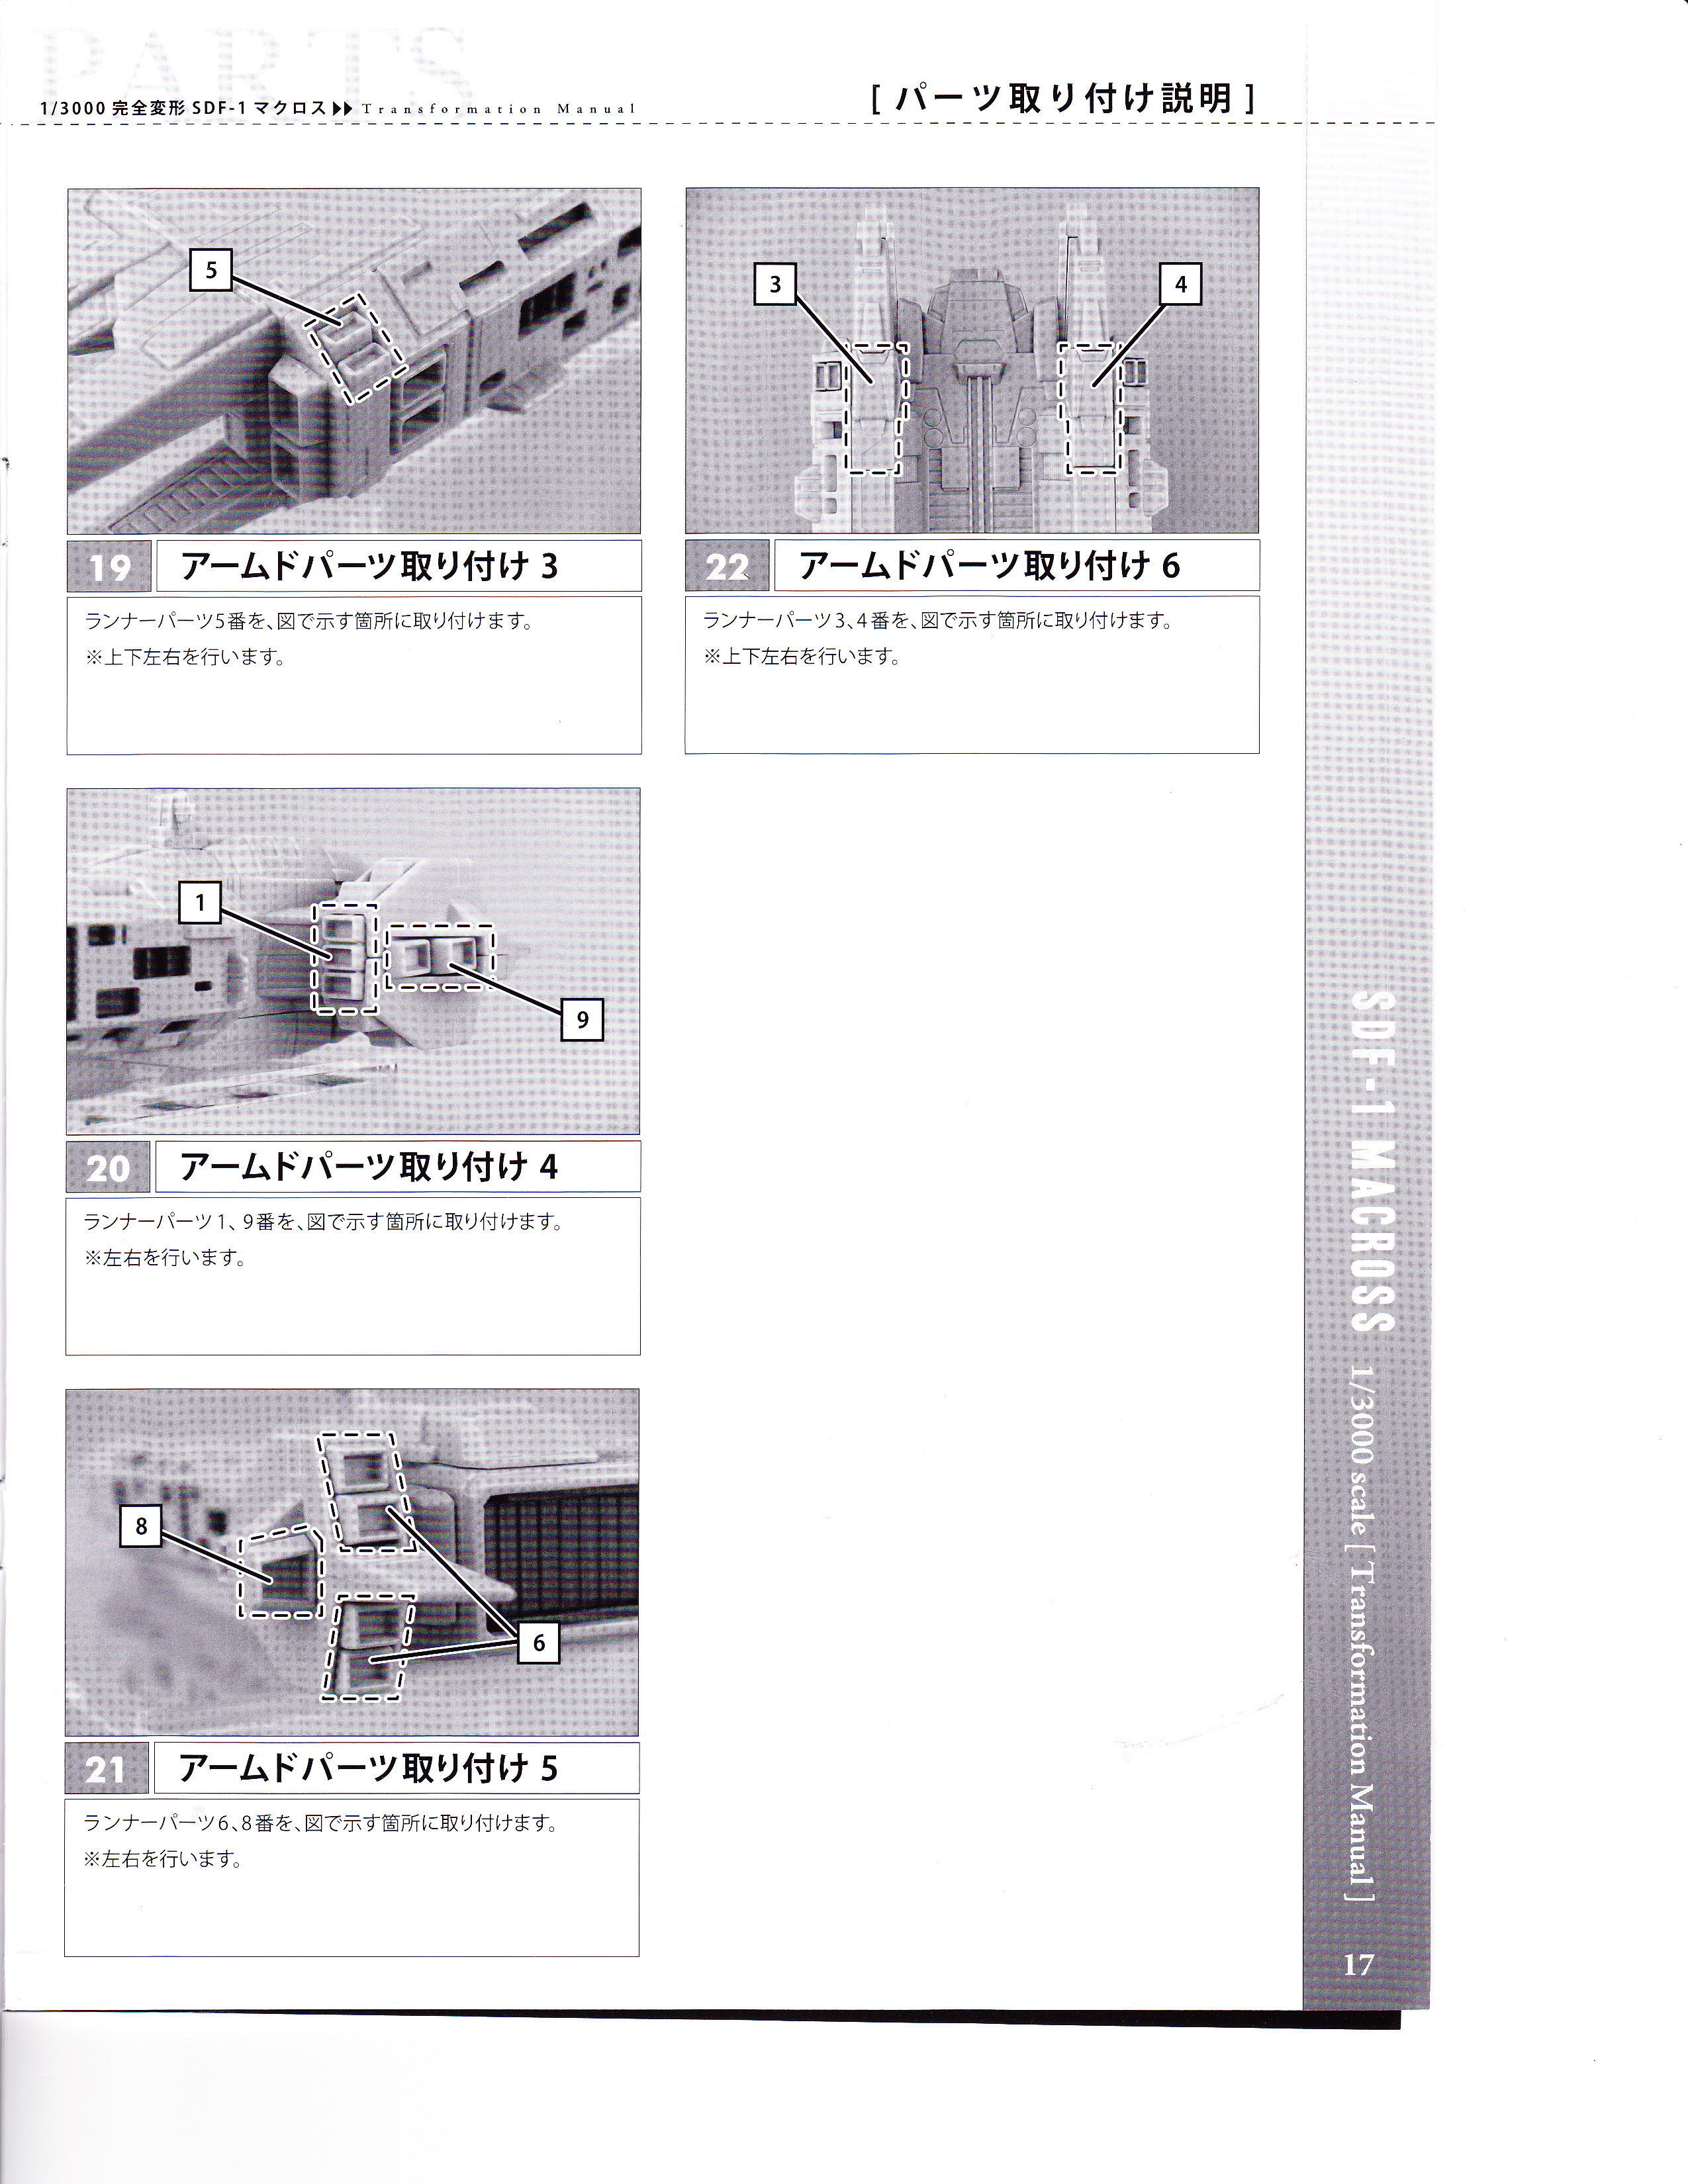
Instruction Manual
The instruction manual is 17 pages long, excluding front and rear covers, is printed on glossy paper and is printed in grayscale. There is an additional supplementary lose single photocopied page, which seems to mention something about the small parts (thrusters, that fit on the front of the ARMDs).
As usual (given the target market) the instruction manual is all in Japanese. However, working out how to transform the Yamato 1:3000 scale SDF-1 is not rocket science and you should be able to figure out how to transform the toy without any problems just by following the photos in the instruction manual.
SDF-1
Instruction Manual |
|||||
 |
 |
 |
 |
 |
 |
 |
 |
 |
 |
 |
 |
 |
 |
 |
 |
 |
 |
 |
 |
||||
Negatives
Only a few minor points that I can think of really. The first being the price, which given the current high Japanese Yen exchange rate at the time of this review is going to make purchasing by those living outside of Japan rather expensive. If Yamato could knock say 5,000 Japanese Yen off the already high recommended retail price, that would definitely sweeten the deal for some who where otherwise sitting on the fence about buying.
Another minor personal niggle about this toy, is the large number of small parts that need to be cut off the sprues and glued on. I know some people enjoy doing this, but I do not and would rather all the small parts have been fitted at the factory. As I nearly found out to my horror, there is the possibility of spilling or squirting excessive glue on what is a very expensive collectors item, when trying to fit these small parts.Be careful of the horizontal antenna on the top of the bridge. It is by necessity quite small (and thus fragile) and easy to knock or bend accidentally during handling and transformation and it will not take much to snap it off. Mine is already showing showing stress marks on both sides from where I have accidentally mishandled it during transformation (entirely my own fault). In the new photos added below in the addendum, you can clearly see the two white stress marks on the left and right sides of the horizontal bridge antenna. Again these are entirely my fault as I rested the toy upside down a few times during transformation.
Last minor complaint. Attaching the two ARMD platforms is quite tricky as you have to use a bit of force while wiggling them on. I was a bit worried about damaging the connection point on the arms, but removing and ataching them several times, everything is fine.
Conclusion
If you are a fan of the DYRL movie type SDF-1 Macross or just a fan of cool looking, high-quality, ultra-detailed, collector-grade spaceships in general, this piece is highly recommended.There is really nothing (other than the price), which I can fault about this toy. It’s detailed, well made and great looking. I give it a 9.5 out of 10, only losing a 0.5 because of the price.
The Future
Will Yamato release a 1:3000 scale TV version SDF-1 Macross next? Well, they are still undecided and a large part of that decision may well depend on how well this DYRL version sells. To release a 100% accurate TV version would require almost all new tooling, which is a very expensive proposition. So if the DYRL version sells very well (and preorder indications are very positive), we could possibly get a TV version sometime in the future.
That's all. Hope you enjoyed the review.Graham
28th December, 2010Hong Kong
Addendum to review - 28 December 2010
It was pointed out to me today by one of our forum members, that in the above review photos the prongs located on the tips of the main gun booms seemed shorter than the prongs in photos of the toy shown on other websites. Some of our members wondered if the prongs were in fact retractable and perhaps I had neglected to extend them for my review photos? To be honest, it hadn't occurred to me that the prongs may in fact be extendable.
So I immediately sent off a quick email to Yamato and received a fast reply from them by phone a few minutes later, reassuring me that yes indeed the prongs were extendable and could just be pulled out by hand and when extended are about 15mm longer than in the closed position.
Once I got home tonight, I took out the 1:3000 scale SDF-1 toy and tried to extend the prongs. the prongs on the right boom extended fairly smoothly and easily, but the ones on the left boom were quite tight and in the end I had to resort to carefully pull them out with a pair of rubber jawed pliers. Anyway, here are 5 photos of the toy in cruiser mode, with the prongs extended.
Review notes:
- Shooting location: My sitting room.
- Lighting: Natural daylight. No artificial lighting used (I'm not a professional photographer & have no idea how to set up lighting correctly for photo shoots).
![]()